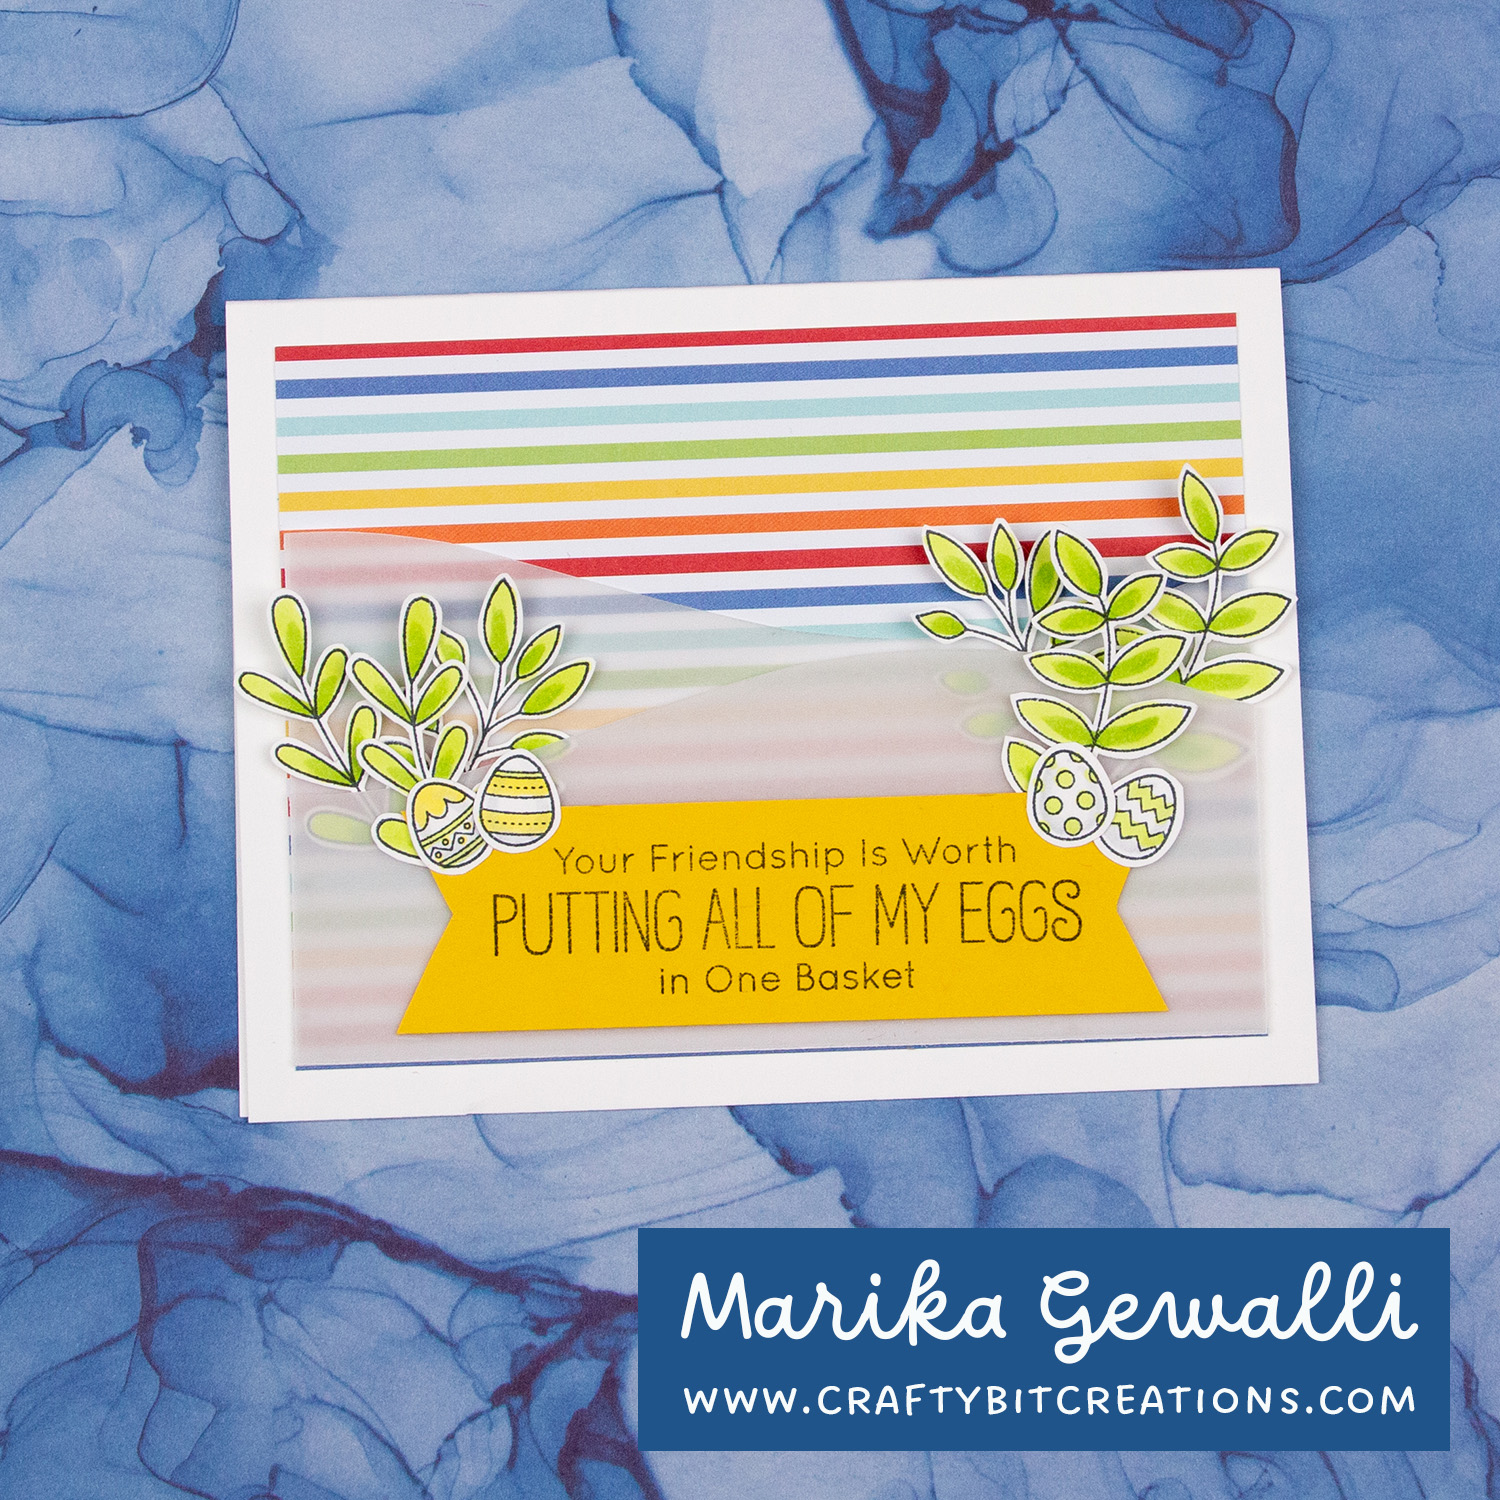
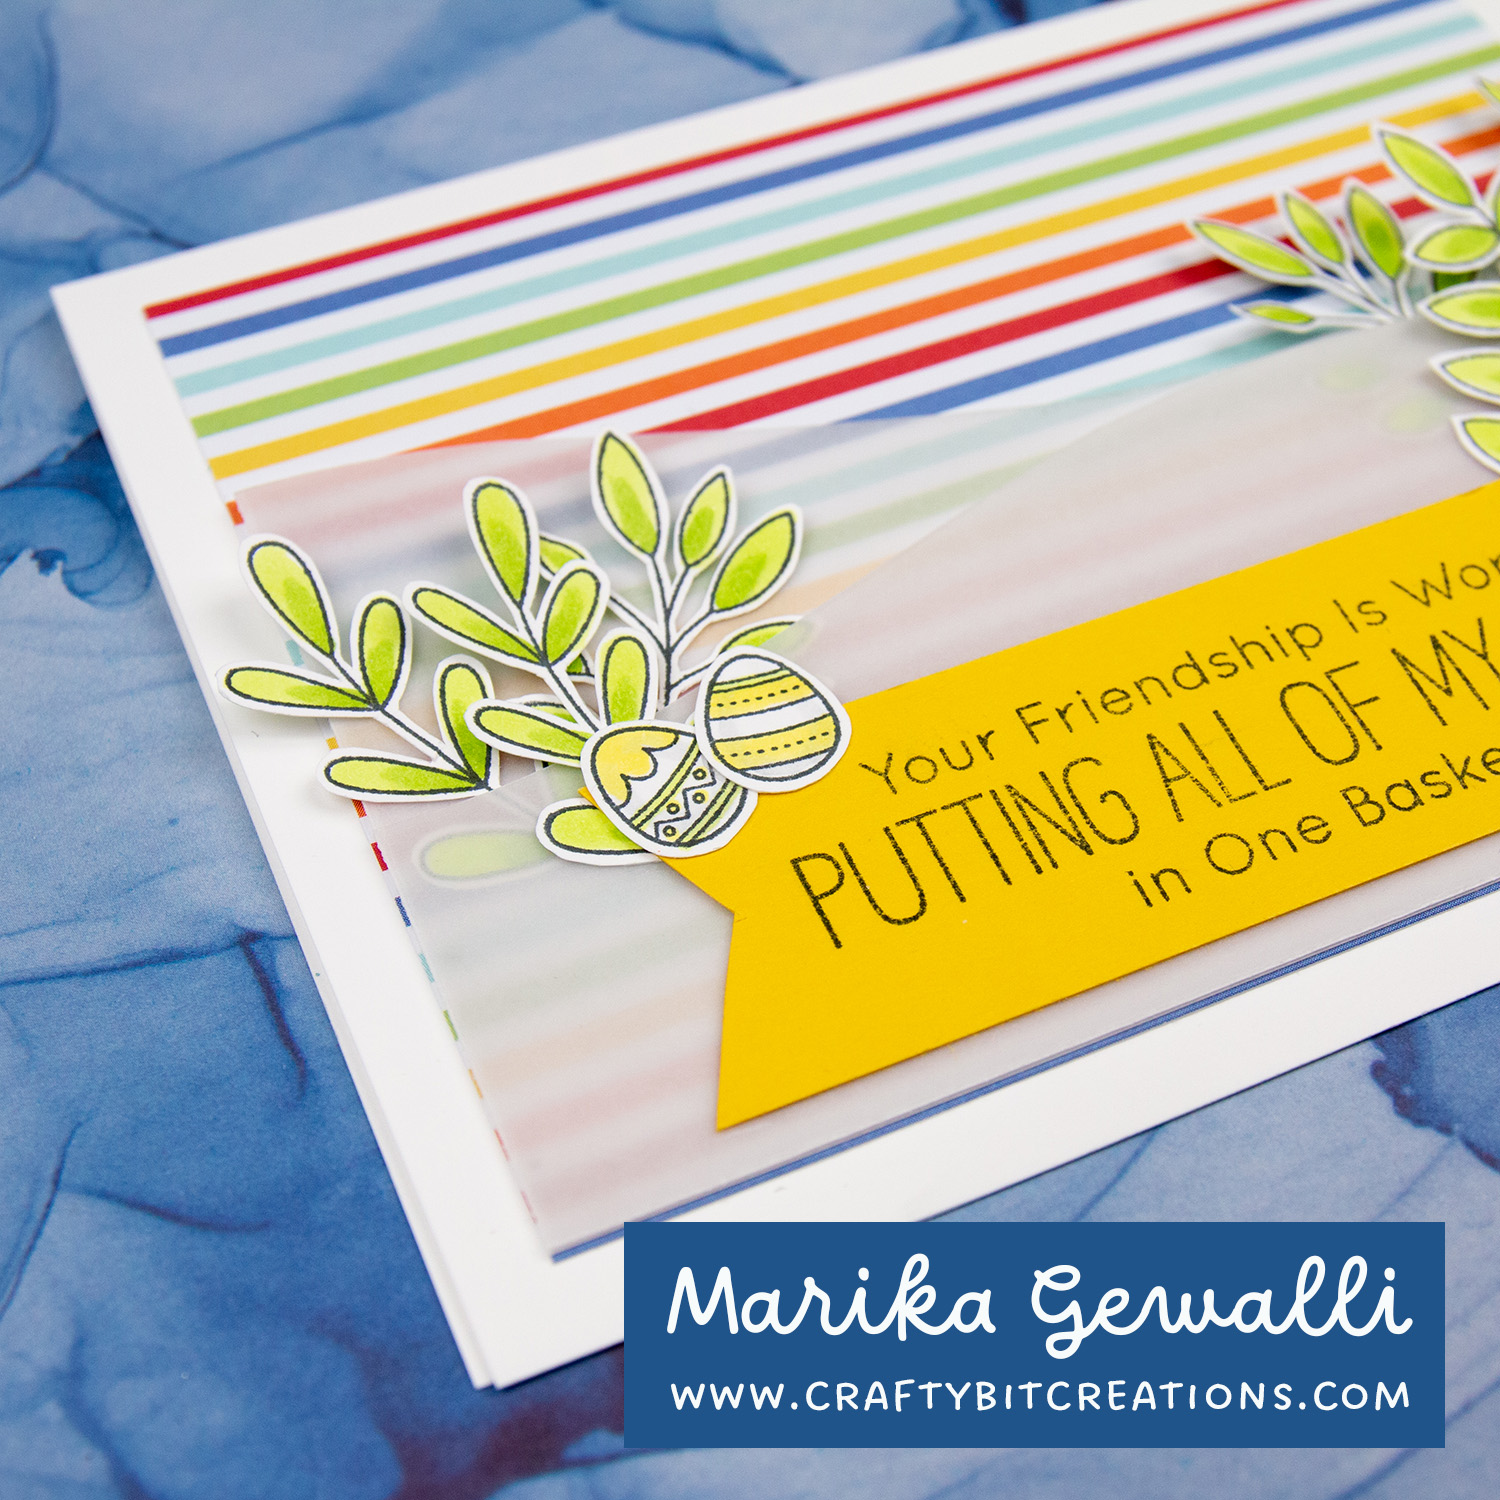
I completely love the Happy Patterns Paper Pad, it’s so bright and rainbow! It also have quite a lot of contrast with the bright colors together but also the bright white areas. I sometimes struggle using those kind of papers and I thought I’ll take the bull by it’s horns so to say. So today I’m showing you two ways of using bright pattern papper for my cards.
When possible affiliate links are used, this means that I receive a small commission when products are purchased through the links (at no extra cost to you) I use the money to support my blog and youtube channel. If you like my projects and tutorial please consider supporting me by clicking through these links when you shop. Thanks!
When I saw the Adorable Adventures stamp set I knew I needed it and that it would be awesome for so many occasions. The card that I made today has been growing in my mind for weeks. It wasn’t until I saw the Slimline Challenge – Inside-Out that it fully came together, however I did interpret the challenge wrong so I won’t be able to enter it in the challenge. But hey that’s ok, this card is awesome on it’s own.
As I said the idea has had time to sit with me. A couple of weeks ago I picked out the stamps I wanted to use. I created small piles on my counter (in my almost done craft room, while make a tour as soon as I have the rest done), where I added some card stock, dies and the stamp sets for the cards. I tried to make every pile different in both kind of card but also color scheme.
This card was on the next list but I ended up adding others before just because limited season and similar reasons (like the Spring Gnomes one). But I finally dived in. But I really feel it was a good decision, as I allowed myself to think about it and really get a solid idea for it.
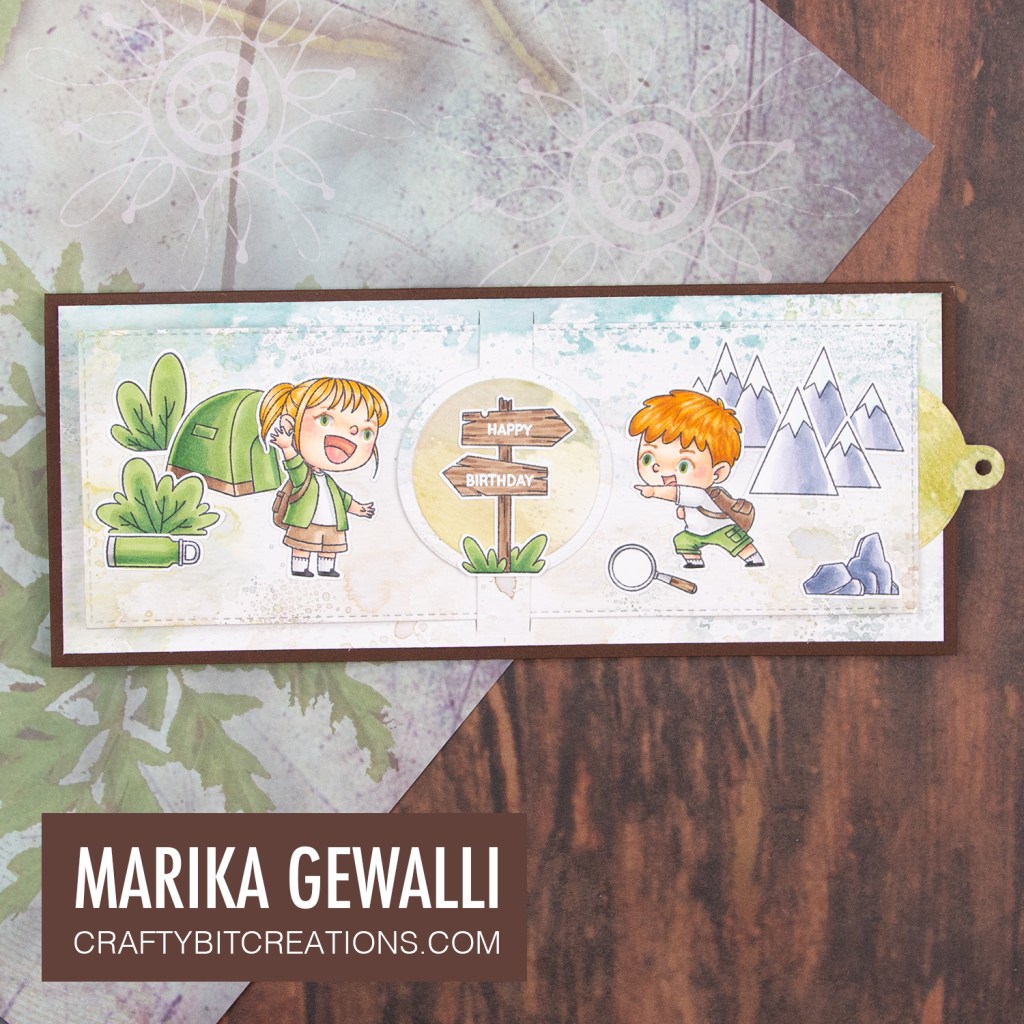
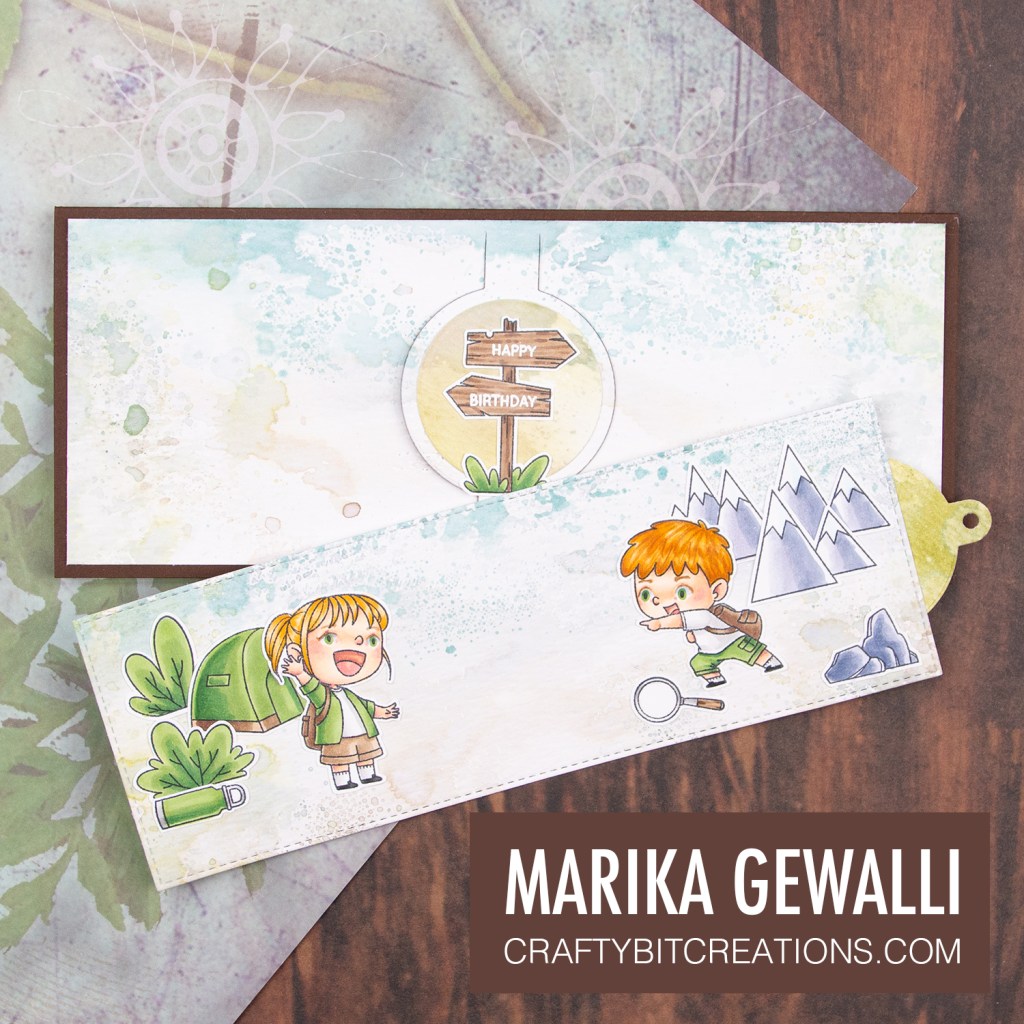
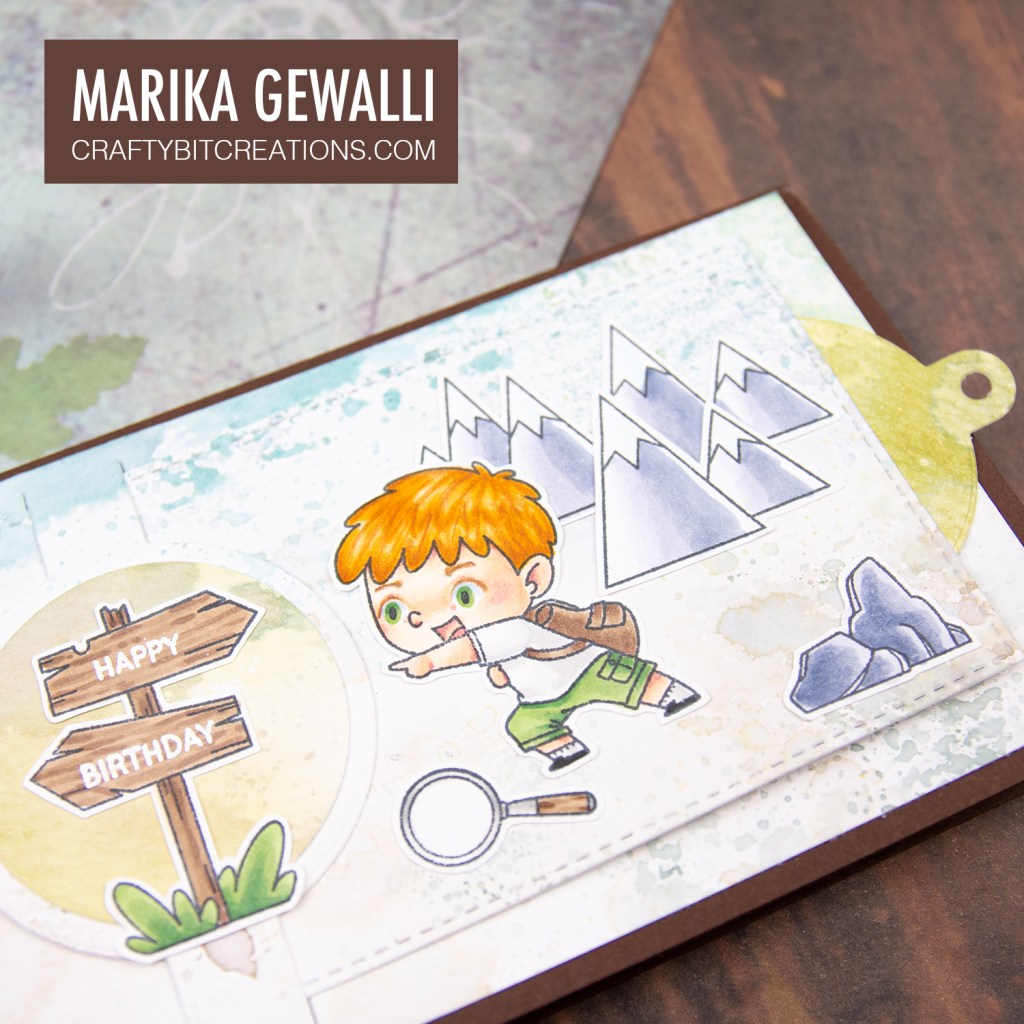
I wanted to build a scene, but at the same time allowing the background to be a little bit diffuse so that the character and the other stamps really pops. So I’ve used one of my favorite techniques, which is ink smooching, specifically doing this with light neutral Distress Inks allowing a lot of the white of the watercolor paper to be seen. I used Weather Wood, Pumice Stone, Shabby Shutters, Iced Spruce and the oh so gorgeous Speckled Egg, on some Tim Holtz Distress Watercolor Cardstock. I made two pieces of 3 1/2″ by 8 1/2″ so that I could use the Slimline Slide In die and cut the tag from one of them and the slide in belly band on the other, which I cut down to 3 1/4″ by 8 1/4″.
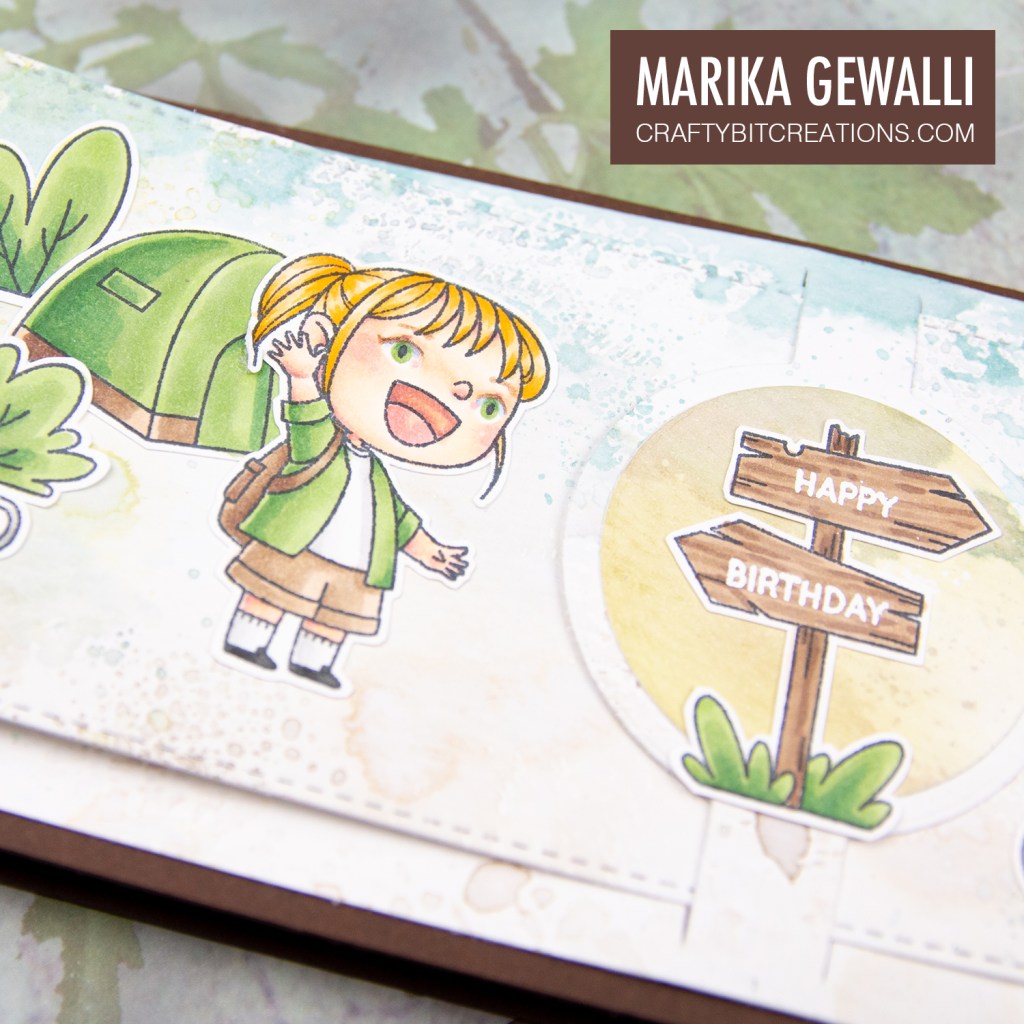
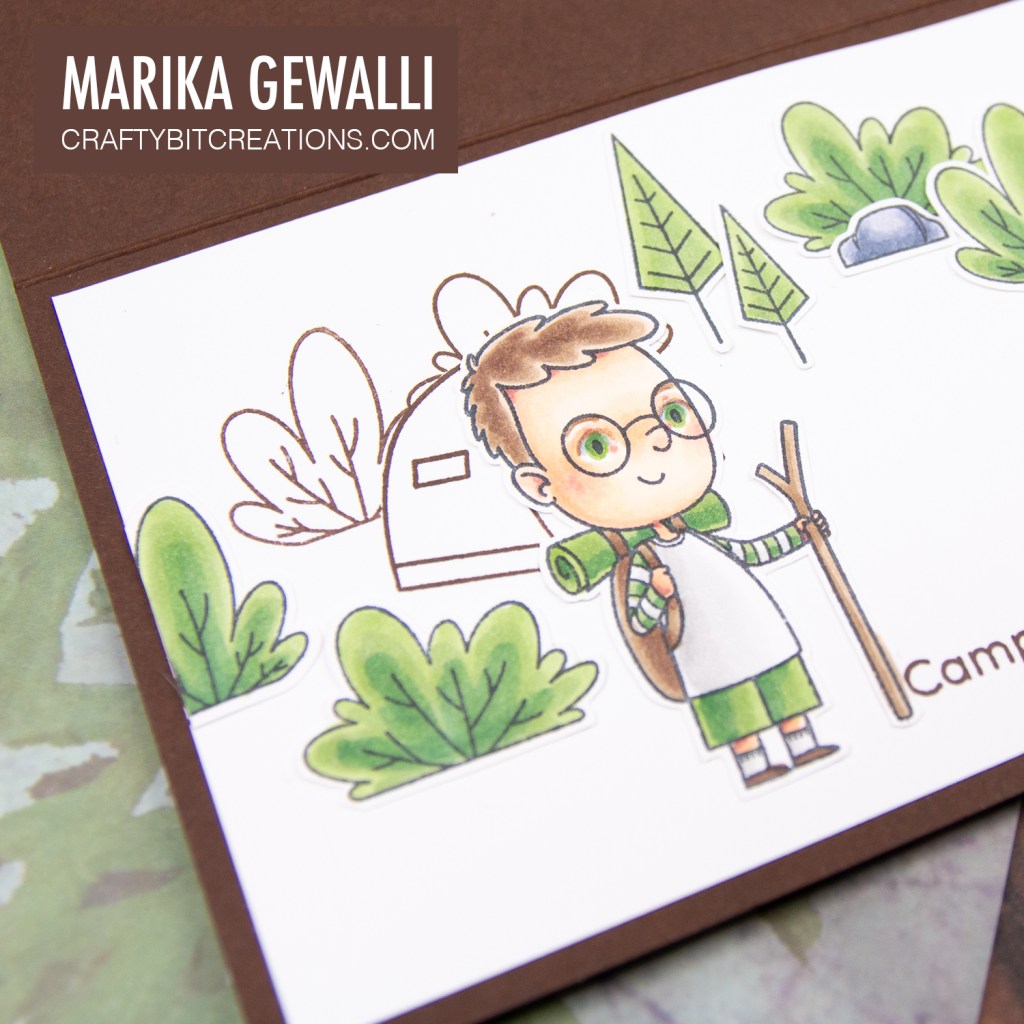
I then created the scene on the tag, a little forest on the left side with a tent and a character. On the right side I built a mountain scene with another character. On the little belly band on the main piece I added a little circle (from another ink smooched piece in just the green colors) and on top of that the sign stamp that I colored like wood and then white embossed happy birthday.
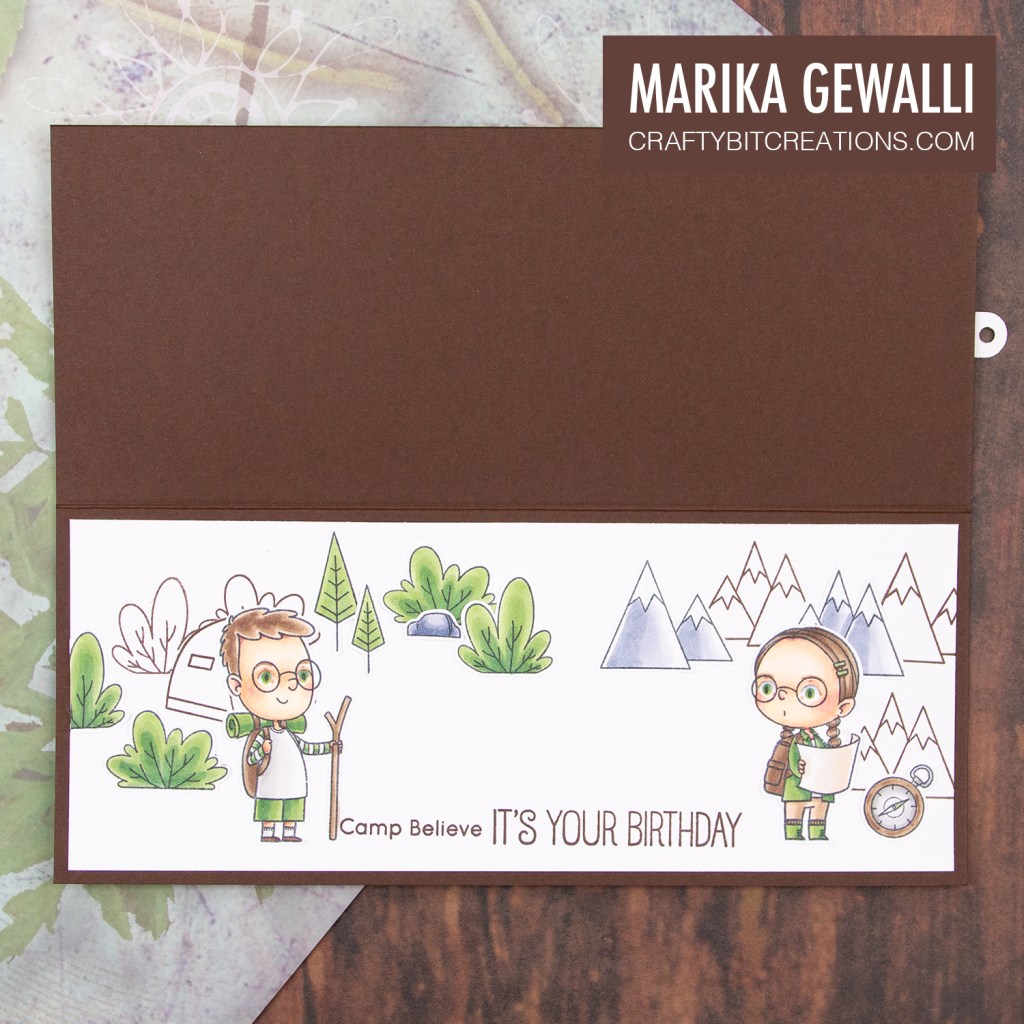
I built a similar scene on the inside on top of a 3 1/4″ by 8 1/4″ piece of white neenah. However I mixed stamping just the outlines in Milk Chocolate ink and adding some of the left over copic colored images. I left the middle empty to have somewhere to write a message. You could also write a secret message on the backside of the tag on the outside also.
I loved making this card, hope you liked watching the videos too!
When possible affiliate links are used, this means that I receive a small commission when products are purchased through the links (at no extra cost to you) I use the money to support my blog and youtube channel. If you like my projects and tutorial please consider supporting me by clicking through these links when you shop. Thanks!
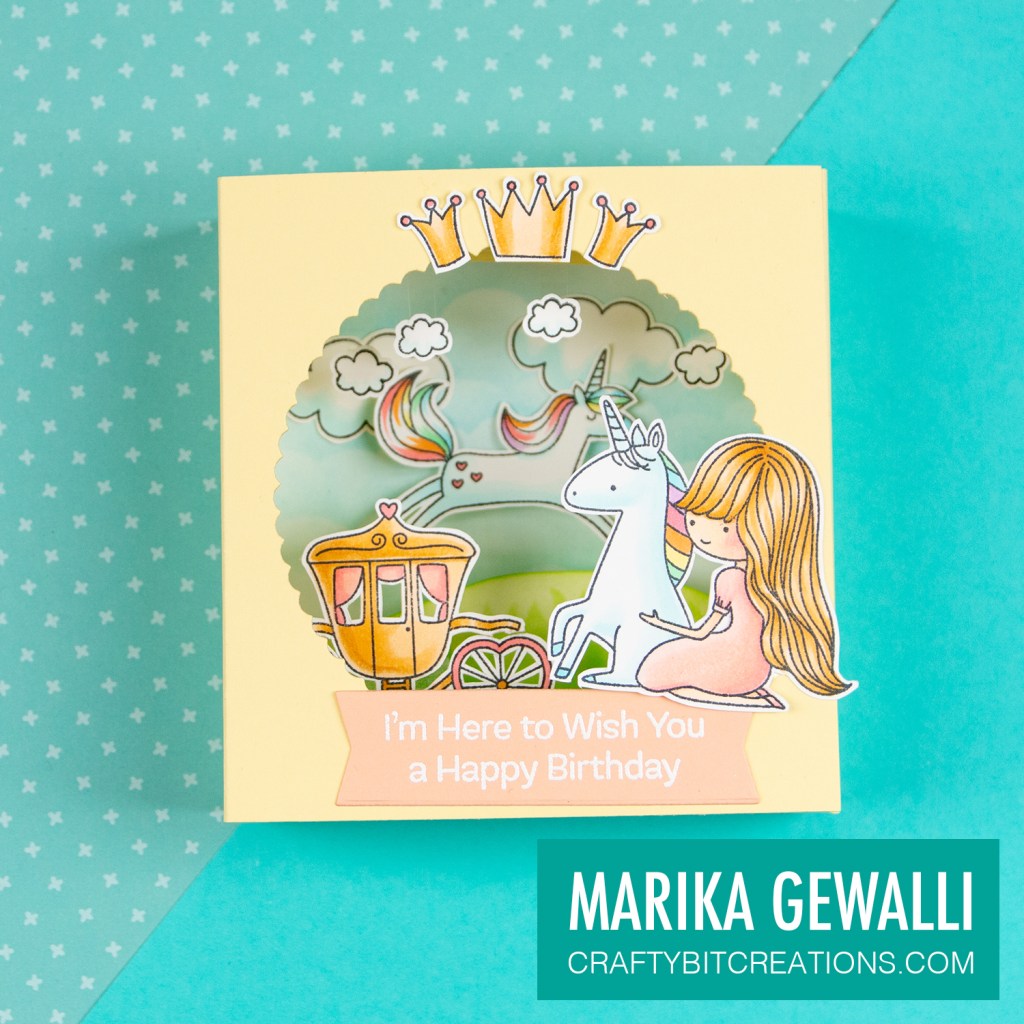
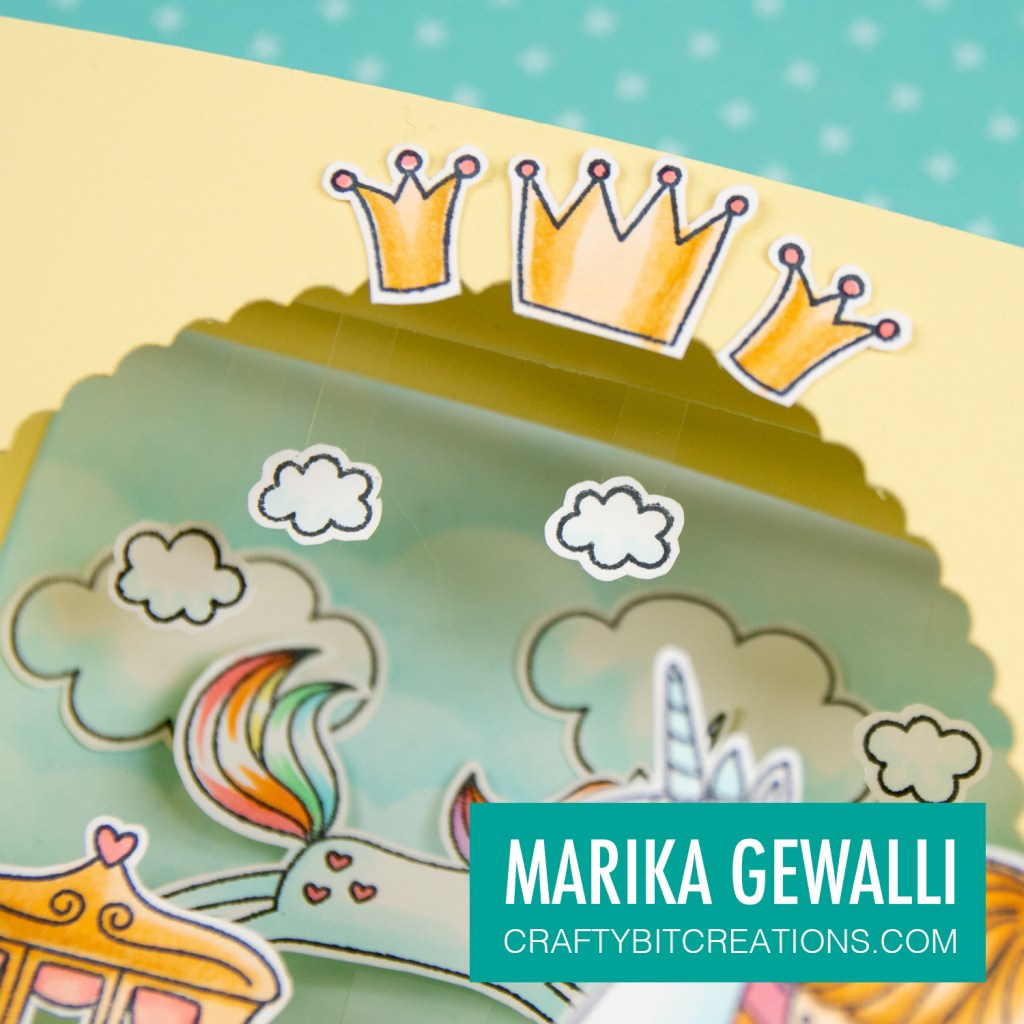
Hi! Today I made a shadow box with unicorns and princesses, everything I love! The video tutorial goes through how to cut, score and put everything together, but I have also made an instruction sheet that you can see below and you can find it as a pdf HERE.
Making a shadow box means some measuring and scoring and if you find that hard (or boring), there is dies out there. One that also flattens to an A2 card size like the box I have done is the one from MFTStamps.
In the video below you can follow along on how I did my box out of less than one sheet of letter sized card stock. Also you can see how I decorated it using stamps from the Pretty Princess and Friendly Unicorn Stamp sets. You can find all the products used listed below, and there you also find all the copics used to color the stamps. Which you can see how I did in the second video.
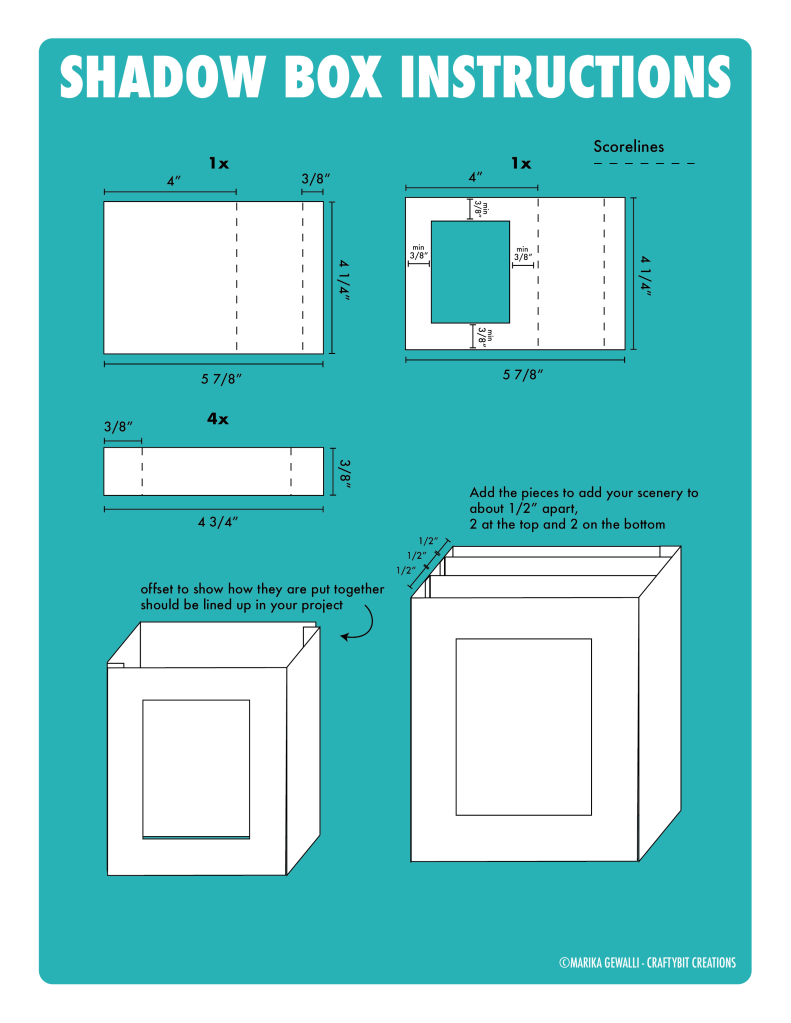
For the shadow box I cut out 2 pieces measuring 5 7/8″ by 4 1/4″ for the back and front, and 4 pieces measuring 3/8″ by 4 3/4″, 2 for upper delimiters and 2 for bottom delimiters. The 5 7/8″ by 4 1/4″ should be scored on the long side at 4″ and at 5 1/2″, and the delimiters should be scored at 3/8″ on both ends. Before putting together the card, take one of the bigger pieces and cut a hole out of the 4″ part of it. Make sure that the hole has a minimum of 3/8″ to all edges so that the tabs aren’t seen from the other side. I used a die for this as I wanted to have cute scalloped edges for my window. Putting together the card, use a strong tape so that it stays together, I use sookwang tape. You can follow the instructions below and I have made a pdf that you can download HERE.
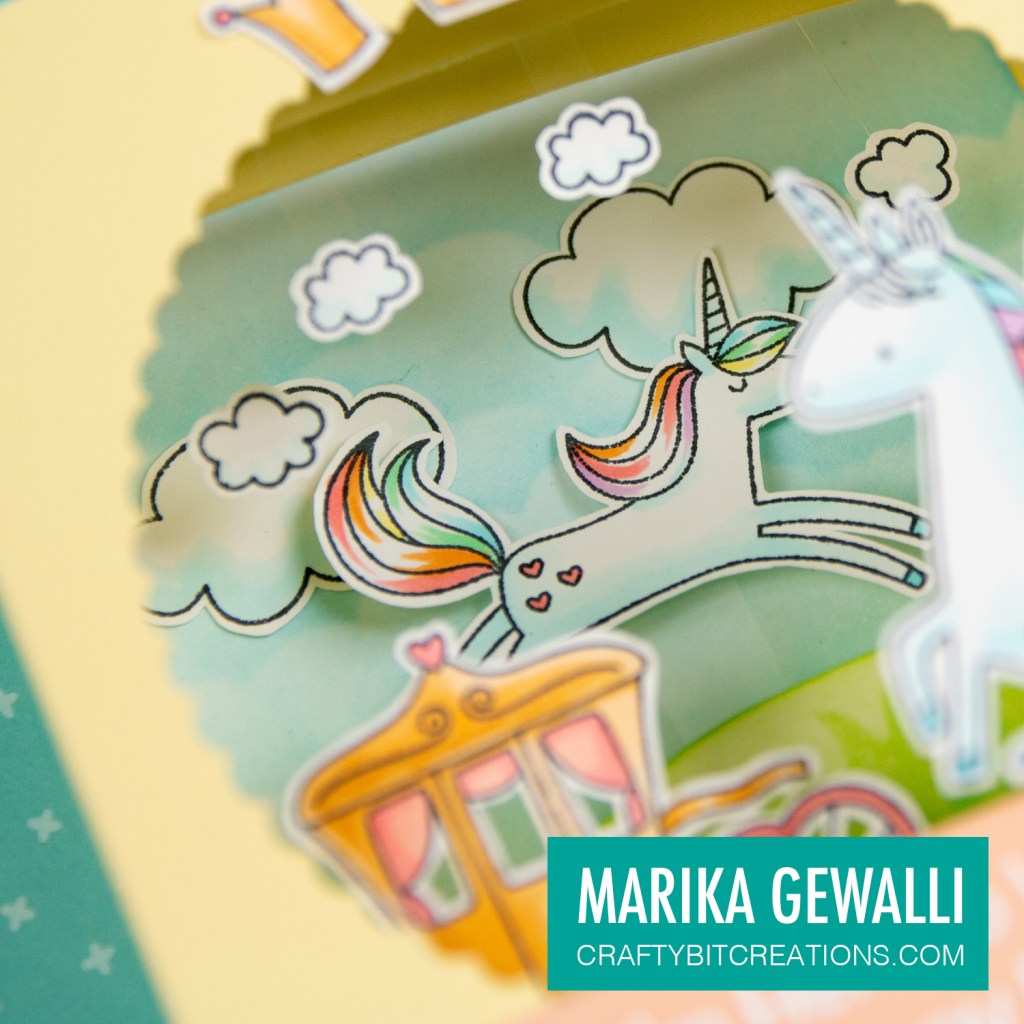
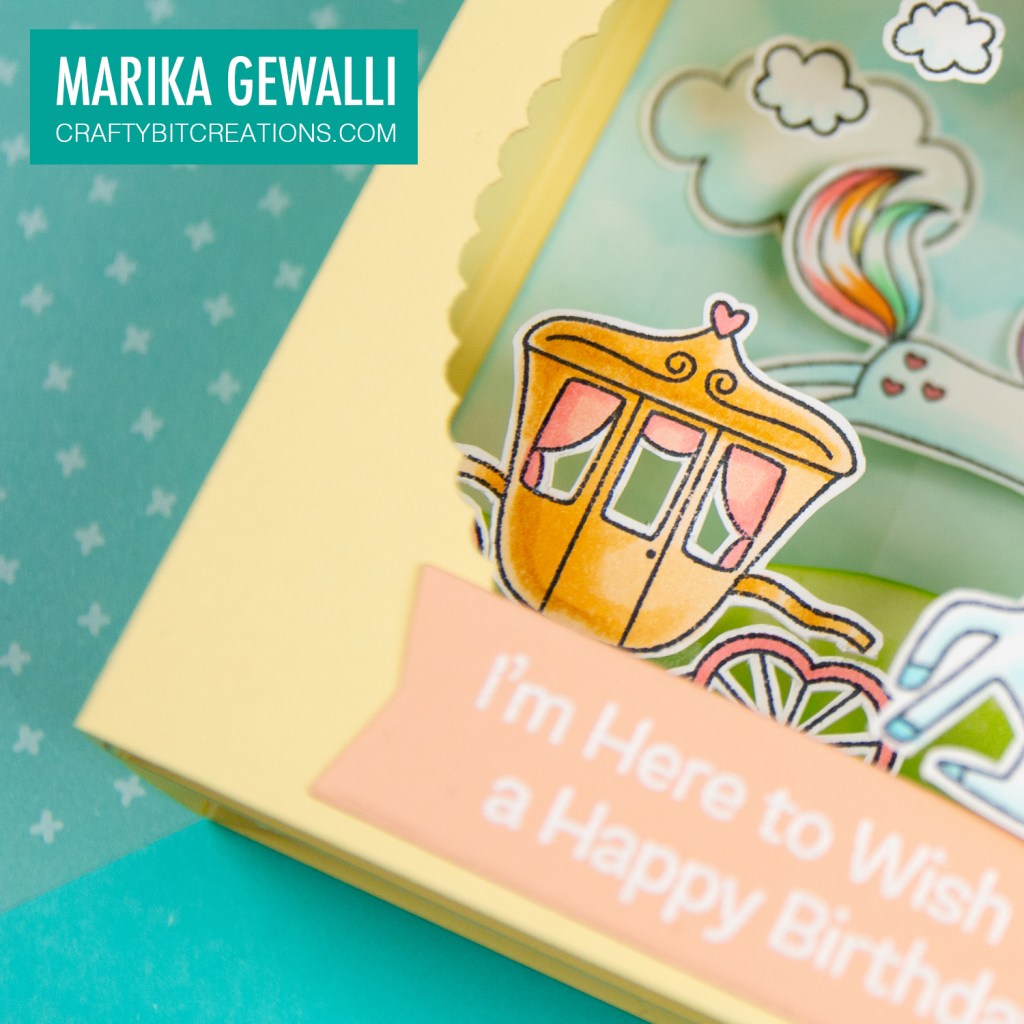
After putting together the shadowbox it’s now time to decorate! I used stamps from the Pretty Princess and Friendly Unicorn stamp set. I colored them with copic markers and then cut them out (there is dies, but I prefer to fussy cut). Then blending Tumbled Glass and Cracked Pistachio Distress Inks over the for Mini Cloud Edges stencil the backdrop and Cracked Pistachio and Twisted Citron Distress Inks over the Grassy Edges stencil to give some dimension and texture. For the hanging clouds and the back unicorn and chariot I used acetate to fasten them so that it’s harder to see how they are attached. To finish it off I ended up white heat embossing a sentiment on some Peach Bellini card stock.
Hope you enjoyed the tutorial and I’ll see you back here soon! Happy Crafting!
When possible affiliate links are used, this means that I receive a small commission when products are purchased through the links (at no extra cost to you) I use the money to support my blog and youtube channel. If you like my projects and tutorial please consider supporting me by clicking through these links when you shop. Thanks!
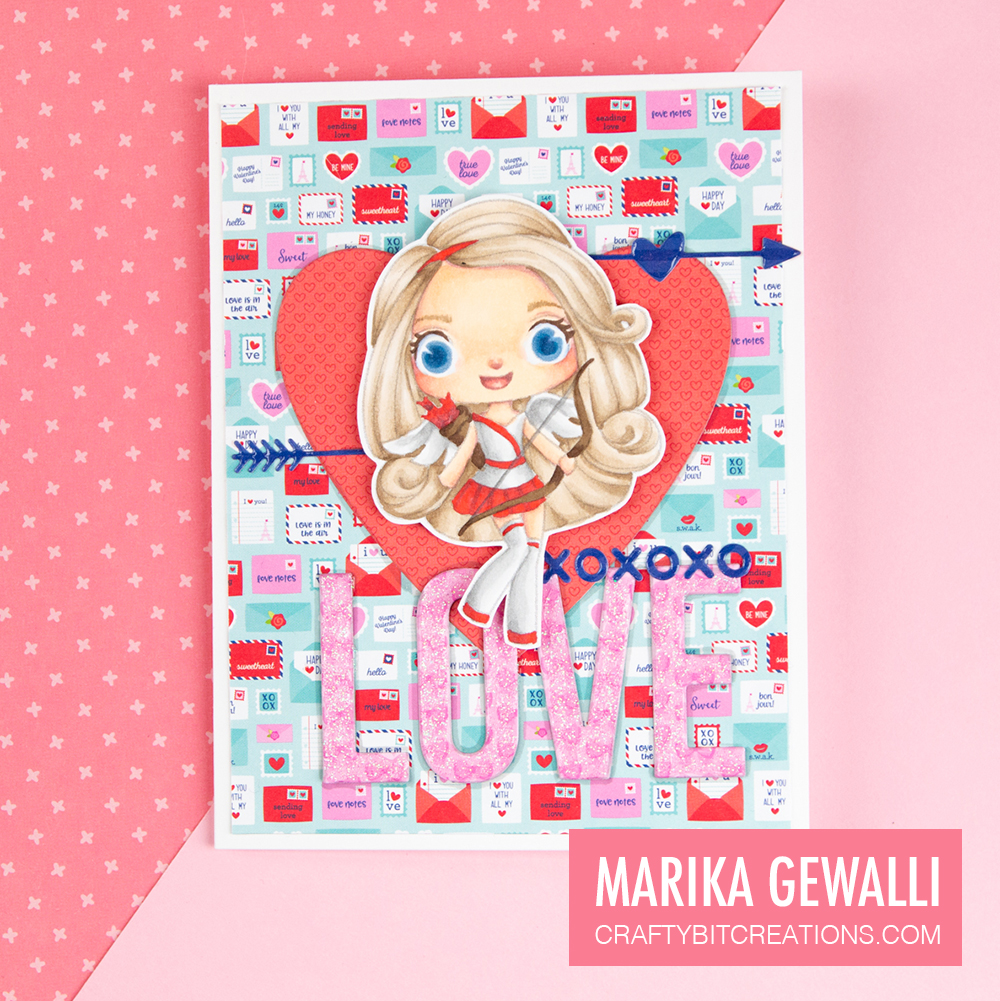
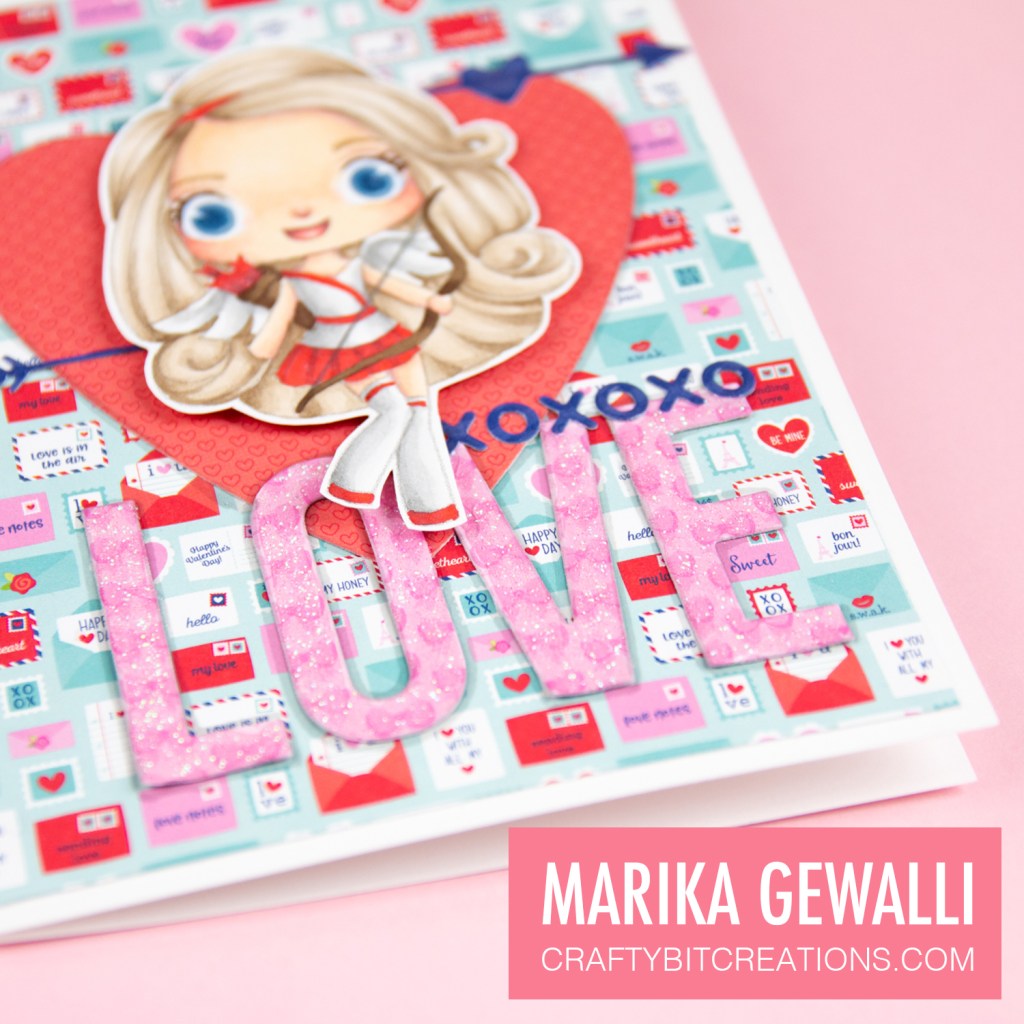
Todays card have combined multiple pattern papers and dies to make a colorful valentines card. It’s topped off with a copic colored digital stamp called Carley Cupid by Stamp Anniething. There is two videos, one for the cardmaking and one for you coloring lovers out there, I’m back with a real-time coloring video too.
This card was started with that I yet again saw a beautiful card made by Stampin Steve and I knew I needed to finally bite the bullet and get me some Stamp Anniething stamps. When jumping on the site I saw there also were a couple of digital stamps I decided to start there.
Carley Cupid Valentine Card
This all came together very fast as I really, really wanted to use Carley Cupid and Valentines is coming fast. When this goes live it should only be on day left (it’s actually only two days left as I write this), and I really wanted to get it up before.
I decided to yet again play around with the no-line coloring technique and before choosing colors I had a little flip through some of my pattern papers and I ended up going pattern paper crazy. So decided for a simple and limited color scheme on the the cute little girl.
Hope you enjoyed my card and tutorial and Happy Valentines!
When possible affiliate links are used, this means that I receive a small commission when products are purchased through the links (at no extra cost to you) I use the money to support my blog and youtube channel. If you like my projects and tutorial please consider supporting me by clicking through these links when you shop. Thanks!
I love making different kind of smaller projects with my craft supplies, and these paperclip flags are perfect to use up those scrap pieces you have laying around that you just don’t wanna throw out.
Four valentine paperclip flags made with lawn fawn pattern papers and stamps.
I recently started to really use my planner and take part of the planner community on social media. I found these kind of flags there but wanted to make them in my way, more like little notes than just decorative pieces for my planner. And while I was at it I made a little tutorial on how I make them.
For the theme, I knew I wanted to do valentine, I also knew that I wanted to dig out some of my lovely pattern papers that I haven’t used in a while. And as happened I have subscribed to the Lawn Fanatics email list and their launch email for the active challenge came into my box. The challenge is “For the birds”, so I dived into my stamp collection and ended up pulling out a whole bunch! I also picked out some valentiny paper packs and I started playing.
Large valentine paperclip flags made with lawn fawn pattern papers and stamps.
The first flag is the larger of the one, it’s created on the 78 mm (3 1/8″) paperclip and the flag measures 2 1/2″ in width. The larger size made it possible to use a bigger sentiment. To ground the sentiment I used a couple of thin paper strips in different patterns, and then as a little pop I added a cute little bird.
Medium valentine paperclip flag made with lawn fawn pattern papers and stamps.
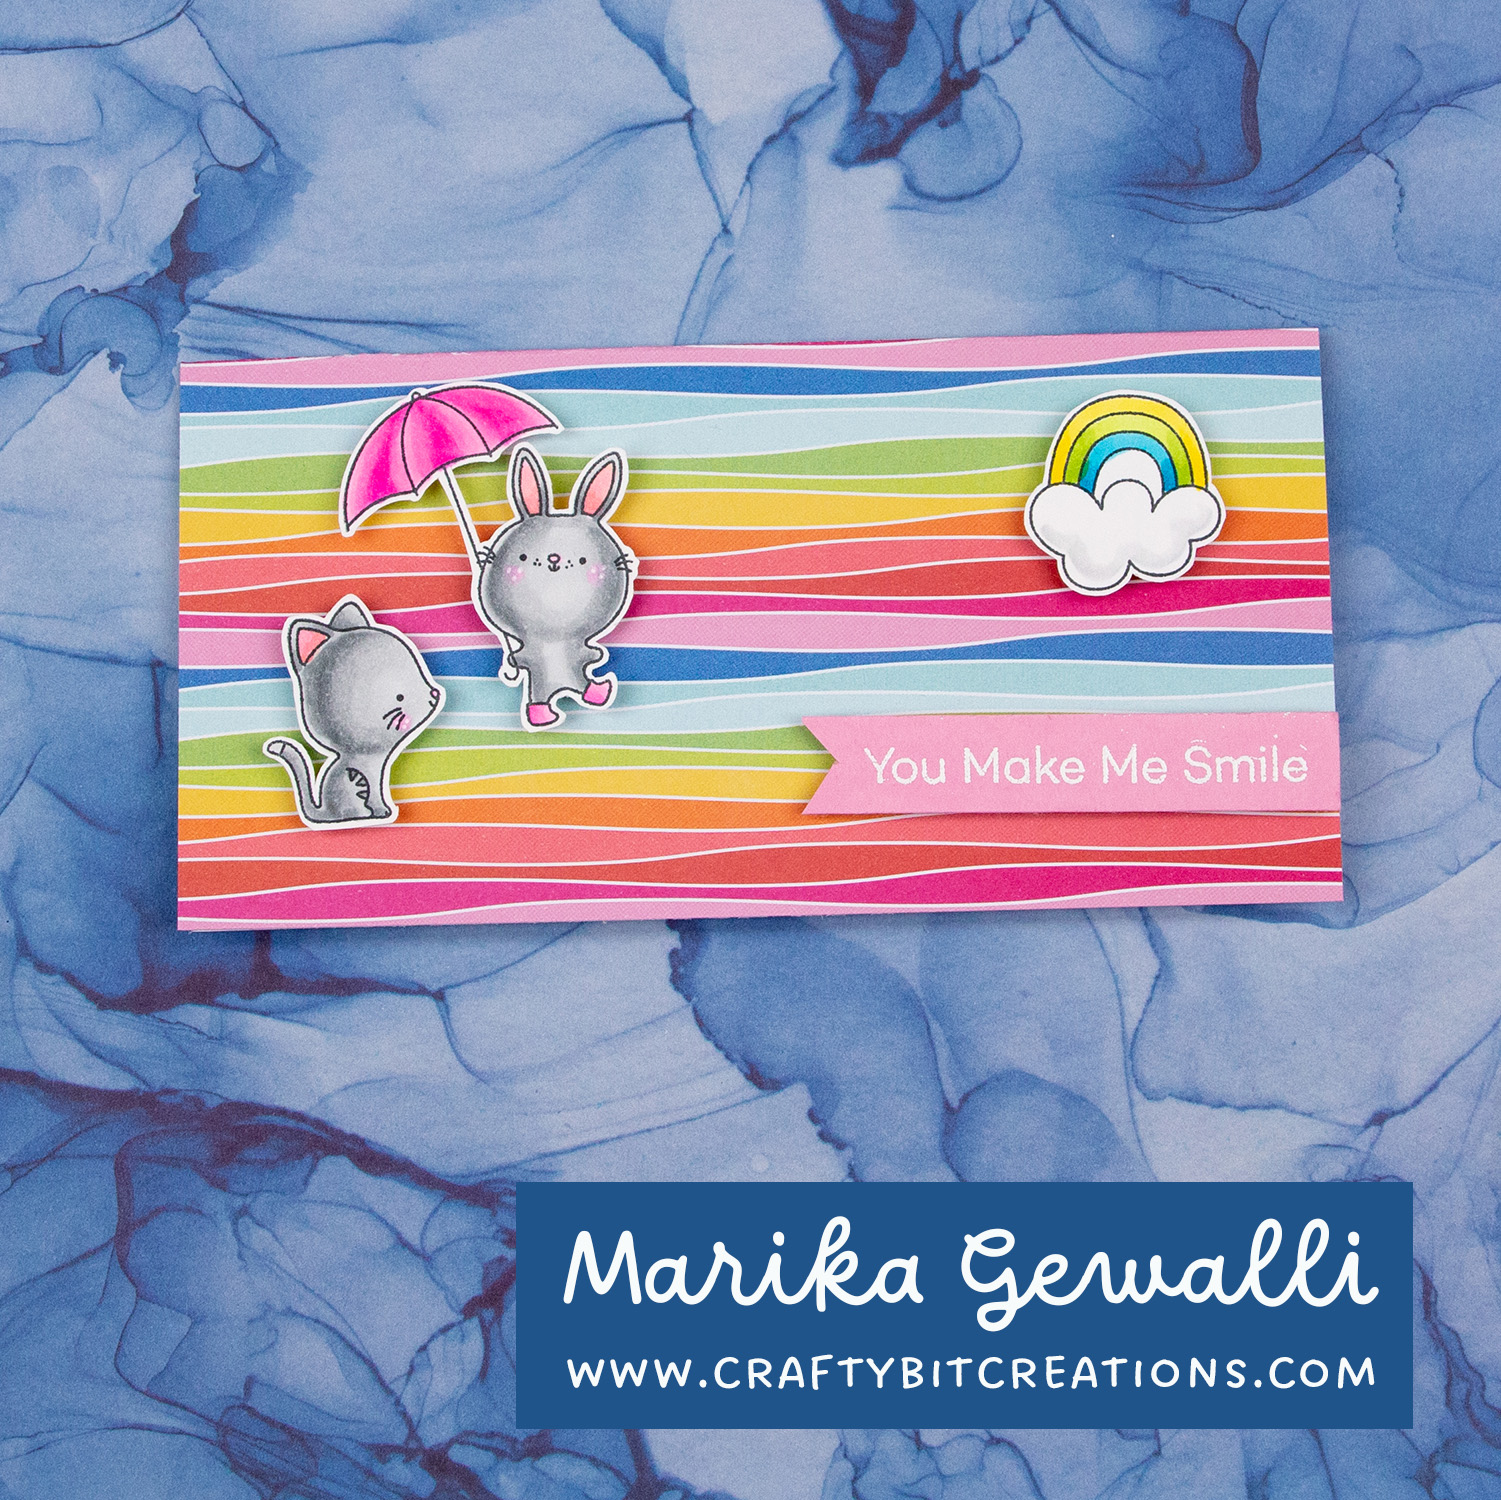
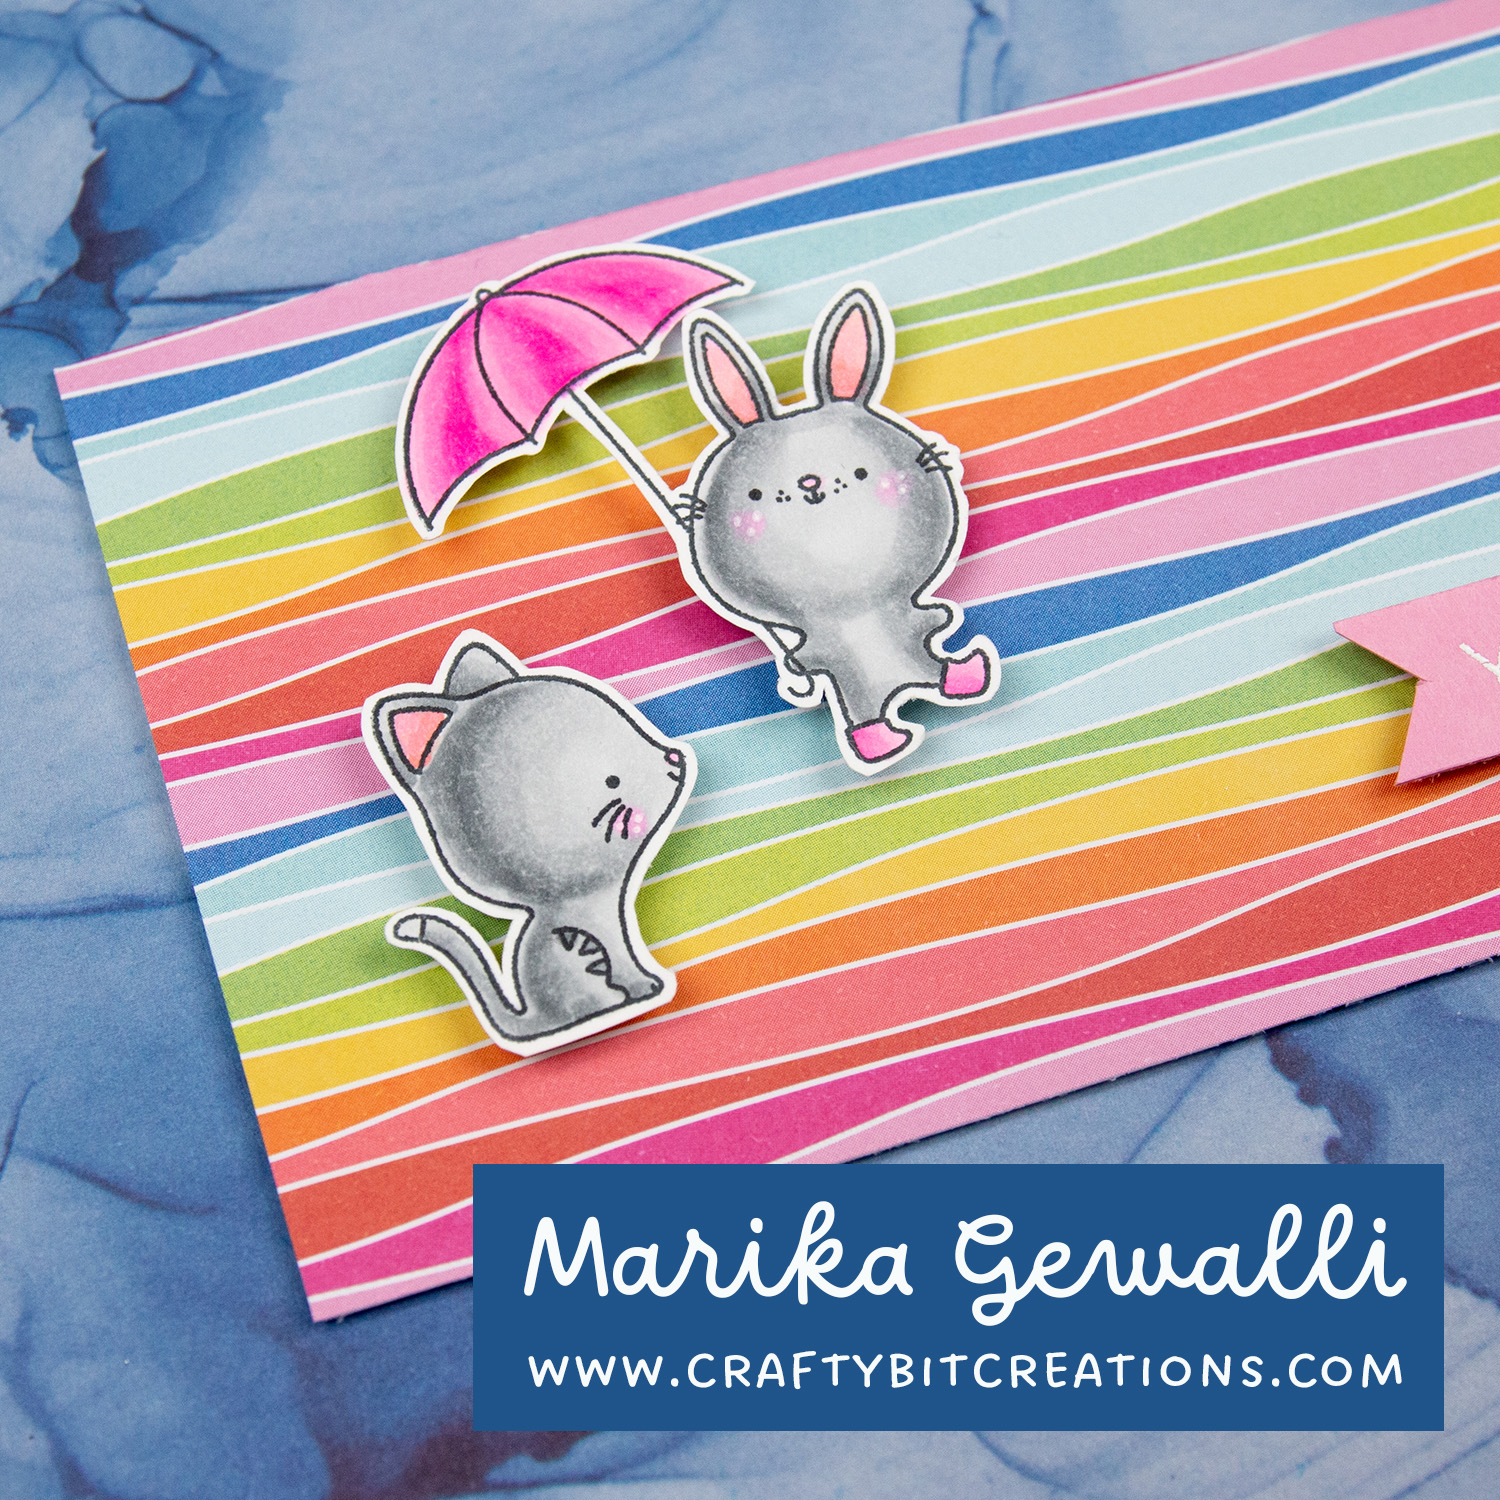
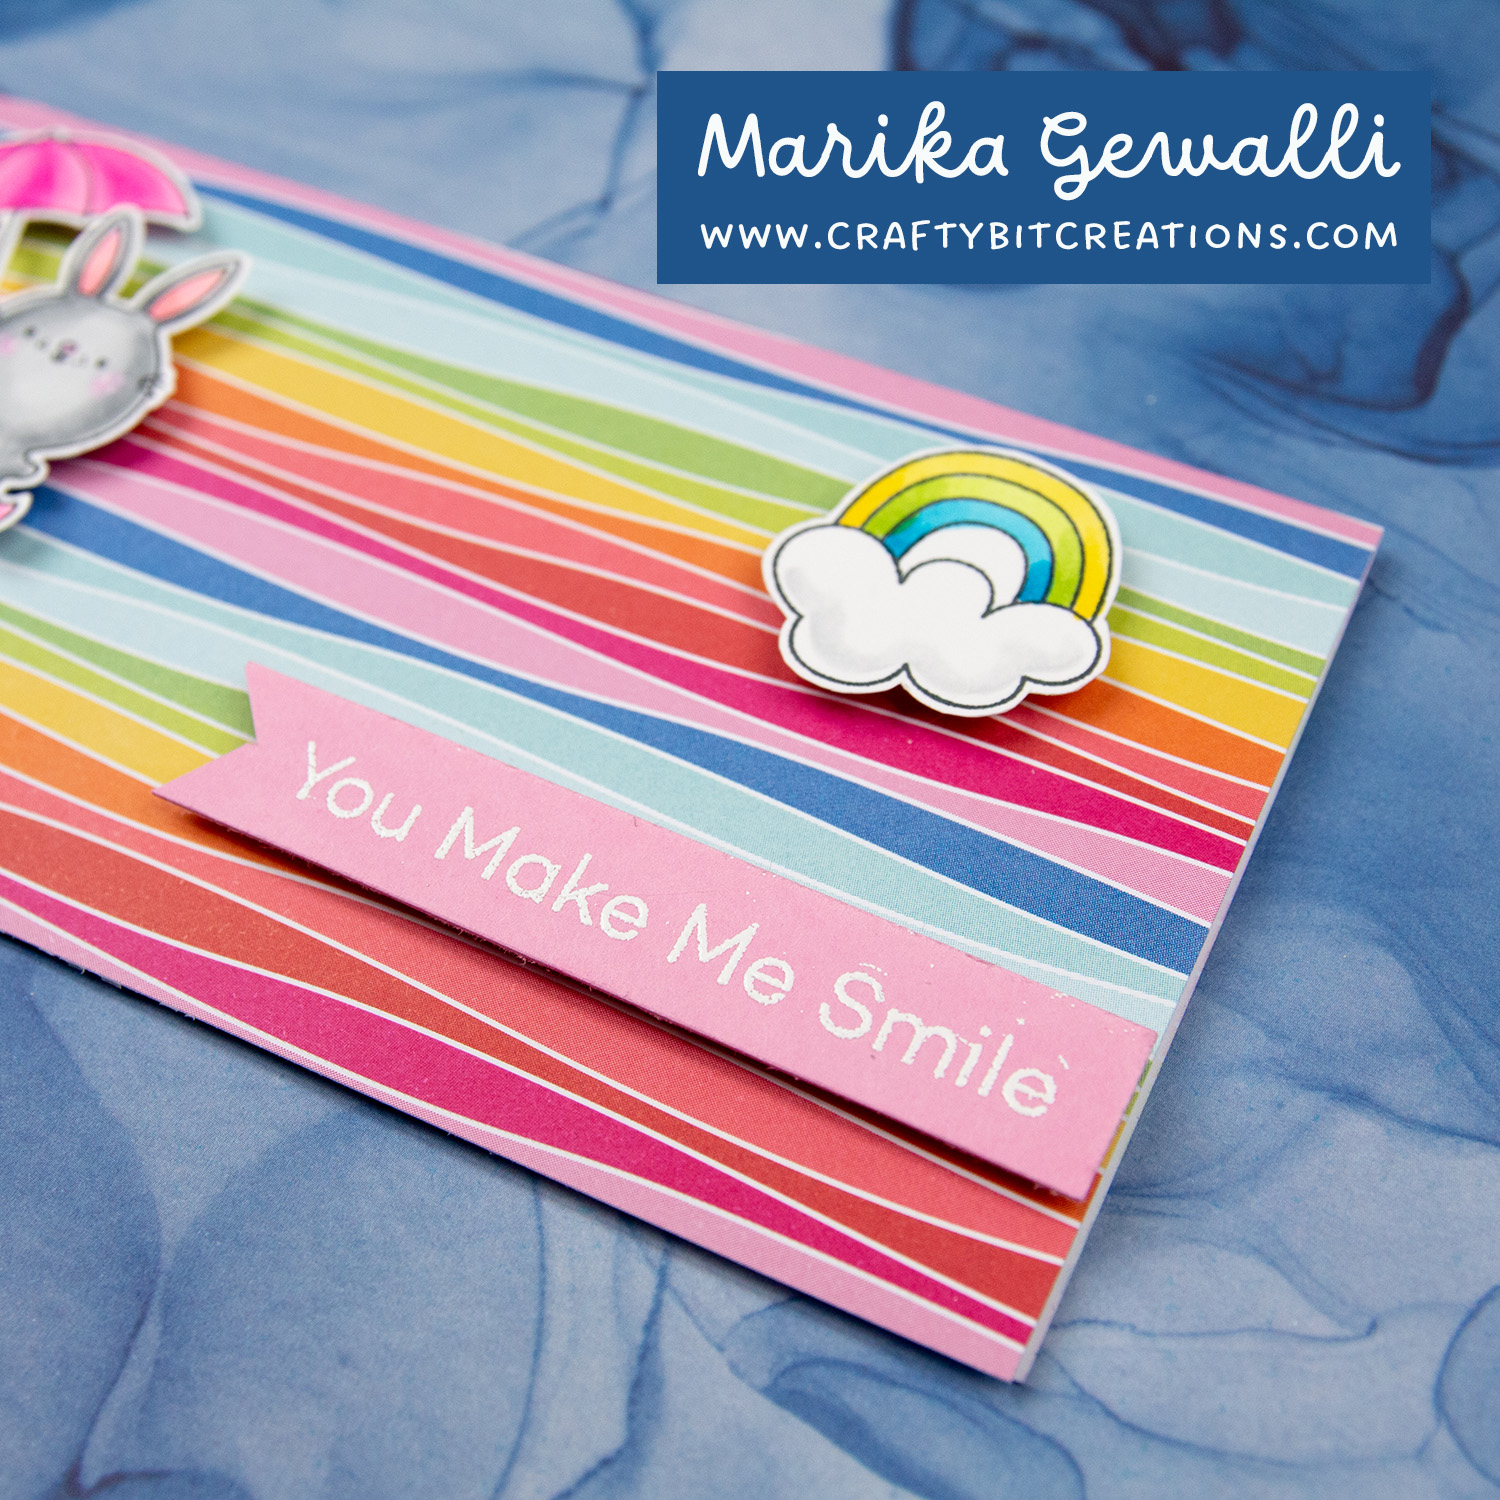
Next flag up is on a very colorful bright rainbow striped paper, so the sentiments and the image used is a little more block colored so they pop a little bit more. I again used some stripes of pattern paper to ground one of the sentiments. I tried finding papers that where less patterned but still had a little bit. It’s made for the 45 mm (1 11/16″) paperclip and the flag measures 1 3/8″ in width.
Small valentine paperclip flag made with lawn fawn pattern papers and stamps.
The third flag is made on a tone on tone pattern paper which gave me the possibility to add a sentiment that is a little more busy. I hand cut around the sentiment to keep the movement in it. Then I added a little bird and some hearts that almost look like they are the notes from the bird singing. I added some glitter drops to the heart just because I wanted it to have that little extra. This flag is created for the smallest paperclip that measures 32 mm (1 5/16″) and the flag measures 1″ in width.
Small valentine paperclip flag made with lawn fawn pattern papers and stamps.
The last flag was just a little extra, I had found this little speech bubble with a heart in it and I just wanted to use it! So I stamped up another bird that could tweet it out and colored it to match. It’s also created on the smallest paperclip I had.
Hope you liked the flags and the tutorial. If you decide to use my tutorial I would love to see your creations!
When possible affiliate links are used, this means that I receive a small commission when products are purchased through the links (at no extra cost to you) I use the money to support my blog and youtube channel. If you like my projects and tutorial please consider supporting me by clicking through these links when you shop. Thanks!
I don’t know about you, but I have loads of candy left from Christmas, at least the ones I don’t eat myself. So for my Hershey Nuggets I made a 9 piece treat box that I’ve given to my family as belated new year gifts. They where very appreciated so I thought I would make a tutorial on how to make them.
These treat boxes is not only fitted perfectly for 9 nuggets, you can also get 4 from a letter sized piece of cardstock and one sheet of transparency film.
Hershey Nugget 9 Piece Treat Box Duo Tutorial
The box is made up by a base and a lid. The base is a 4″ x 5″ piece of card stock, scored on all sides at 1/2″, tabbed on the long side as shown in the video and put together with some score tape. The lid is a 4 1/16″ x 5 1/16″ piece of transparency film, scored on all sides at 1/2″ , tabbed on the long side as shown in the video and put together with some score tape.
Hershey Nugget 9 Piece Treat Box Duo Tutorial
The Hershey Nuggets are individually wrapped in 3″ x 1″ pieces of pattern paper. After adding them to the treat box and closed the lid, the box was wrapped in red organza ribbon. As a the last detail, a diecut tiny tag and a diecut snowflake was put together and tied to the ribbon with some bakers twine.
Hershey Nugget 9 Piece Treat Box Duo Tutorial
I had a lot of fun making these boxes and I will most likely make more, but with some other card stock and pattern papers. I might make some for some easter treats. If you decide to follow my tutorial and share on social media please tag me so I can see what you have made.
When possible affiliate links are used, this means that I receive a small commission when products are purchased through the links (at no extra cost to you) I use the money to support my blog and youtube channel. If you like my projects and tutorial please consider supporting me by clicking through these links when you shop. Thanks!
Today it is all about creating a masked blended background with distress inks and oxide inks, using dies and stamps with masking paper to mask out the area. The card is finished off with stamps by My Favorite Things colored in the no-line coloring technique with copic markers.
For the card base I went with a square base measuring 4 1/4″ by 4 1/4″. The first part of the mask was cut with a stitched mod square die out of a 4 1/4 strip of masking paper, so that the mask can cover the card base and a little over to the backside as it will not be folded when I blend.
I also stamped a couple of the clouds and a moon from the Witch Way Is The Candy stamp set onto another piece of masking paper and then cut them out with my scissors. These I placed towards the upper left corner in a little arrangement of three.
I did the blending first with the distress inks in the colors Festive Berries and Wilted Violet, but as I was working on Neenah card stock and I went in with a little to heavy hand I just couldn’t get a good blend, so I finally decided to just take out my oxide inks in the same colors and then just blend on top. The oxide inks are a little bit easier to blend and they are also more opaque so it hid a little bit of the original blending. I finished it off with some water droplets flicked with my fingers and then padded off with a paper towel, to add a little bit of texture.
I then finished off the outside with some fussy cutted images, that I had colored in the no-line coloring technique, fastened with some foam tape. And a stamped sentiment. For the inside I stamped a sentiment, used my left over images and then I added splatters as I accidentally gotten some ink on the inside while blending and though it would hide it a bit.
You can follow a long with both the coloring and the card progress in the videos below. And under that you find links to all the products I used and a list of the copics I used to color the images. Hope you have a great day!
When possible affiliate links are used, this means that I receive a small commission when products are purchased through the links (at no extra cost to you) I use the money to support my blog and youtube channel. If you like my projects and tutorial please consider supporting me by clicking through these links when you shop. Thanks!
Oh gosh! It’s been ages! More than a month to be exact. Last post was the start of the 30 Day Coloring Challenge, and I did not finish it. I thought that my energy was coming back but was hit with some really stressful news (don’t worry it’s all fixed now) so I got sick and haven’t been able to craft at all since. But I’m back today with a Christmas in July card.
I did record this in December but didn’t have time to edit it before I went on vacation, and I finally did! I really really love how the coloring came out so I’ve been eager to share it with you.
The stamp is a digital stamp from Make It Crafty called Waving Santa. I went with the standard Christmas colors, and the card actually went very masculine when I finished it and again really liked the finished card. The background is a masked background stamp from Simon Says Stamp together with a sentiment stamp from My Favourite Things. Super simple but still packs a punch.
I also decided to make a real-time coloring video from the coloring as I had more things to say about the coloring that would fit in a standard card video. Hope you enjoy them both! In the coloring video I bring up a bunch of coloring people I love, so thought I would link them here too 🙂
When possible affiliate links are used, this means that I receive a small commission when products are purchased through the links (at no extra cost to you) I use the money to support my blog and youtube channel. If you like my projects and tutorial please consider supporting me by clicking through these links when you shop. Thanks!
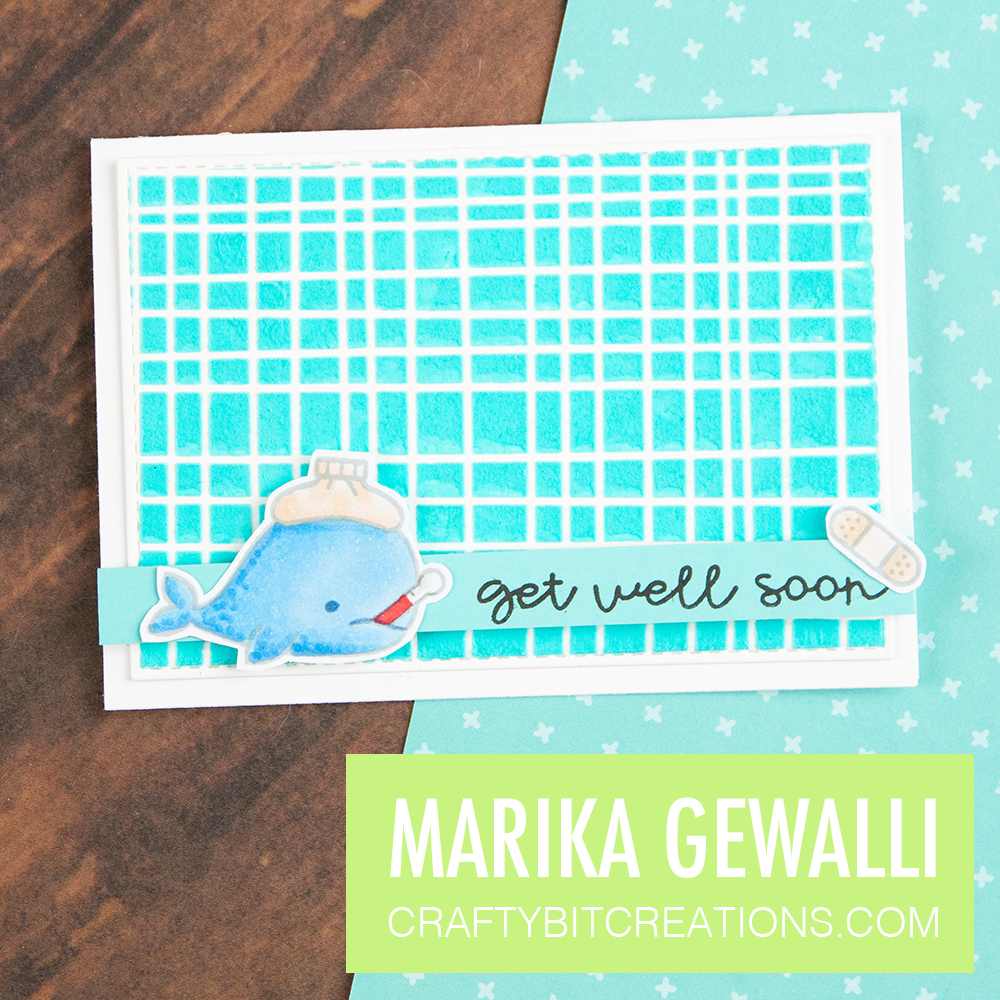
In todays video I’m showing you 5 ways to tint your embossing paste. I love experimenting with the materials I have in my craft room, trying to extend them as much as possible. One way of doing that is to go for the white and transparent mediums first and then use the coloring materials you already have in your craftroom to get all the colors you want. I choose five coloring mediums, some of them are new in my craft room and some are old and rarely used. I’ve choosen to sort of stay in one color group both because it makes it easier to compare, but also so I could easier make all of them in to similar cards.
While I’m using Wendy Vecchi Embossing Paste, you can try this with any texture paste. A little disclaimer though, the packaging says to use waterbased dyes, and the first test I did was with Tim Holtz Alcohol Inks, and it turned out great for me, but I can’t promise it will work with any other kinds of pastes. So if you test this with your own pastes, try it with a smaller batch and not on your main project, to make sure that the paste dryes as it should.
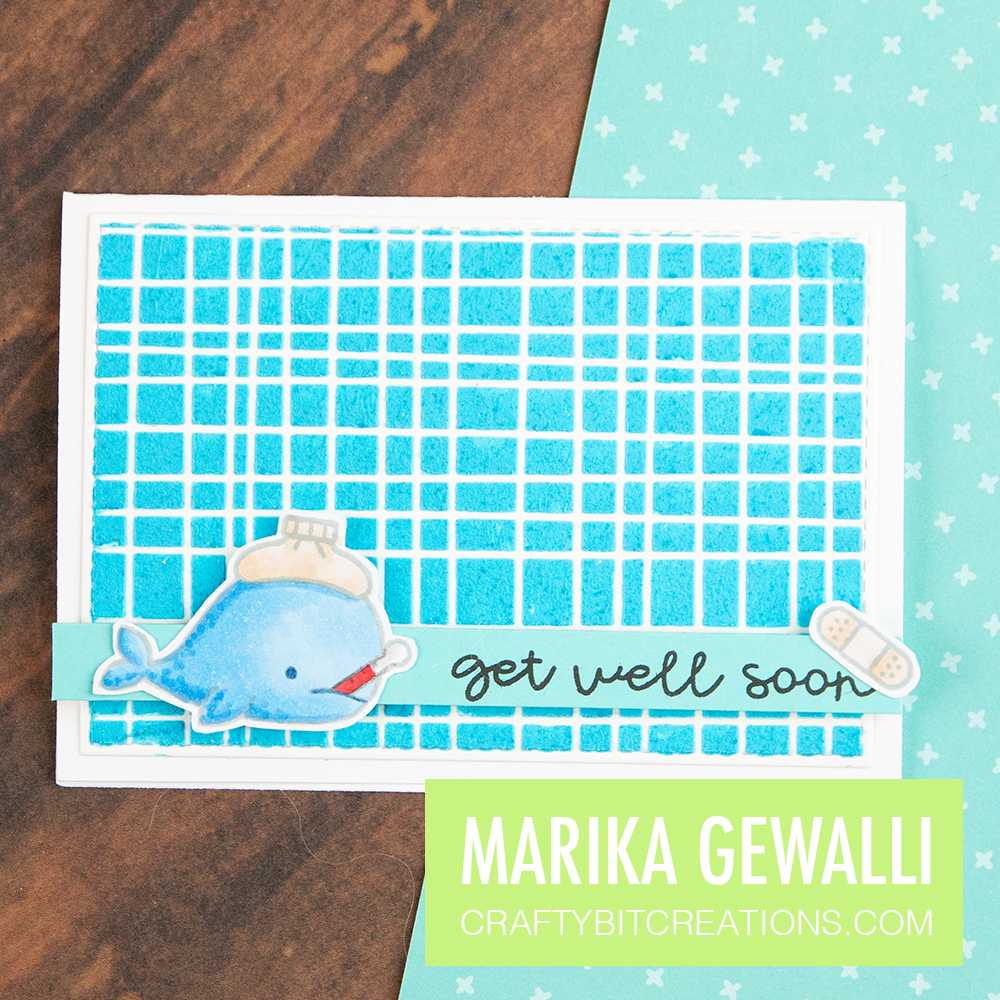
My first test was with the Mermaid Alcohol Ink by Tim Holtz. I love the color it created and it was very easy to make a nice blend with it.
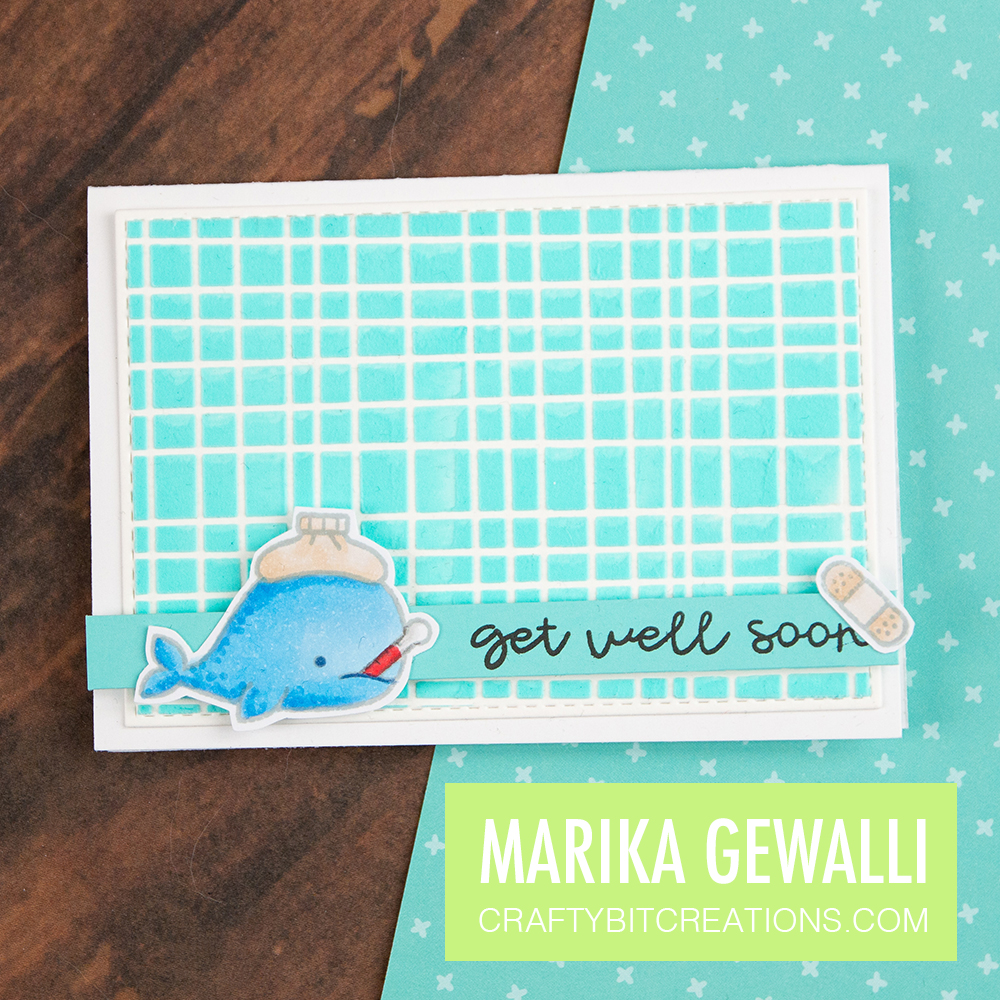
The second test was with Sublime Alcohol Pearl Ink, and even tho the pearl effect didn’t come through, it seems like it broke down and made these beautiful speckles with in the paste.
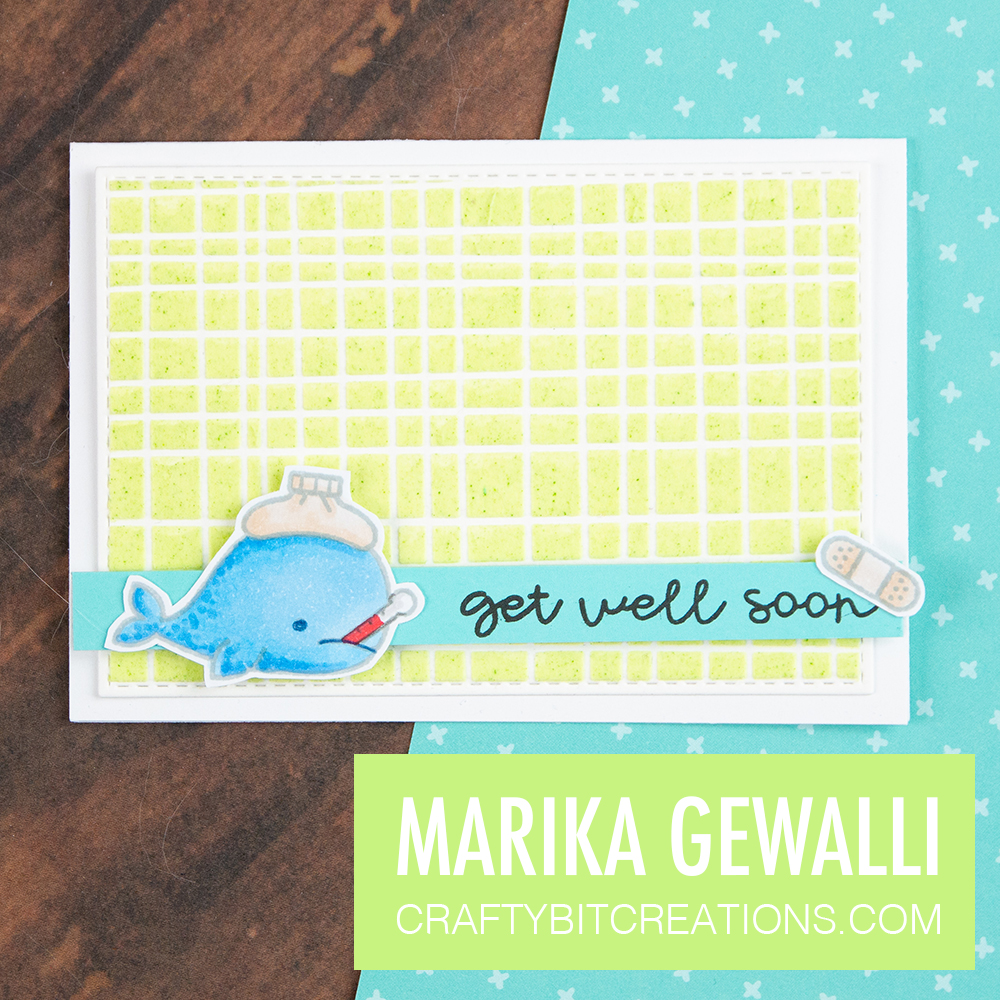
The fourth medium is Gelato in the color Cotton Candy. I ended up doing two test with this, I still count it as one way though. I started off by cutting a little bit of gelato off and then mix it directly into the paste, I call it dry blending. It took a lot of time, and I finally gave up letting it have small speckles of the unblended gelato in the paste.
So I decided to try it again, this time blending the gelato with water first. This made a big difference reducing the speckles to almost nothing. I think if I’ve been more patient it might not had any speckles.
For the fifth and final test I wanted to see if I could get the matte & white paste a little more pearlescent, so I added a very new addition to my craft room. Some Nuvo Mica Mist in the color Silver Smoke. I’m sad to say that it really didn’t do anything but give it a very light grey tint. But I did like the grey, so it wasn’t a complete waste.
For some final words, I loved playing around mixing different things and I recommend you doing it too. Have you tinted paste before? What kind of materials have you used?
Copic:
E40, E41, E42, T0, T2, B21, B32, B24, R35
When possible affiliate links are used, this means that I receive a small commission when products are purchased through the links (at no extra cost to you) I use the money to support my blog and youtube channel. If you like my projects and tutorial please consider supporting me by clicking through these links when you shop. Thanks!
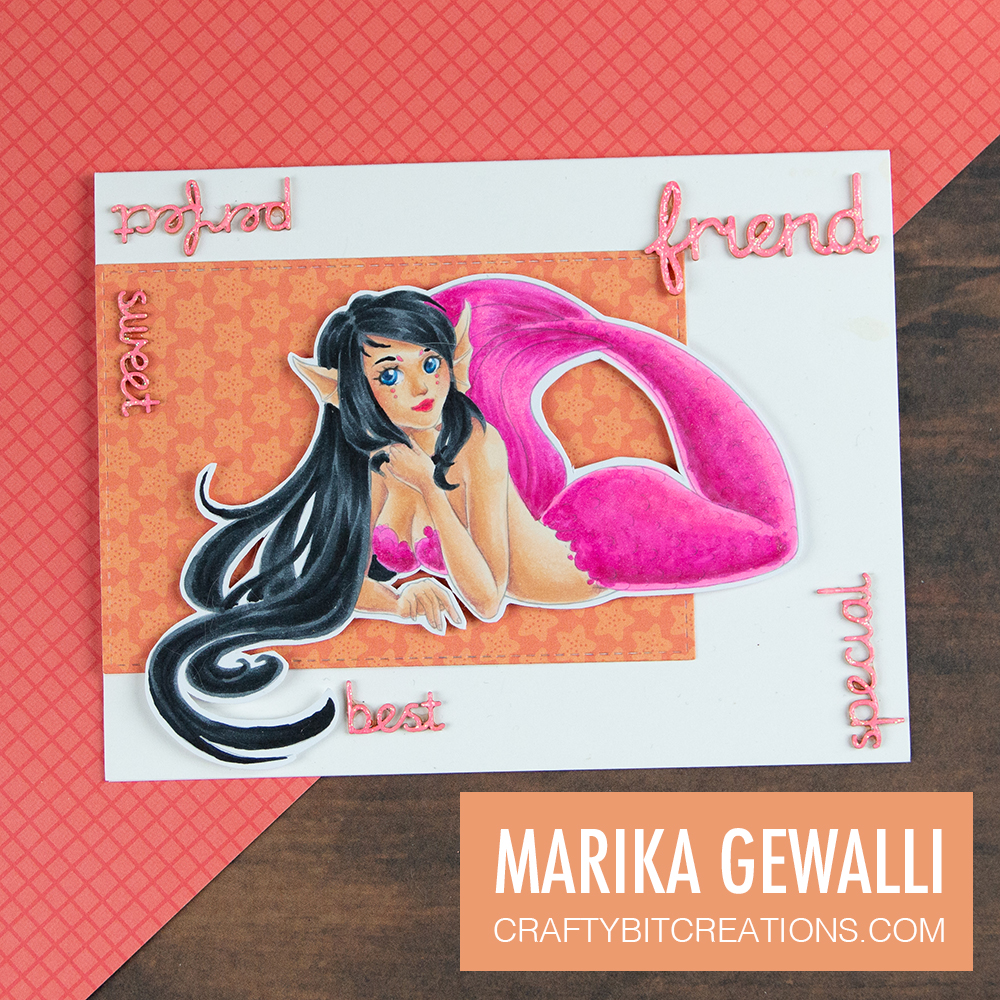
Hi! I have totally fallen in love with the no-line coloring technique, Zoe over at Make It Crafty started it years ago and it came back about a year ago. I was very hesitant, even a little bit scared of trying. But now that I have, I just can’t stop!
I love the softness that it creates, but in todays card (and video) I’m trying it out with some more stronger colors to see if it works. And I kind of like it! Also this is another mermaid creation as I love mermaids and during may in the art world people do mermay, and I decided to join is this year, so all my creations will be mermaid inspired this month.
When possible affiliate links are used, this means that I receive a small commission when products are purchased through the links (at no extra cost to you) I use the money to support my blog and youtube channel. If you like my projects and tutorial please consider supporting me by clicking through these links when you shop. Thanks!