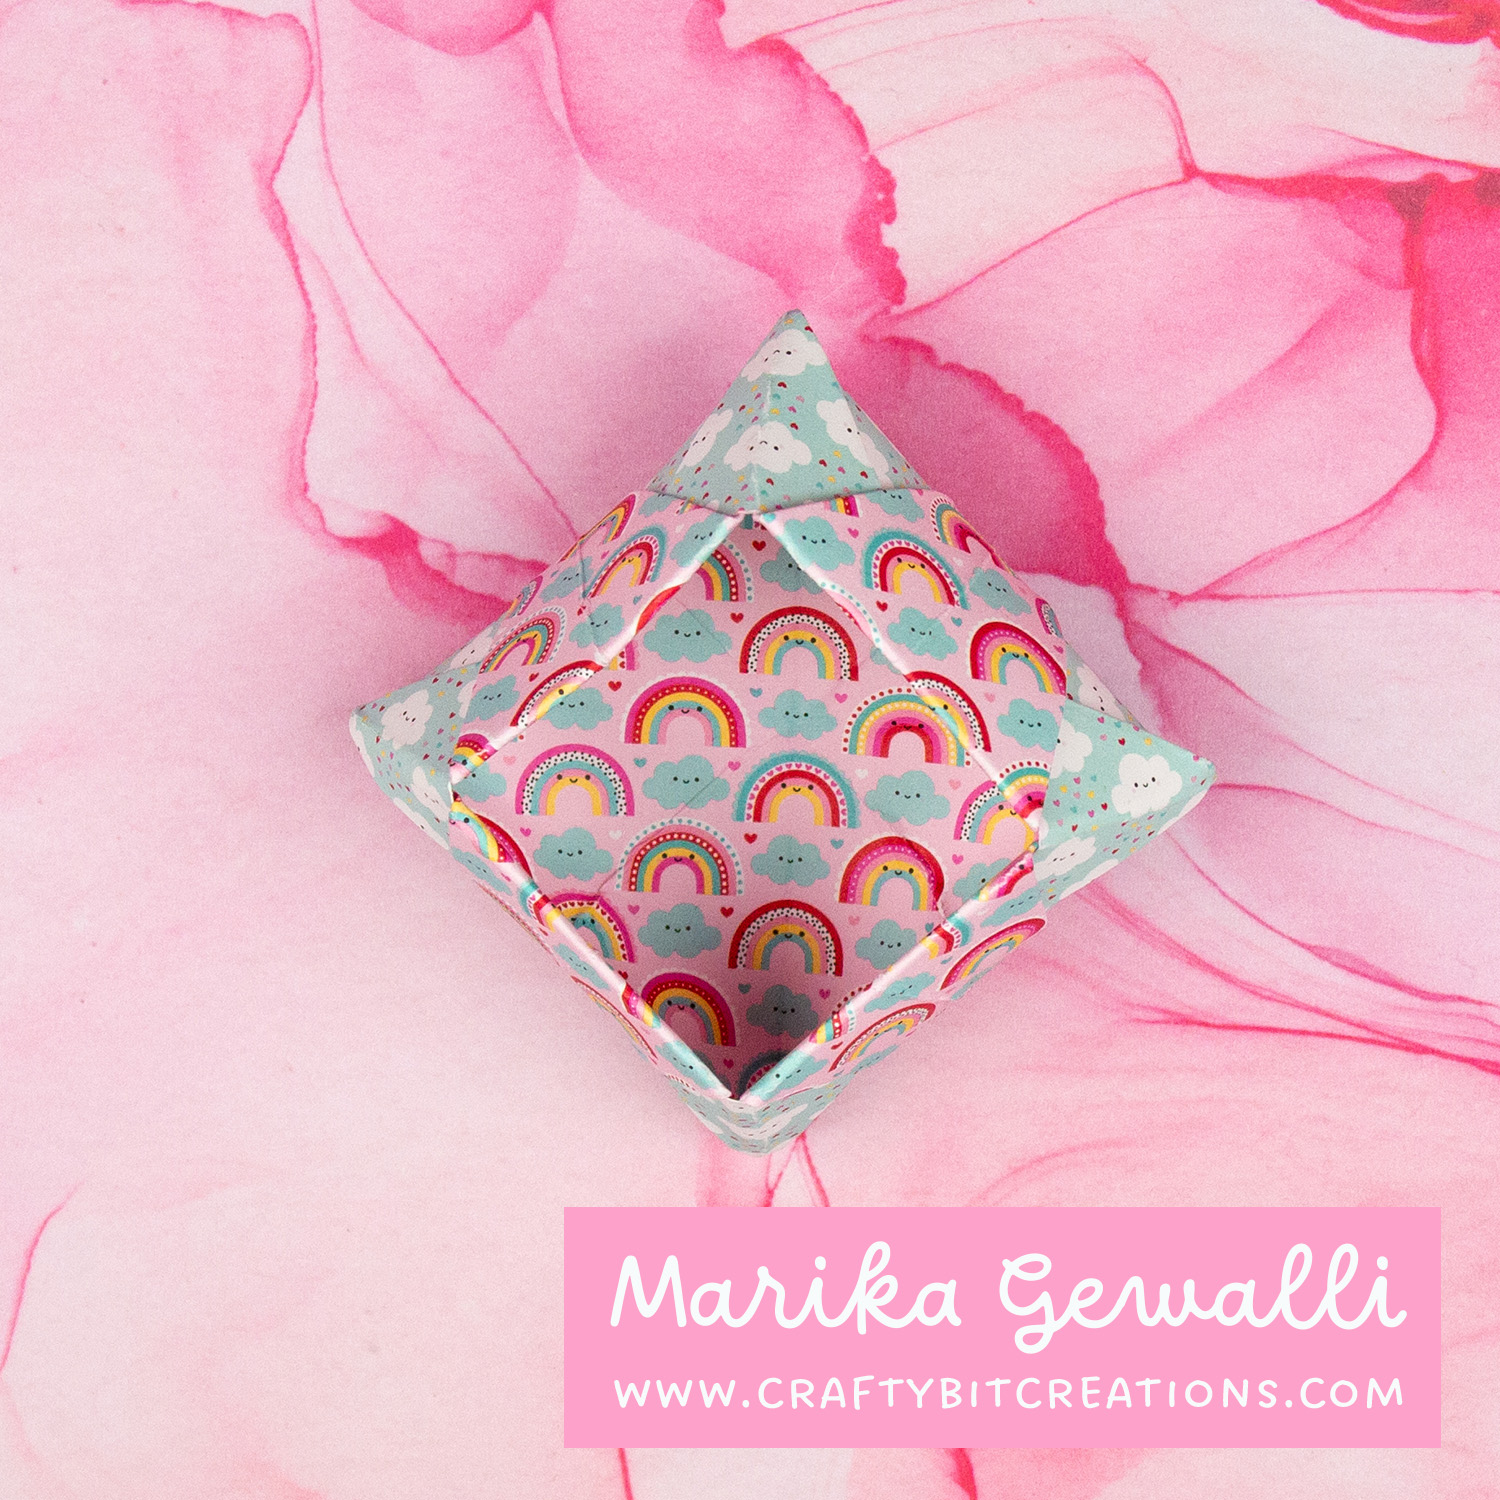
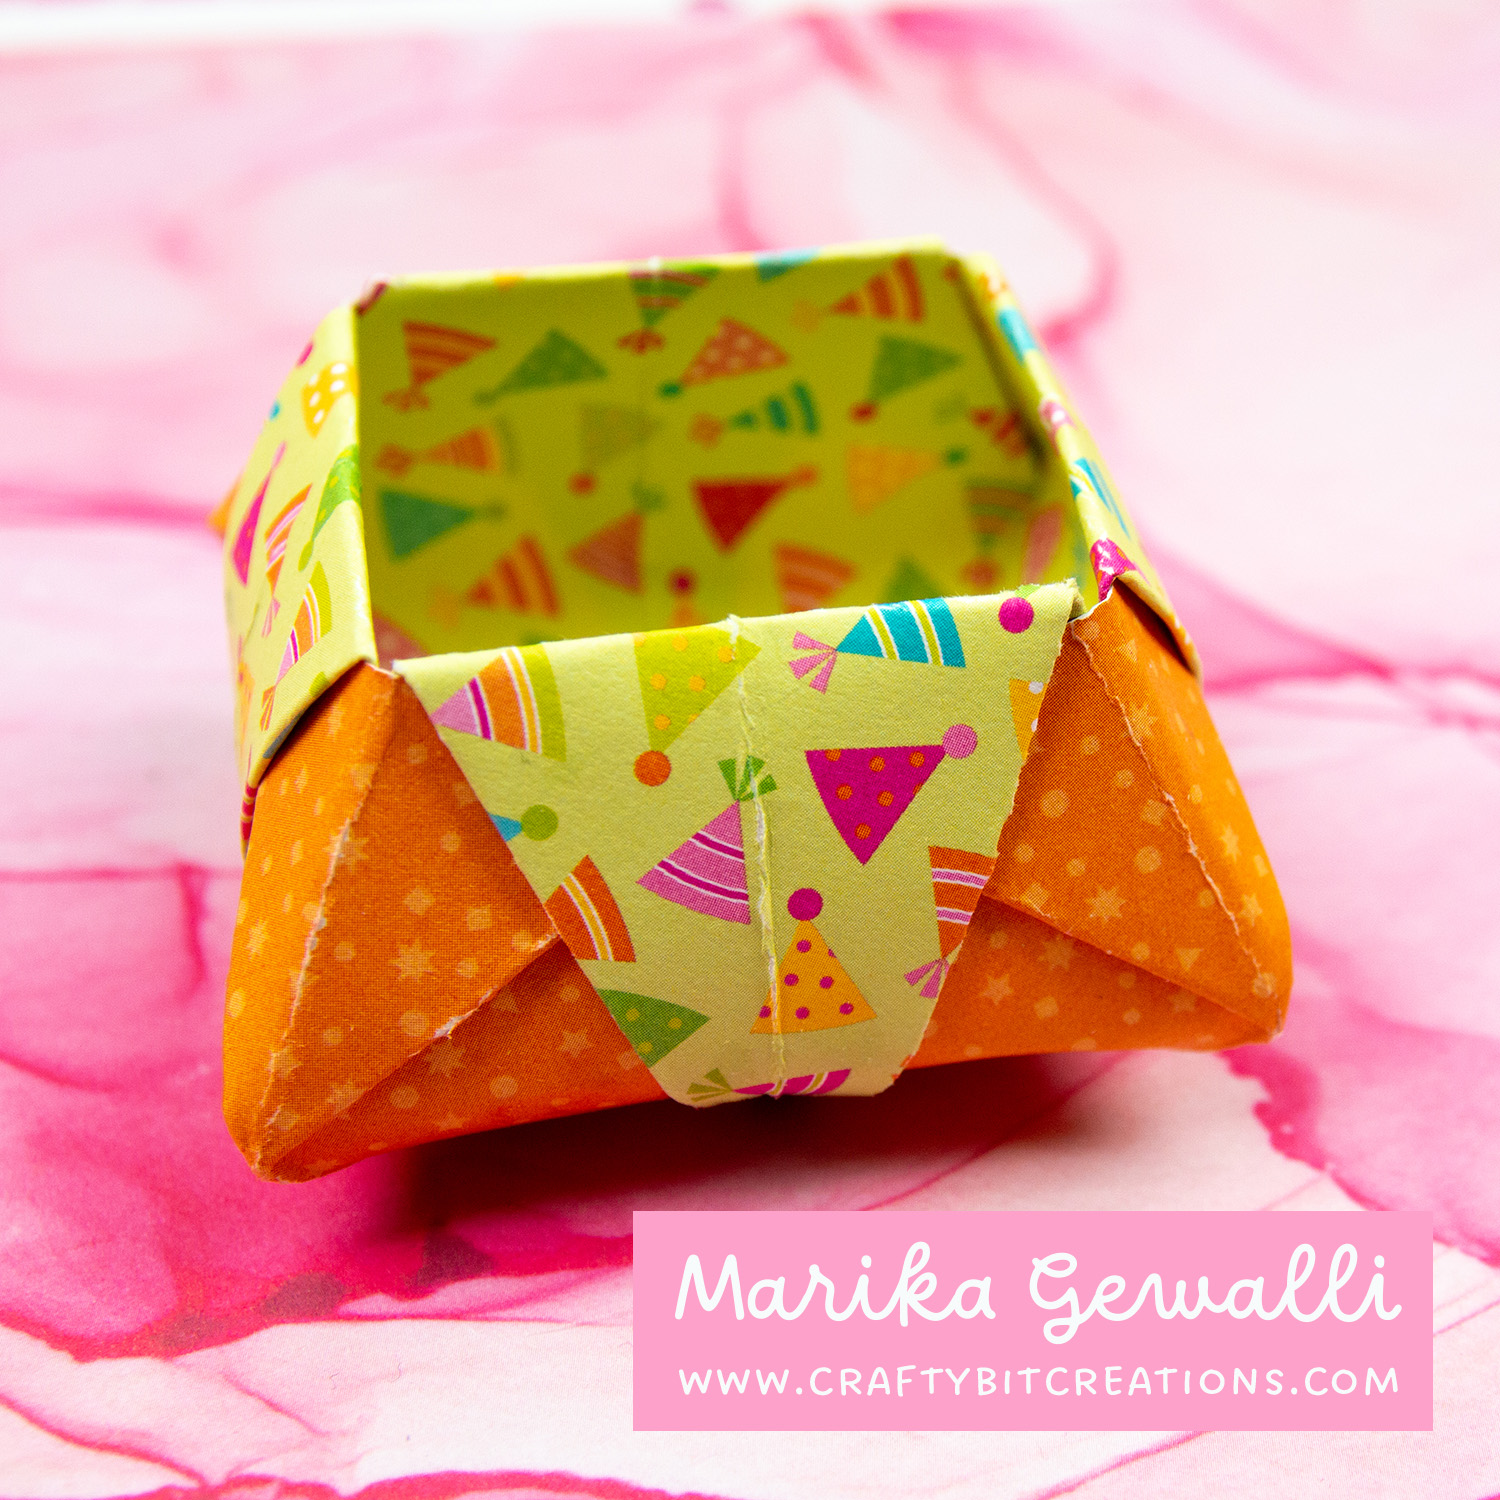
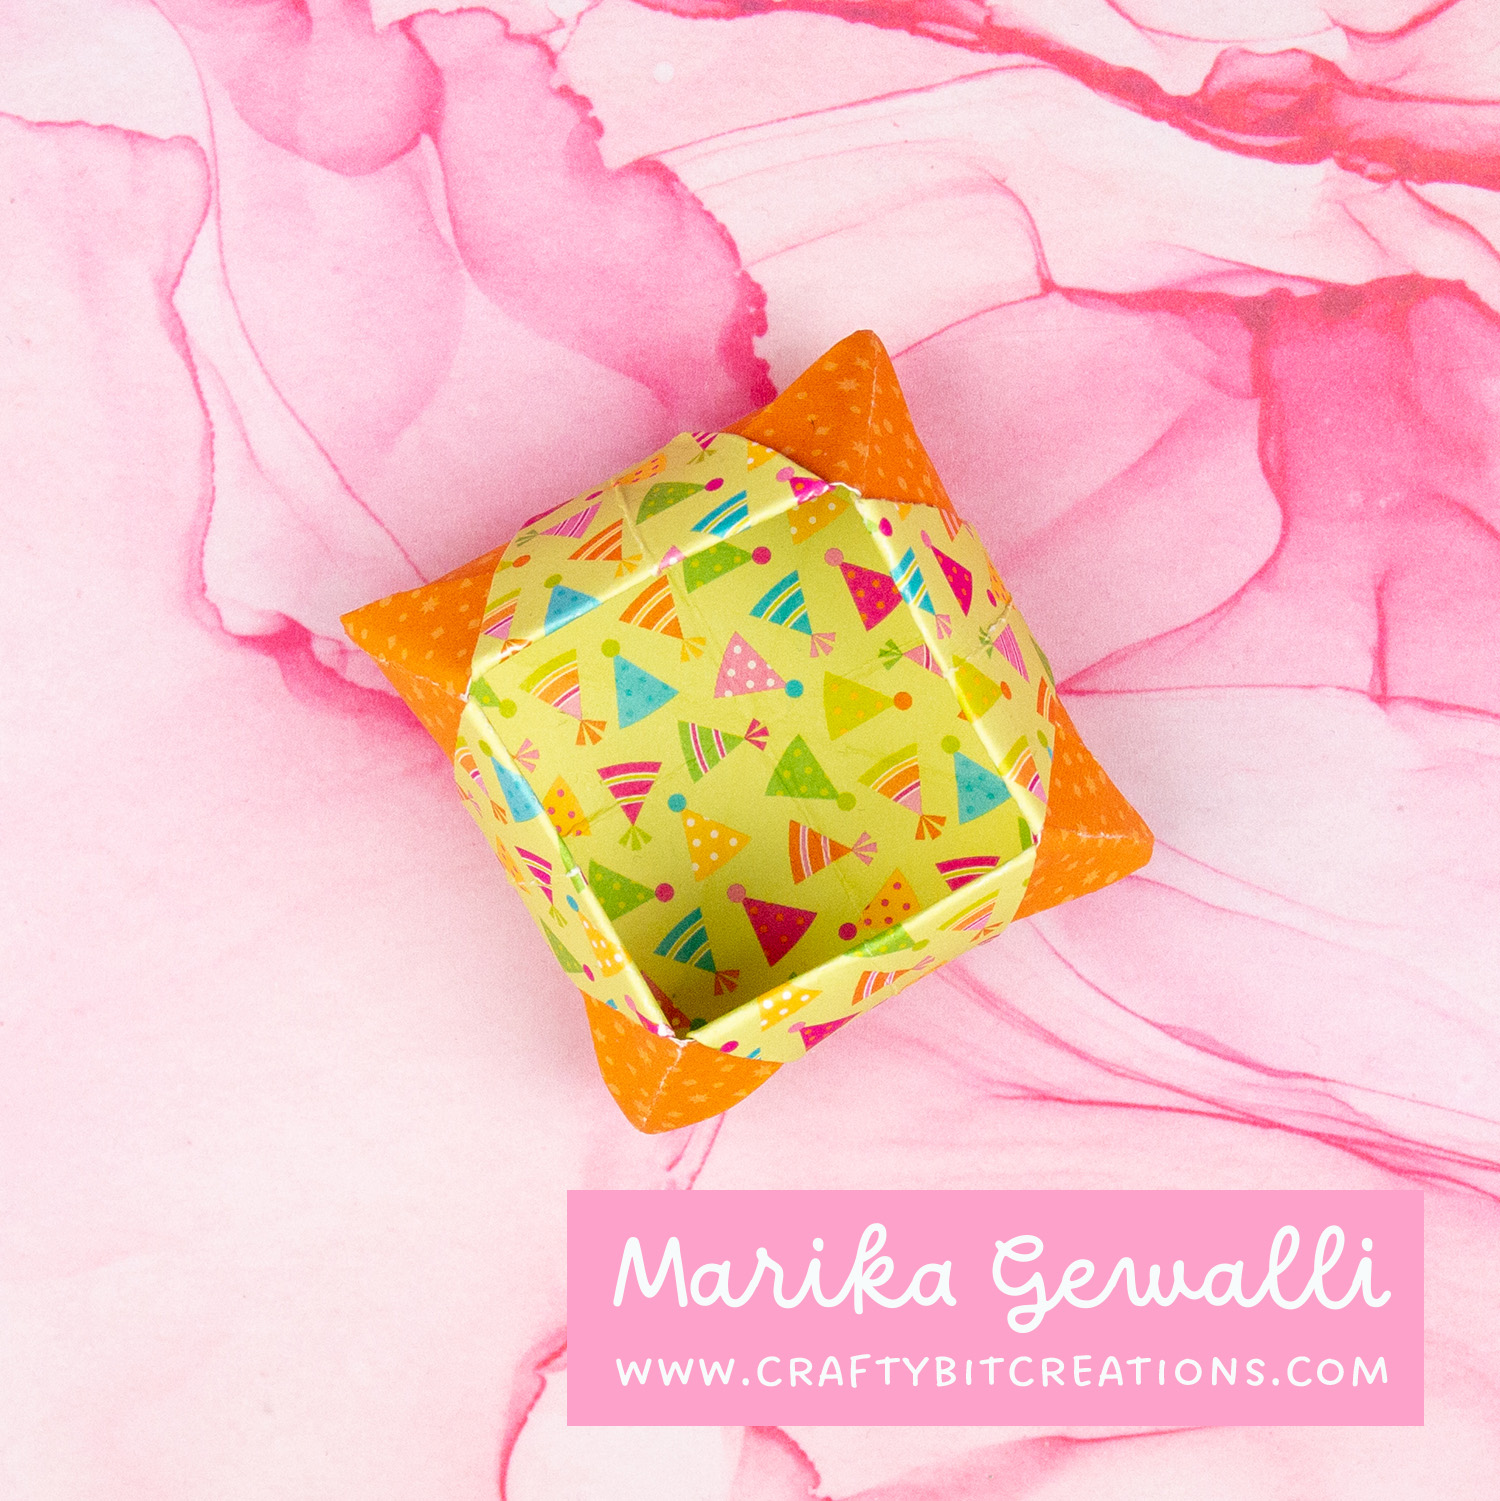
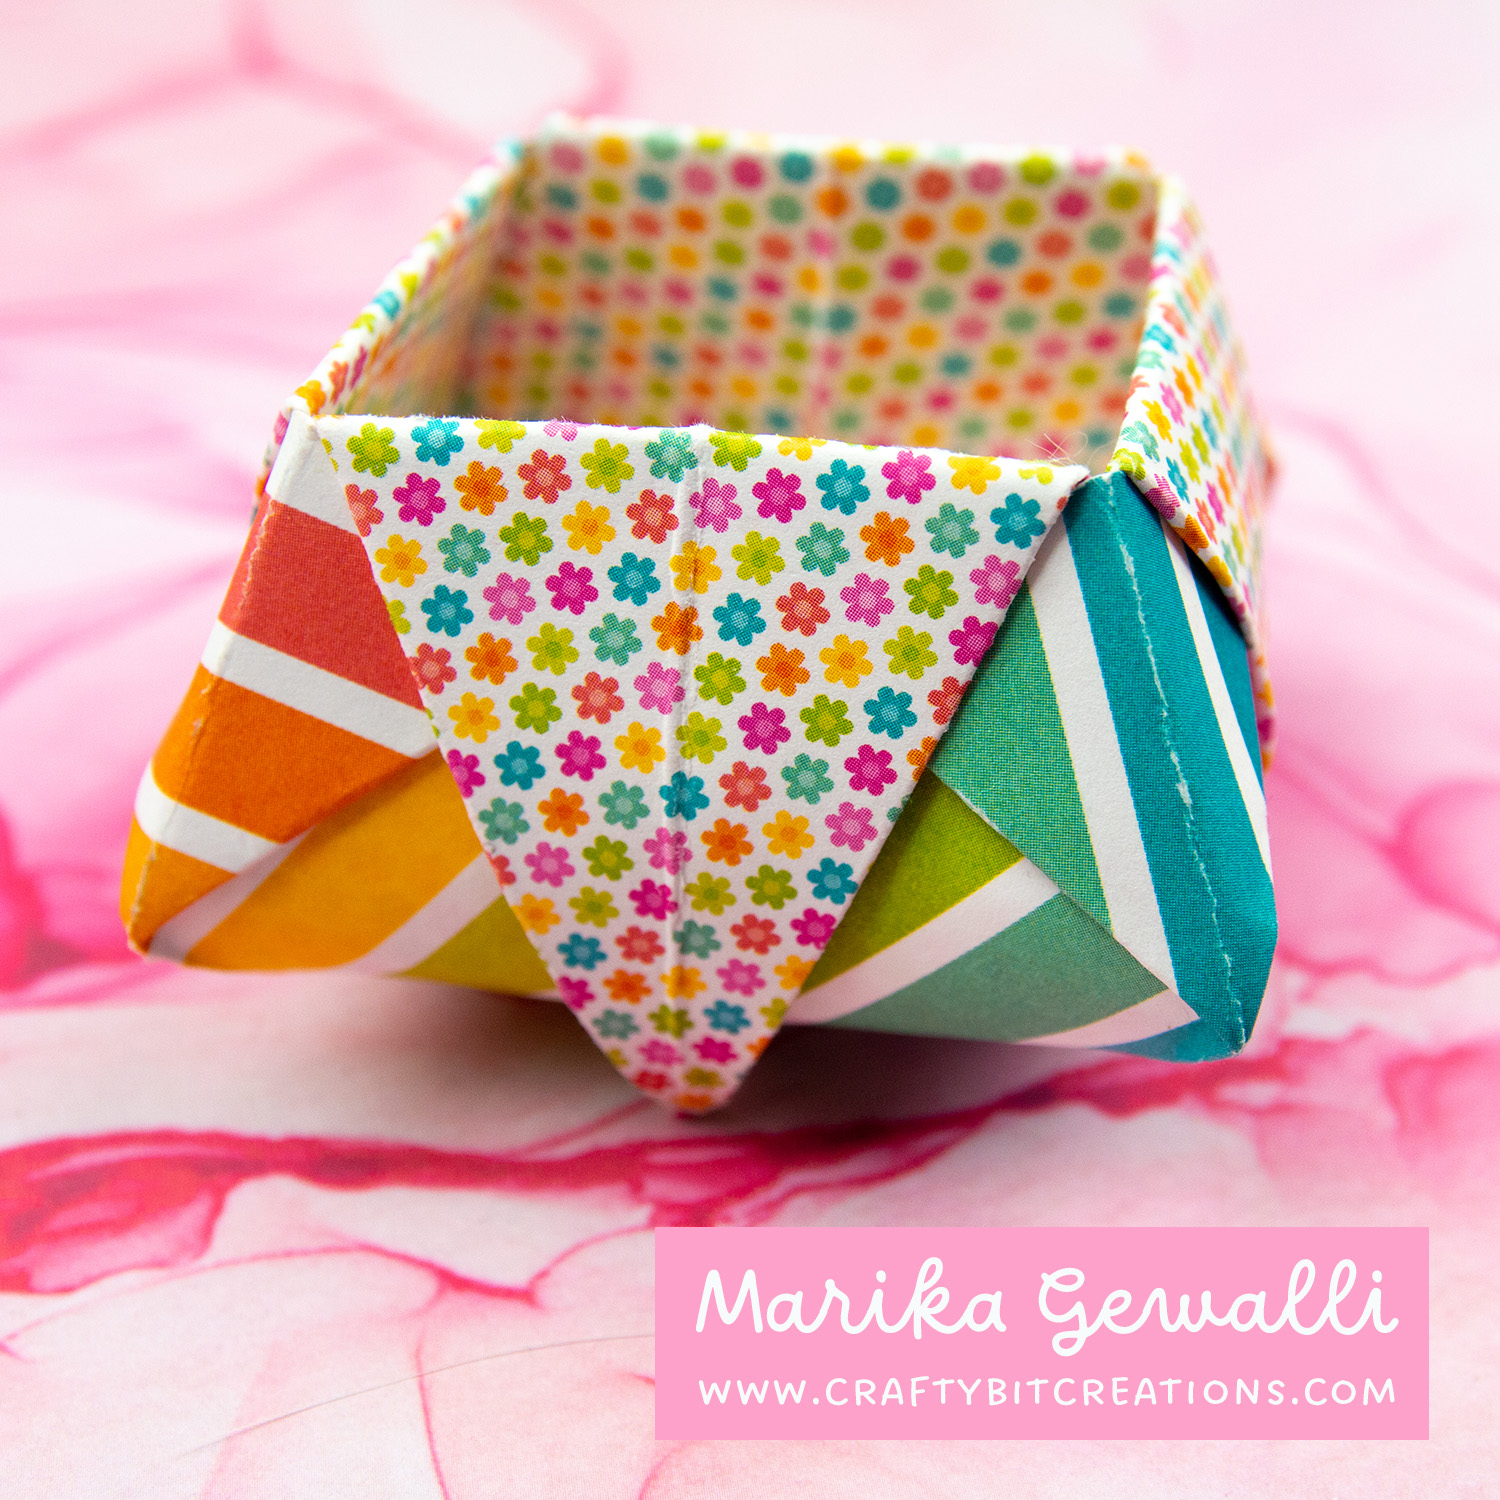
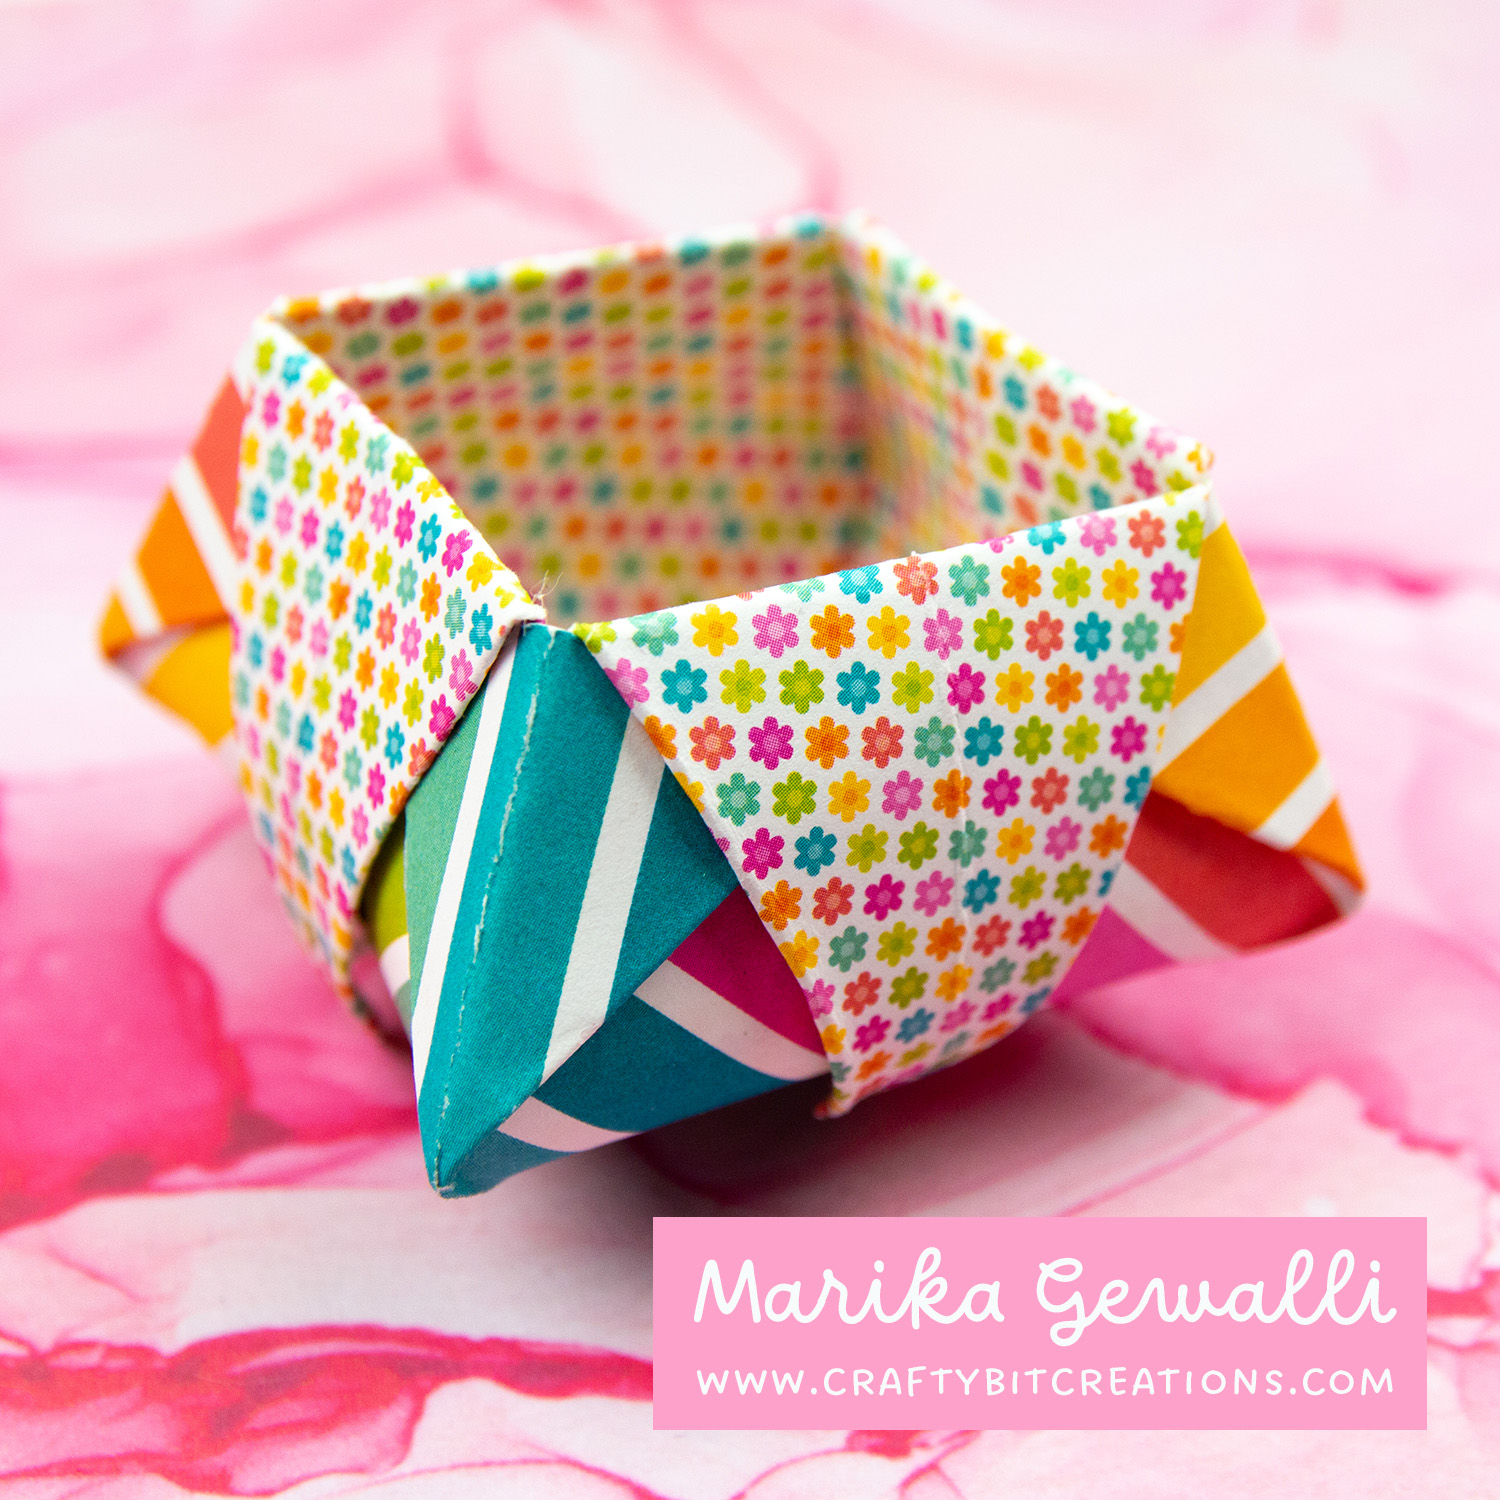
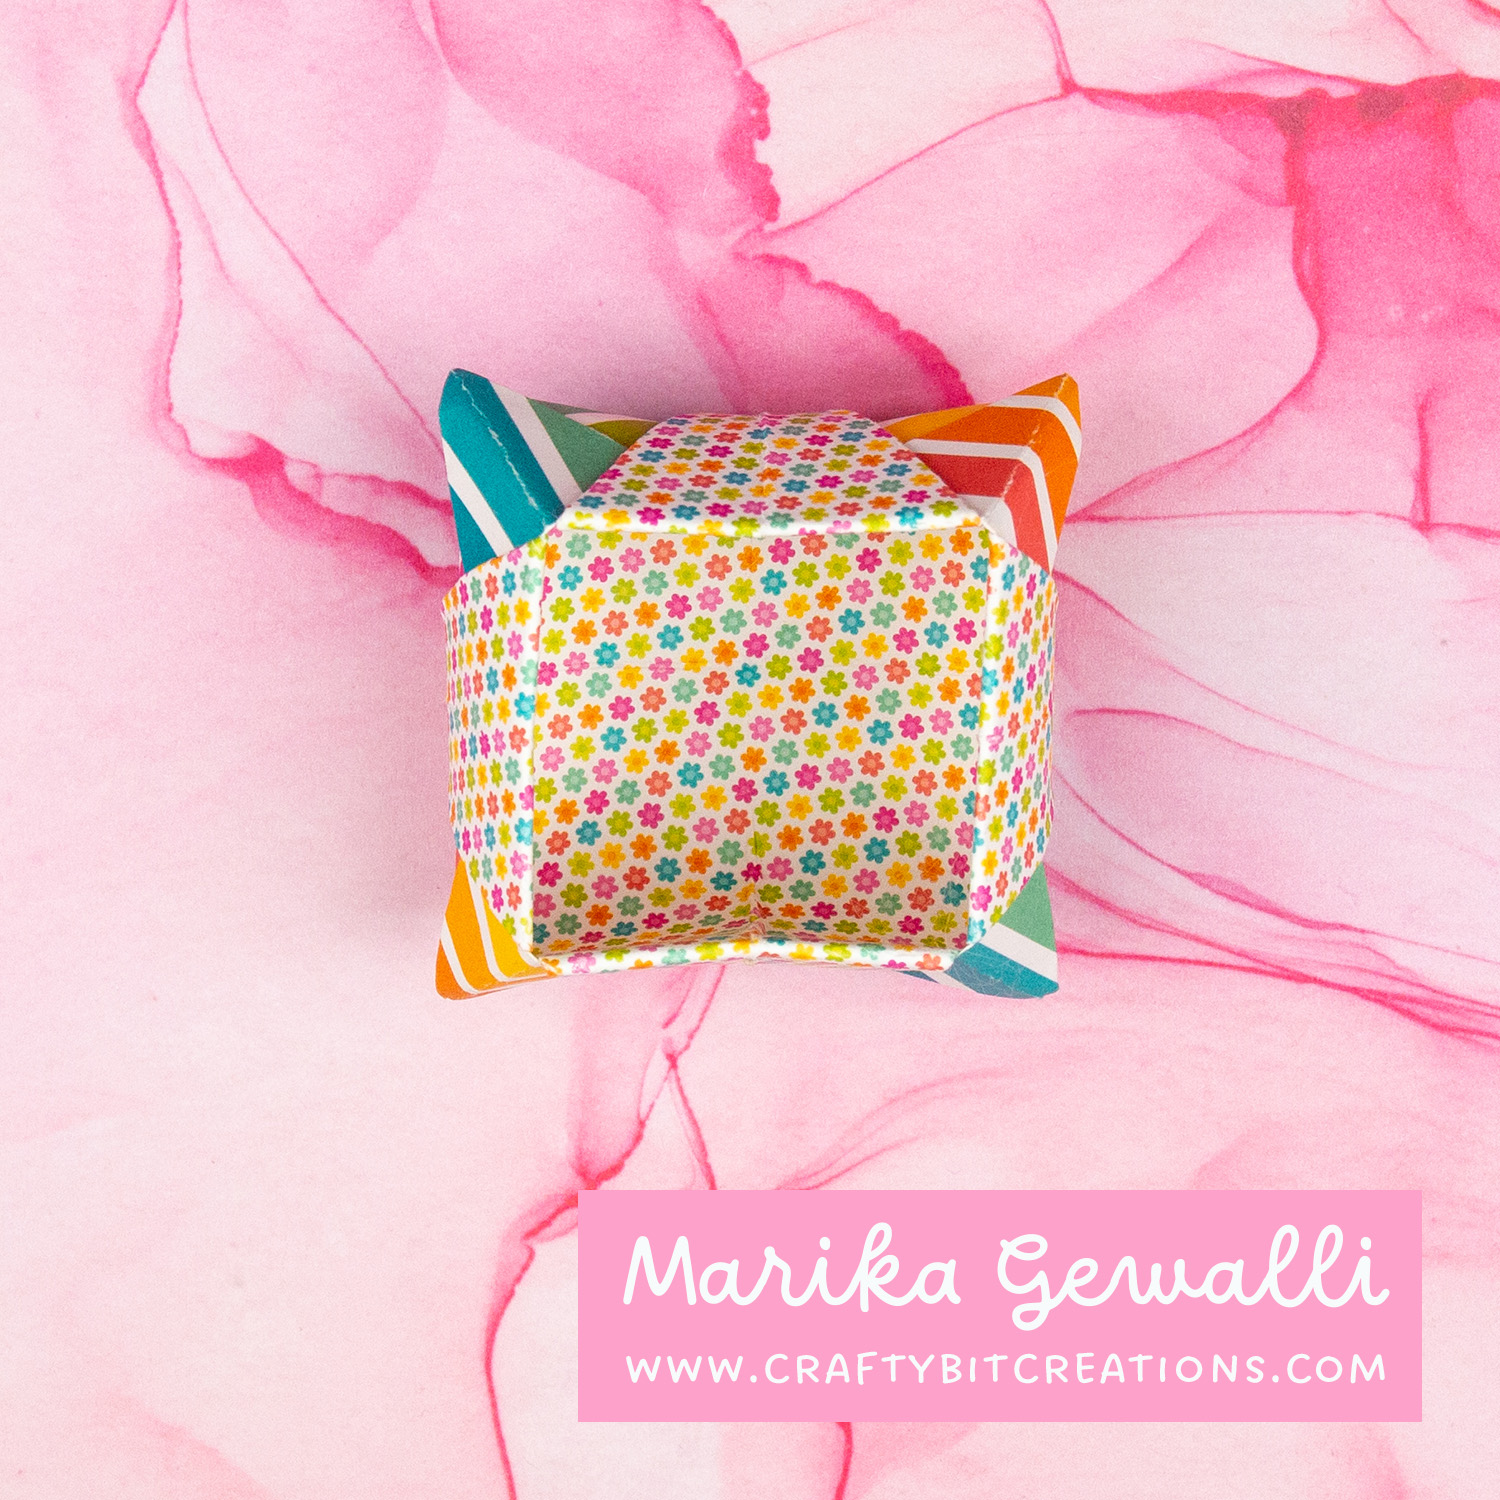
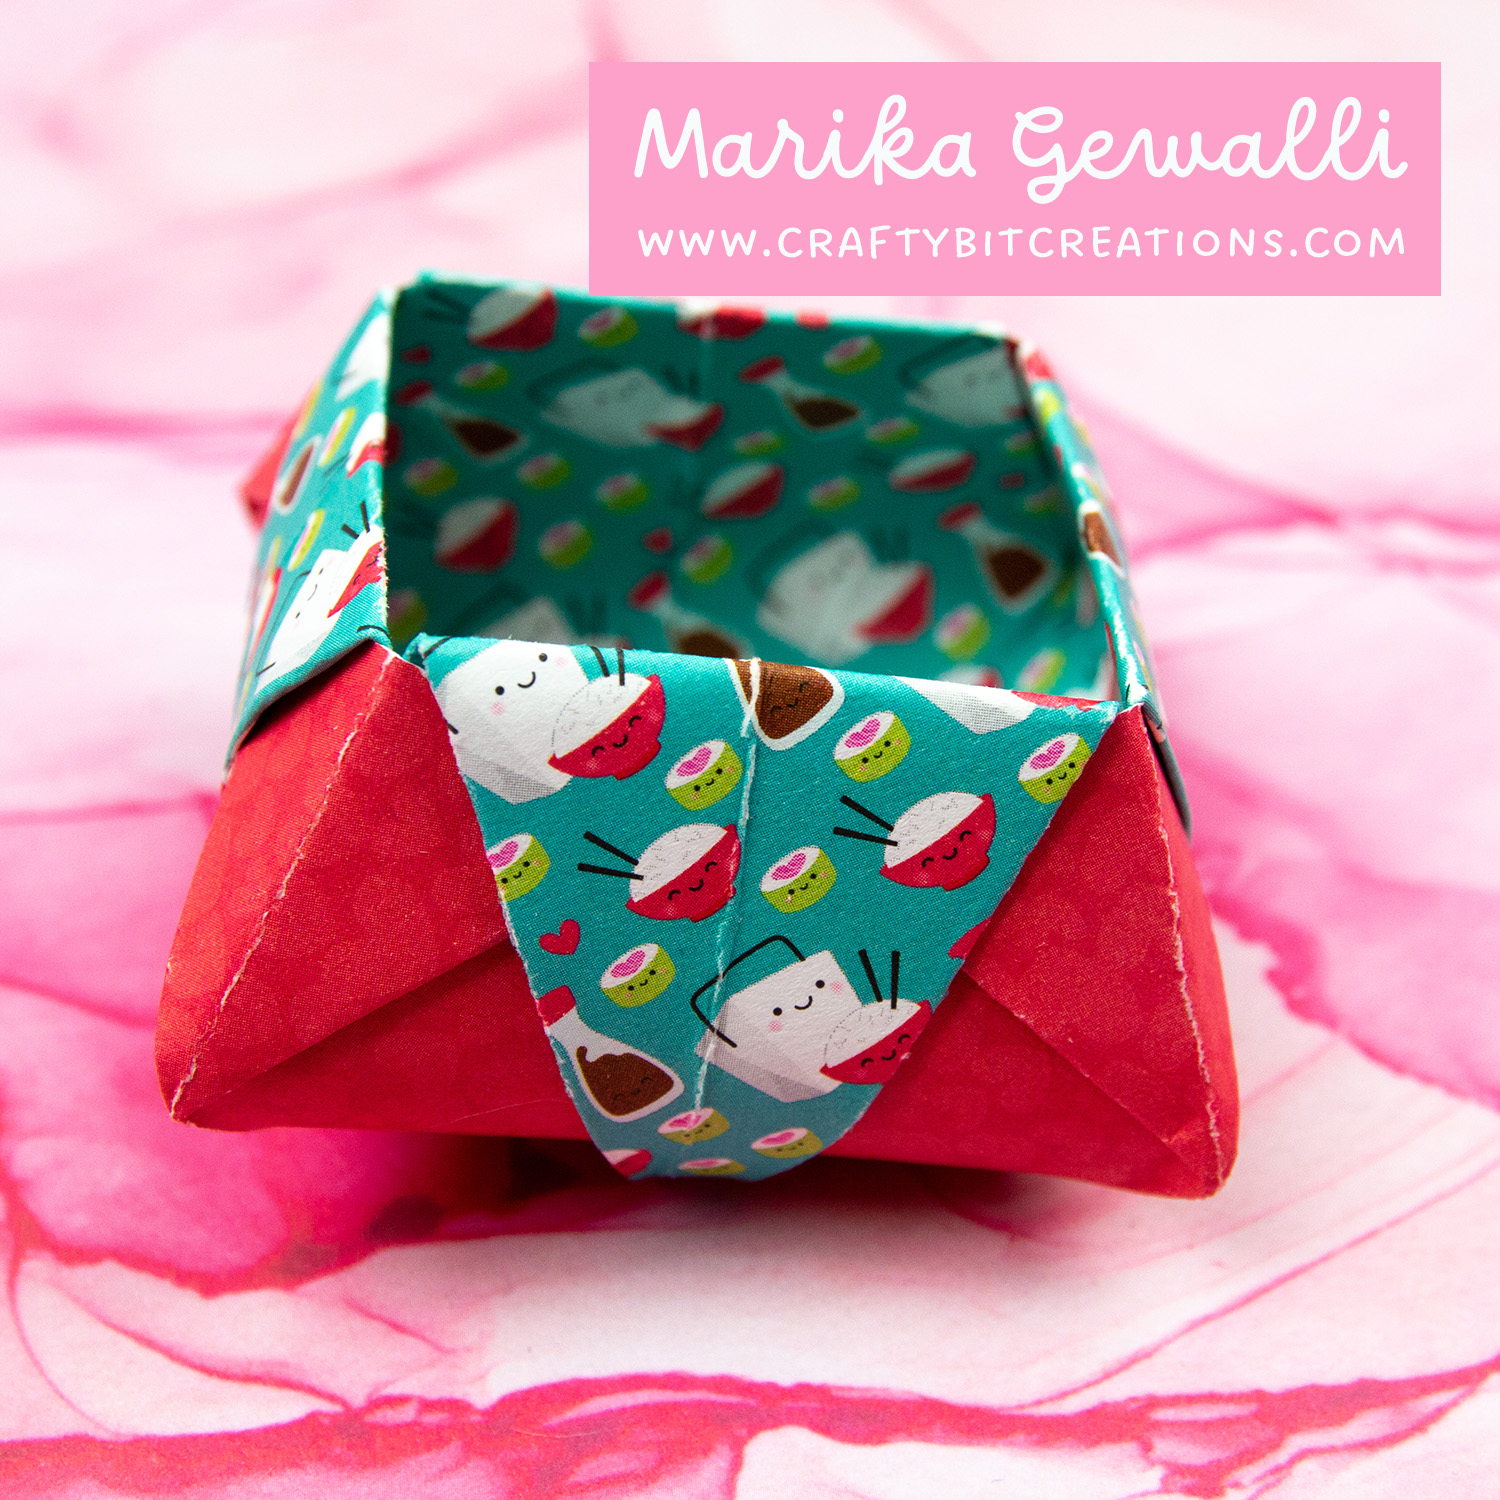
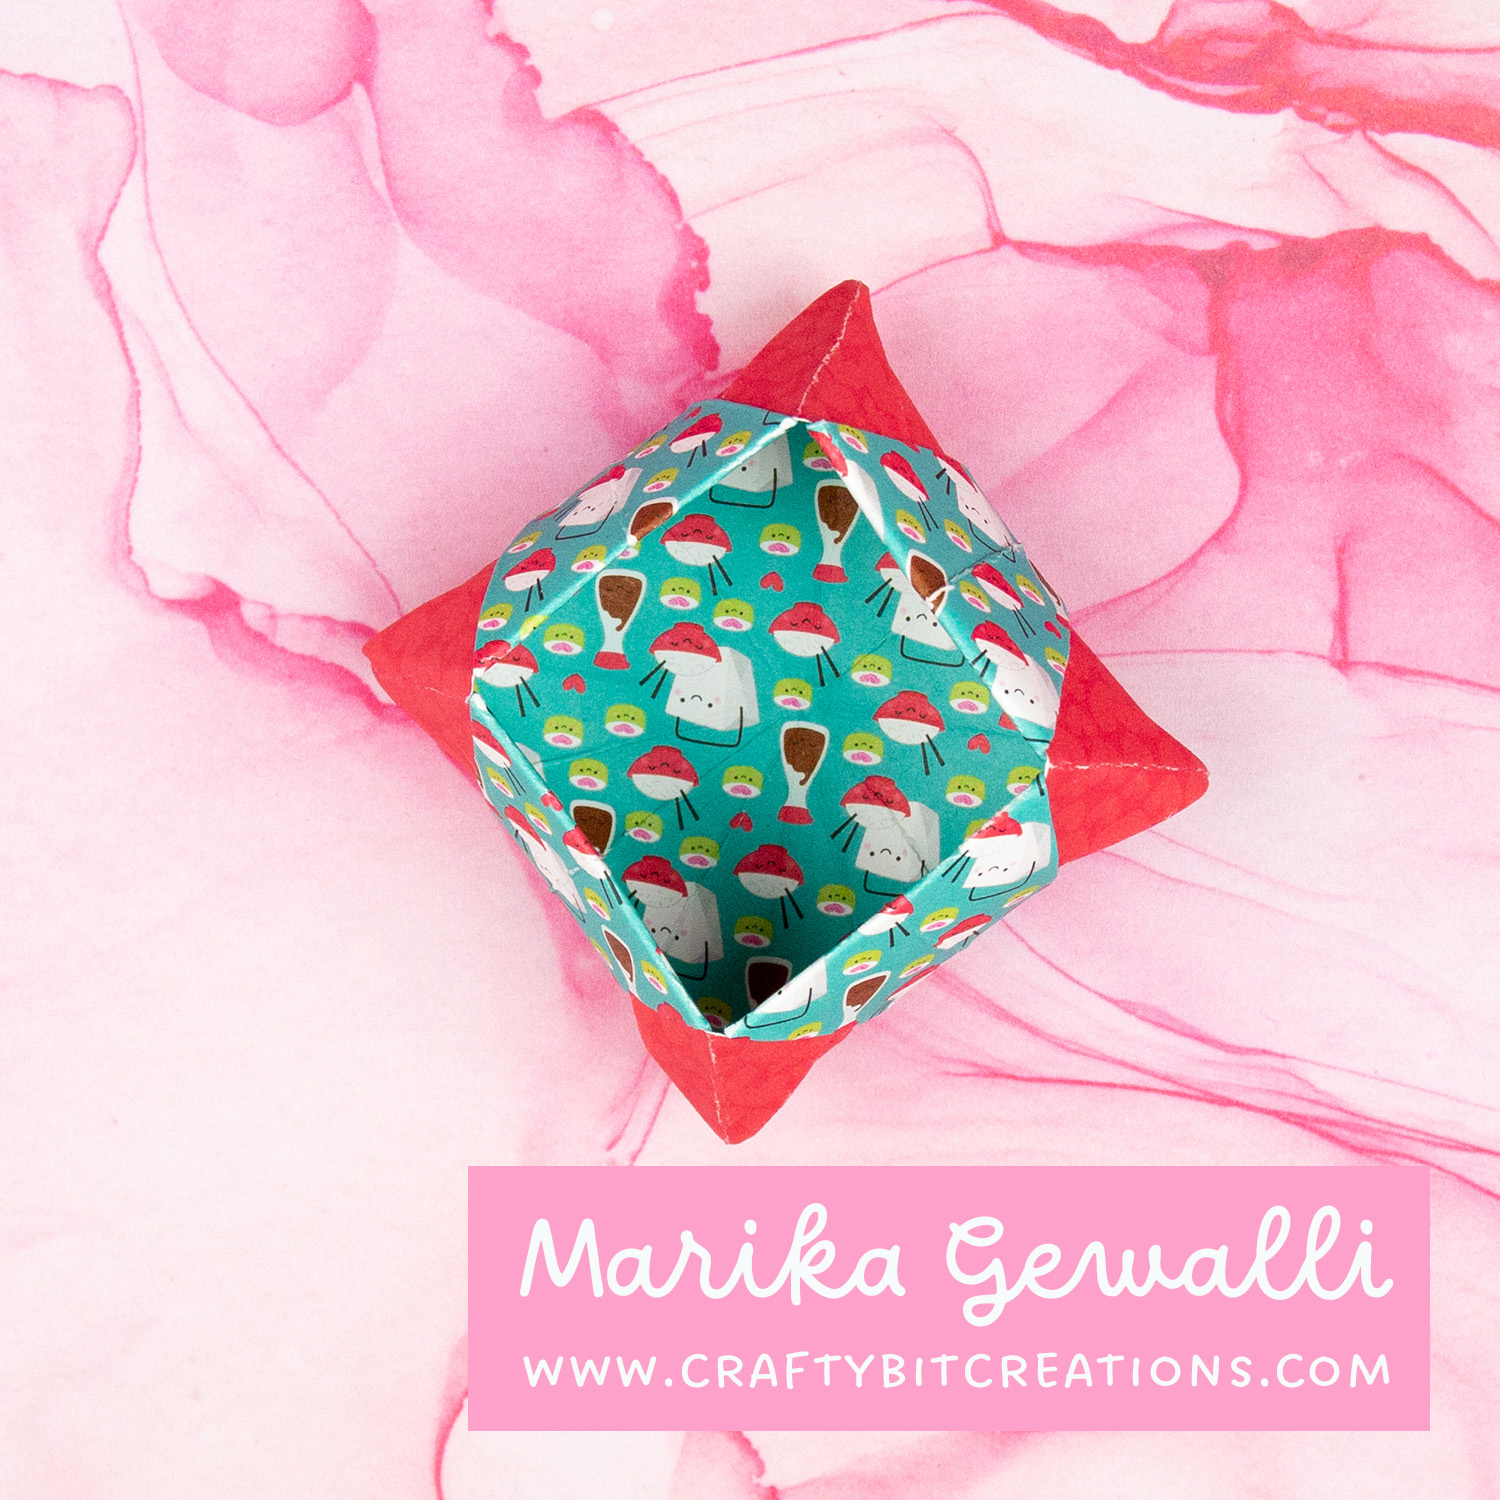
Do you like me have loads of 6×6 pattern paper pads? These little origami boxes are super easy to make and takes one sheet of double sided pattern paper. They are super fun to make and I just couldn’t stop myself and have at least 10 of them laying on my table. As usual when making boxes I have a schema below that you can use together with the video tutorial. And if you want to see more box videos you can see all I have HERE.
When possible affiliate links are used, this means that I receive a small commission when products are purchased through the links (at no extra cost to you) I use the money to support my blog and youtube channel. If you like my projects and tutorial please consider supporting me by clicking through these links when you shop. Thanks!
Supplies
DD Hey Cupcake 6×6 Pattern Paper Pack: SSSSBC Doodlebug LOTS OF LOVE 6×6 Inch Paper Pad: SSSSBC MFT On-Point Precision Glue Pen: MFT Large Score Board: SSSAMZSBC
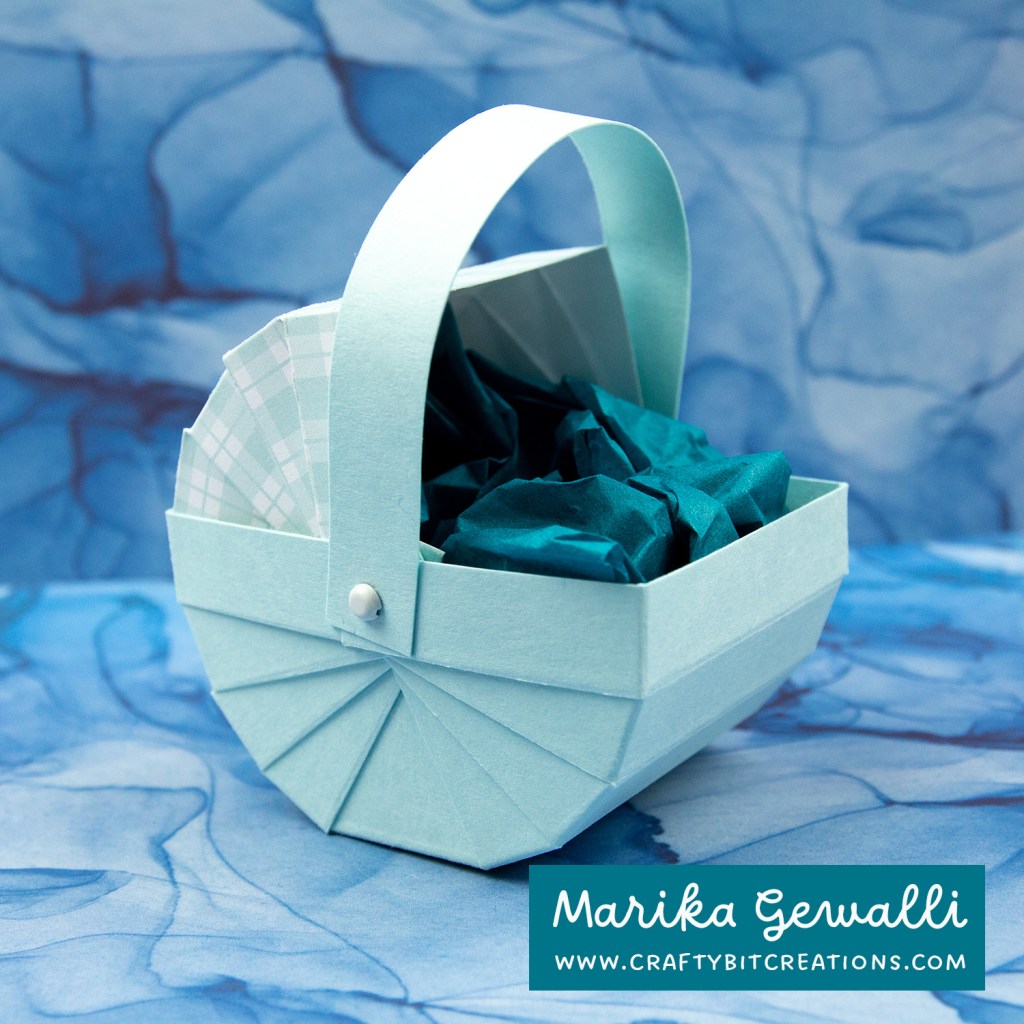
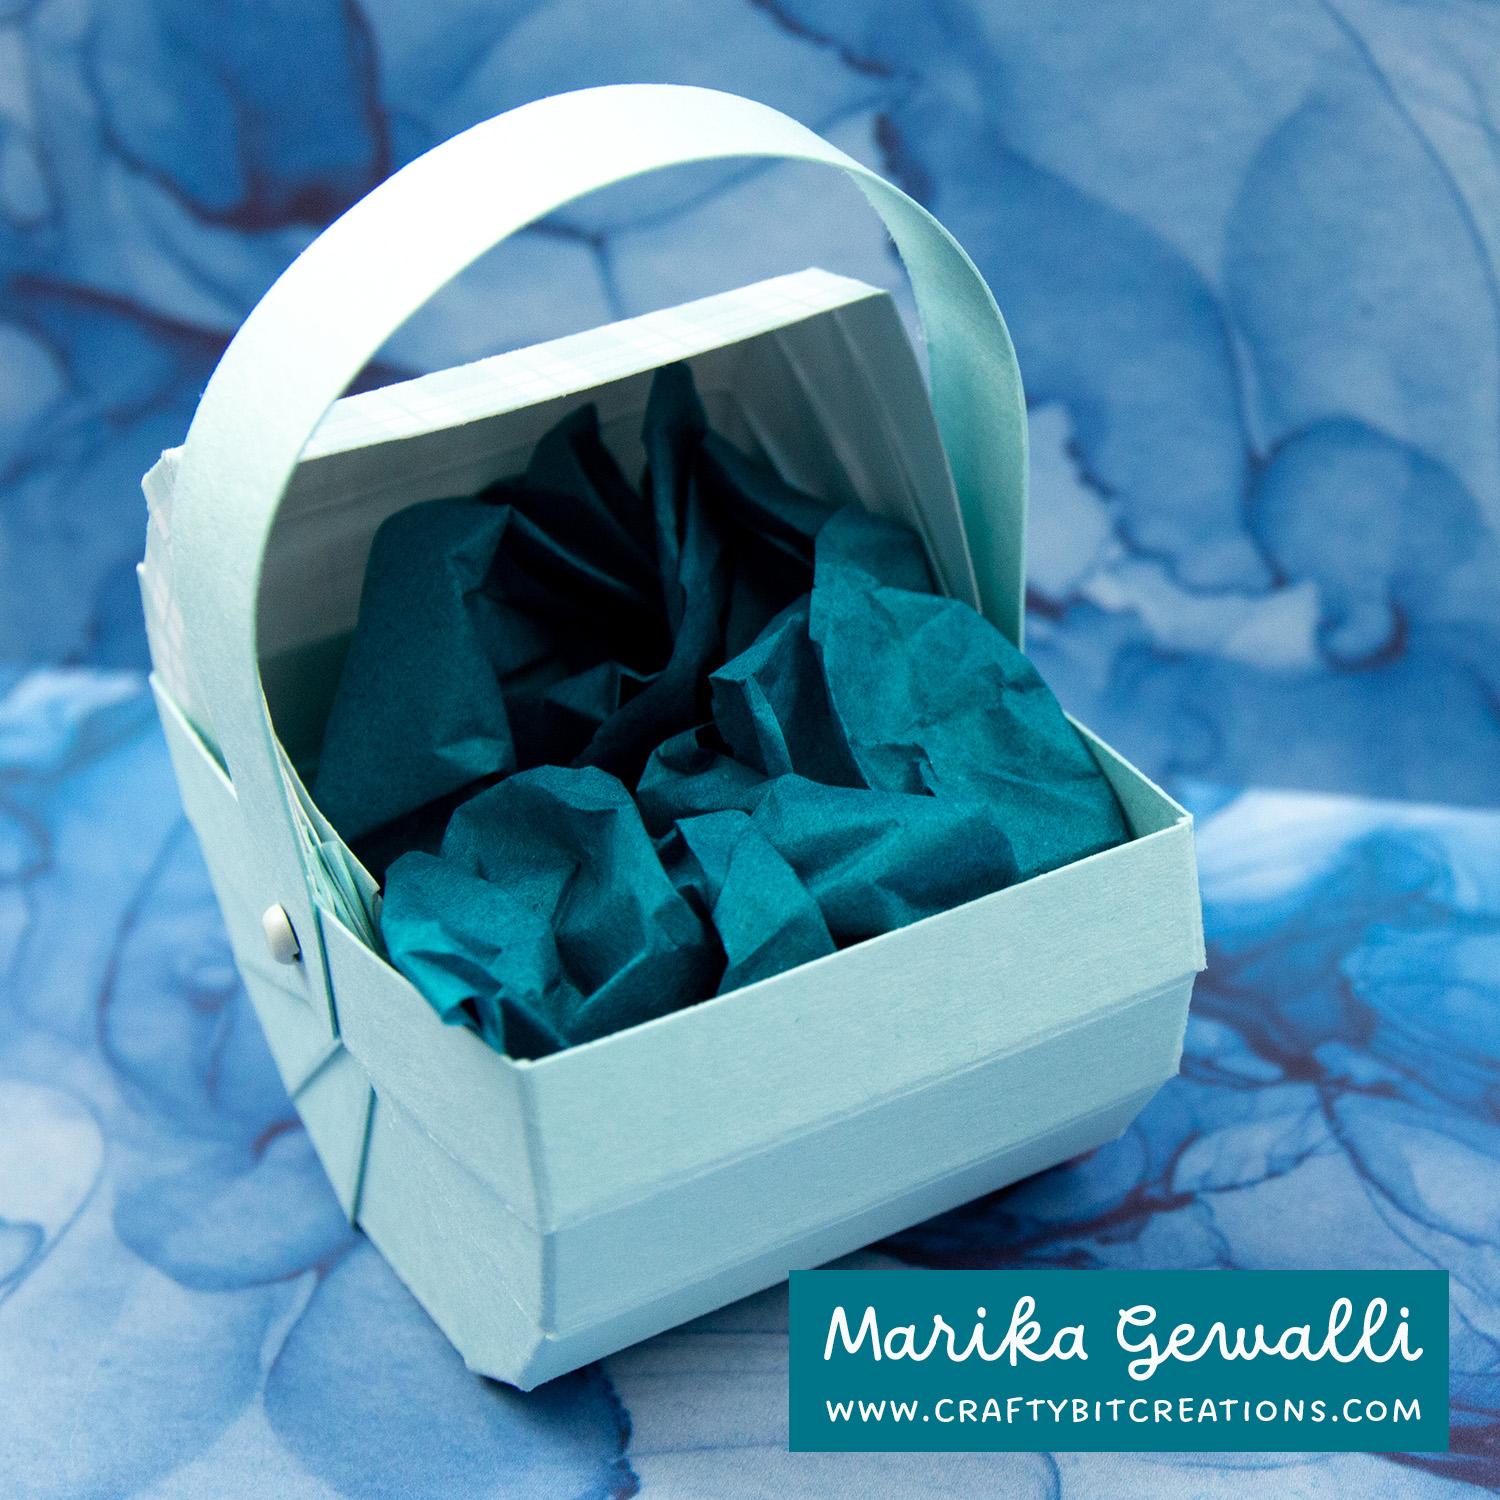
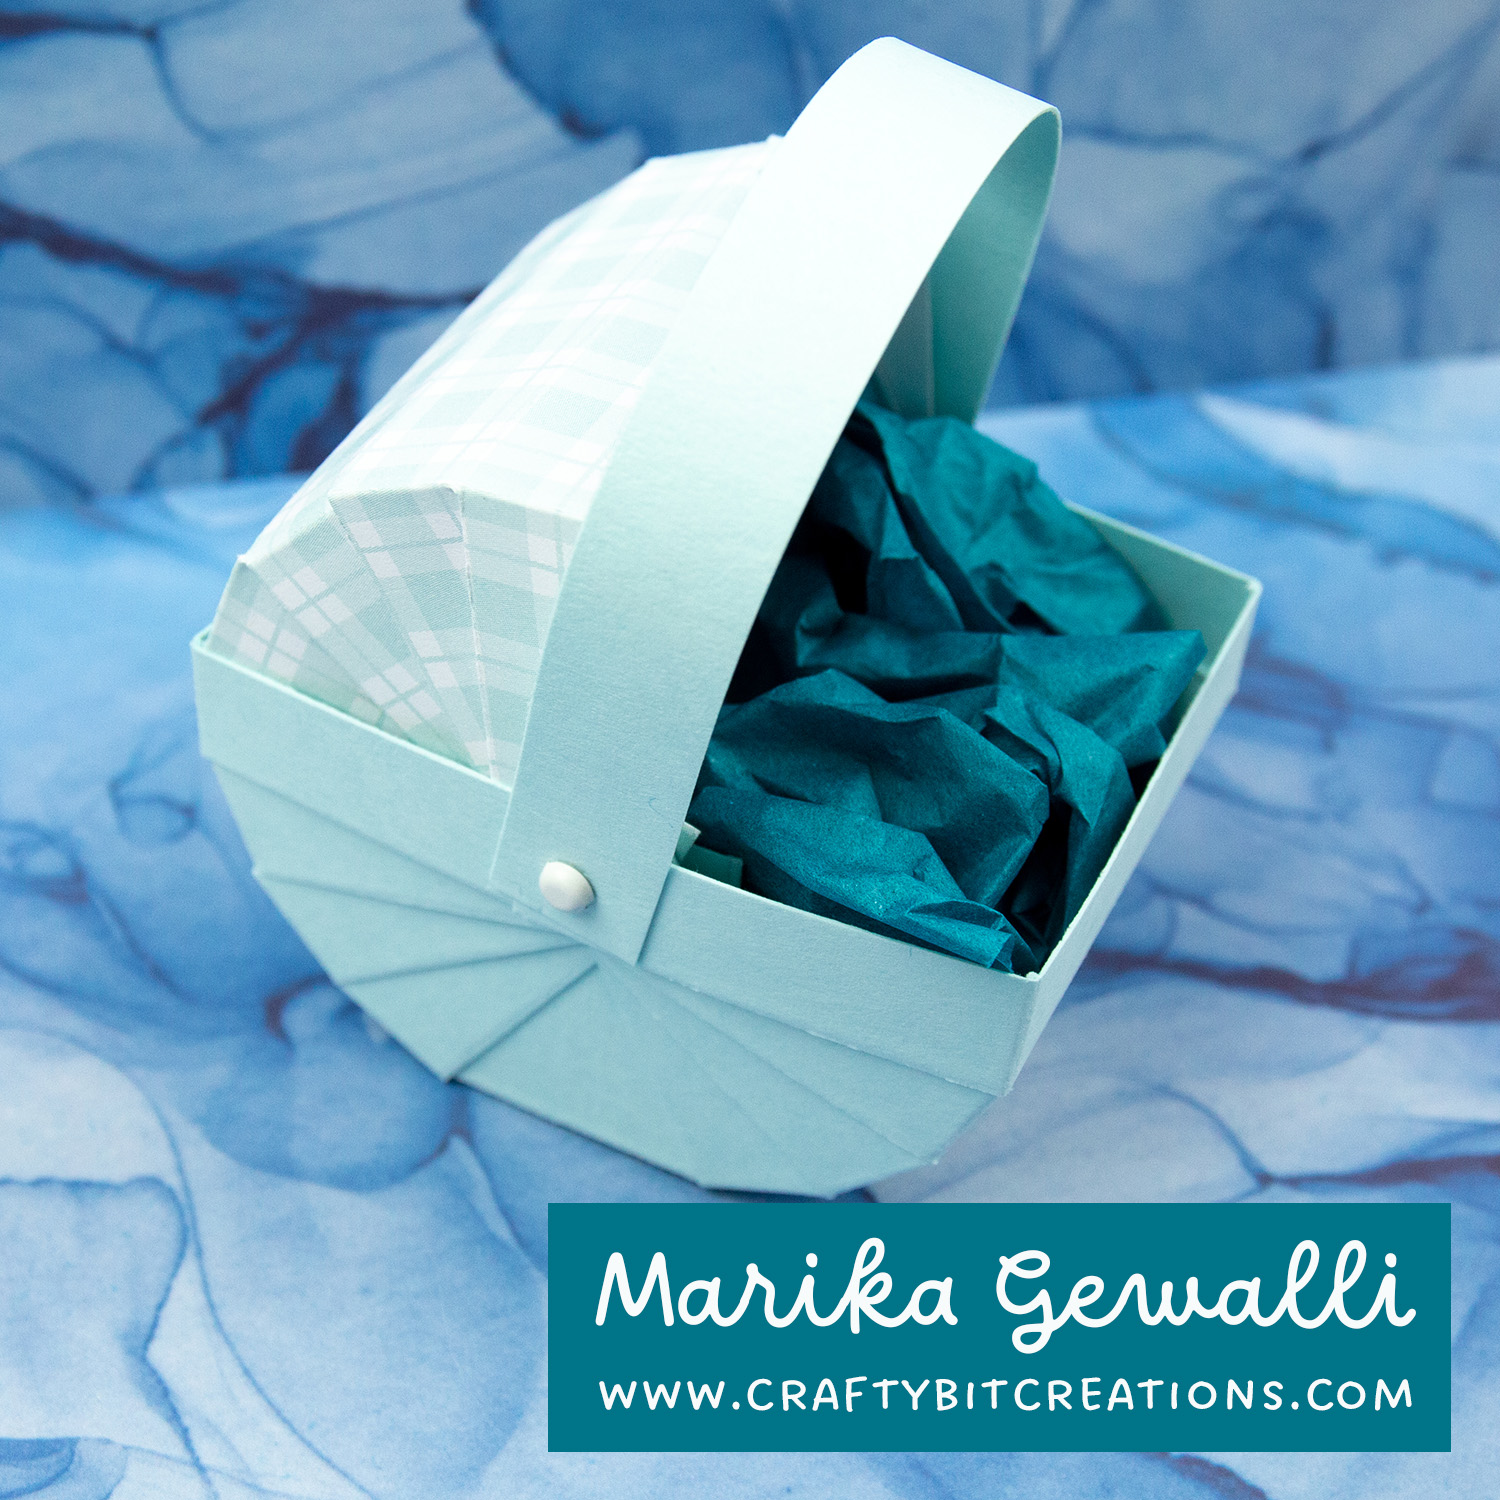
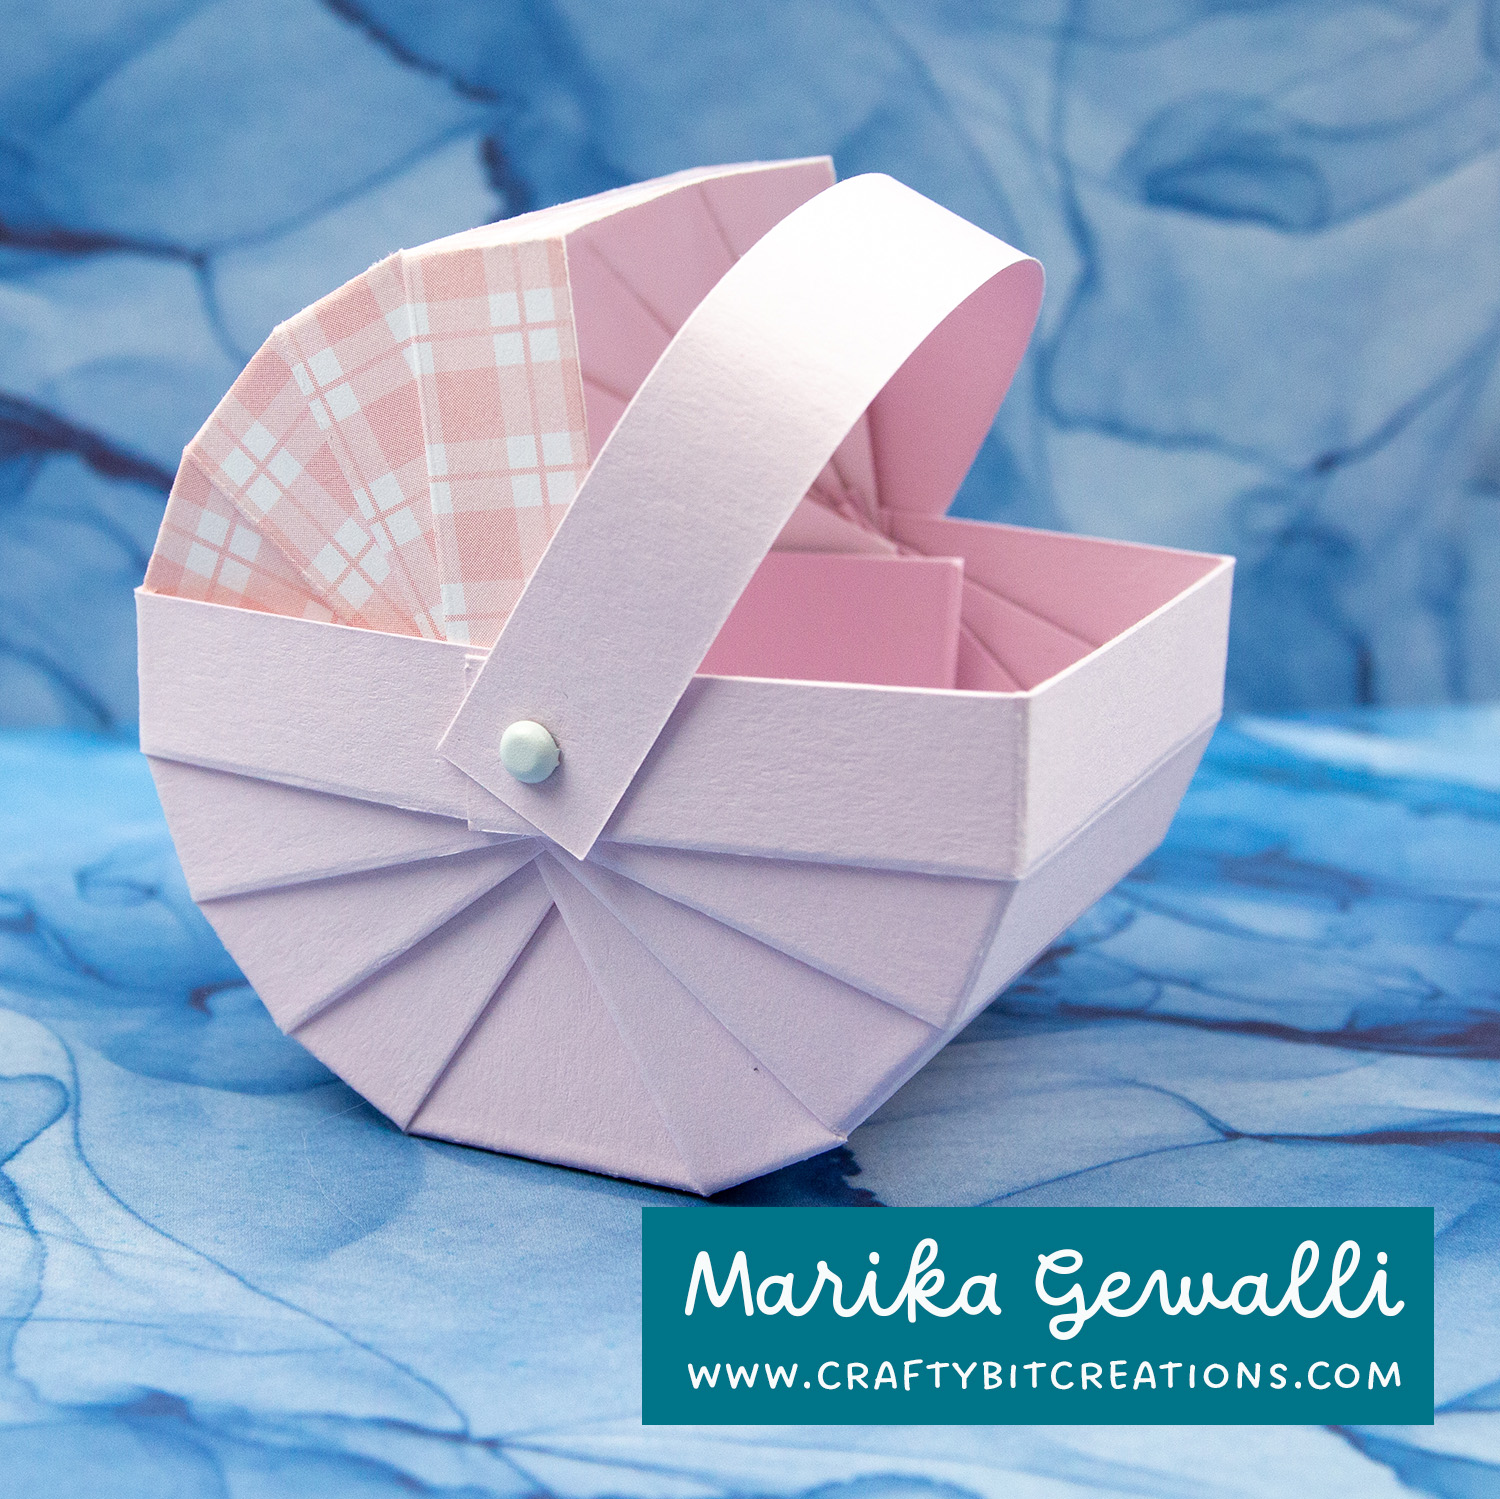
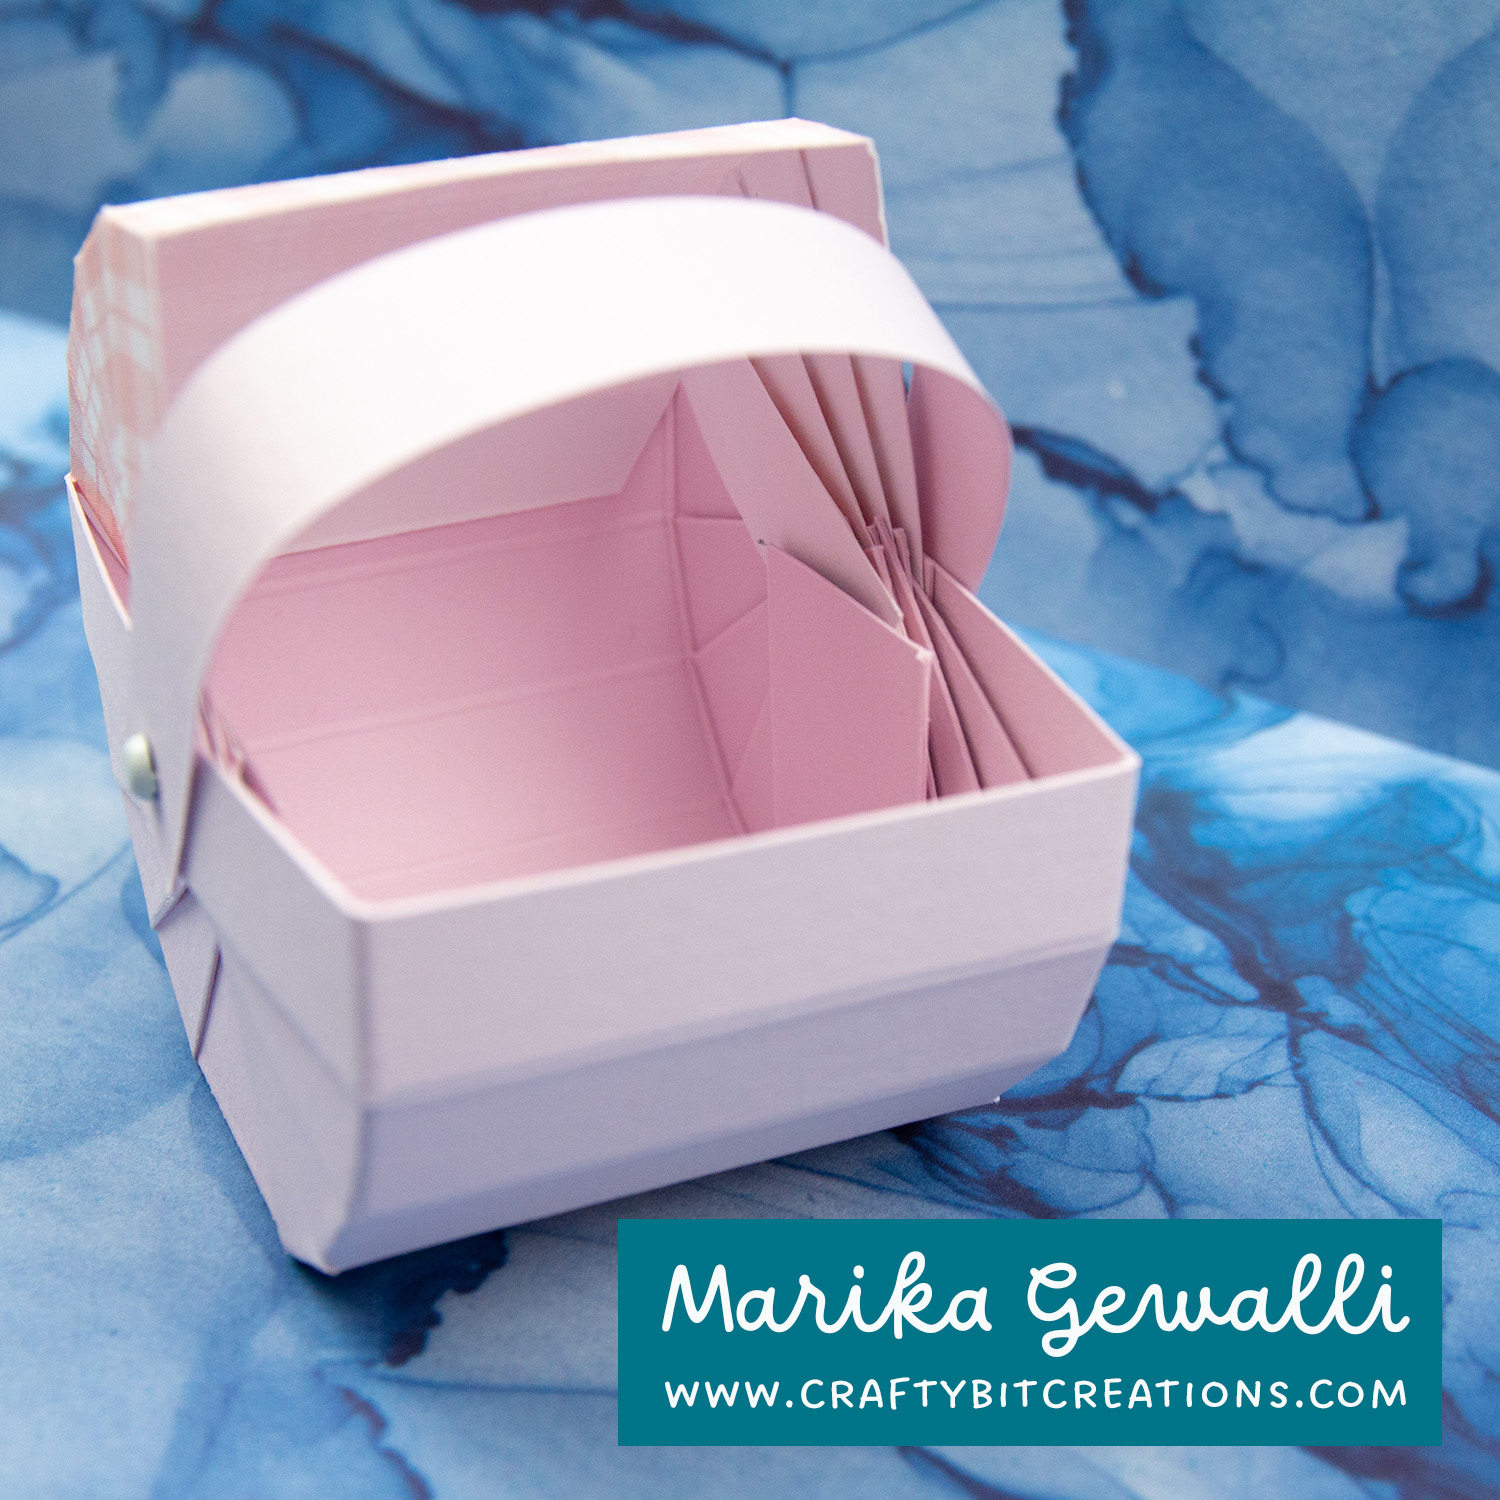
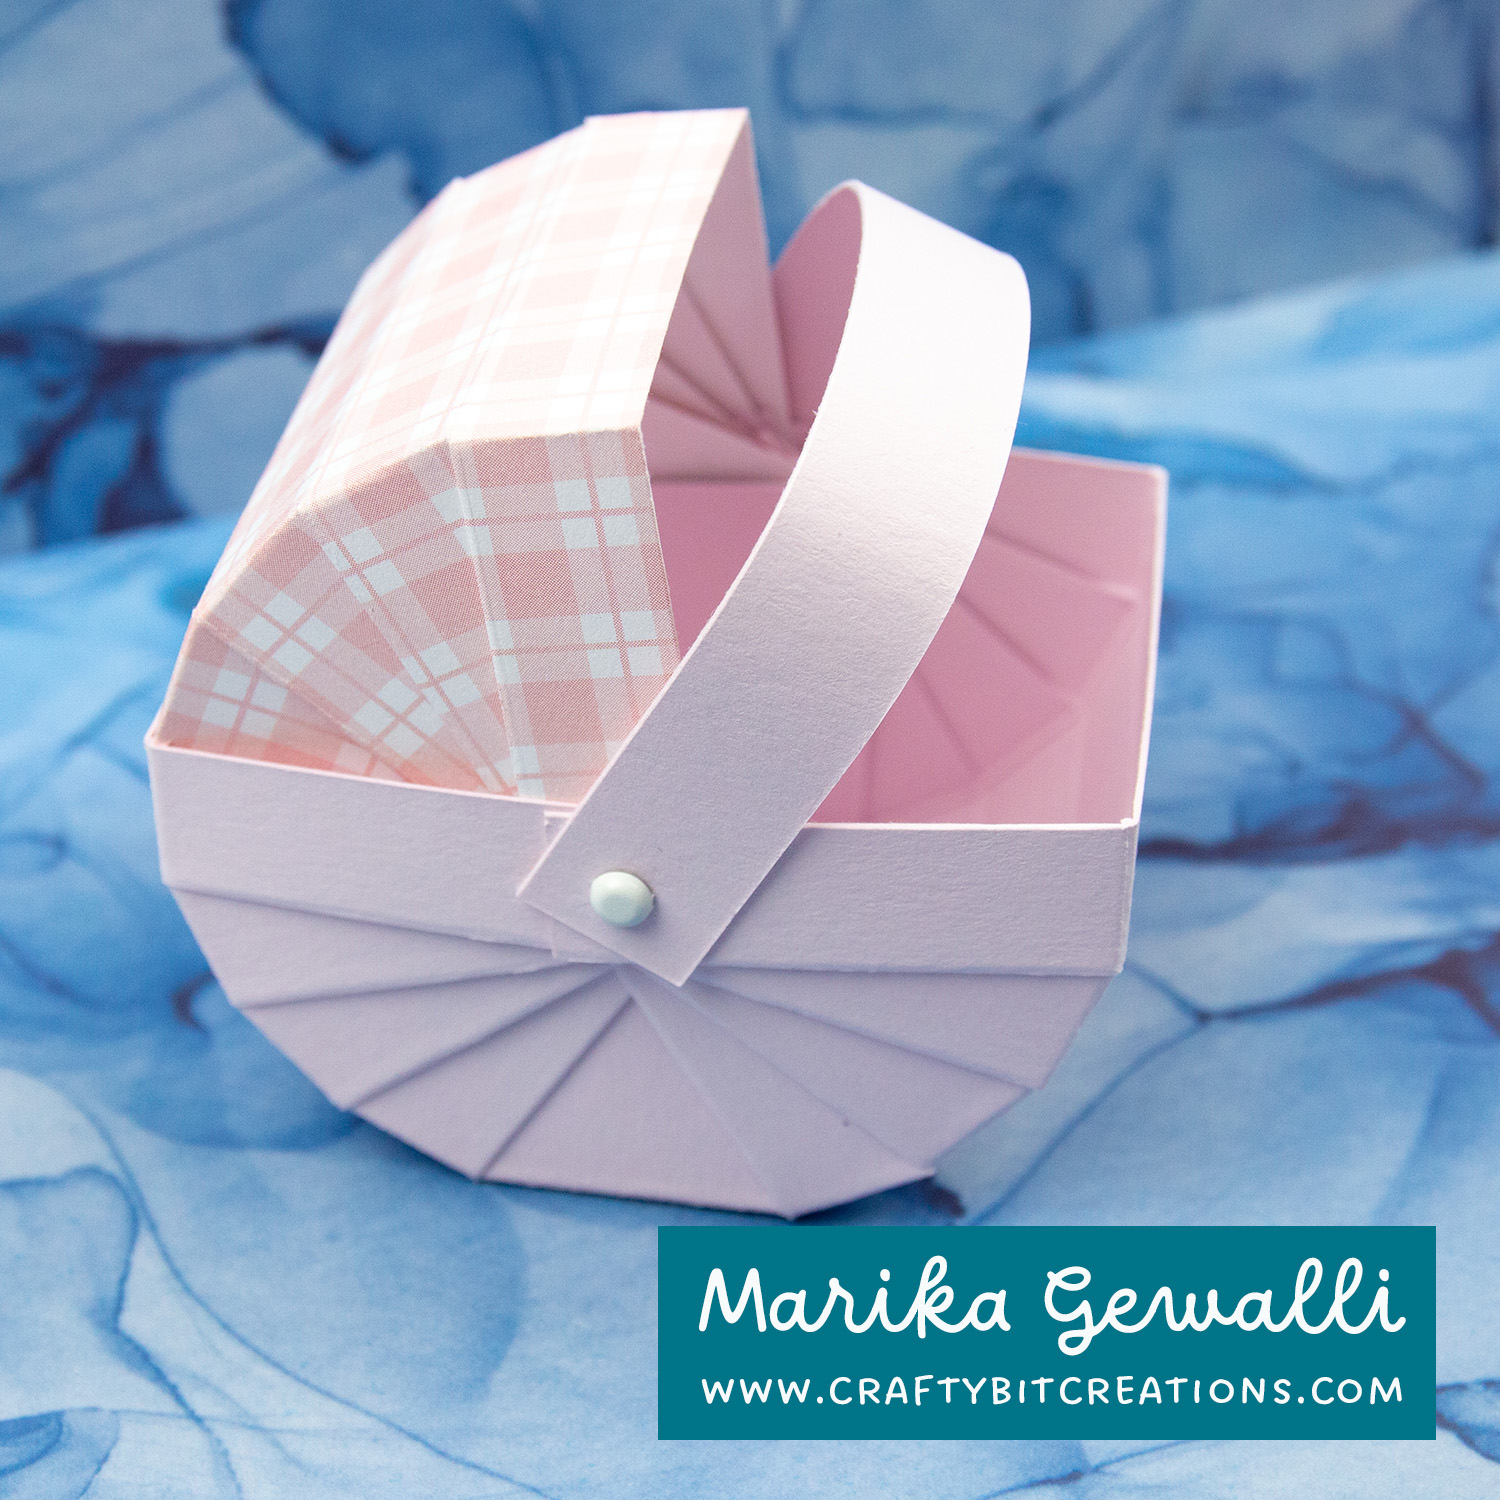
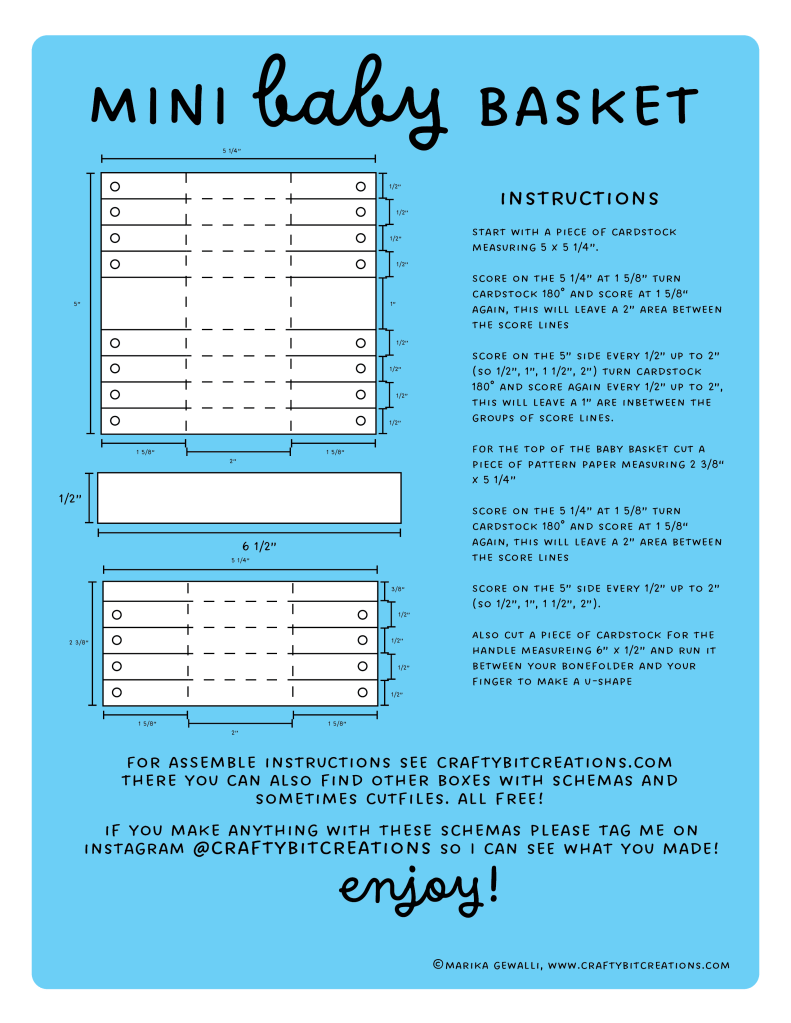
When creating the Easter Basket earlier this month I had in the back of my mind that this would be perfect as a Baby Basket. Perfect to hold a little gift for a mother to be, or as party gift for attending people at a baby shower. I had so much fun choosing the pattern papers and matching card stock for this project. Below you can find a video Baby Basket Tutorial and a schema with measurements for cutting and scoring for the baby basket. If you want to see more baskets and boxes you can find all I have made HERE.
When possible affiliate links are used, this means that I receive a small commission when products are purchased through the links (at no extra cost to you) I use the money to support my blog and youtube channel. If you like my projects and tutorial please consider supporting me by clicking through these links when you shop. Thanks!
Supplies
Happy Patterns Paper Pad: MFTSSS MFT Poppin’ Polka Dots Paper Pad: MFTSSS MFT Rainbow Love Paper Pad: MFTSSS MFT Pretty in Plaid Paper Pad: MFTSSS Pawsome Prints Paper Pad: MFT Mini Brads: MFTSSSSBC MFT Sno Cone Card Stock: MFT Sookwang Tape 1/4”: SSSAMZ
I don’t know about you, but I have loads of candy left from Christmas, at least the ones I don’t eat myself. So for my Hershey Nuggets I made a 9 piece treat box that I’ve given to my family as belated new year gifts. They where very appreciated so I thought I would make a tutorial on how to make them.
These treat boxes is not only fitted perfectly for 9 nuggets, you can also get 4 from a letter sized piece of cardstock and one sheet of transparency film.
Hershey Nugget 9 Piece Treat Box Duo Tutorial
The box is made up by a base and a lid. The base is a 4″ x 5″ piece of card stock, scored on all sides at 1/2″, tabbed on the long side as shown in the video and put together with some score tape. The lid is a 4 1/16″ x 5 1/16″ piece of transparency film, scored on all sides at 1/2″ , tabbed on the long side as shown in the video and put together with some score tape.
Hershey Nugget 9 Piece Treat Box Duo Tutorial
The Hershey Nuggets are individually wrapped in 3″ x 1″ pieces of pattern paper. After adding them to the treat box and closed the lid, the box was wrapped in red organza ribbon. As a the last detail, a diecut tiny tag and a diecut snowflake was put together and tied to the ribbon with some bakers twine.
Hershey Nugget 9 Piece Treat Box Duo Tutorial
I had a lot of fun making these boxes and I will most likely make more, but with some other card stock and pattern papers. I might make some for some easter treats. If you decide to follow my tutorial and share on social media please tag me so I can see what you have made.
When possible affiliate links are used, this means that I receive a small commission when products are purchased through the links (at no extra cost to you) I use the money to support my blog and youtube channel. If you like my projects and tutorial please consider supporting me by clicking through these links when you shop. Thanks!
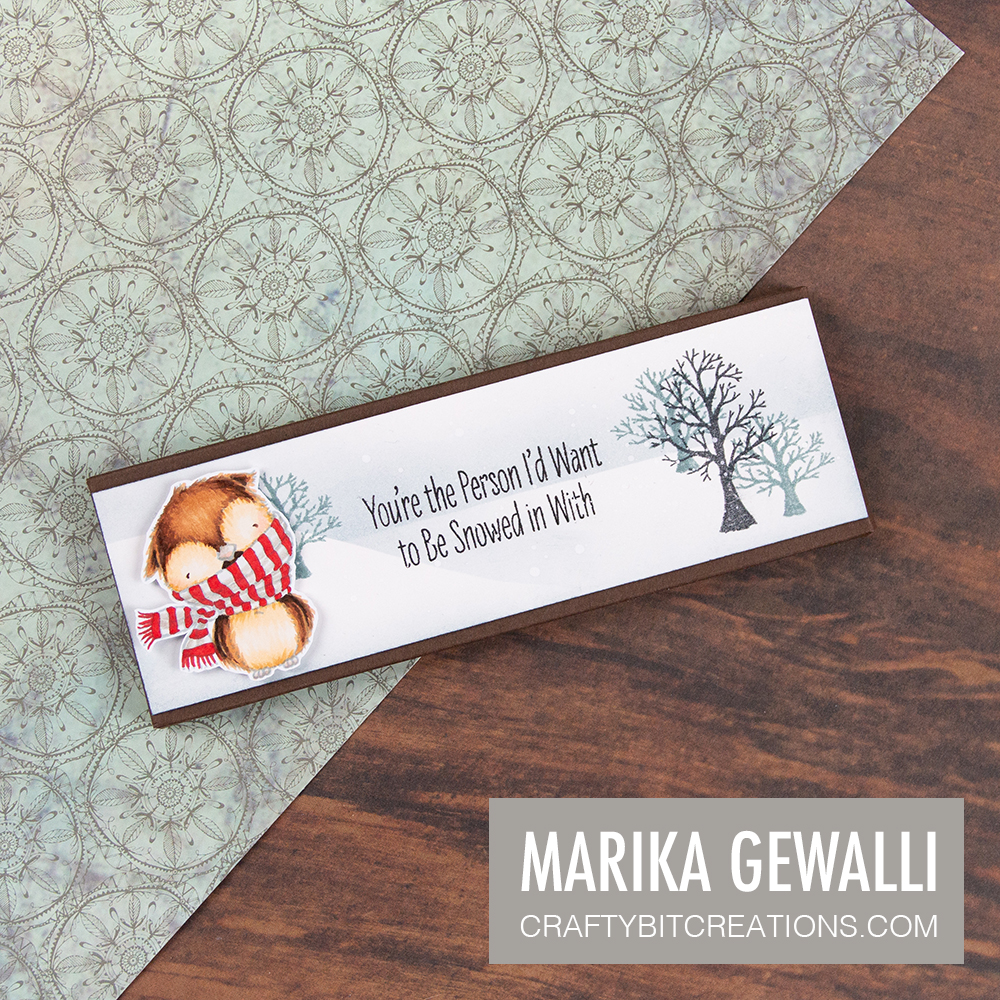
Hi everyone! I love making custom packaging to small gifts, and even something as simple as a Hersey Chocolate Bar can become a great present if you put a little time in creating the box and decorate it.
The box itself is pretty straight forward to create, I made a blueprint with all the measurements for you if you want to recreate it. You can either just save the .png by right clicking on it or if you want a little higher quality you can download the the pdf HERE.
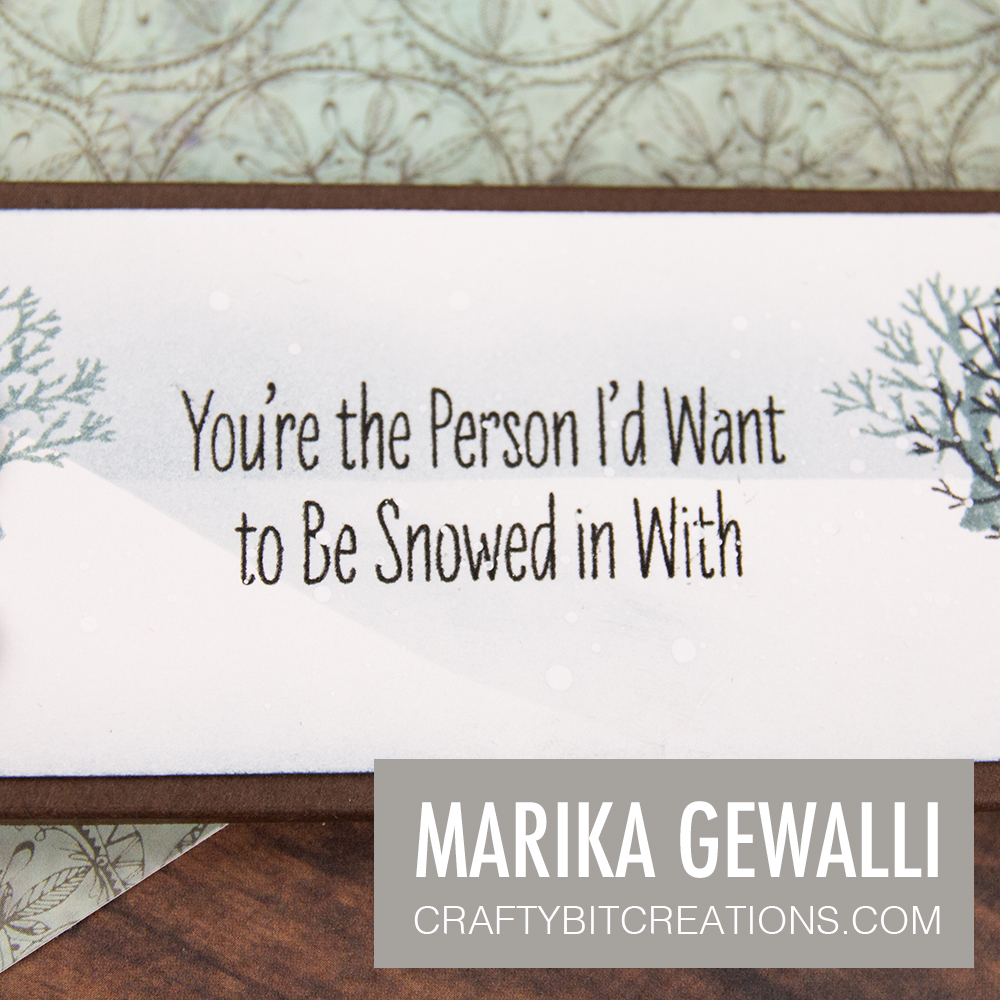
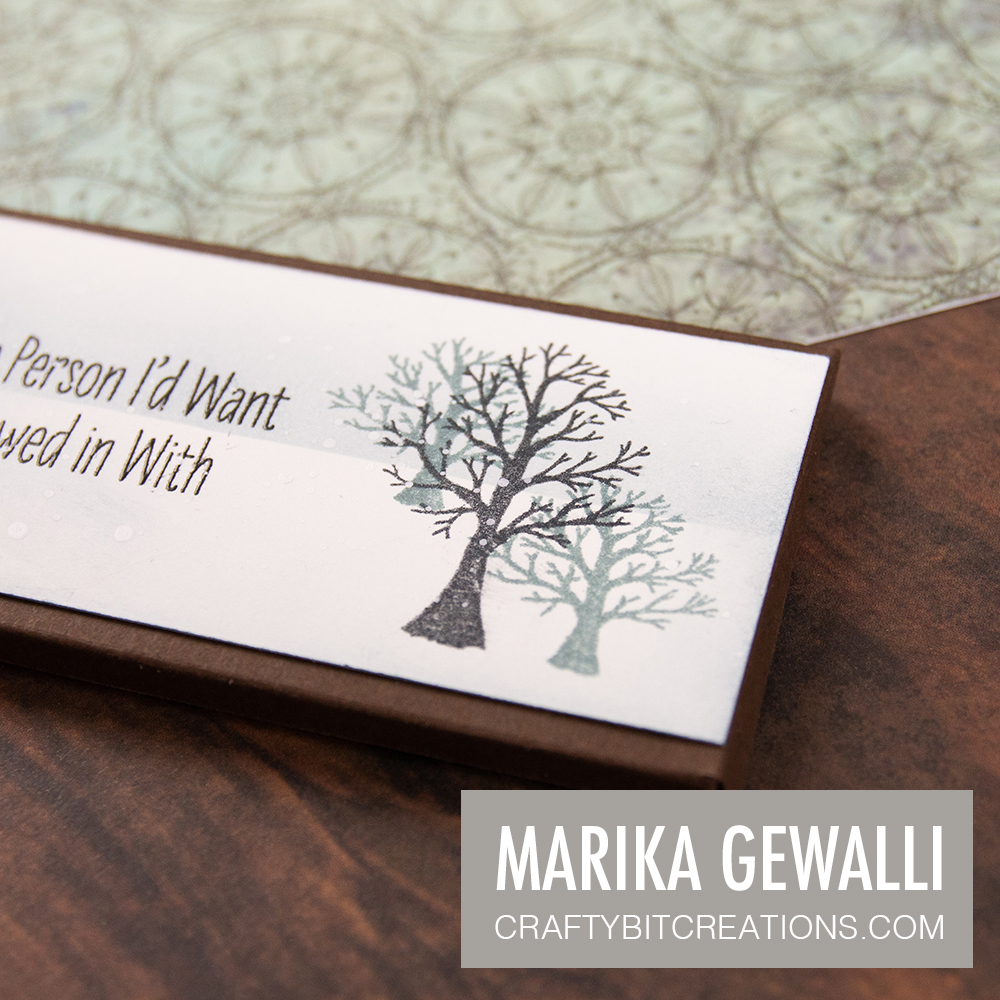
To decorate the box I decided to go with a small scene created with the Warm & Feathered Hugs stamp set. When creating it it was inches of snow outside and super cozy and all I wanted was to stay indoors and craft. I’ve used a blended layering technique to create some depth in the scene, I also stamped the trees in grey and black to give the trees some depth to. The lighter the tree the further away it feels. For the sentiment I stamped it in the blackest ink I have, and then added some clear embossing powder to make it stand out just a little bit extra.
To finish it up I used one of the owls, coloring in a no-line coloring technique to be able to give the feathers that whispy feeling. I also kept the owl in neutral colors, adding a pop of red to make the eye being pulled there first.
When possible affiliate links are used, this means that I receive a small commission when products are purchased through the links (at no extra cost to you) I use the money to support my blog and youtube channel. If you like my projects and tutorial please consider supporting me by clicking through these links when you shop. Thanks!