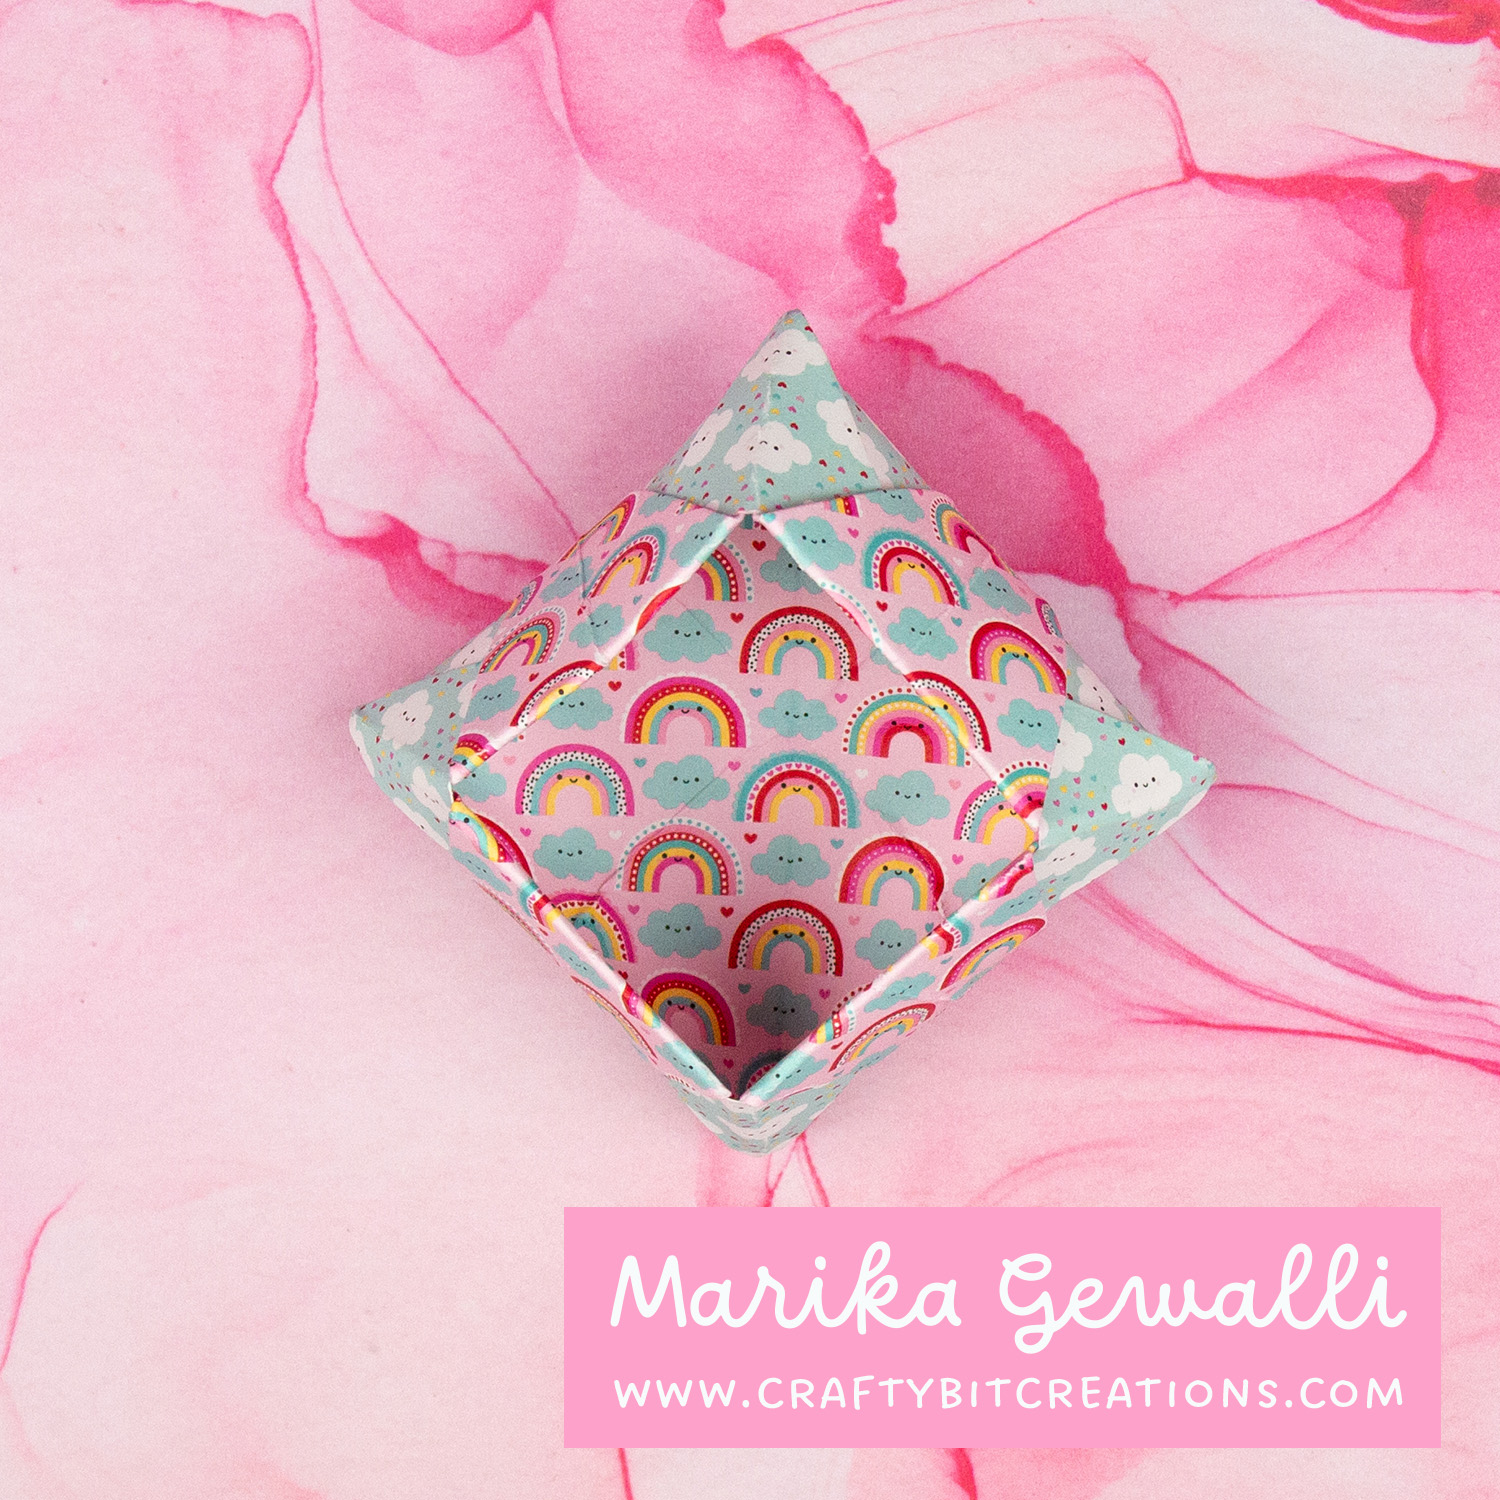
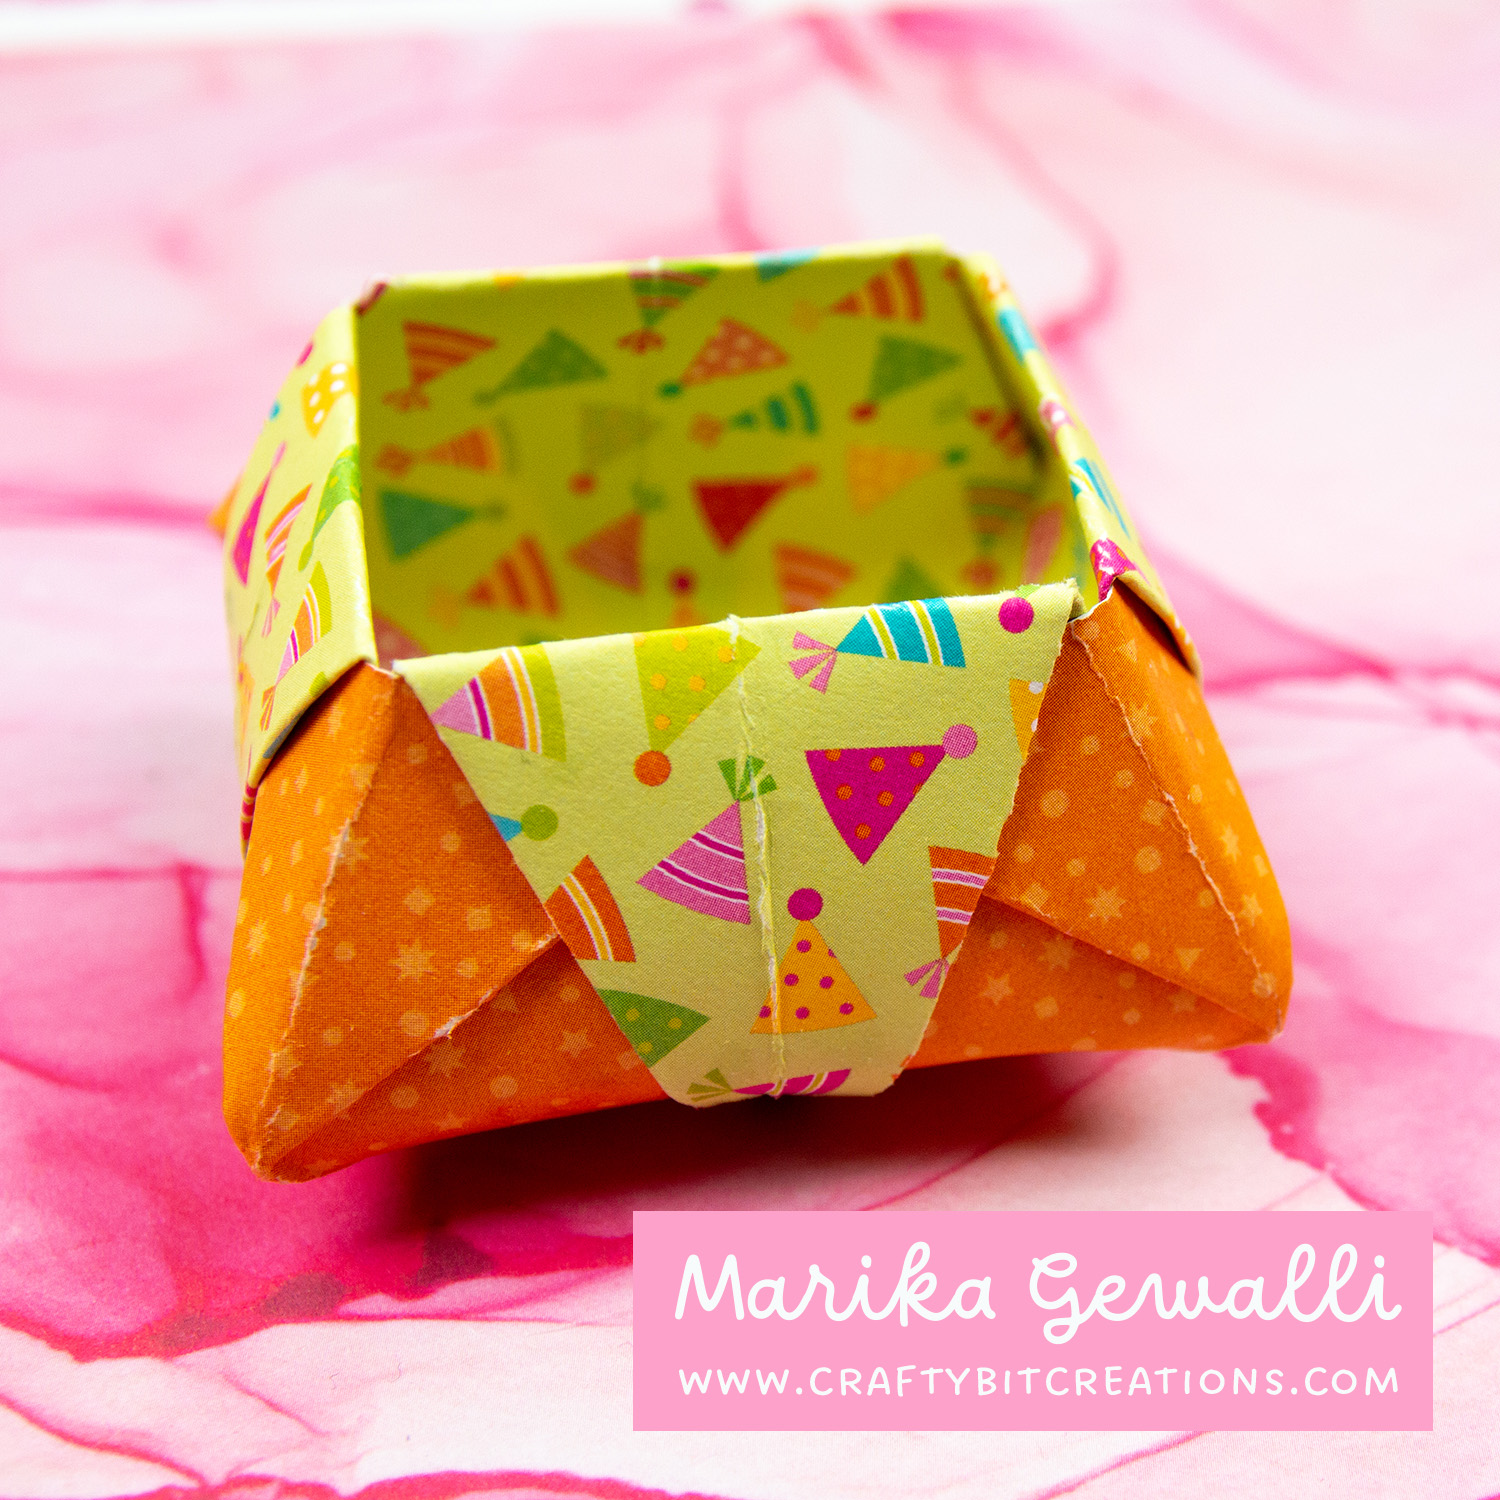
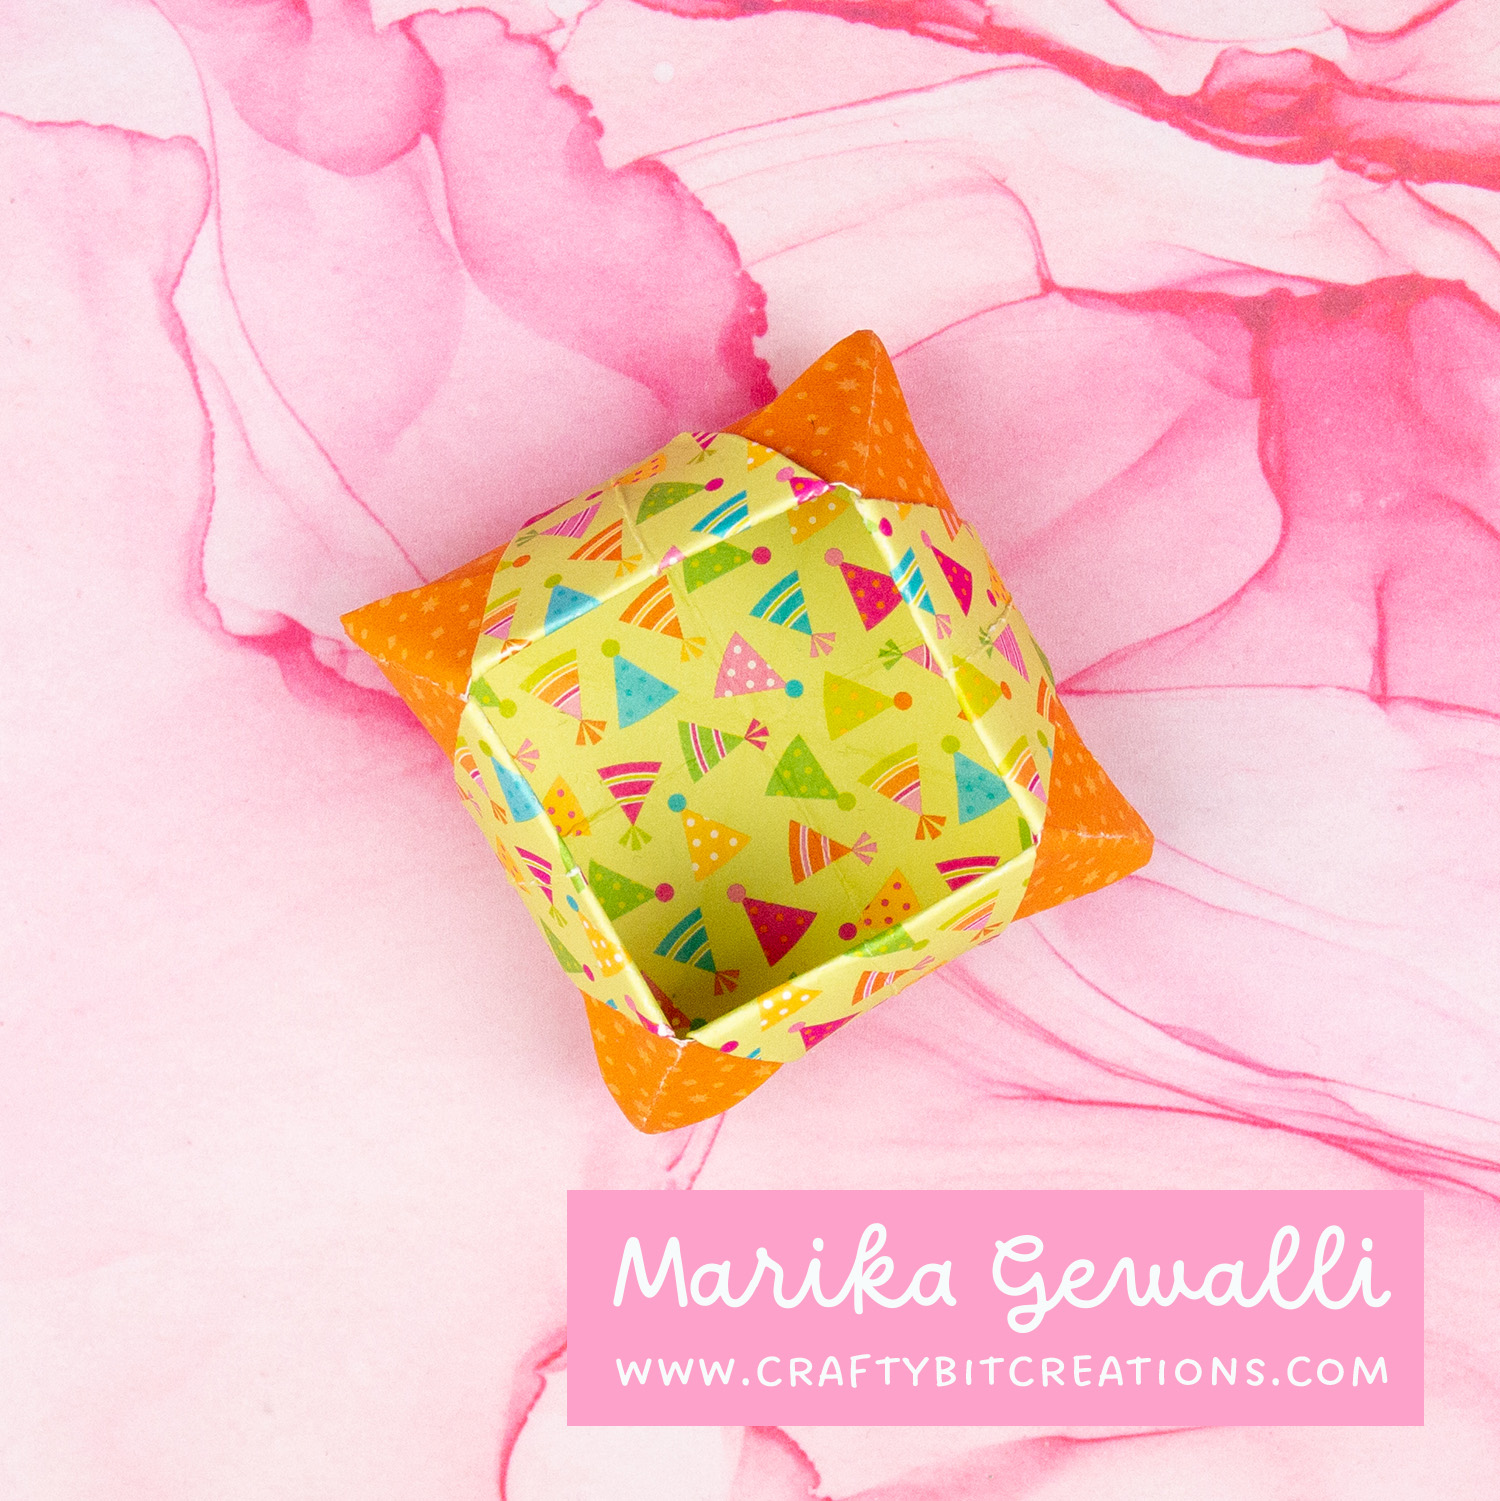
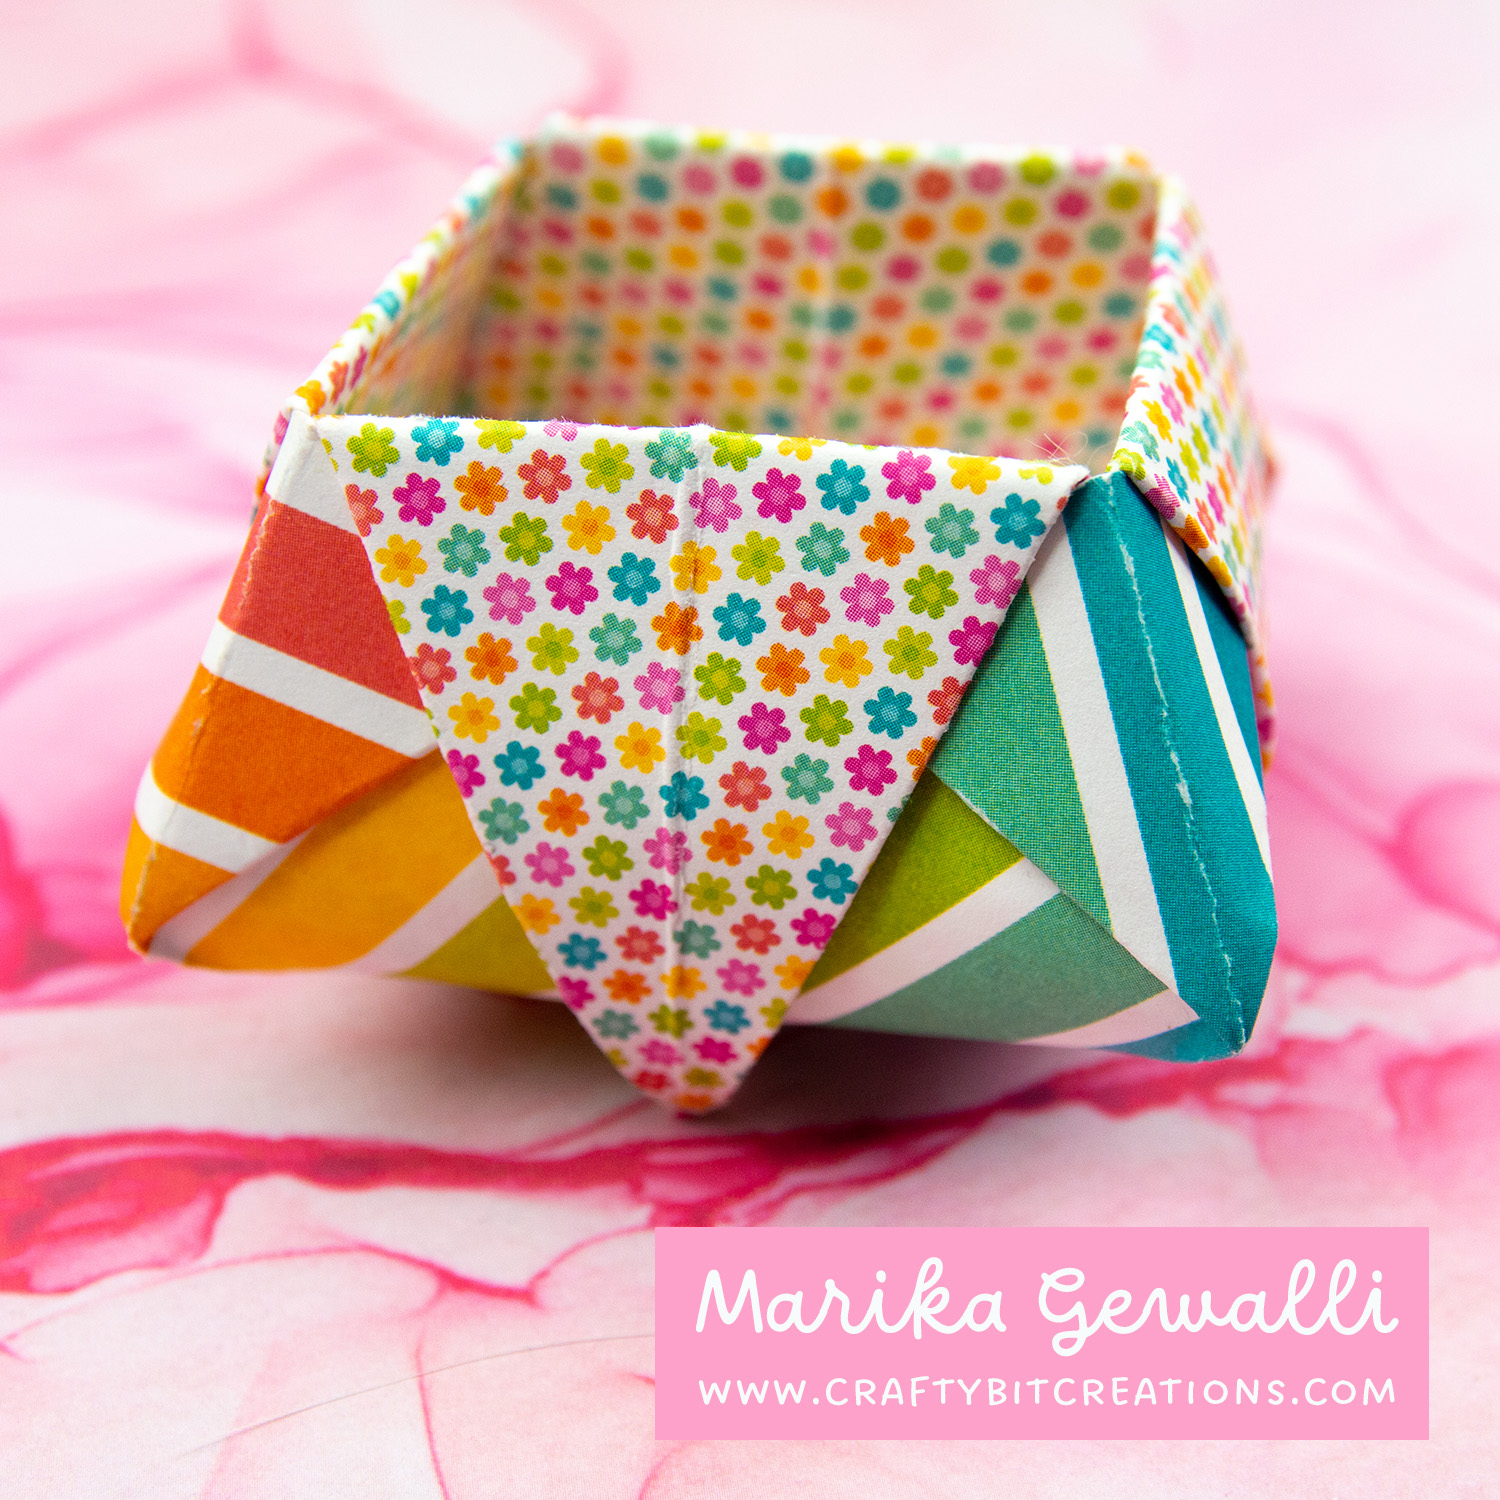
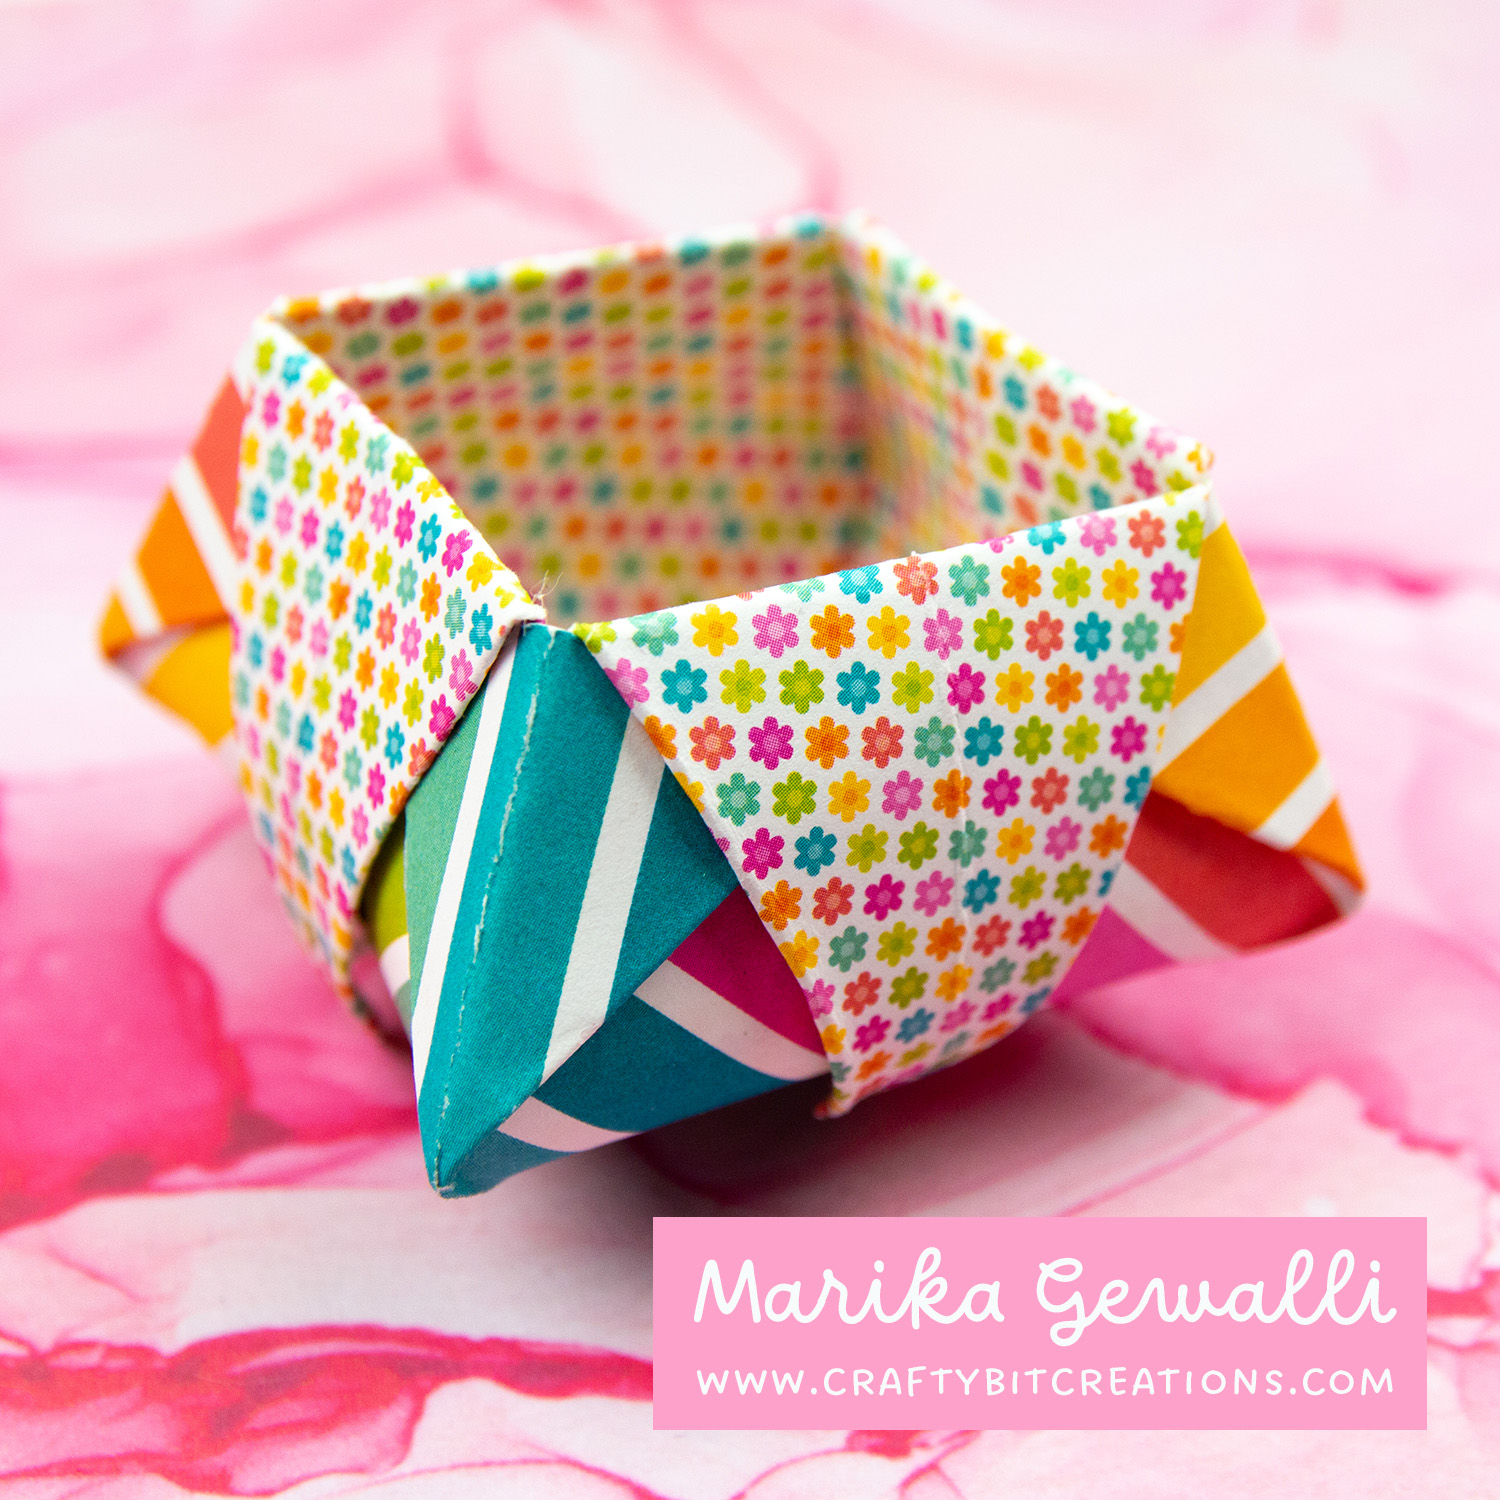
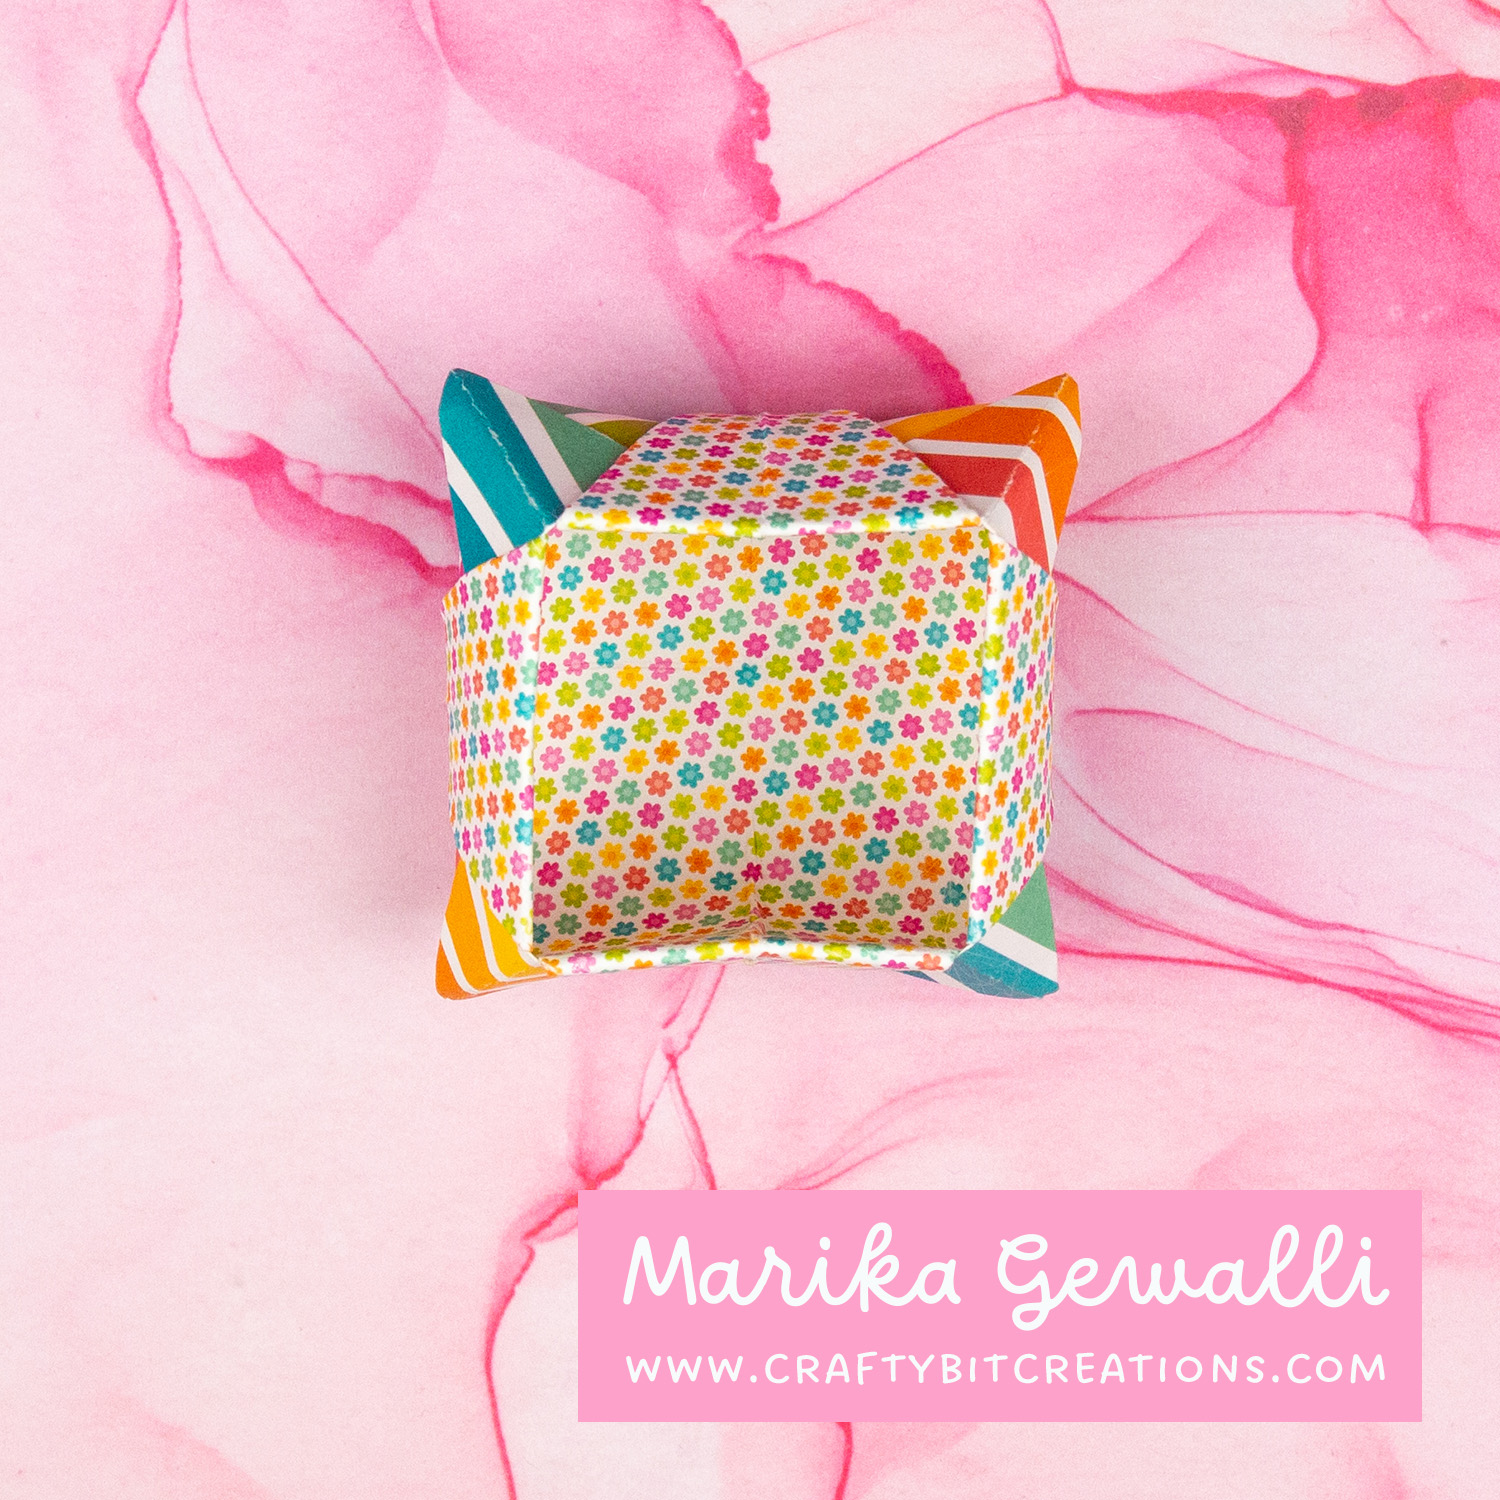
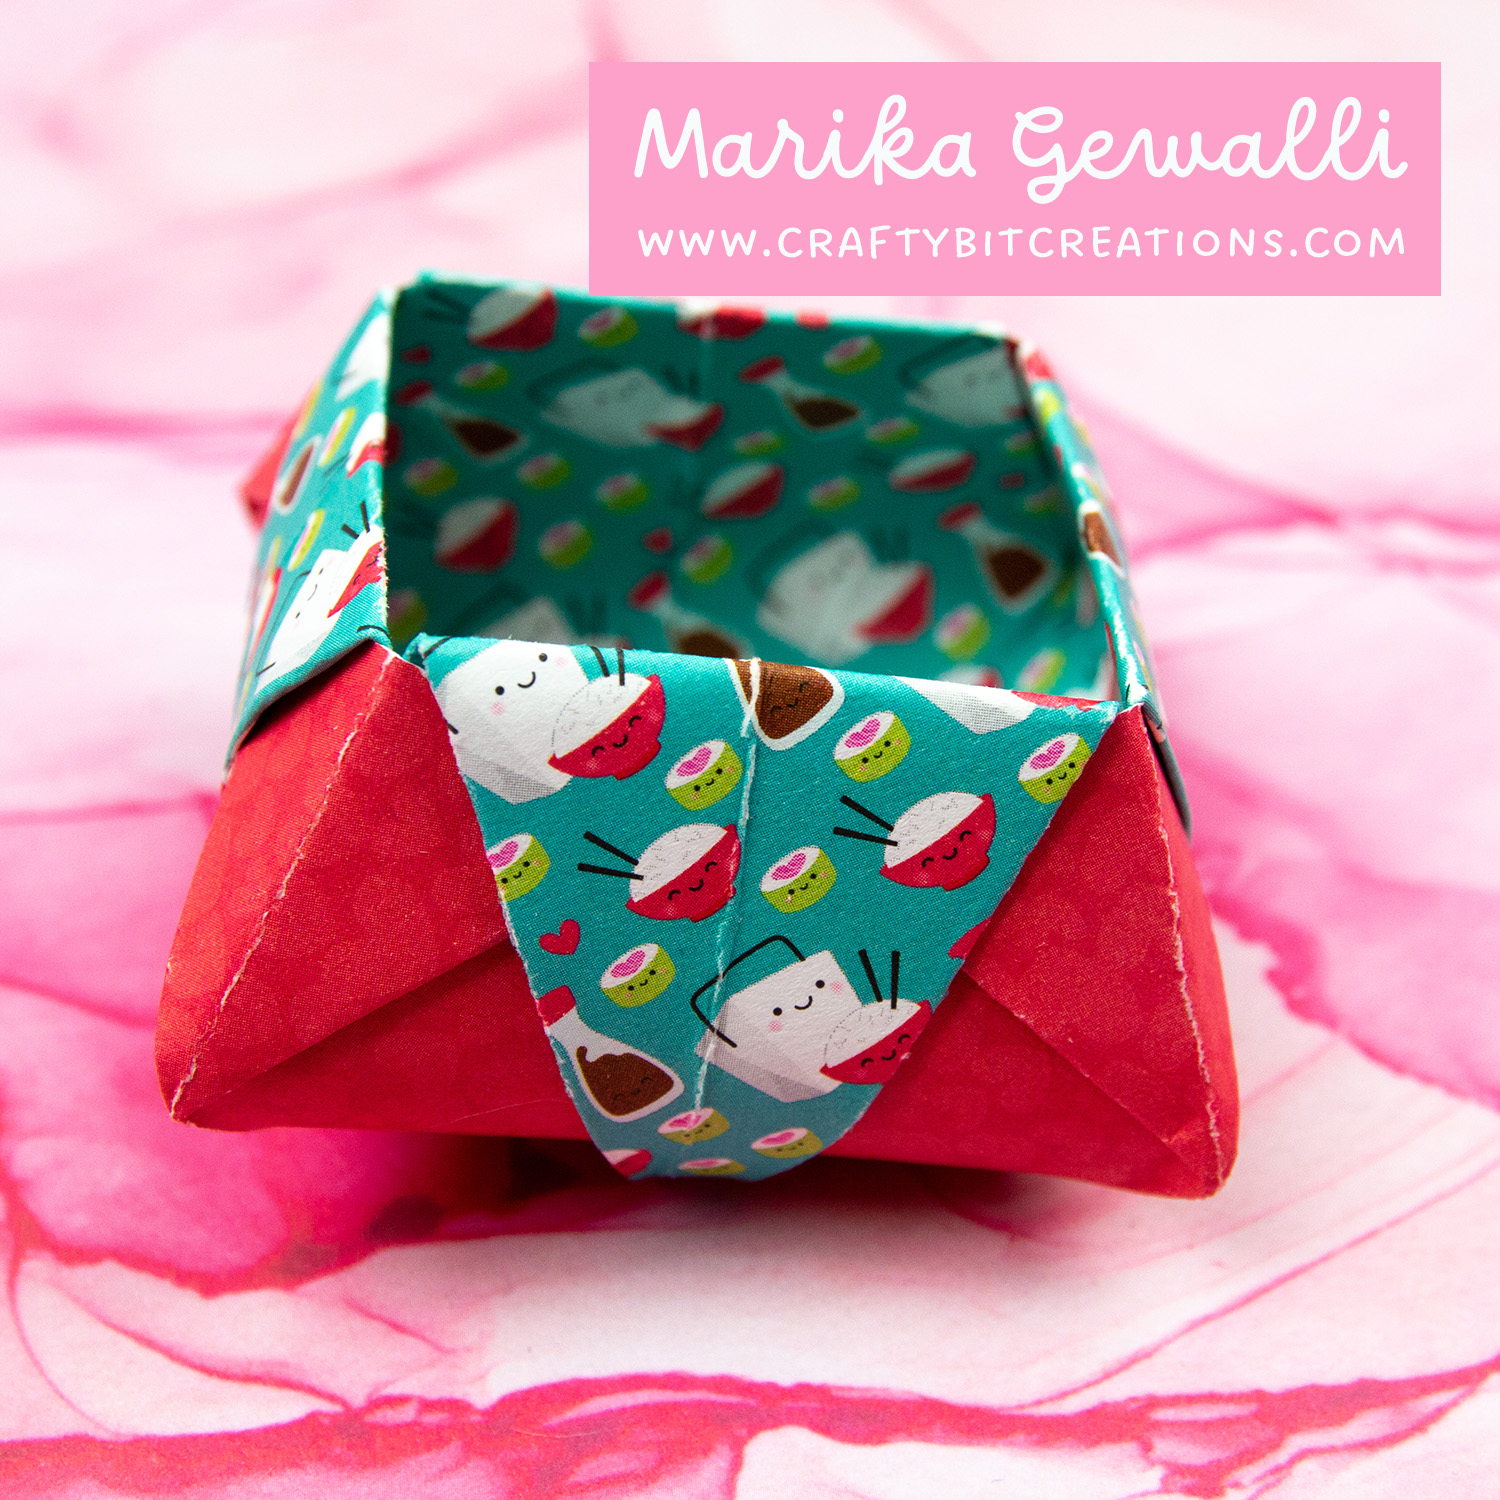
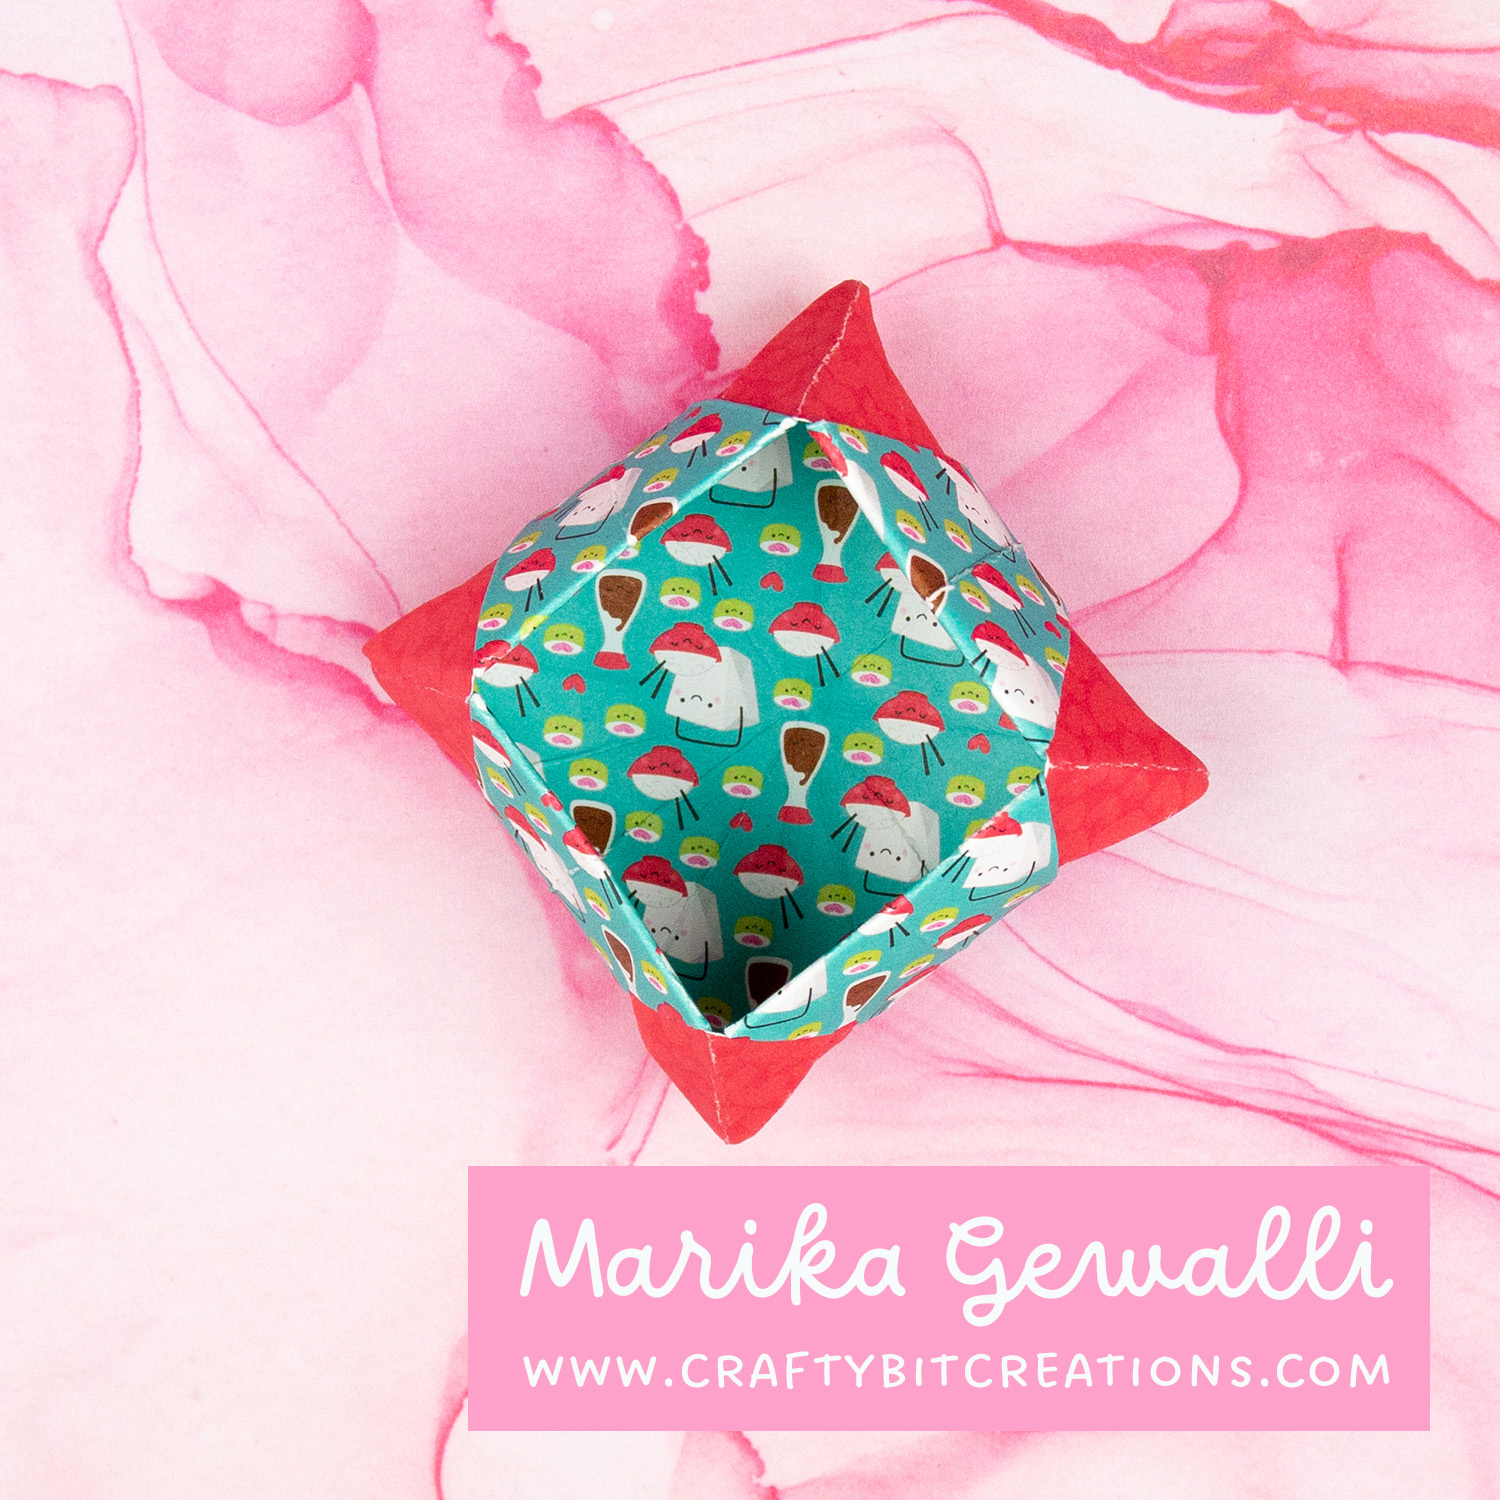
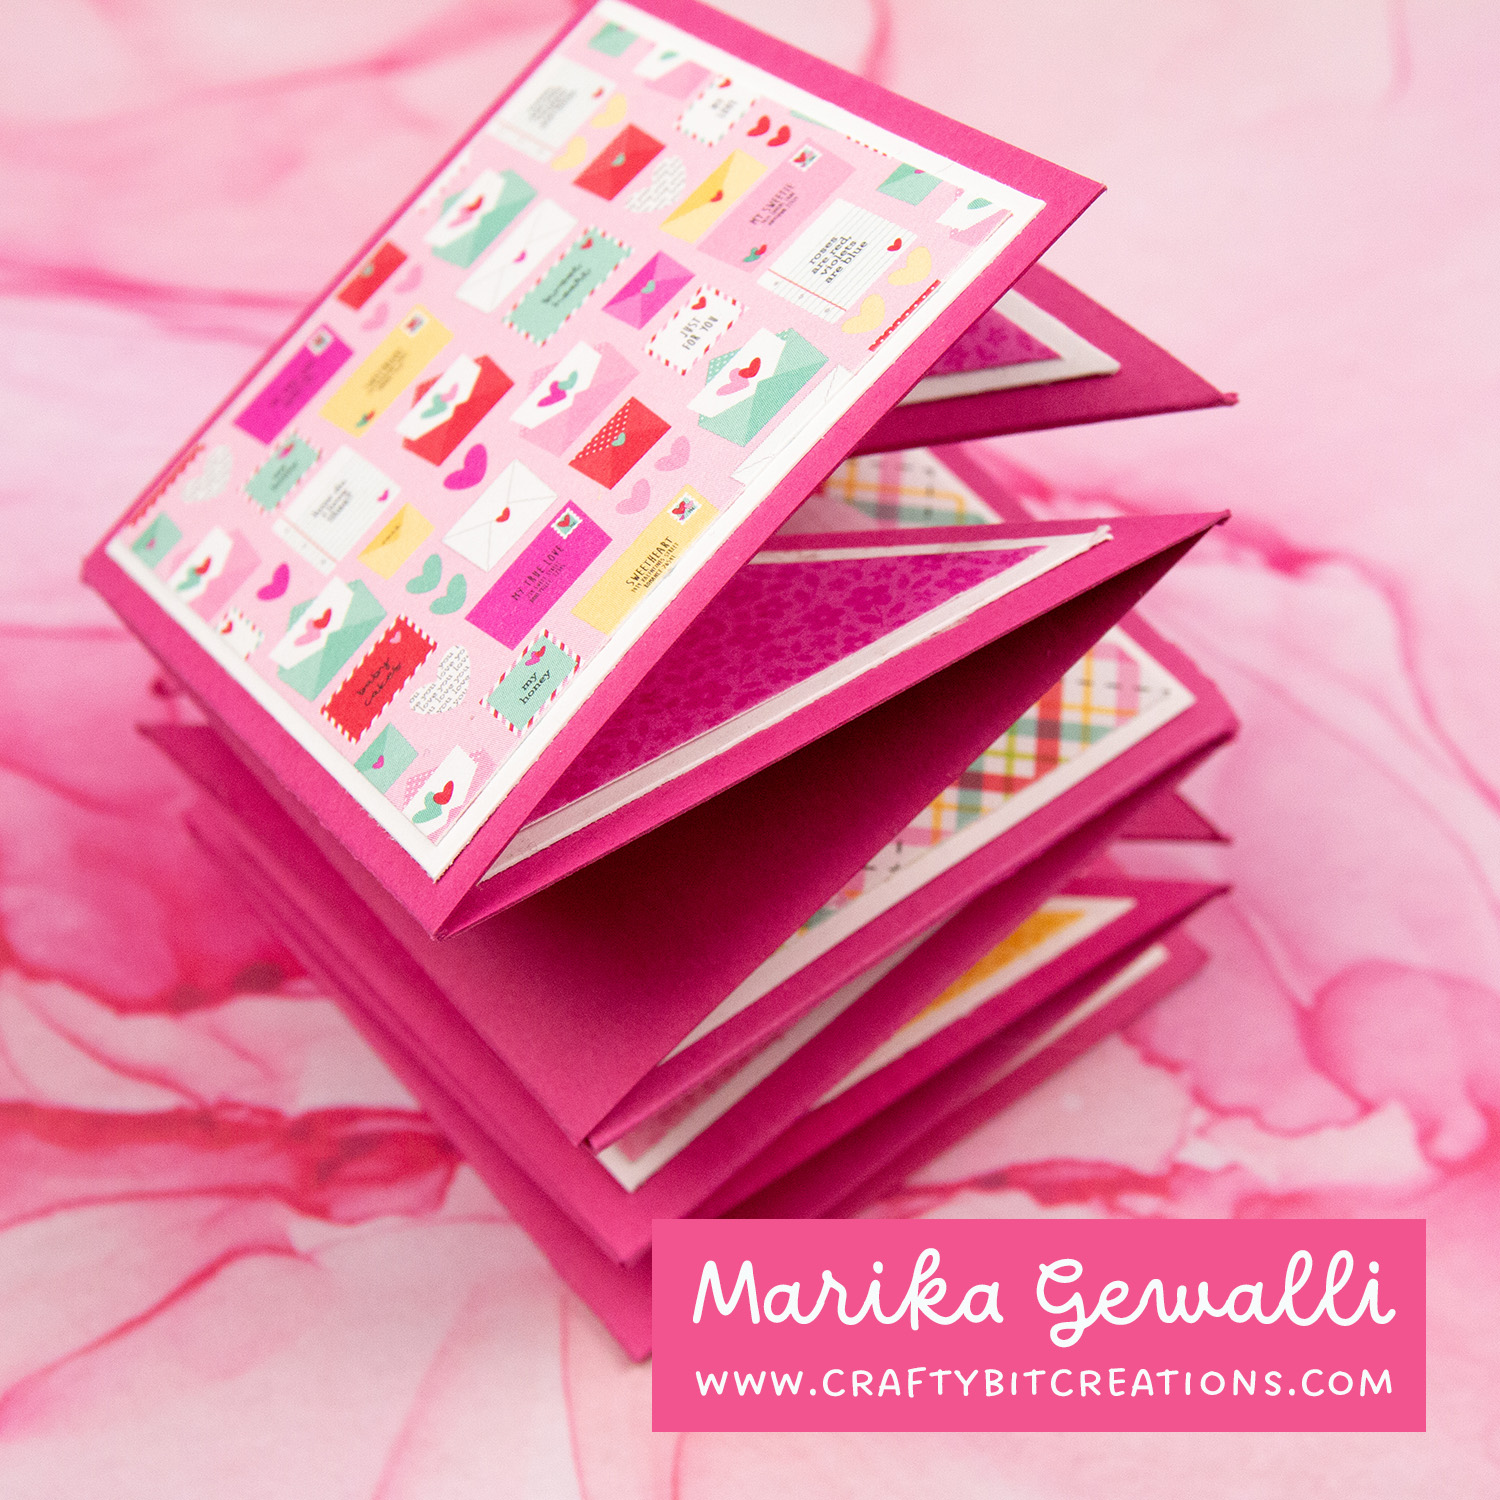
Do you like me have loads of 6×6 pattern paper pads? These little origami boxes are super easy to make and takes one sheet of double sided pattern paper. They are super fun to make and I just couldn’t stop myself and have at least 10 of them laying on my table. As usual when making boxes I have a schema below that you can use together with the video tutorial. And if you want to see more box videos you can see all I have HERE.
When possible affiliate links are used, this means that I receive a small commission when products are purchased through the links (at no extra cost to you) I use the money to support my blog and youtube channel. If you like my projects and tutorial please consider supporting me by clicking through these links when you shop. Thanks!
Supplies
DD Hey Cupcake 6×6 Pattern Paper Pack: SSSSBC Doodlebug LOTS OF LOVE 6×6 Inch Paper Pad: SSSSBC MFT On-Point Precision Glue Pen: MFT Large Score Board: SSSAMZSBC
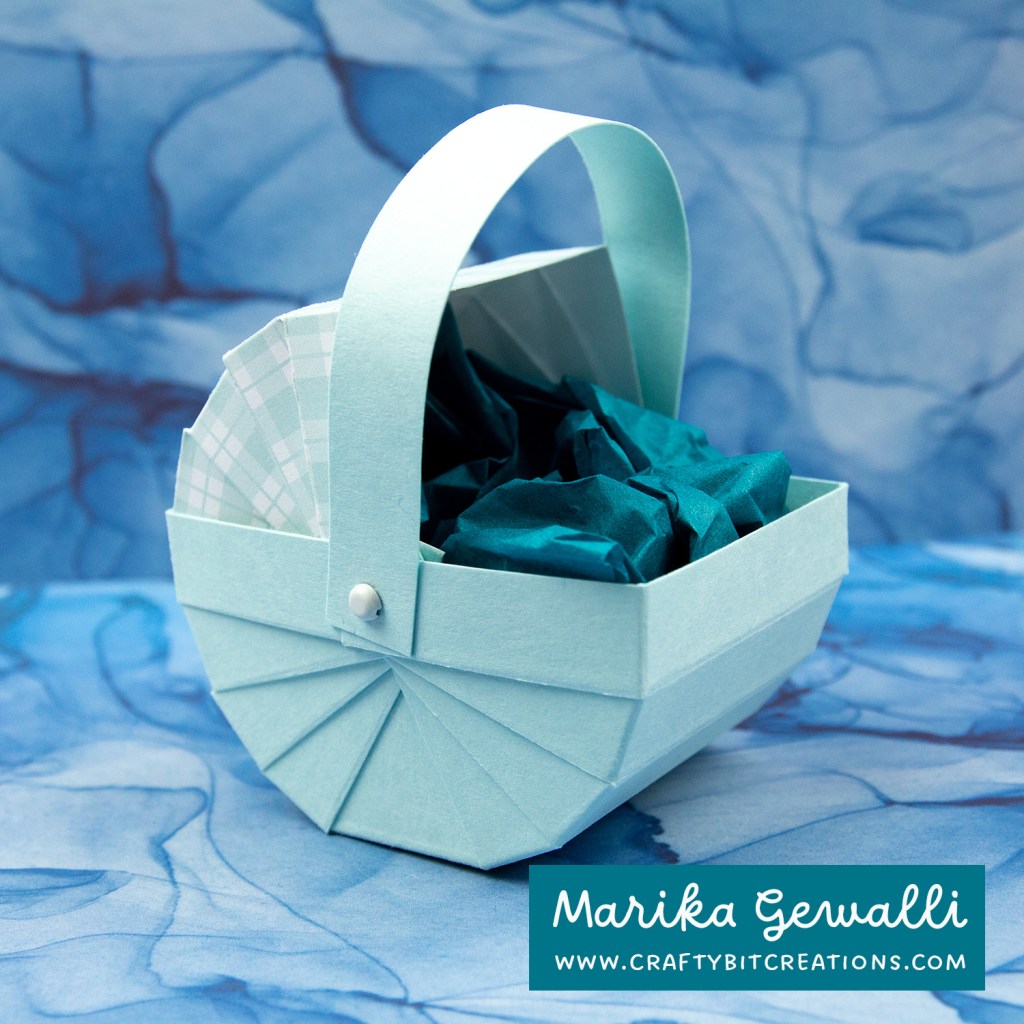
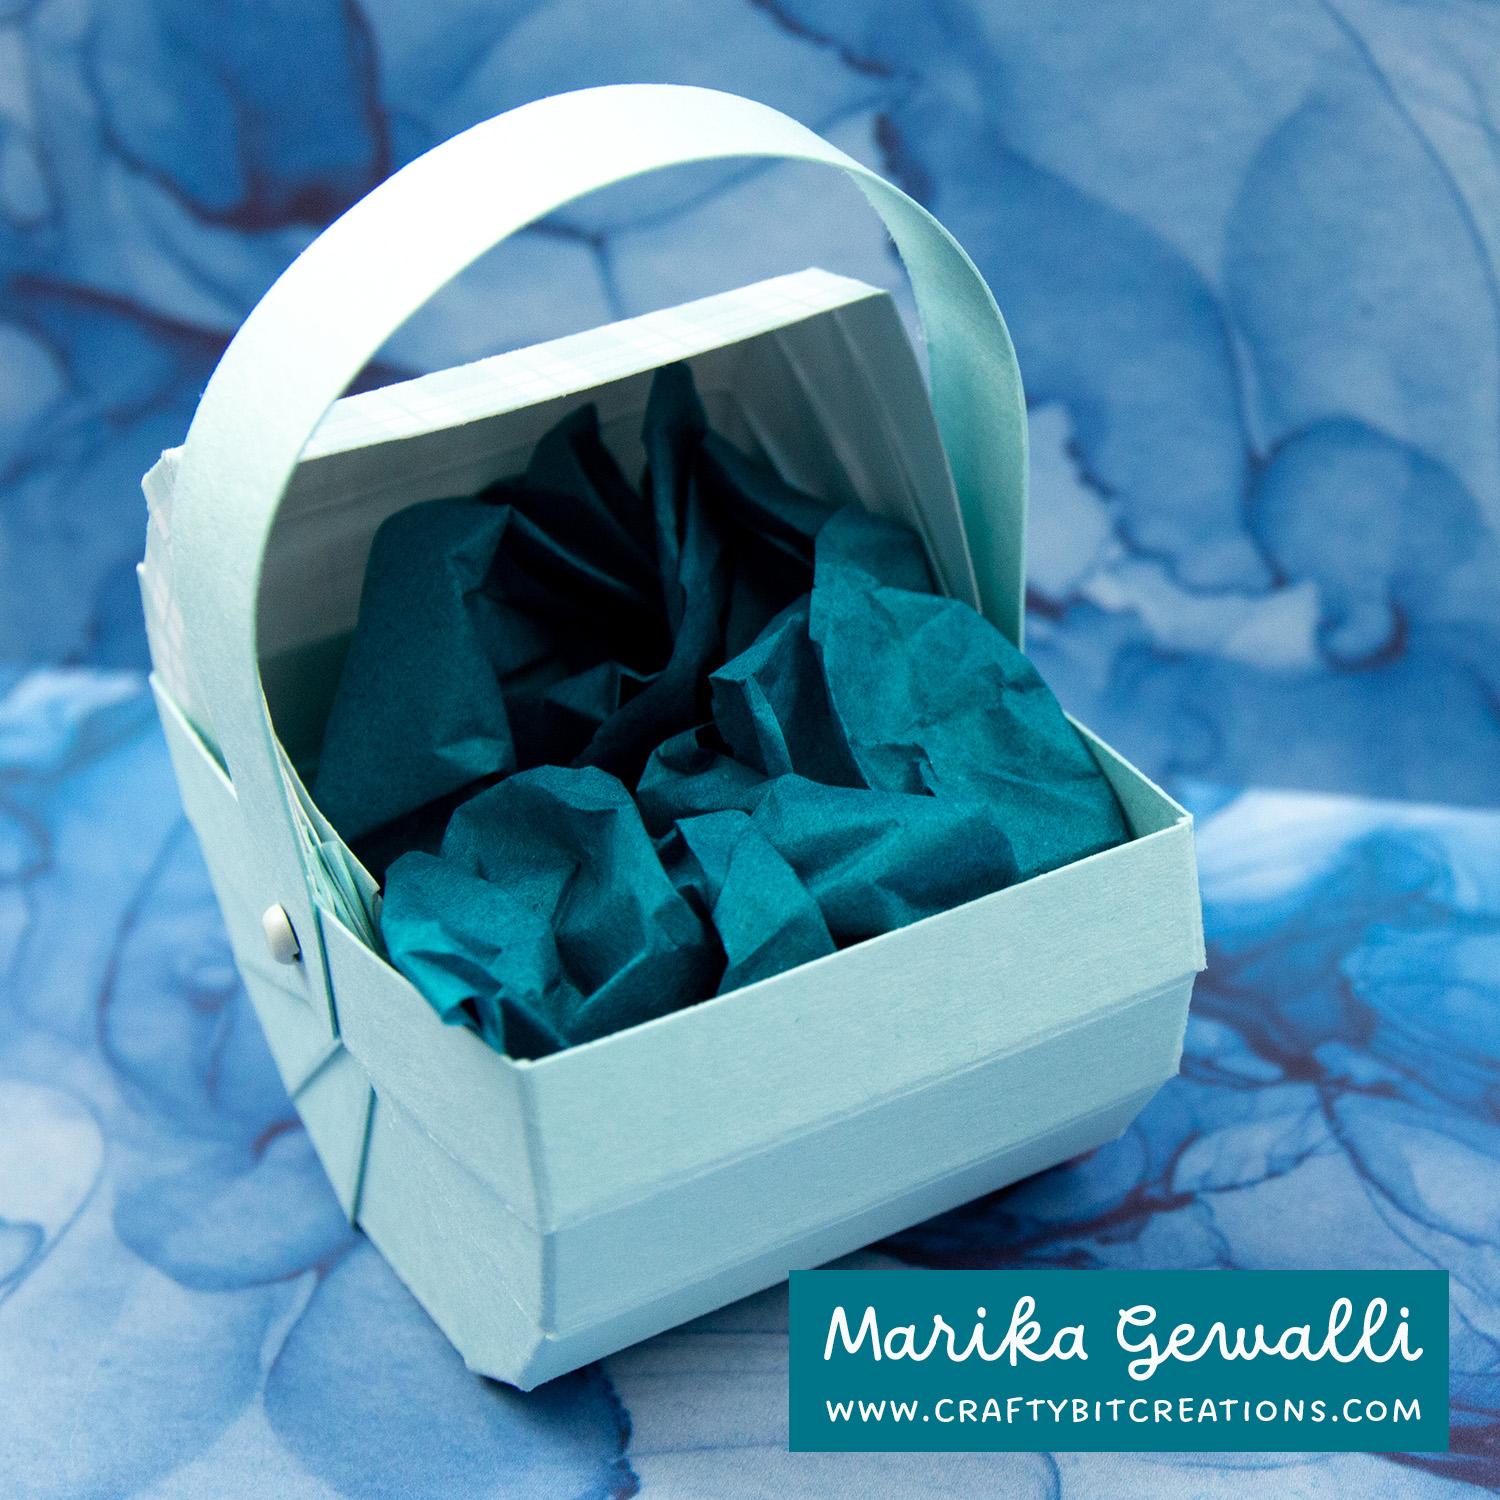
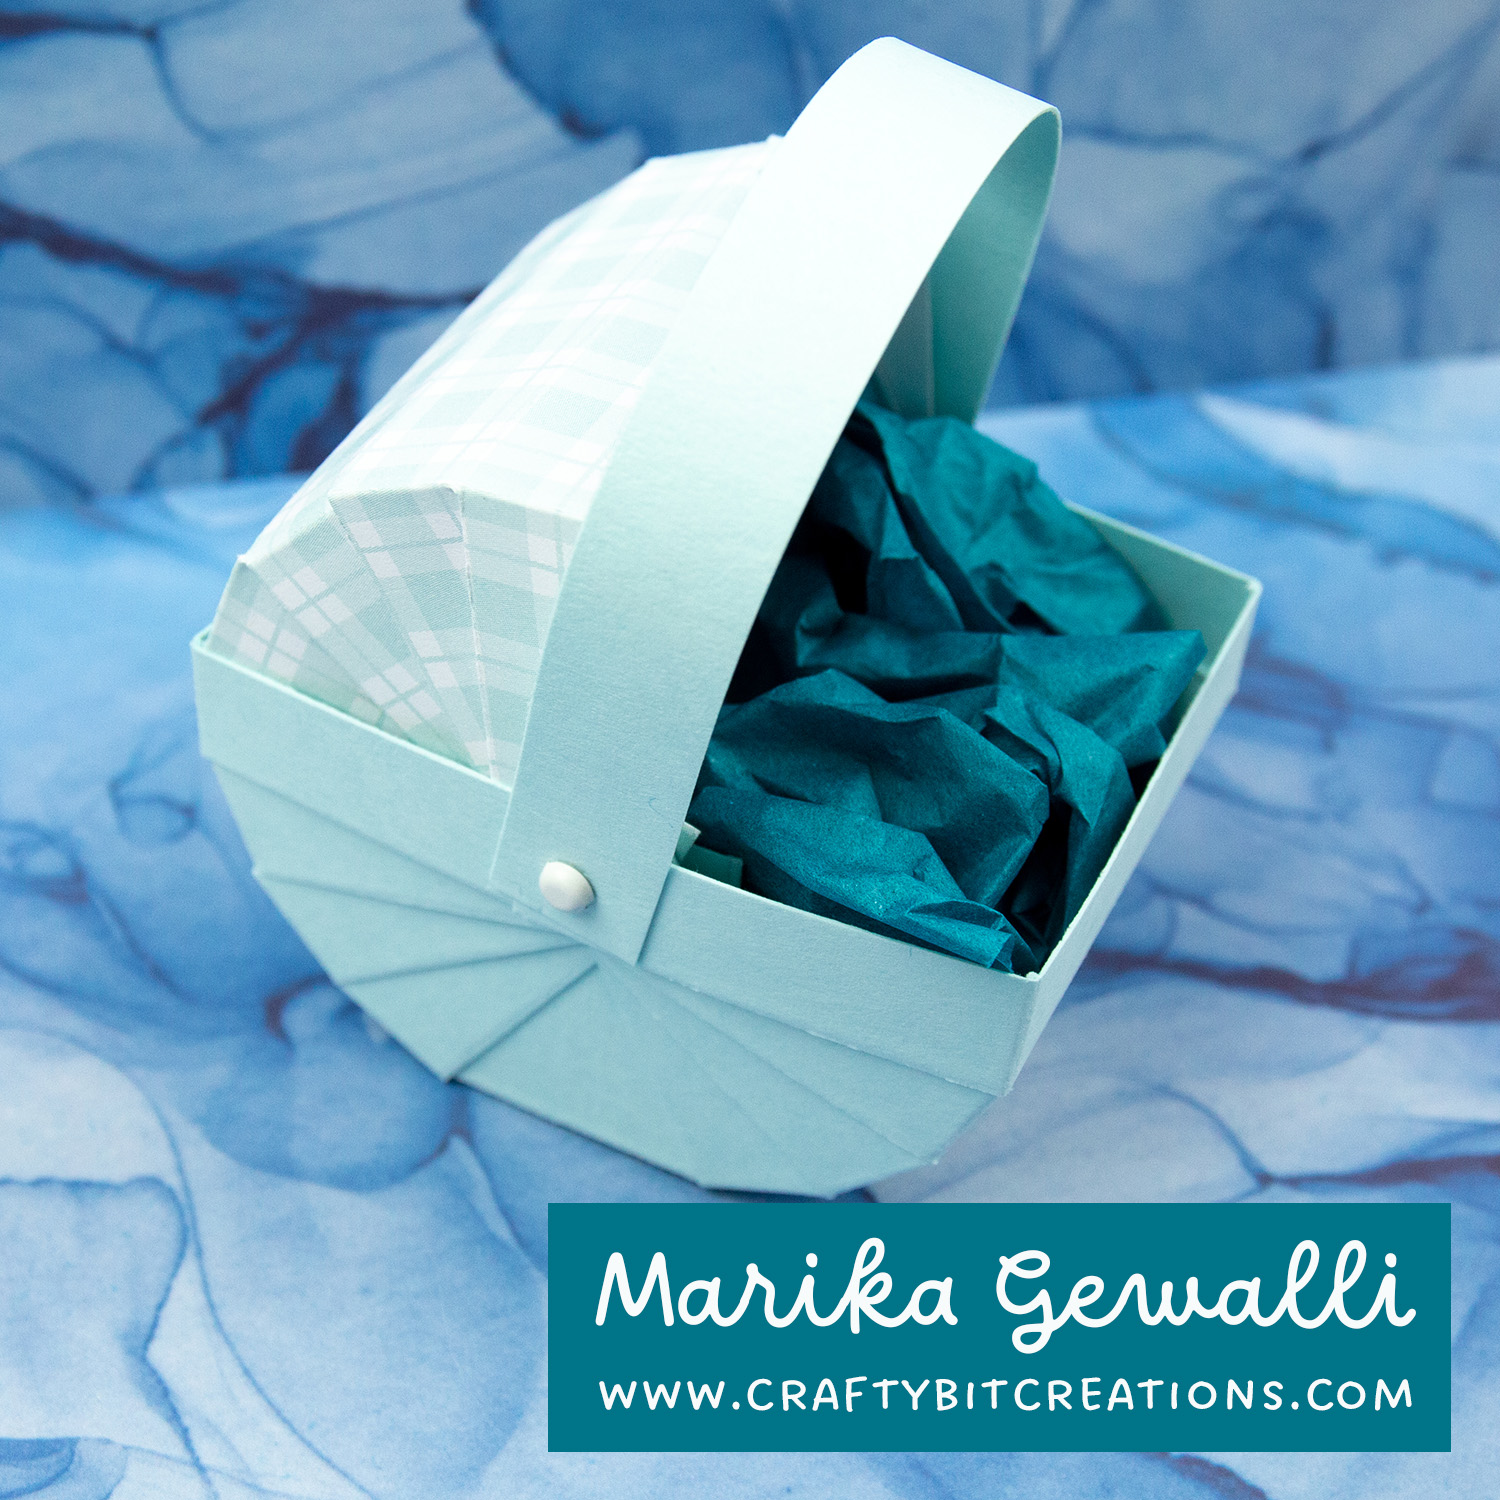
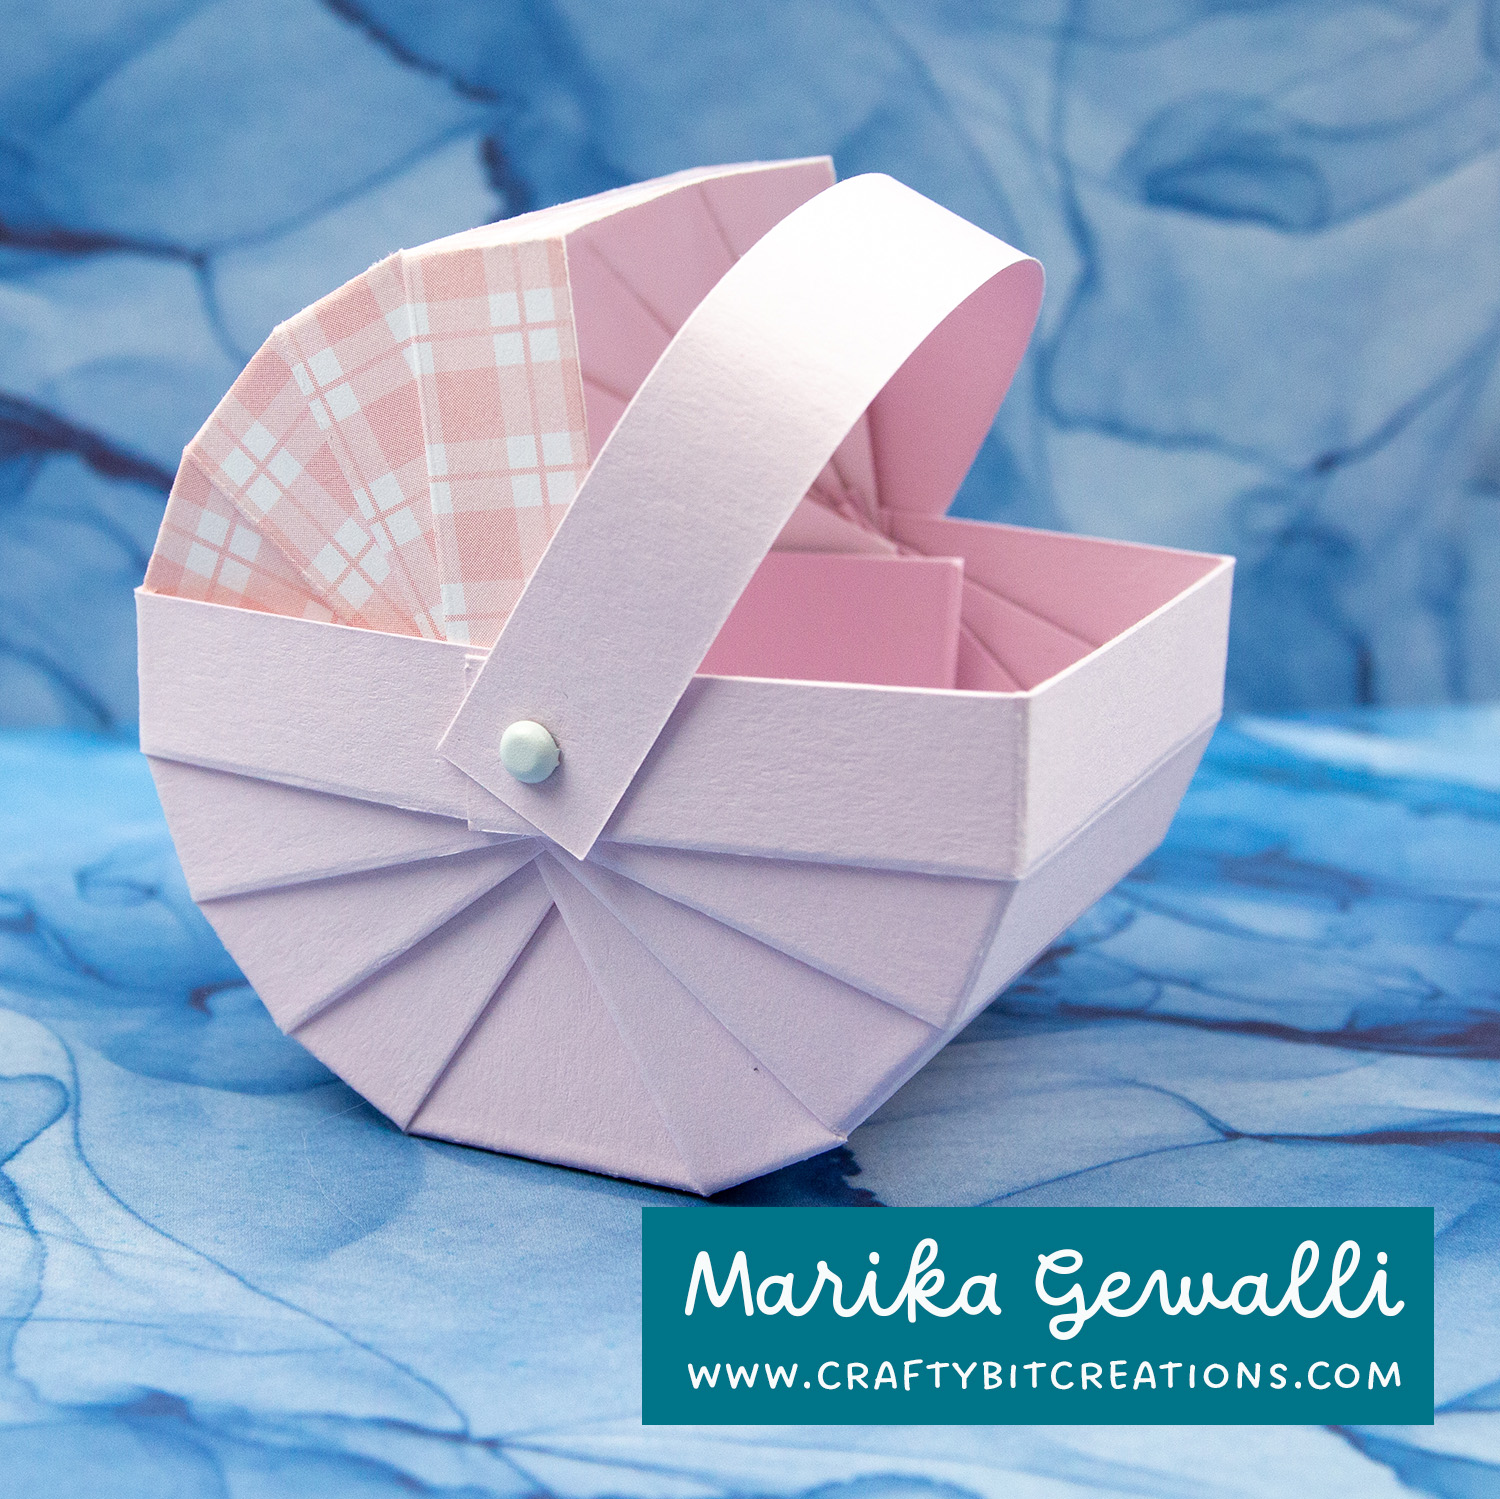
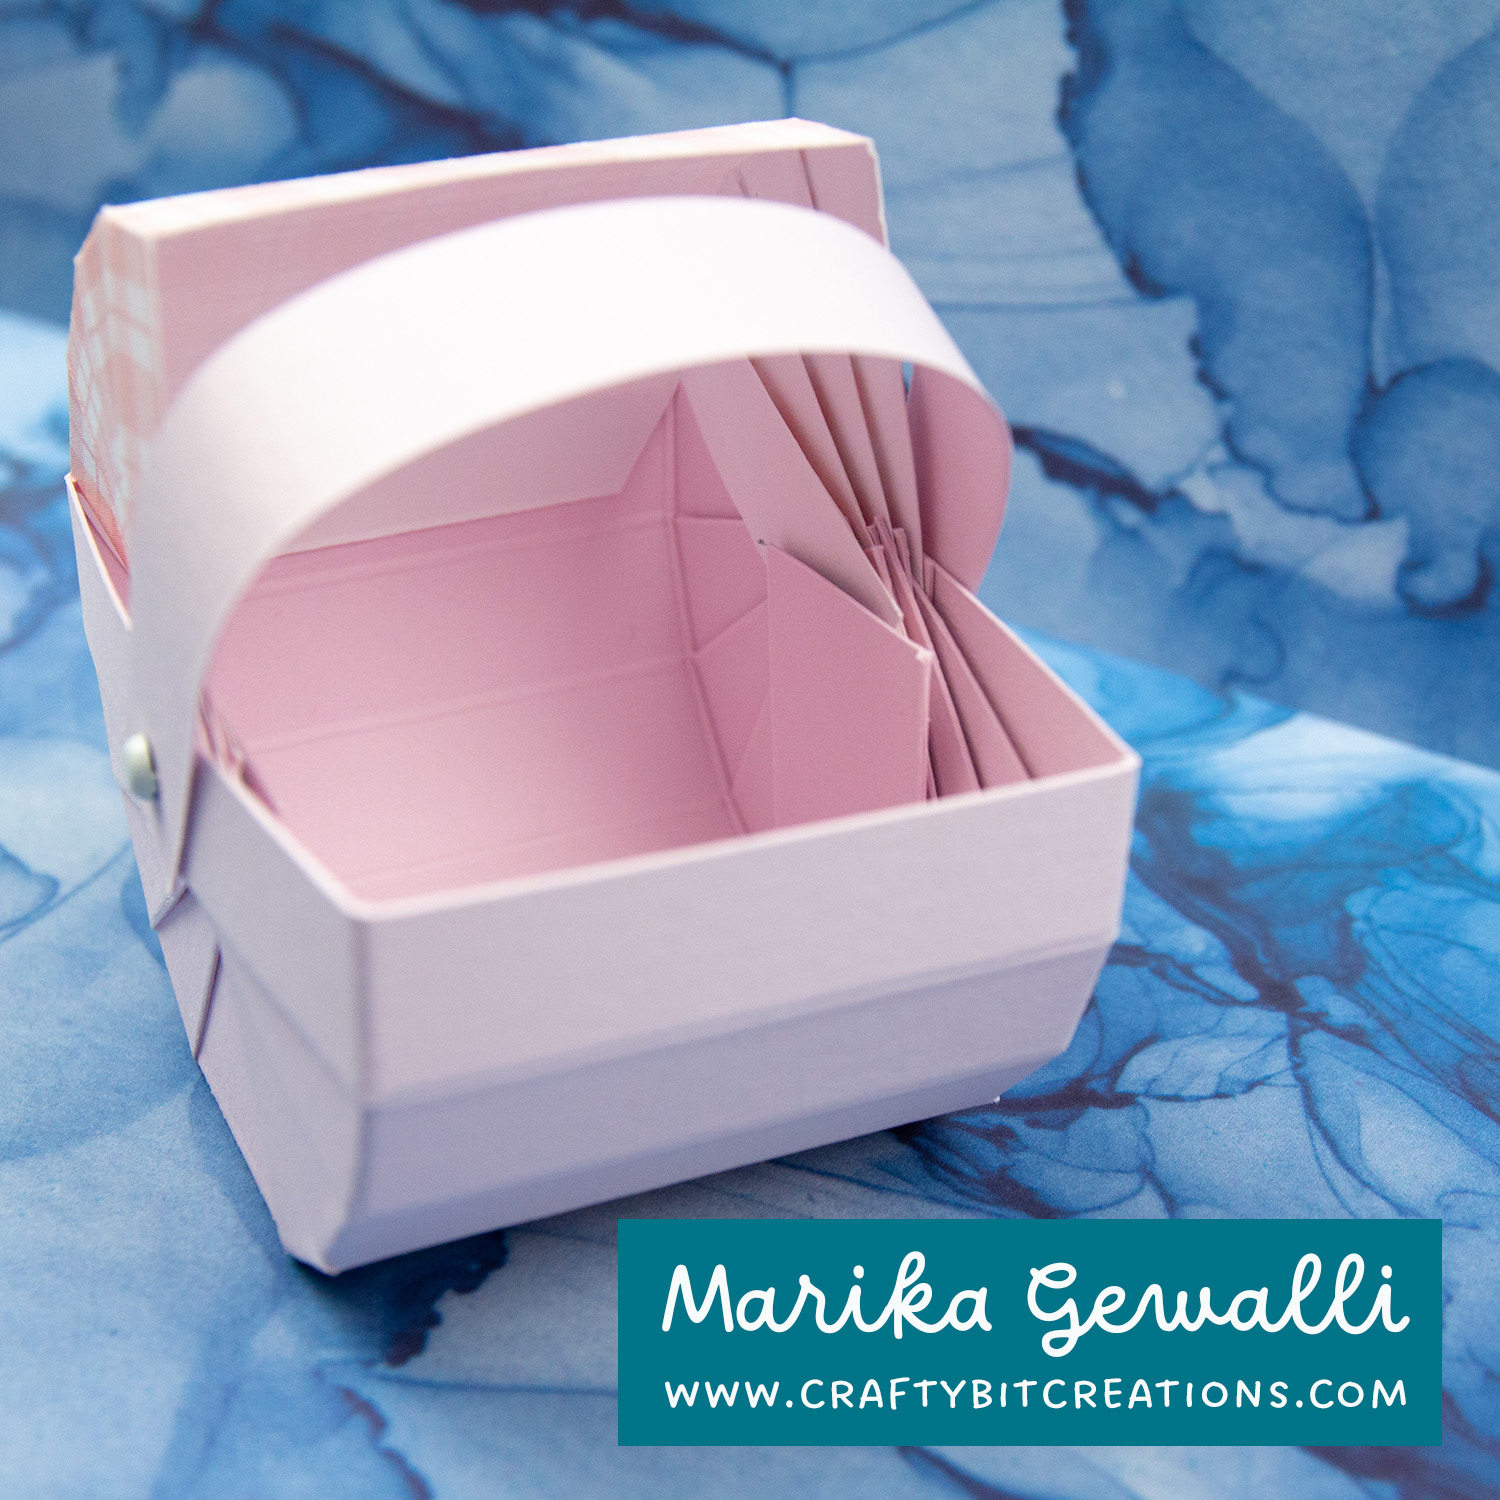
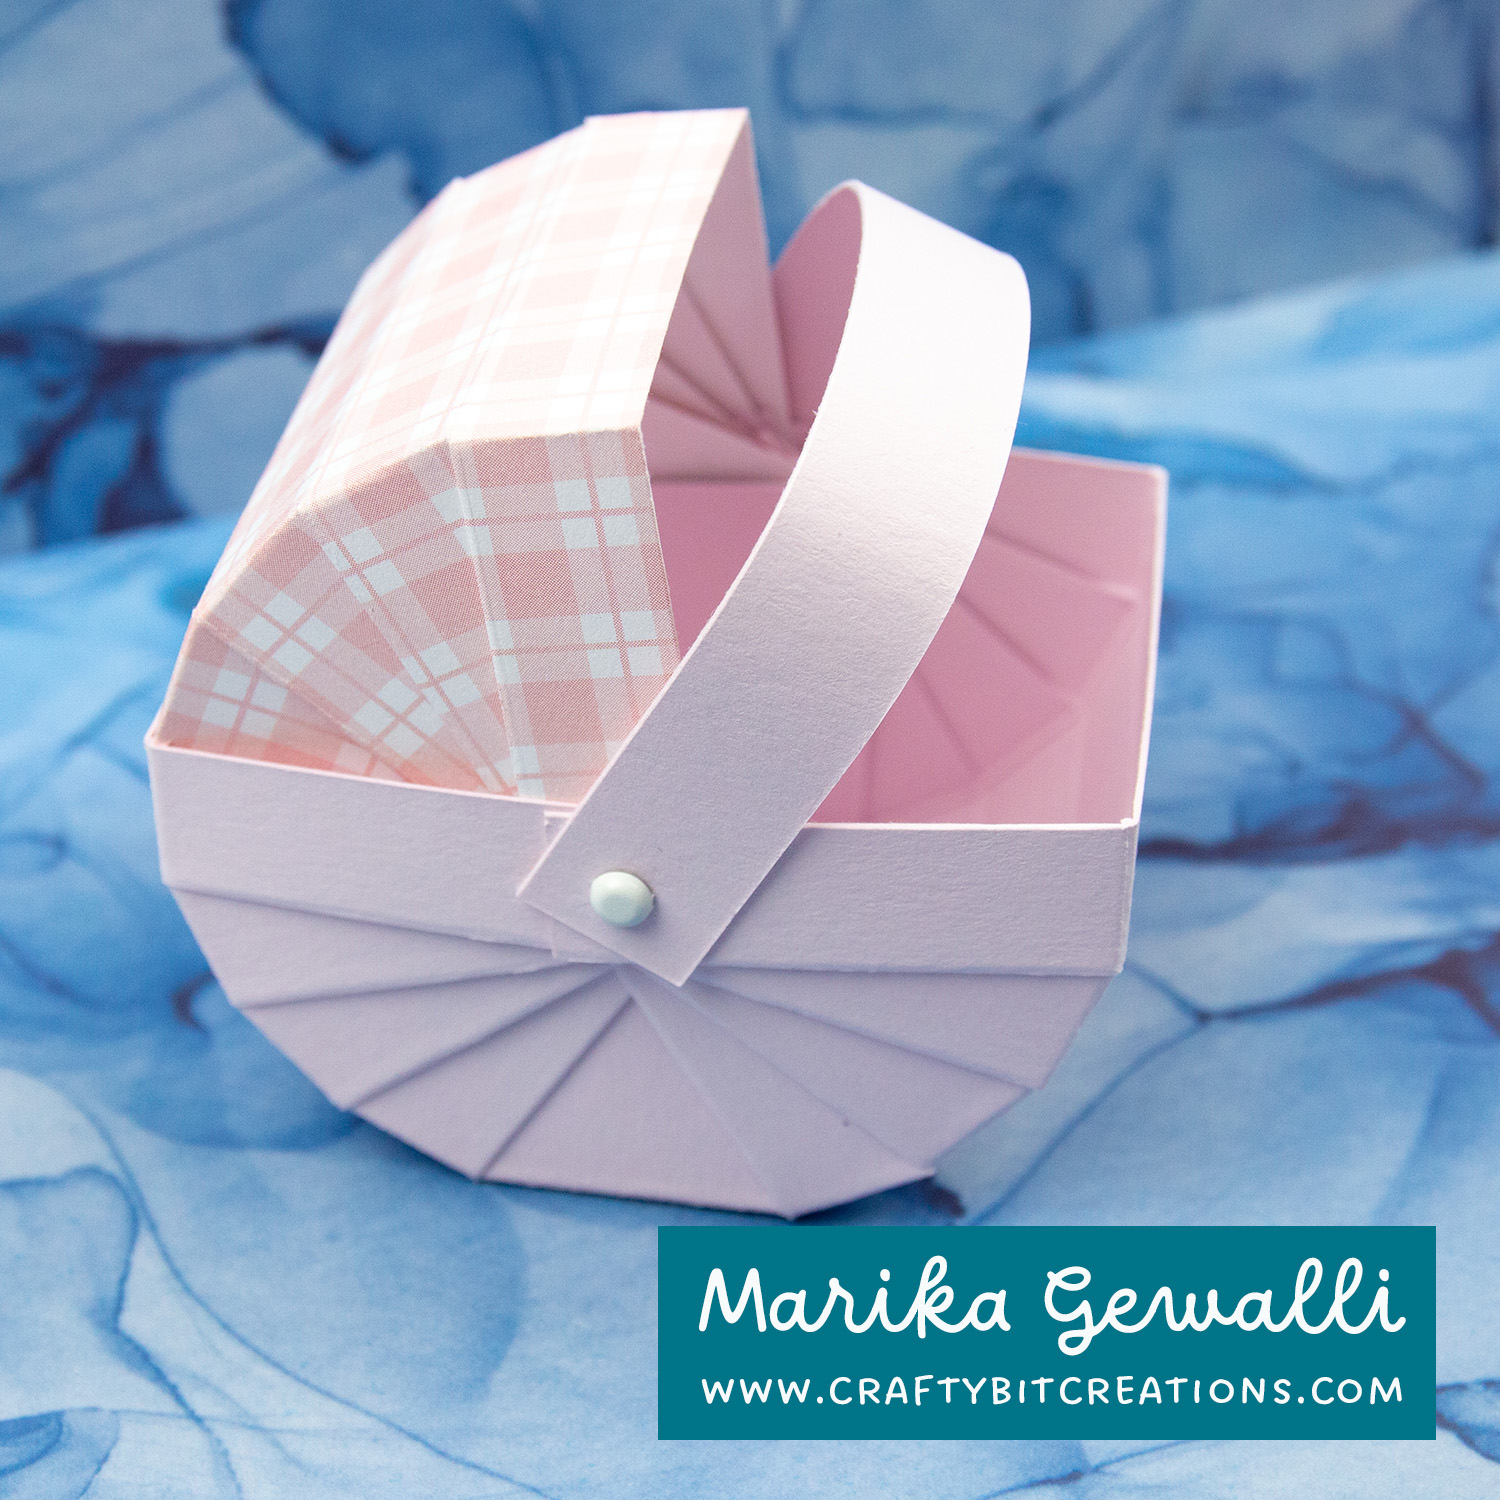
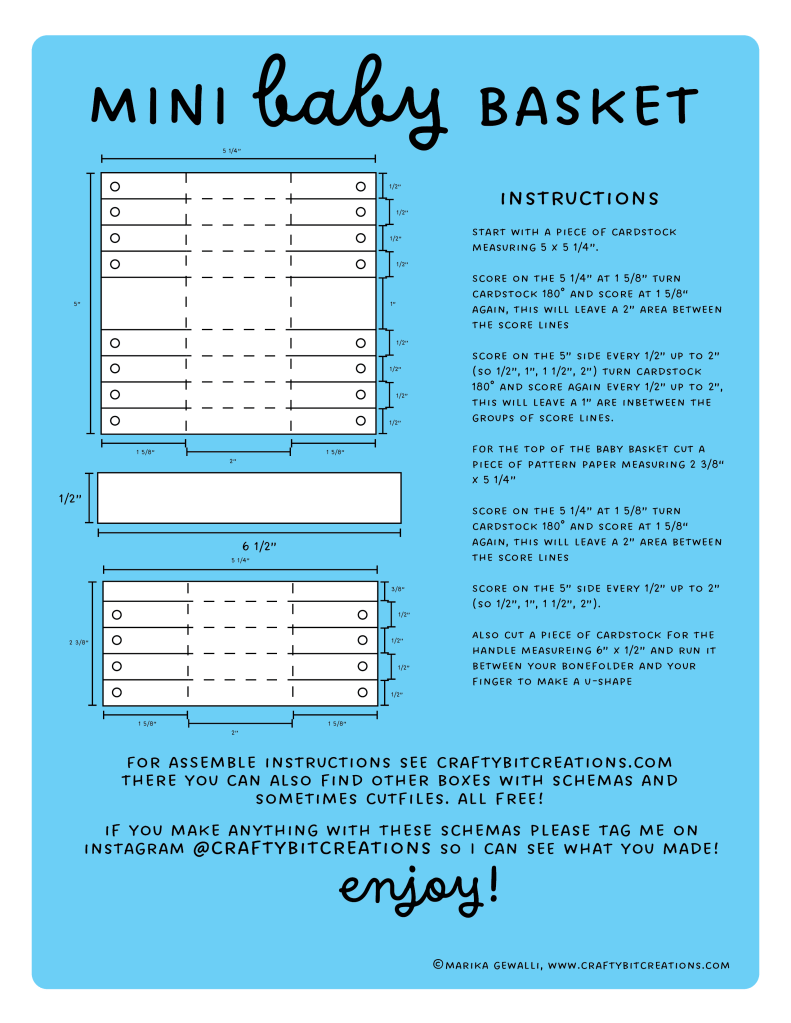
When creating the Easter Basket earlier this month I had in the back of my mind that this would be perfect as a Baby Basket. Perfect to hold a little gift for a mother to be, or as party gift for attending people at a baby shower. I had so much fun choosing the pattern papers and matching card stock for this project. Below you can find a video Baby Basket Tutorial and a schema with measurements for cutting and scoring for the baby basket. If you want to see more baskets and boxes you can find all I have made HERE.
When possible affiliate links are used, this means that I receive a small commission when products are purchased through the links (at no extra cost to you) I use the money to support my blog and youtube channel. If you like my projects and tutorial please consider supporting me by clicking through these links when you shop. Thanks!
Supplies
Happy Patterns Paper Pad: MFTSSS MFT Poppin’ Polka Dots Paper Pad: MFTSSS MFT Rainbow Love Paper Pad: MFTSSS MFT Pretty in Plaid Paper Pad: MFTSSS Pawsome Prints Paper Pad: MFT Mini Brads: MFTSSSSBC MFT Sno Cone Card Stock: MFT Sookwang Tape 1/4”: SSSAMZ
This is my last easter project for the year, I hope you have enjoyed them. This is an easter mini clutch box and they are made to fit 6 Lindt Mini Chocolate Eggs. But they can fit anything small that you could think of. You can also go the clutch version or add a “handle” and make it a purse.
You can follow the template above or you can download the pdf HERE and the free templates & cut files HERE. If you enjoy the tutorial and want to see more you can find all of my boxes with video tutorials, templates and cut files HERE.
Copic
YG11, YG23, YG01, YG25, B12, B23
When possible affiliate links are used, this means that I receive a small commission when products are purchased through the links (at no extra cost to you) I use the money to support my blog and youtube channel. If you like my projects and tutorial please consider supporting me by clicking through these links when you shop. Thanks!
Supplies
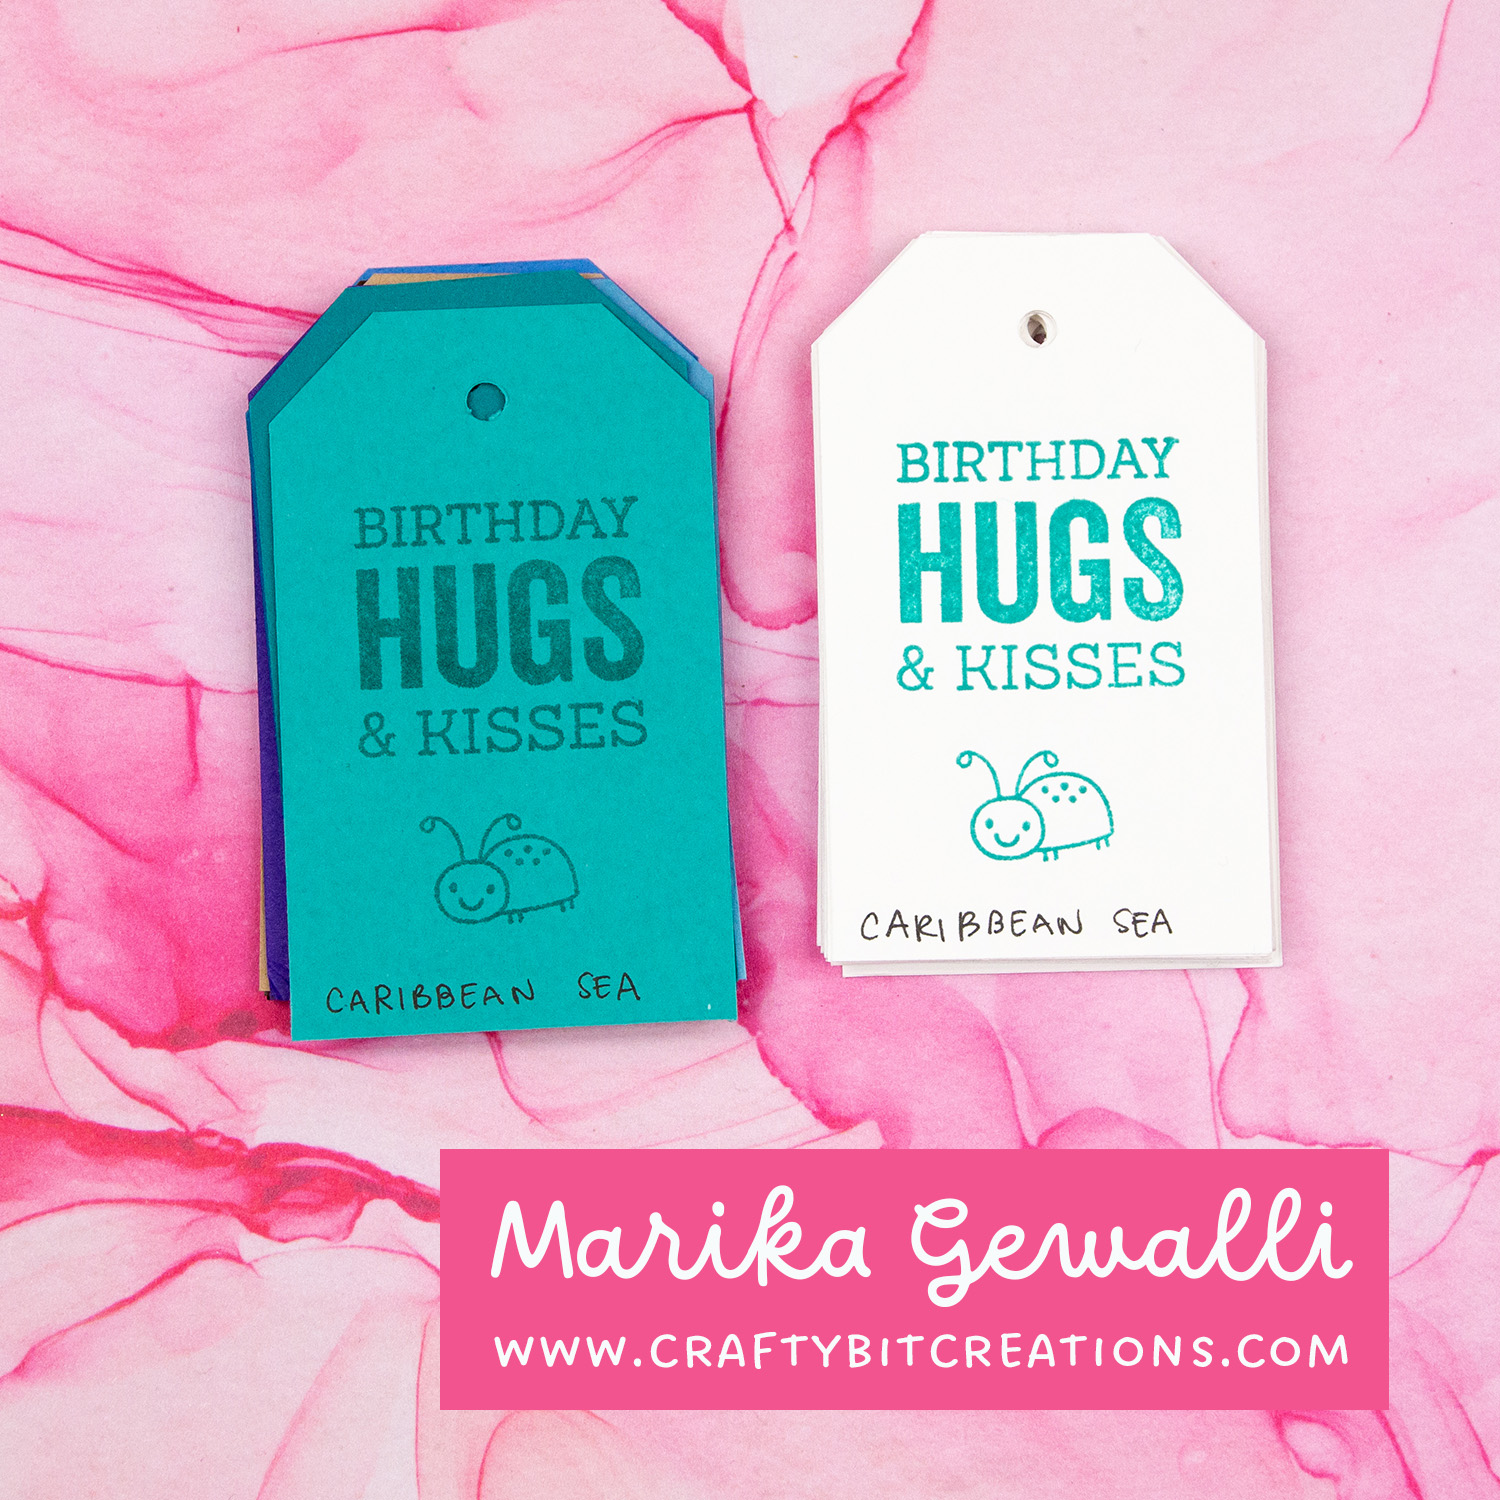
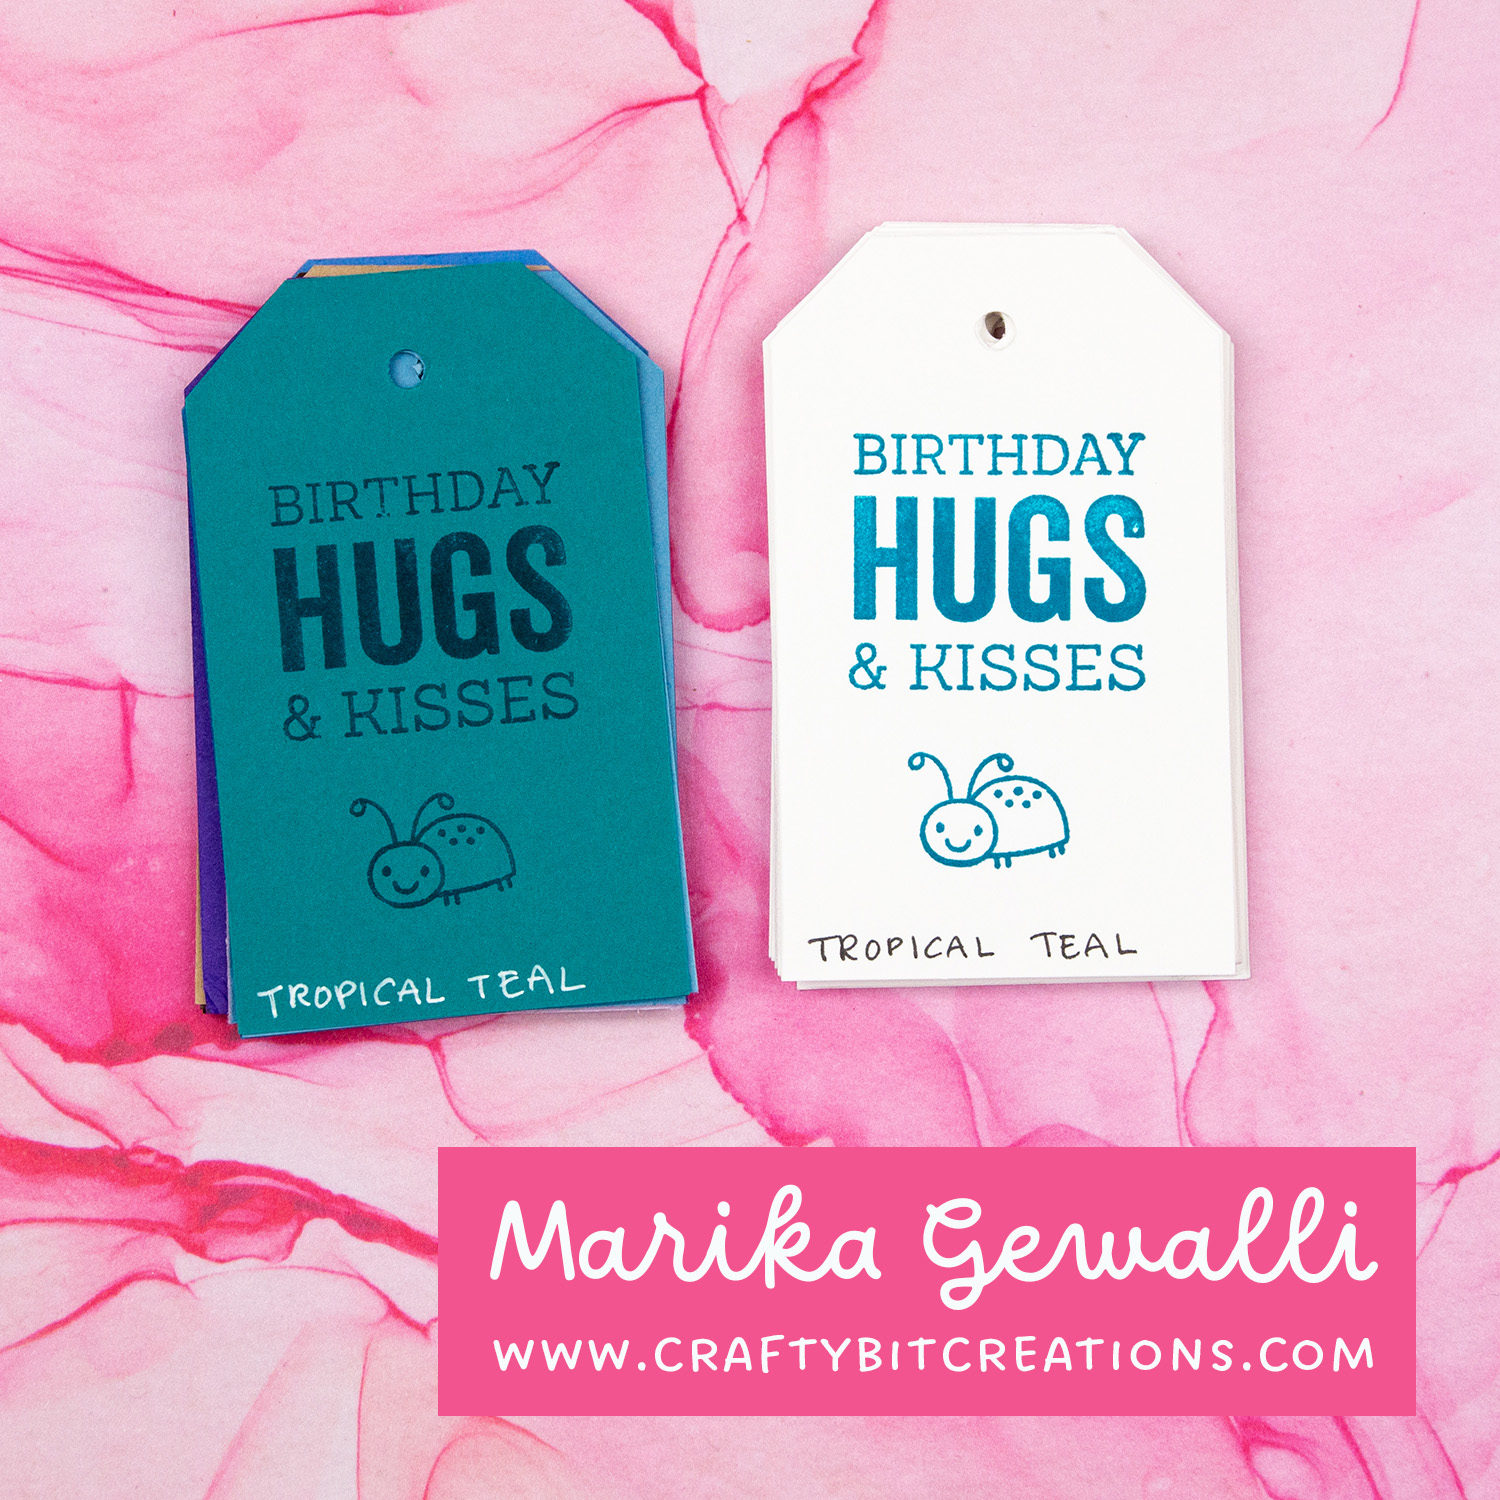
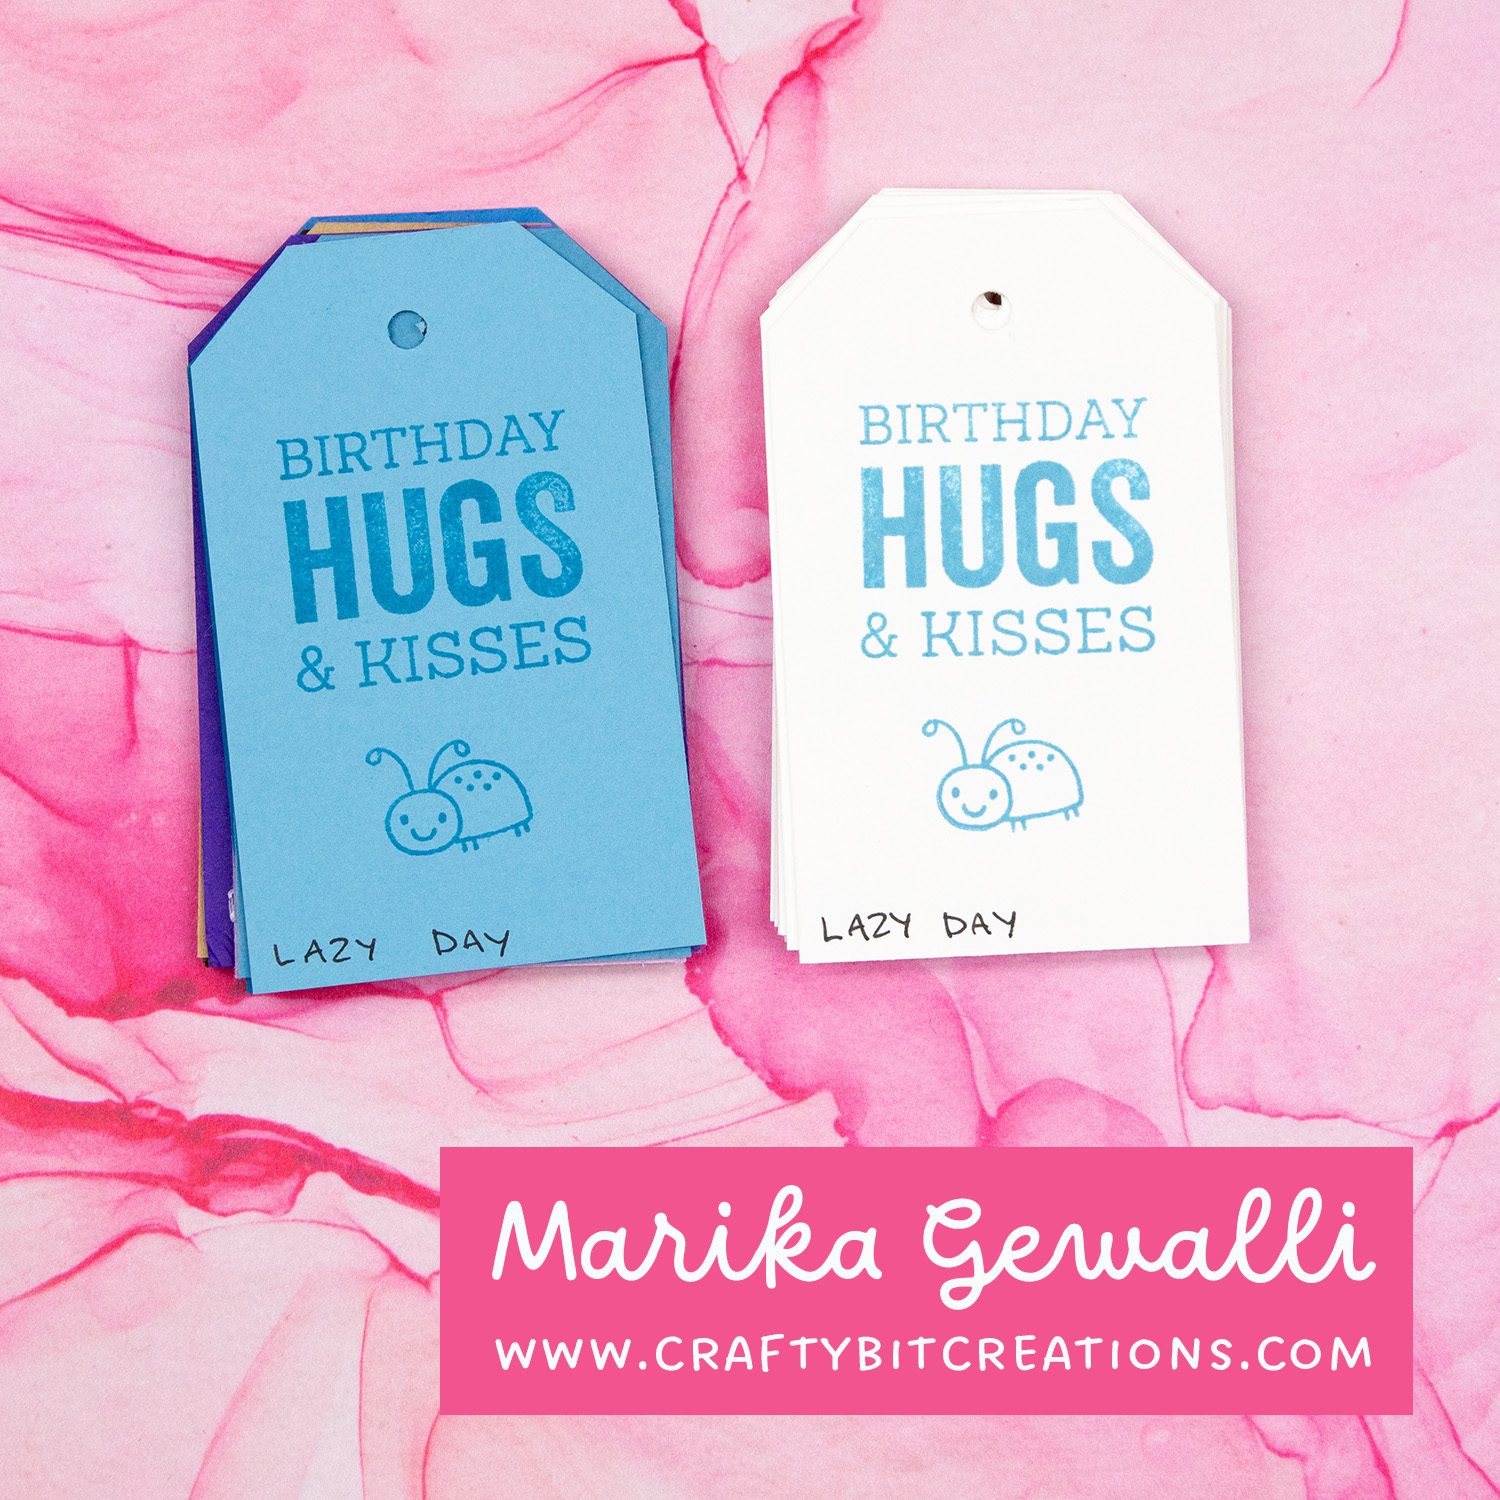
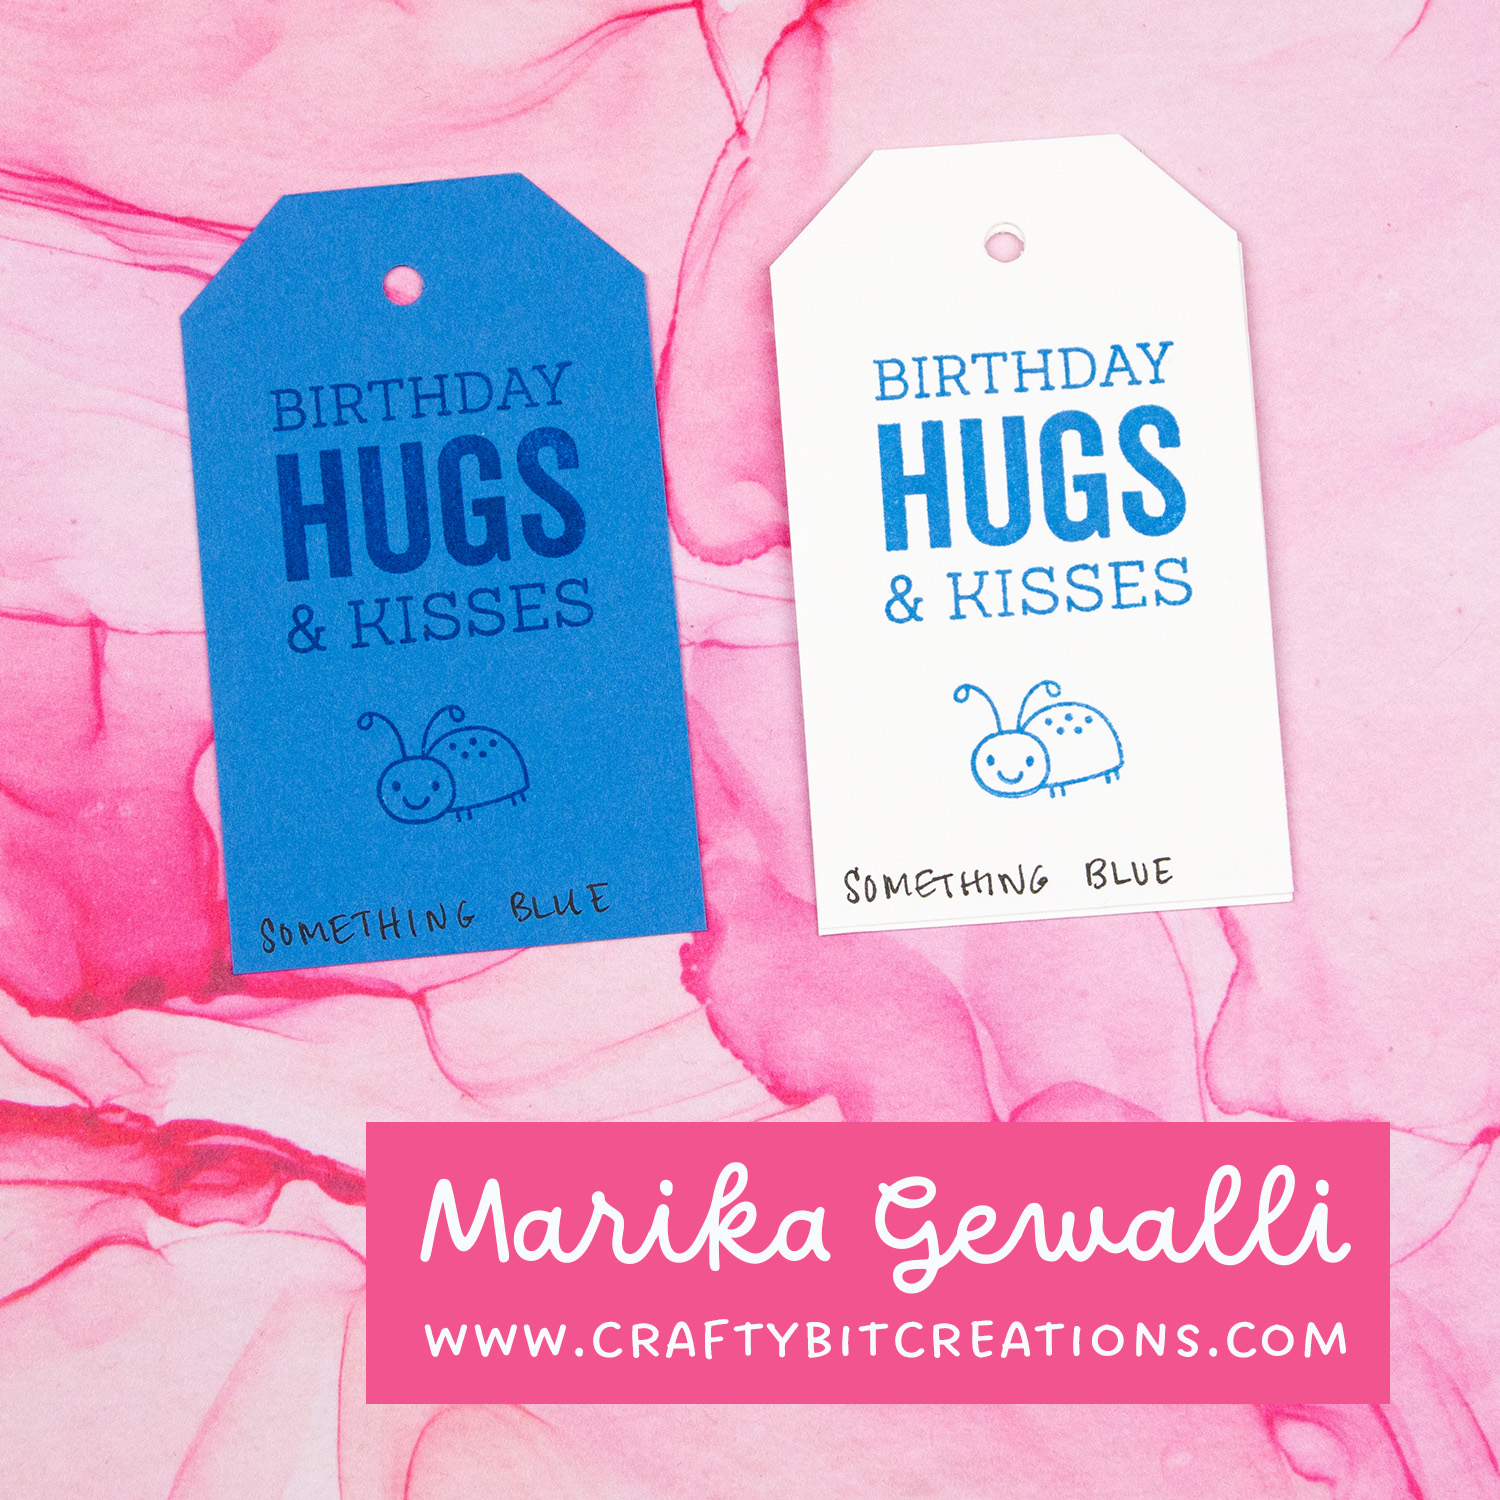
MFT Floral Whimsy: MFTSSS MFT Sending Sunshine and Smiles: MFTSSS Happy Patterns Paper Pad: MFTSSS MFT Something Blue Card Stock: MFT MFT Something Blue Premium Dye Ink Cube: MFTSSS MFT Sour Apple Card Stock: MFT MFT Sour Apple Ink: MFTSSS Fiskars Trimmer : SSSAMZ Cutter Bee Scissors: SSSAMZSBC Sookwang Tape 1/4”: SSSAMZ We R Memorykeepers Corner Chomper: SSSAMZSBC Twine: SSSAMZSBC MFT On-Point Precision Glue Pen: MFT
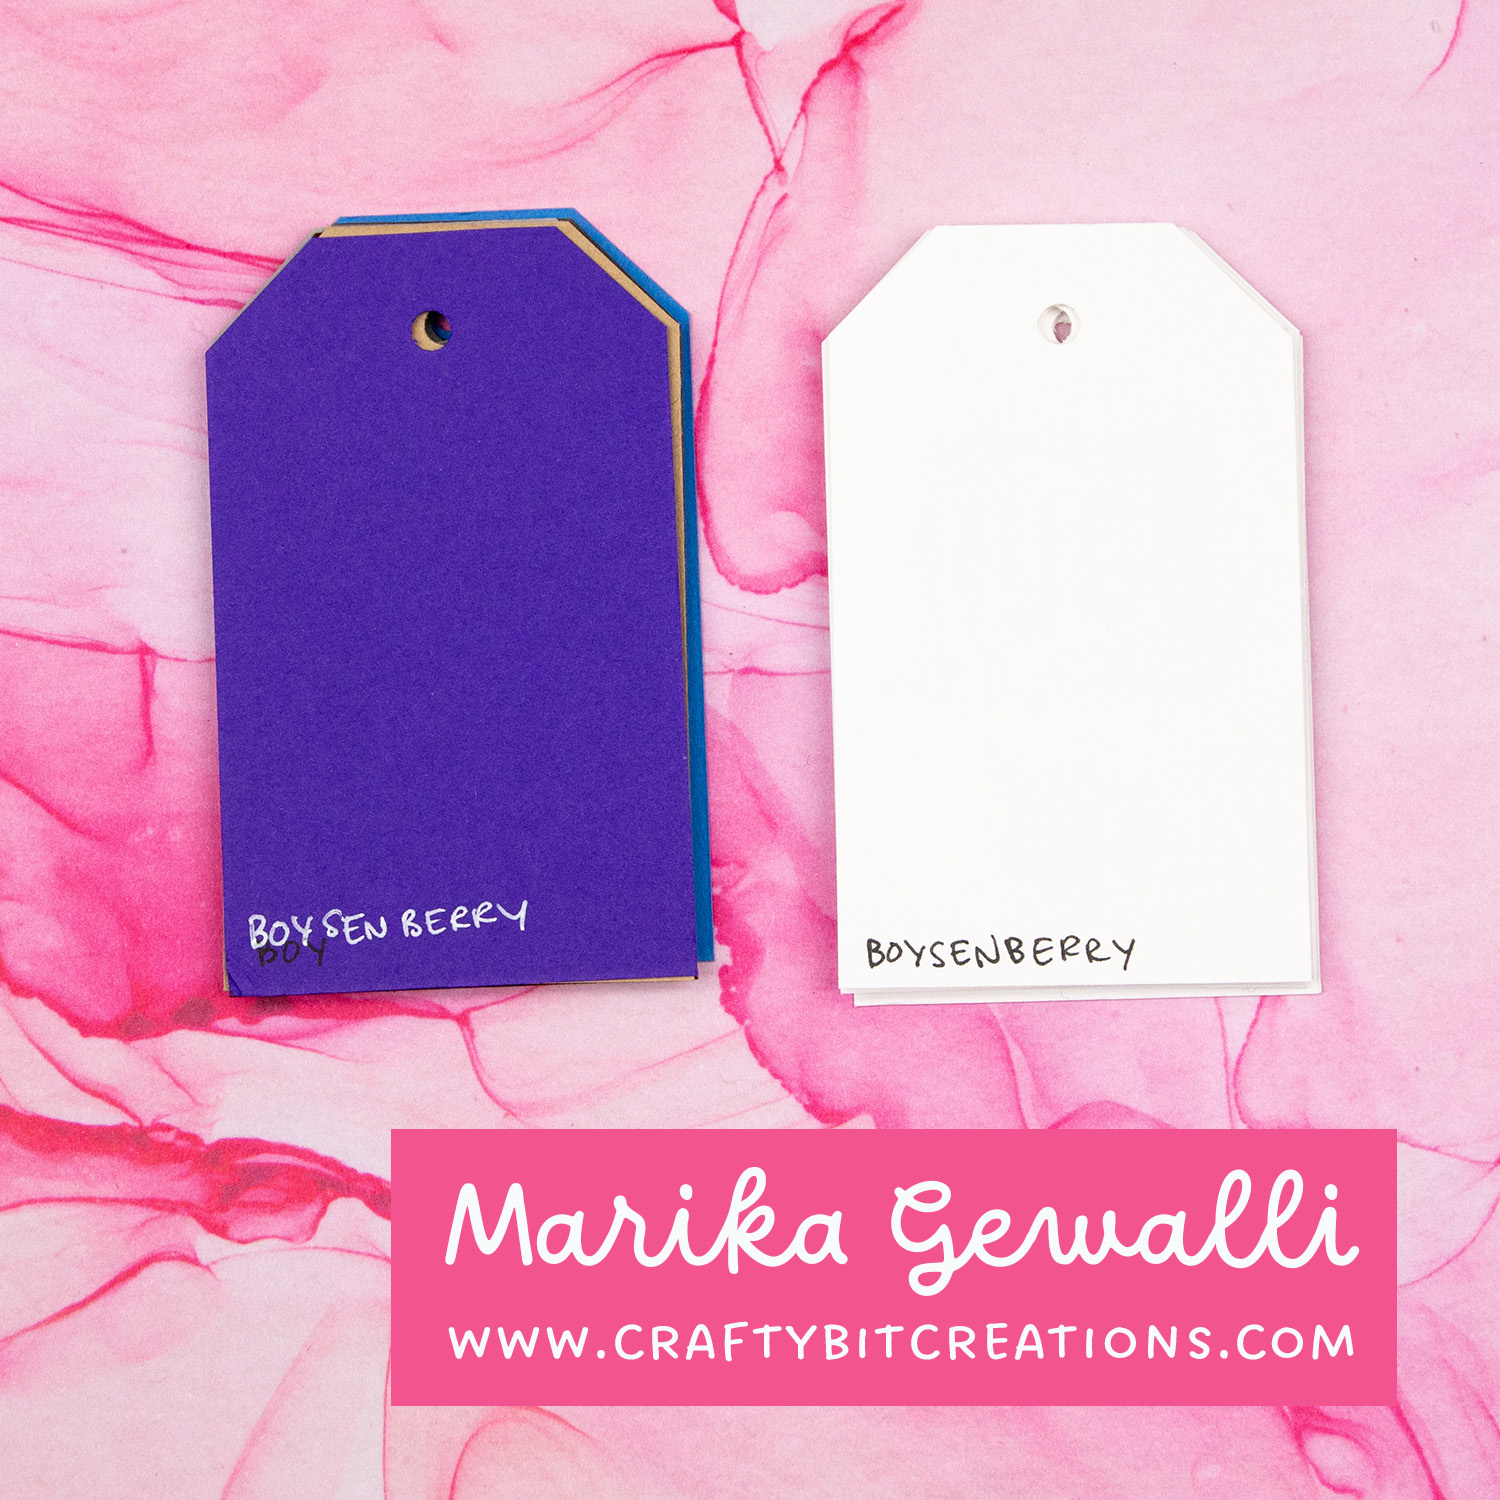
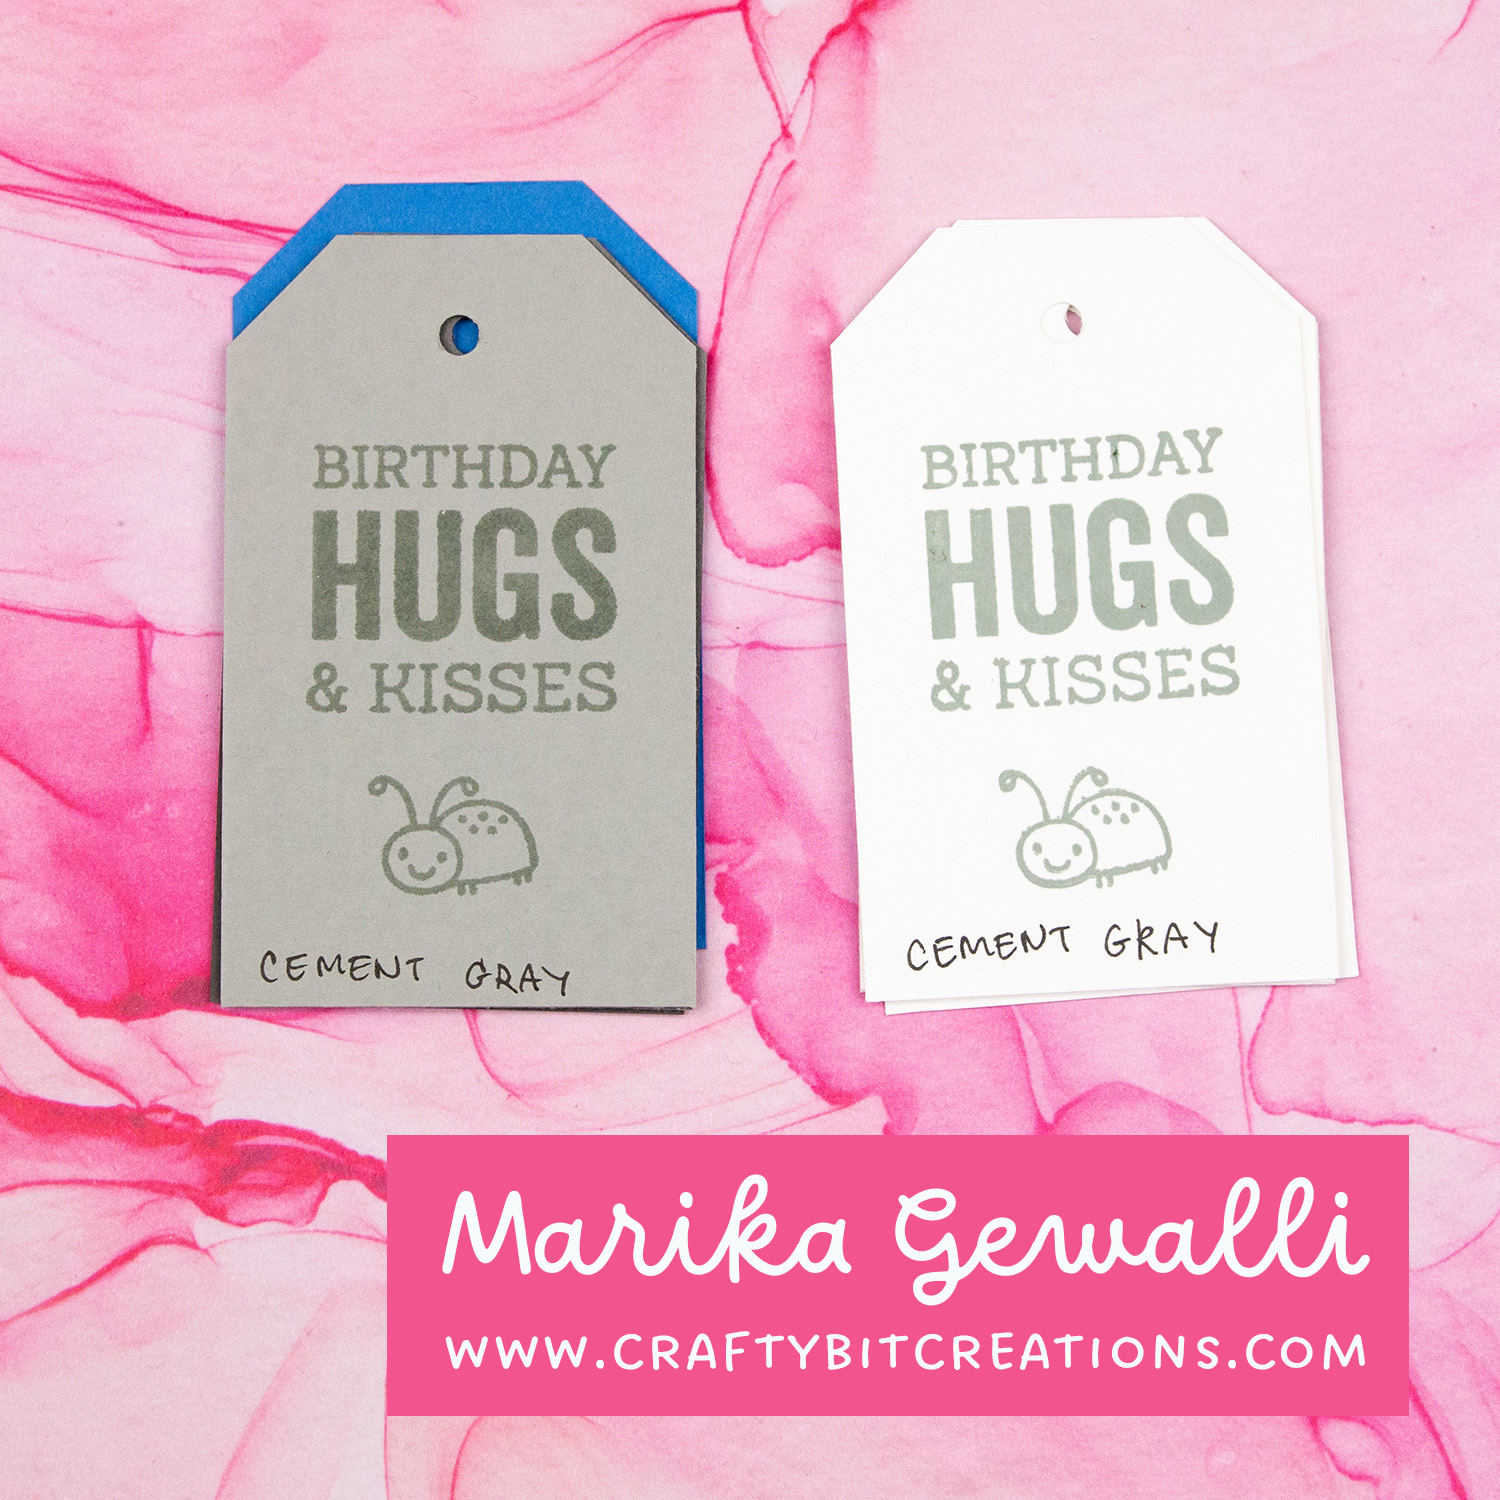
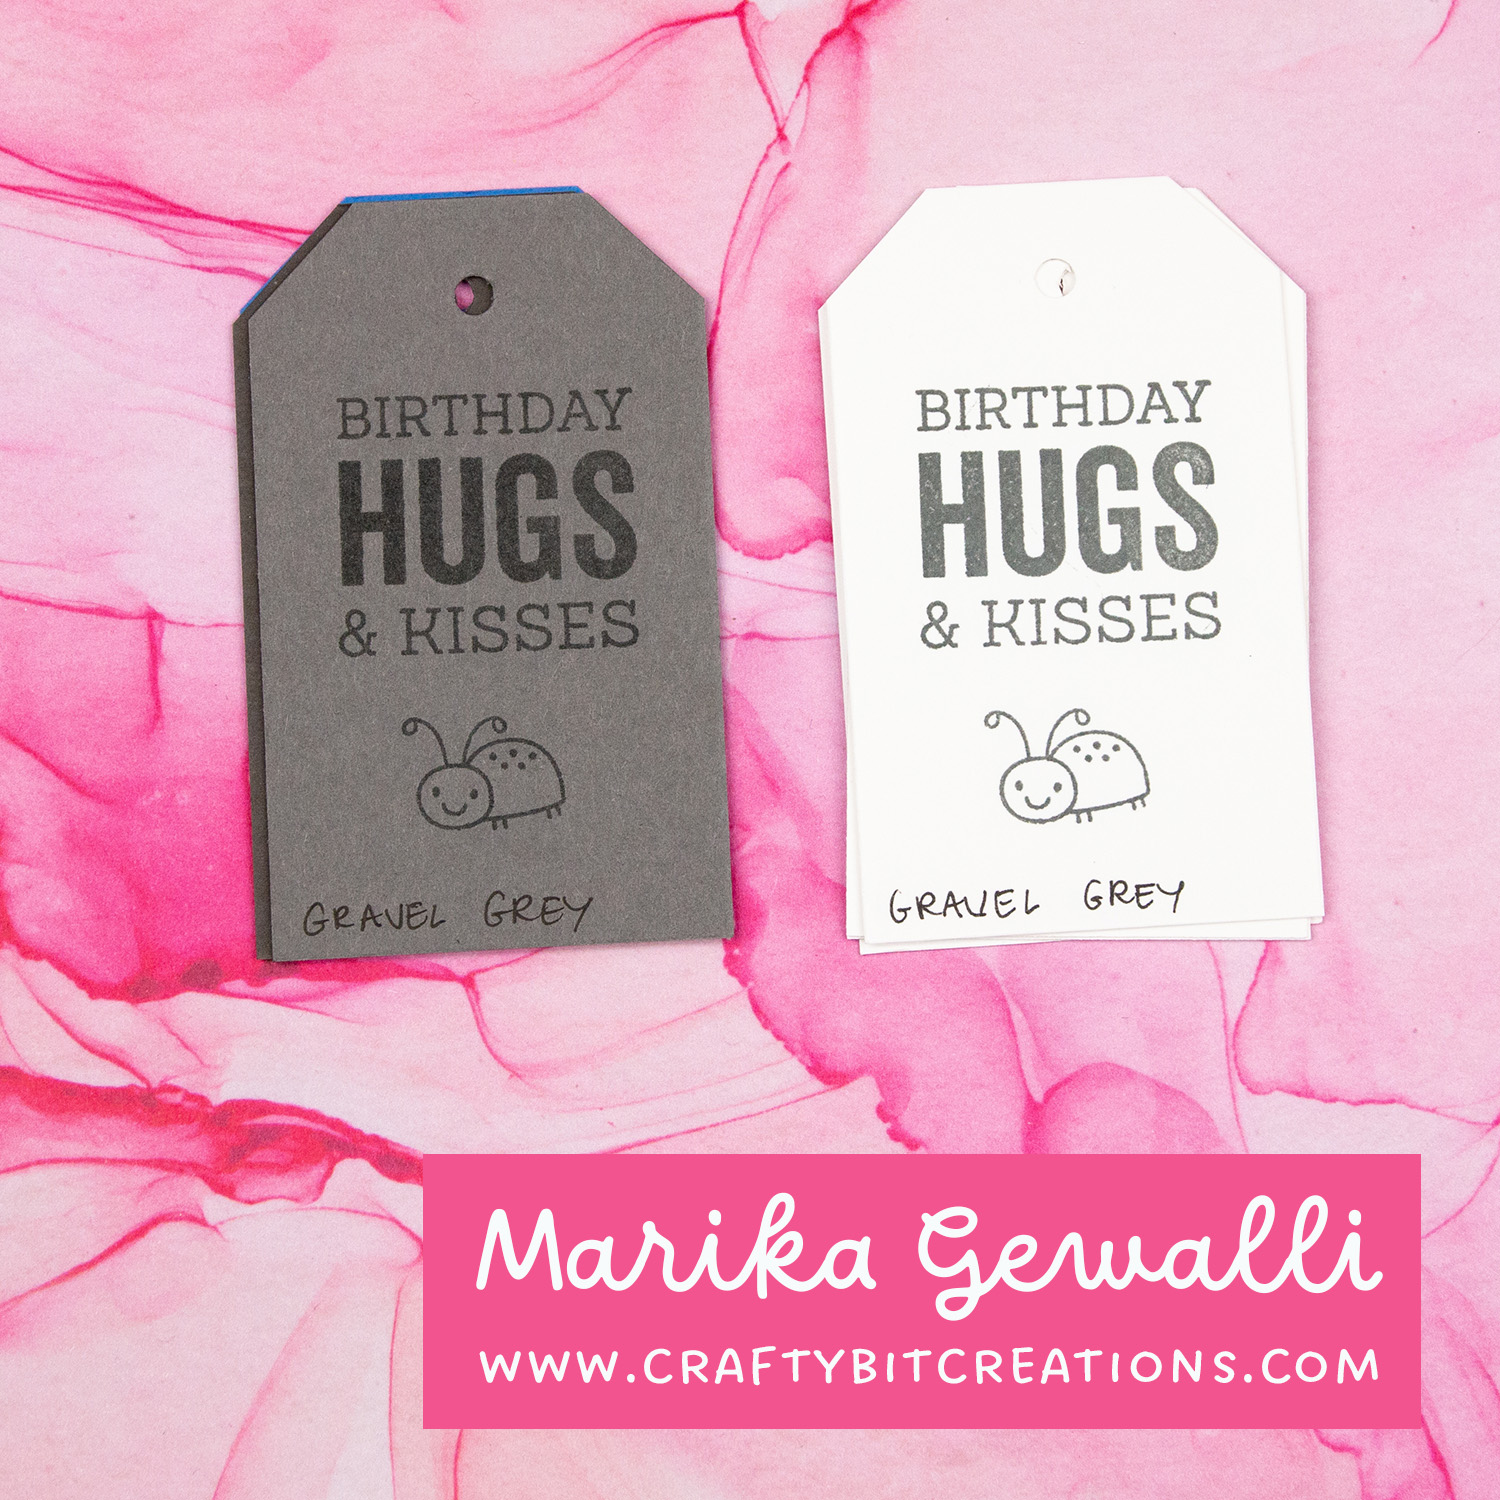
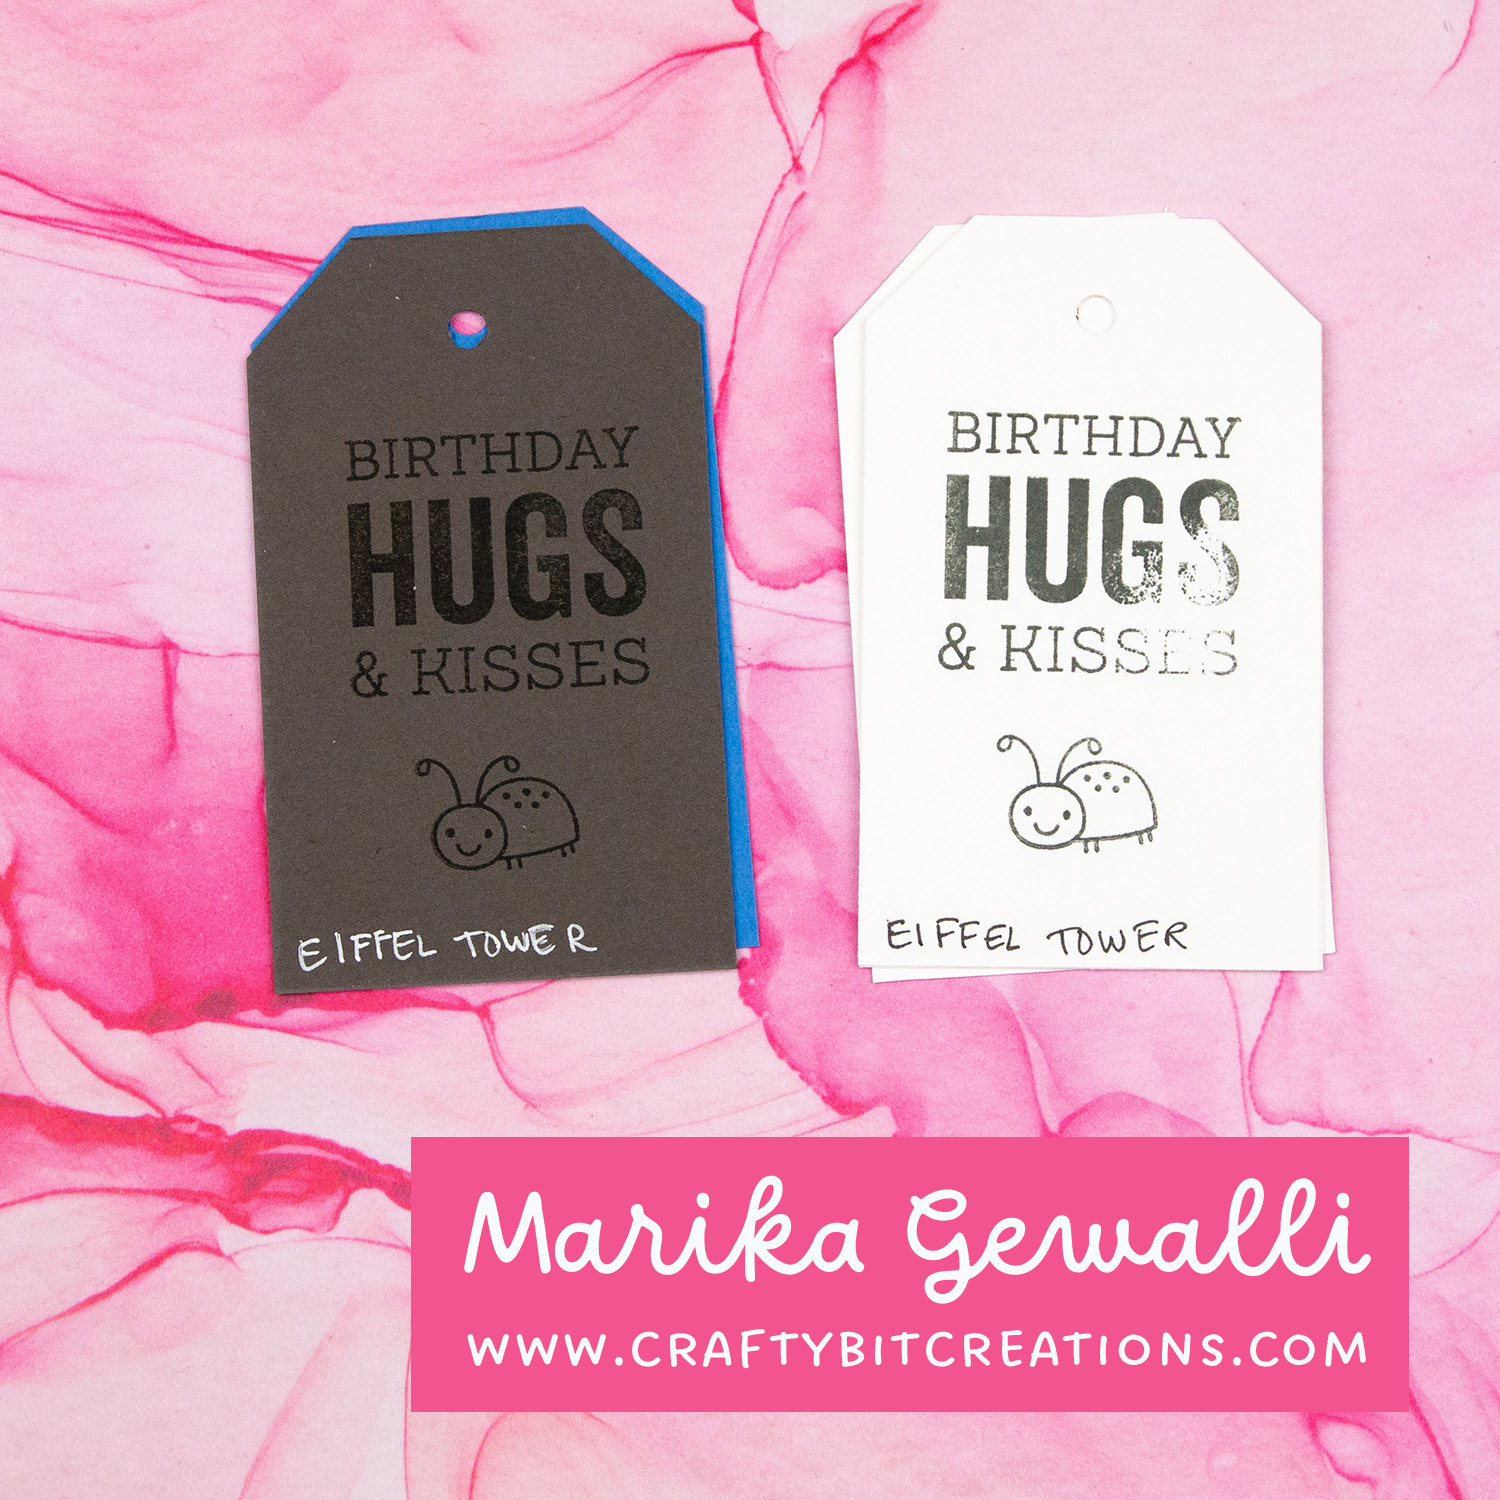
I have almost all the My Favorite Things inks, however I find myself reaching towards the same colors over and over. So I thought by having some swatches I would have a better overview over my inks and might use more of them! Down below you can see all the swatching in a video, all the swatches on photos and a schema for the swatches I made. Also you can download the template and cutfiles for the the swatches.
If you want the templates, cutfiles and pdf you can find them HERE.
When possible affiliate links are used, this means that I receive a small commission when products are purchased through the links (at no extra cost to you) I use the money to support my blog and youtube channel. If you like my projects and tutorial please consider supporting me by clicking through these links when you shop. Thanks!
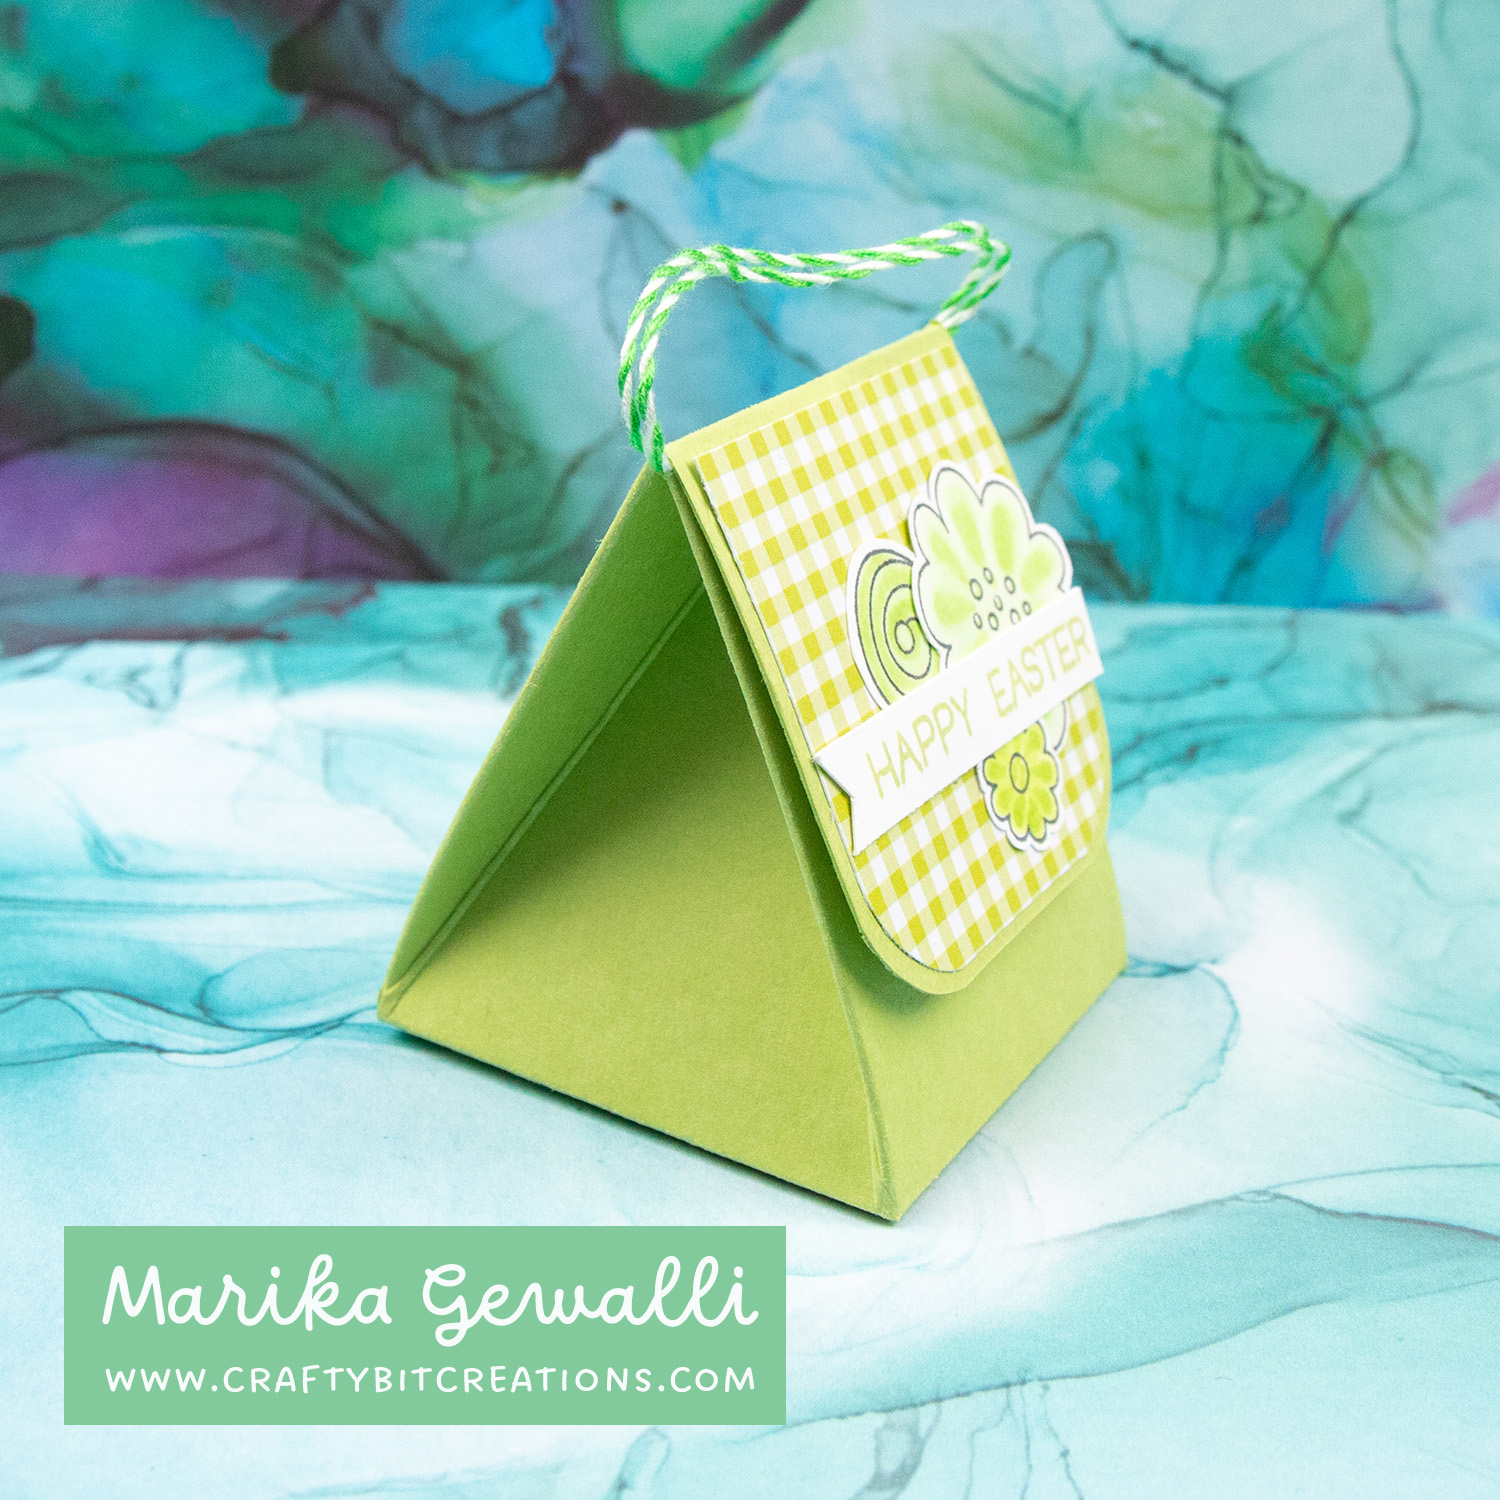
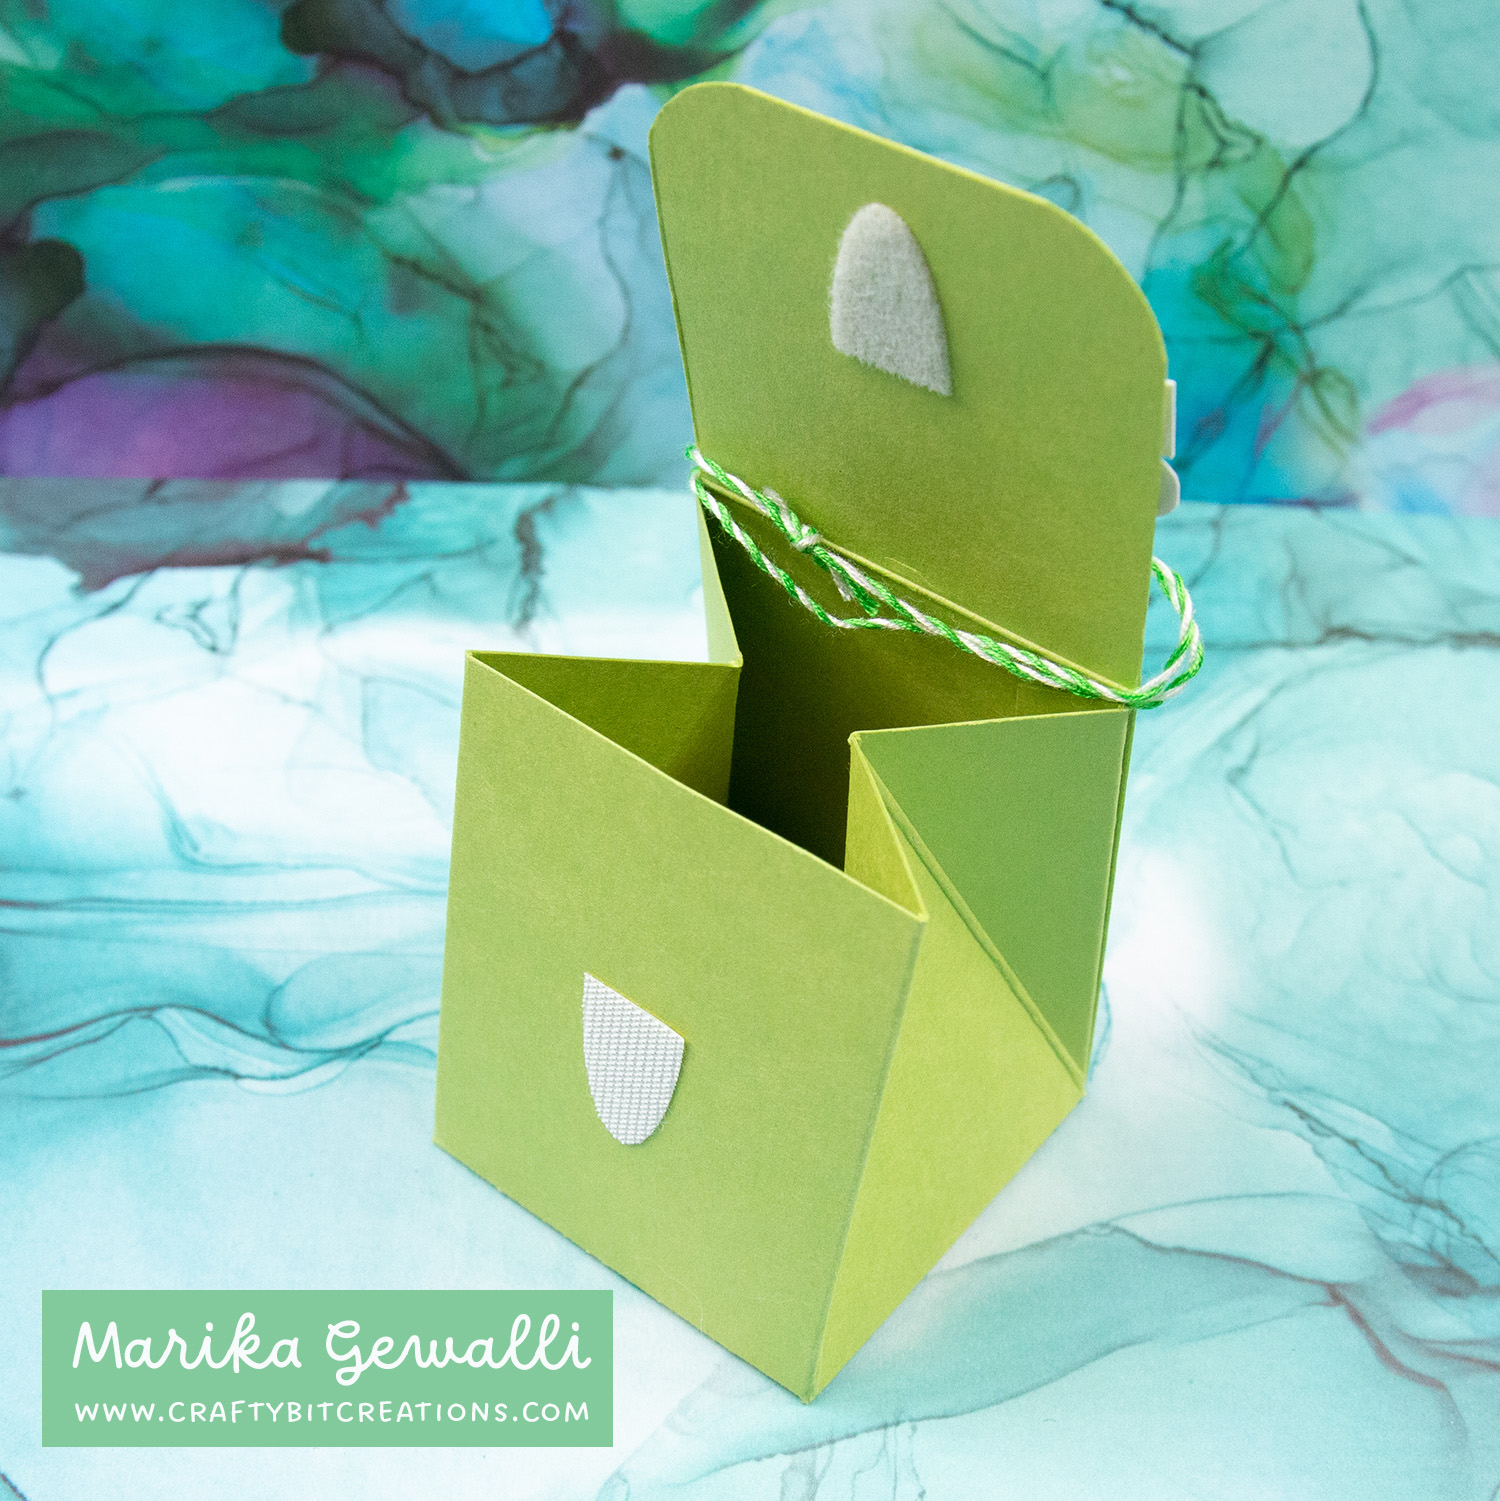
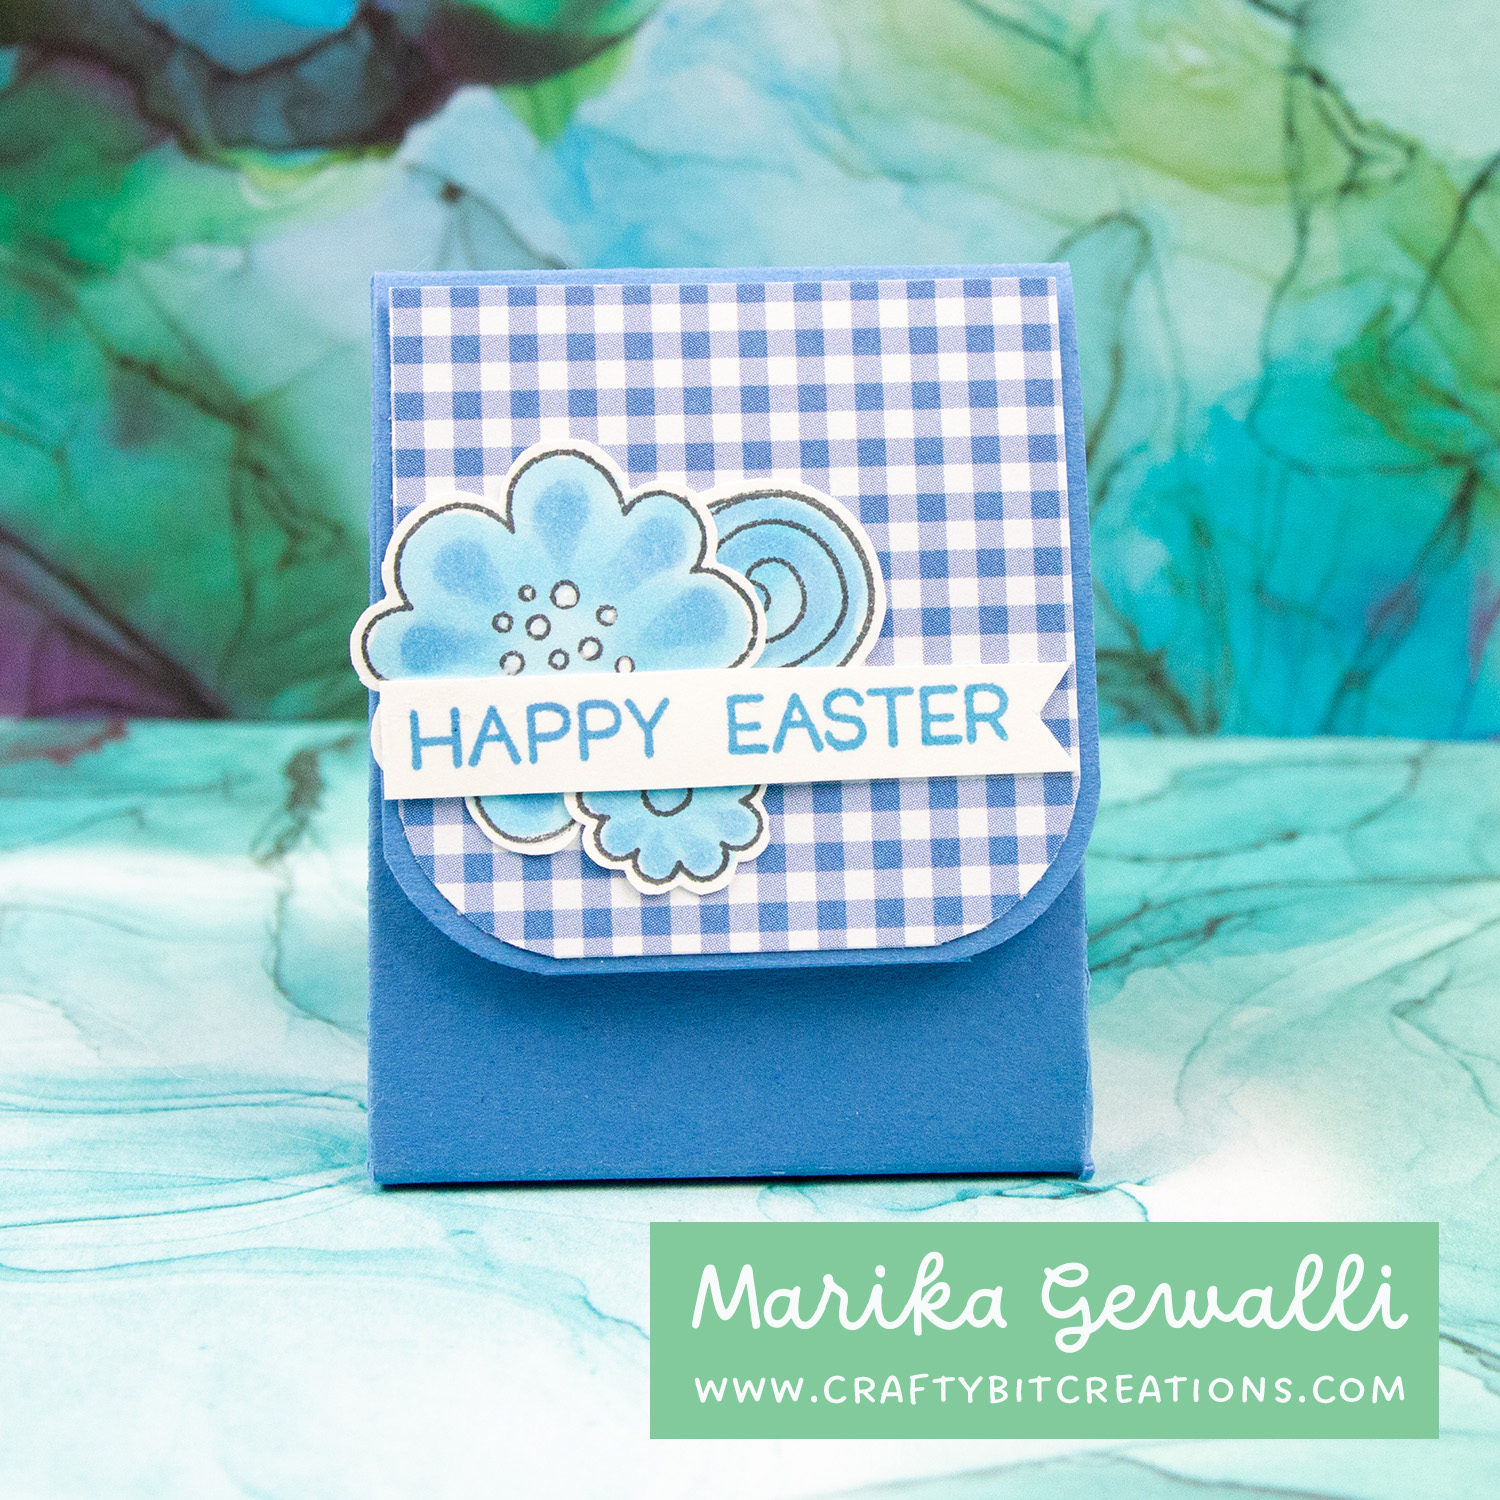
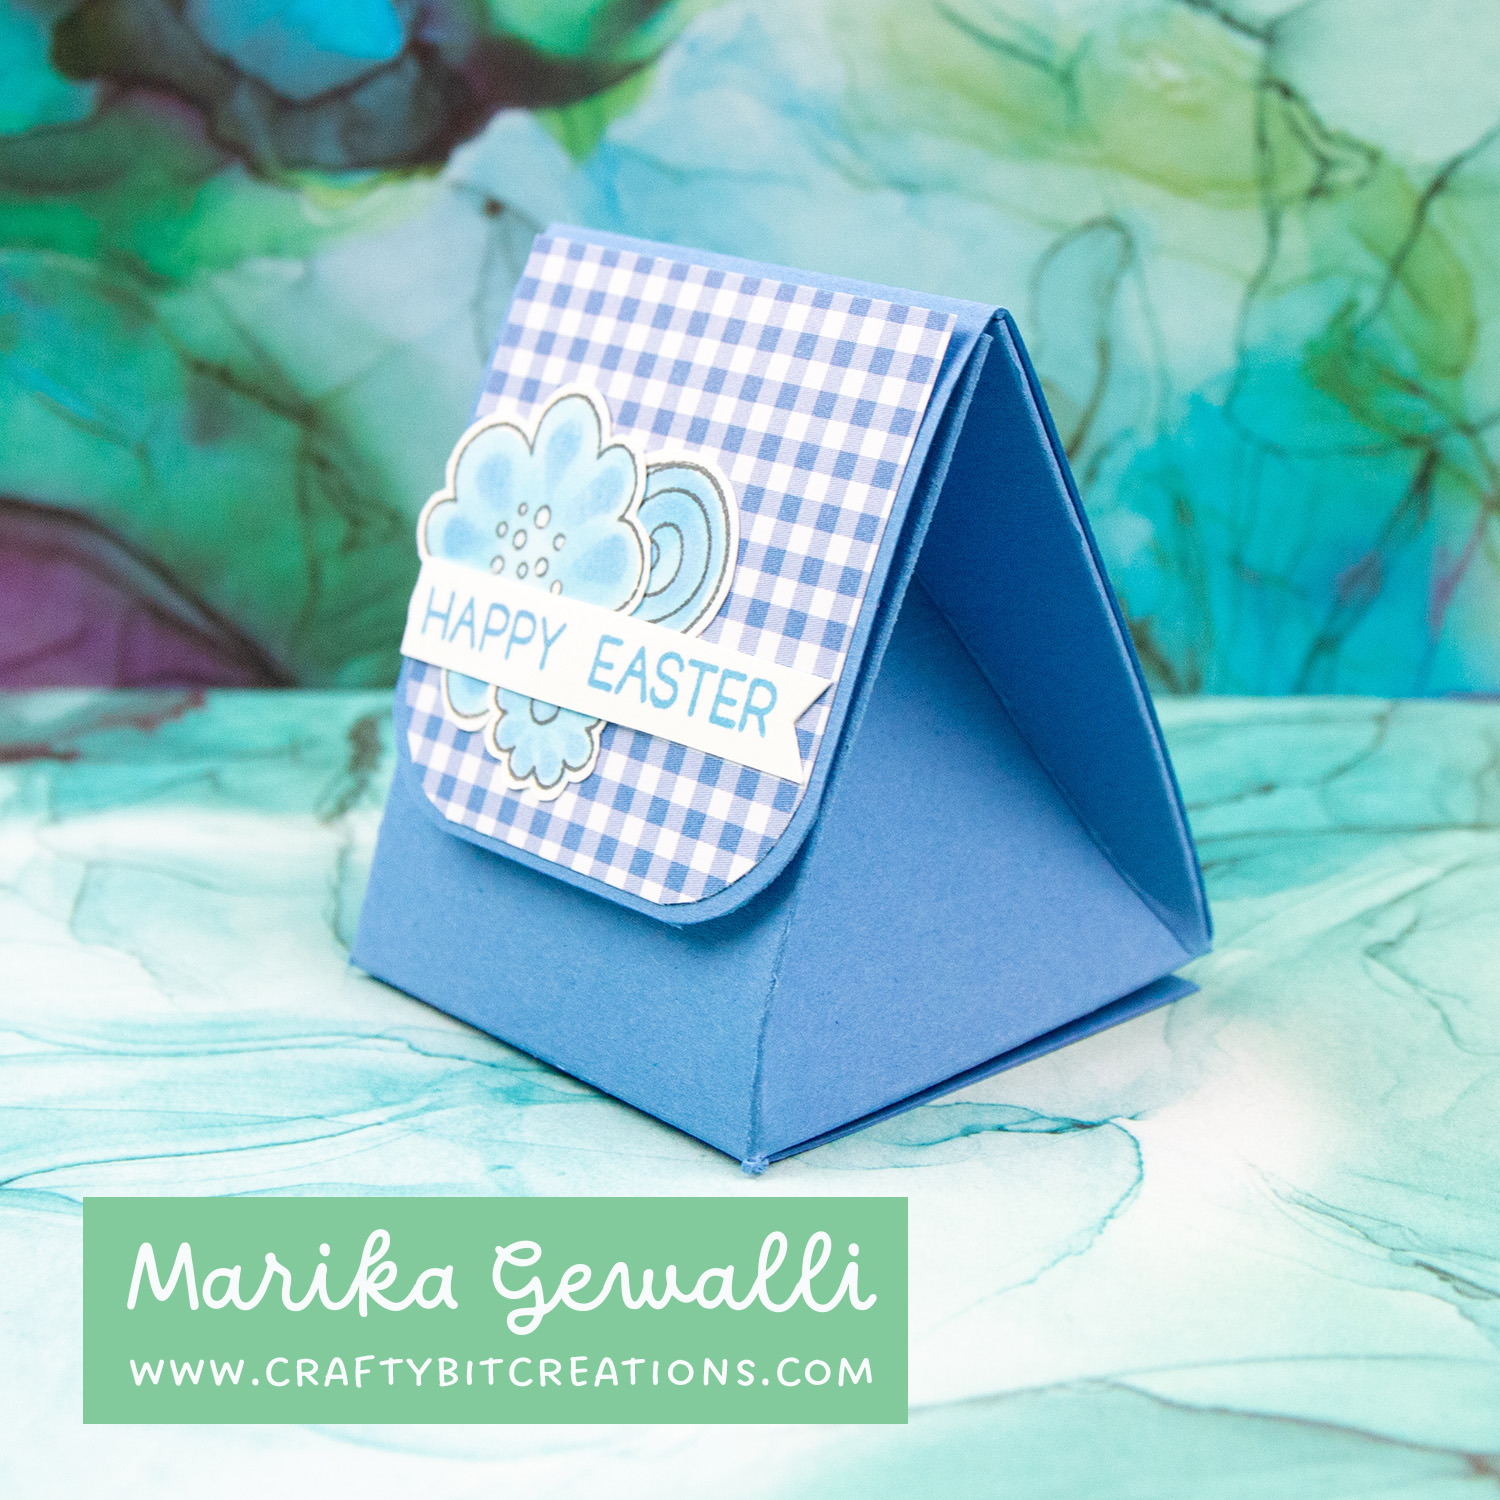
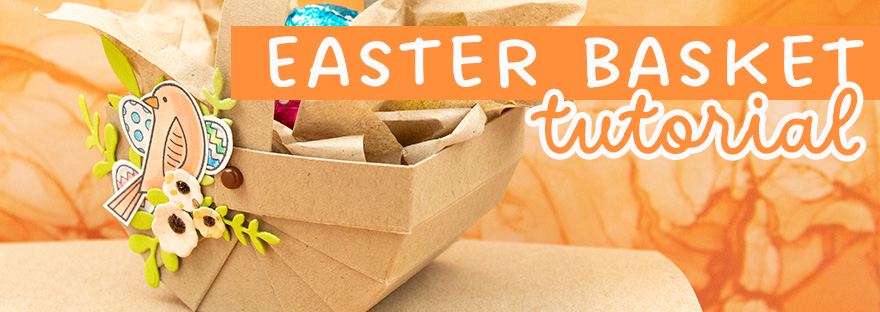
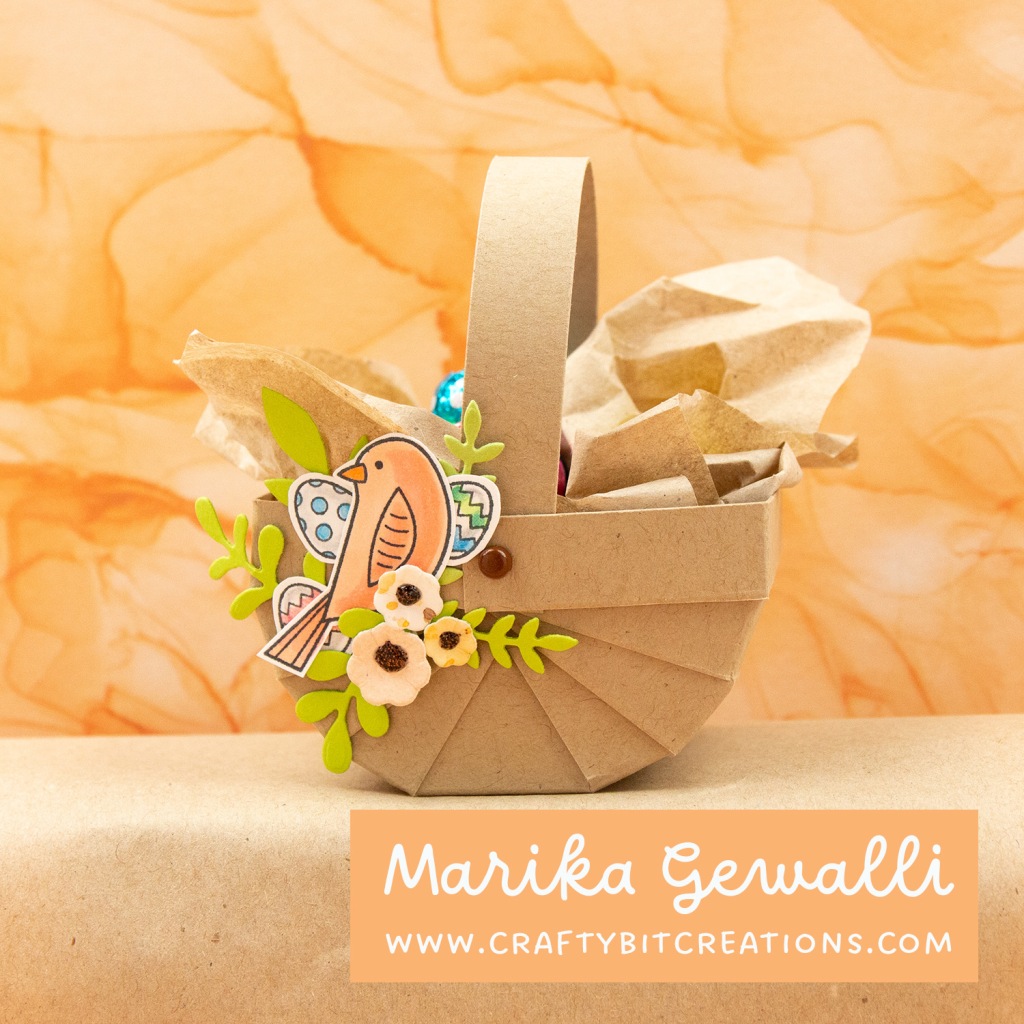
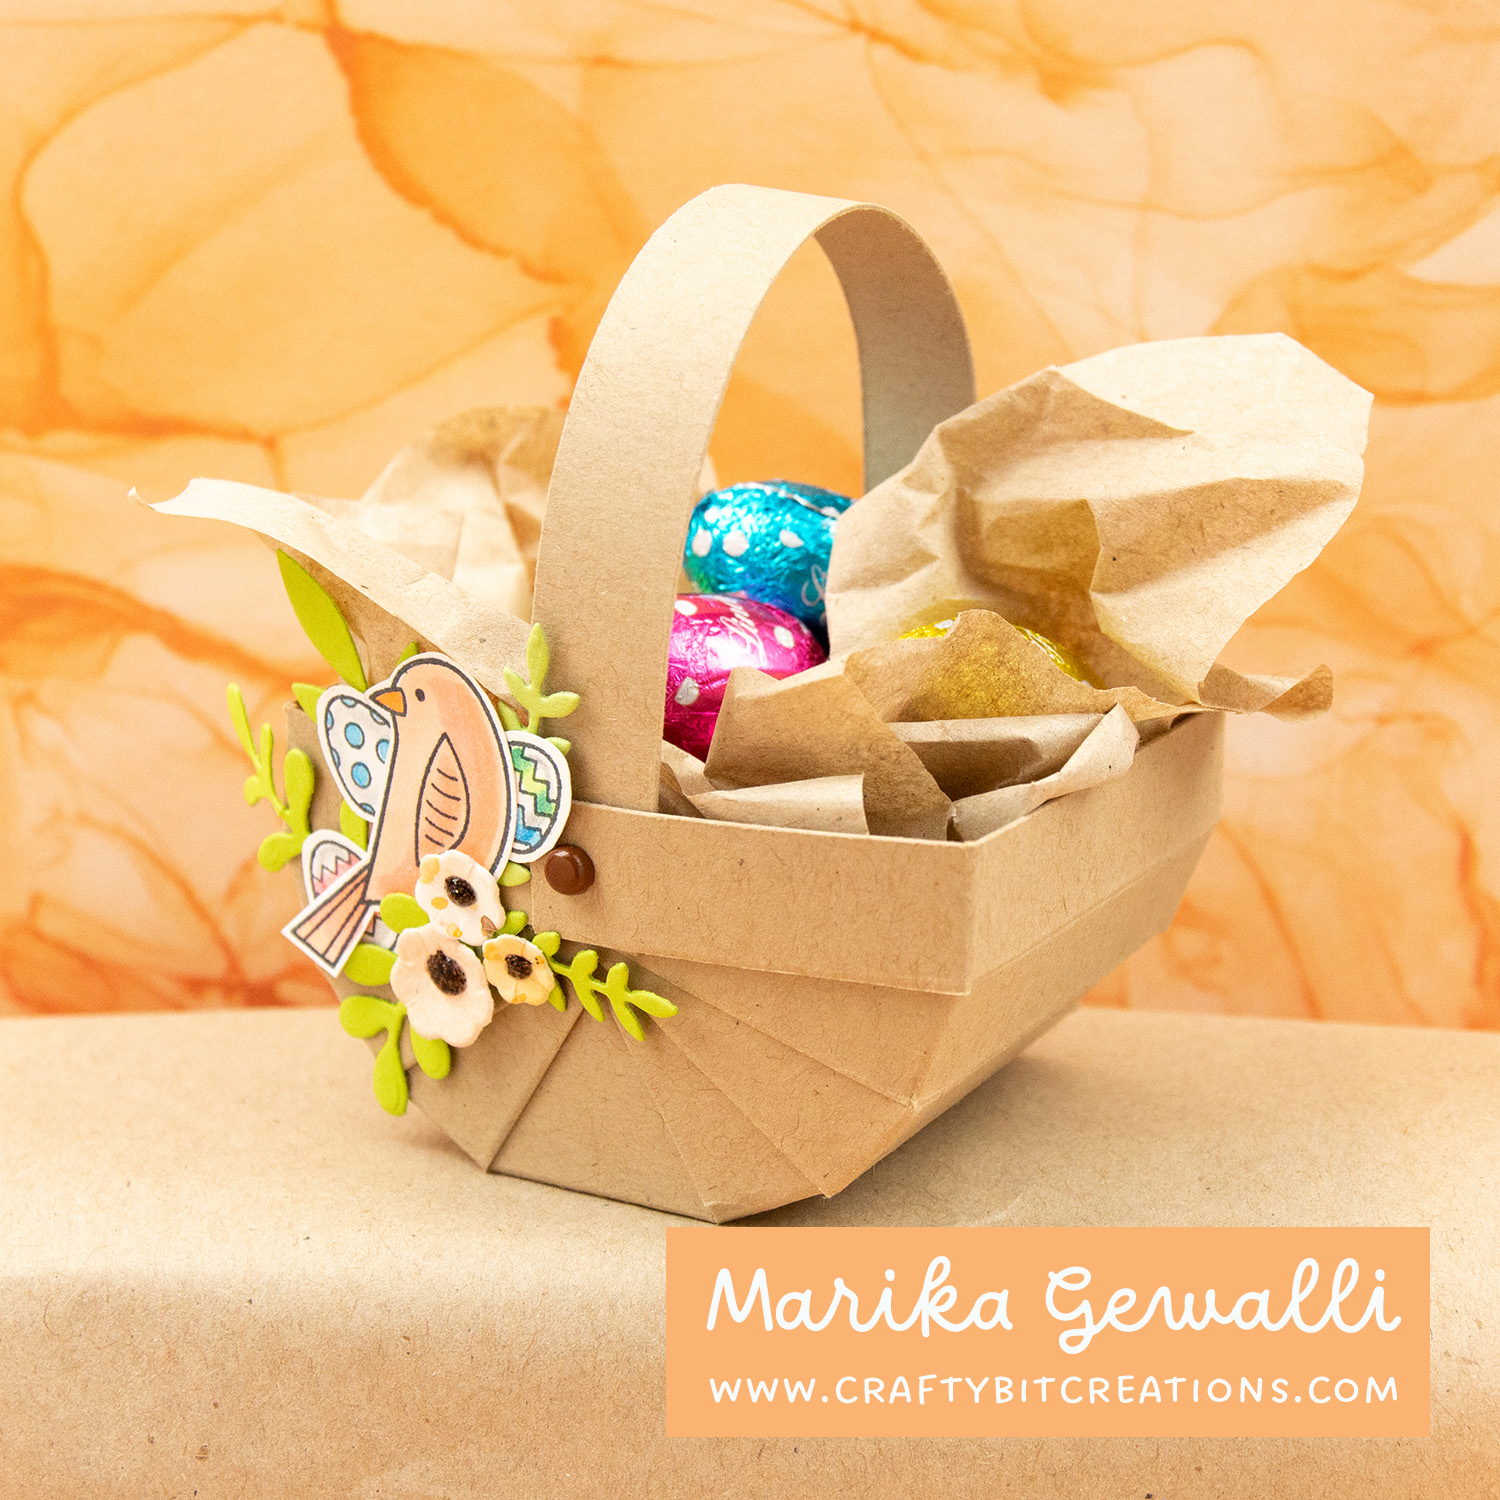
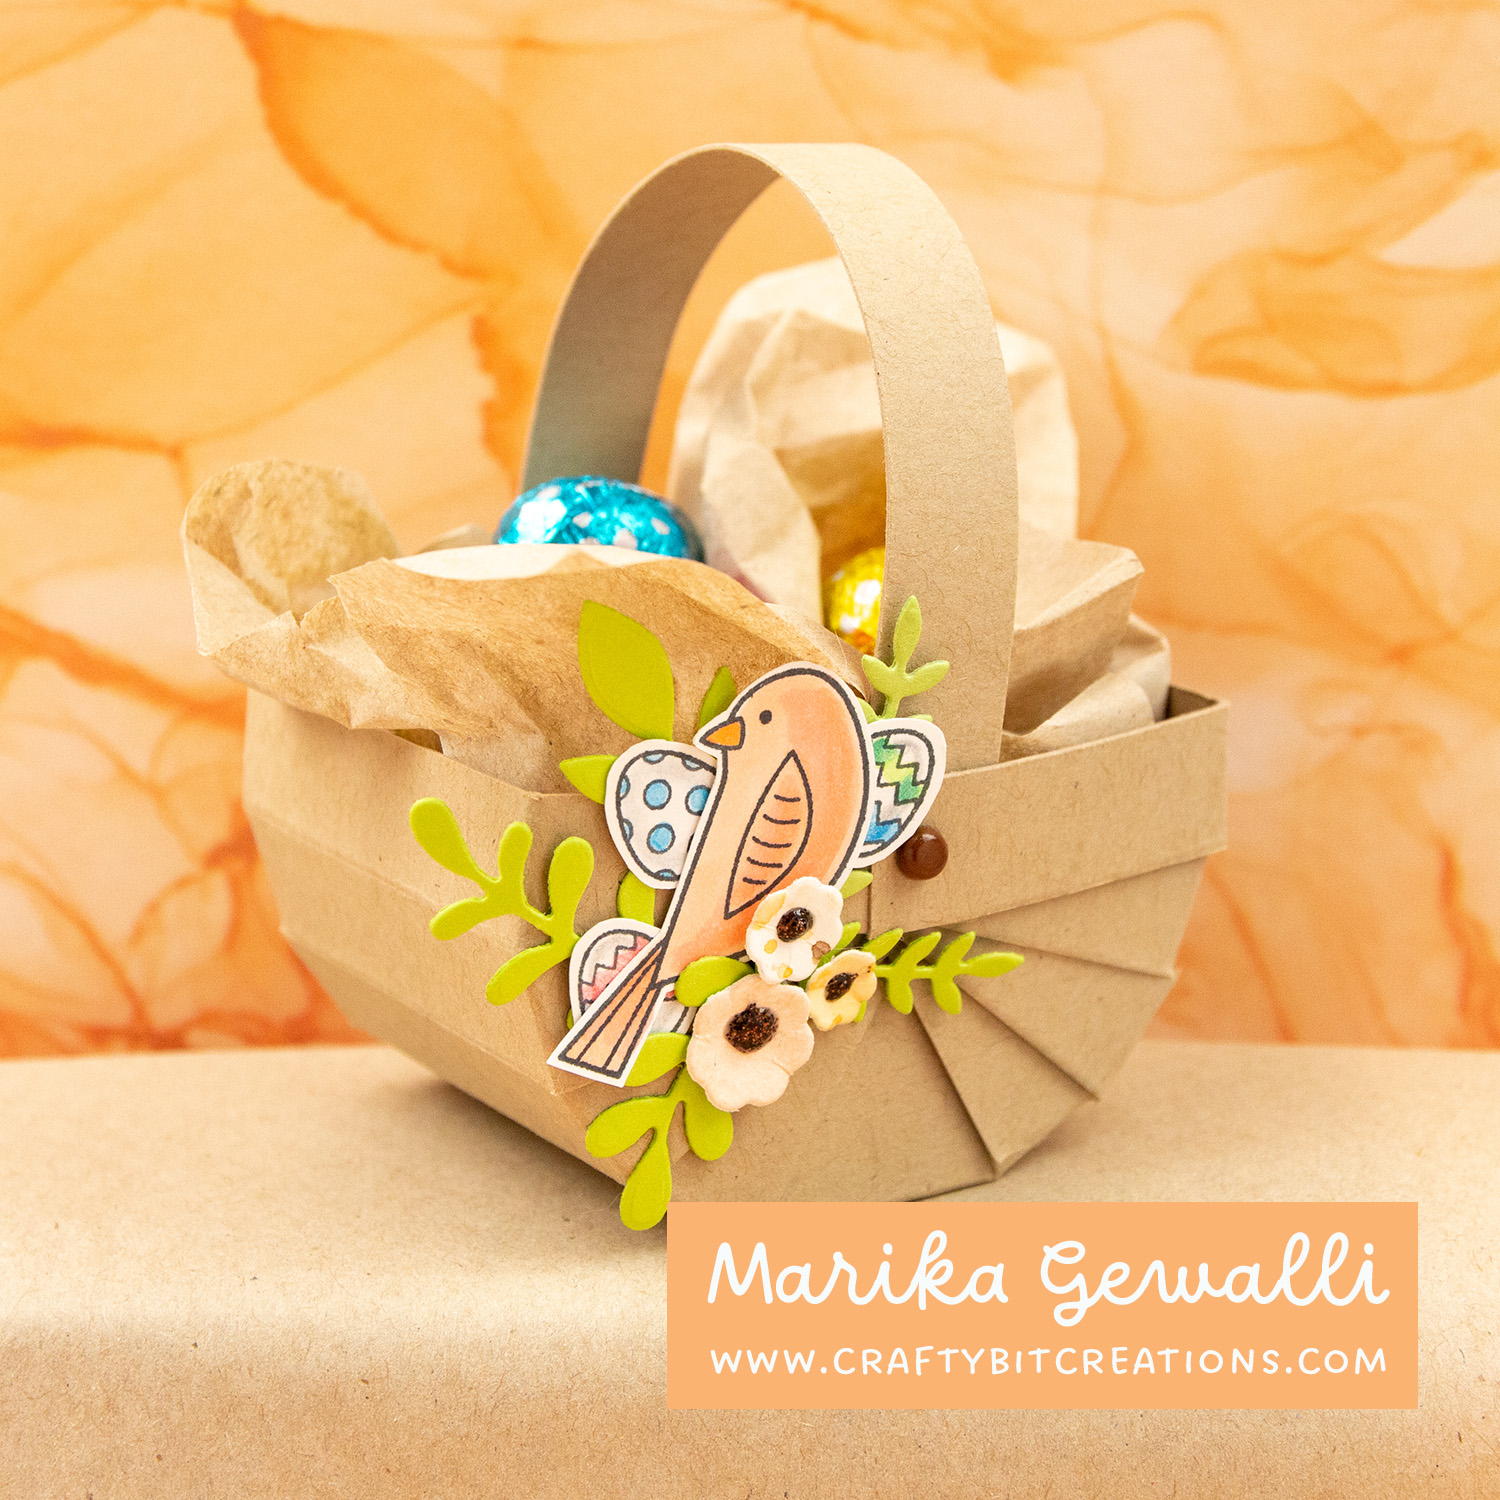
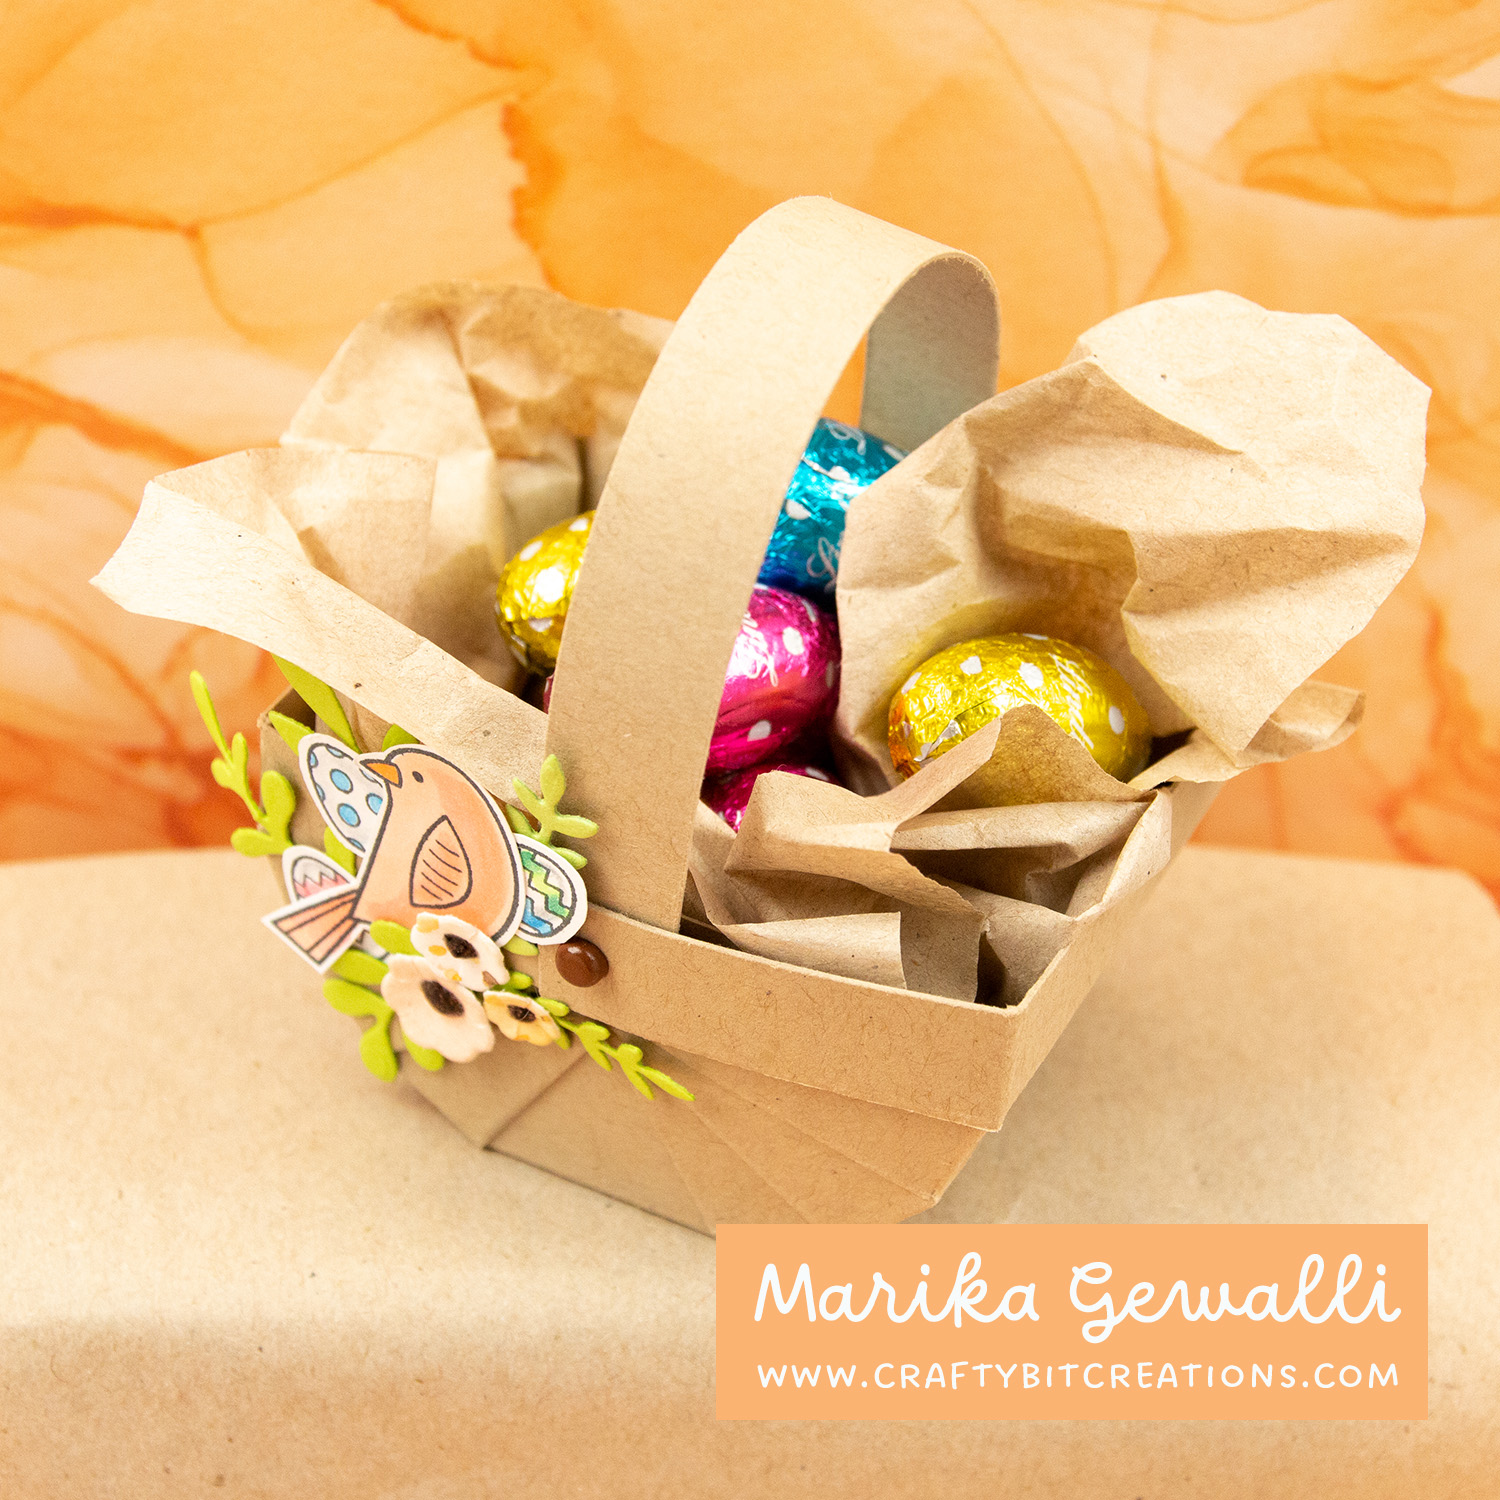
As easter is coming closer and closer, I have another easter project for you. This mini easter basket is super simple to make and perfect as a little easter table gift, or something to make for a child. I have filled mine with Lindt mini chocolate eggs, but as long as it is small you can fill it with anything. It even can hold a regular egg.
What you need to make this is half a sheet of cardstock. Cut it at 5″. The 5″ piece should be cut to 5 1/4″ and the 1/2″ piece should be cut to 6″. For assemble instructions see the video below and the schema.
When possible affiliate links are used, this means that I receive a small commission when products are purchased through the links (at no extra cost to you) I use the money to support my blog and youtube channel. If you like my projects and tutorial please consider supporting me by clicking through these links when you shop. Thanks!
Supplies
Spring Gnomes: MFTSSS Birds of a Feather Die-namics: MFTSSS MFT Fab Foliage Die-namics: MFTSSS MFT Kraft Cardstock: MFT MFT On-Point Precision Glue Pen: MFT Large Score Board: SSSAMZSBC Fiskars Trimmer : SSSAMZ
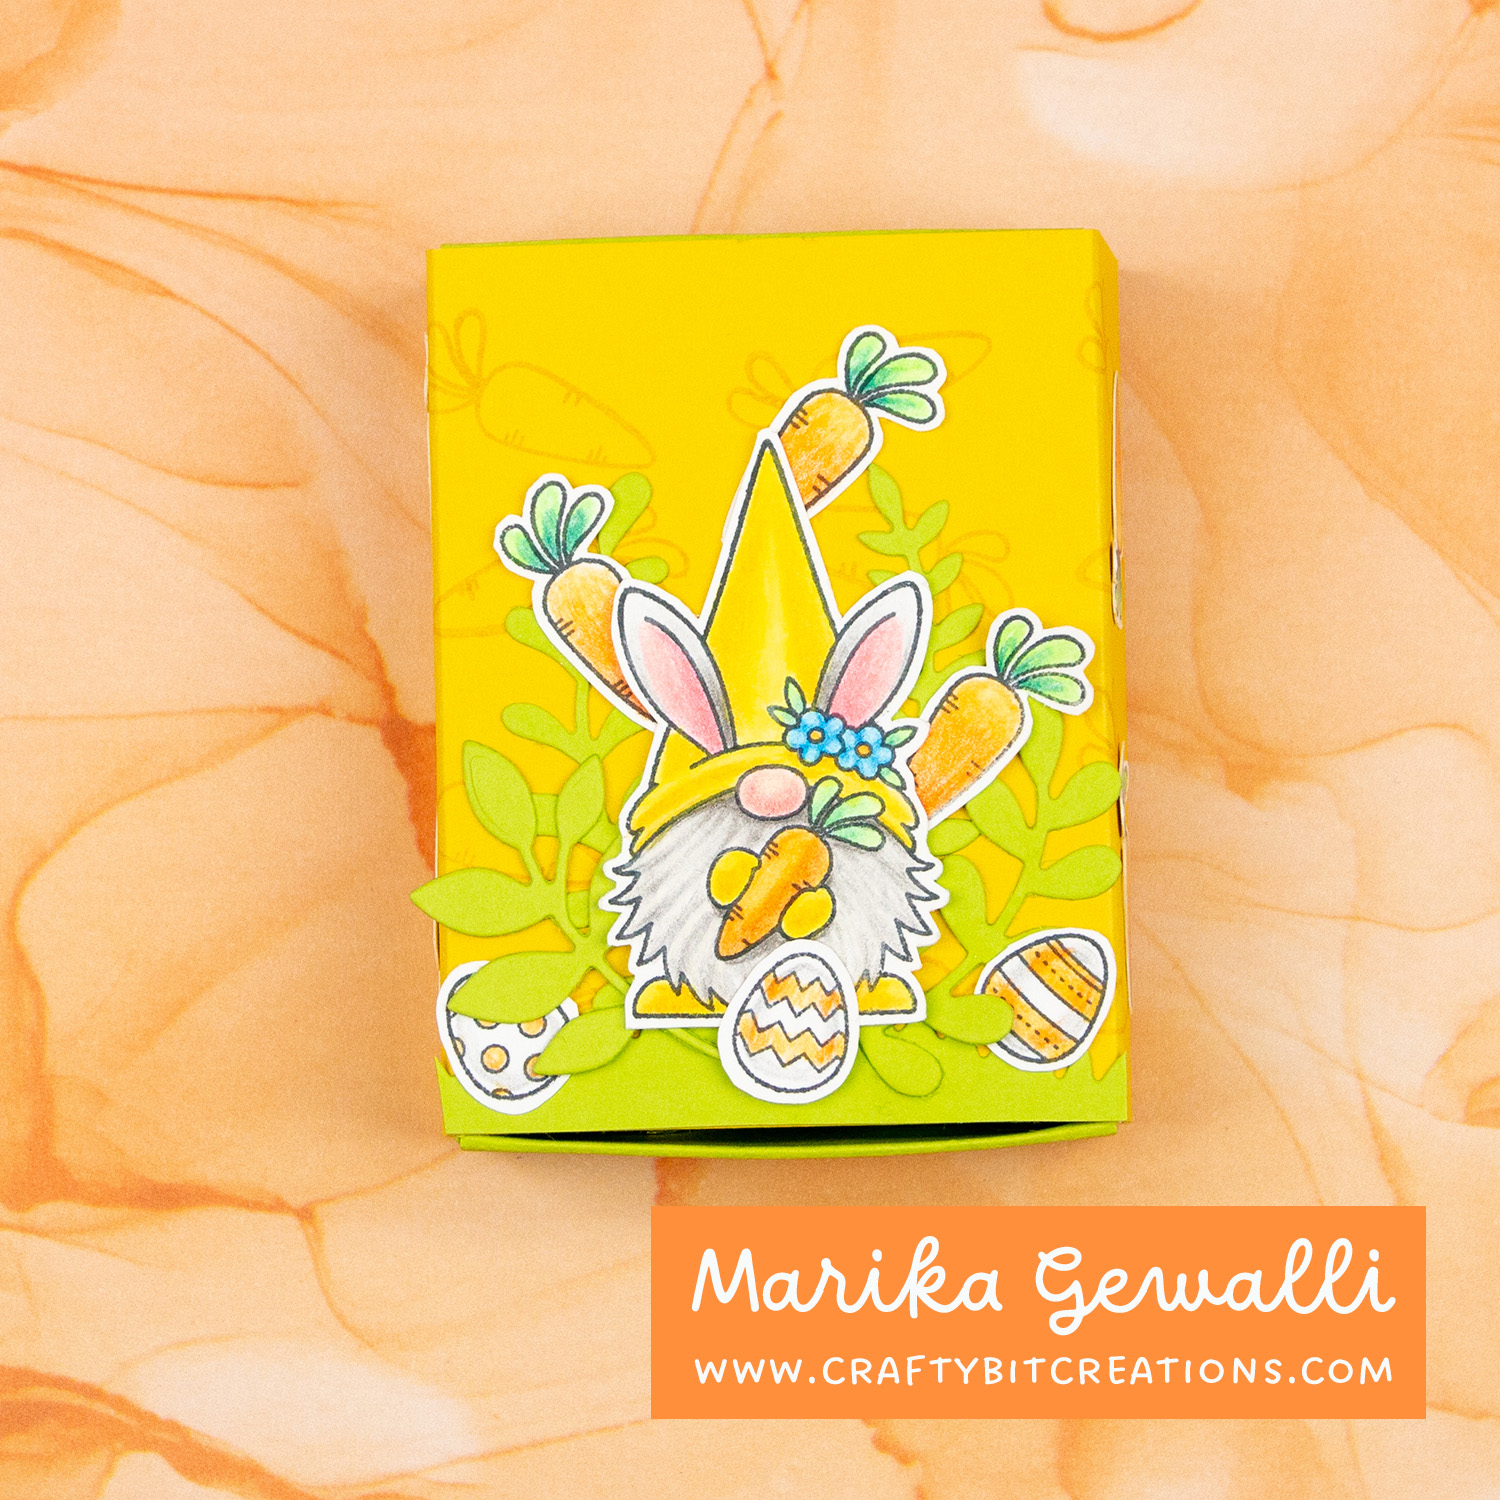
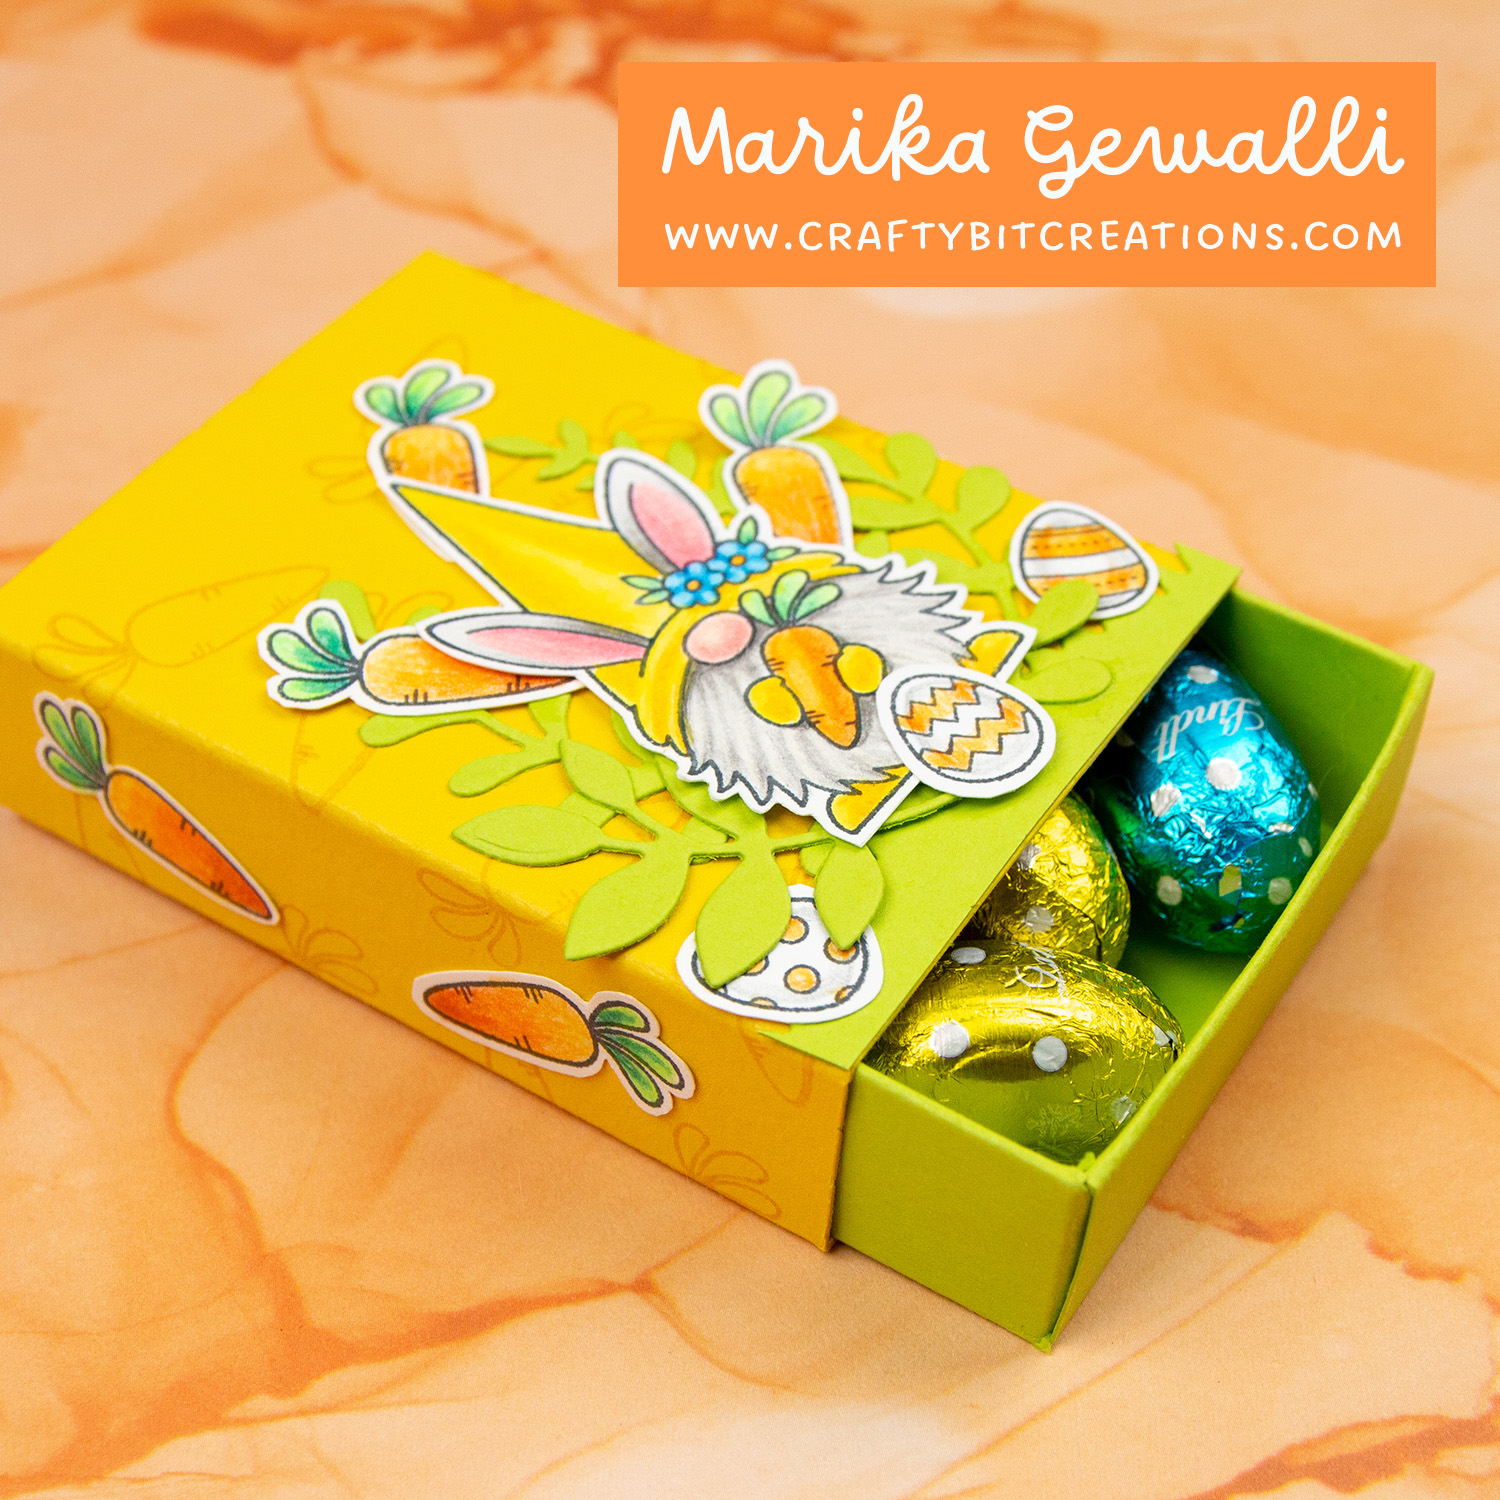
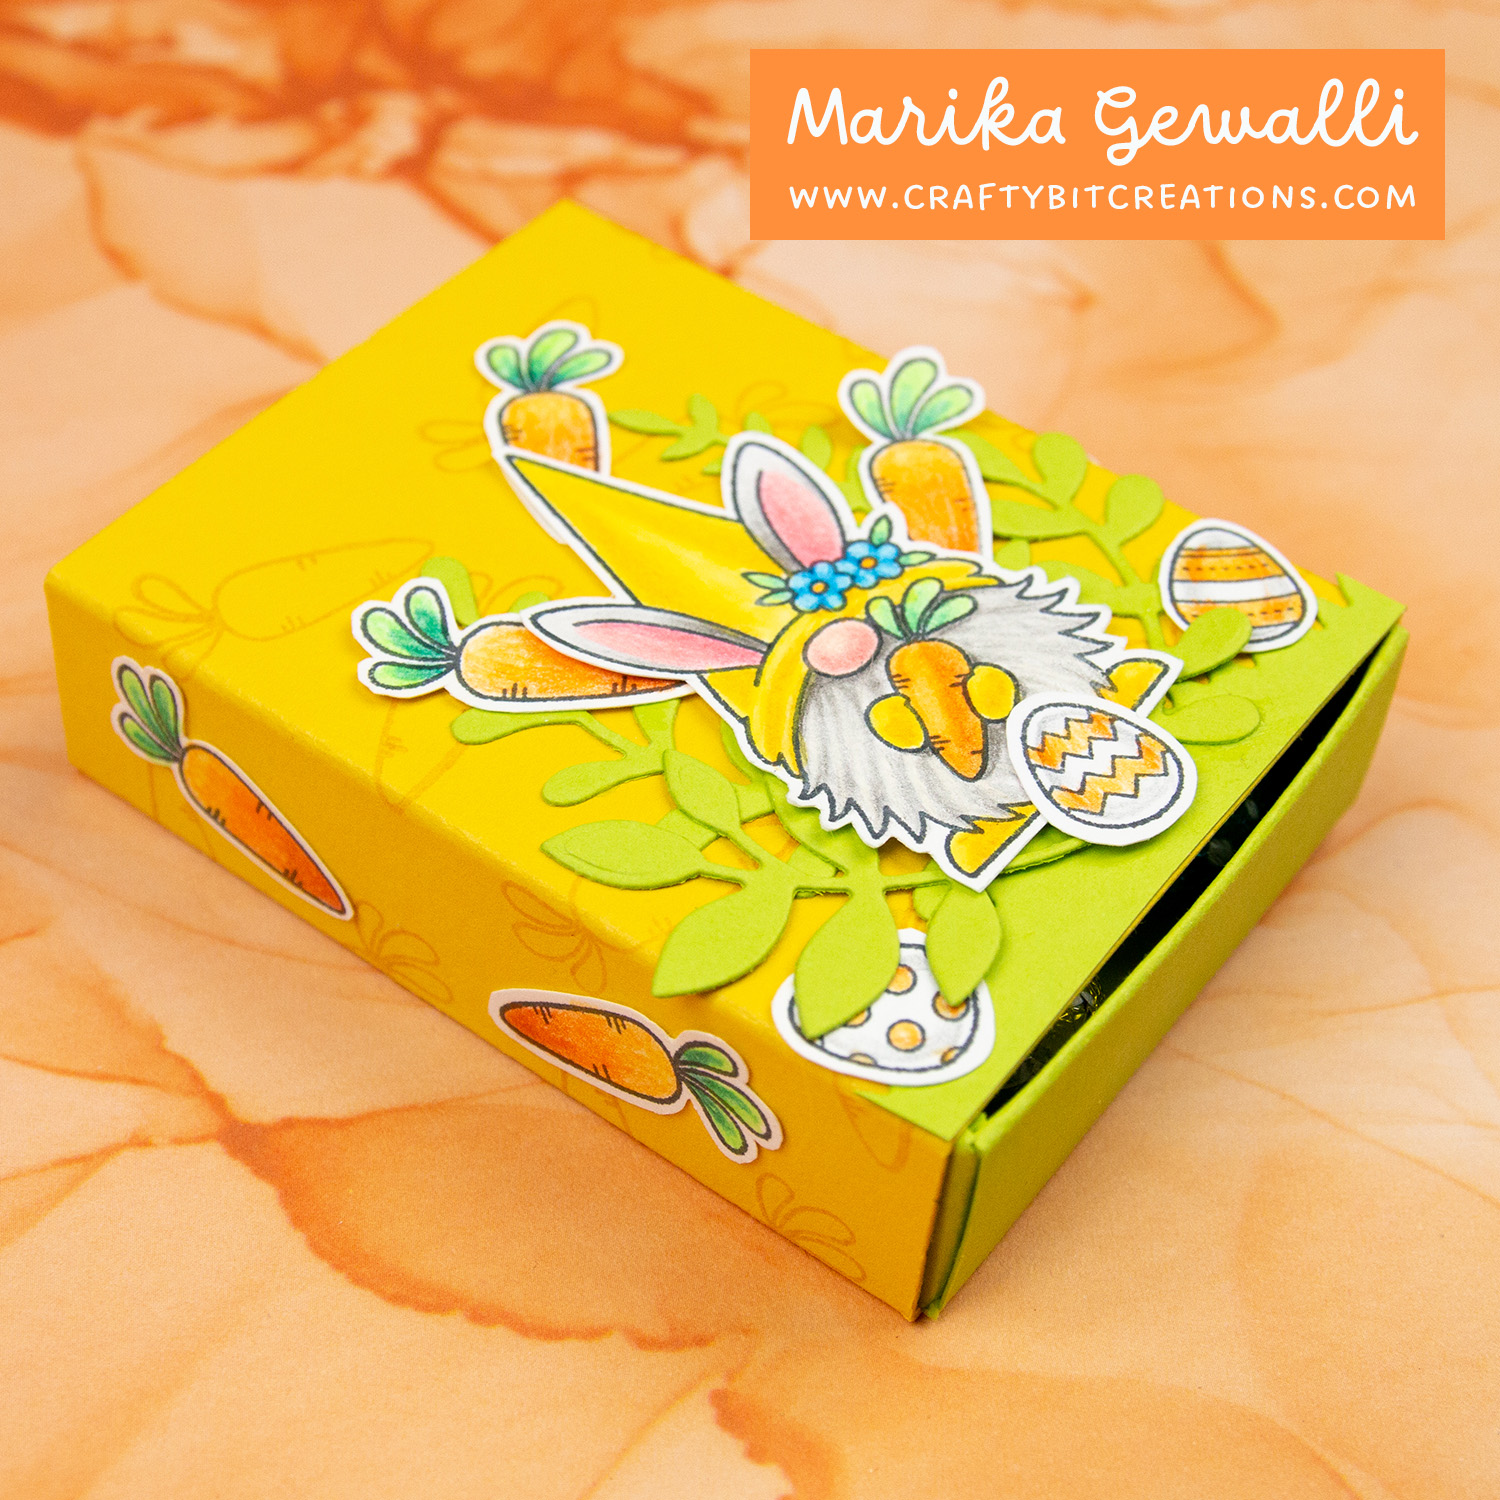
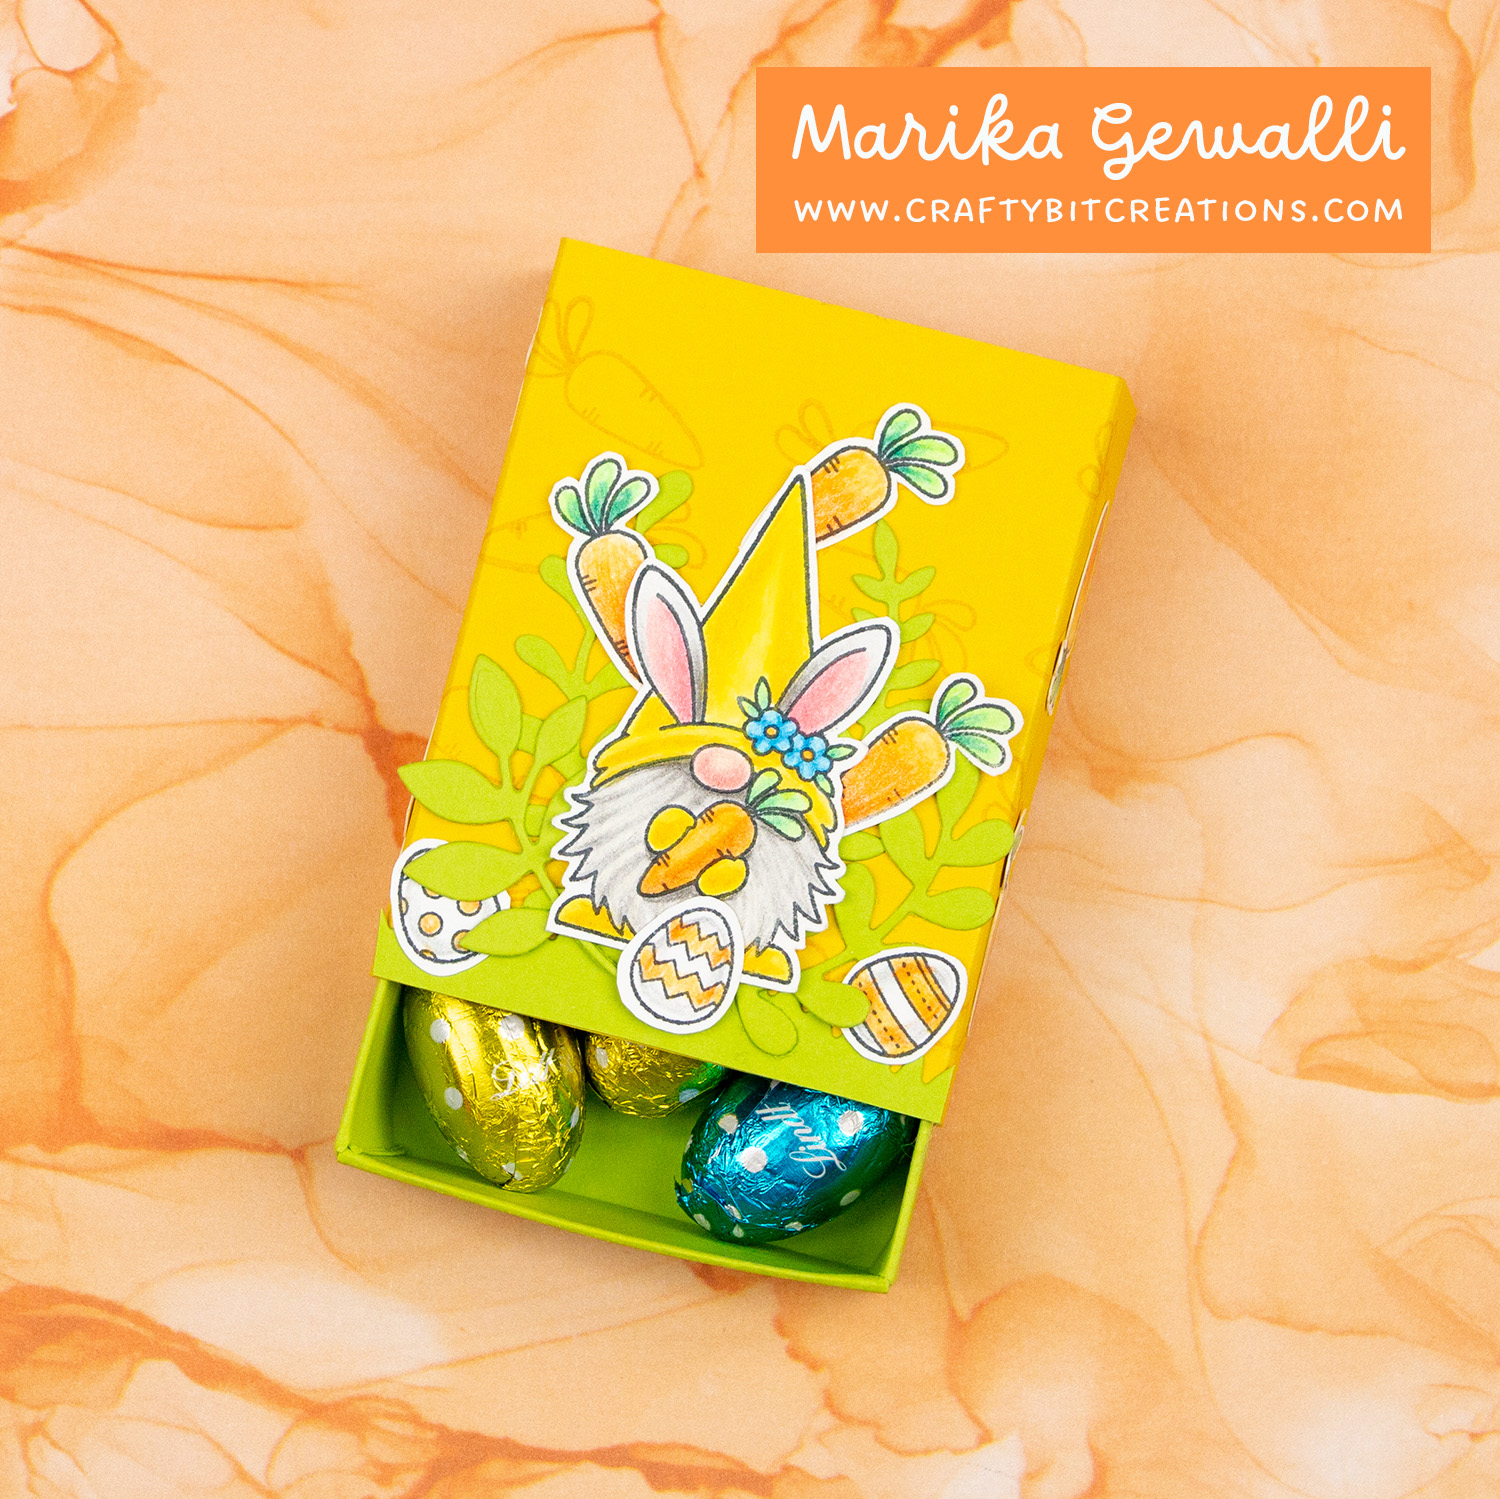
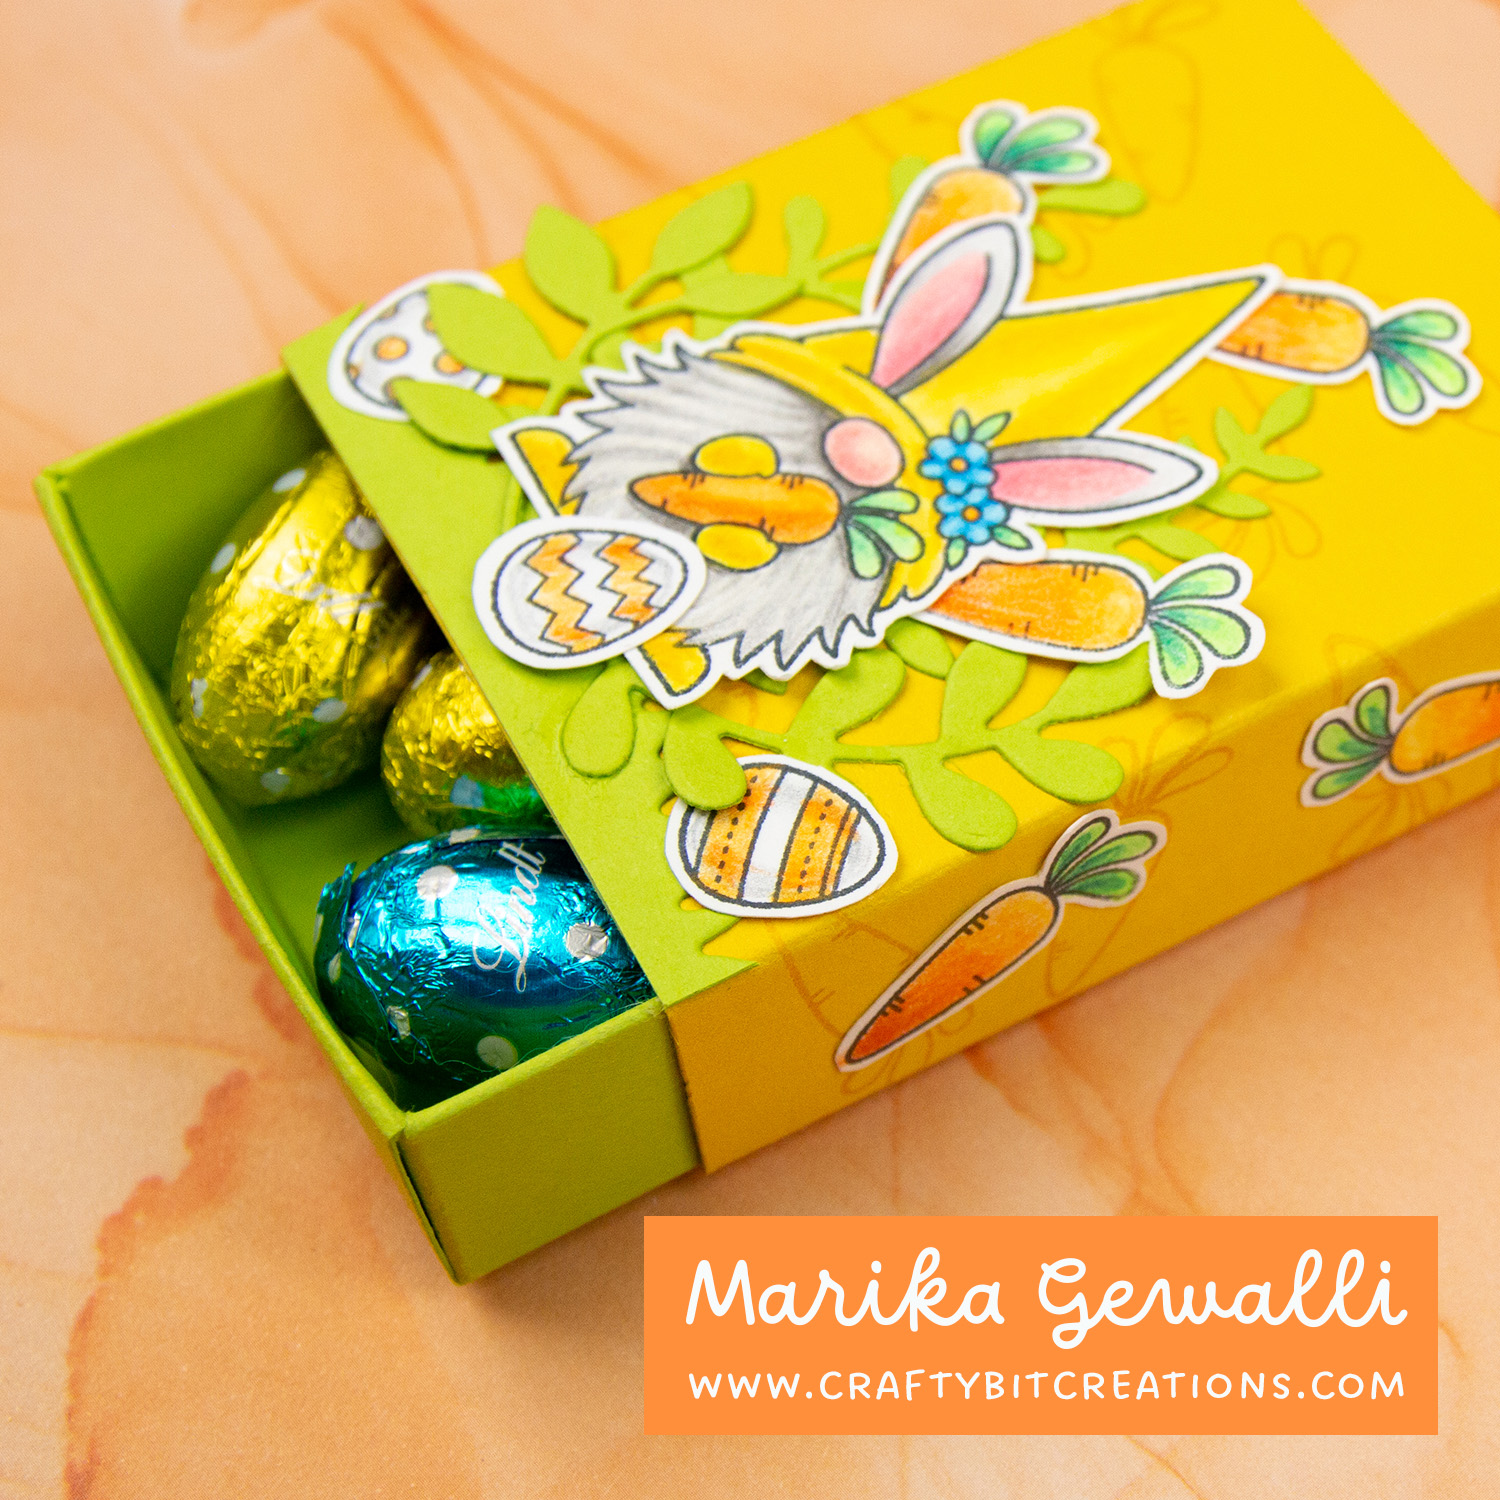
With easter coming closer and closer I thought I would show you how to make a mini easter matchbox. This matchbox is sized to fit 8 Lindth Chocolate Mini Eggs, and could be perfect for small table gifts on your easter lunch, or just to give as a little easter gift.
I started by coloring up a bunch of images from the Spring Gnome stamp set with my polychromos colored pencils. I think coloring is very soothing so I sat in front of the tv coloring away. I then cut the images out. For the box I use Lemon Drop Cardstock for the outer part and Limelight Cardstock for the drawer. To give the outside a little more interest I used the matching Lemon Drop Ink and stamped the cute little carrot all over it. After putting the box together I decorated it with my colored images and some diecuts from the Fab Foliage Die-namics.
You can find the templates, cutfiles and pdf for this box HERE.
Polychromos Colored Pencils
Cold Grey I, II, III, IV, VI, Light Flesh, Dark Flesh, Sanguine, Light Phtalo Blue, Light Green, Cobalt Blue-Greenish, Cinnamon, Light Chrome Yellow, Black, Terracotta, Light Yellow Ochre, Rose Carmine, Dark Chrome Yellow, Hookers Green, Ivory, Orange Glaze
When possible affiliate links are used, this means that I receive a small commission when products are purchased through the links (at no extra cost to you) I use the money to support my blog and youtube channel. If you like my projects and tutorial please consider supporting me by clicking through these links when you shop. Thanks!
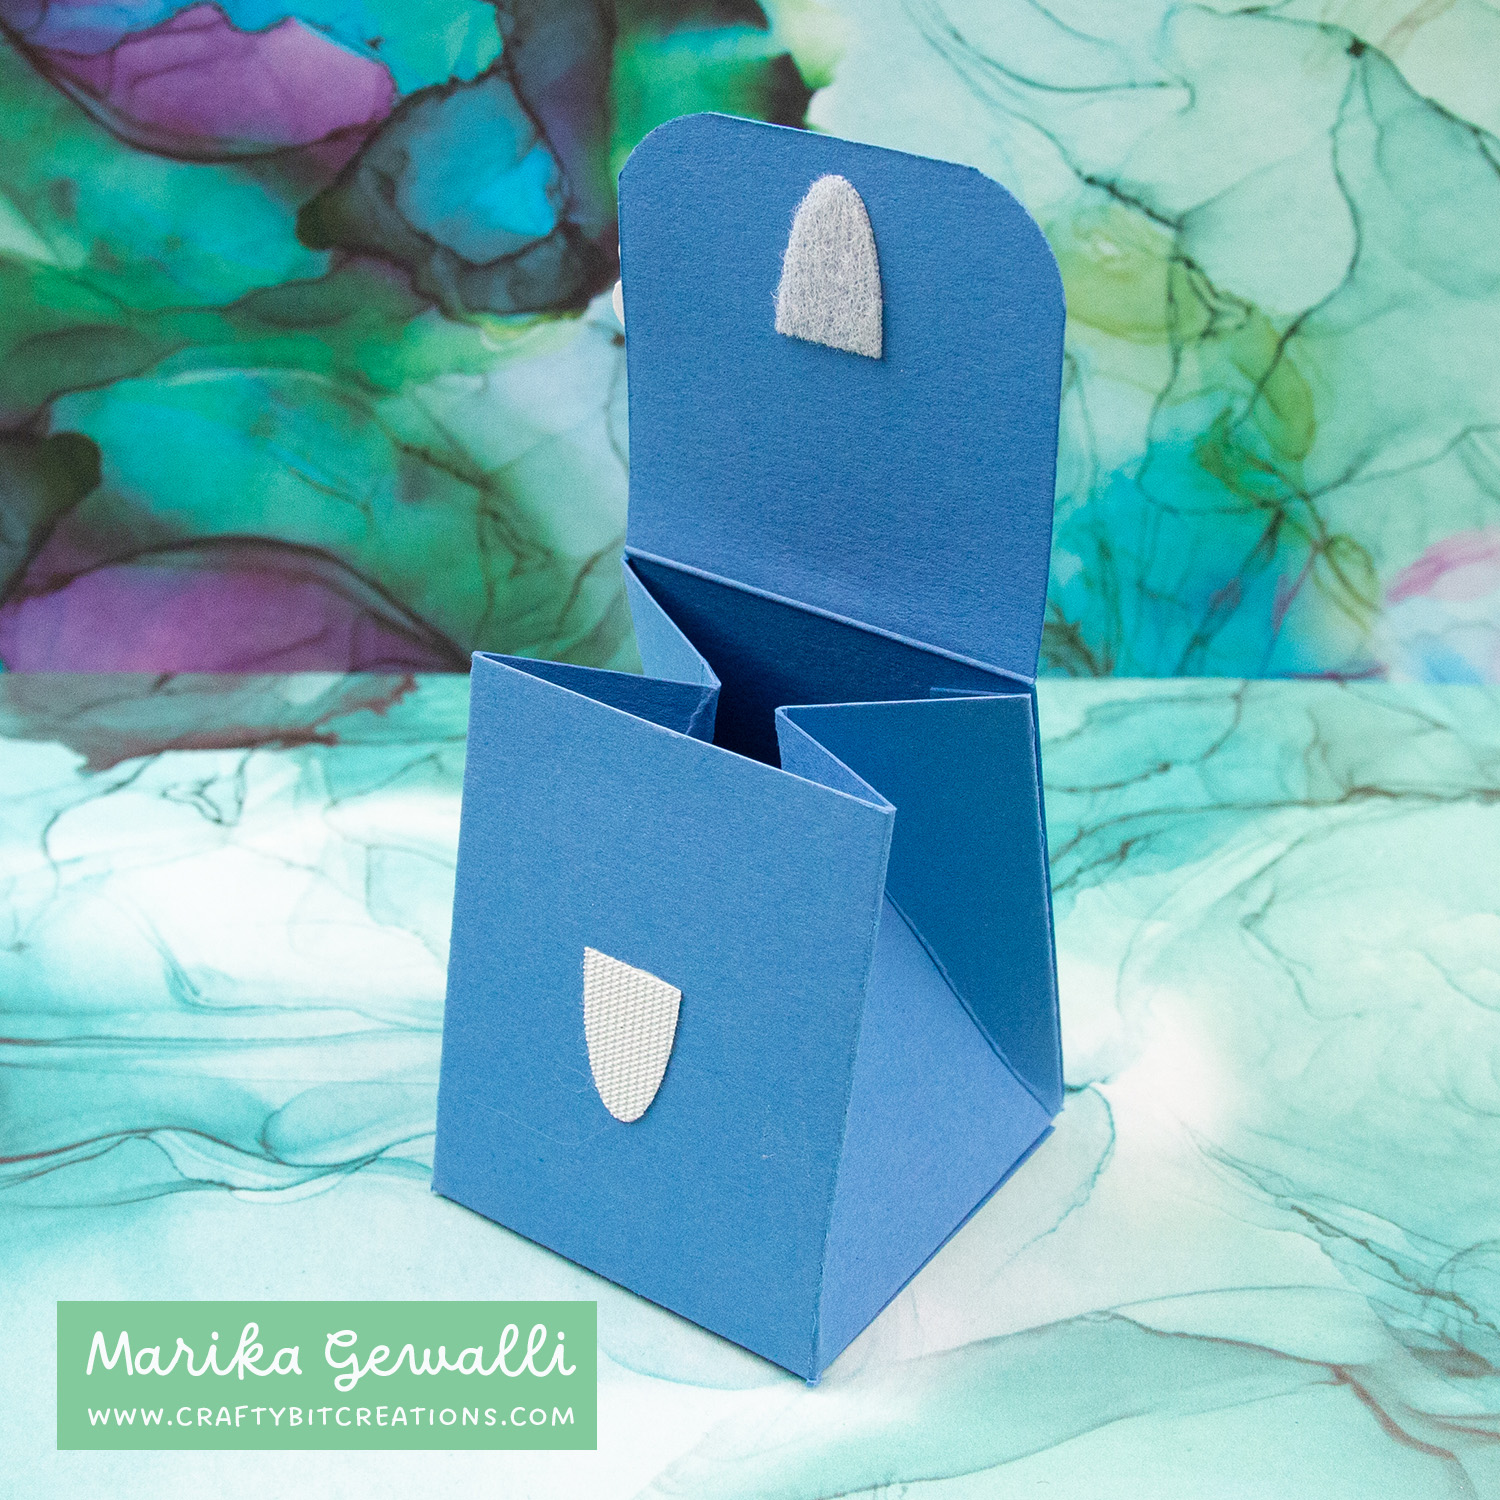
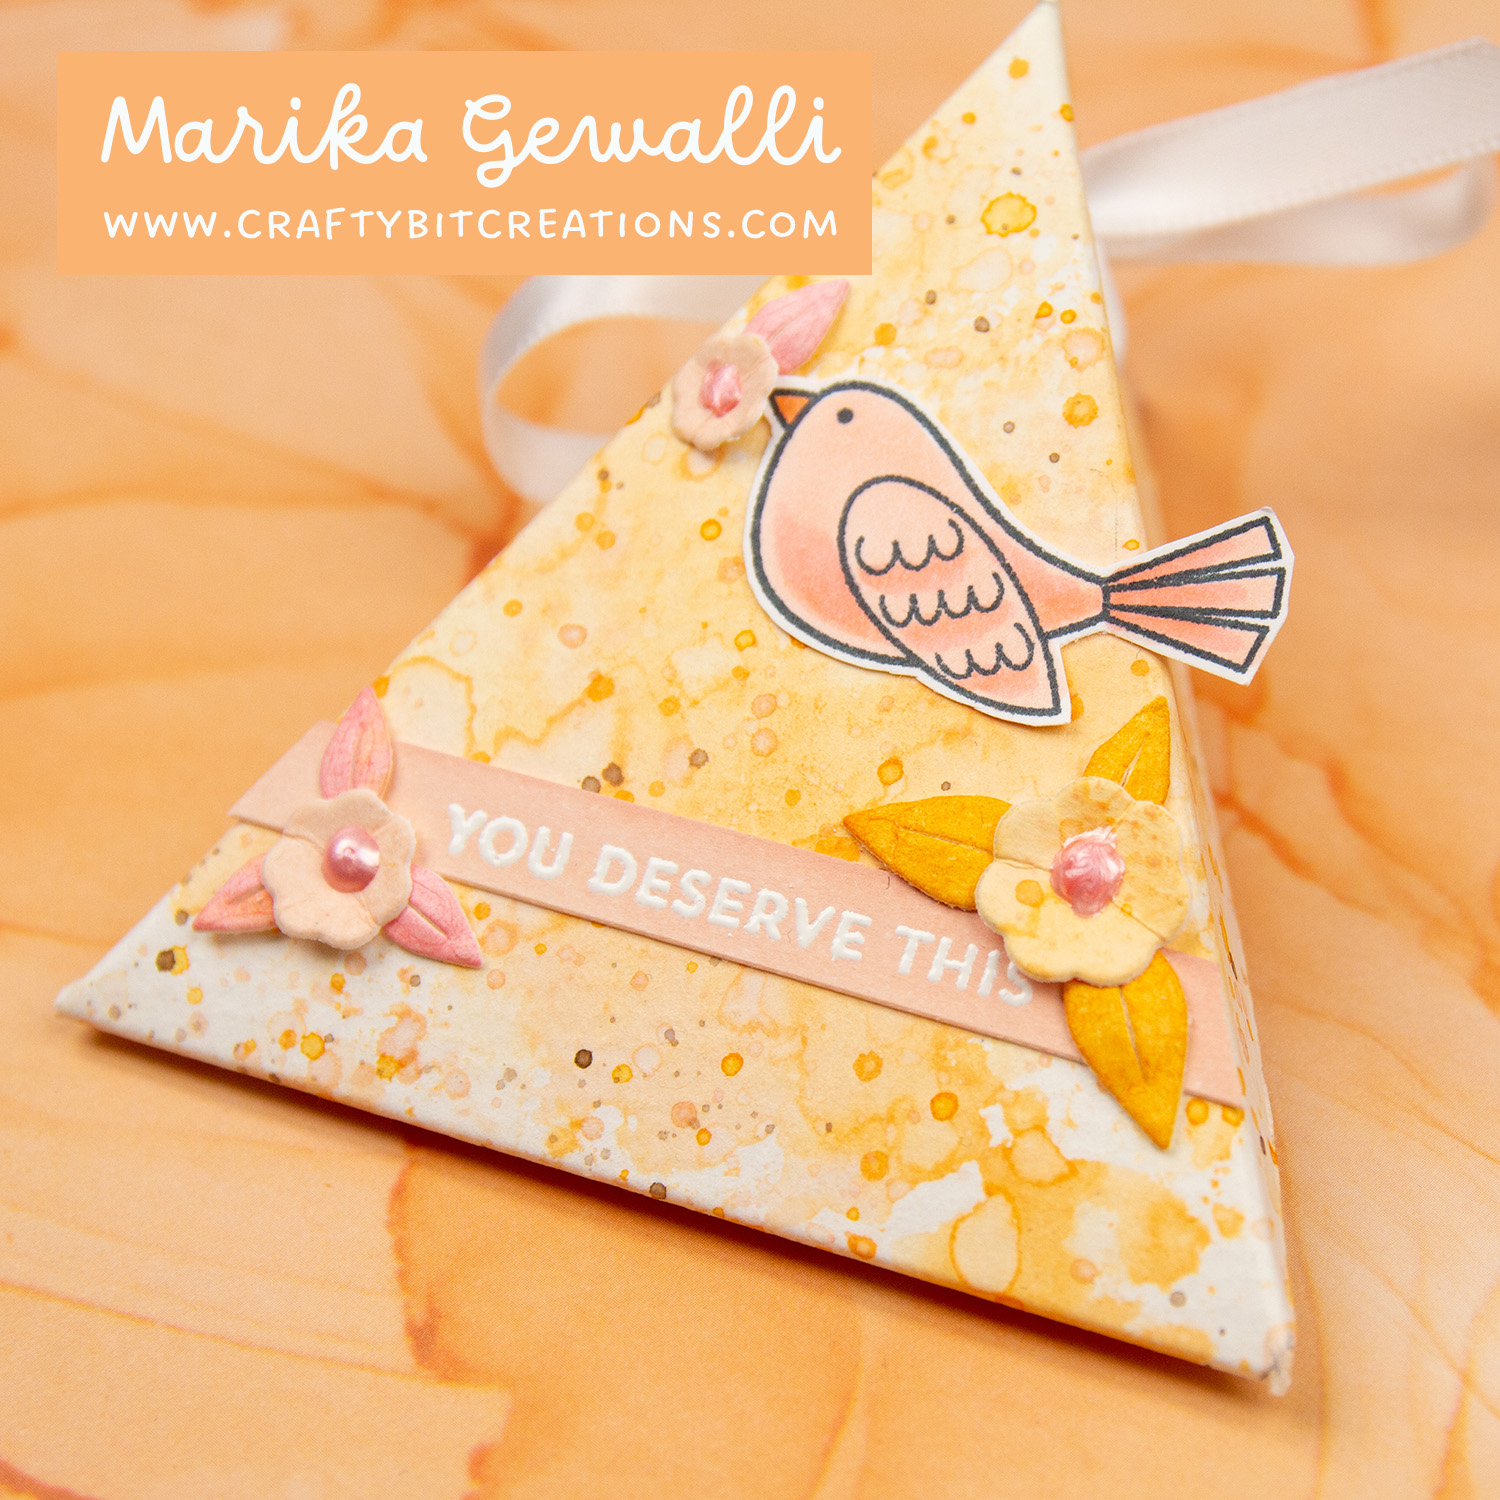
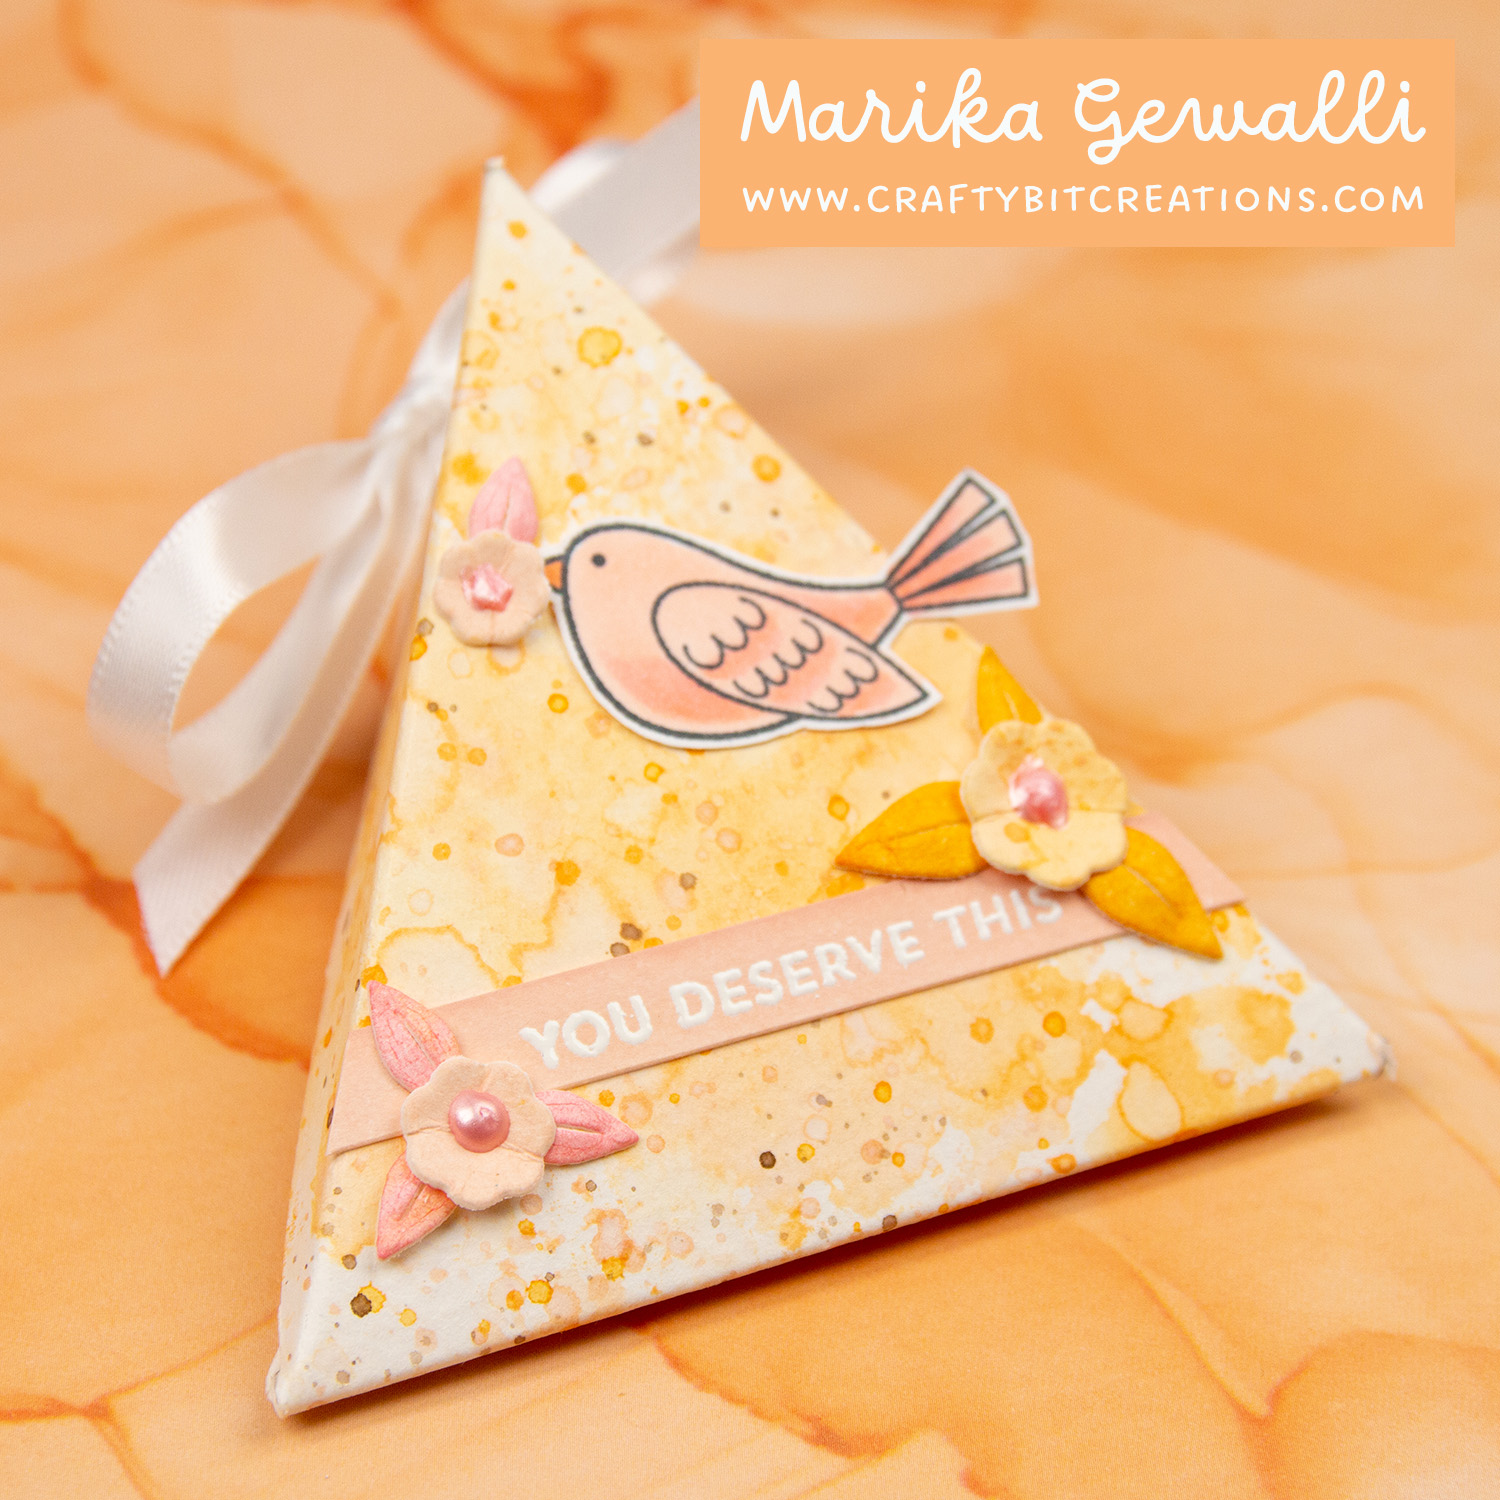
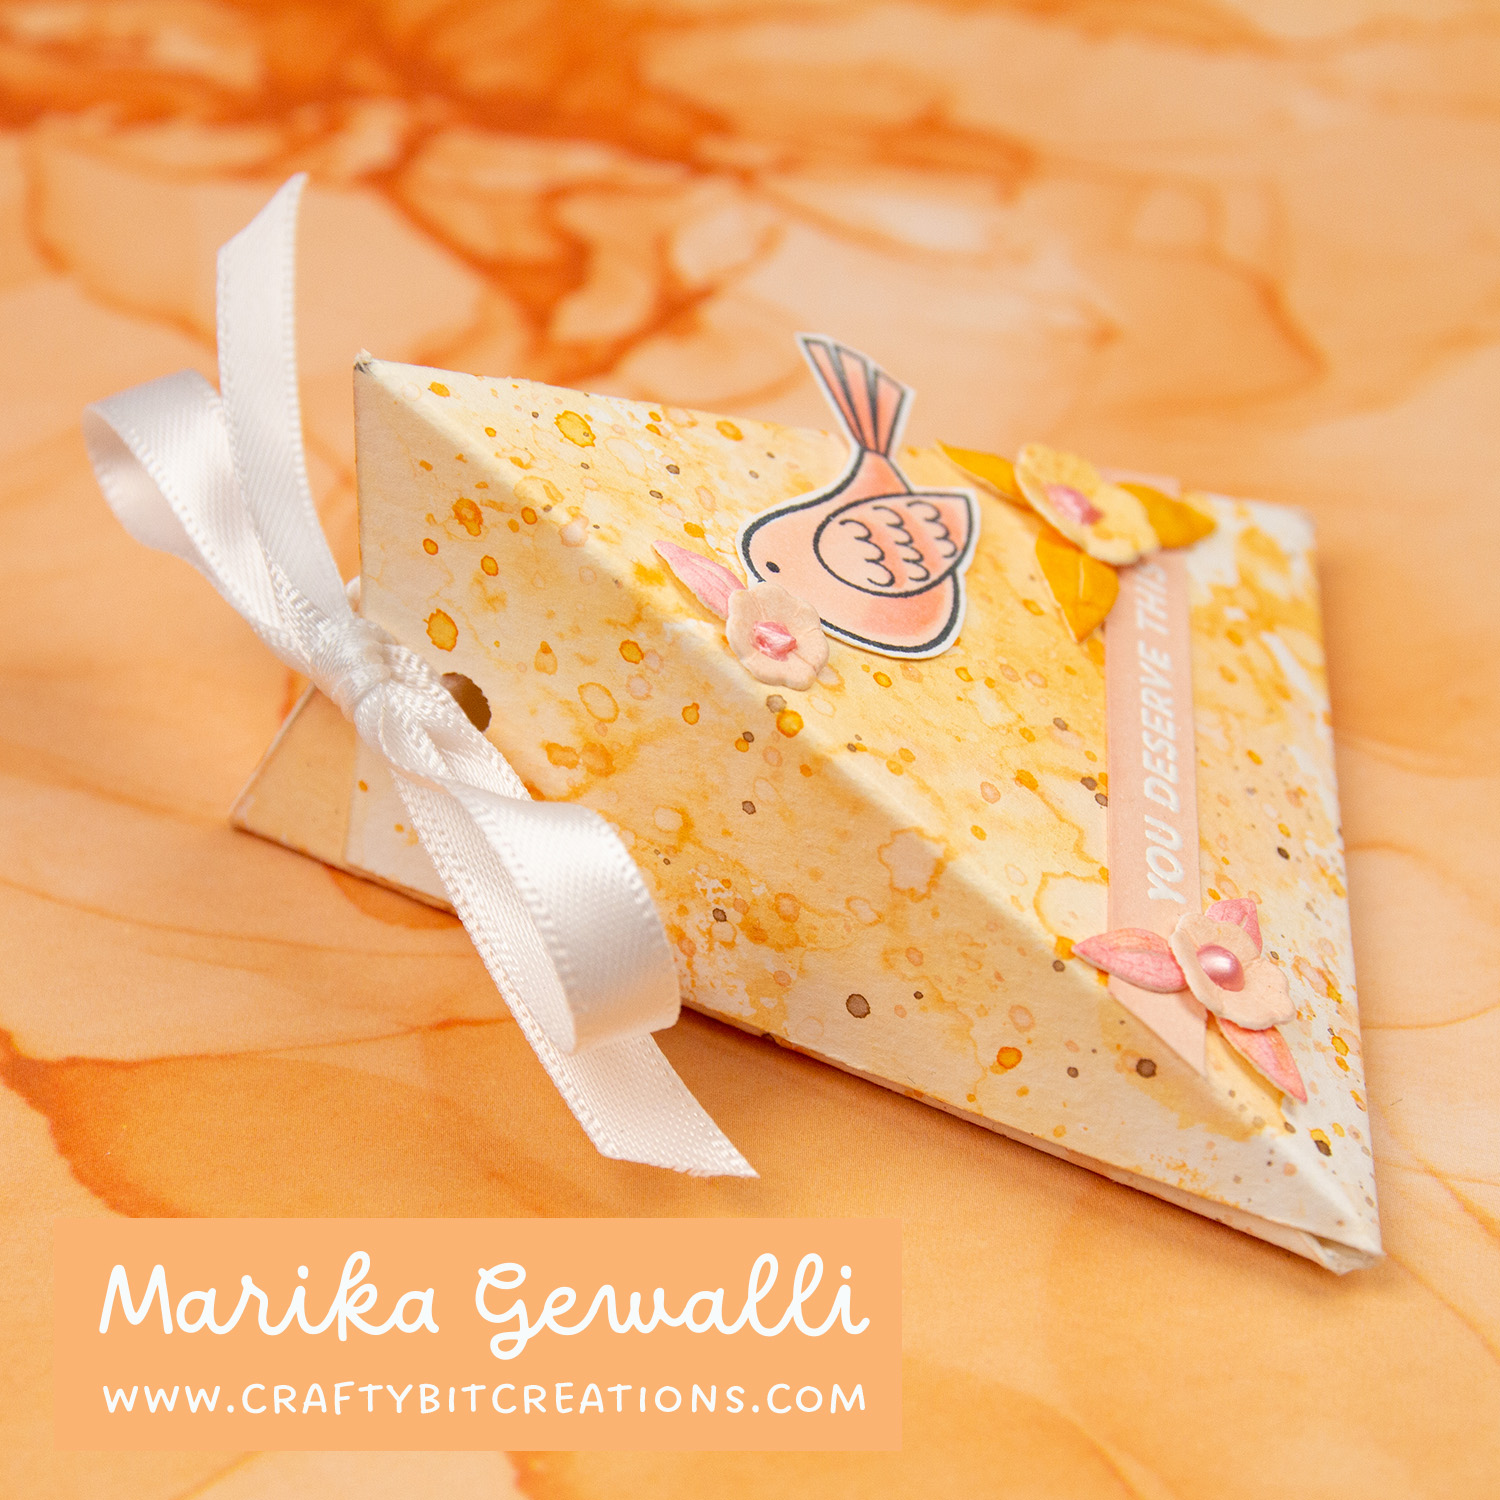
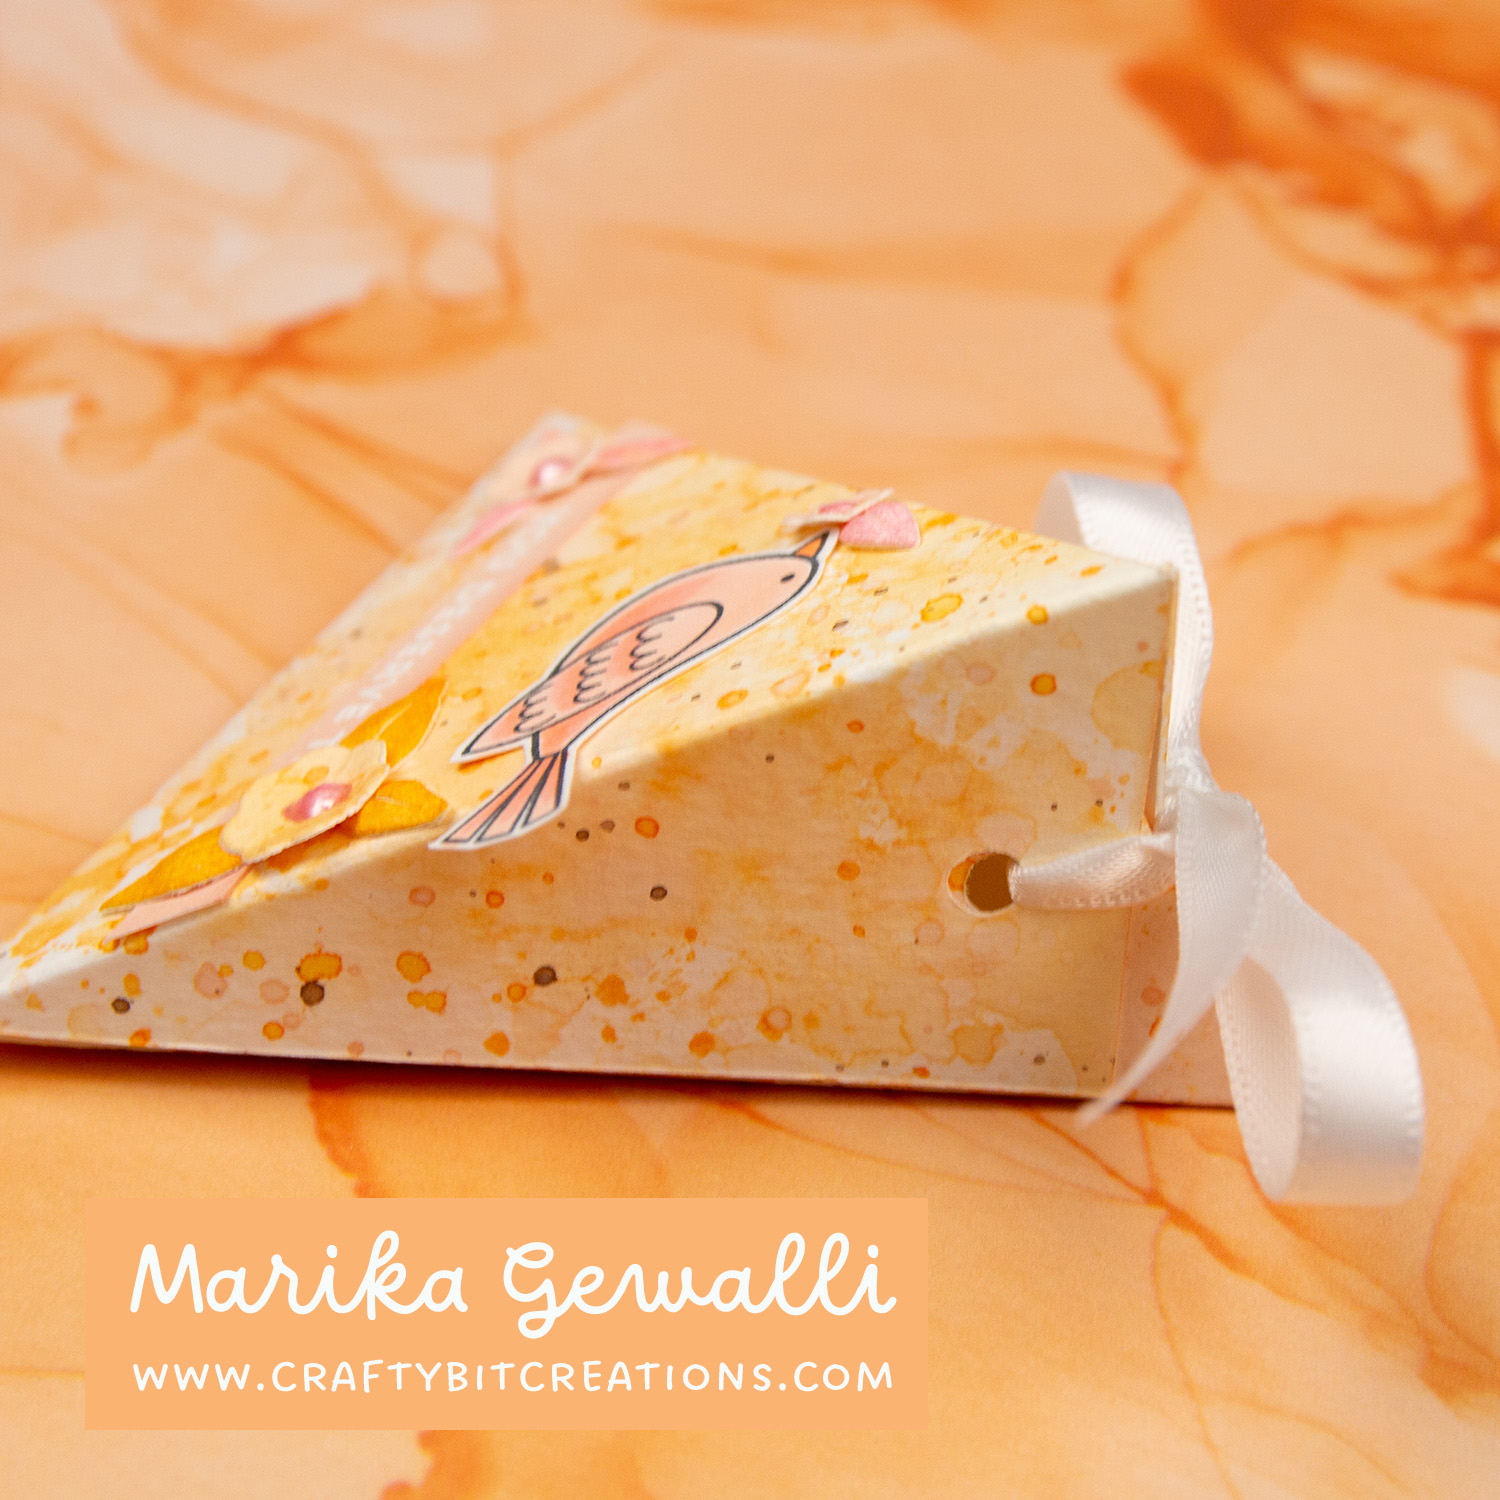
I love cute little boxes, and this Mini Triangle Box is just up my alley! I wanted to make a box that would use my 6″x6″ paper, however I also wanted to use the fun color scheme that I’ve been using all trough this week. And after deep diving into my pile of pattern papers I just couldn’t find one that was perfect for this project.
Instead of using something that wasn’t perfect, I made my own. I used Montval 100% Cotton watercolor cardstock, 200gsm. And created the background with a real fun smooching technique, which you can see in the video below. And below you can also find a schema and you can find it as a PDF HERE, and if you want cutting files you can find them HERE. If you want to know what papers and products to use for smooching you can find a video HERE that explains it.
When possible affiliate links are used, this means that I receive a small commission when products are purchased through the links (at no extra cost to you) I use the money to support my blog and youtube channel. If you like my projects and tutorial please consider supporting me by clicking through these links when you shop. Thanks!
Supplies
Birds of a Feather Die-namics: MFTSSS Beautiful Branch Die-namics: MFTSSS Neenah 110 LB SMOOTH SOLAR WHITE s: SSS Distress Ink Tattered Rose: SSS Distress Ink Dried Marigold: SSSSBC Distress Ink Worn Lipstick: SSSSBC Distress Ink Spiced Marmalade: SSSSBC Dinstress Ink Ground Espresso: SSS Distress Oxide Ink Tattered Rose: SSSSBC Distress Oxide Dried Marigold: SSSSBC Brushes: SSSAMZSBC Mini Blending: SSSAMZSBC Gina K Designs Sheer Satin Fancy Ribbon White and Silver: SBC Tonic SHIMMERING ROSE Nuvo Crystal Drops: SSSAMZ Tim Holtz Heat It Craft Tool US: SSSAMZSBC Tim Holtz Heat It Craft Tool EU: SSSAMZ Tim Holtz Heat It Craft Tool UK: SSSAMZ
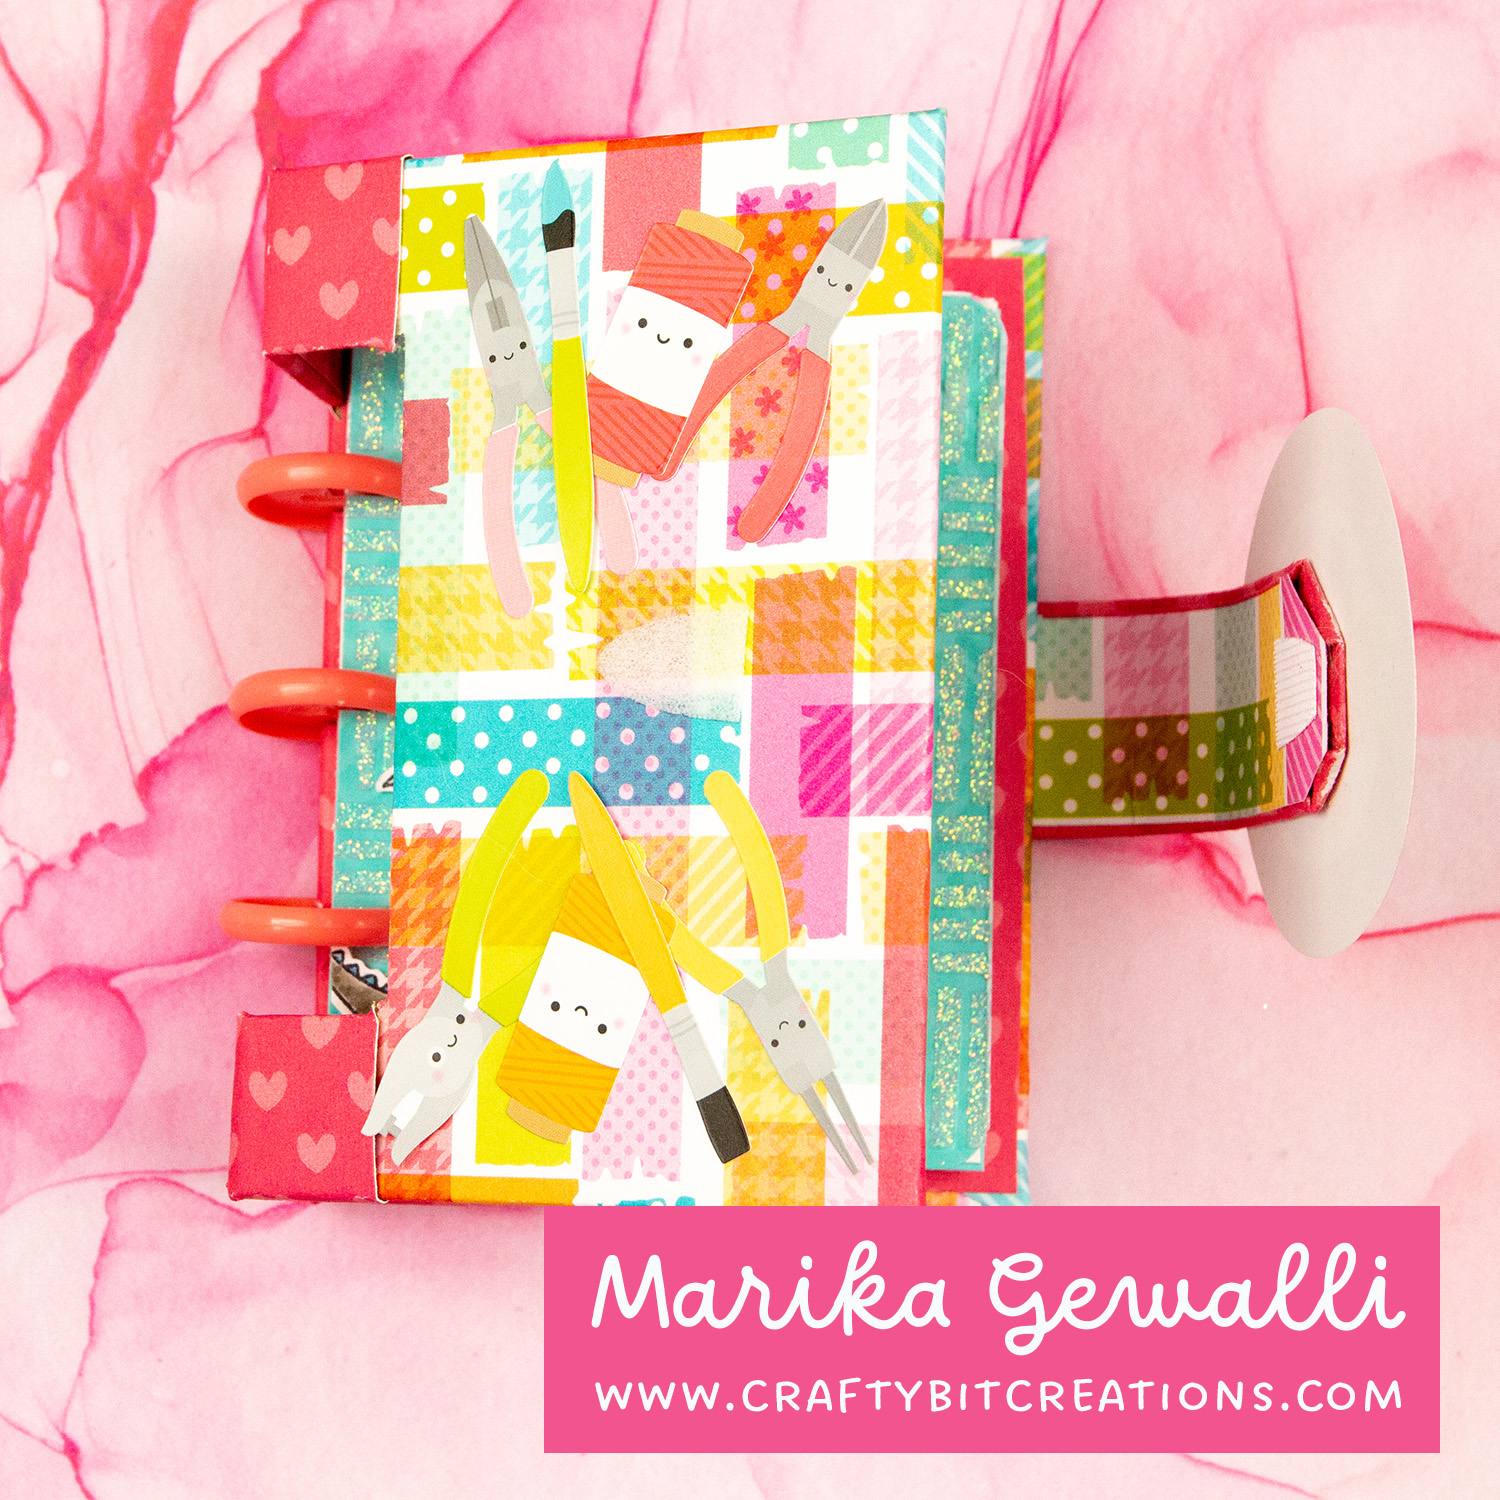
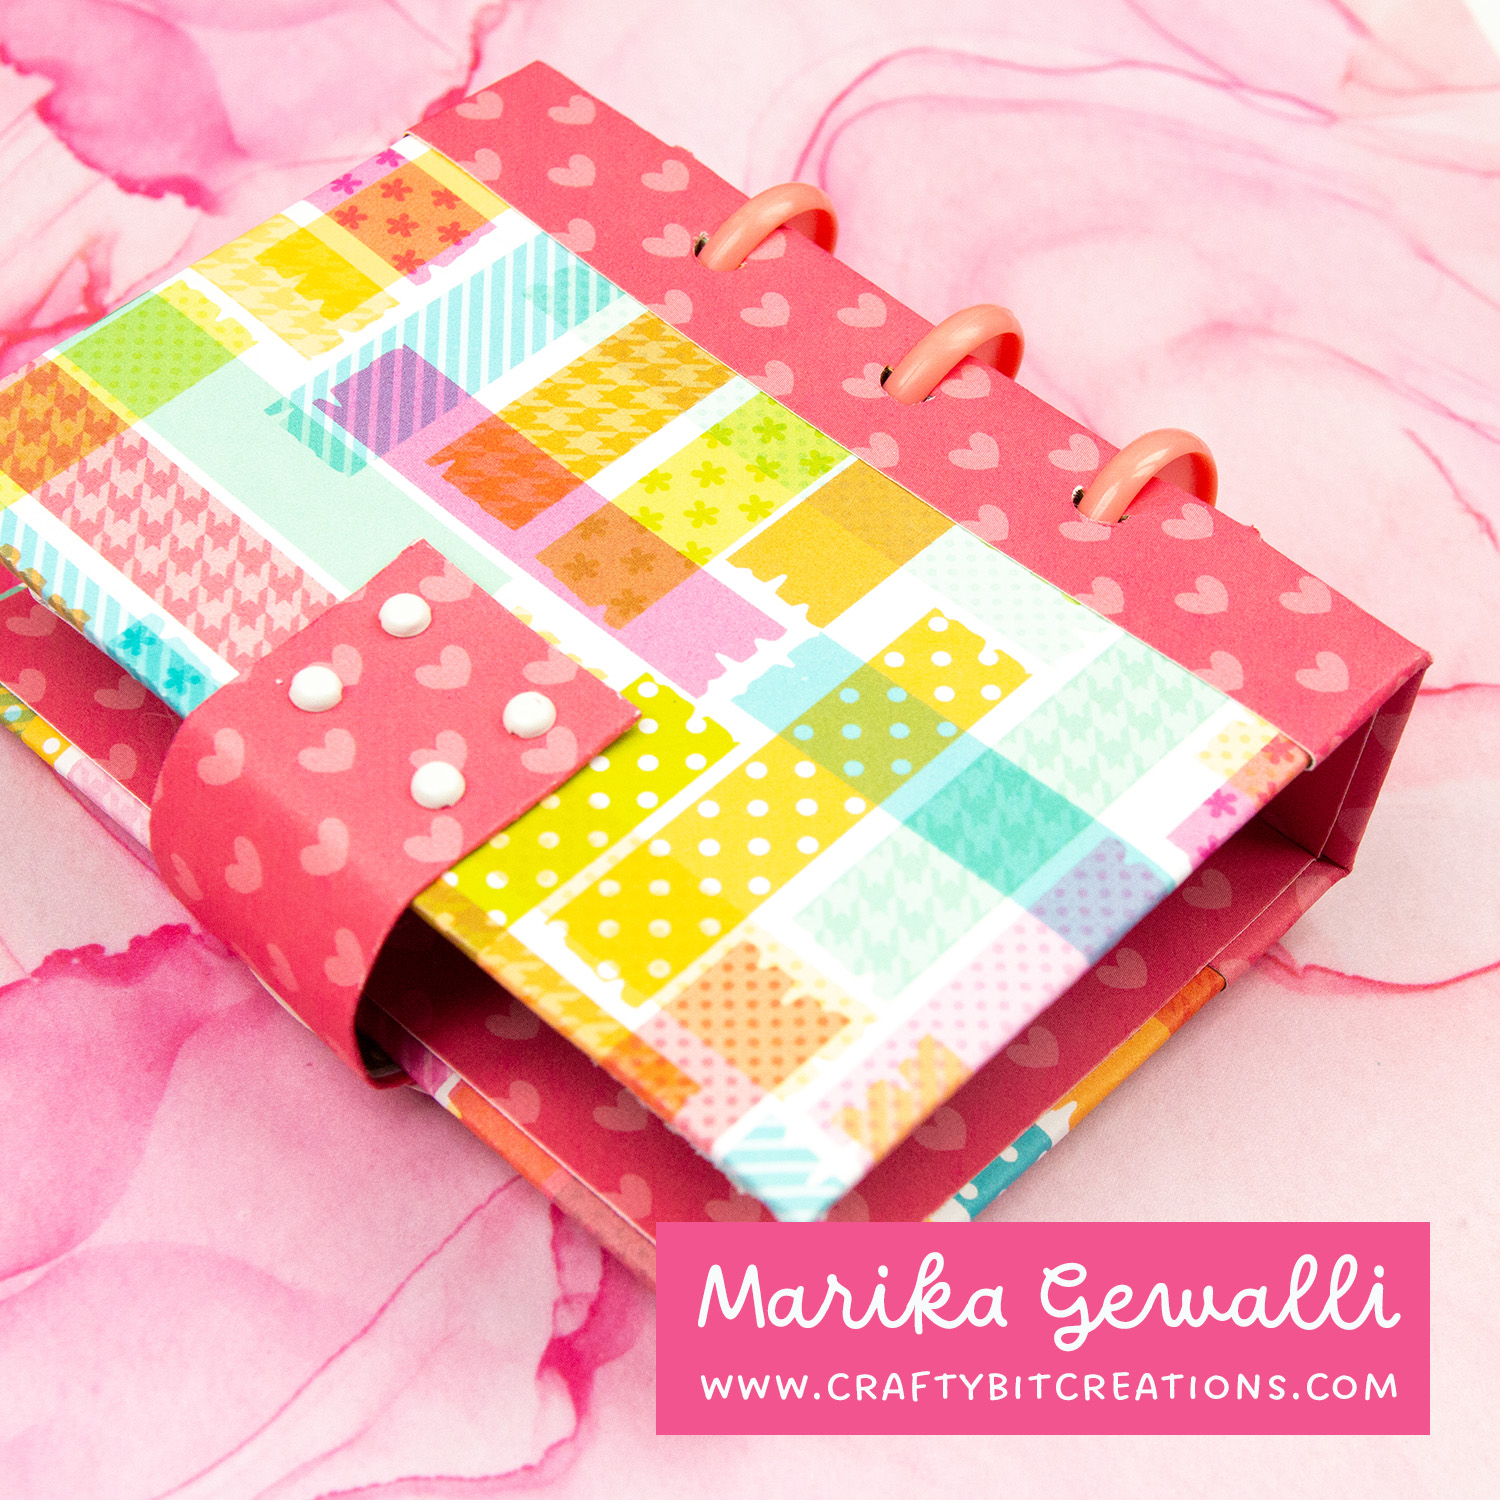
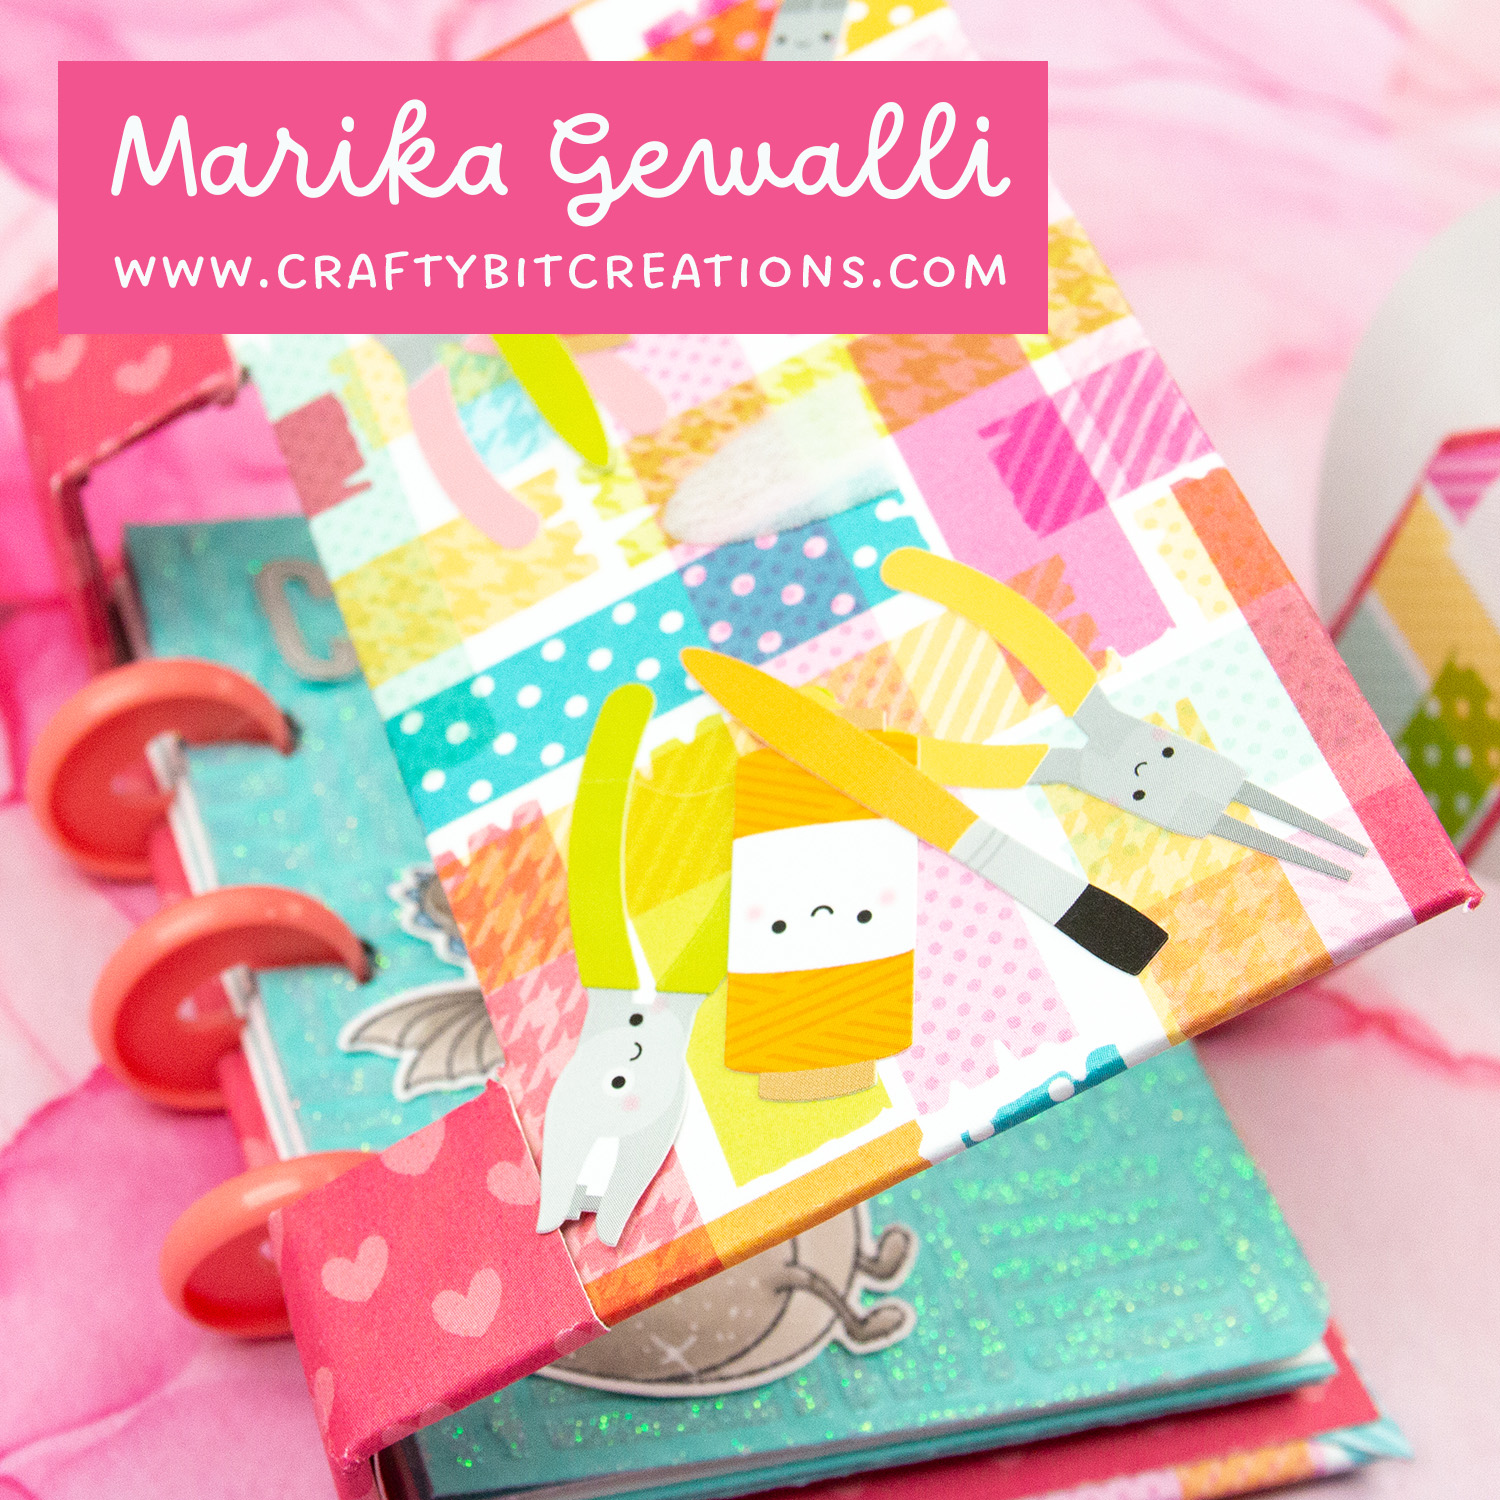
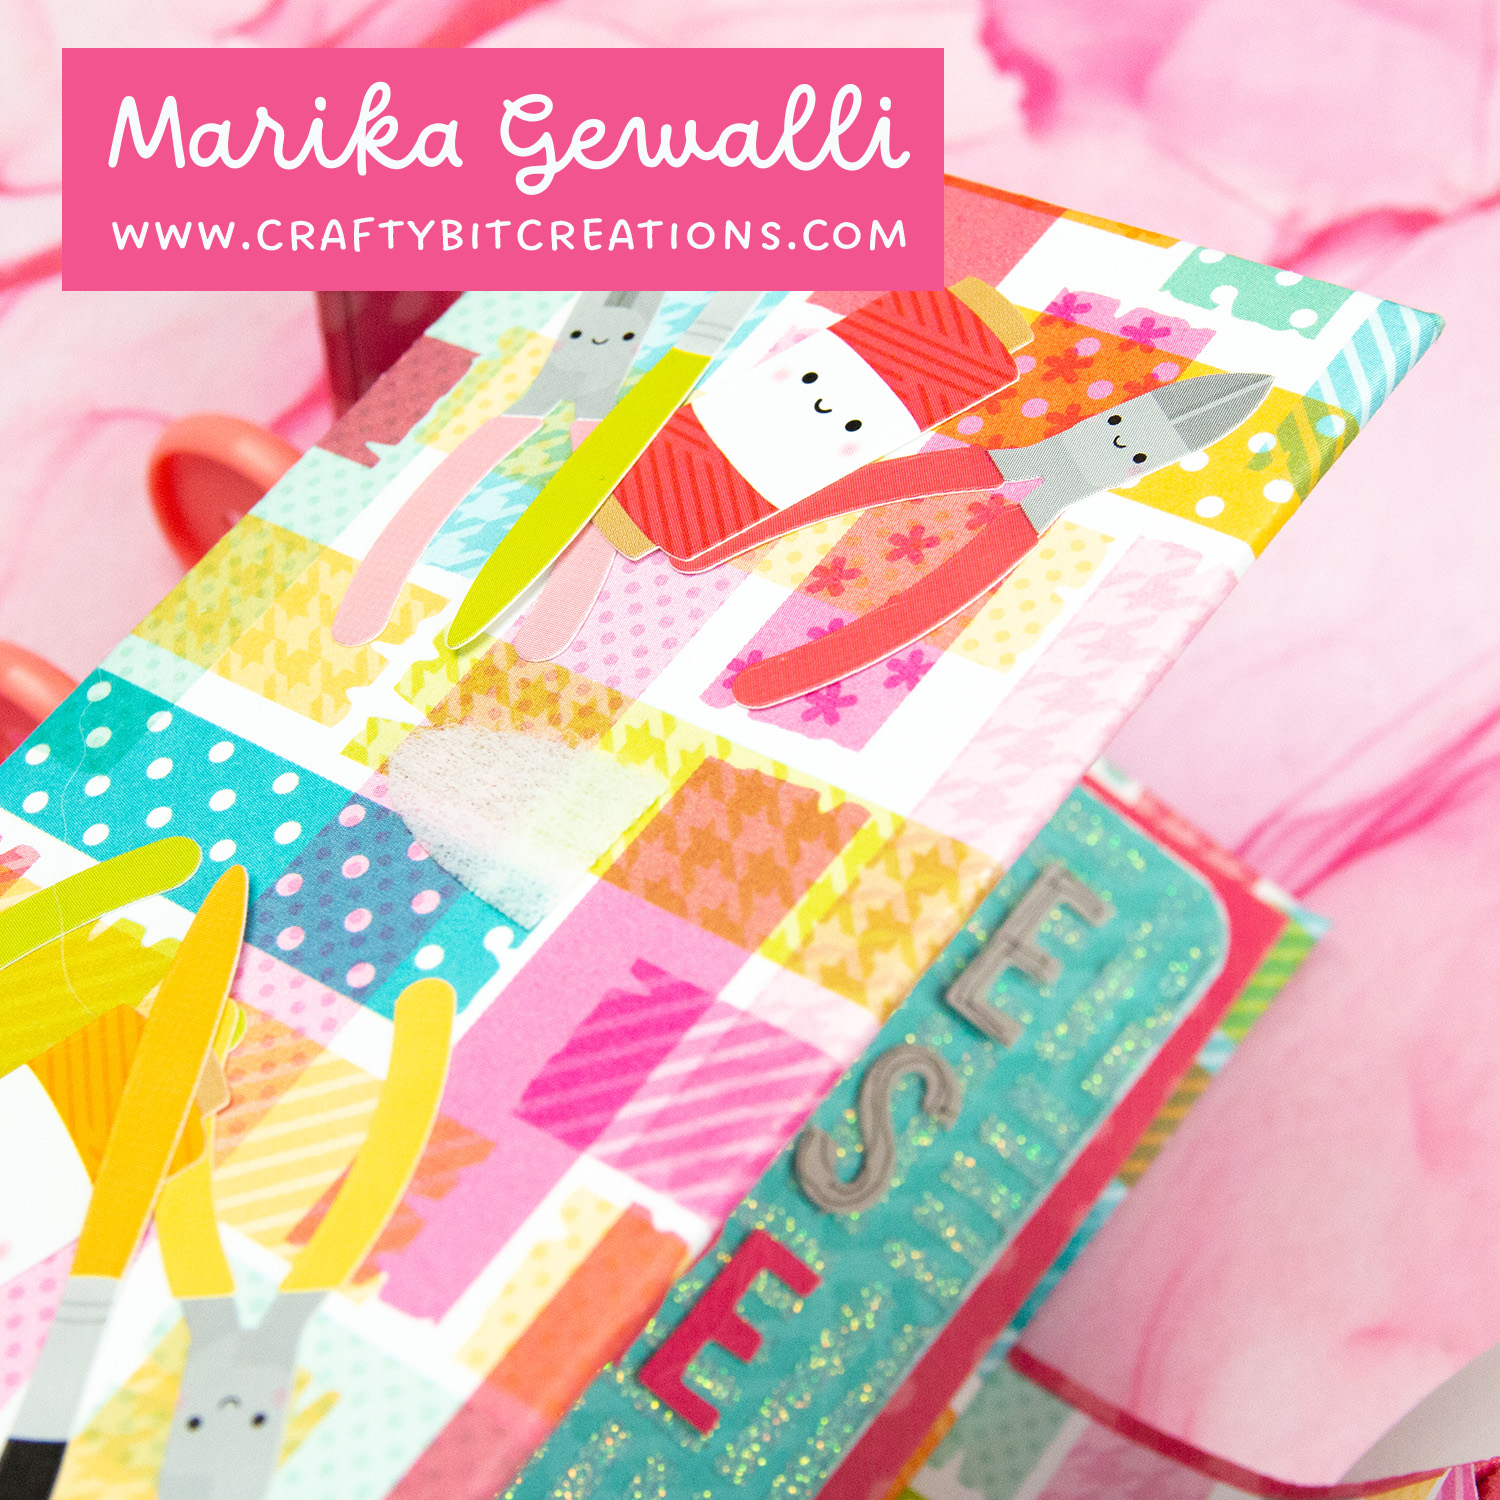
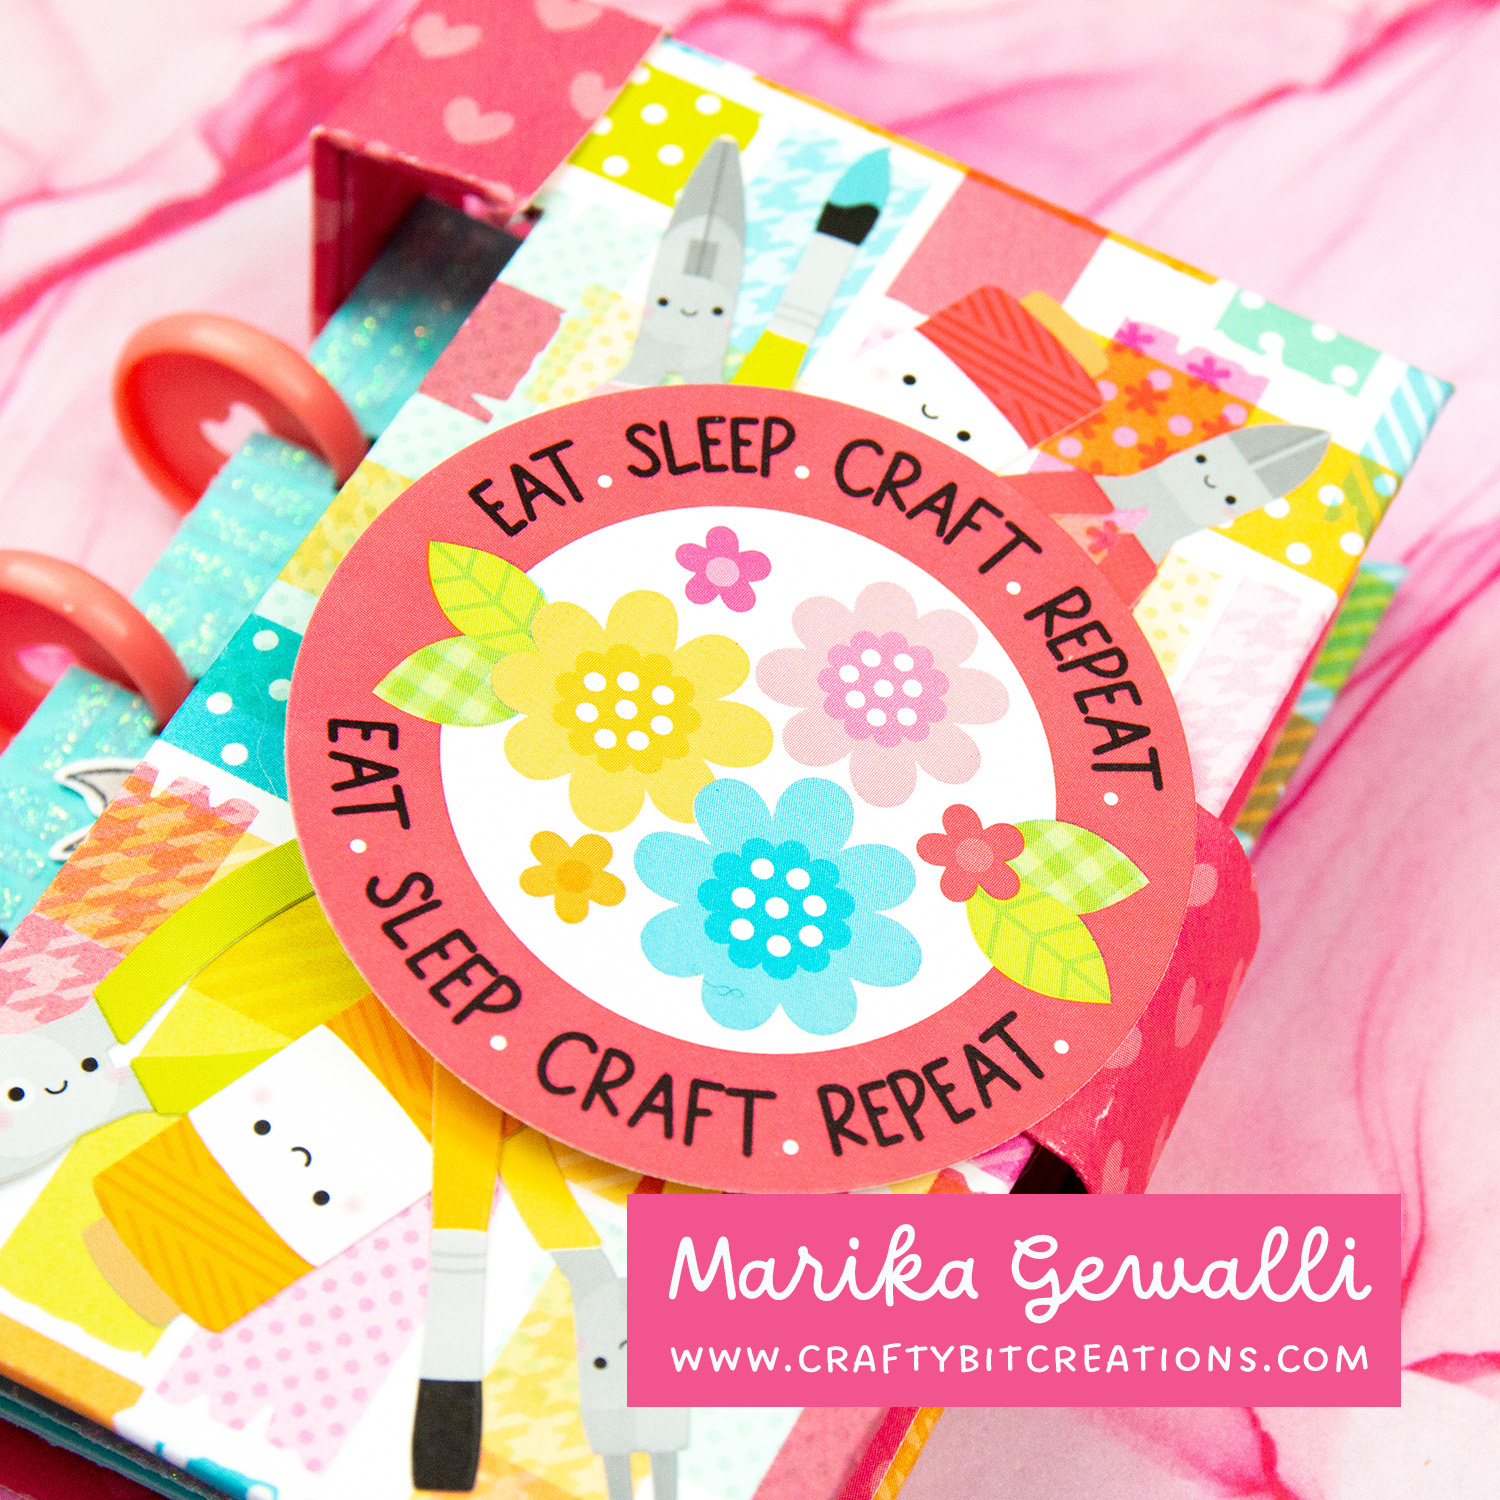
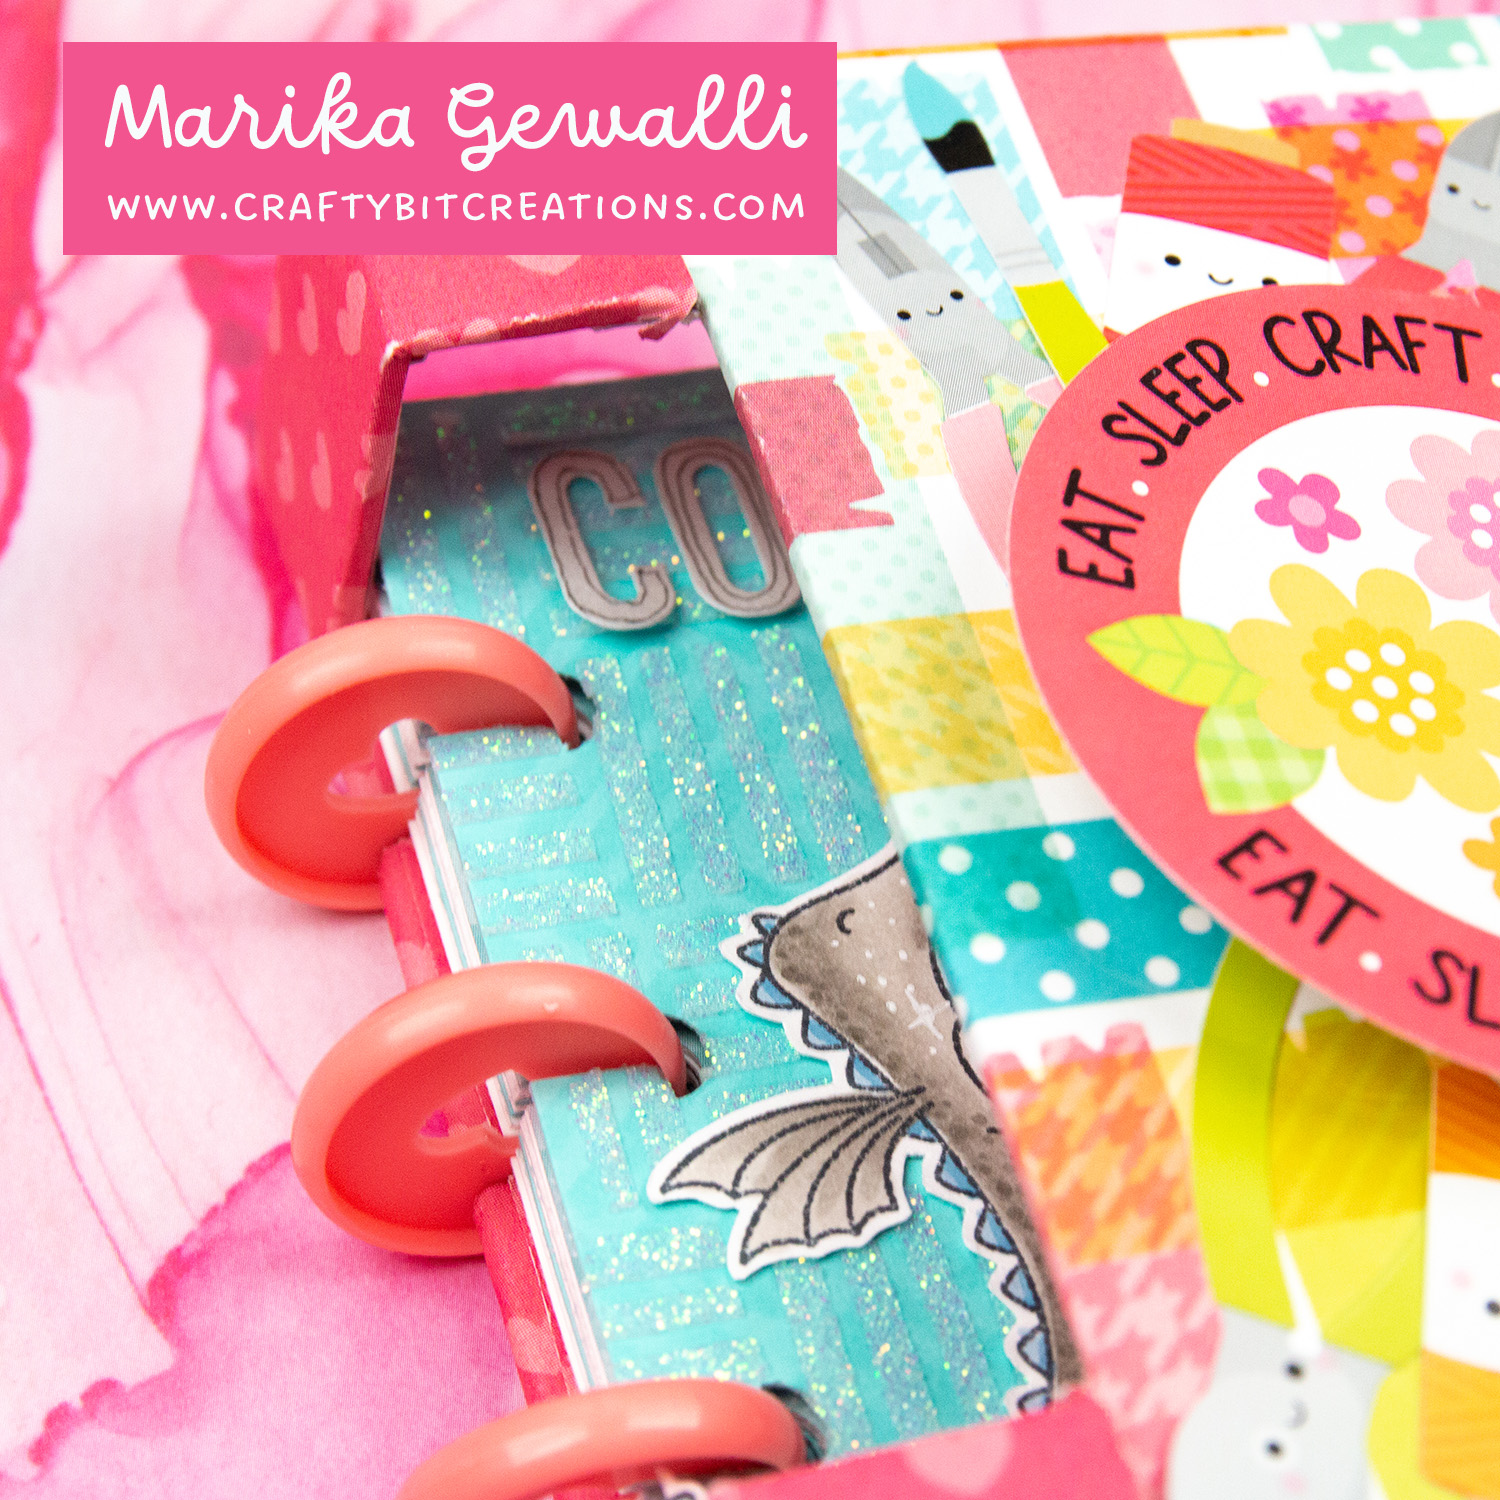
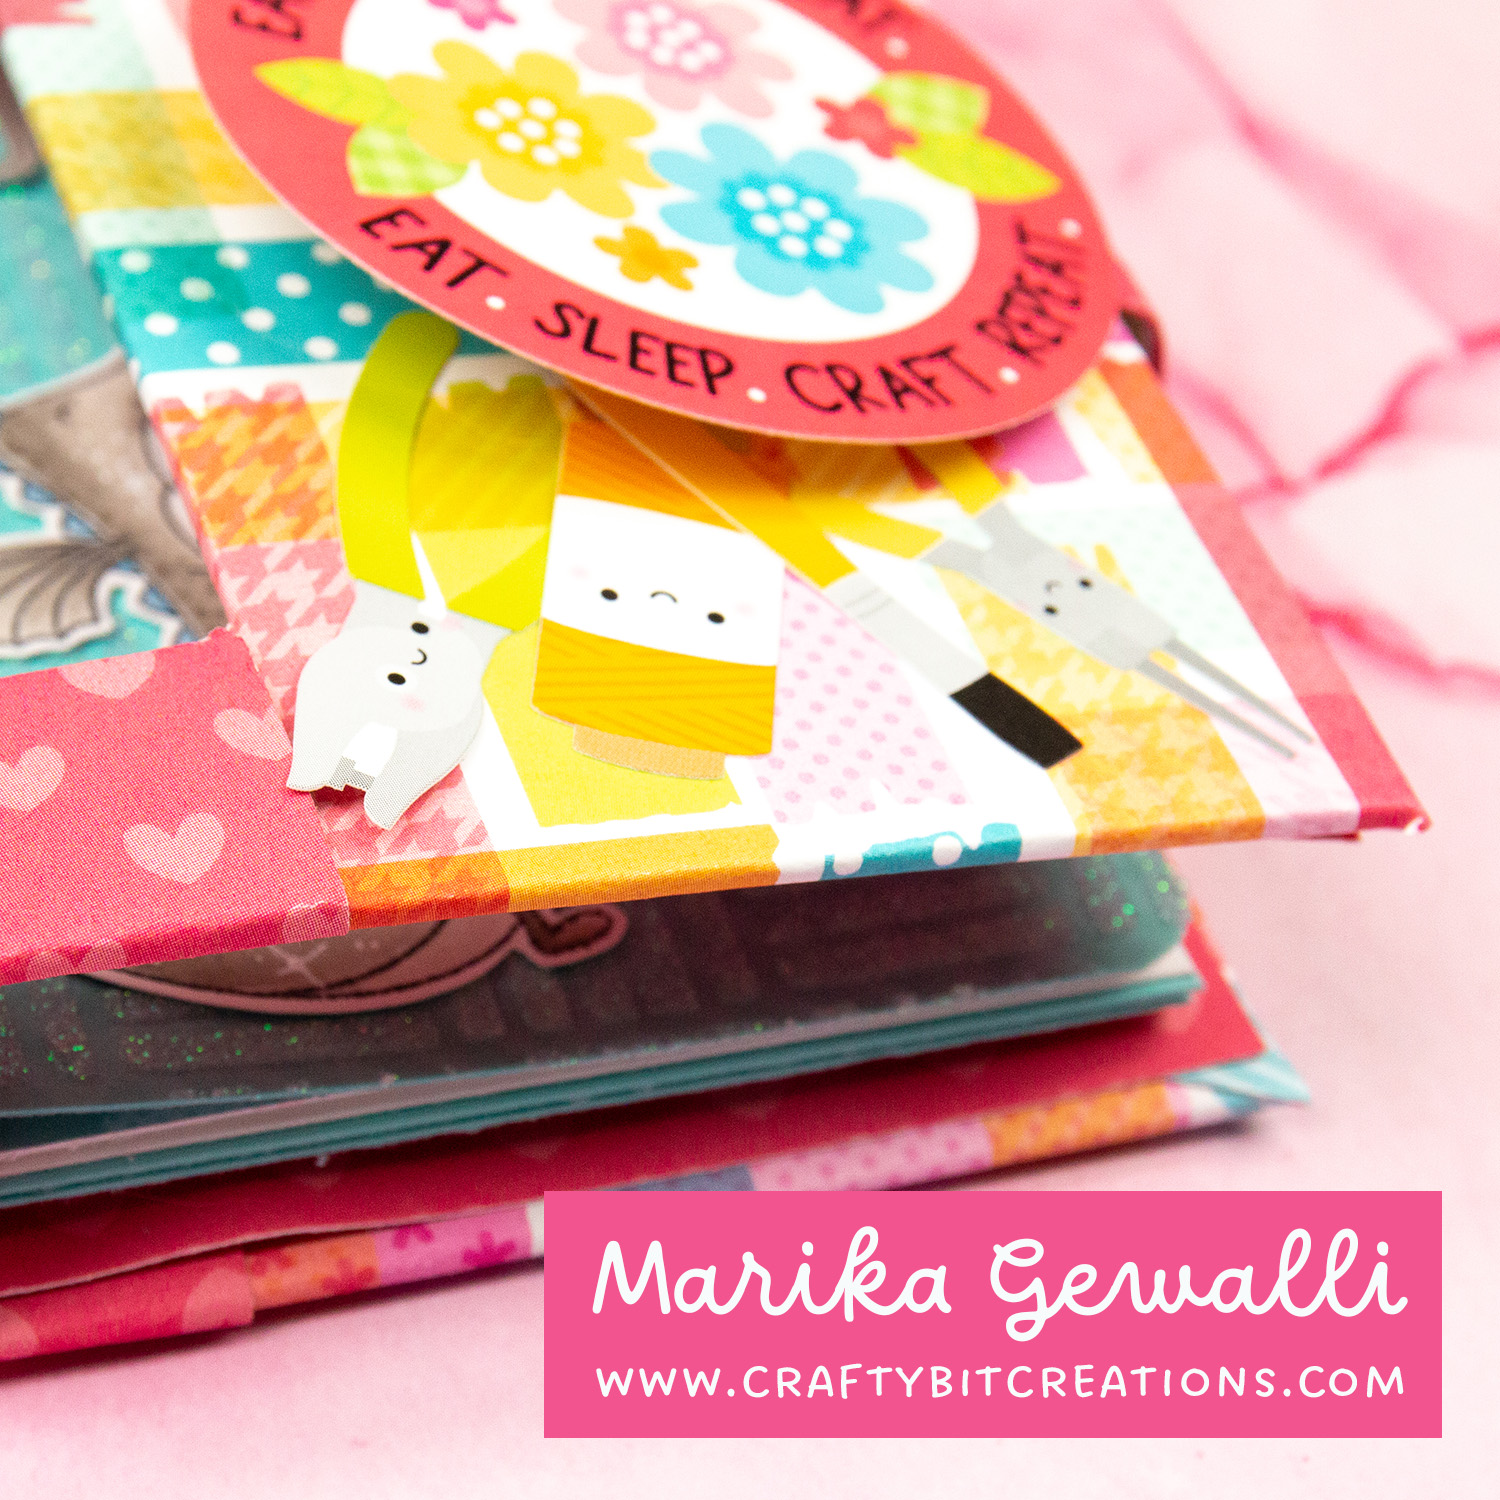
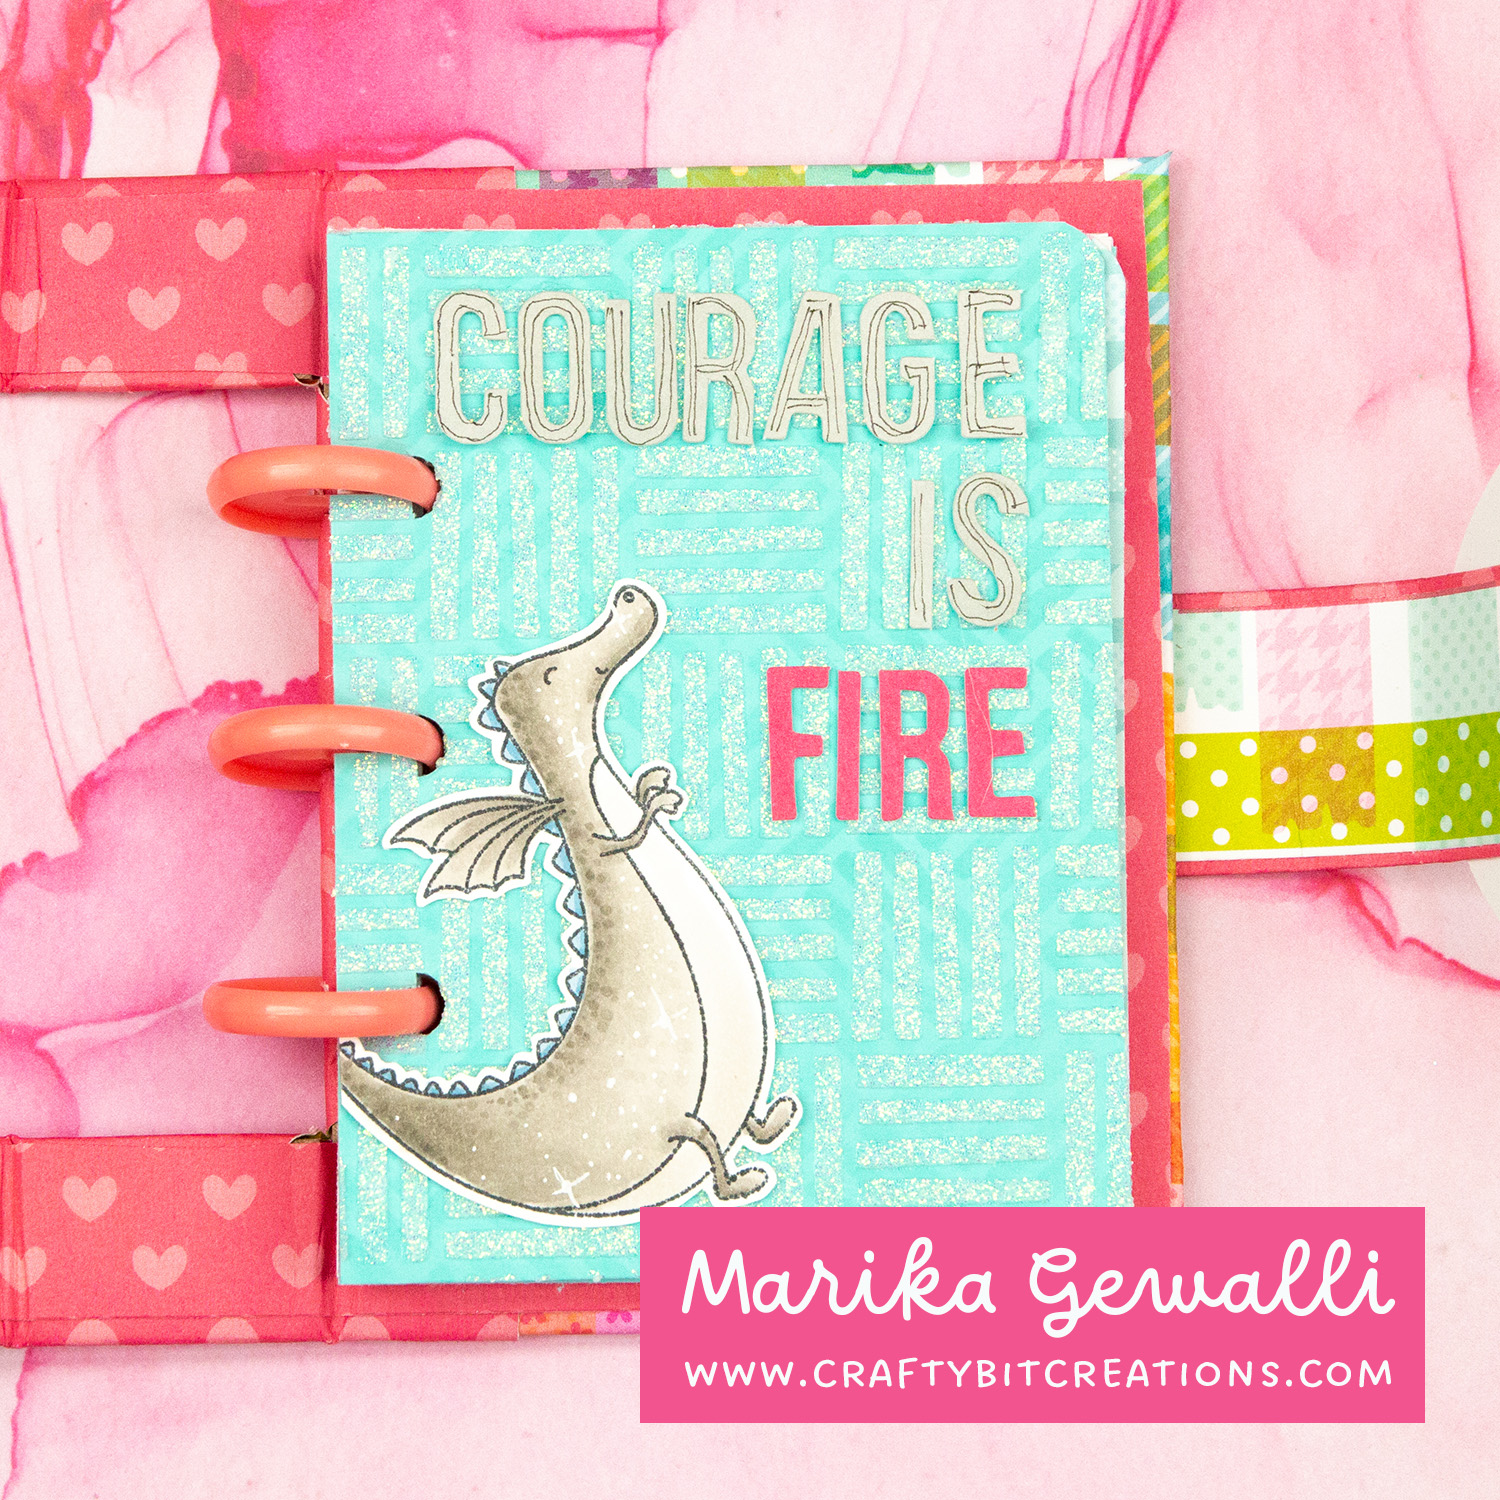
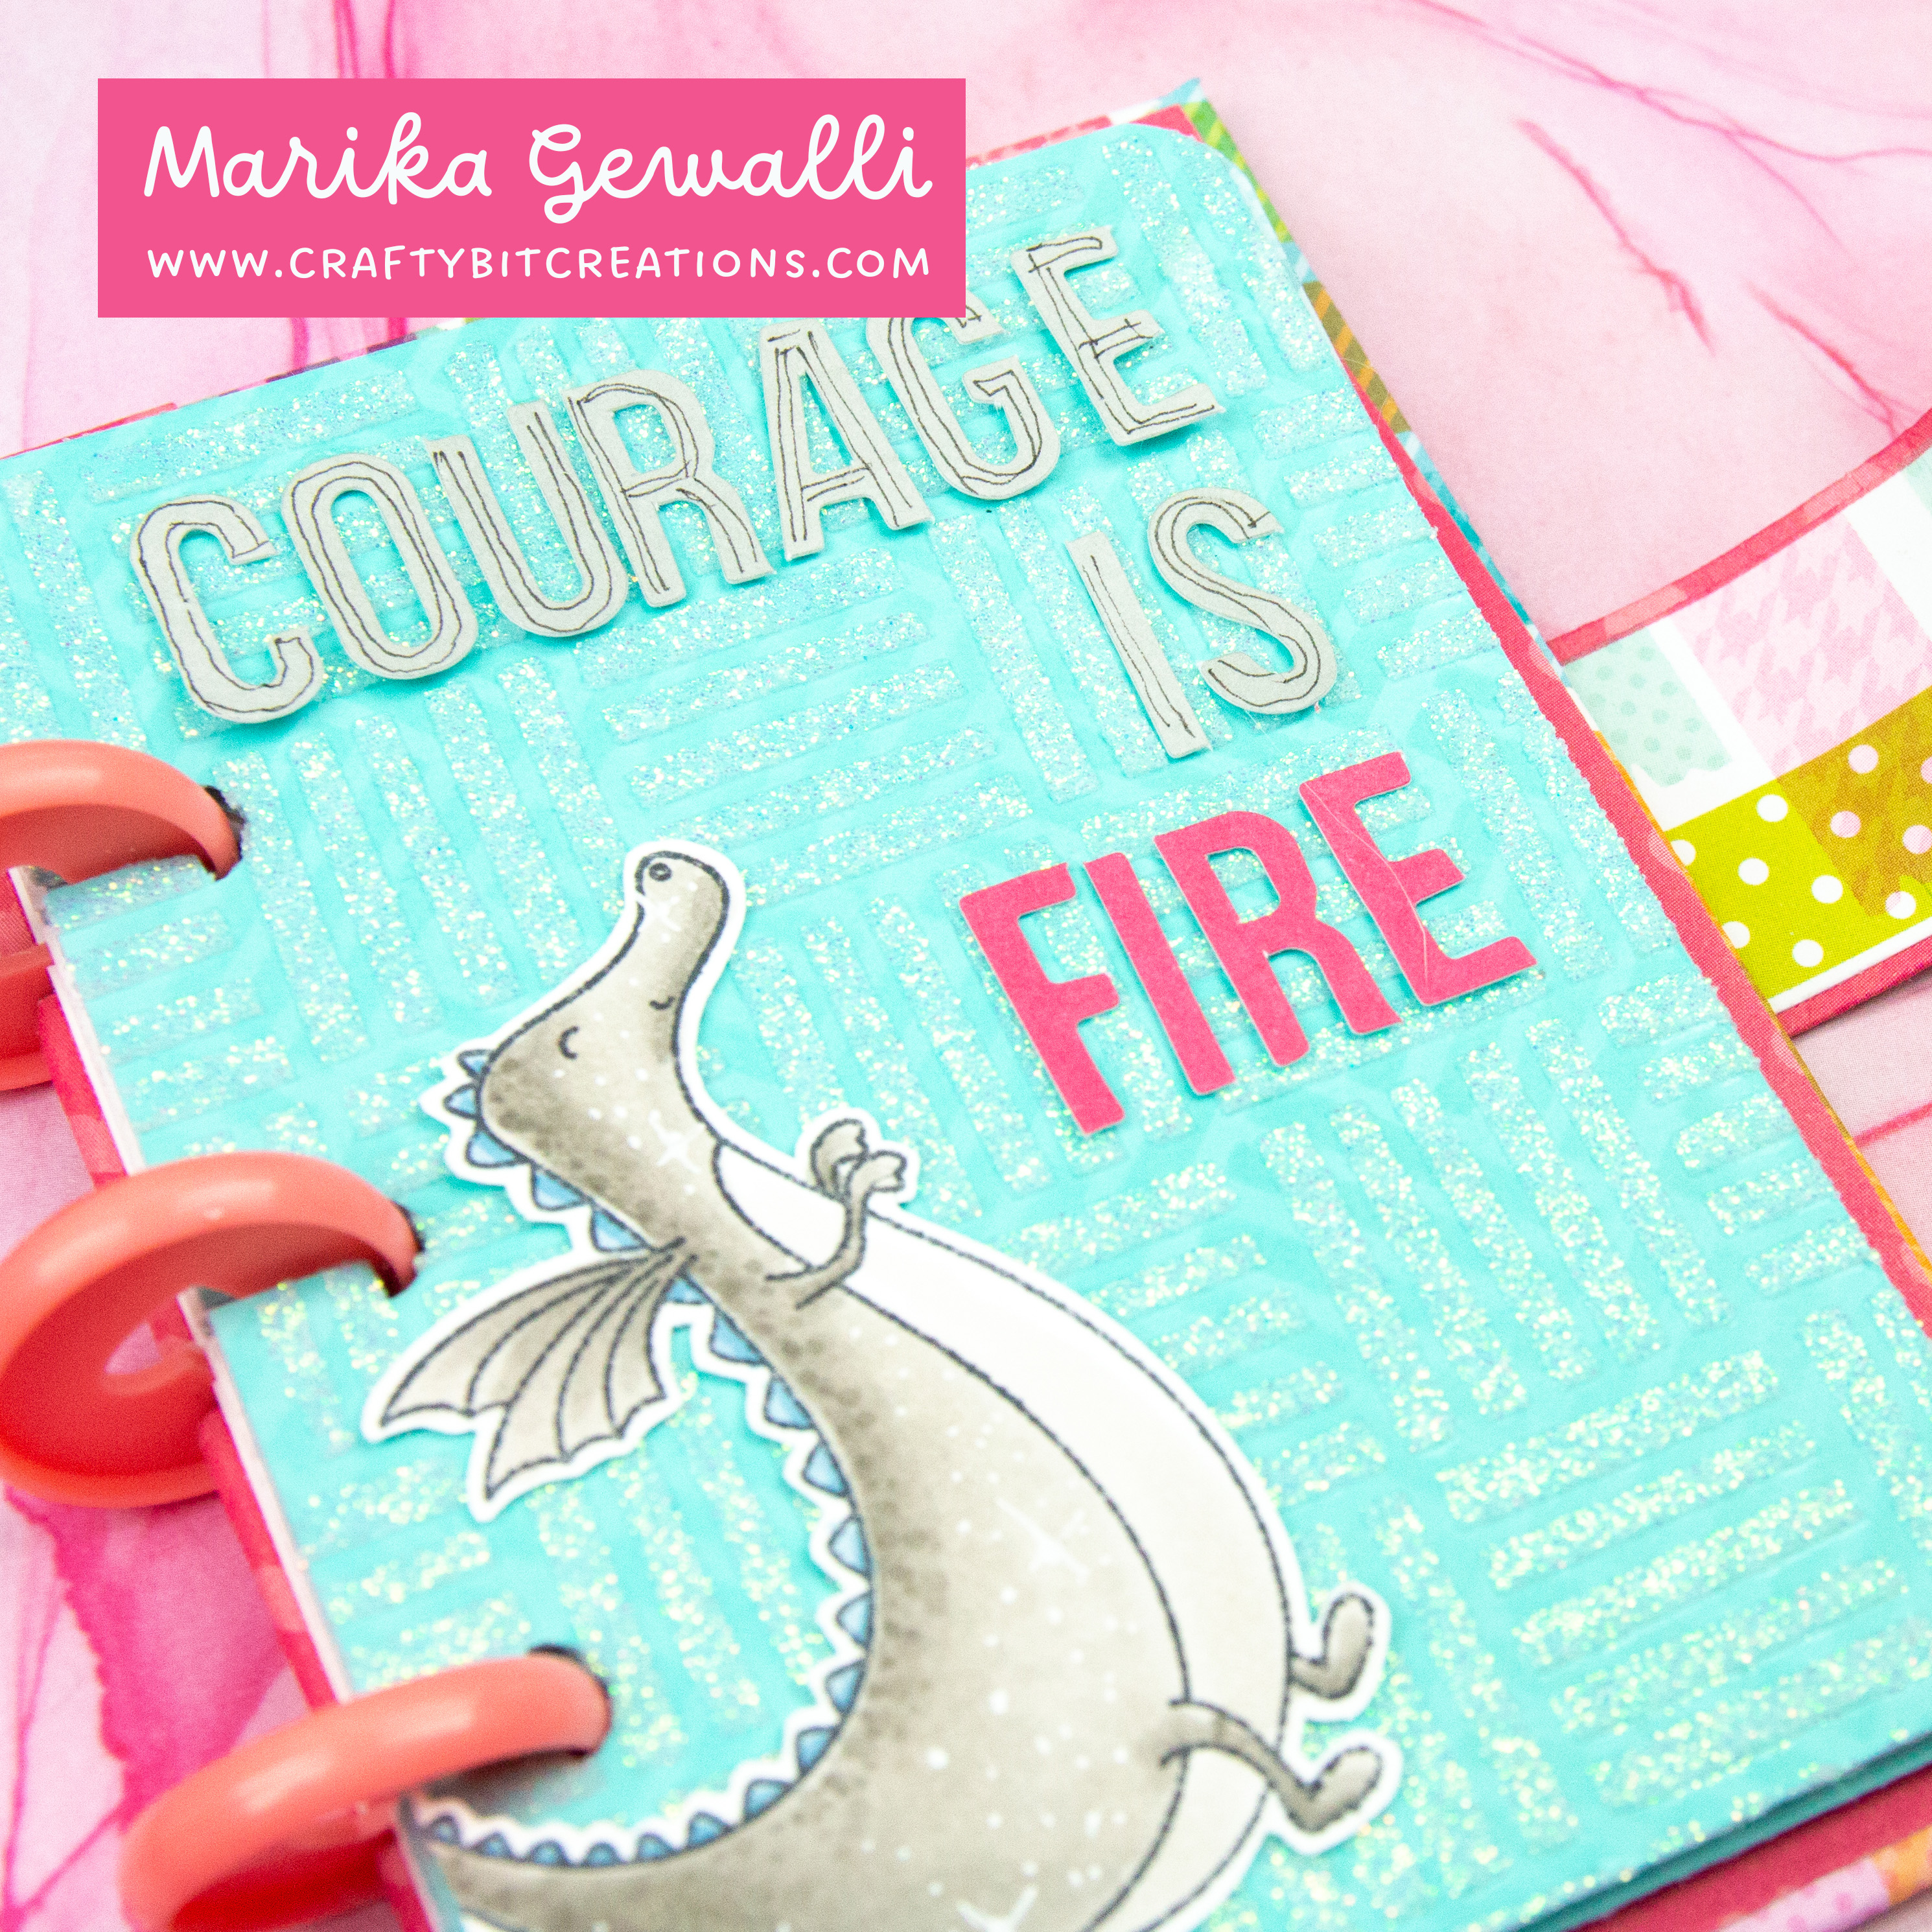
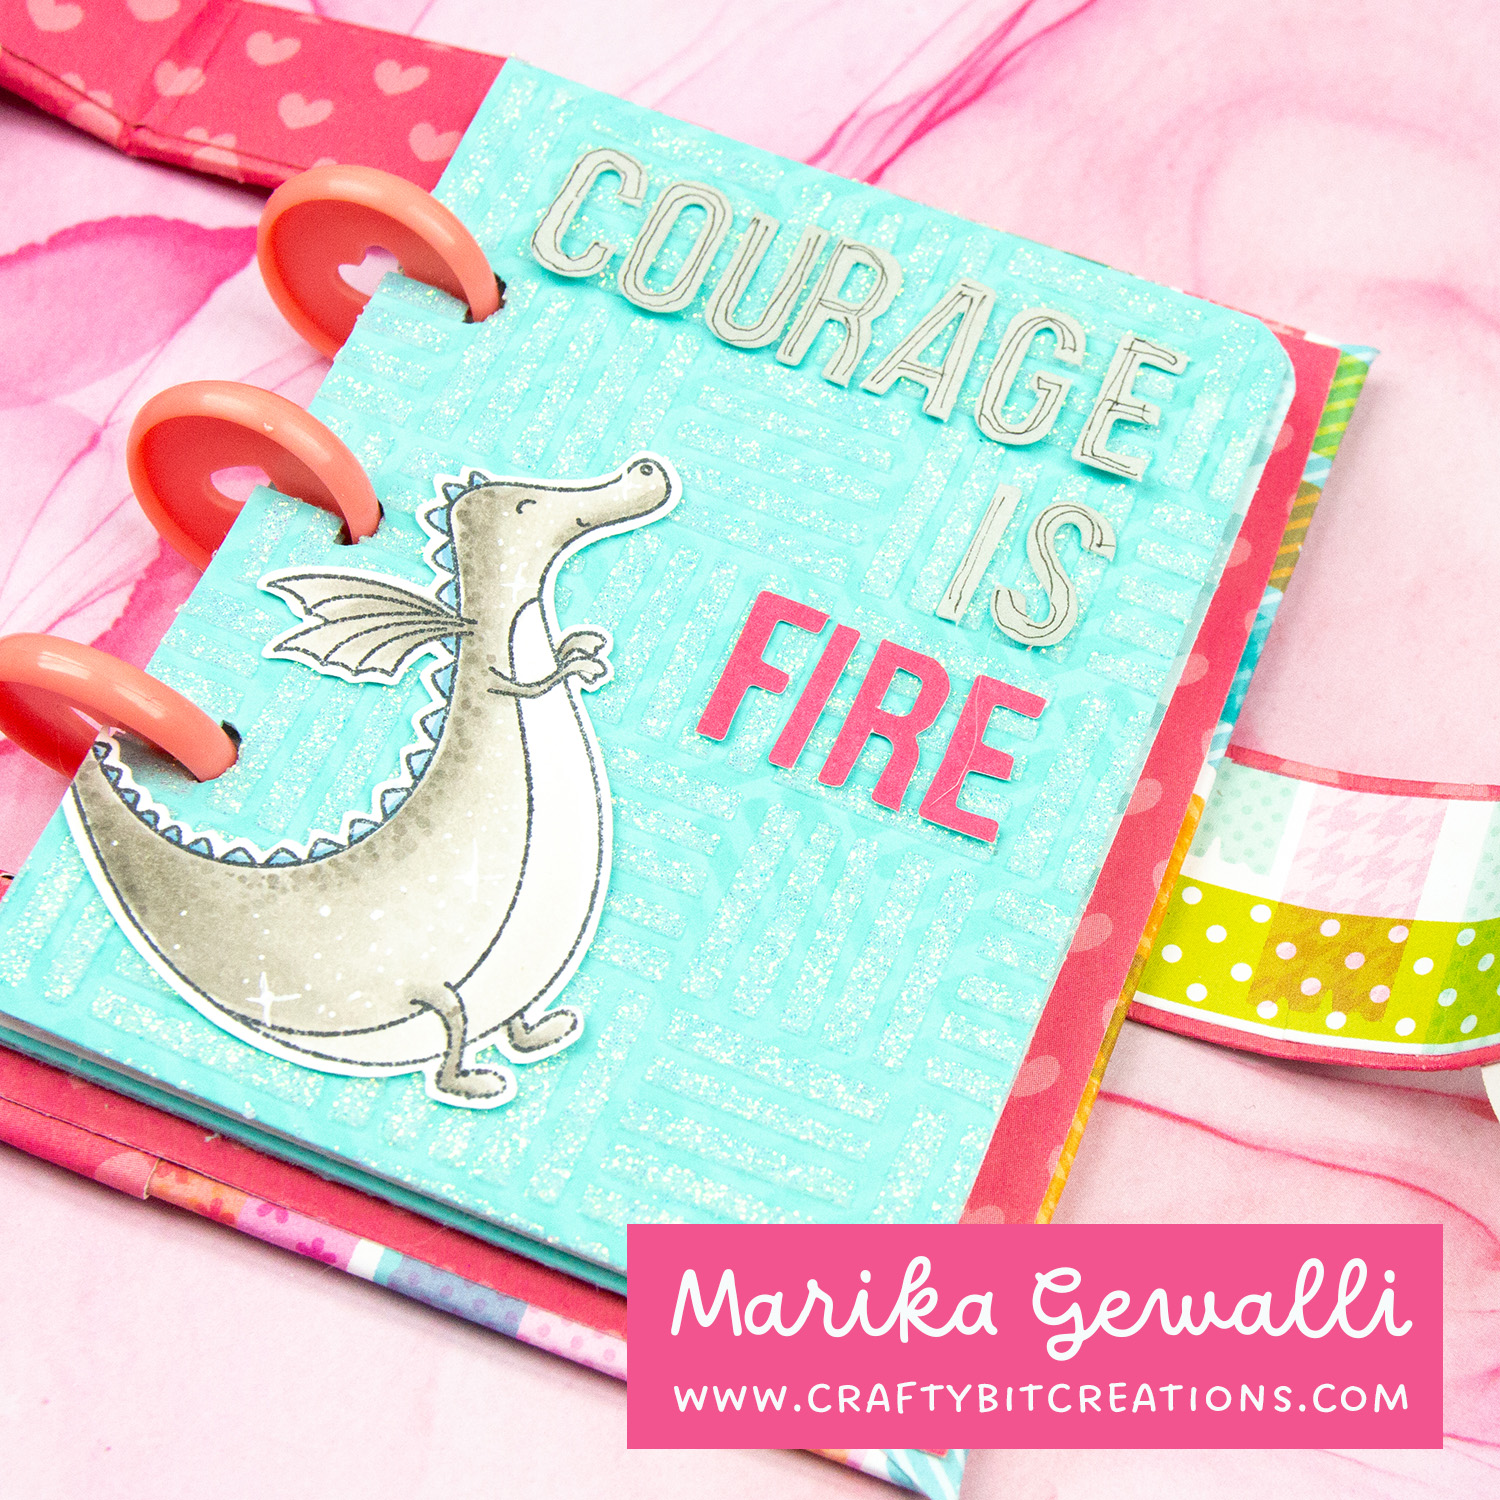
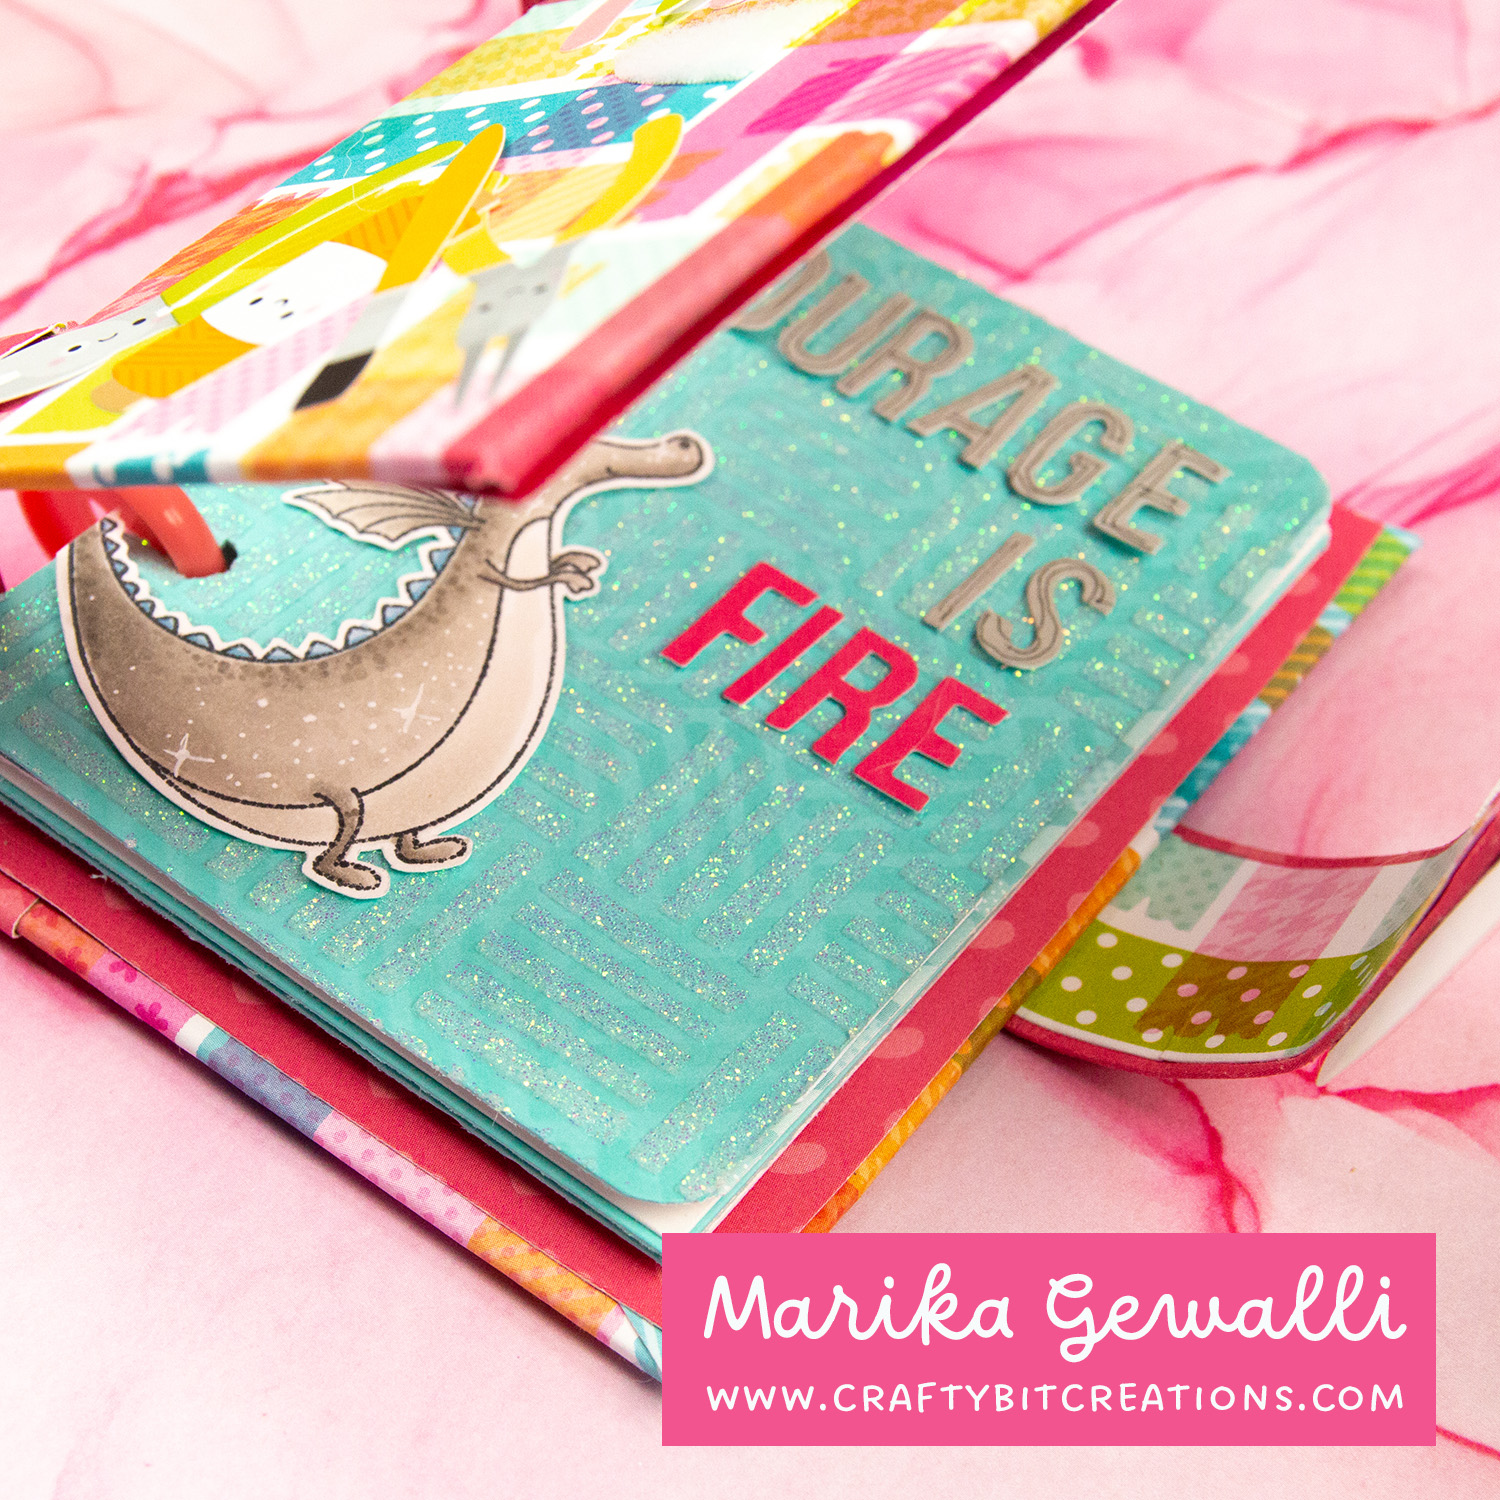
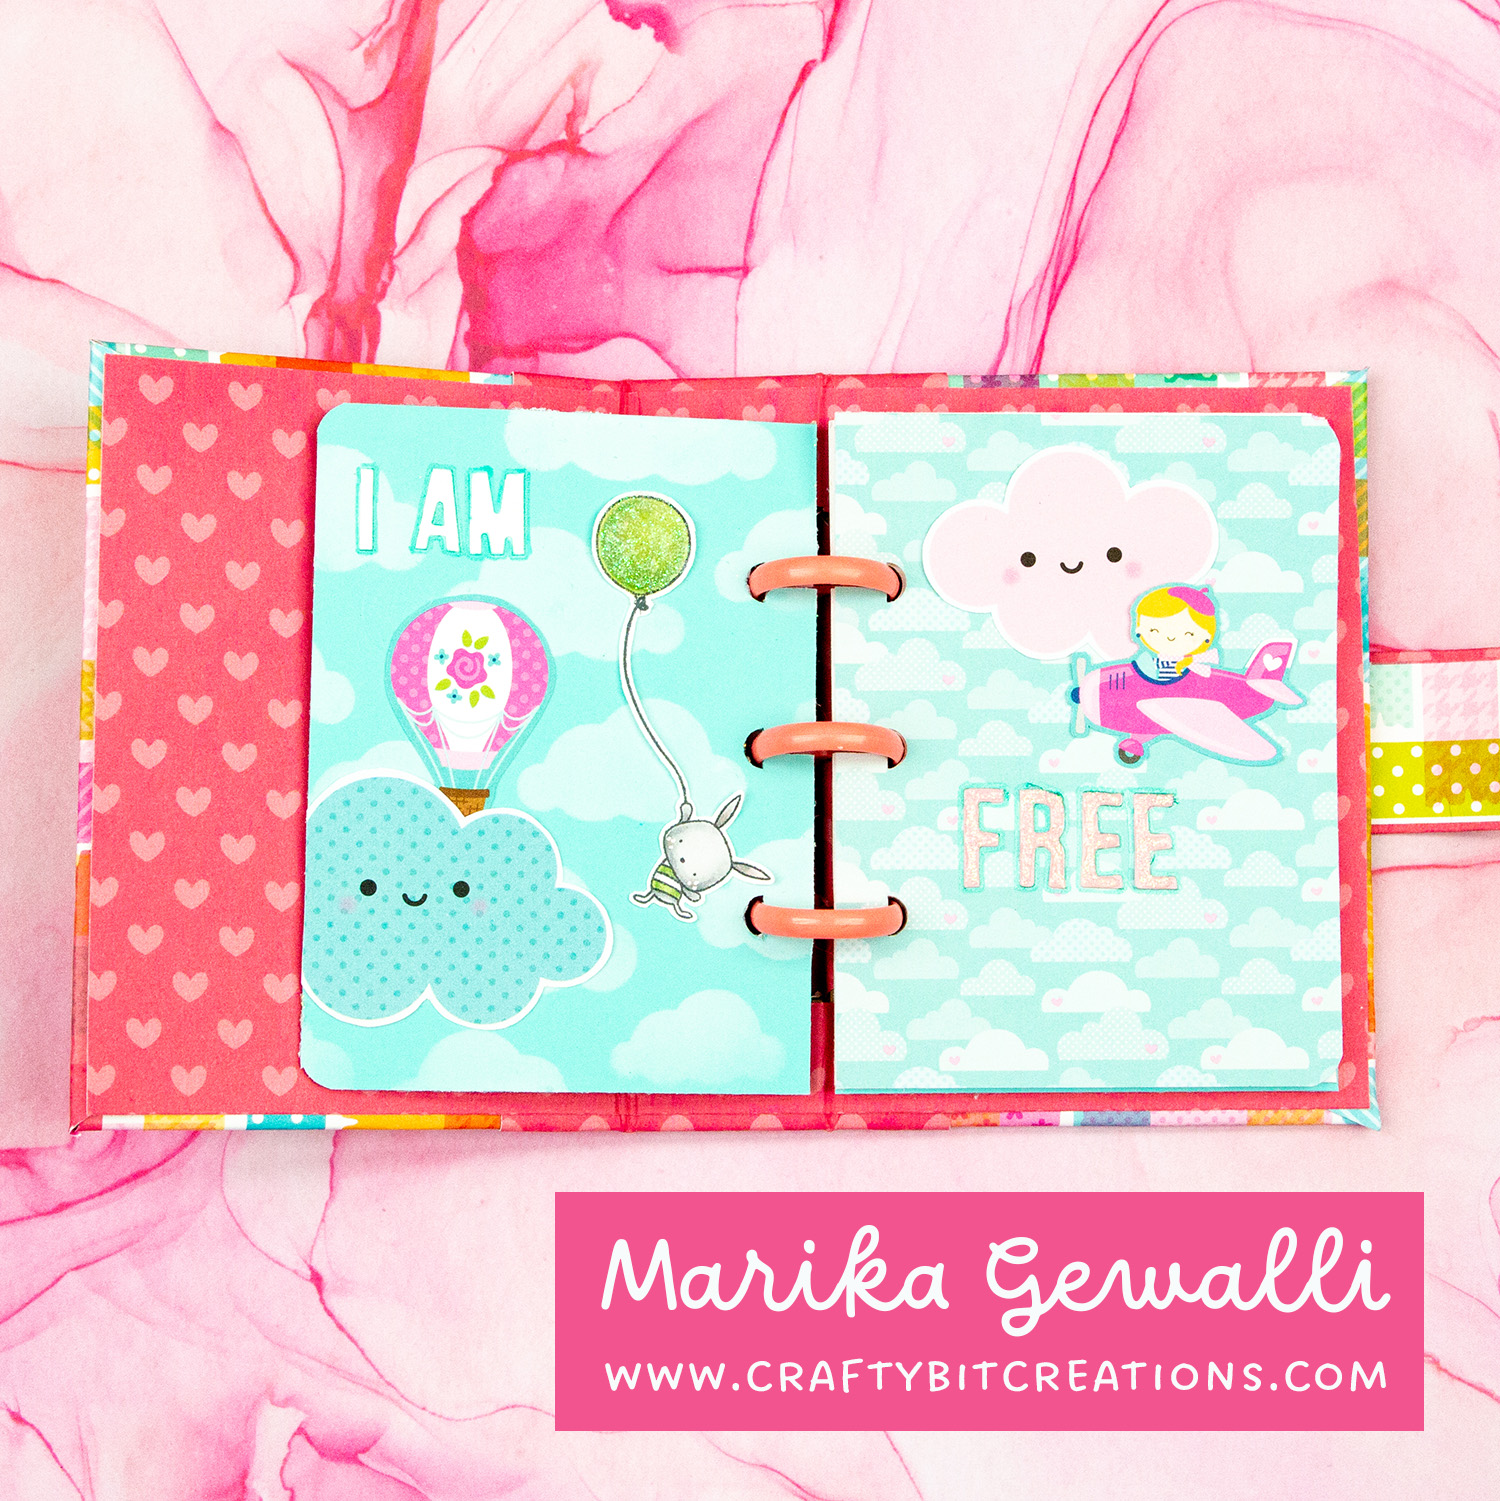
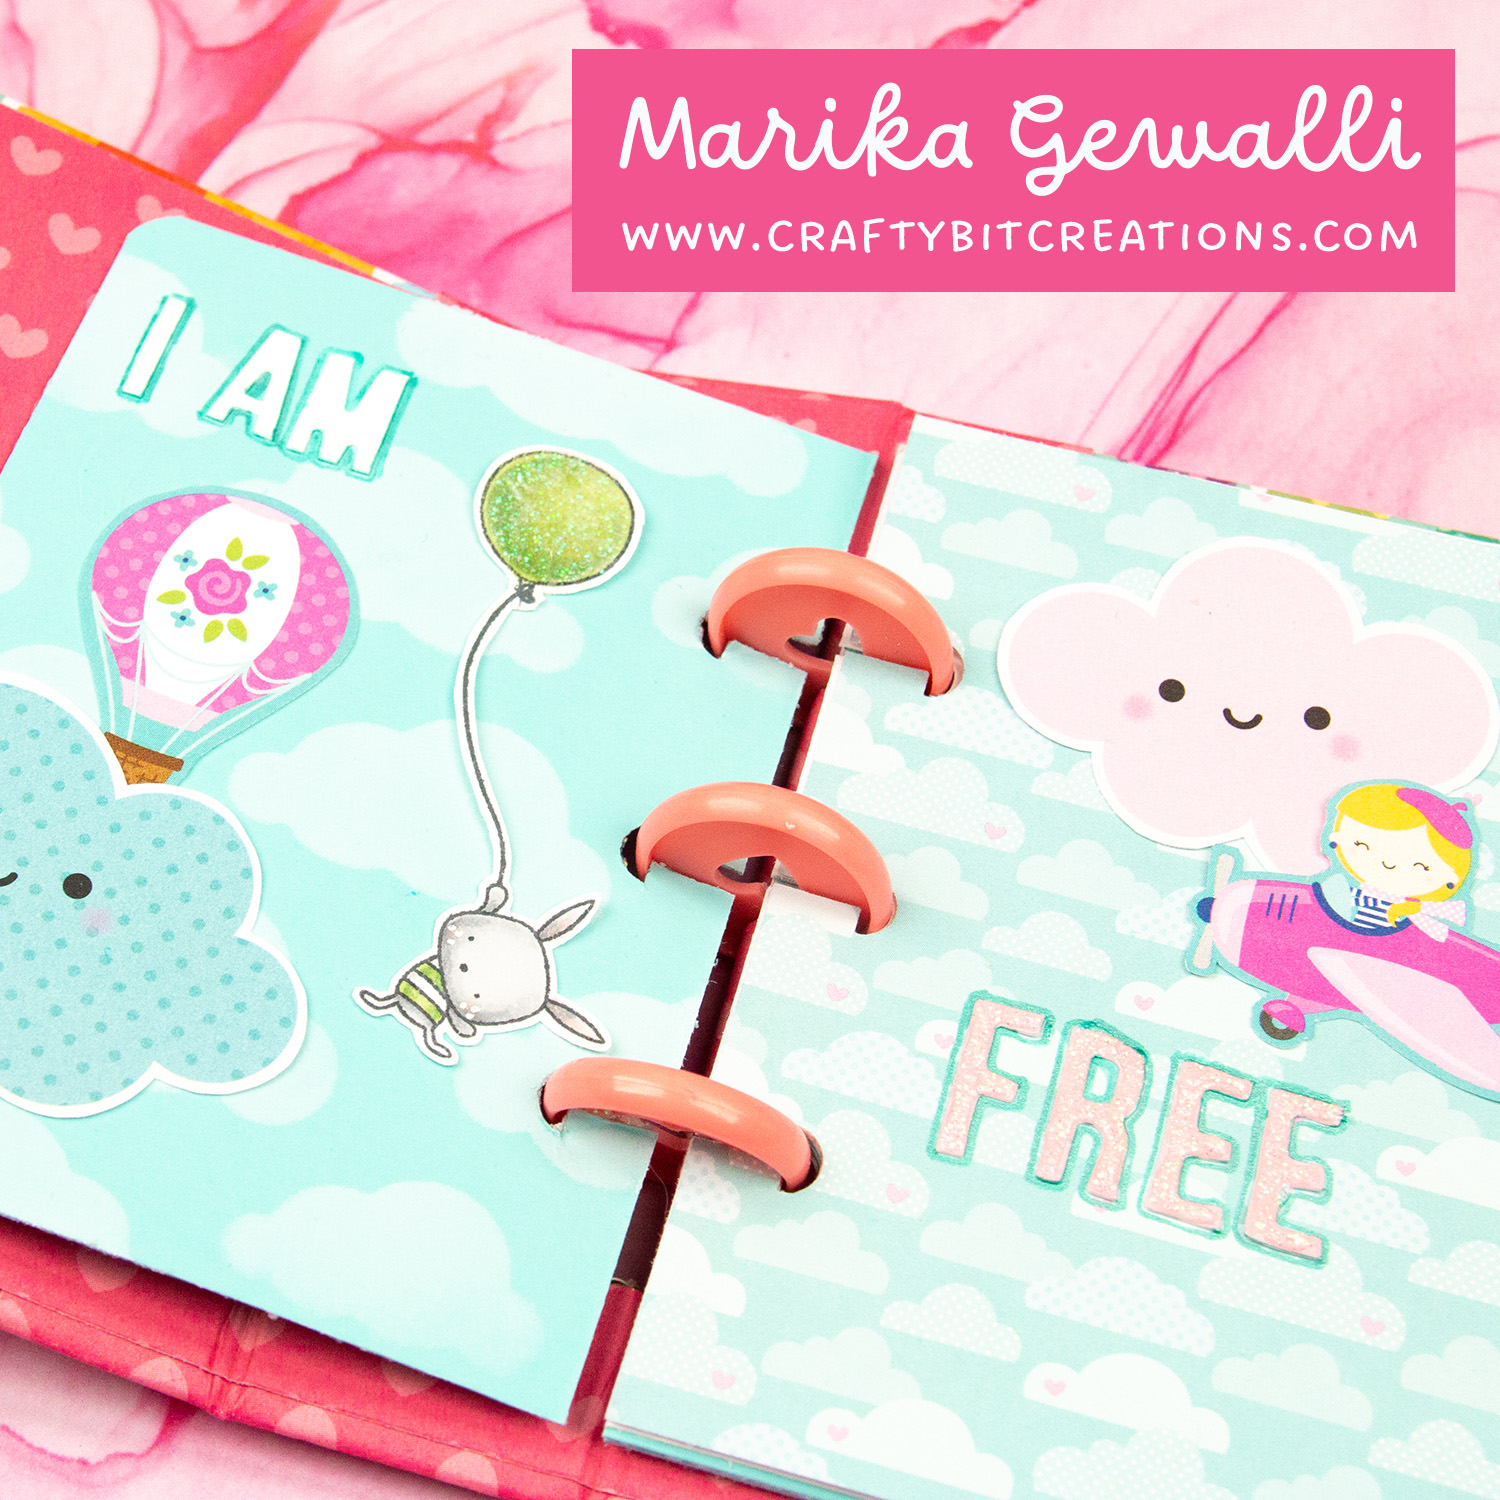
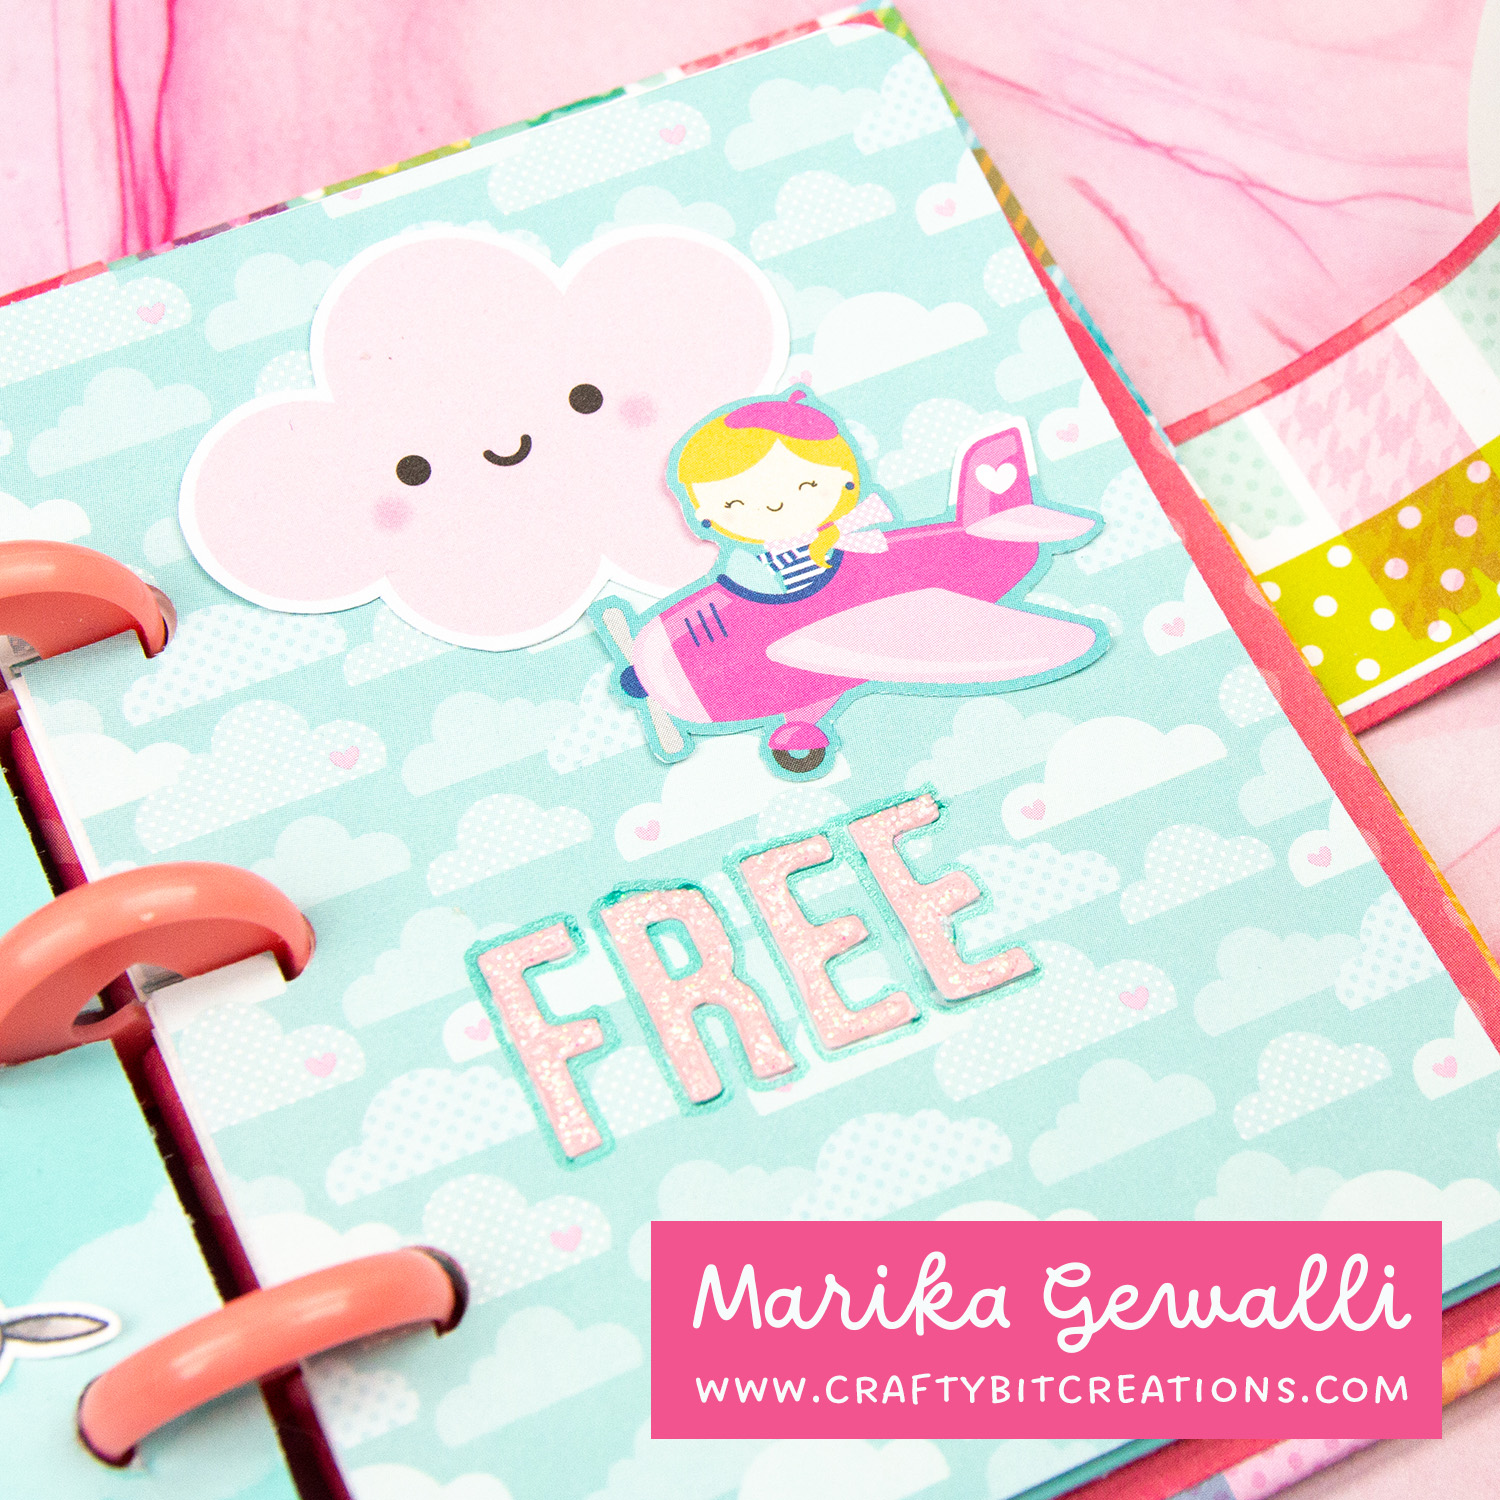
The word of the year that I have chosen is creative. I wanna be more creative, using my craft supplies in more creative ways. And what better place to do that than an art journal. I have started a couple of journals in the past, made a layout or two and then stopped. I think it’s because they have been a little to big and also I didn’t have a clear idea where to go with it creatively.
This journal fits 3″ x 4″ pages, it’s disc bound so you can add as many or as few pages as you want. An added benefit is that you can add pages as you go or change the material of the pages anytime in your creative journey with the journal. The shape of the journal is not my original idea, I just modified it to fit my needs.
I did make two layouts while I was on it. And now all I want to do is to continue to work in it, so look forward to more videos in the future with more layouts. I also found a hole in my craft stash, I need more little sentiments that is more for journaling than greeting cards. I have so many ideas! To see all the layouts I have done so far you can find them HERE.
Cardboard: Spine: 2 pieces measuring 3/4″ x 1″ Back: 1 piece measuring 3 1/4″ x 4 1/4″ Front:1 piece measuring 3 1/4″ x 4 1/4″ with a rectangle measuring 3/4″ x 2 3/4″ cut out of the 4 1/4″ side, see schema above.
Pattern paper: Outside: one piece measuring 5 1/4″ x 8 1/2″, Inside one piece measuring 4 1/8″ x 7 1/2″ Spine: one piece measuring 2 3/4″ x 5 1/4″ Clasp: one piece measuring 1 1/2″ x 5″ cut down to size later, one piece measuring 1″ x 5″ cut down to size later.
When possible affiliate links are used, this means that I receive a small commission when products are purchased through the links (at no extra cost to you) I use the money to support my blog and youtube channel. If you like my projects and tutorial please consider supporting me by clicking through these links when you shop. Thanks!
Supplies:
Tonic MOONSTONE Nuvo Glimmer Paste: SSSSBC Nuvo White Blizzard: SSSAMZ Nuvo – Adhesive Tape Runner – Maxi: SSSAMZSBC We R Memory Keepers Crop-A-Dile Disc Power Punch: SSSAMZSBC DBD Cute and Crafty 12 x 12 Paper Pack: SSSAMZSBC DBD Petite Prints 12 x 12 Paper Pack Cute and Crafty: SSSSBC Happy Planner Mini Discs Value Pack: AMZSBC Create A Smile Alphabet Stickers: CAS MFT Sno Cone Premium Dye Ink Pad: MFTSSS Simon Says Stamp Cardstock 100# SURF BLUE: SSS MFT High Flying Adventure: MFTSSS MFT Fairy-Tale Friendship: MFTSSS Birthday Chicks: MFT Newton’s Nook Designs CLOUDY SKY Stencil: SSS Simon Says Stamp Pigment Ink Pad WHITE: SSS Doodlebug LOTS OF LOVE Odds and Ends Ephemera Die Cut Shapes: SSSSBC
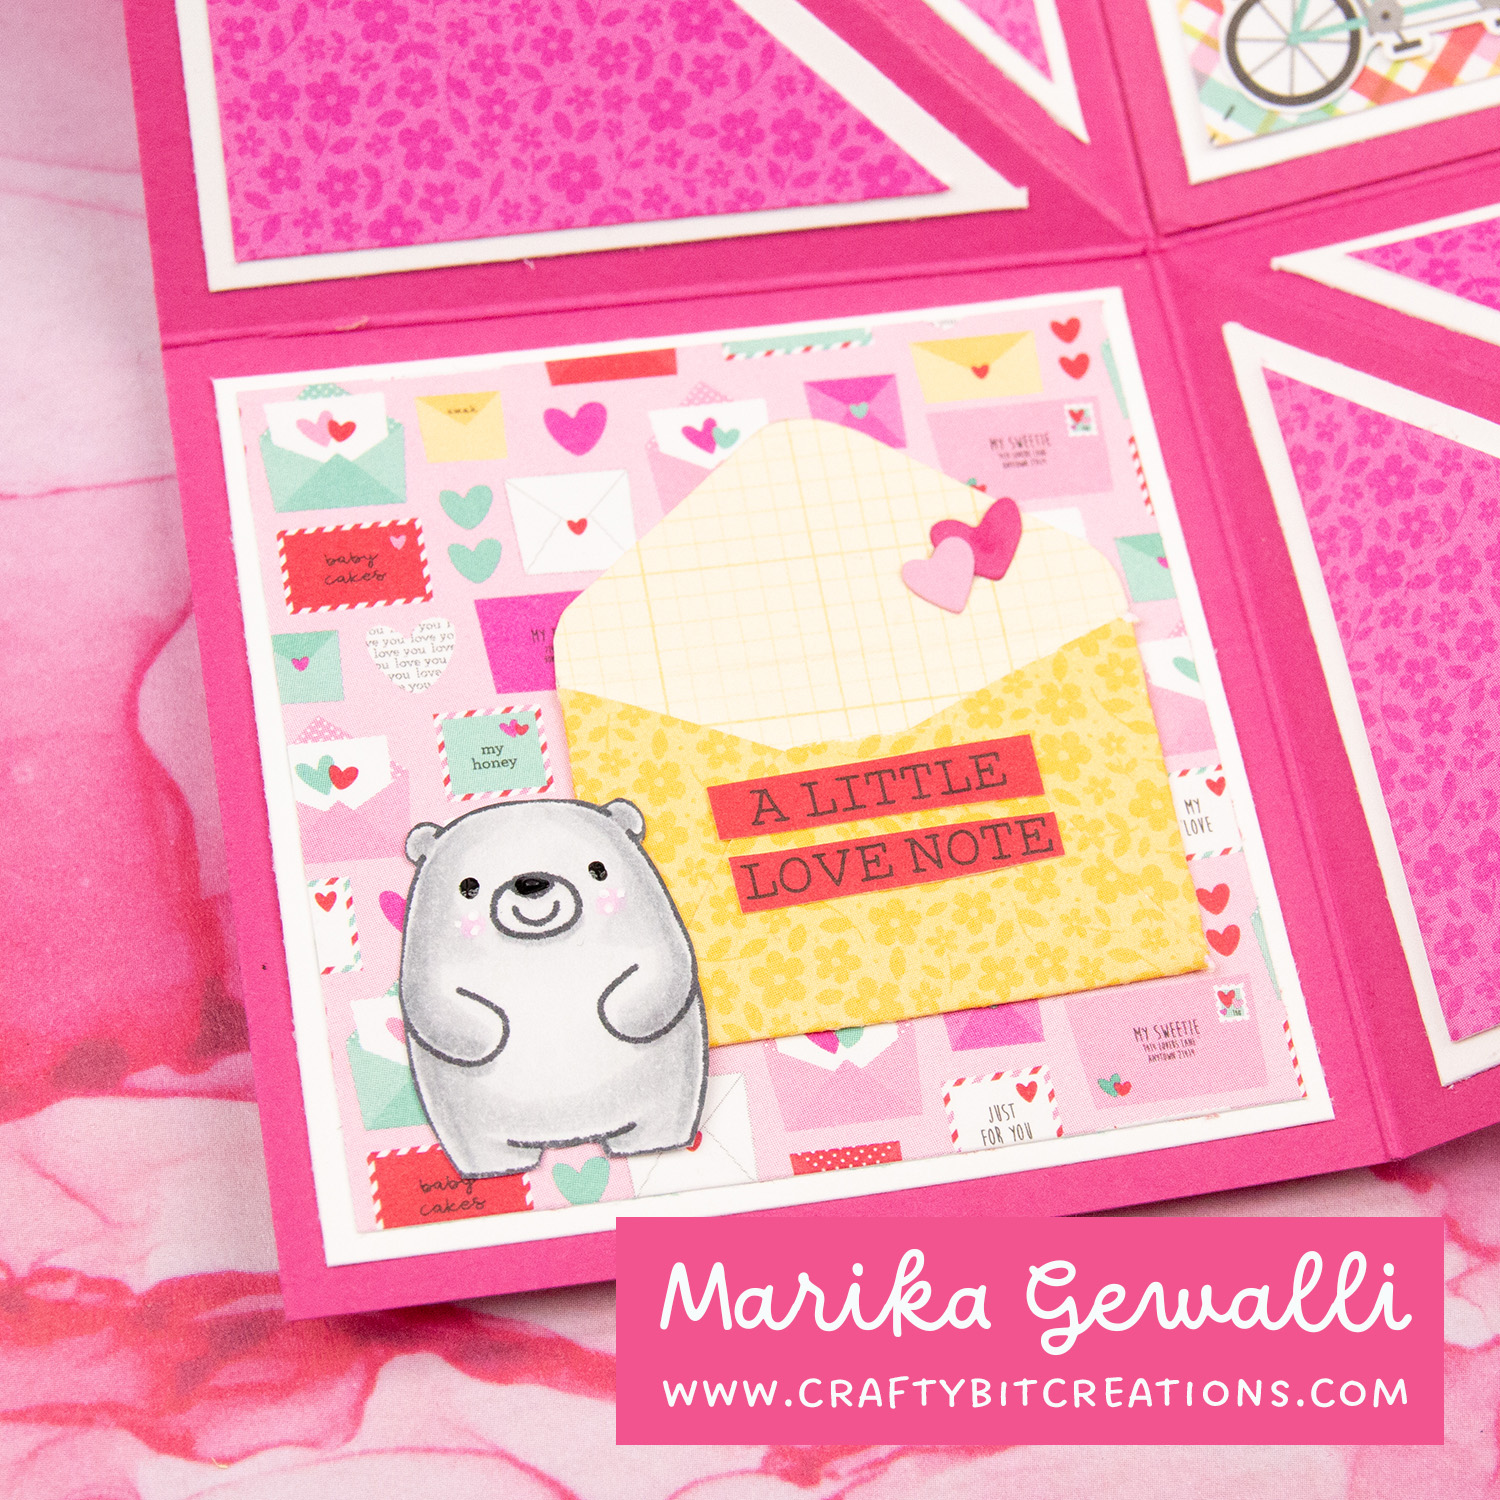
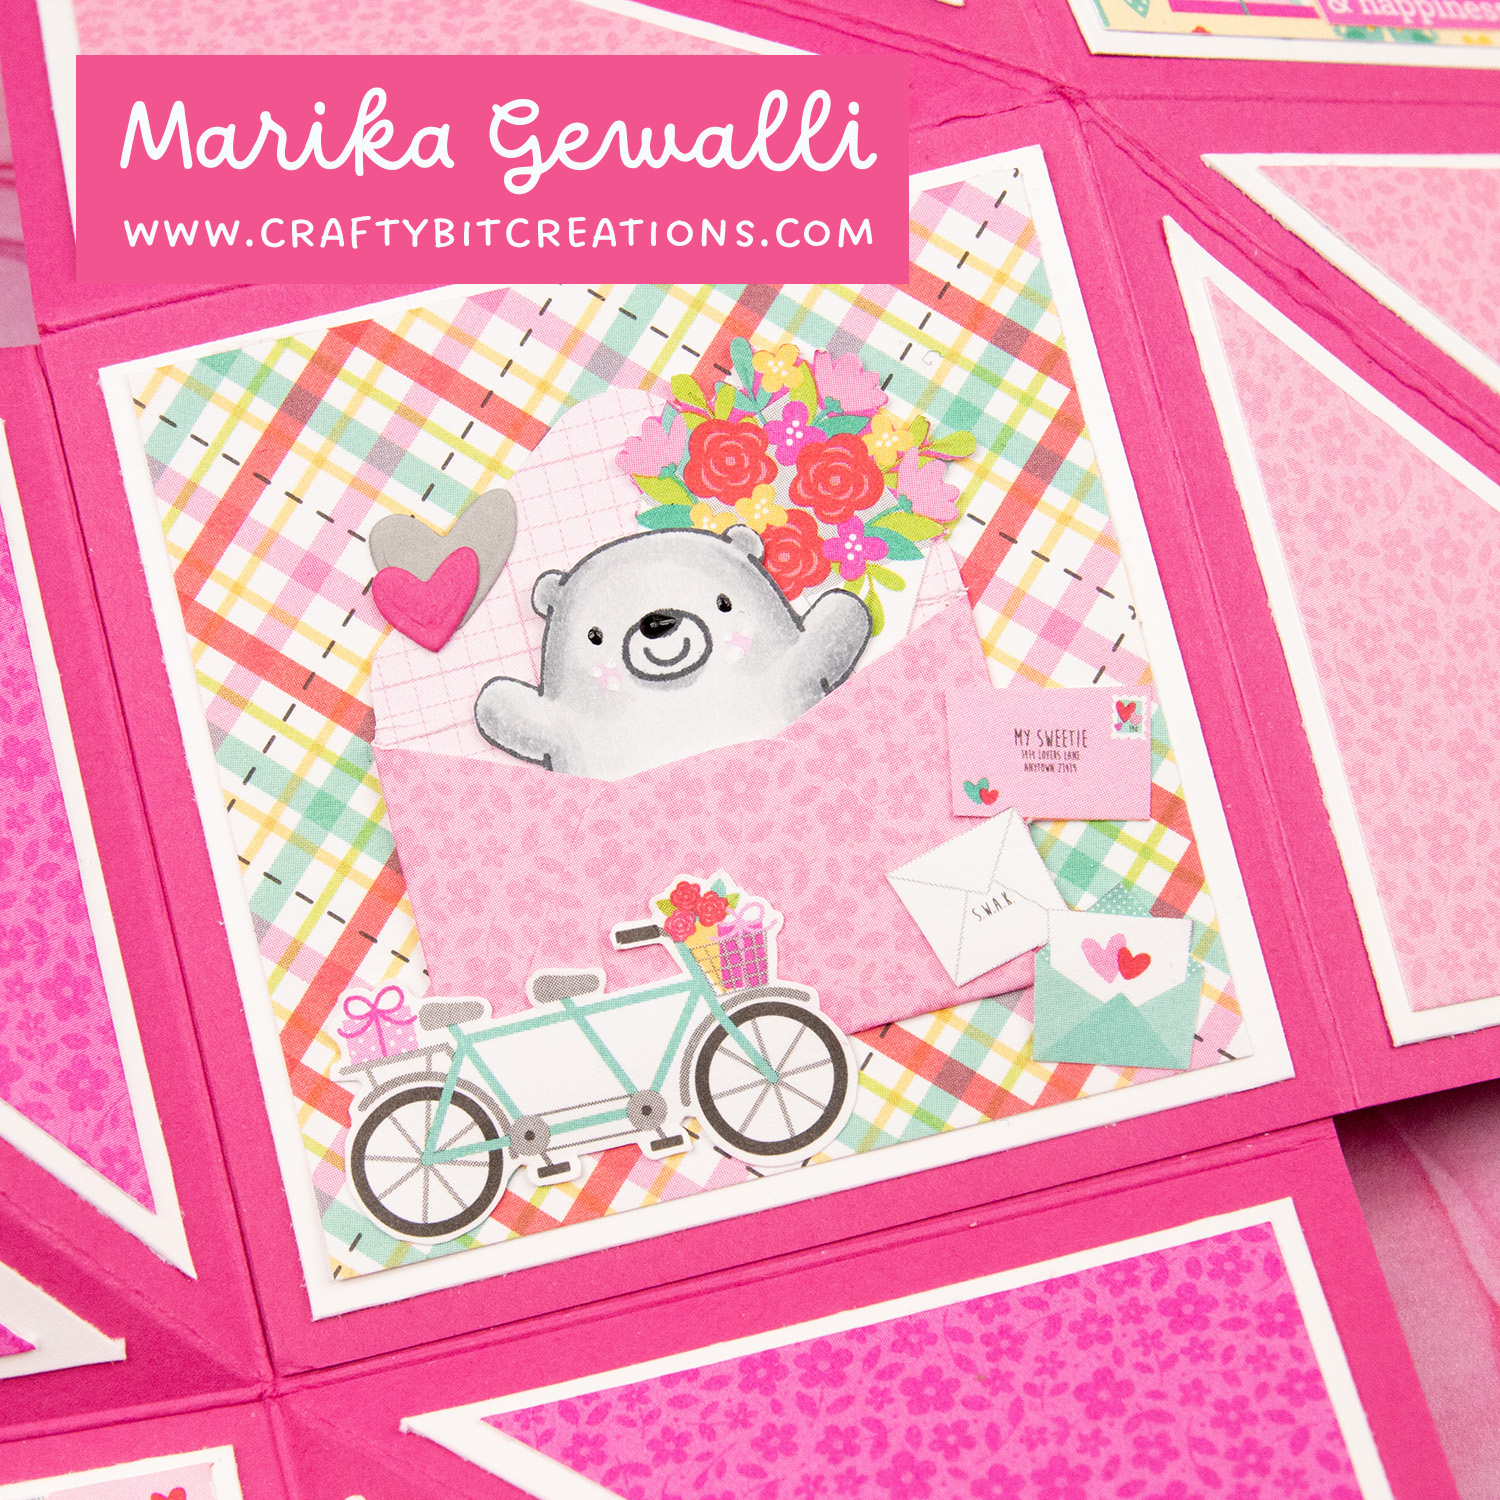
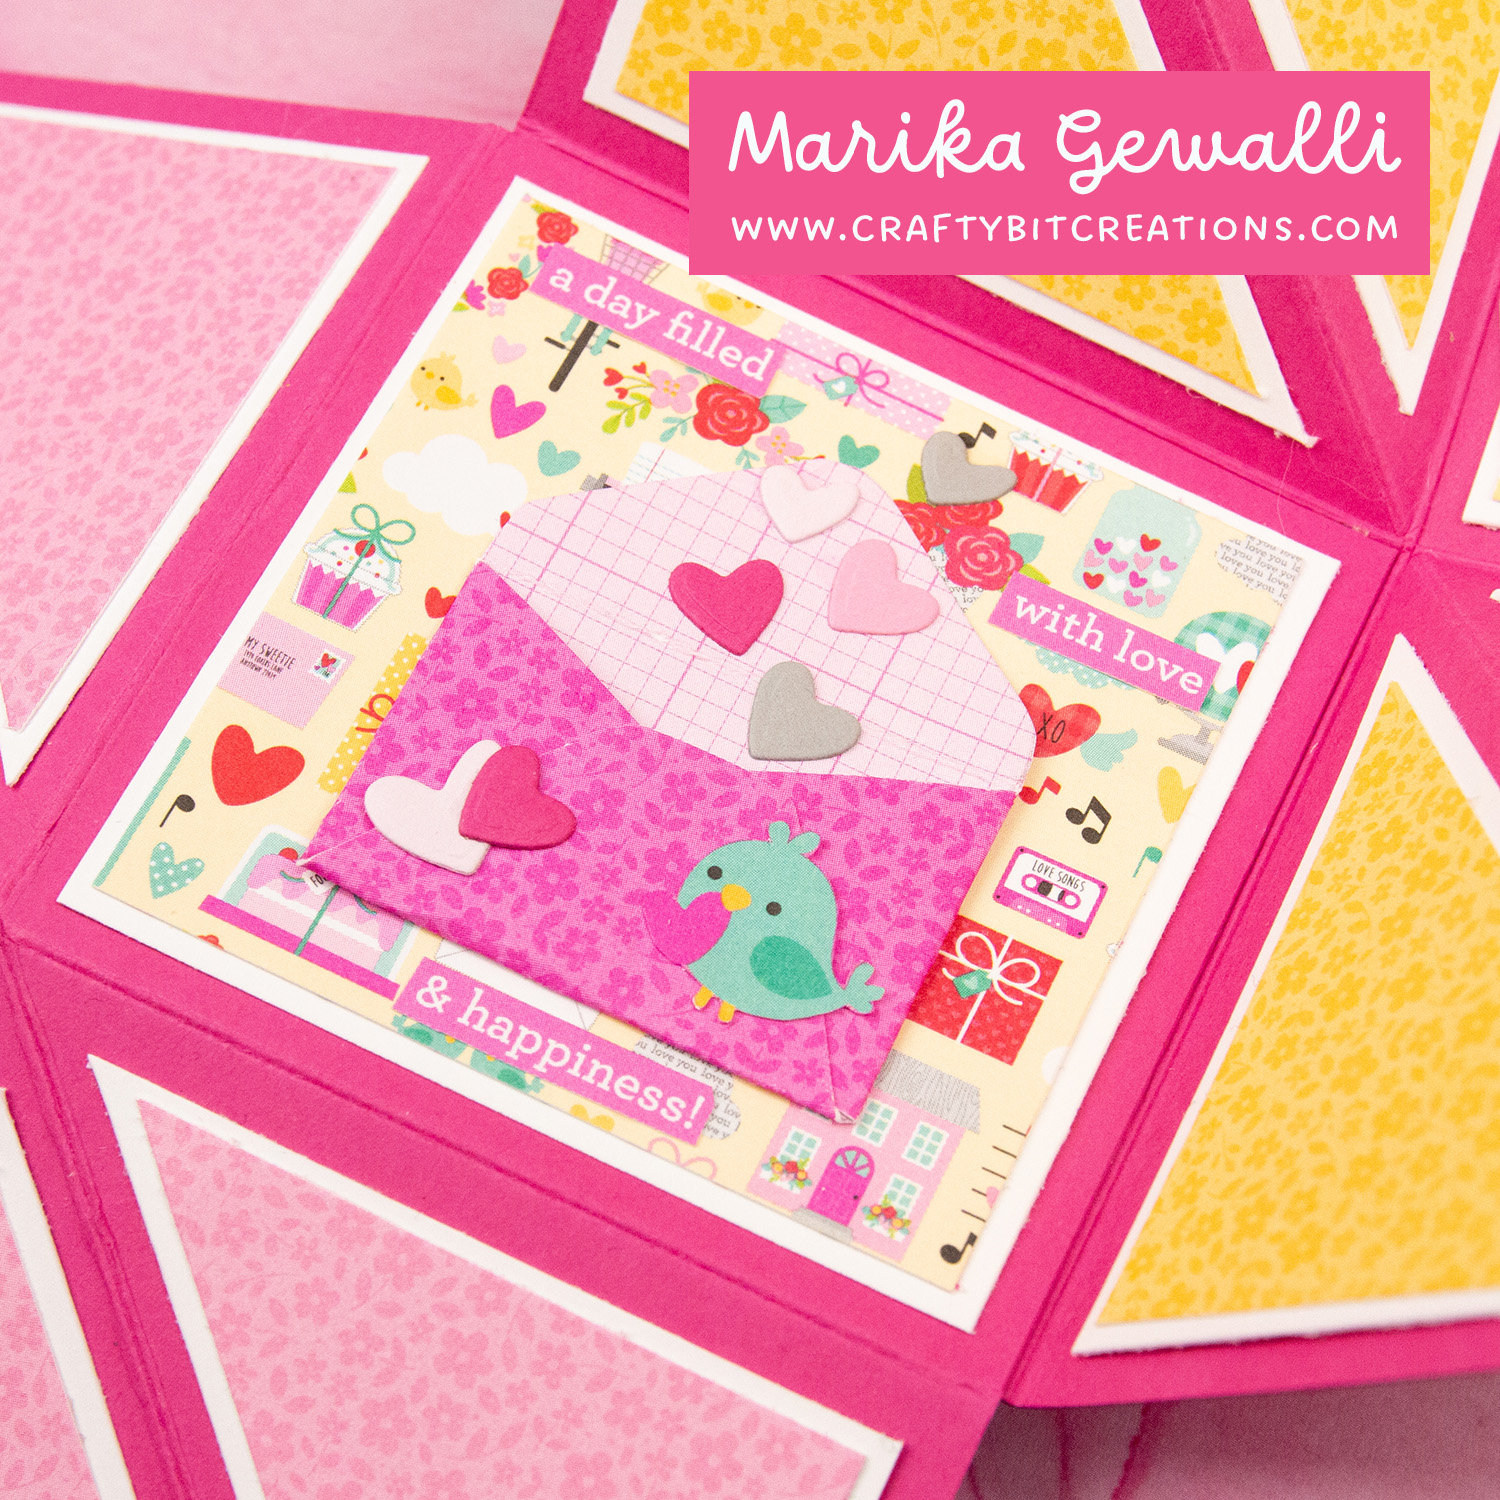
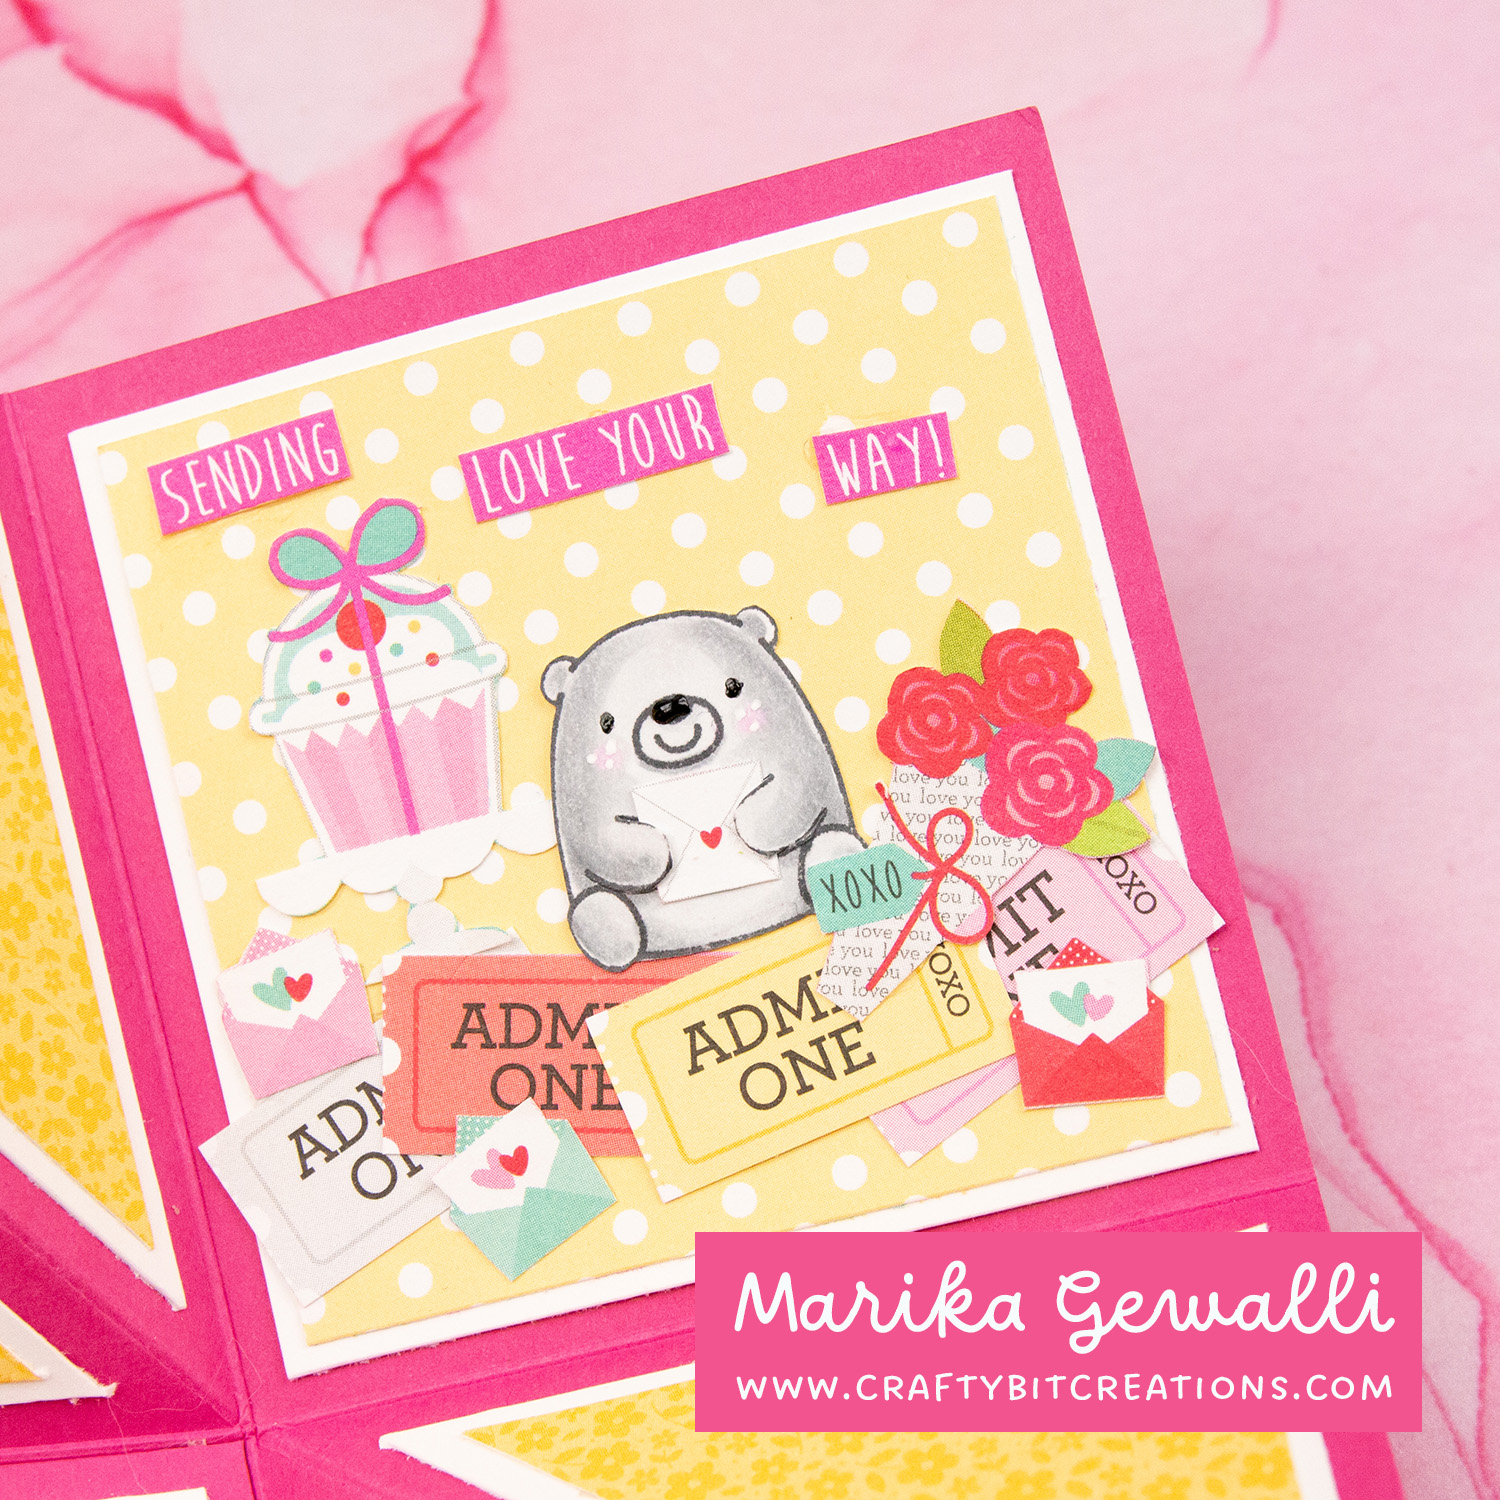
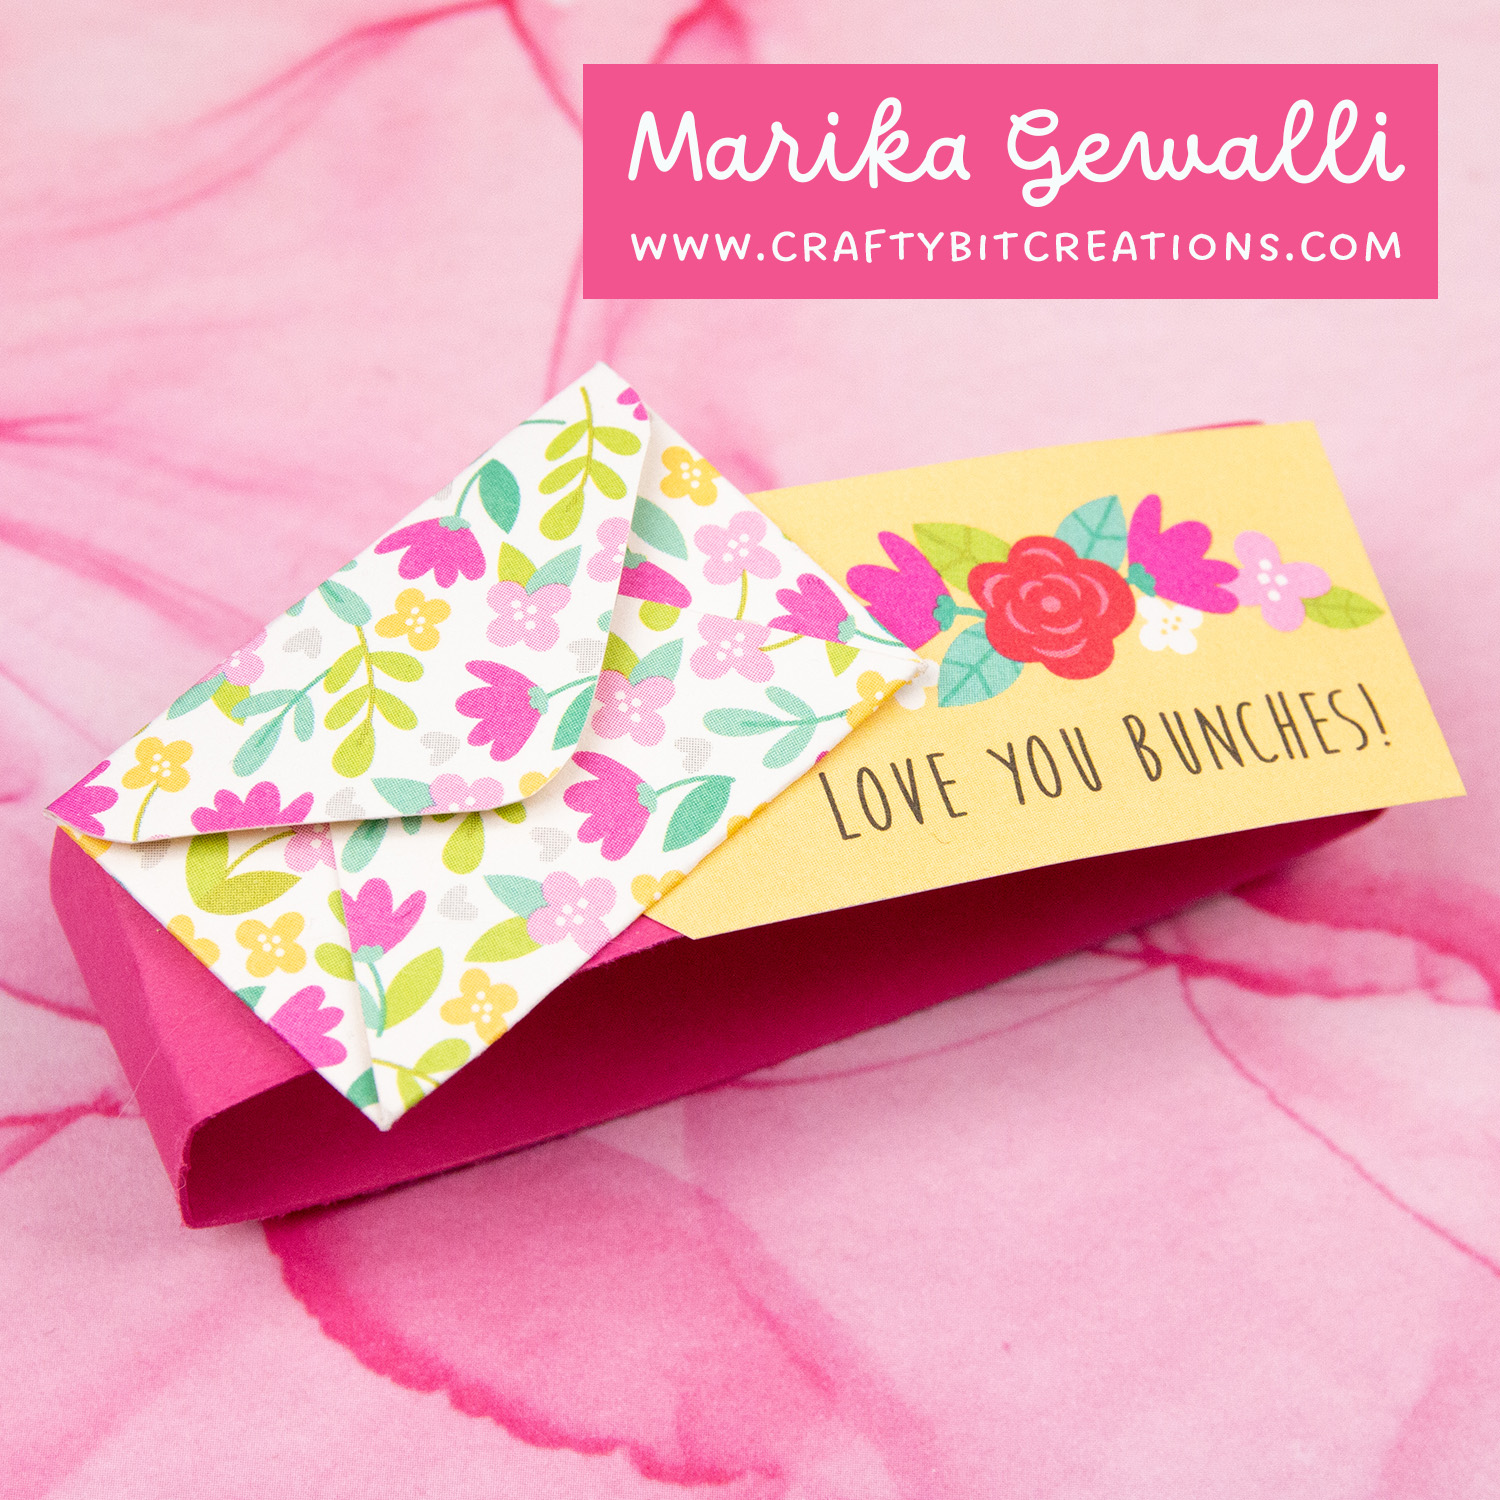
I love an interacting card, but sometimes you want an easy construction and put all your time into decorating. I have been wanting to play with all the little extra tags, borders etc that you can find in the Doodlebug Designs pattern paper packs. And then I saw an exploding card over at instagram and I knew that would be the perfect canvas.
The pattern paper is filled with little letters, so I felt I really needed a teeny tiny envelope to add as decoration. So I went into illustrator and designed one. It took a couple of tries but I really like how it came out. And you can pick up the template and cutting files HERE.
Instructions:
Card: Cut three pieces of card measuring 5 1/2″ x 5 1/2″. Score at 2 3/4″ at both sides. Score diagonally once. Burnish all score lines. Glue together the pieces, overlapping one of the unscored squares with another. See video for more details.
Bottom Layer: In your bottom layer color, cut five pieces that measure 2 1/2″ x 2 1/2″. Then cut six pieces that measure 2 1/4″ x 2 1/4″ and then cut those pieces diagonally so you have 12 triangles.
Top Layer: In your pattern paper, cut five peices that measure 2 3/8″ x 2 3/8″. Then cut six pieces that measure 2″ x 2″ and then cut those pieces diagonally so you have 12 triangles.
Layer all the pieces and decorate as see fit.
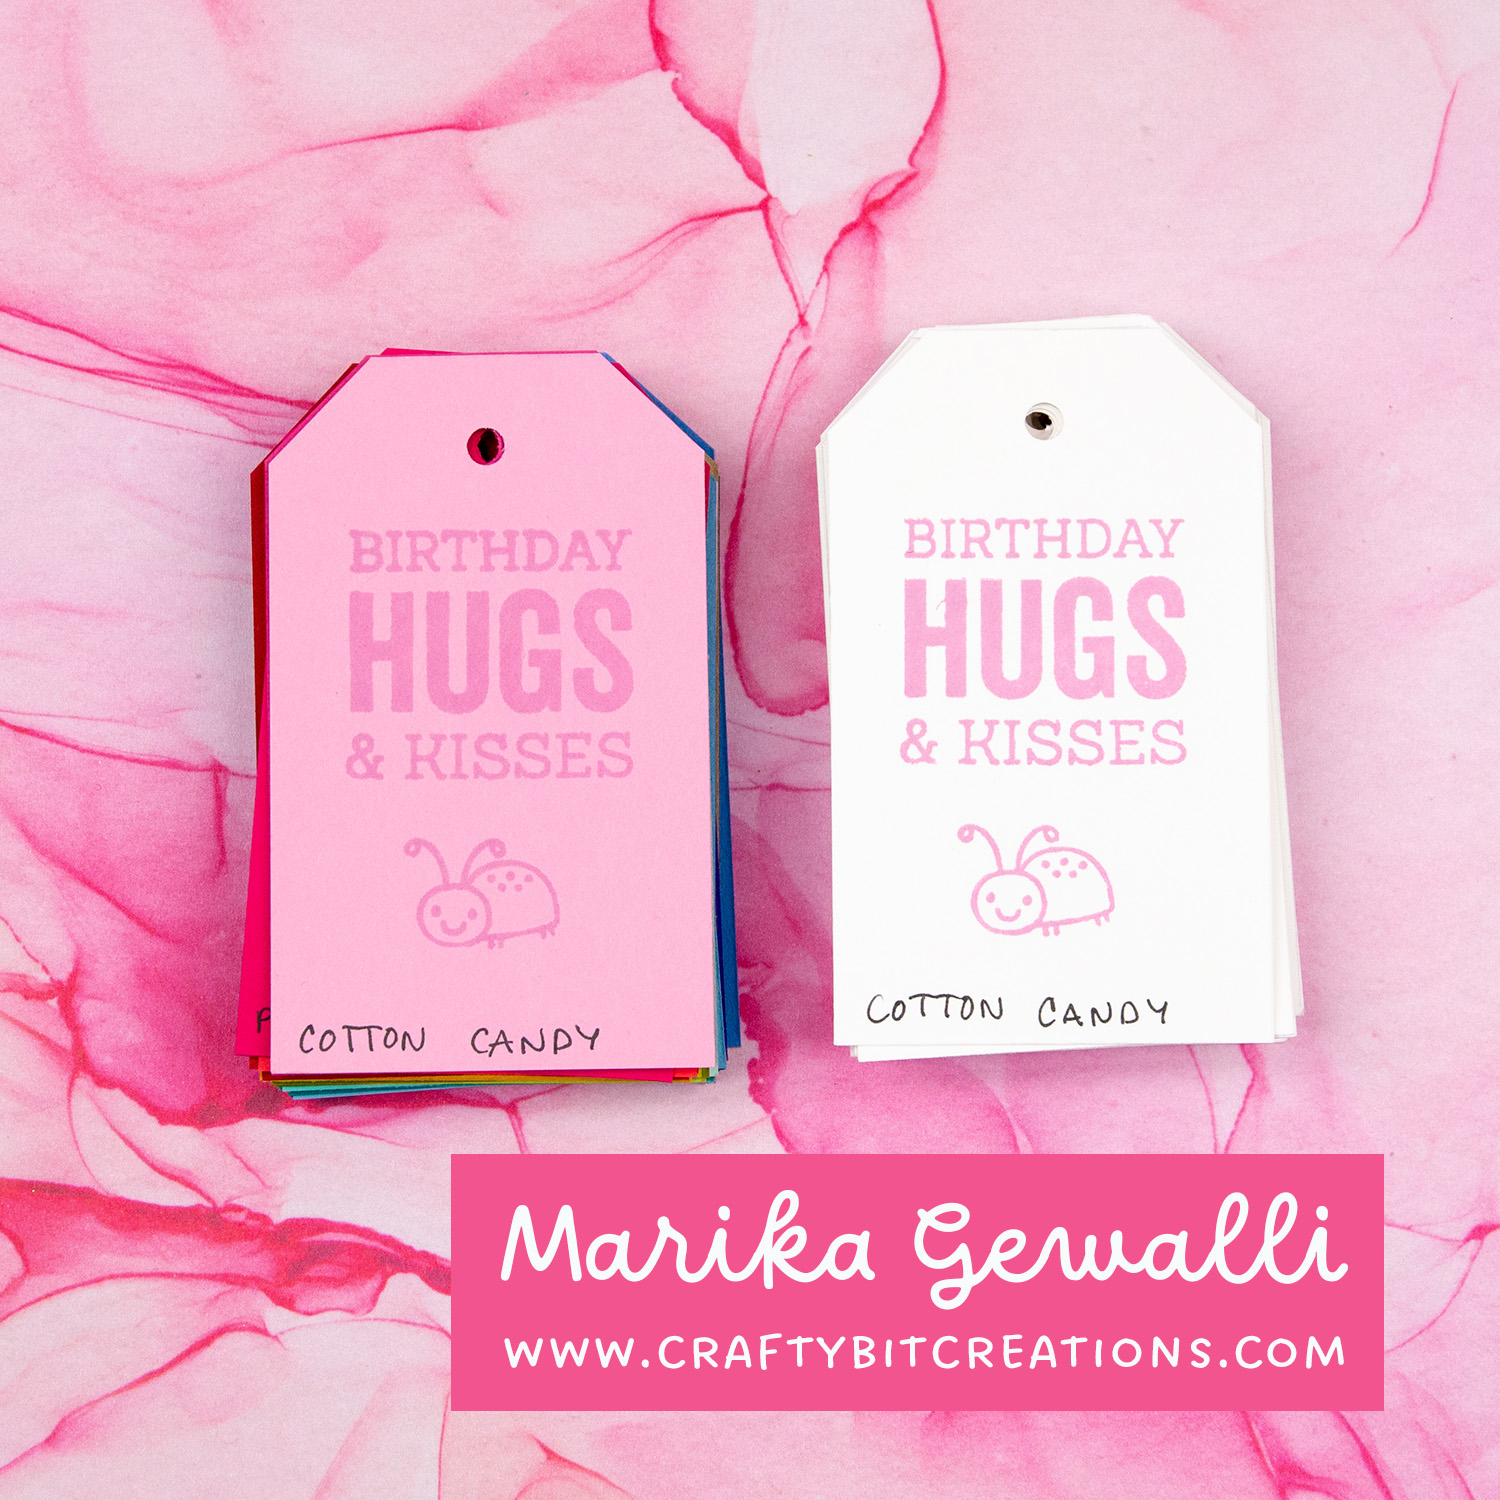
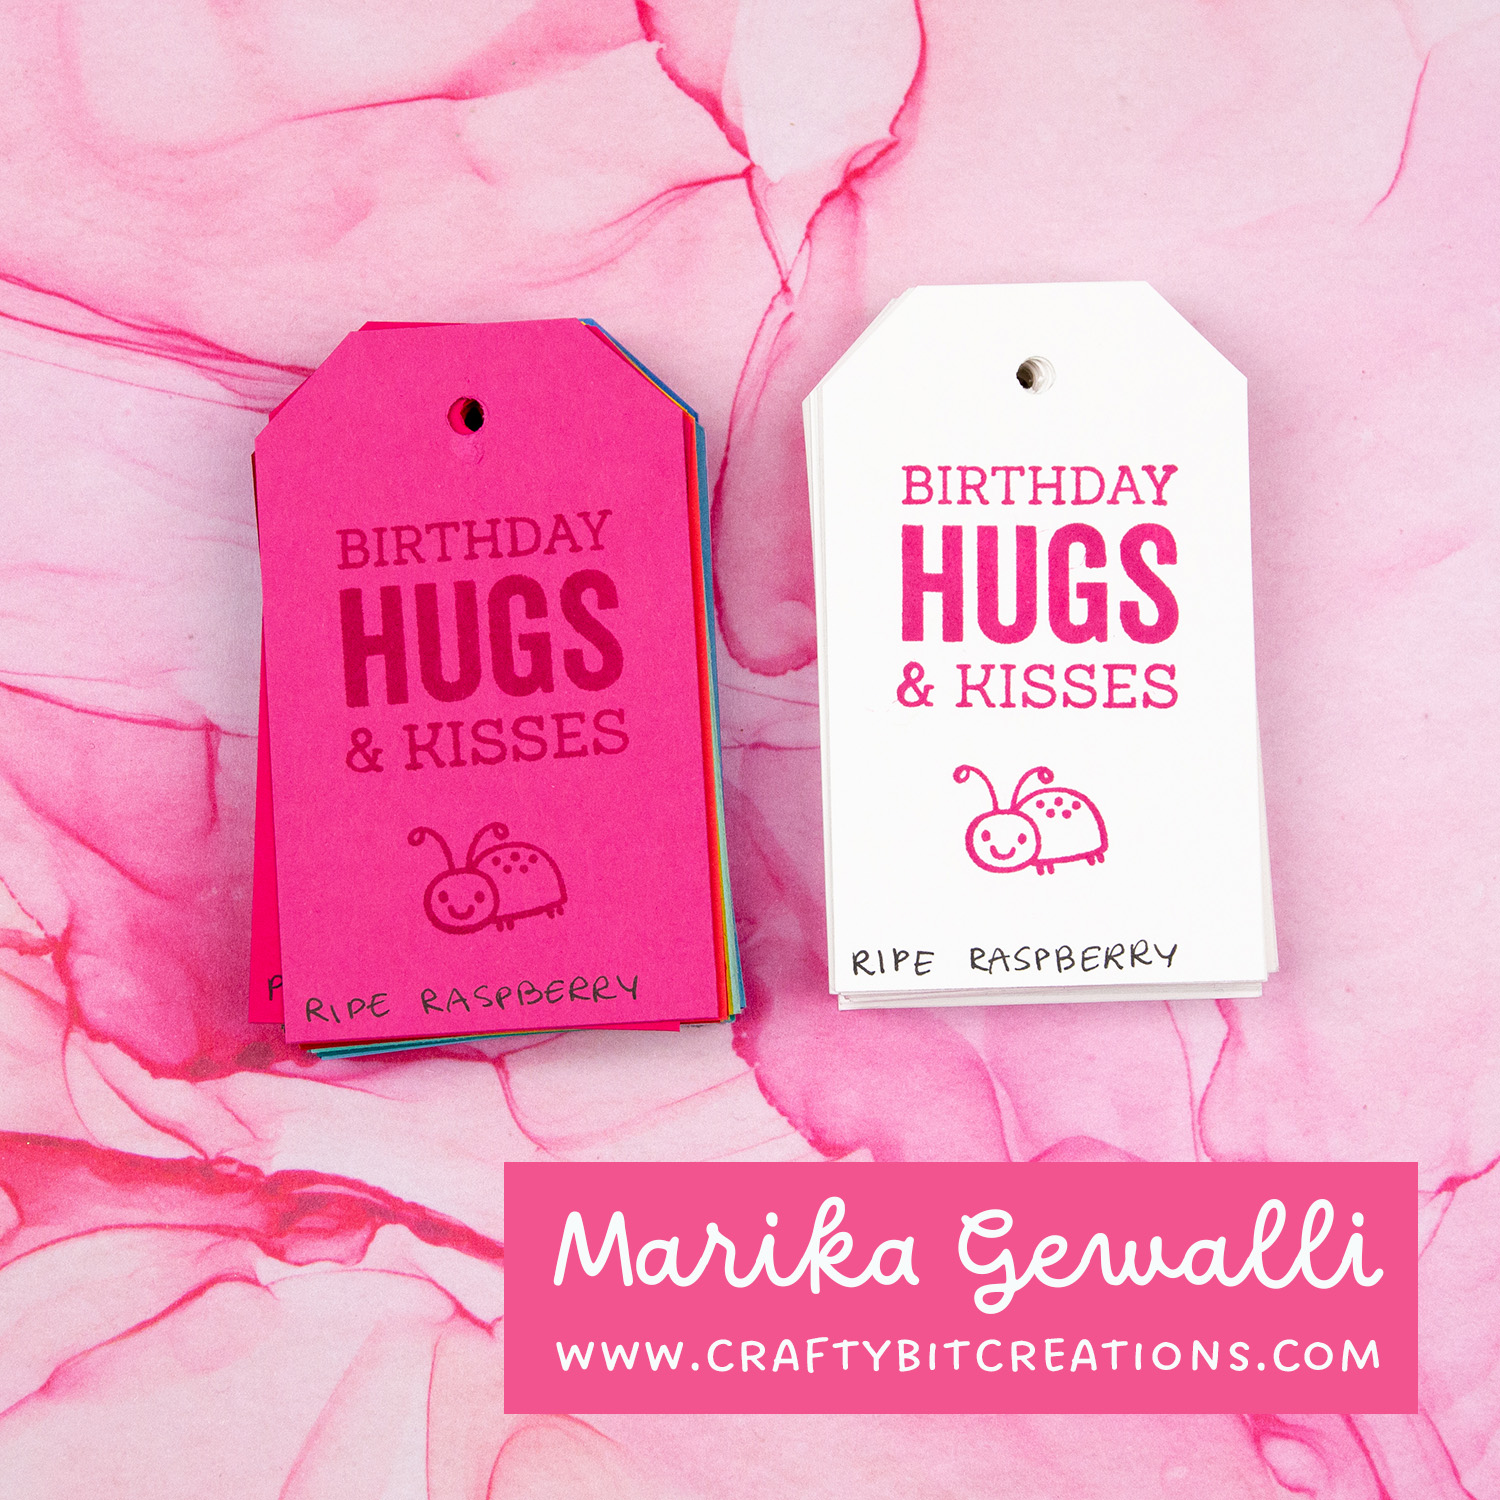
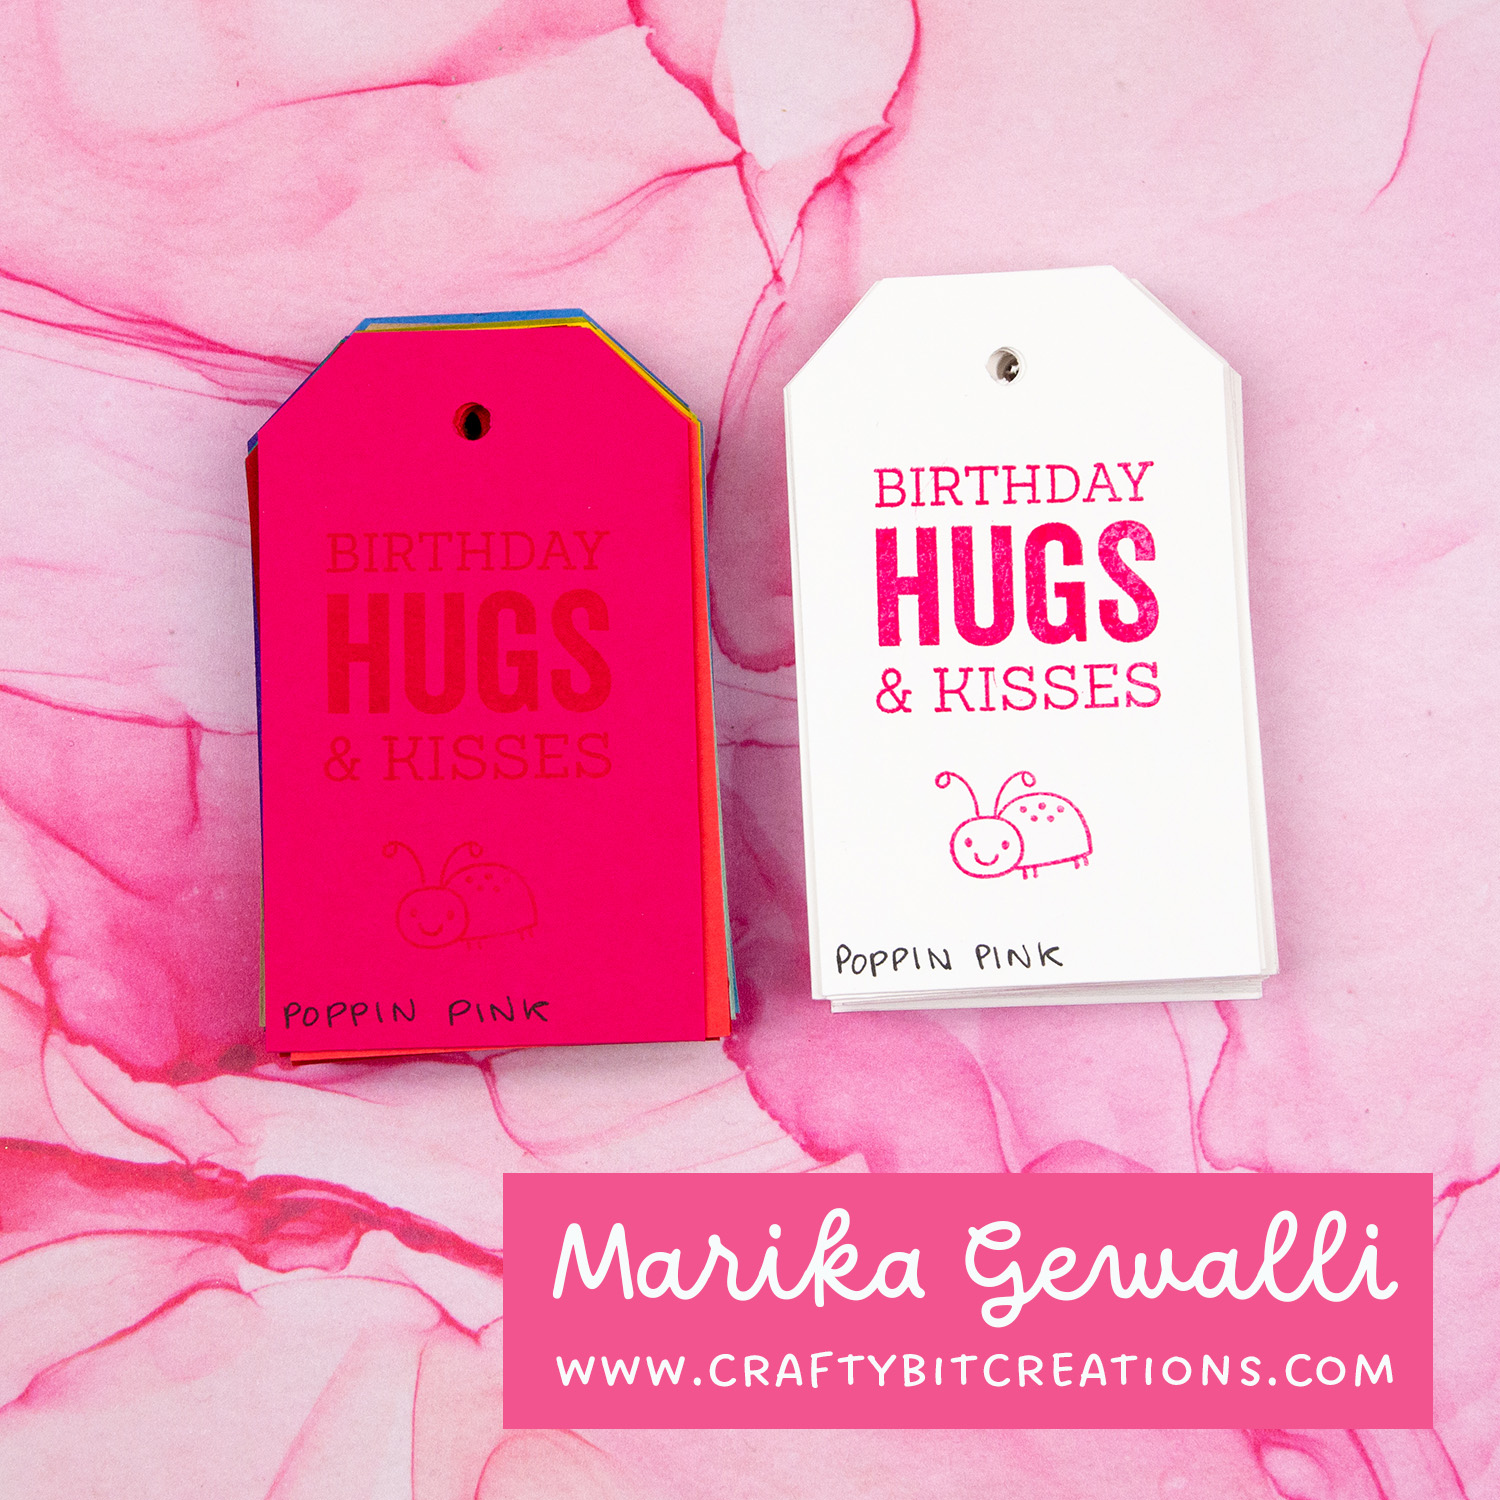
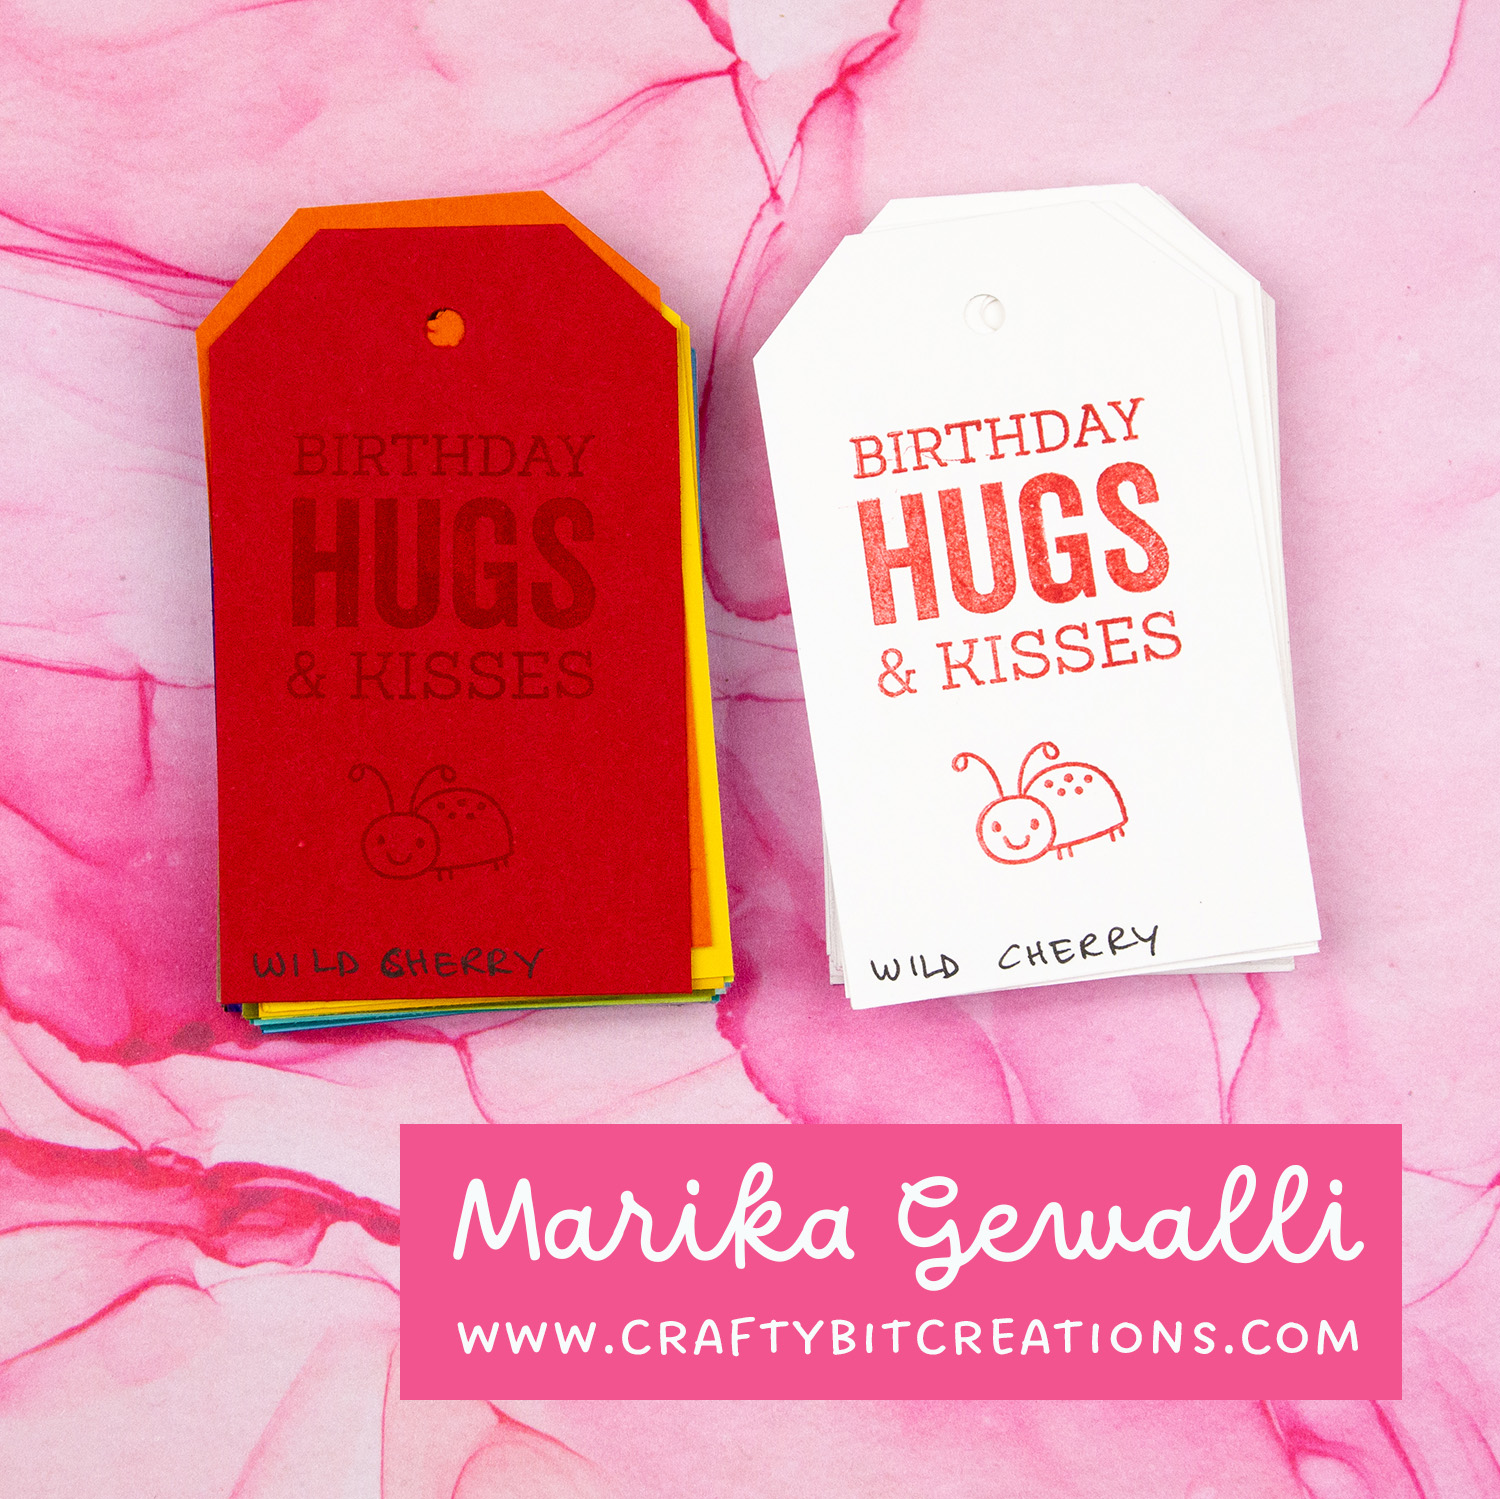
When possible affiliate links are used, this means that I receive a small commission when products are purchased through the links (at no extra cost to you) I use the money to support my blog and youtube channel. If you like my projects and tutorial please consider supporting me by clicking through these links when you shop. Thanks!
Supplies:
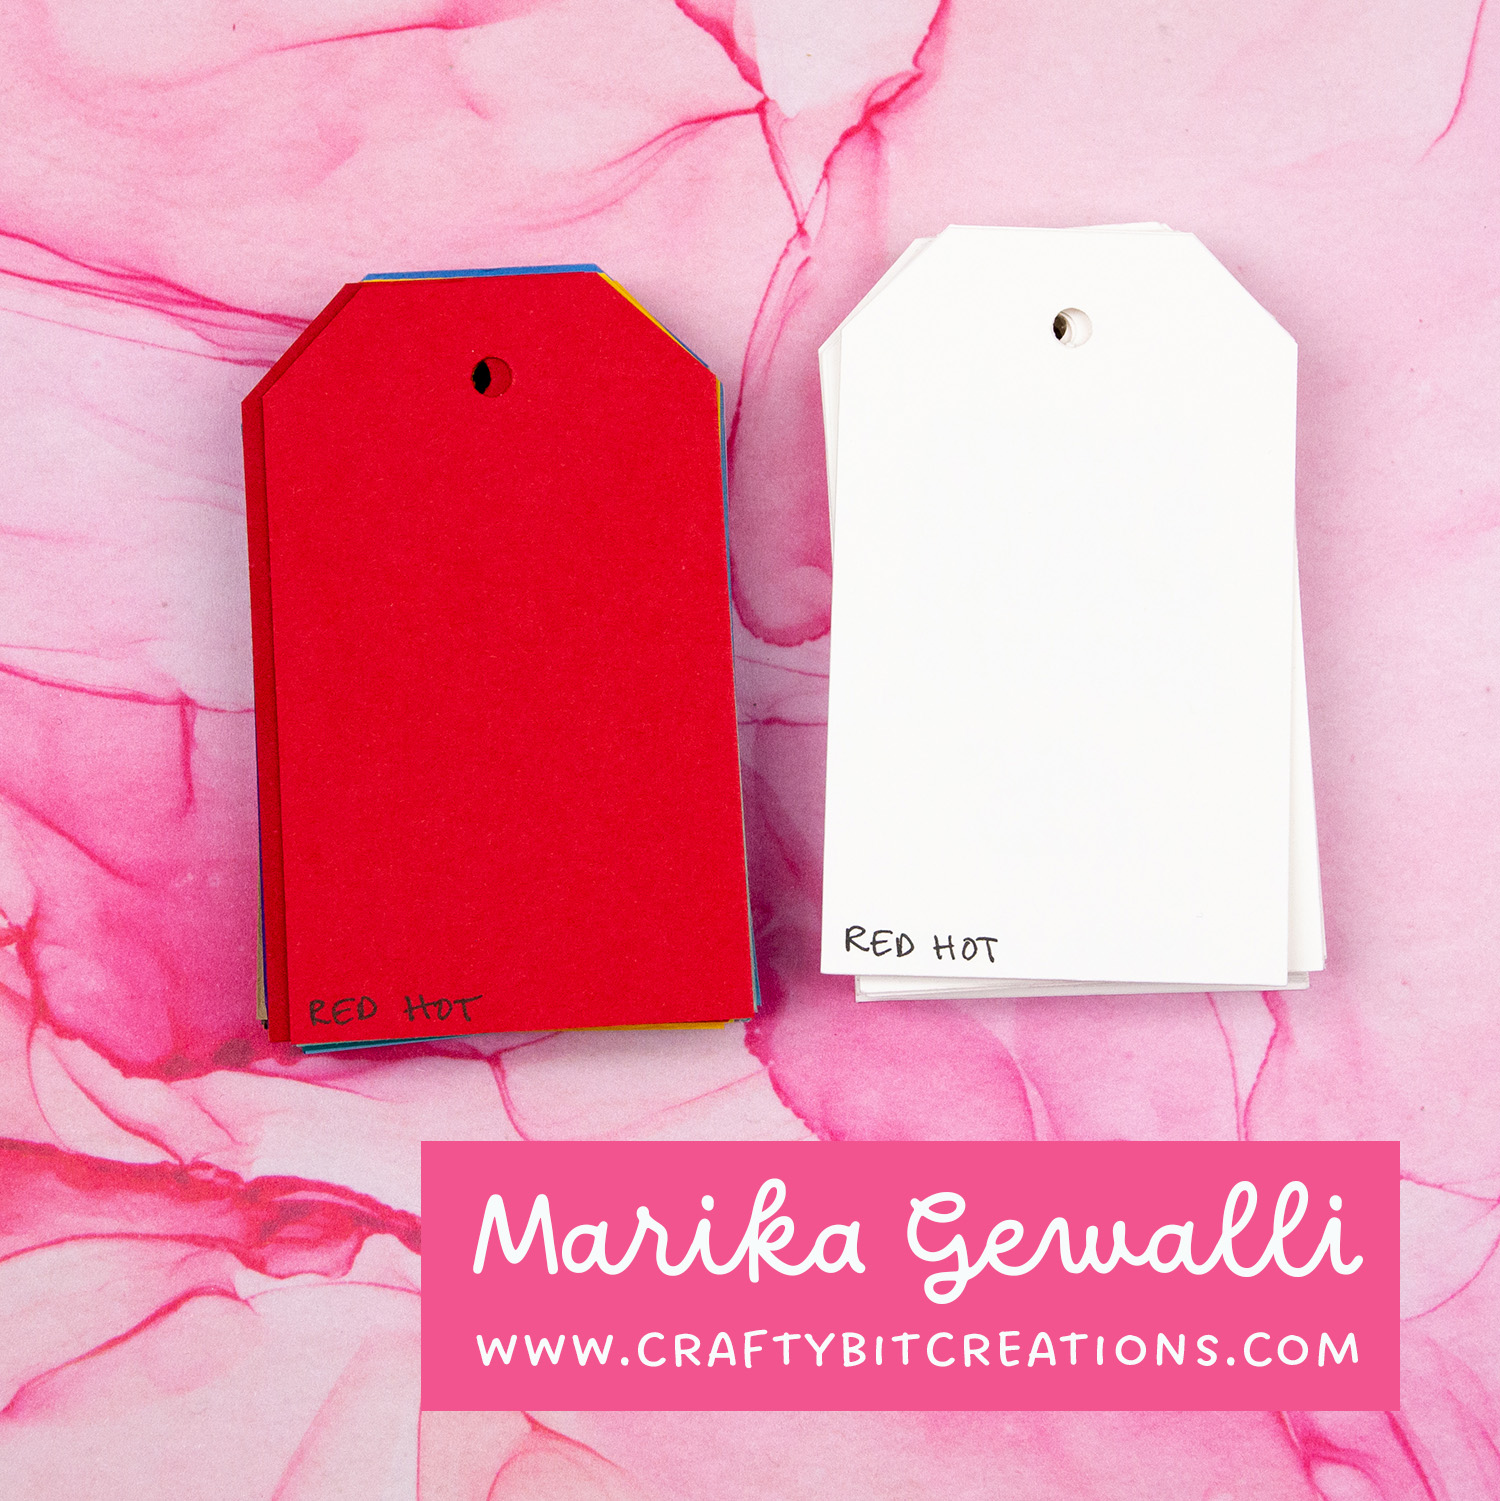
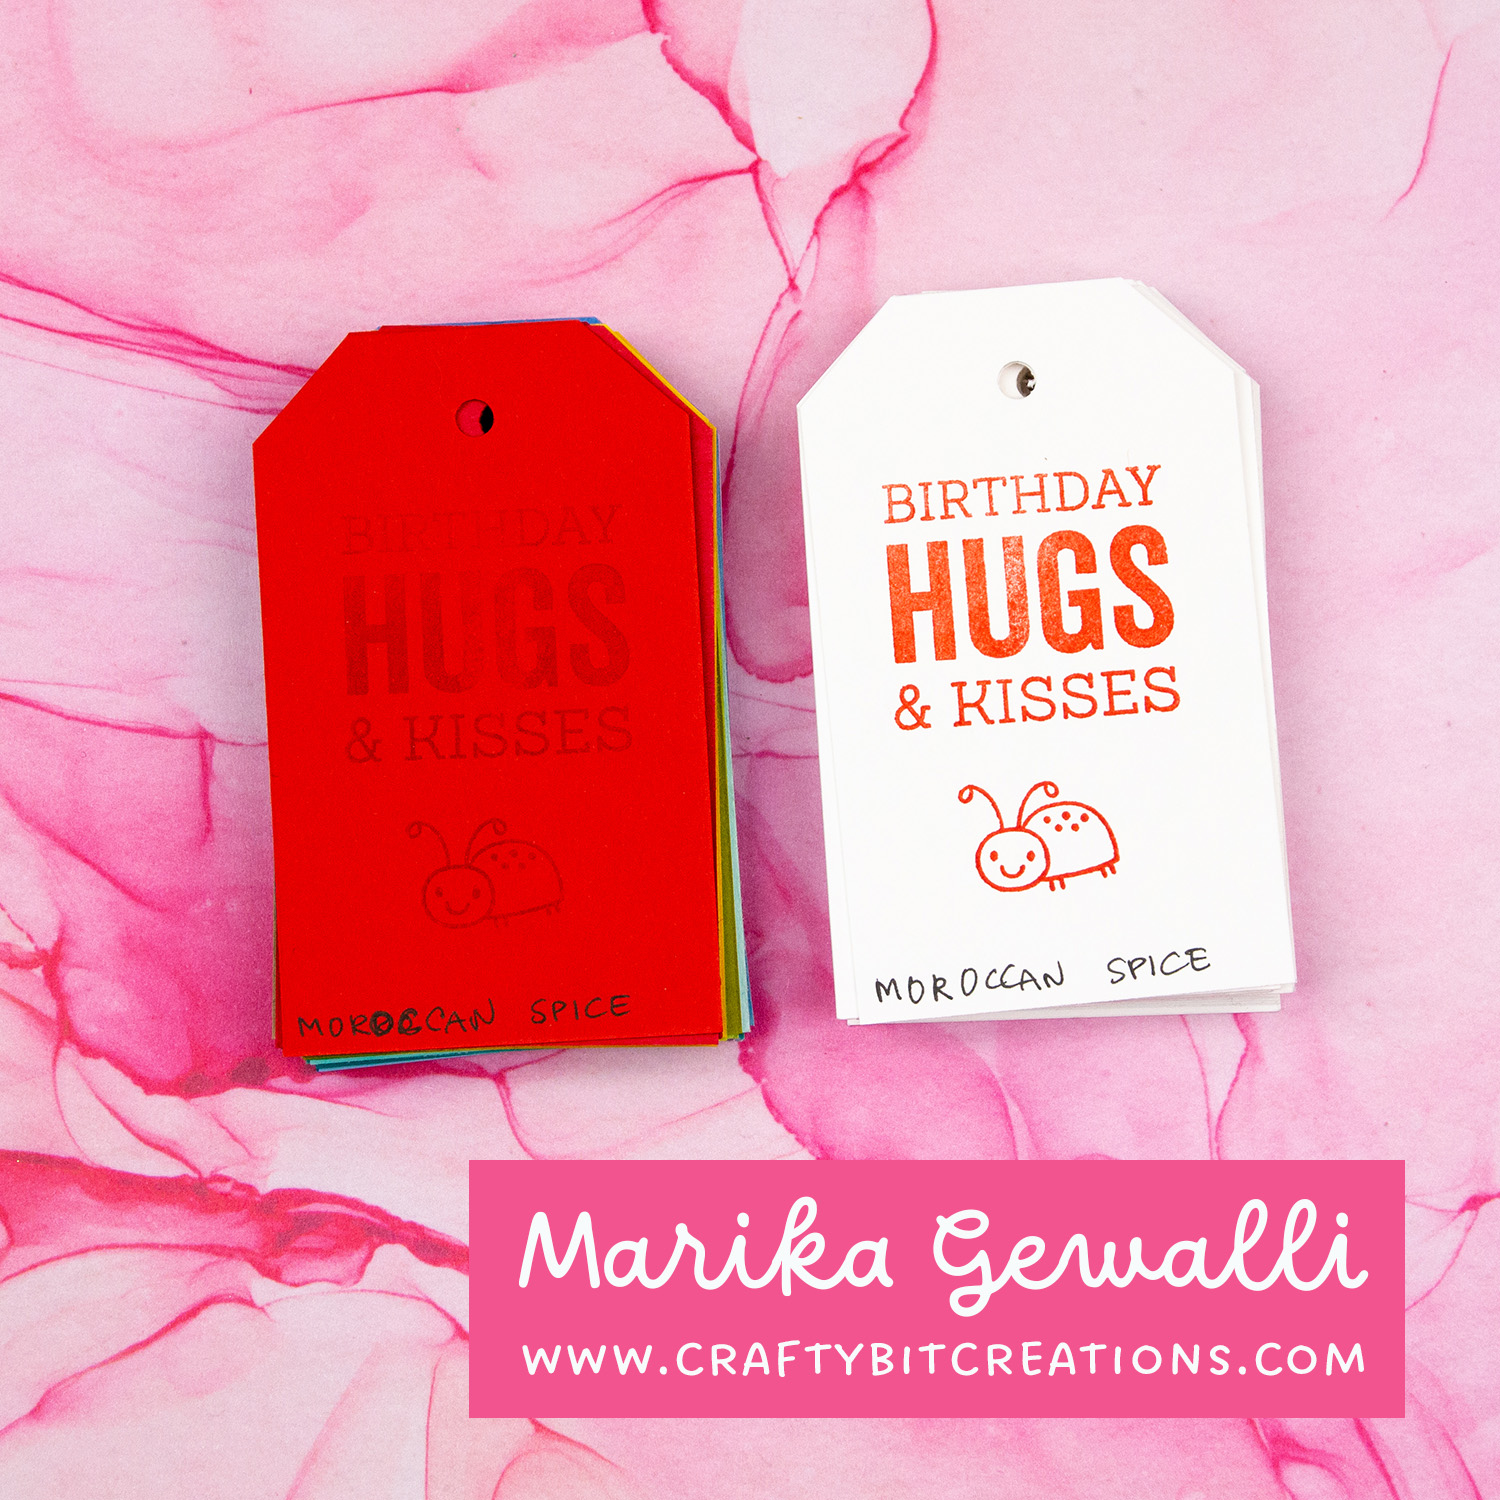
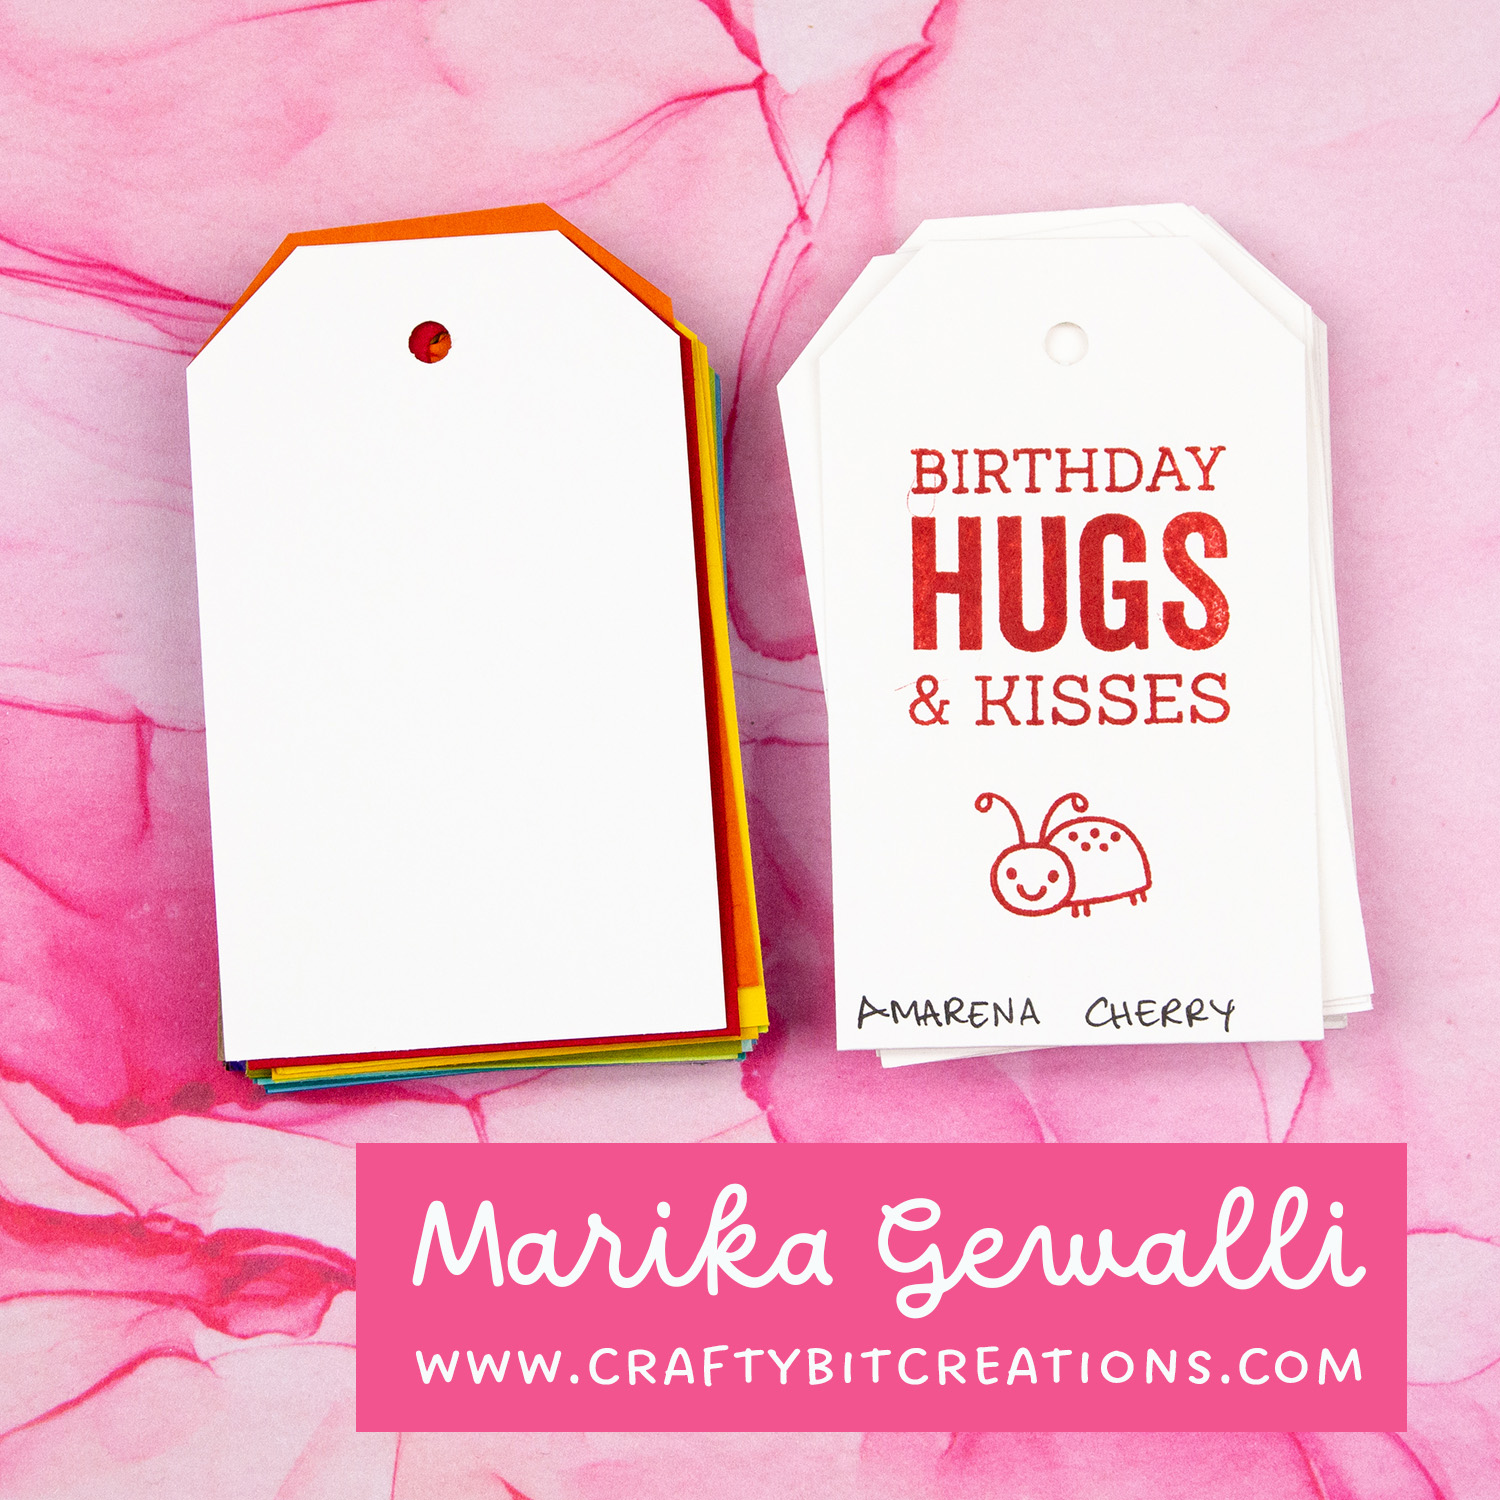
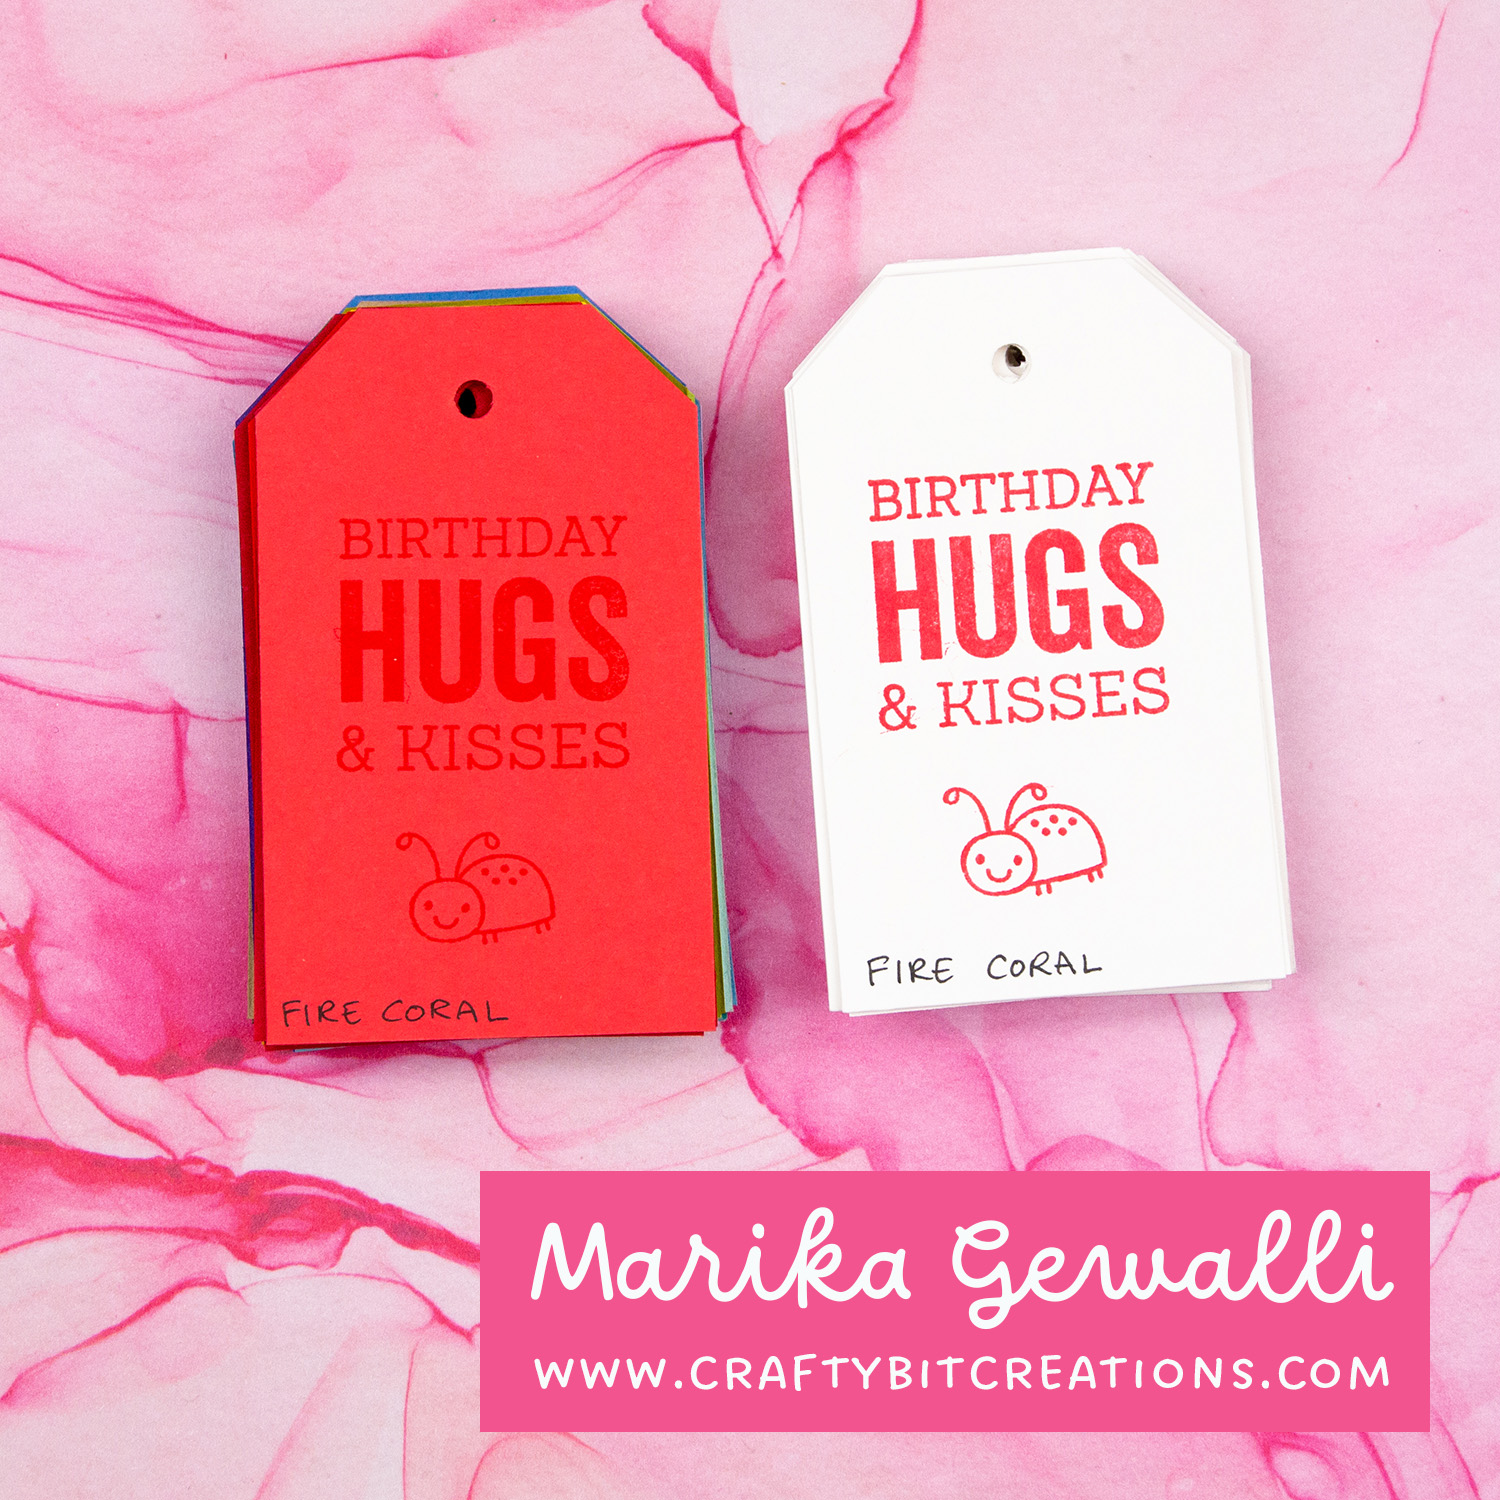
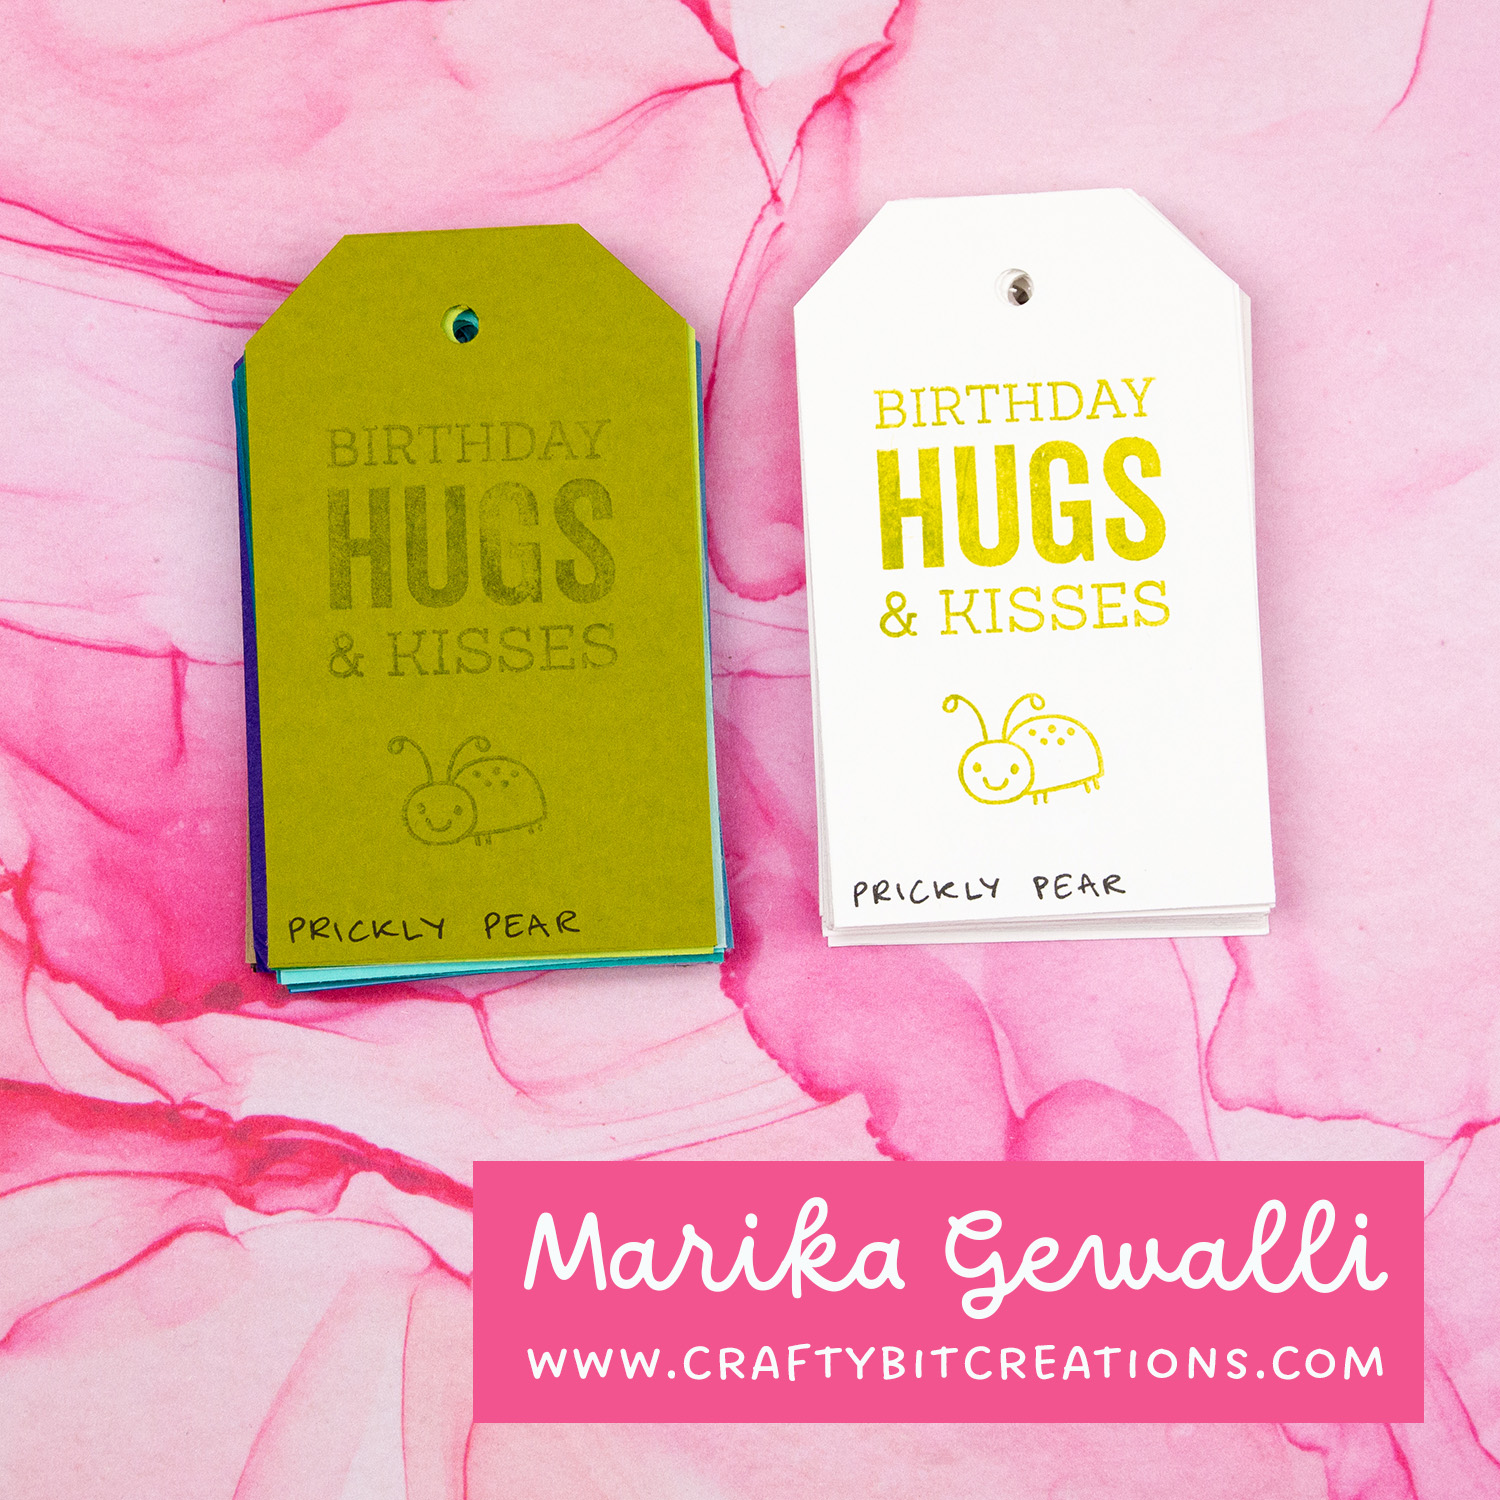
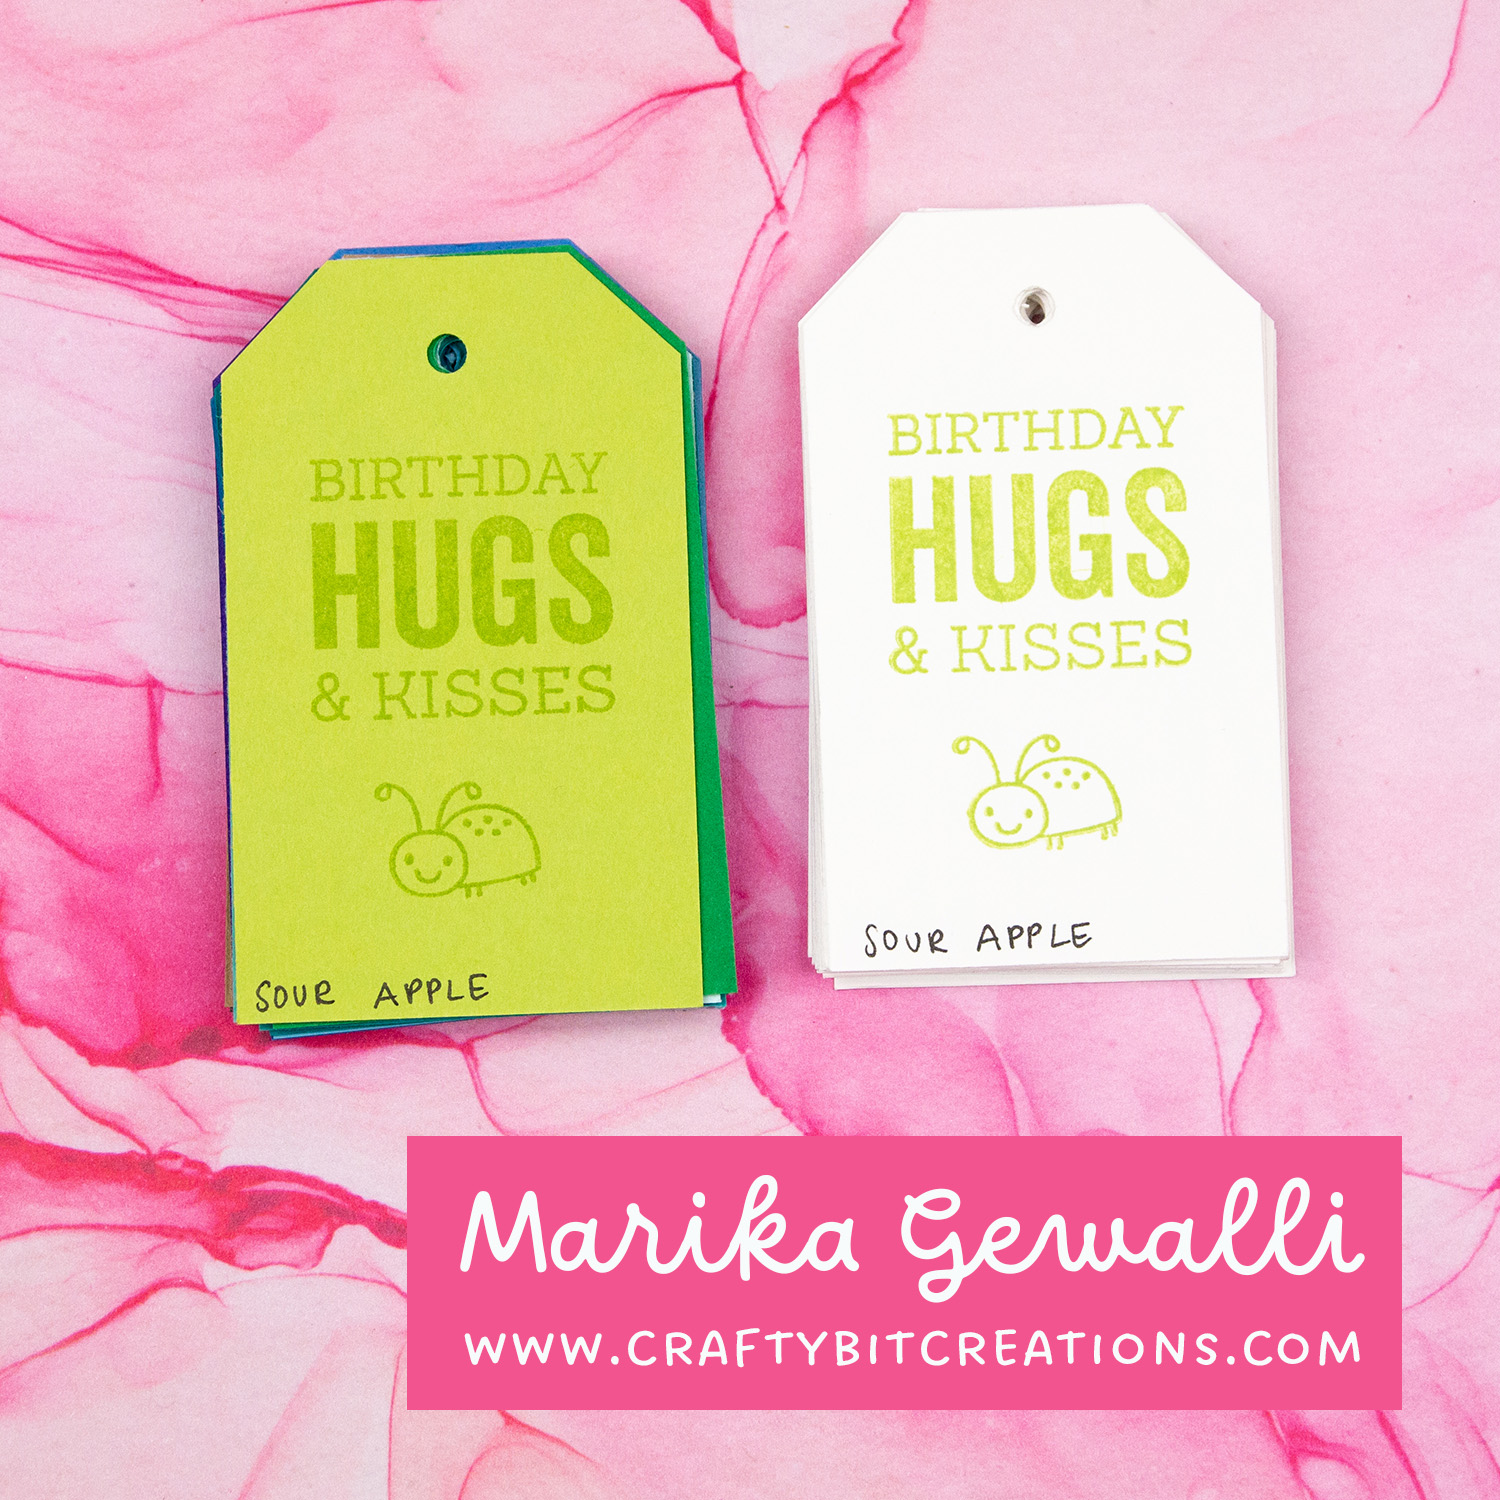
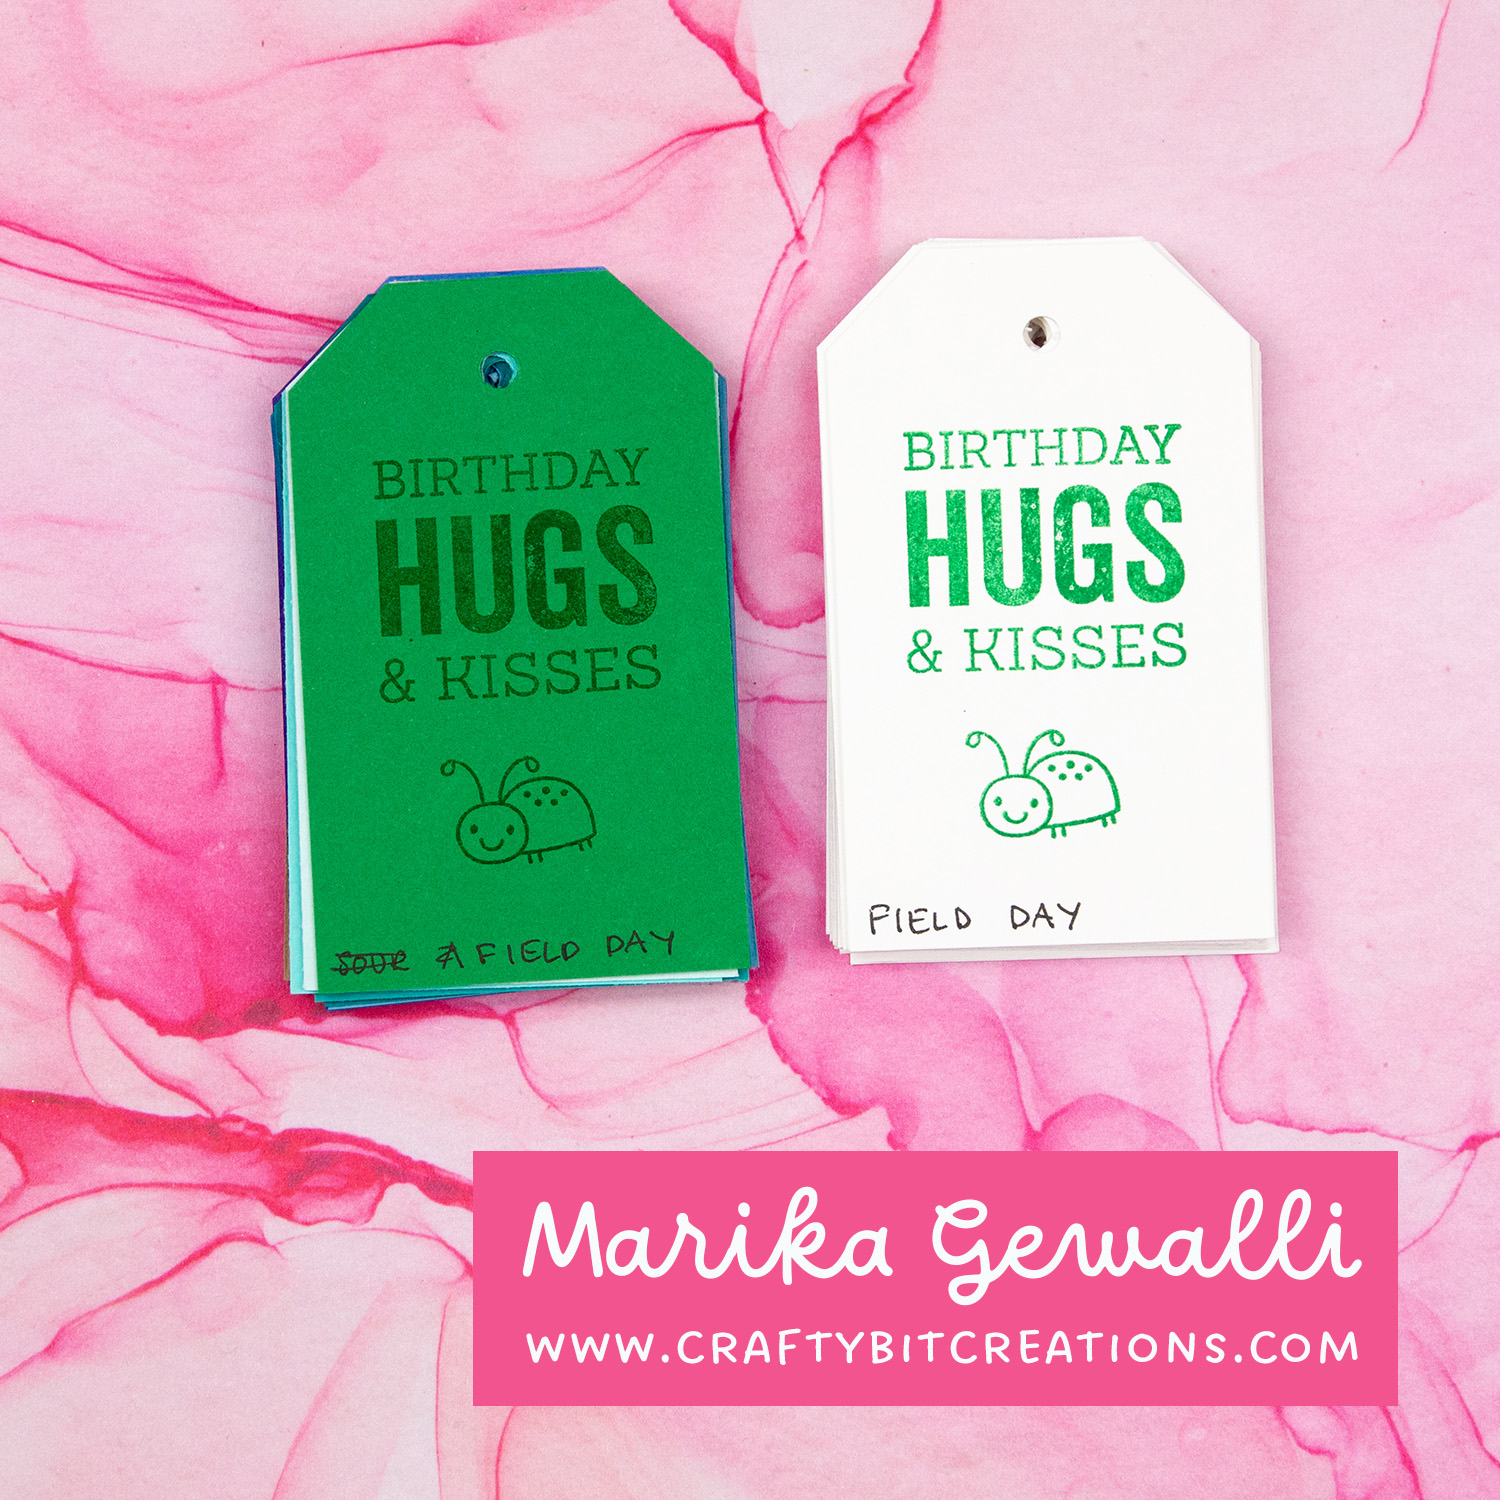
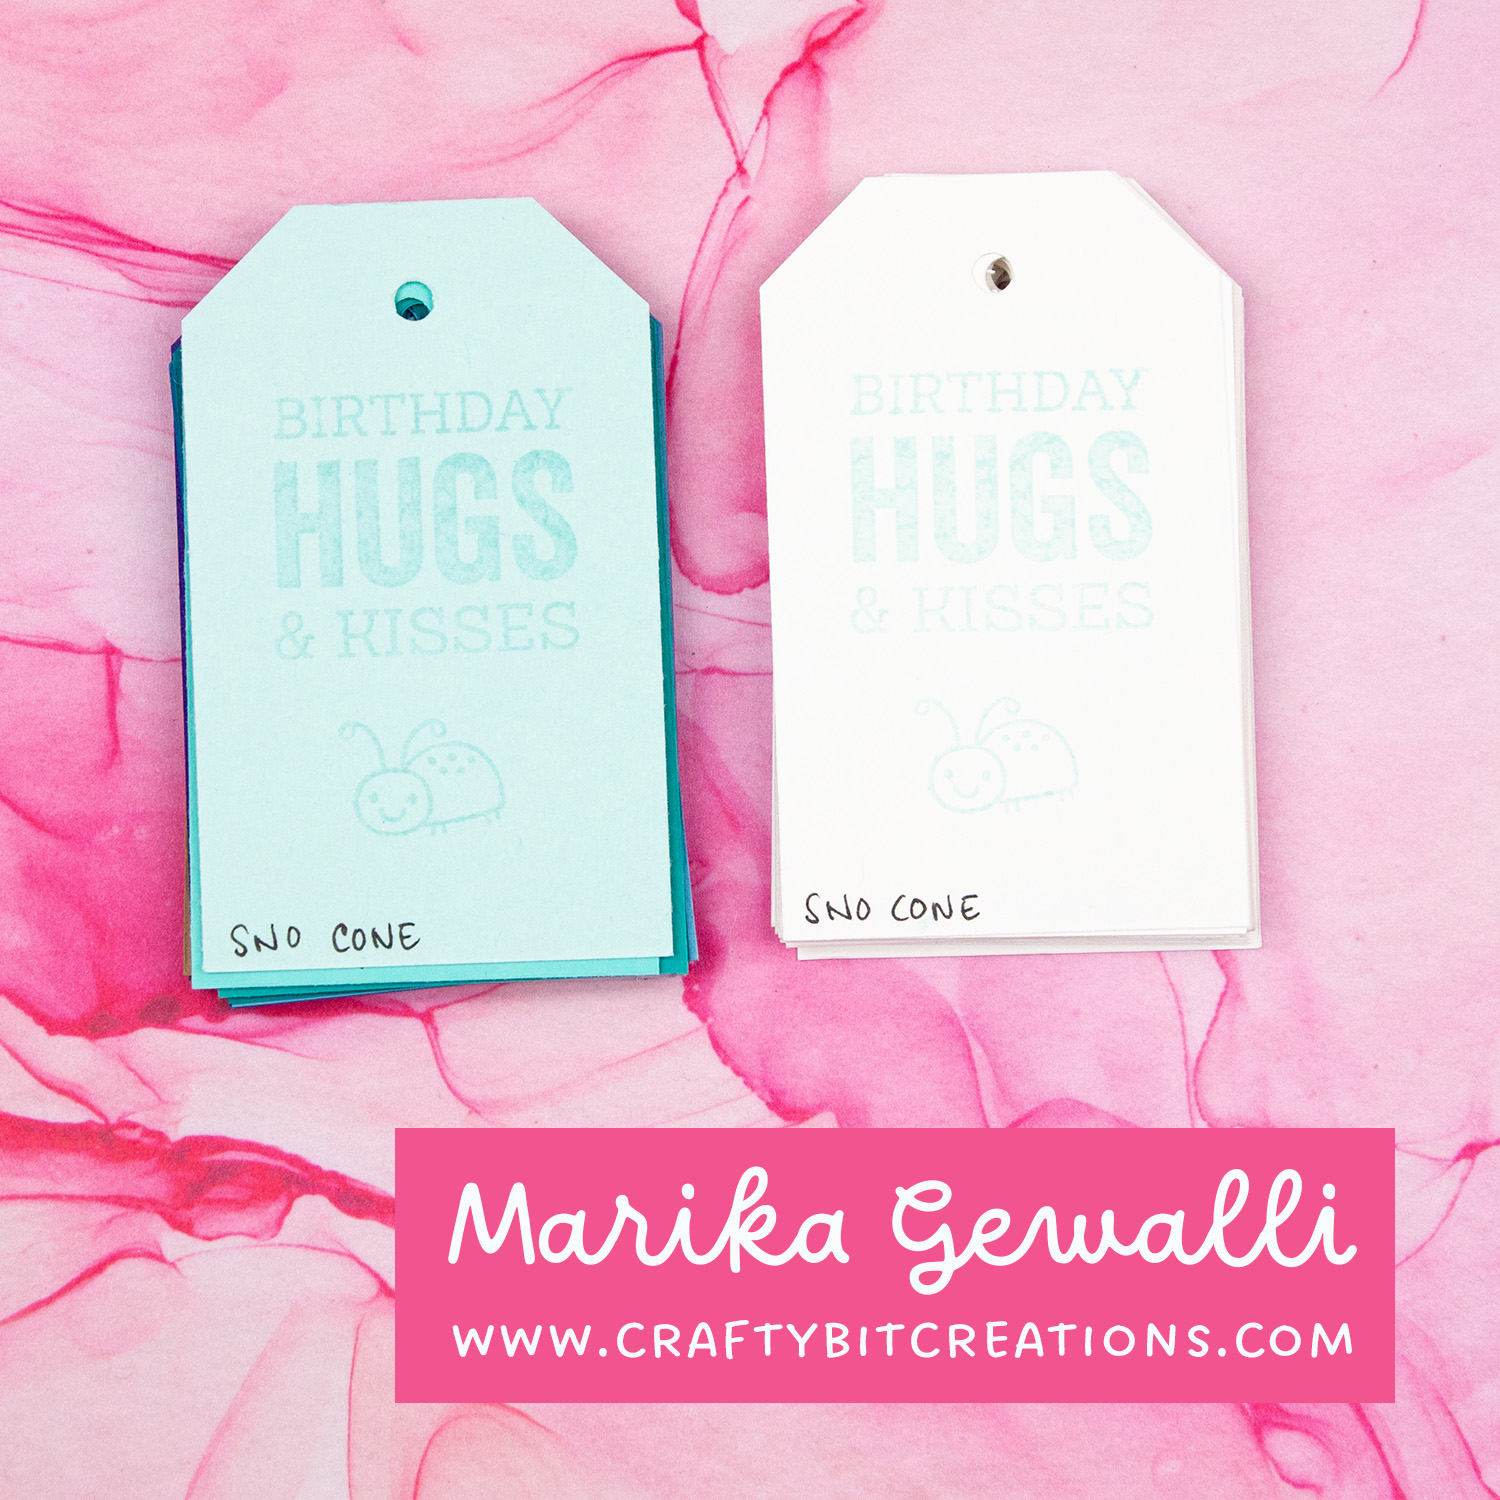
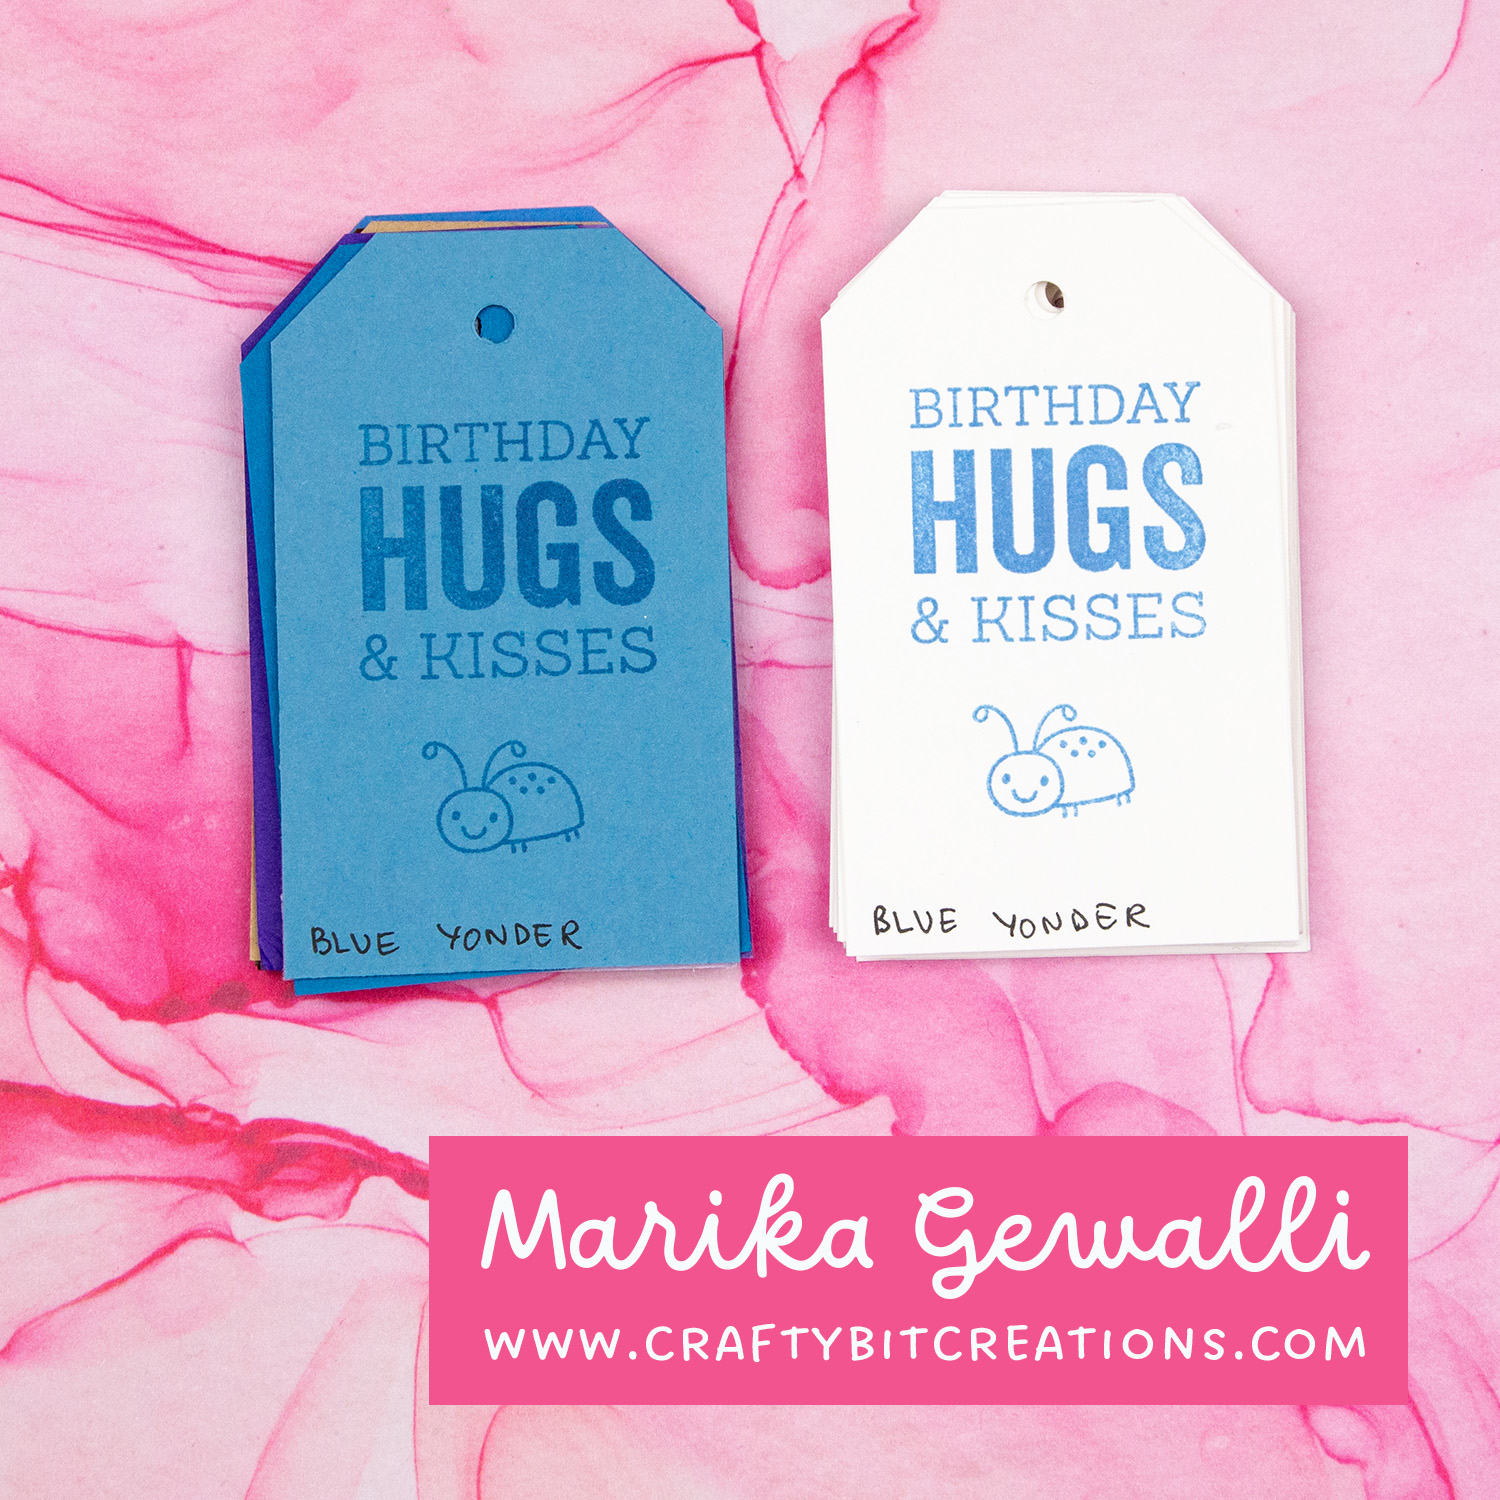
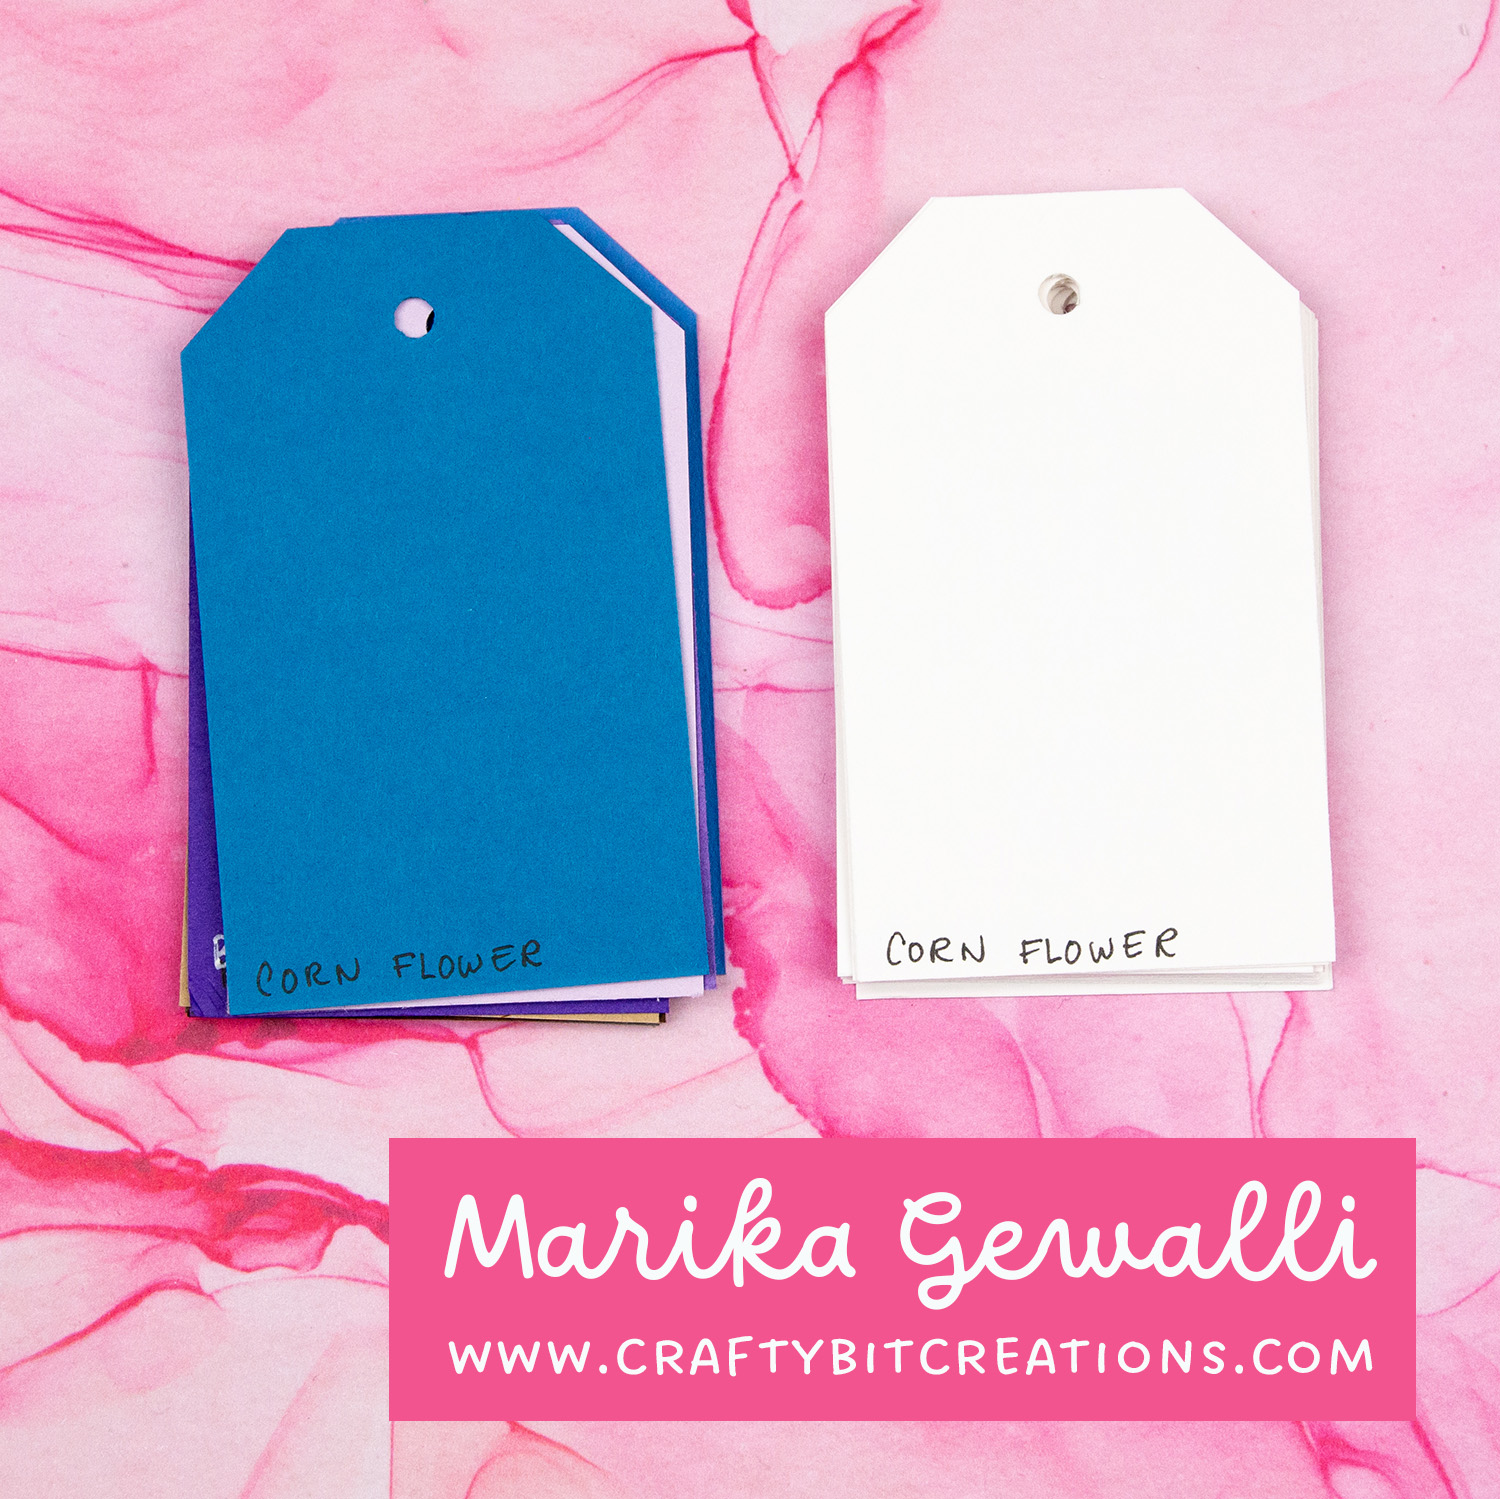
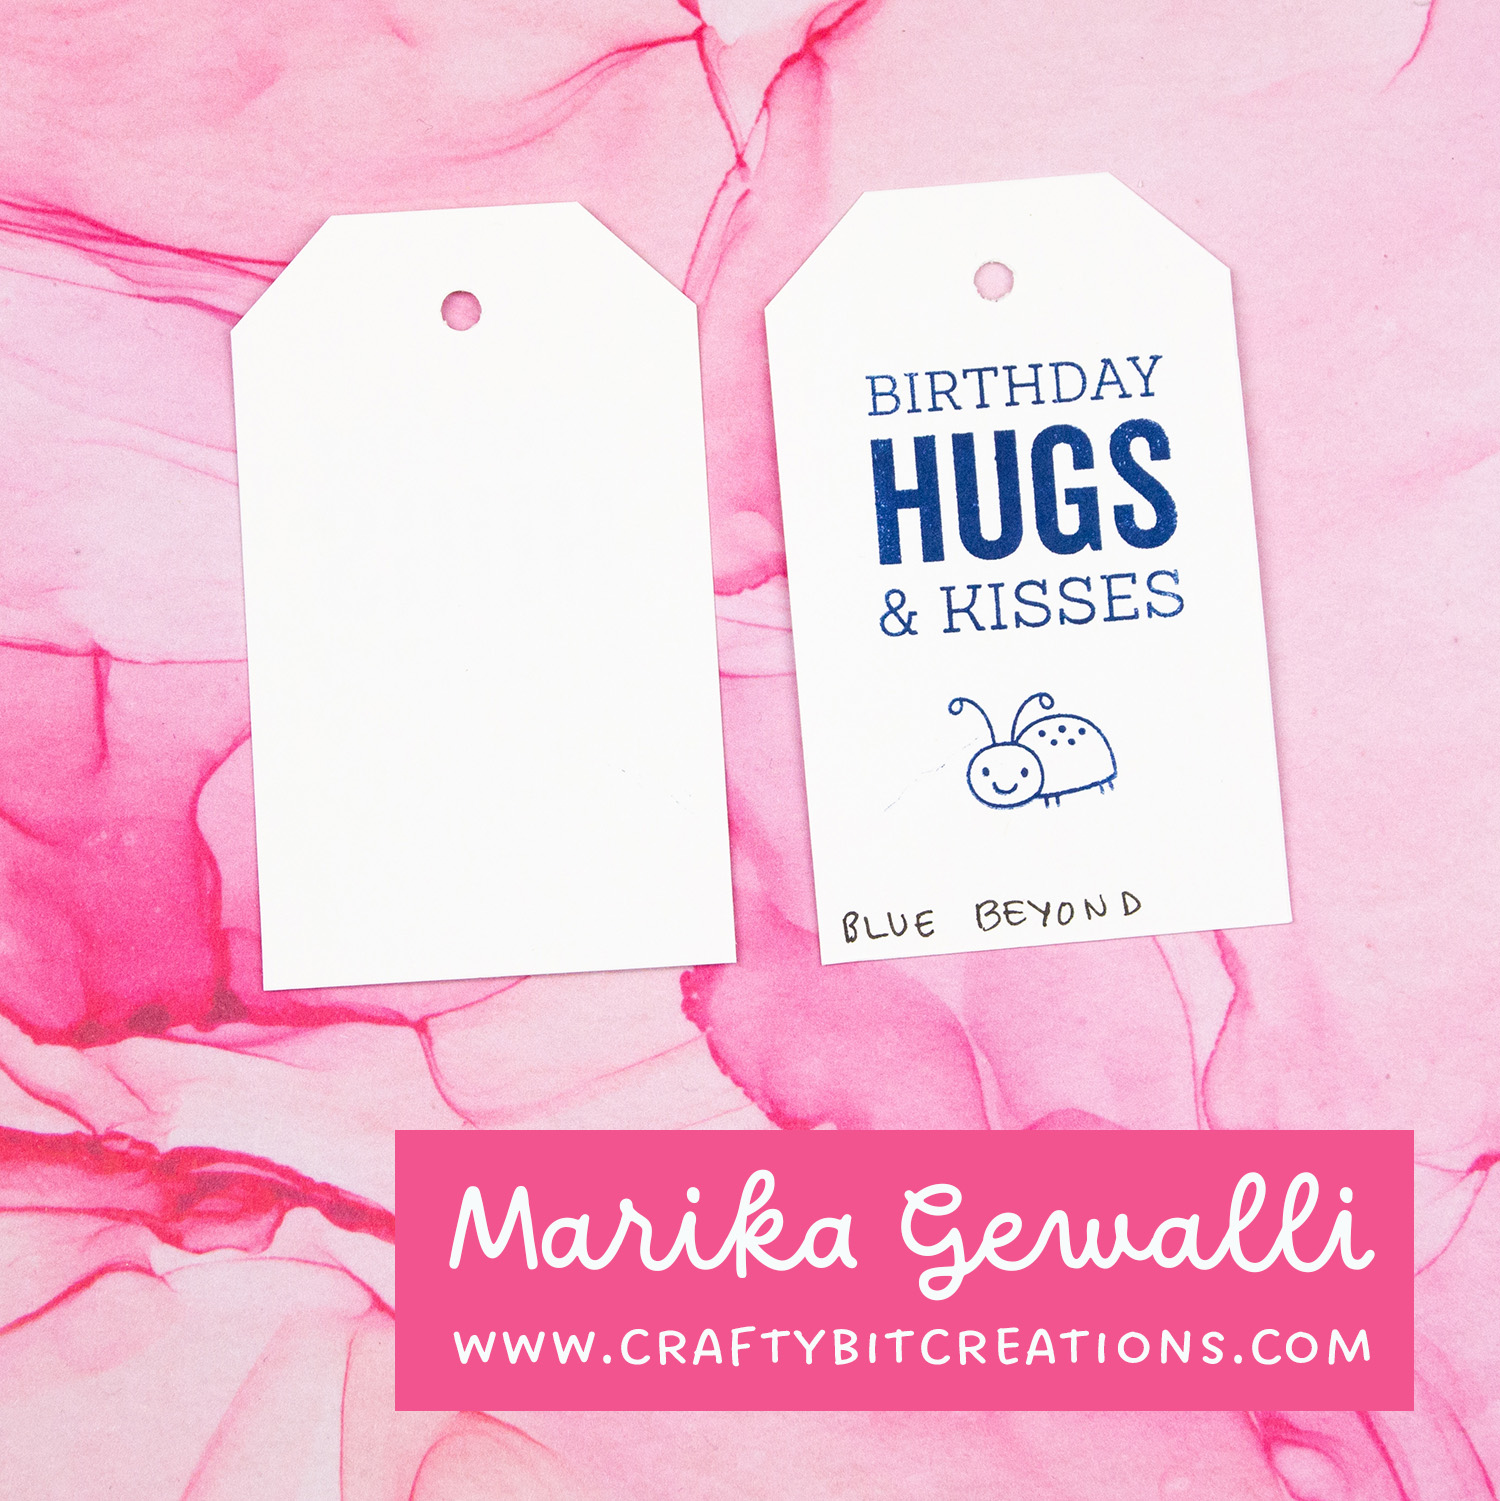
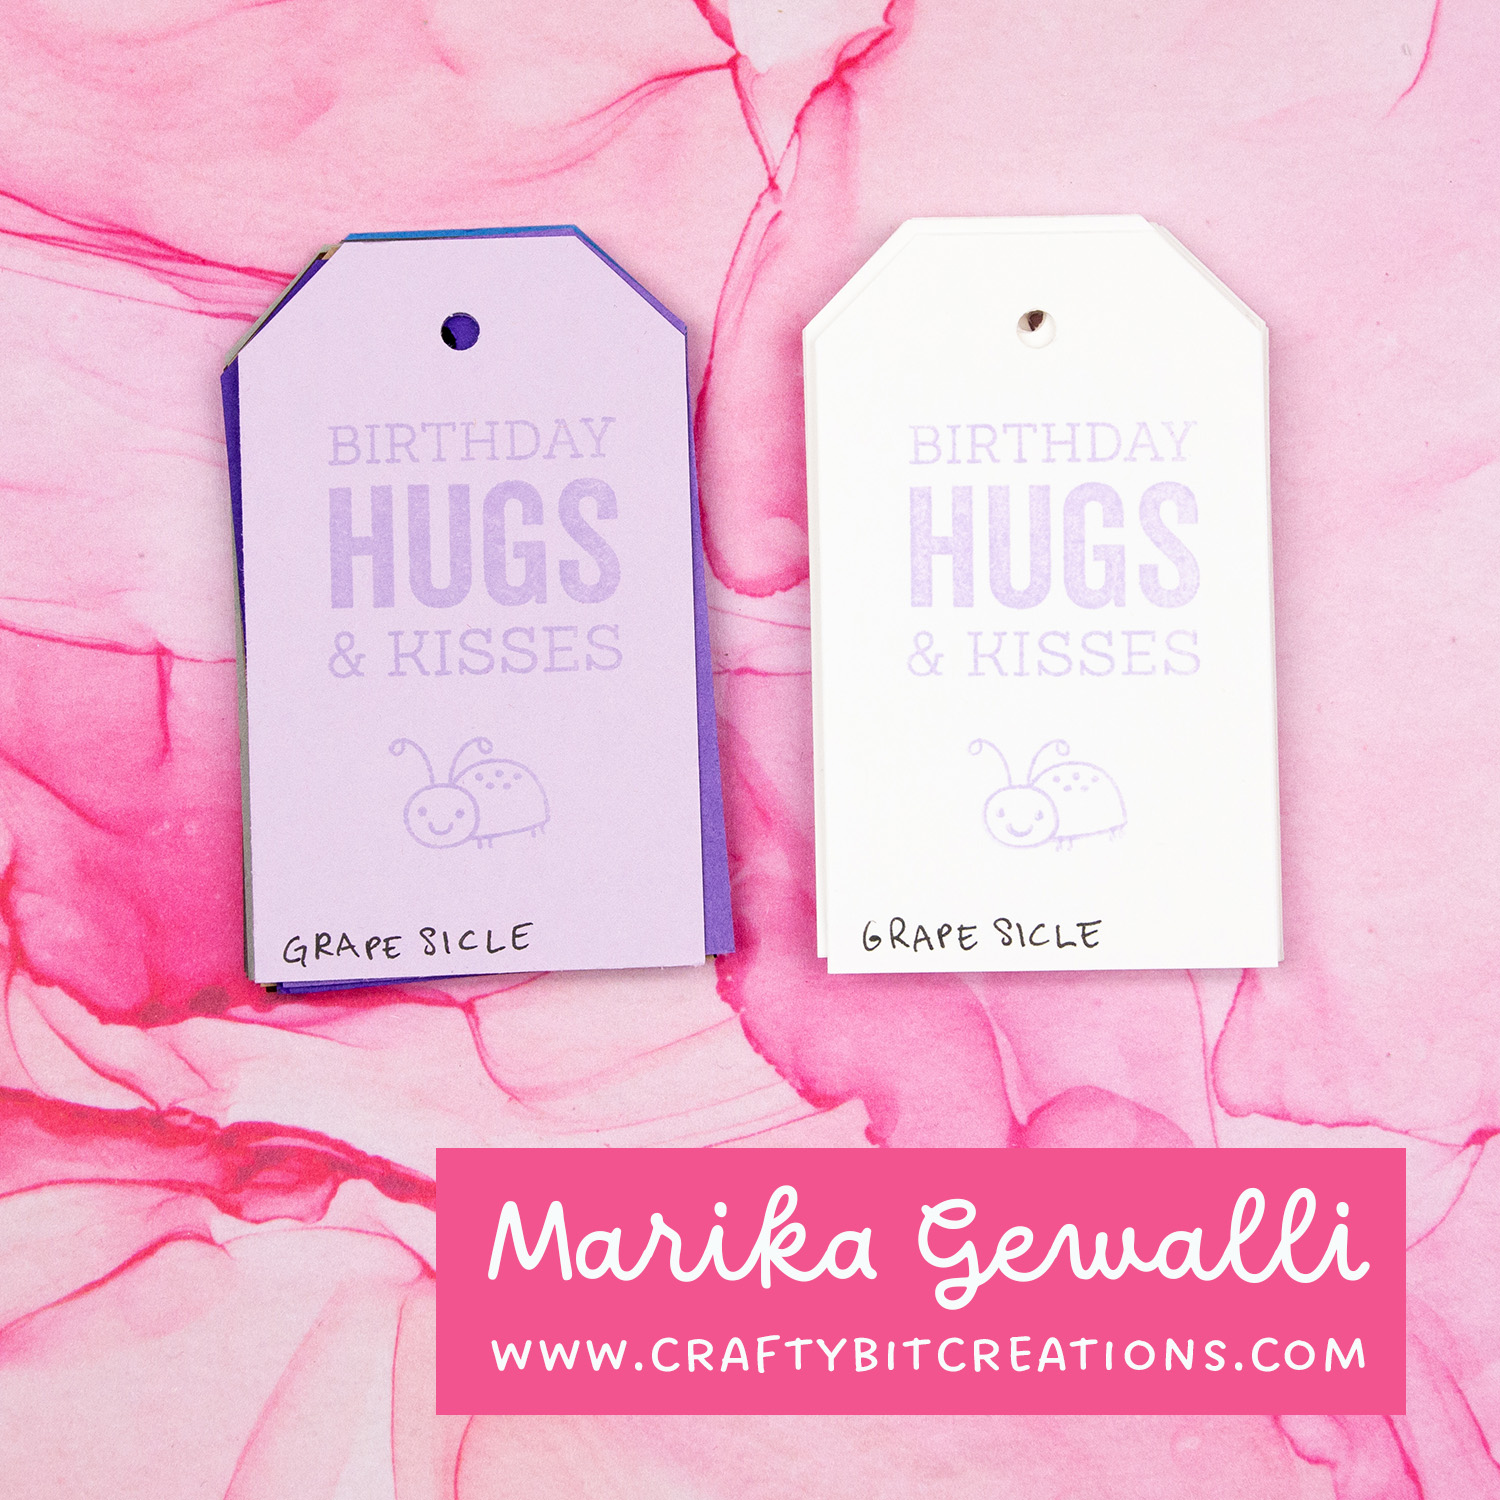
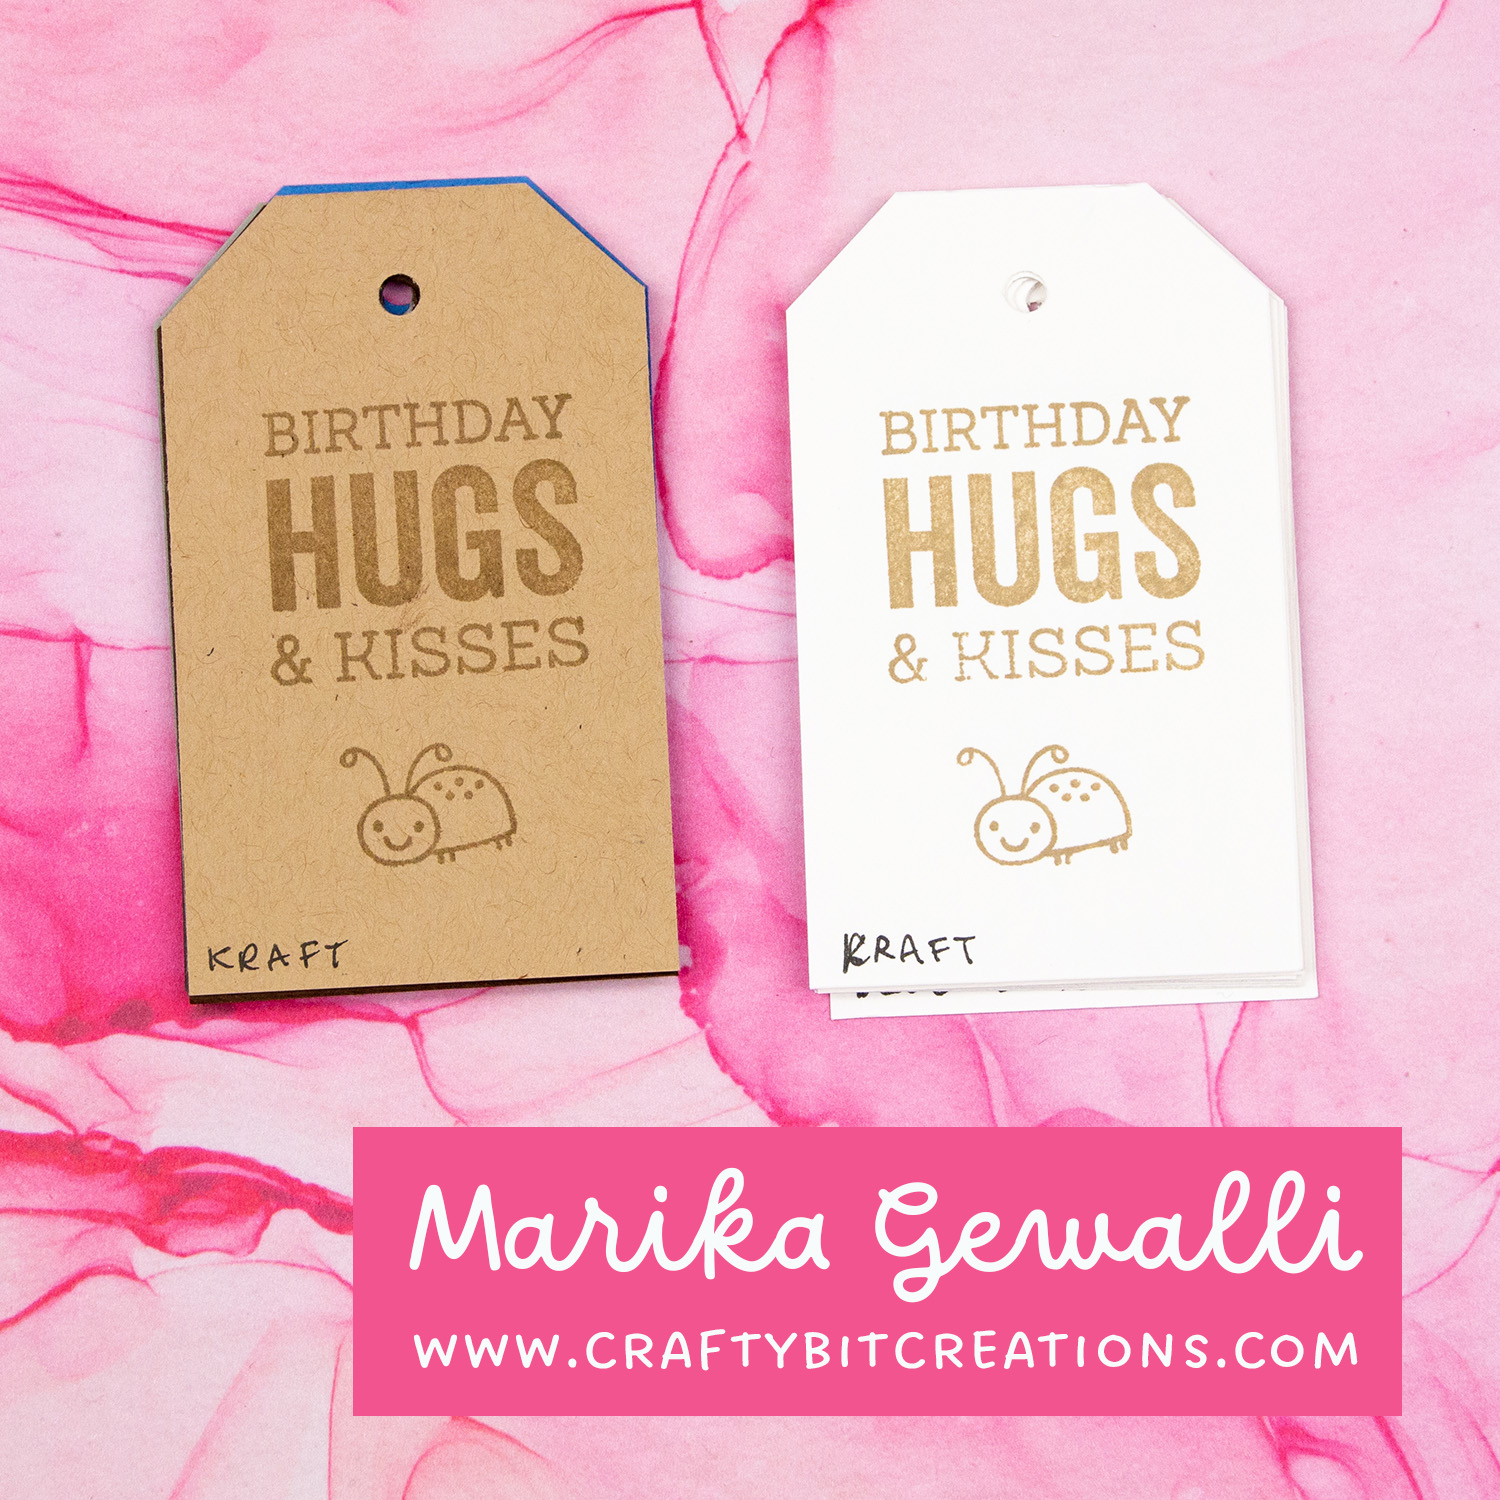
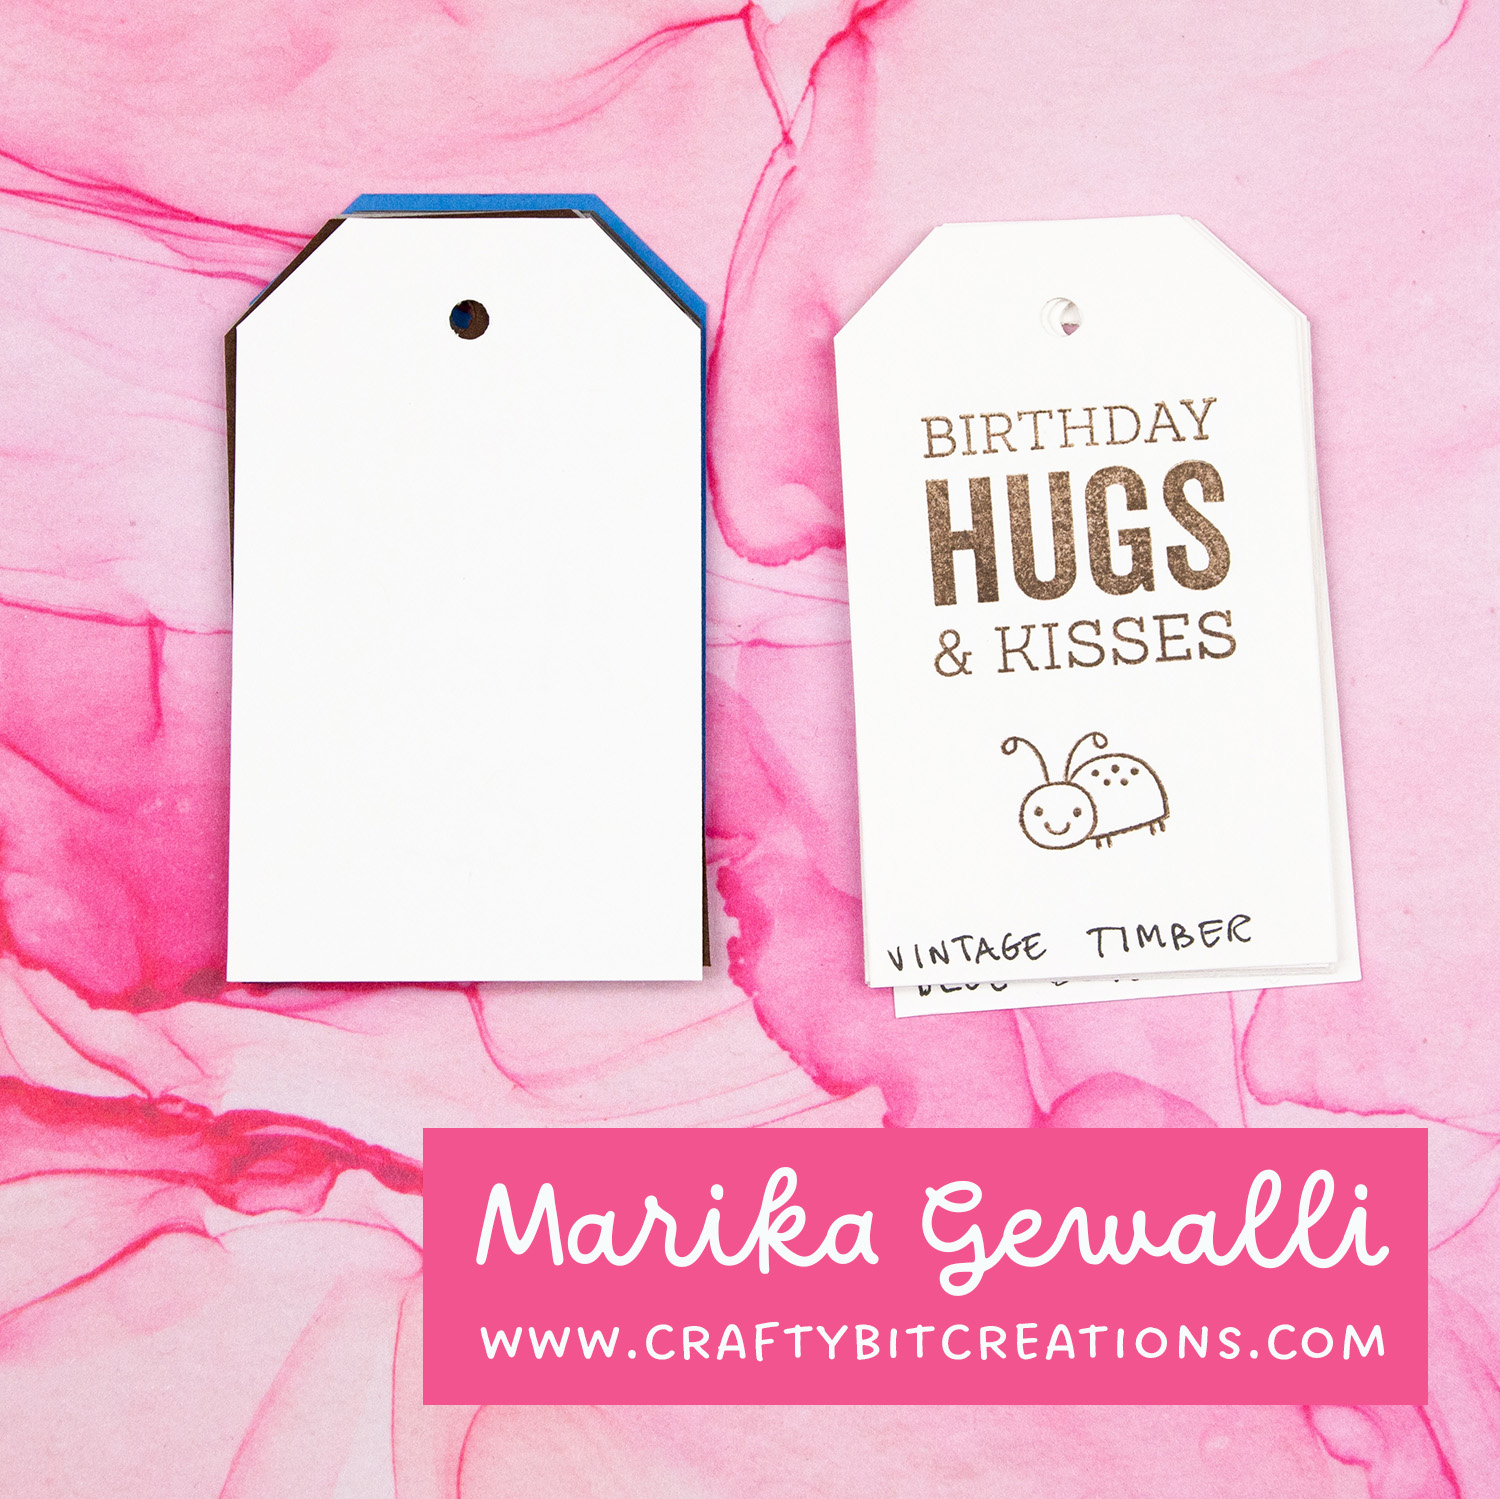
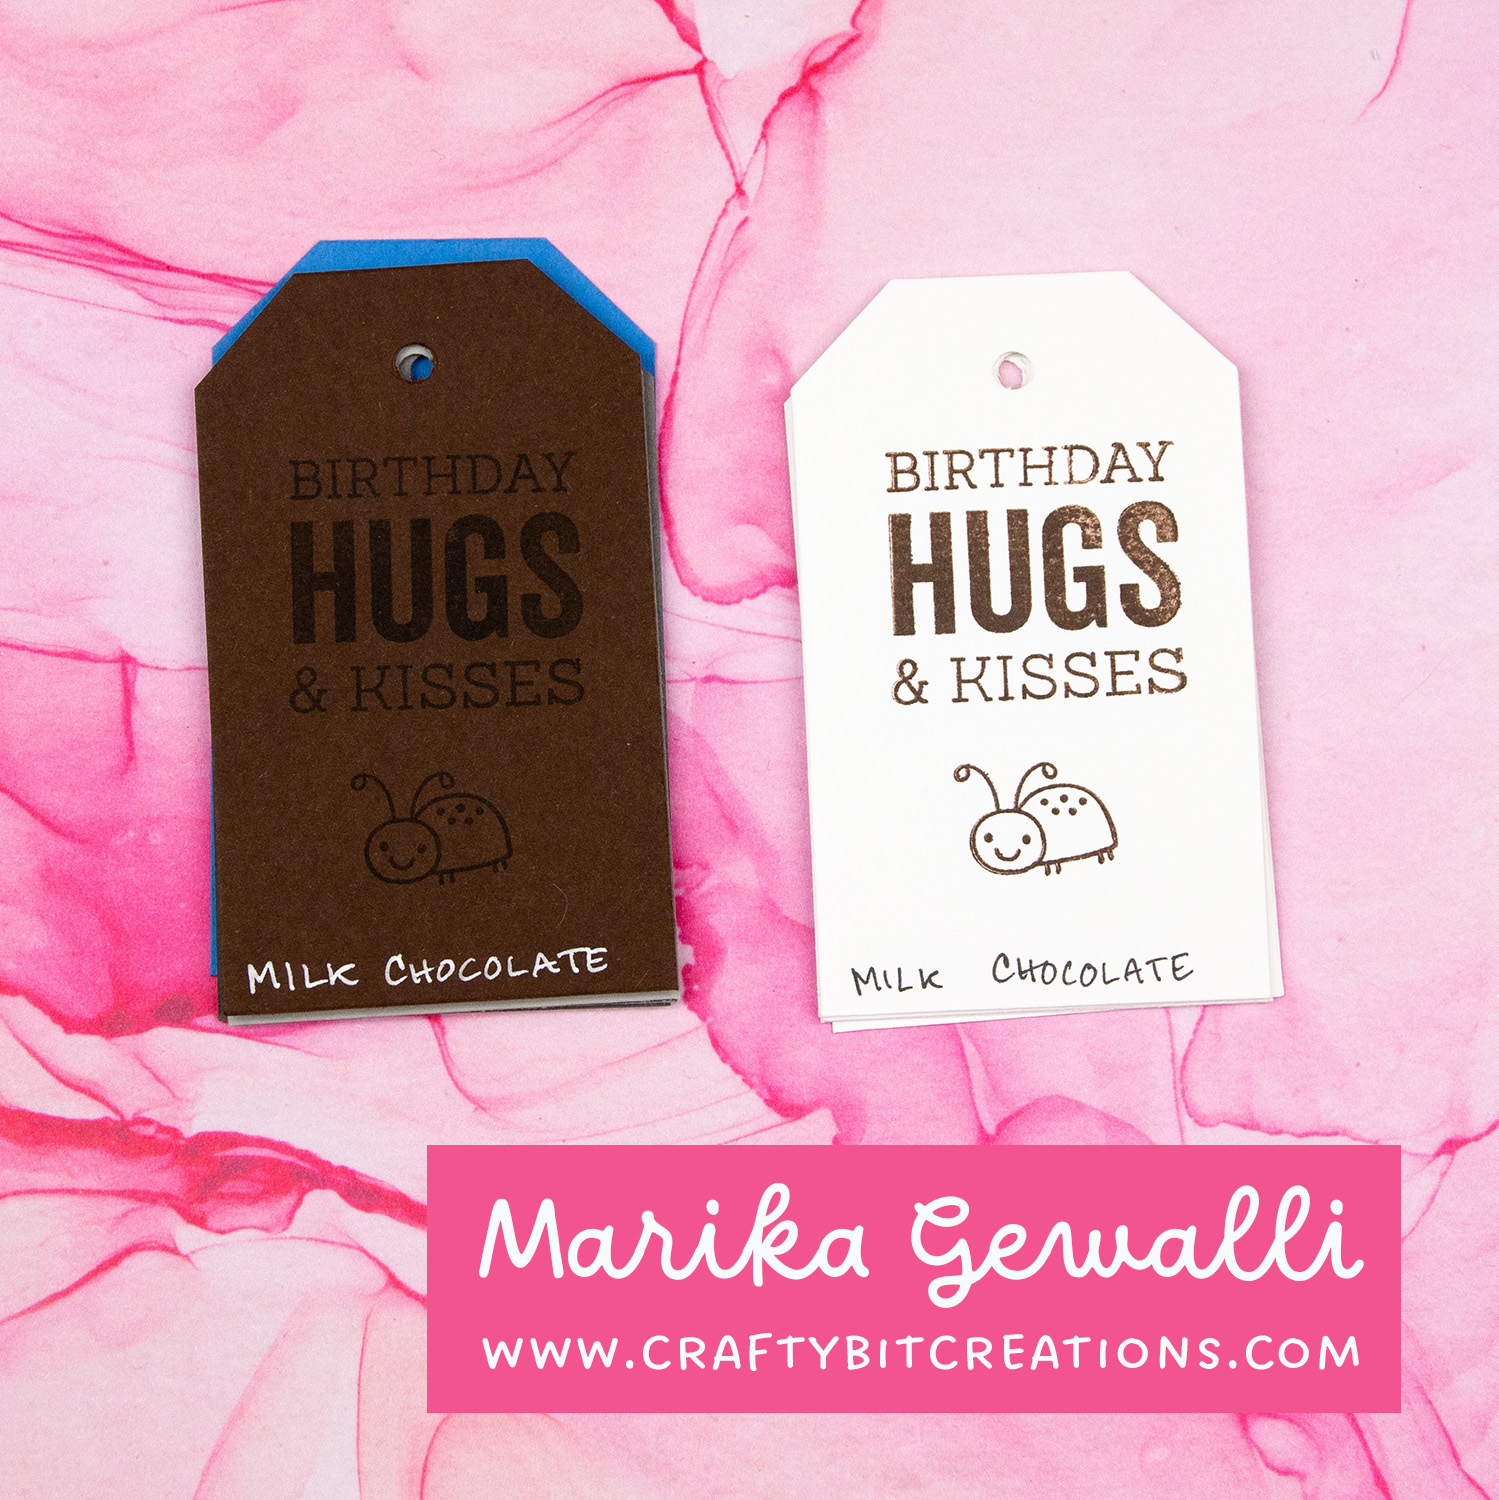
MFT Bitty Bears: MFTSSS MFT Ripe Raspberry Card Stock: MFT MFT Tag Builder Blueprints 5 Dies: MFTSSS DD Love notes: SBC DD Lots of Love: SSSSBC DD Floral-Graph Rainbow Petite Print: SSSSBC Neenah Solar White 80lb: SSSAMZSBC Large Score Board: SSSAMZSBC Fiskars Trimmer : SSSAMZ Sookwang Tape 1/4”: SSSAMZ MFT On-Point Precision Glue Pen: MFT
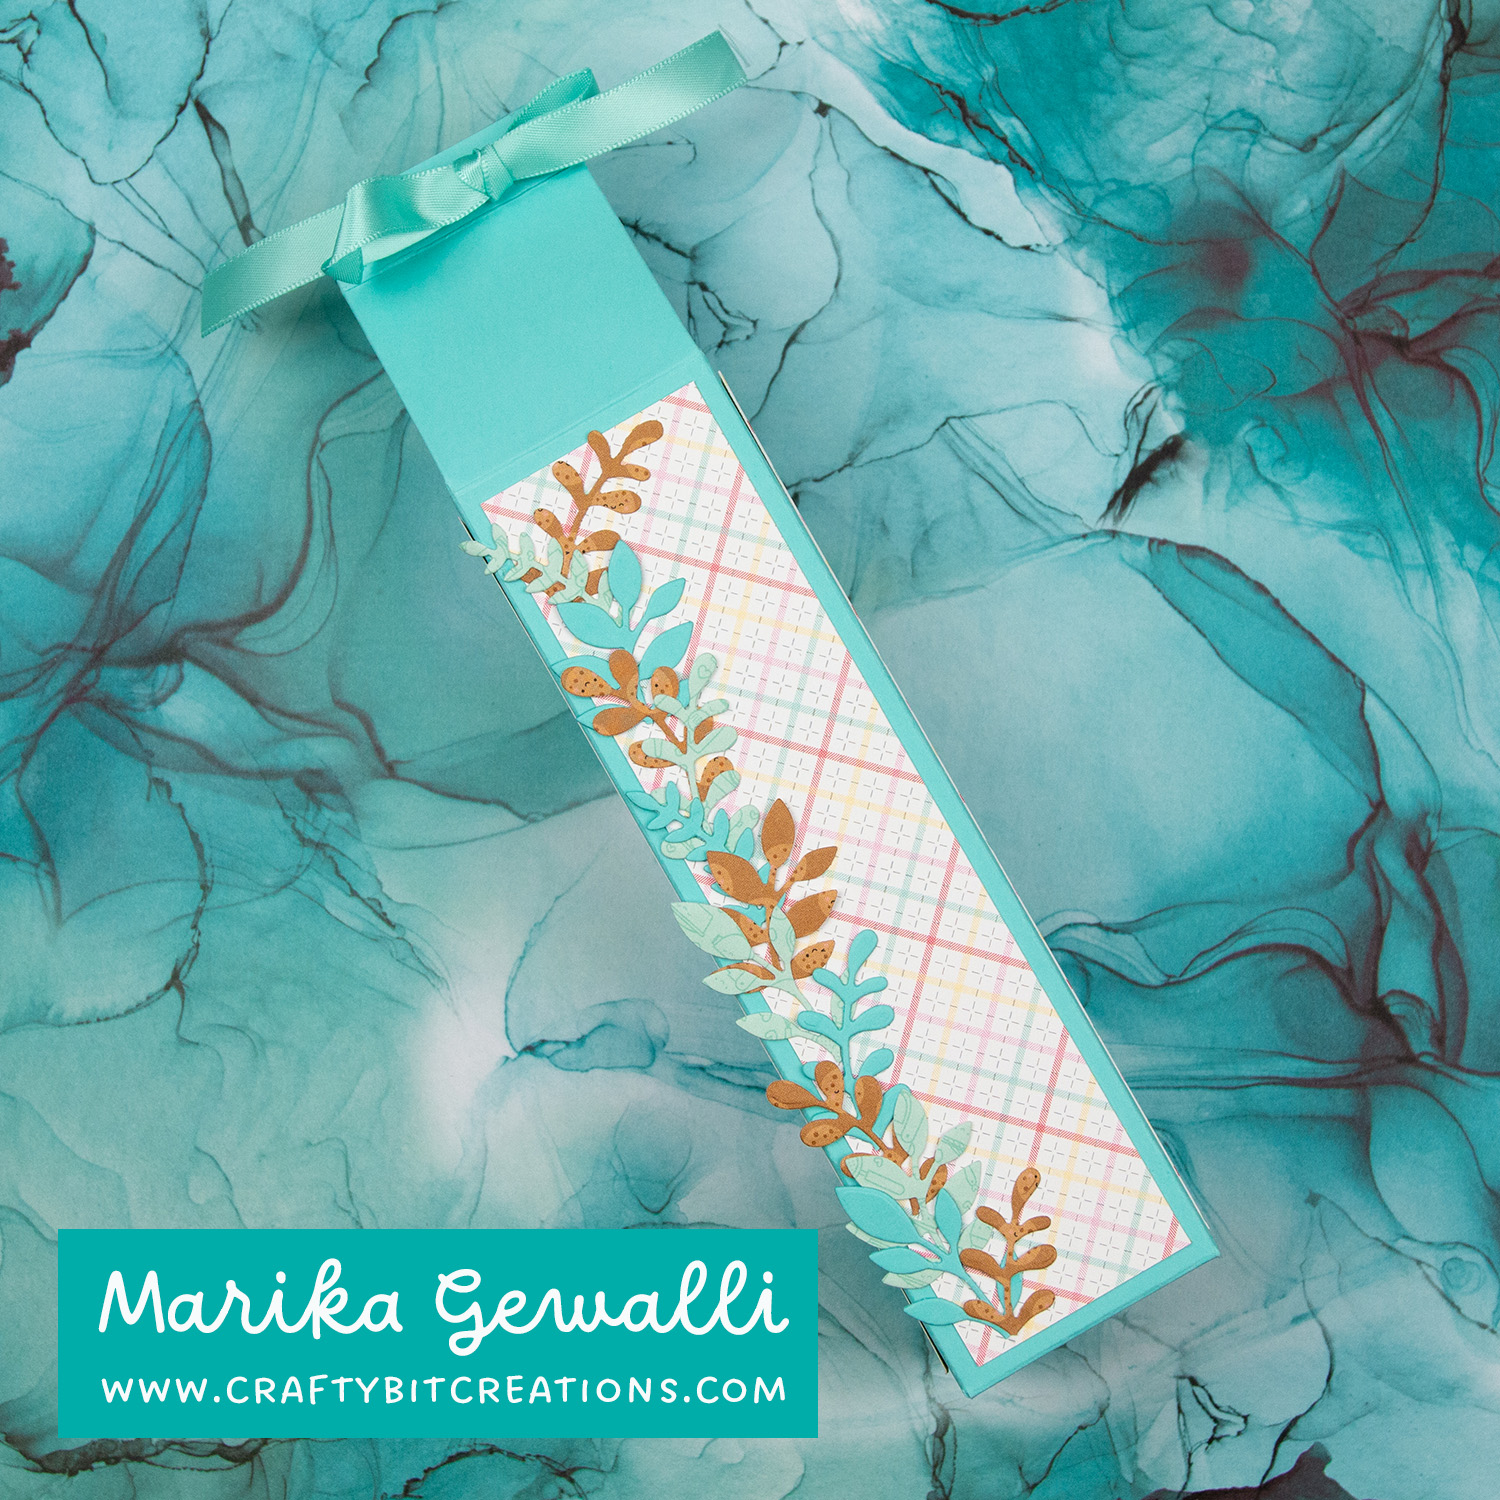
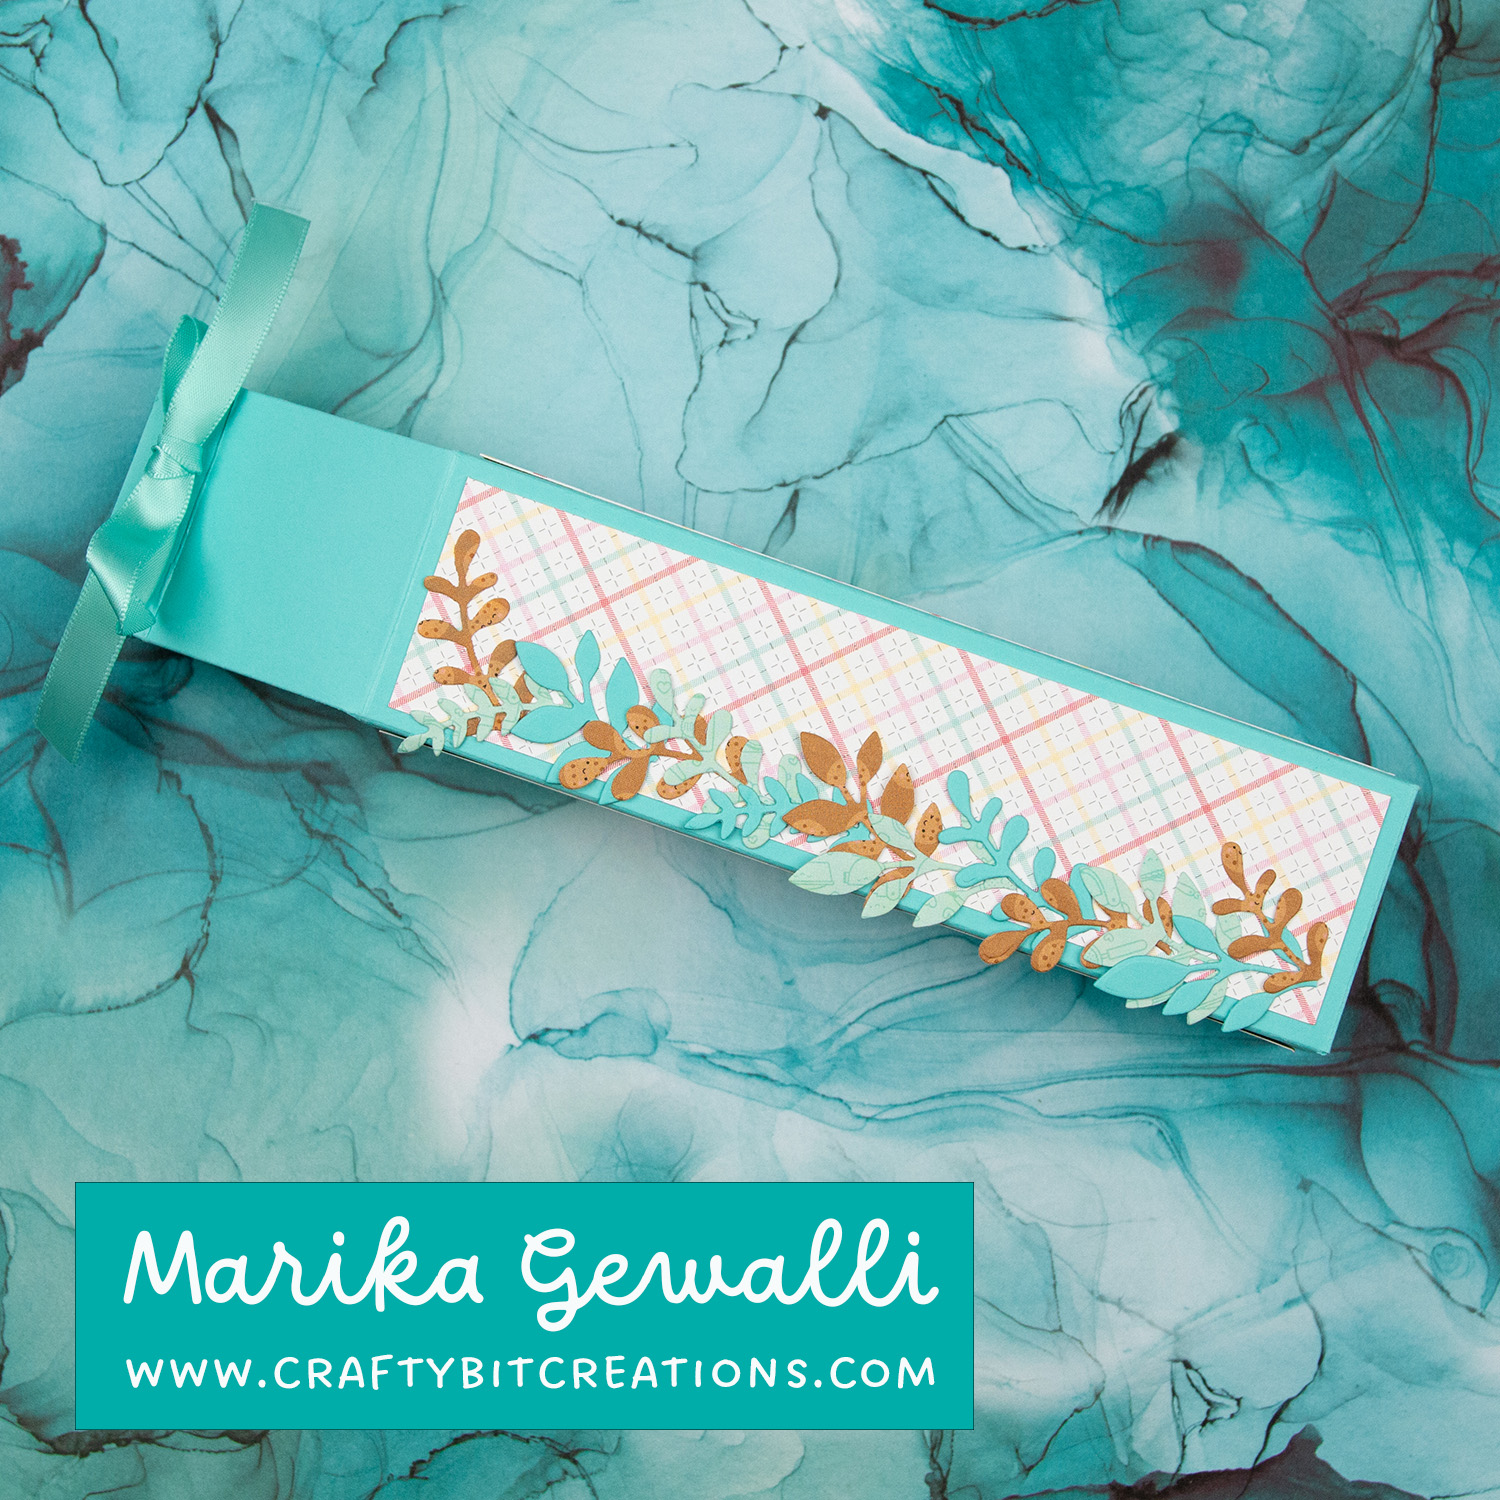
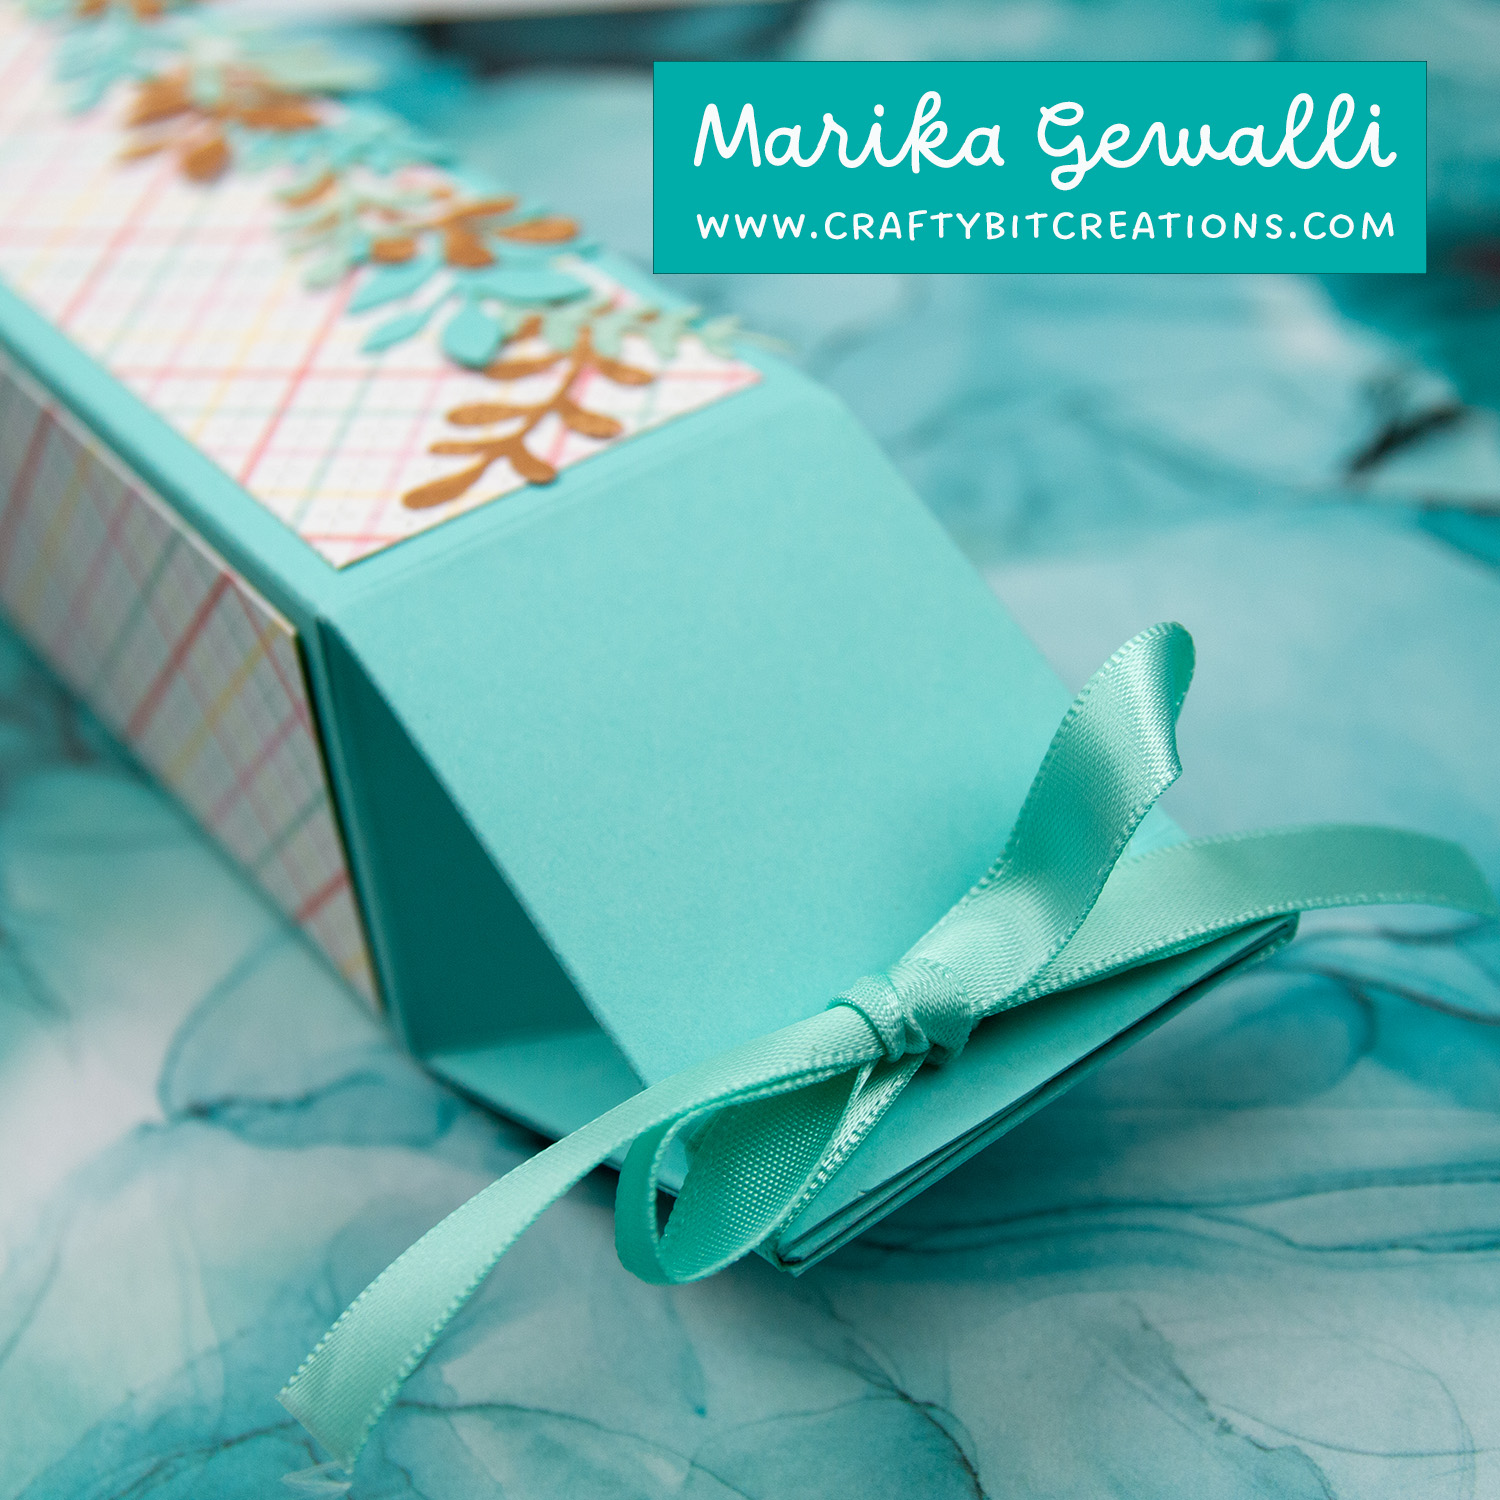
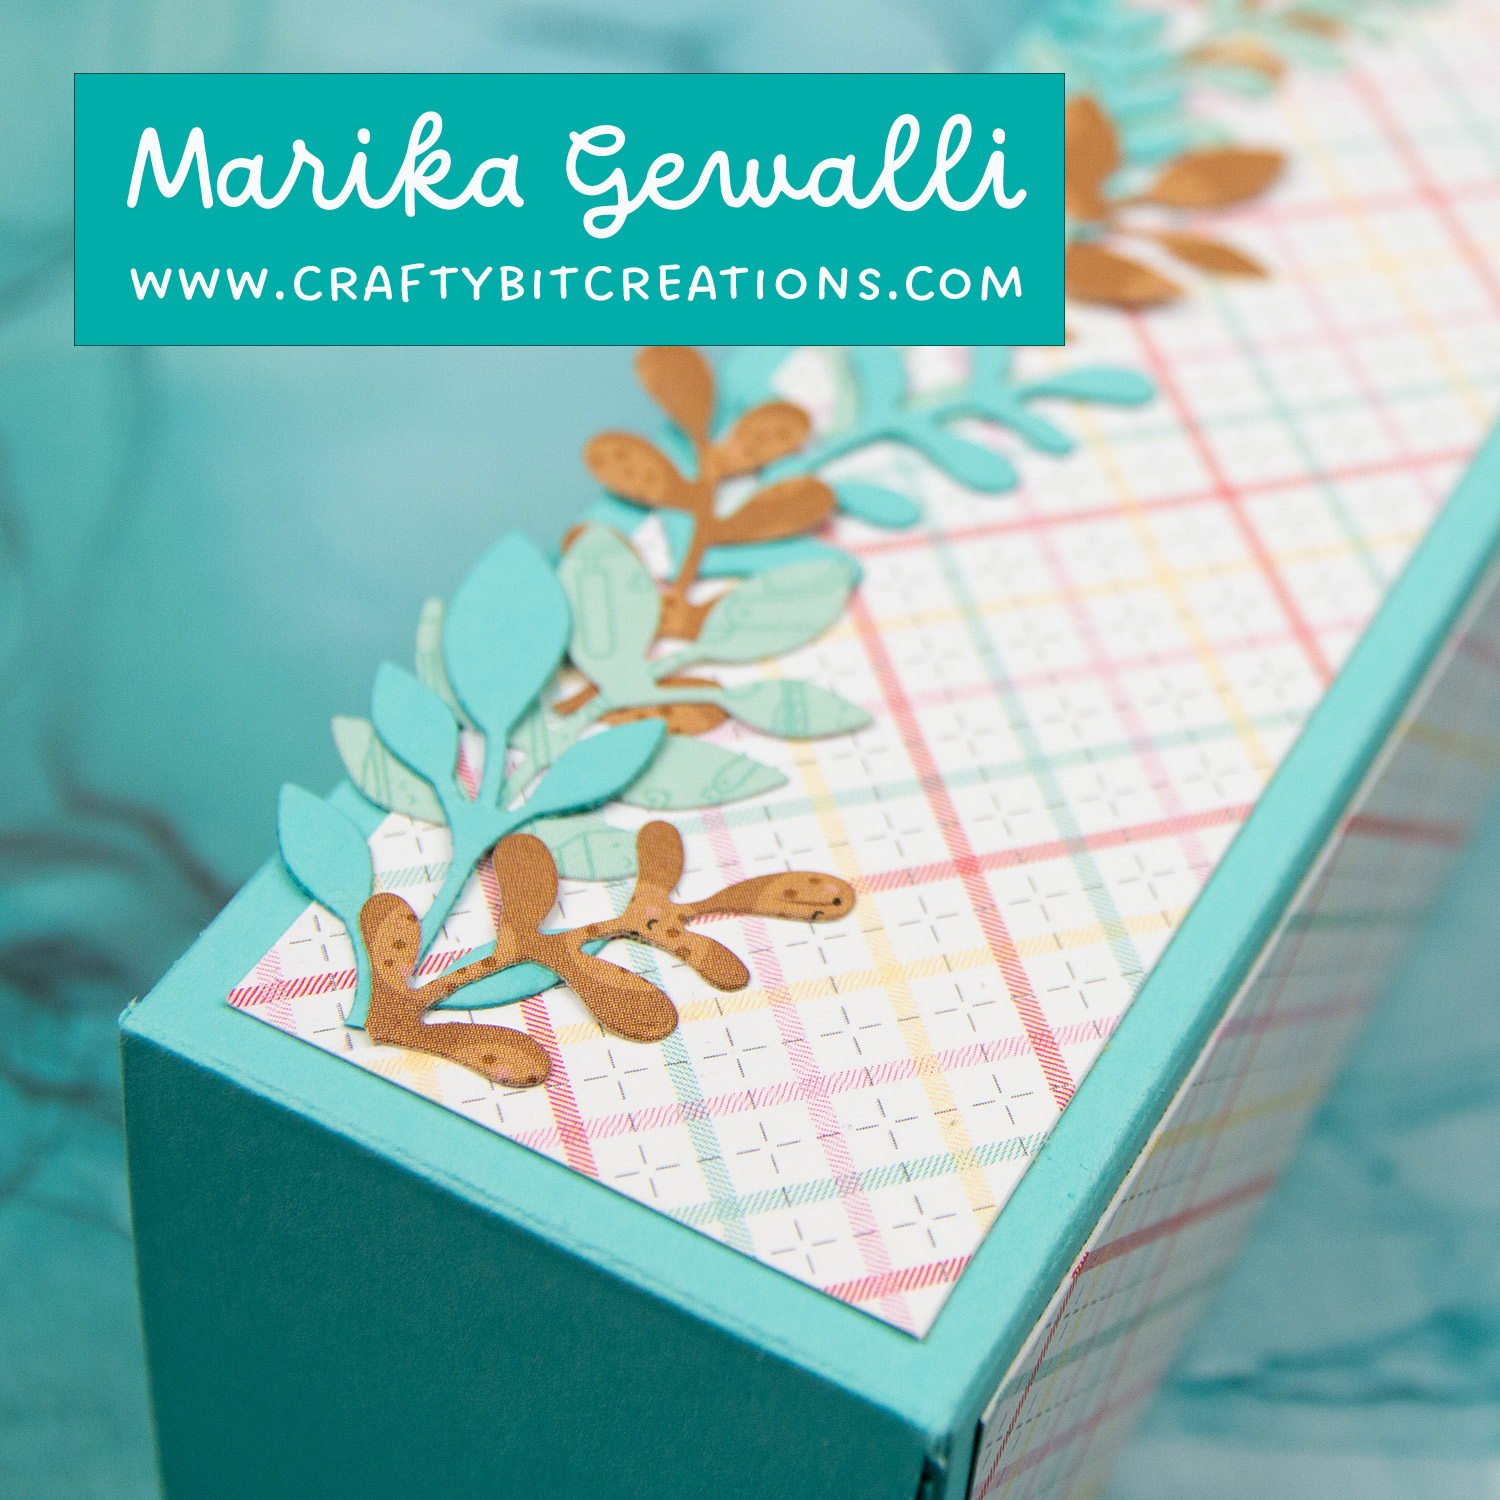
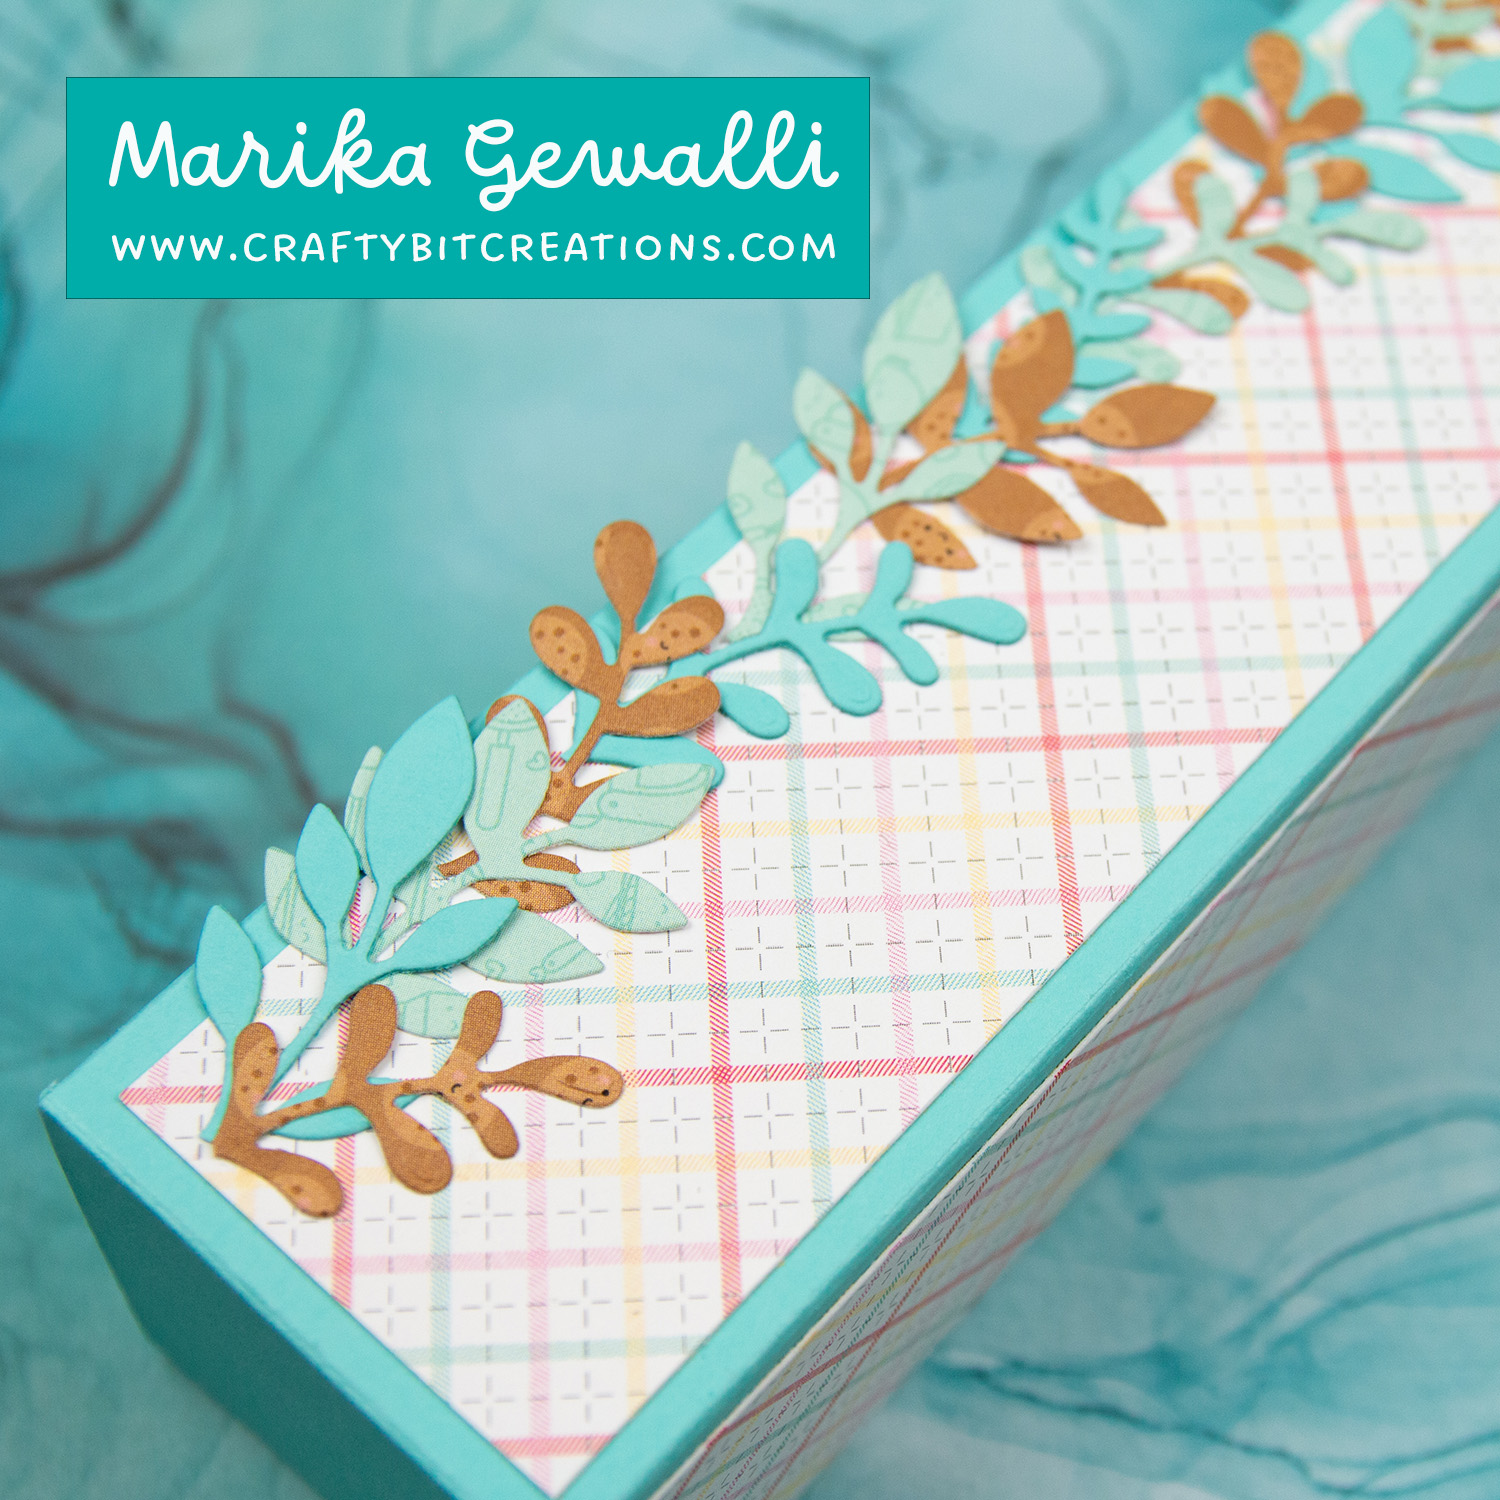
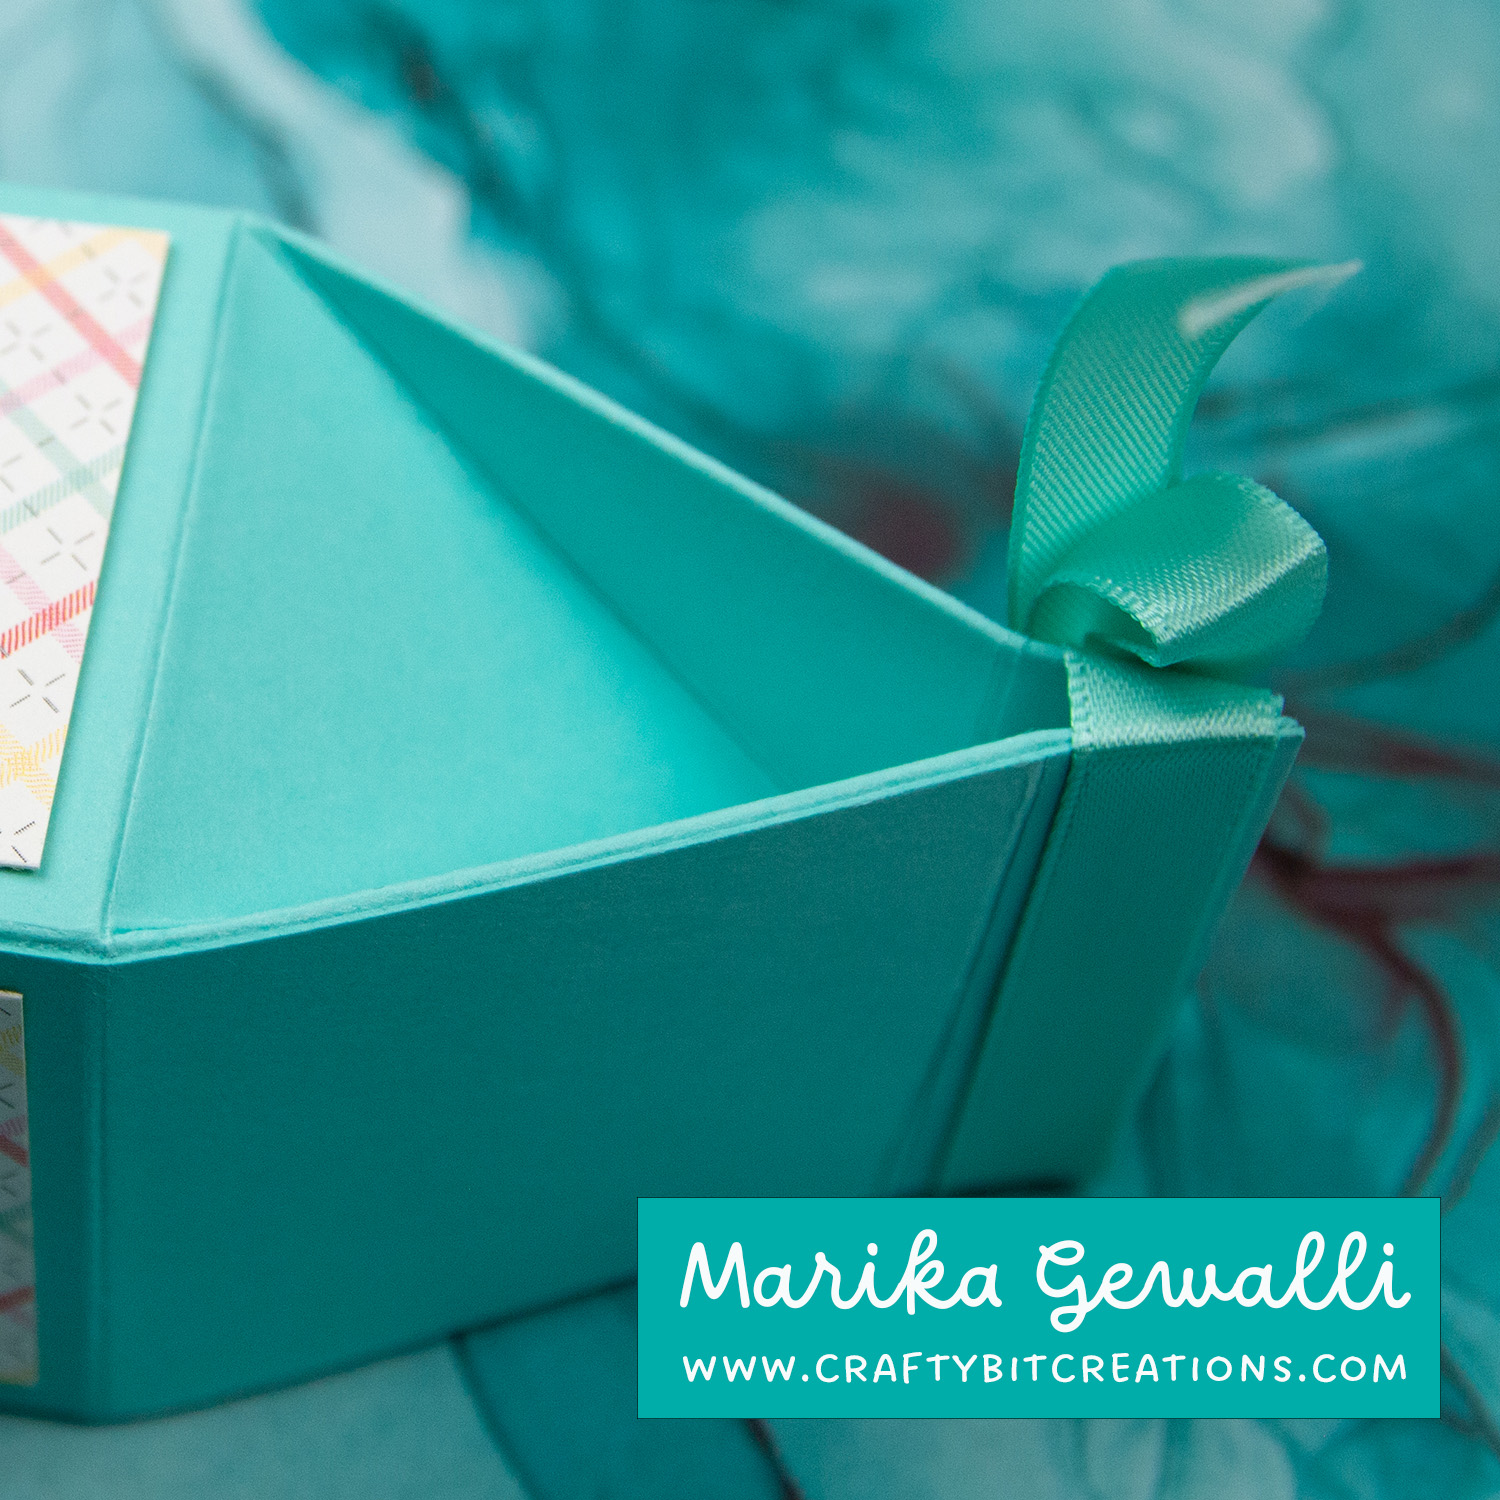
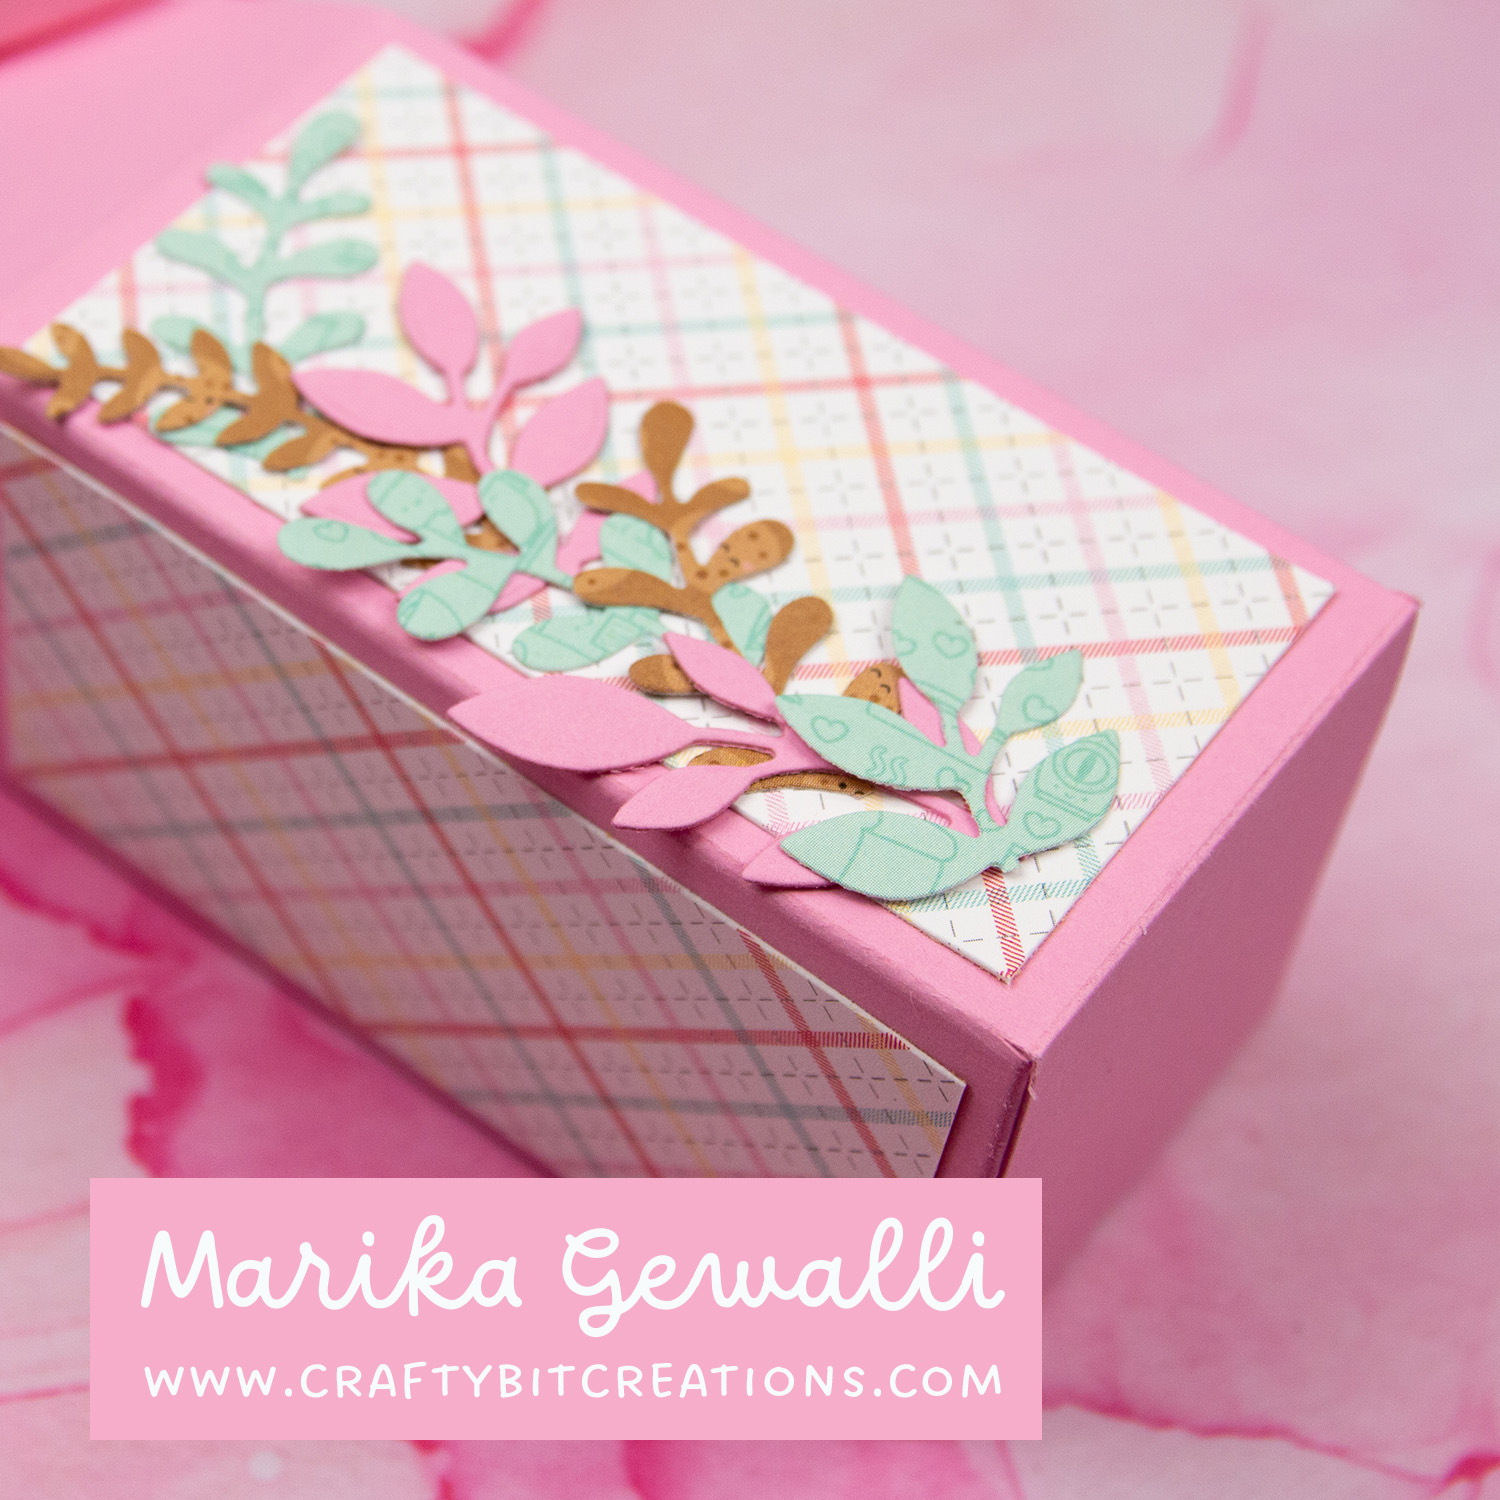
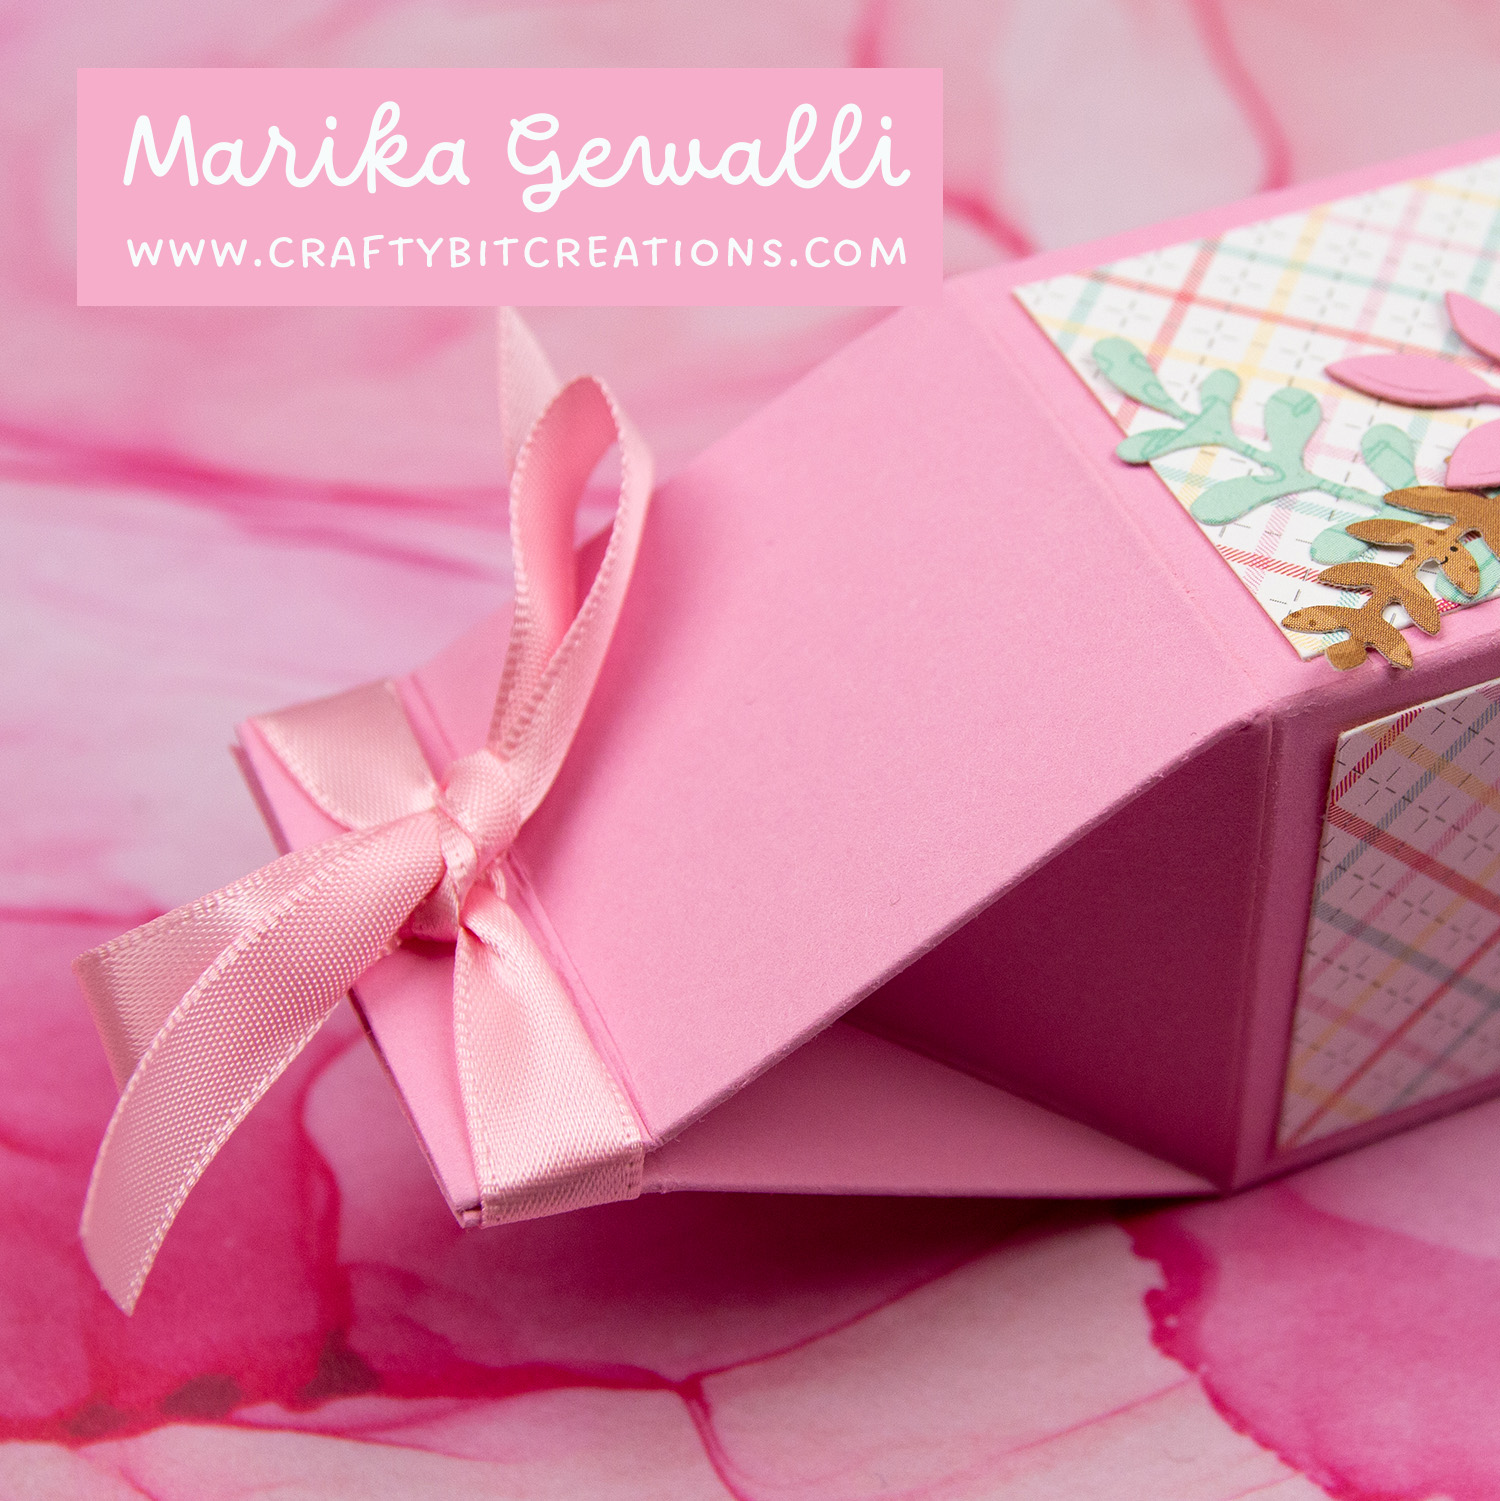
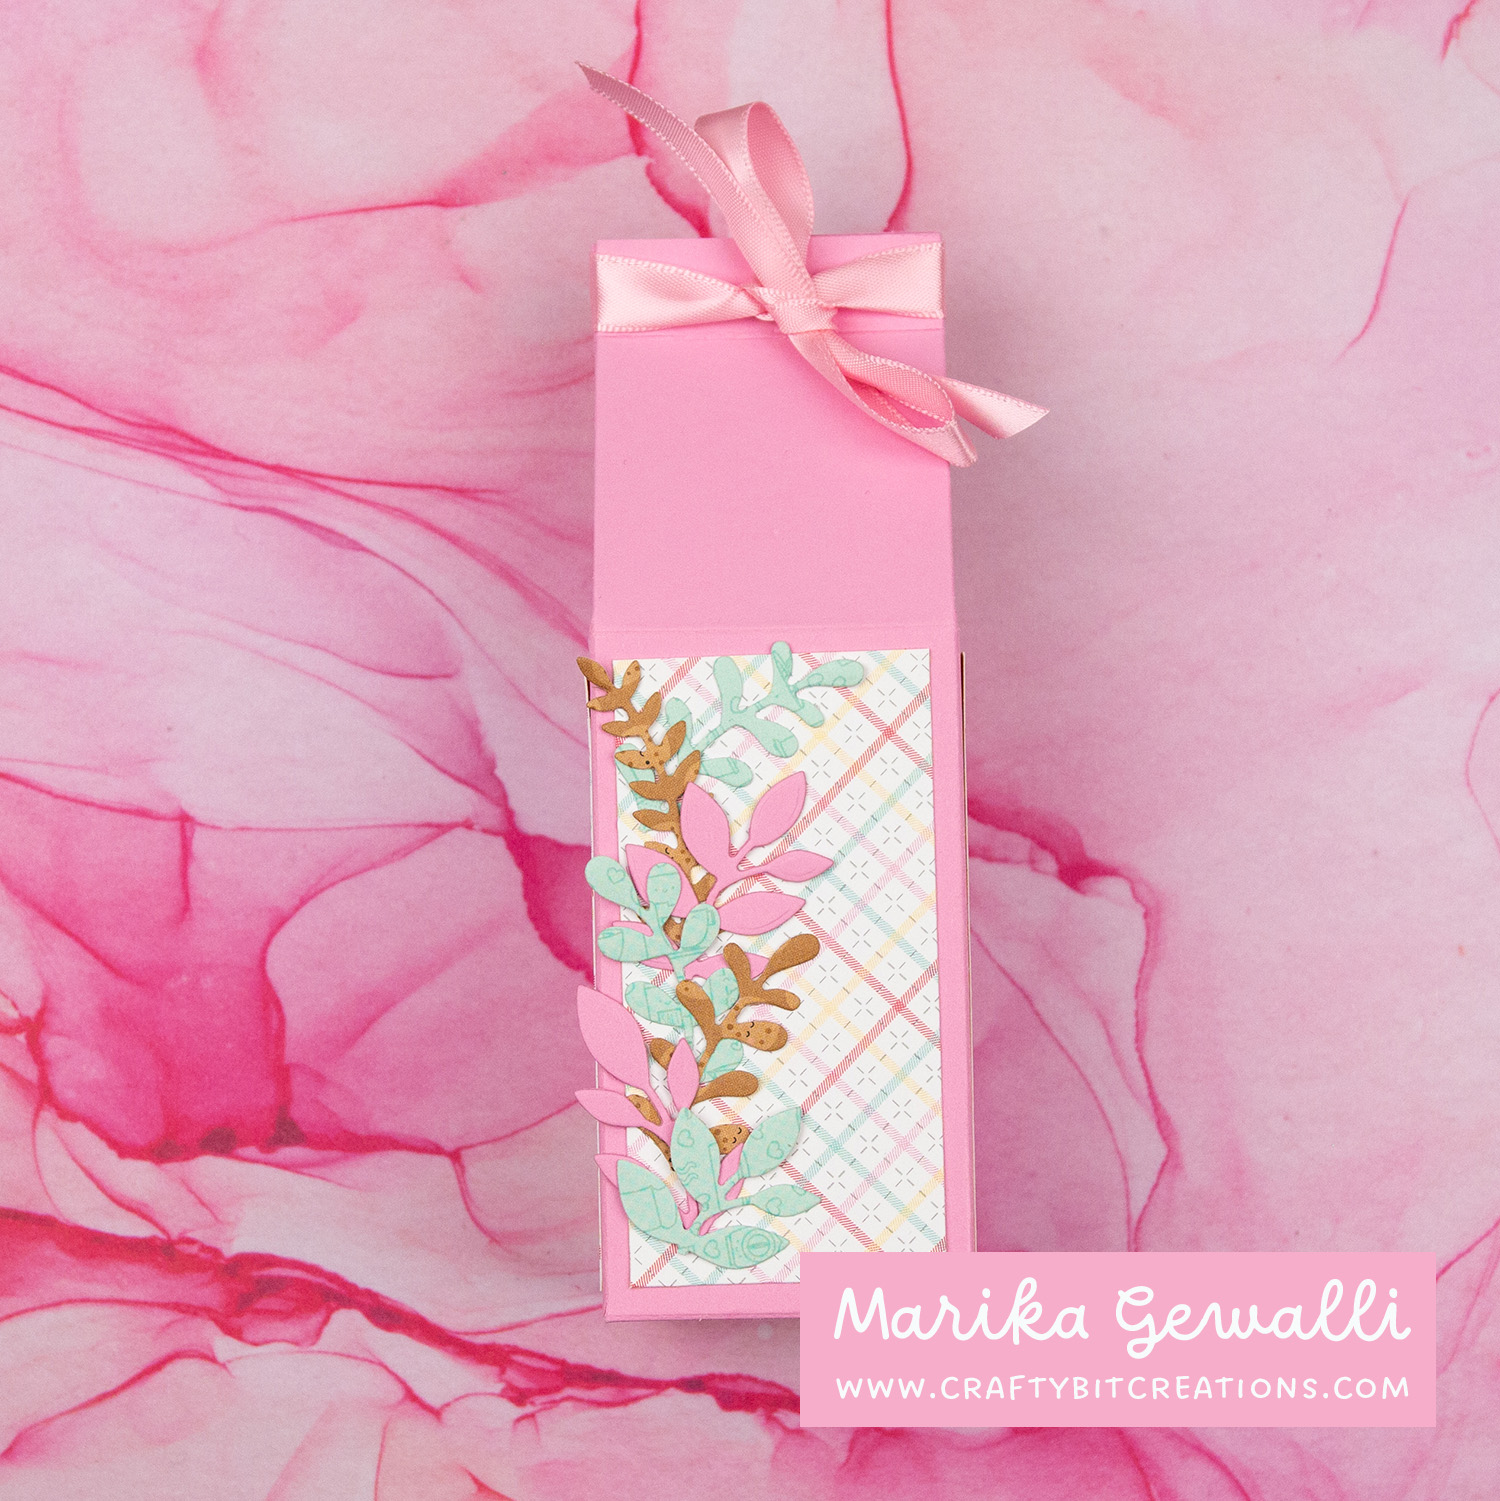
When making my accordion album last week I got loads of little pieces of pattern paper. In todays tutorial the box is sized so the main layers of pattern paper uses up a full sheet of pattern paper. The small one uses up half a sheet. The little leaf decorations uses another two sheets. However out of those sheets you can get decorations for two big boxes or four small ones. The card stock decorations was made of some offcuts I had laying around from previous projects. The box also is perfectly sized for tea lights!
For the tutorial today I’m going back to old school, just using a trimmer, a score board and scissors. But I do have cut-files and templates for you if you want to go that route. The cut-files and template, both PNG and SVG can be found –HERE–. You can also find the schema as a PDF HERE.
Cut and score instructions:
Big box: Cut card stock to 10 1/4″ x 7 3/8″. Score on short side at, 1 3/4″, 8″, 9 3/4″. Score on long side at 1 3/4″ all the way down, 2 5/8″ only on the 1/2″ part, 3 1/2″ all the way down, 5 1/4″ all the way down, 6 1/8″ only on the 1/2″ part and 7″ all the way down. Line up the short score lines with the corner in the box below and make two diagonal score lines creating a triangle, this is the milk box corners. Cut out the bottom tabs, miter all except the middle one that doesn’t have a triangle above, this will be your front tab should just be cut straight, that should also be folded in last. Cut away the side tab from the bottom tabs and miter the corners.
Short box: Cut card stock to 7 1/4″ x 7 3/8″. Score on 7 1/4″ side at, 1 3/4″, 5, 6 3/4″. Then follow the instructions for the big box.
When possible affiliate links are used, this means that I receive a small commission when products are purchased through the links (at no extra cost to you) I use the money to support my blog and youtube channel. If you like my projects and tutorial please consider supporting me by clicking through these links when you shop. Thanks!