With everything going on in the world this card was hard to create, I even considered just not to do it. But at the same time being creative can help mentally. It’s not my best card, but I do like it. I followed the sketch challenge 582 over at My Favorite Things.
I want to finish this by saying. I know that I sit safety here in Sweden, but I’m so scared over what is going on in Ukraine. Ukraine is a free democratic country and I hope that it will stay that way.
When possible affiliate links are used, this means that I receive a small commission when products are purchased through the links (at no extra cost to you) I use the money to support my blog and youtube channel. If you like my projects and tutorial please consider supporting me by clicking through these links when you shop. Thanks!
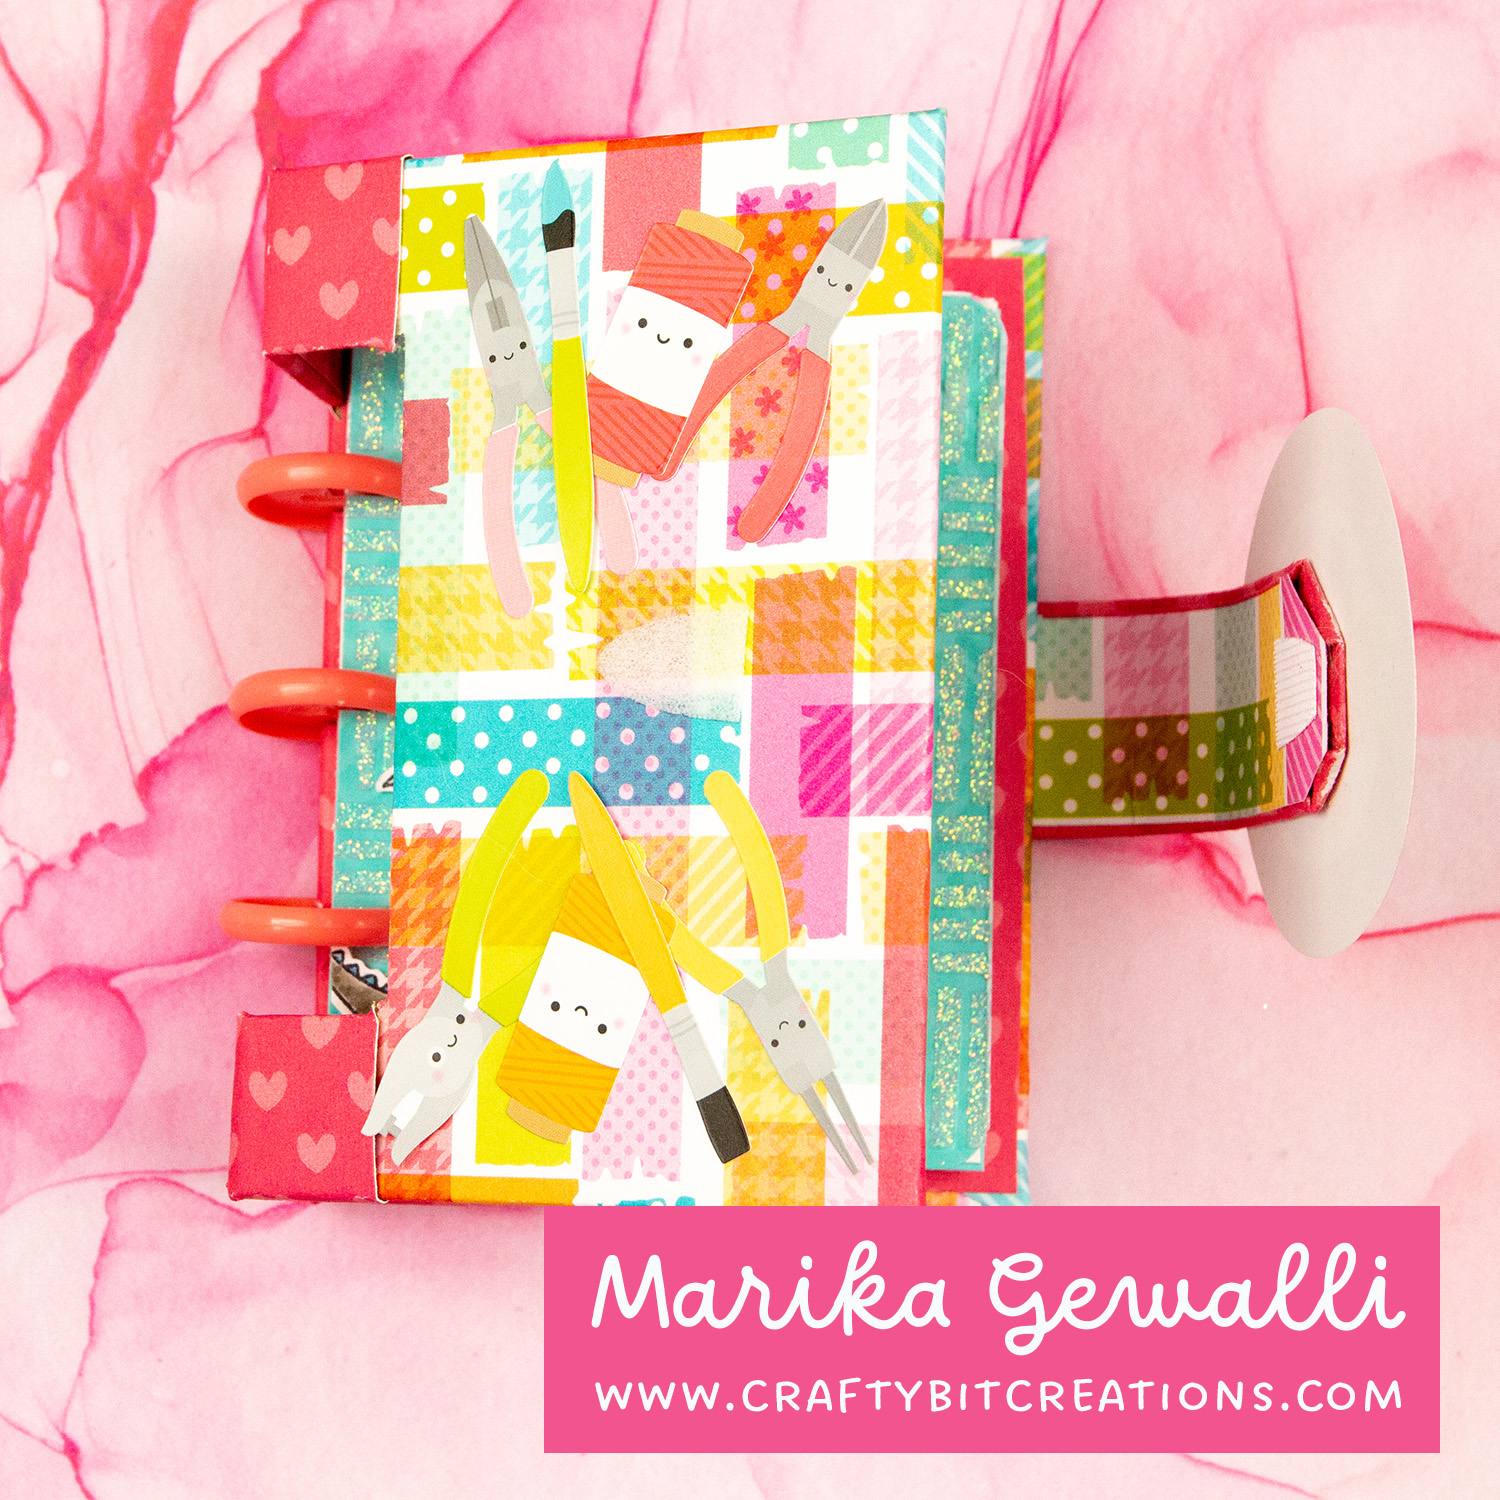
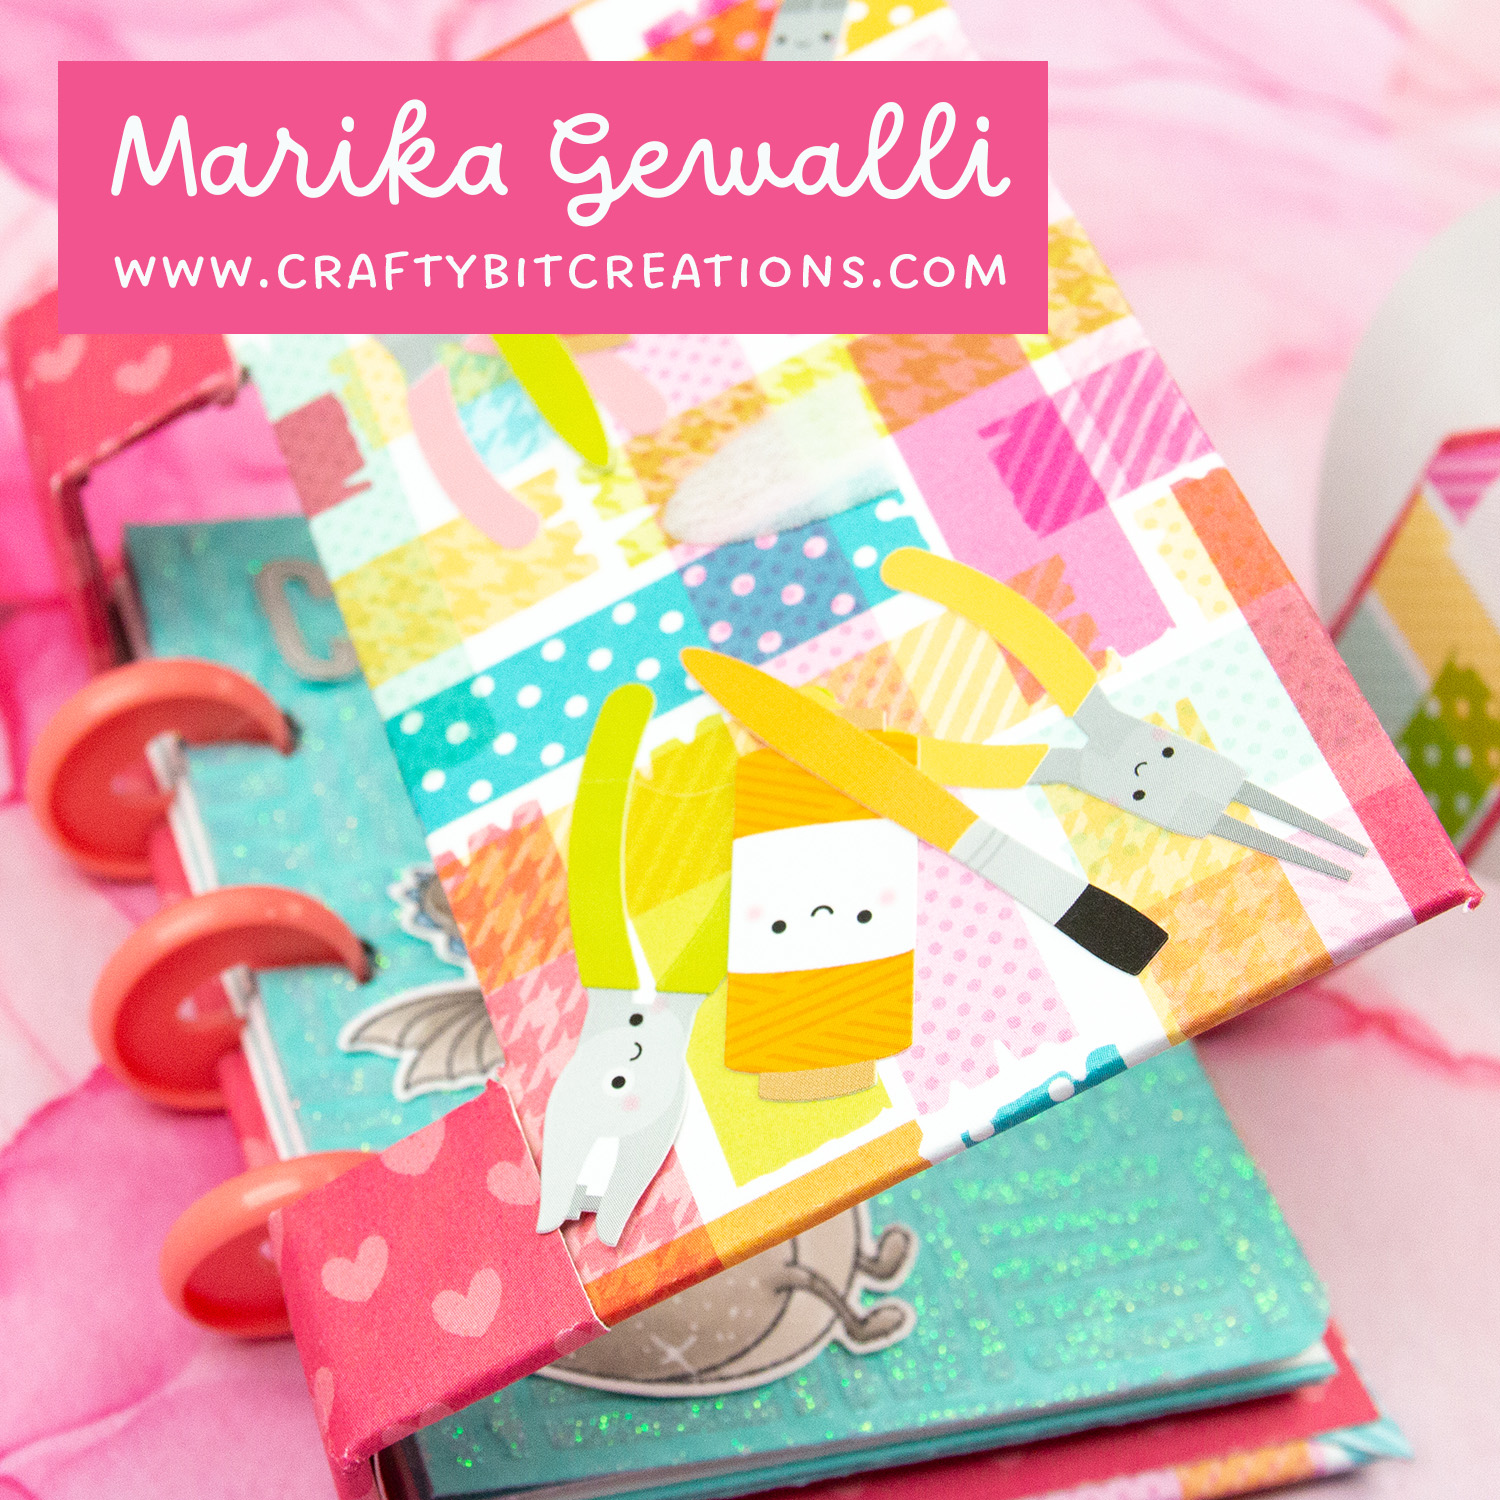
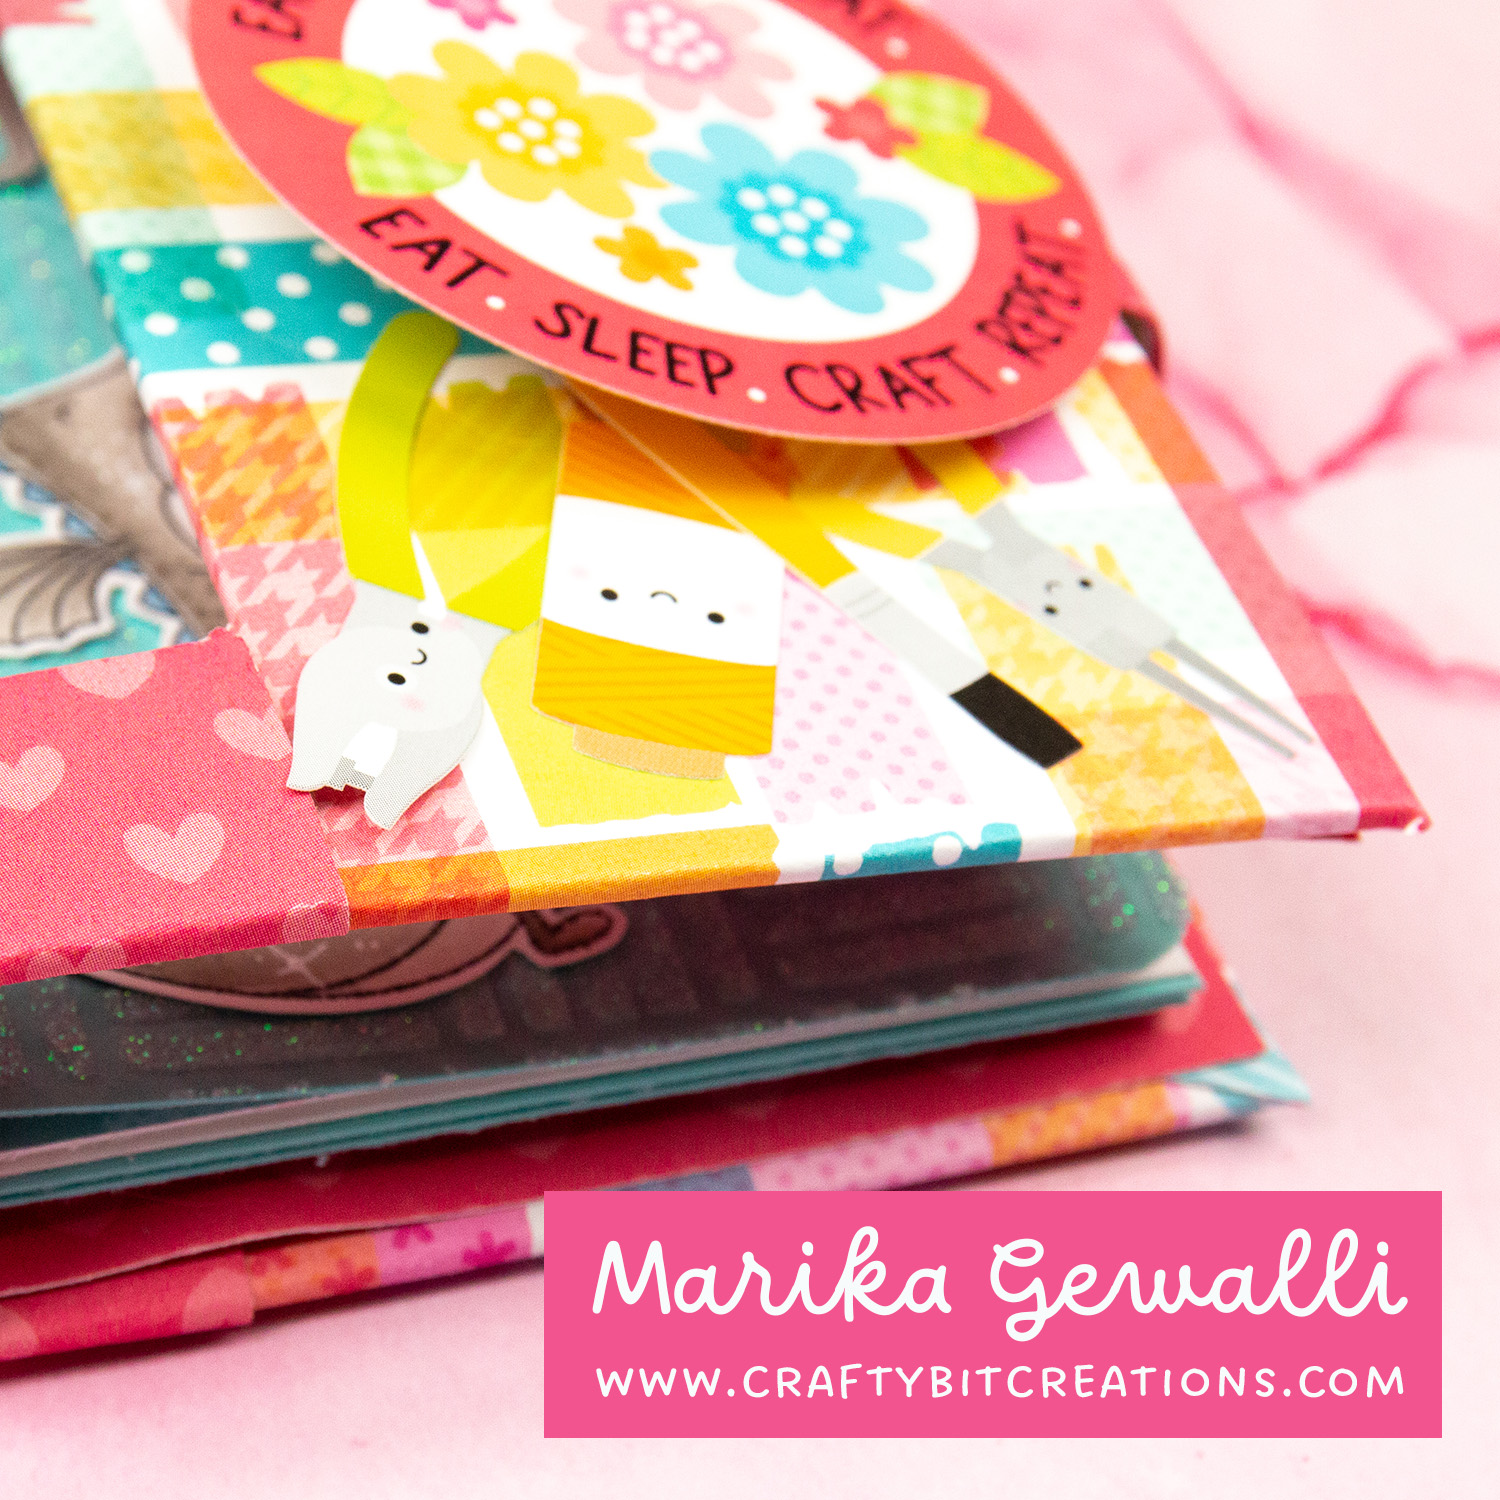
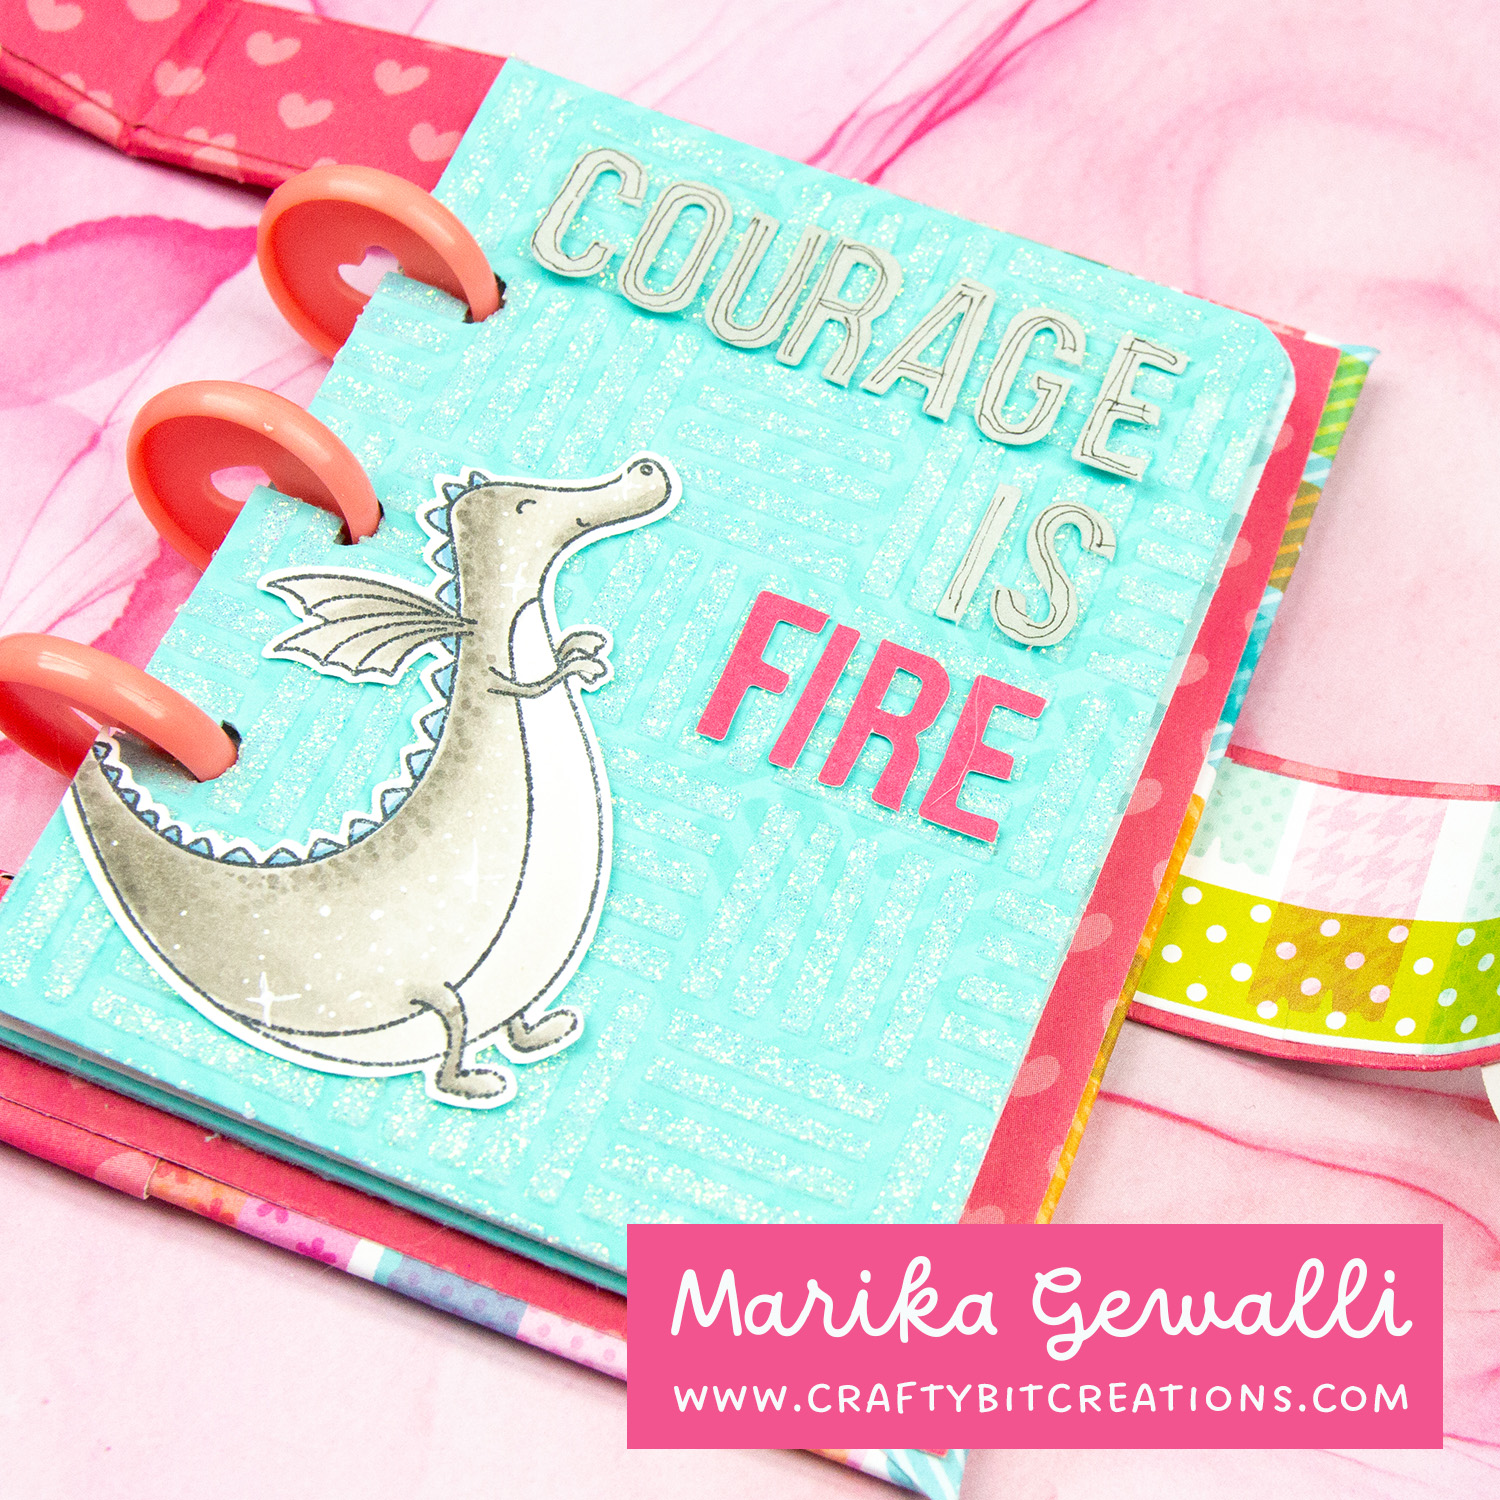
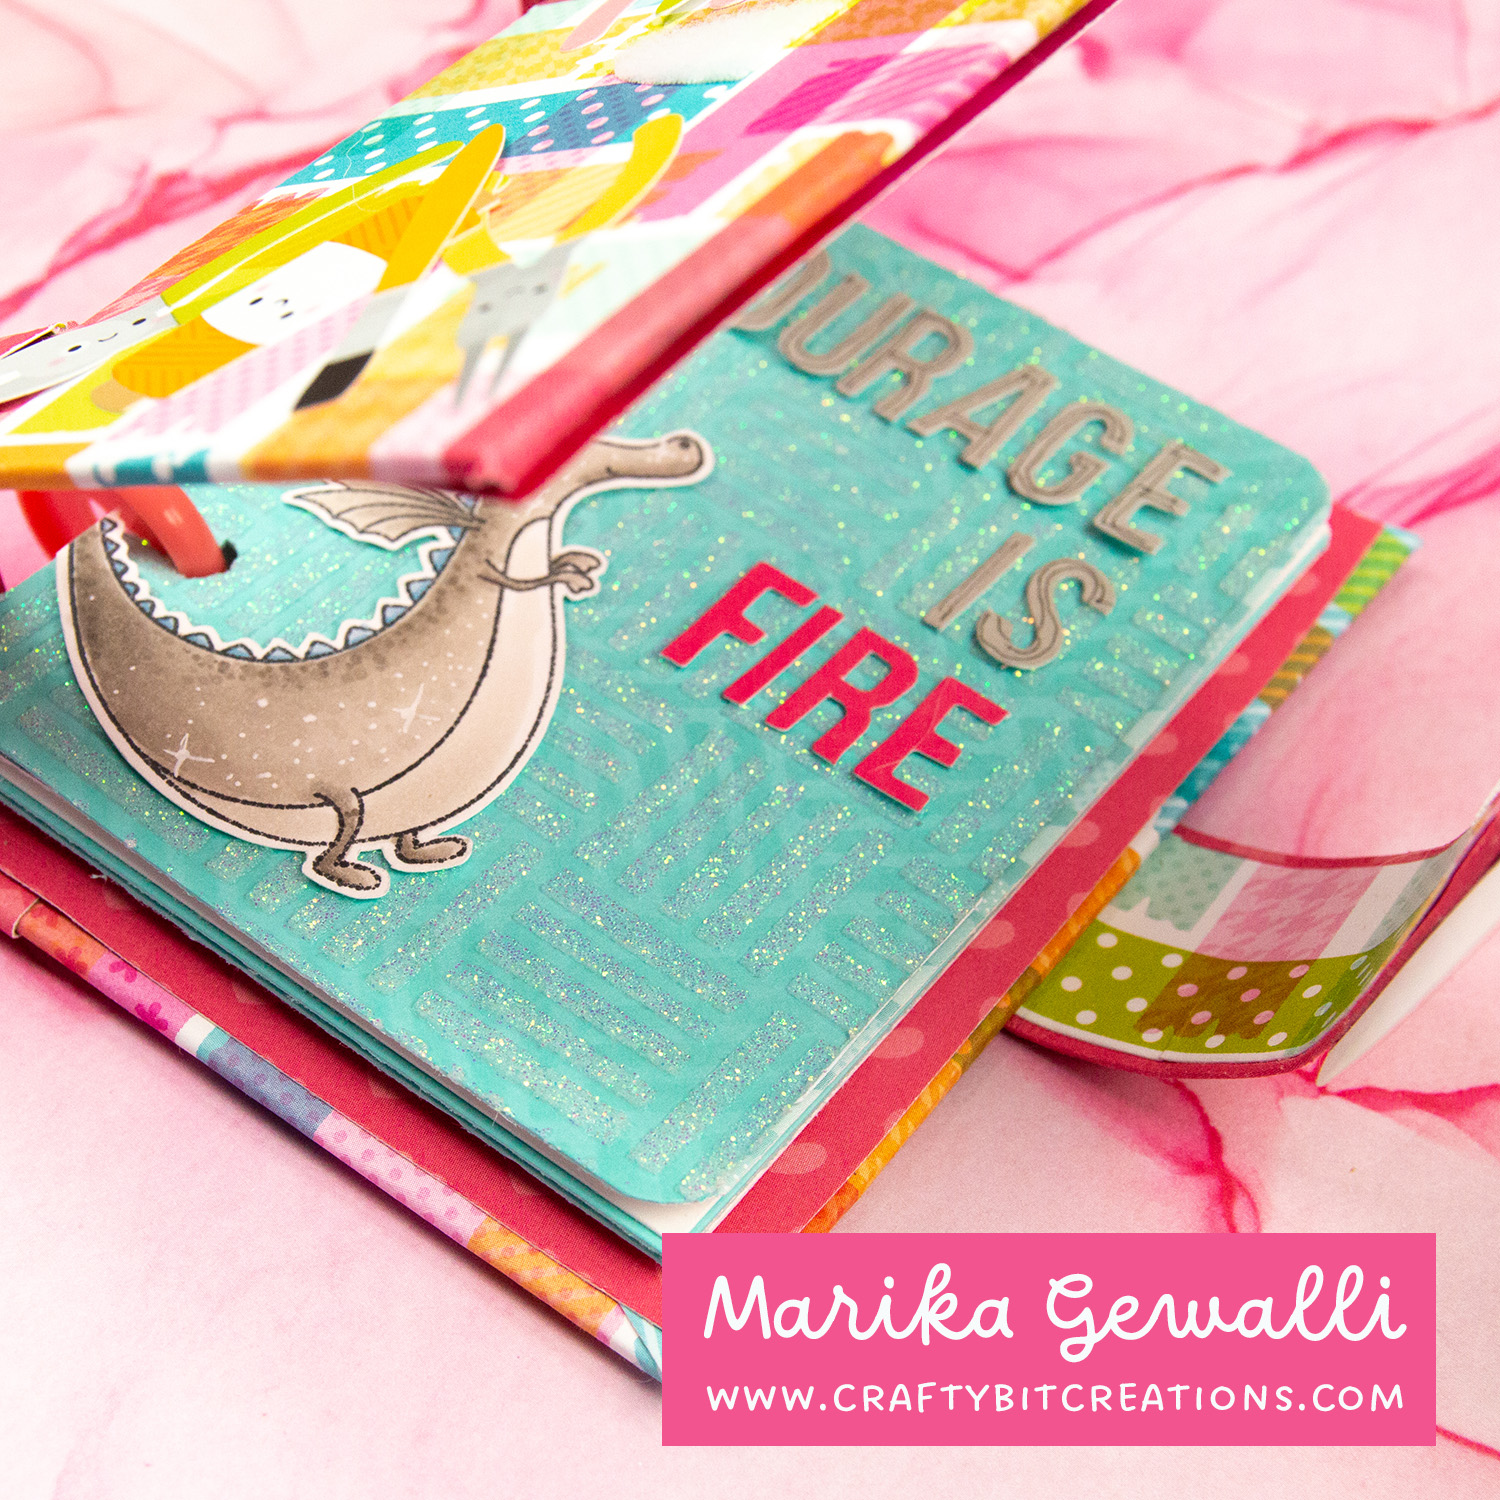
The word of the year that I have chosen is creative. I wanna be more creative, using my craft supplies in more creative ways. And what better place to do that than an art journal. I have started a couple of journals in the past, made a layout or two and then stopped. I think it’s because they have been a little to big and also I didn’t have a clear idea where to go with it creatively.
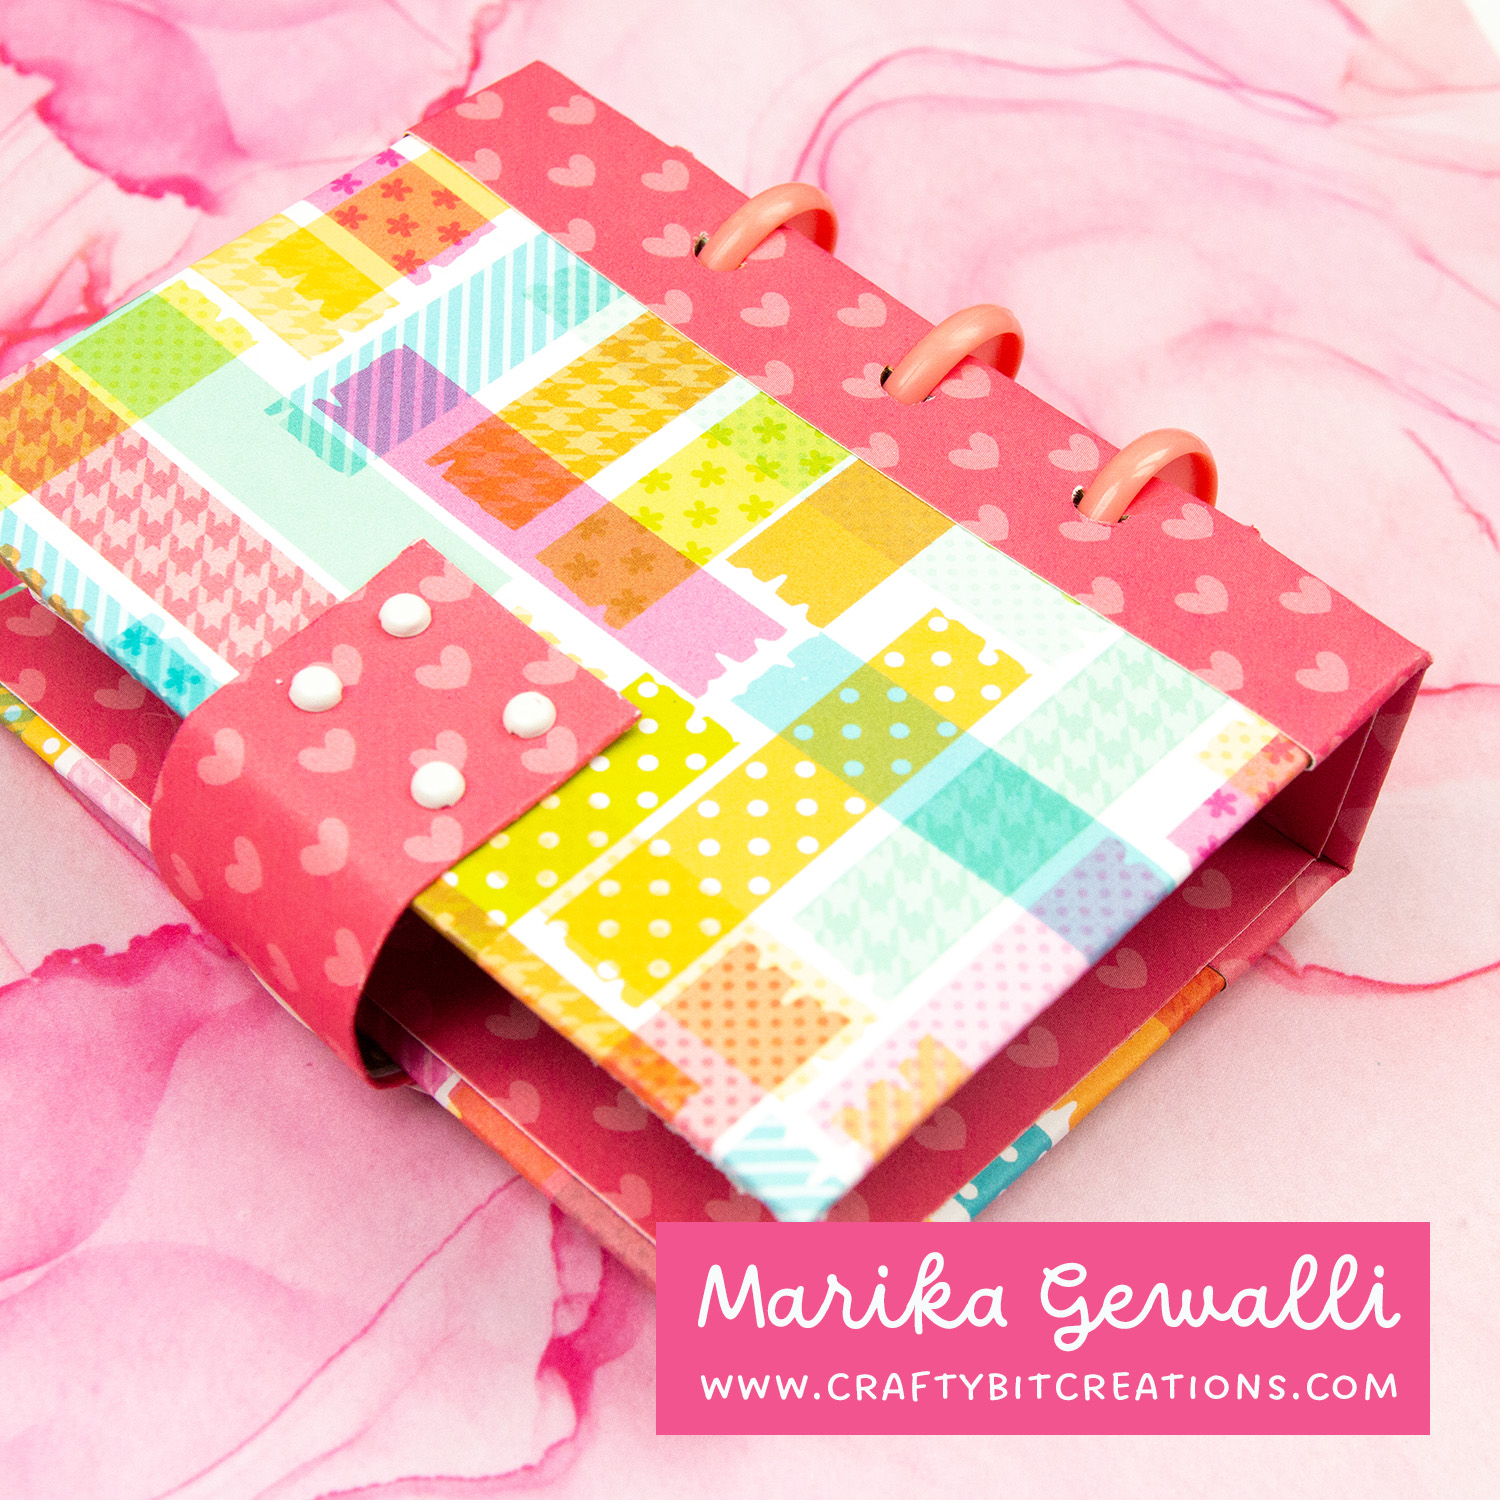
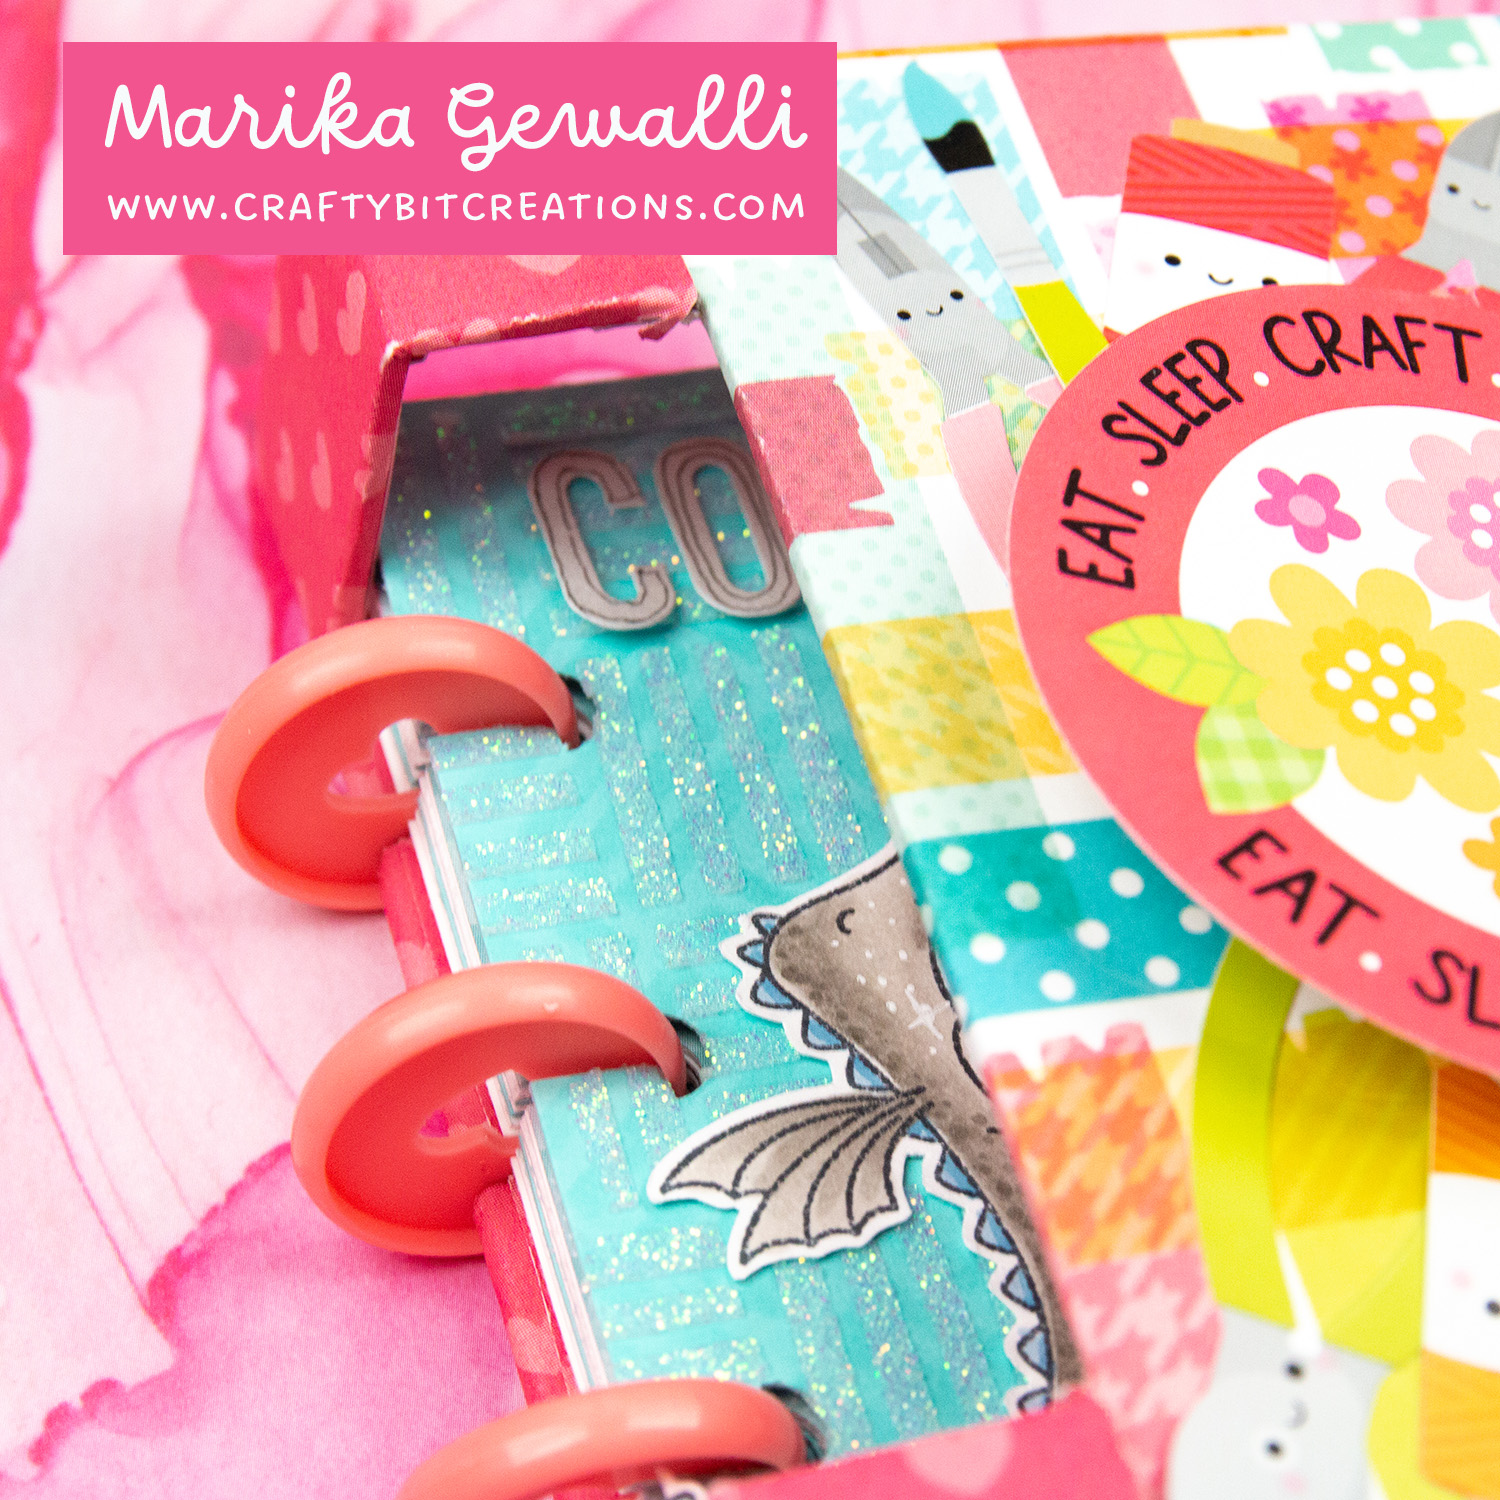
This journal fits 3″ x 4″ pages, it’s disc bound so you can add as many or as few pages as you want. An added benefit is that you can add pages as you go or change the material of the pages anytime in your creative journey with the journal. The shape of the journal is not my original idea, I just modified it to fit my needs.
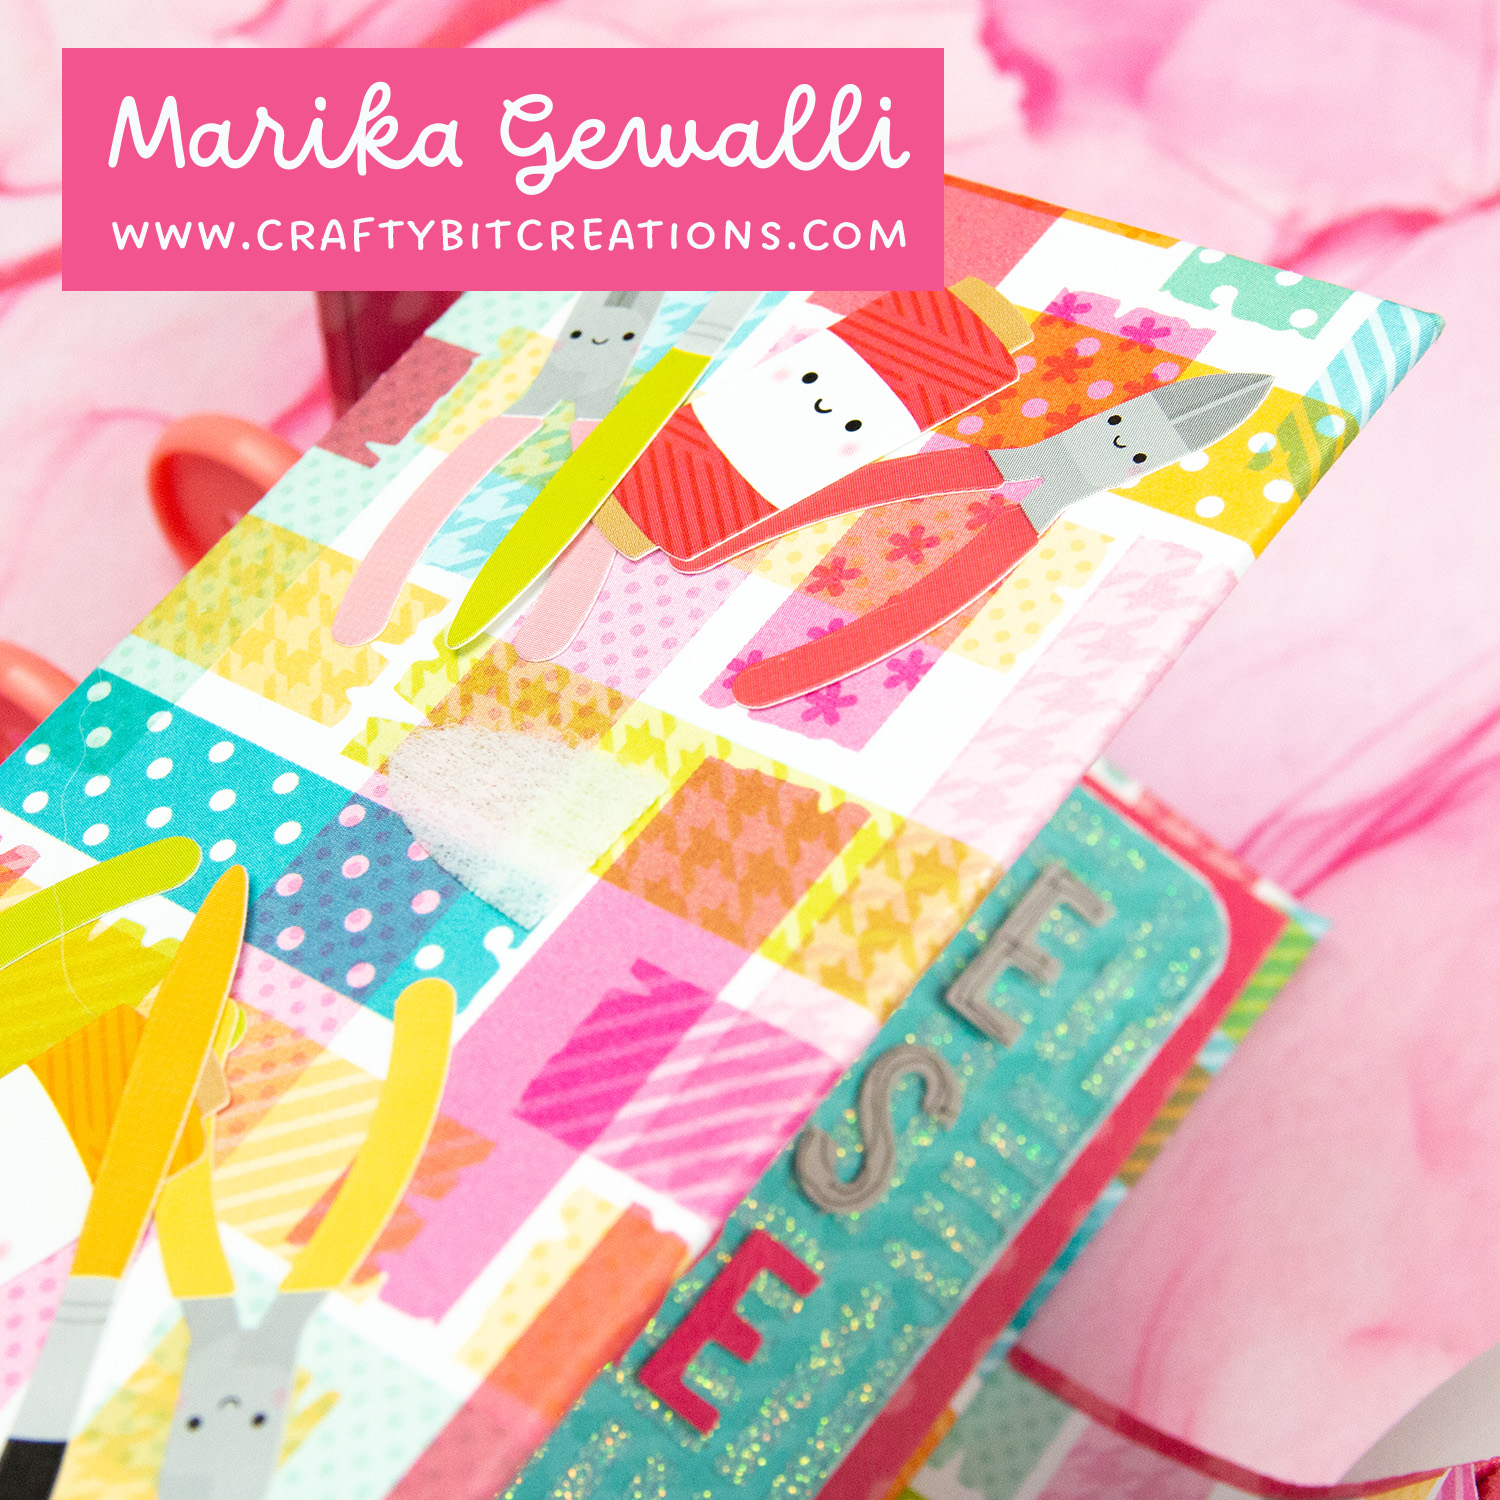
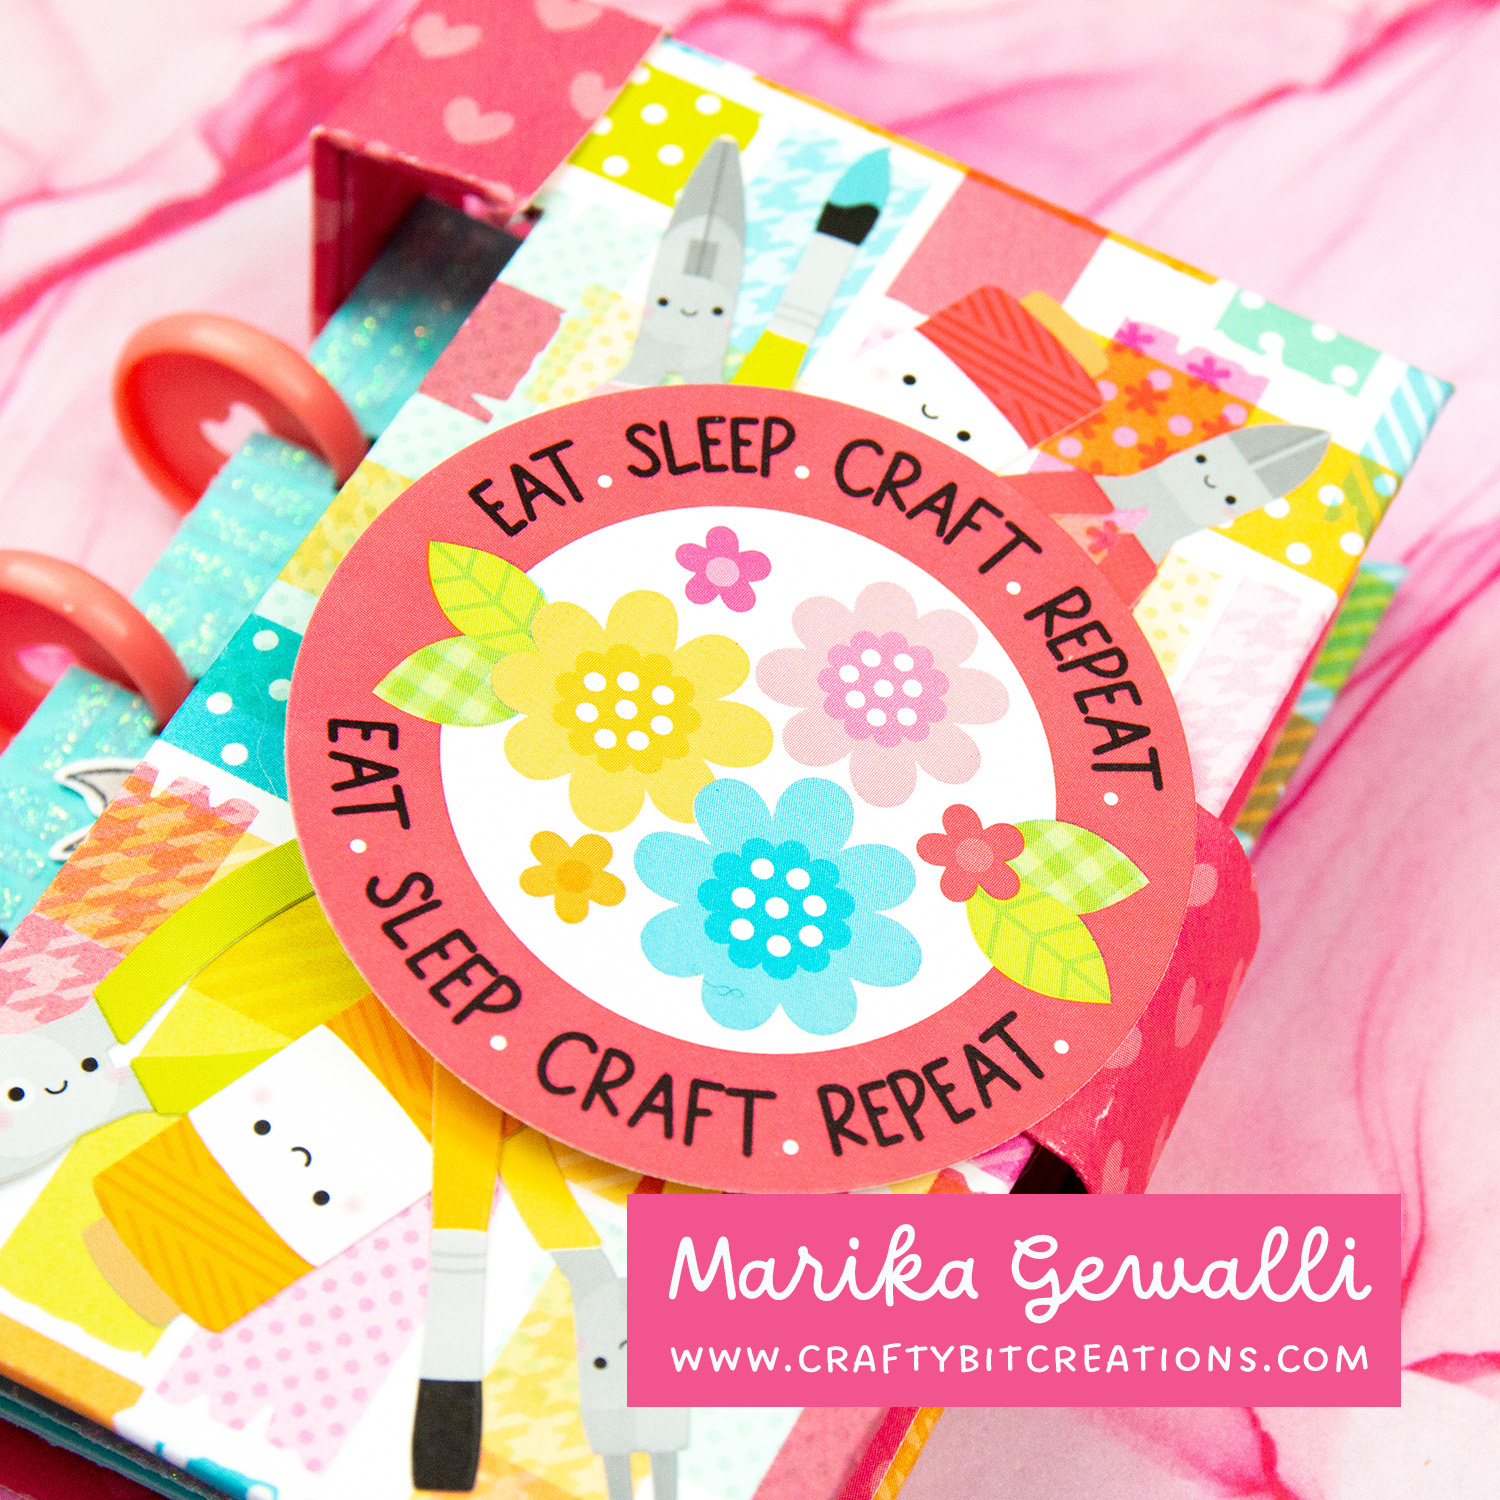
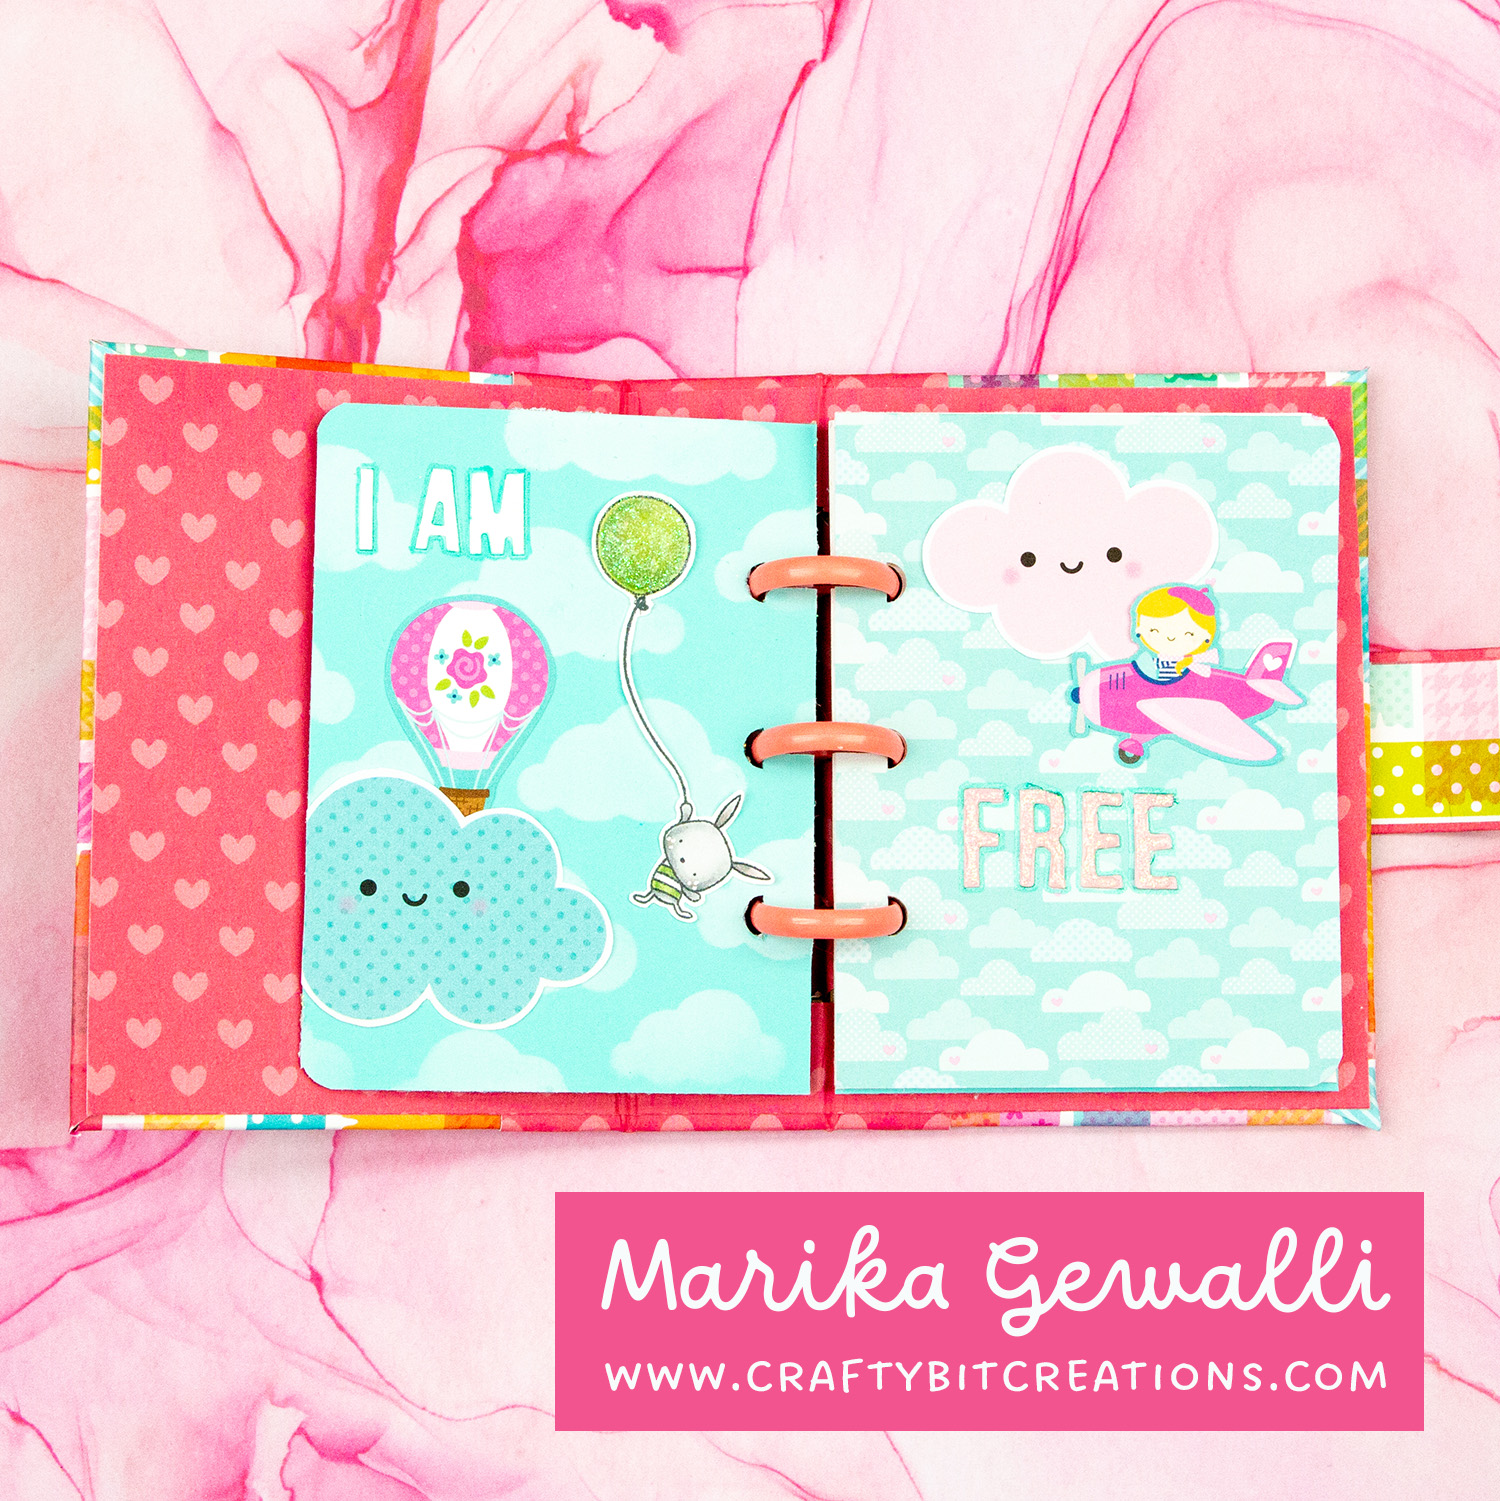
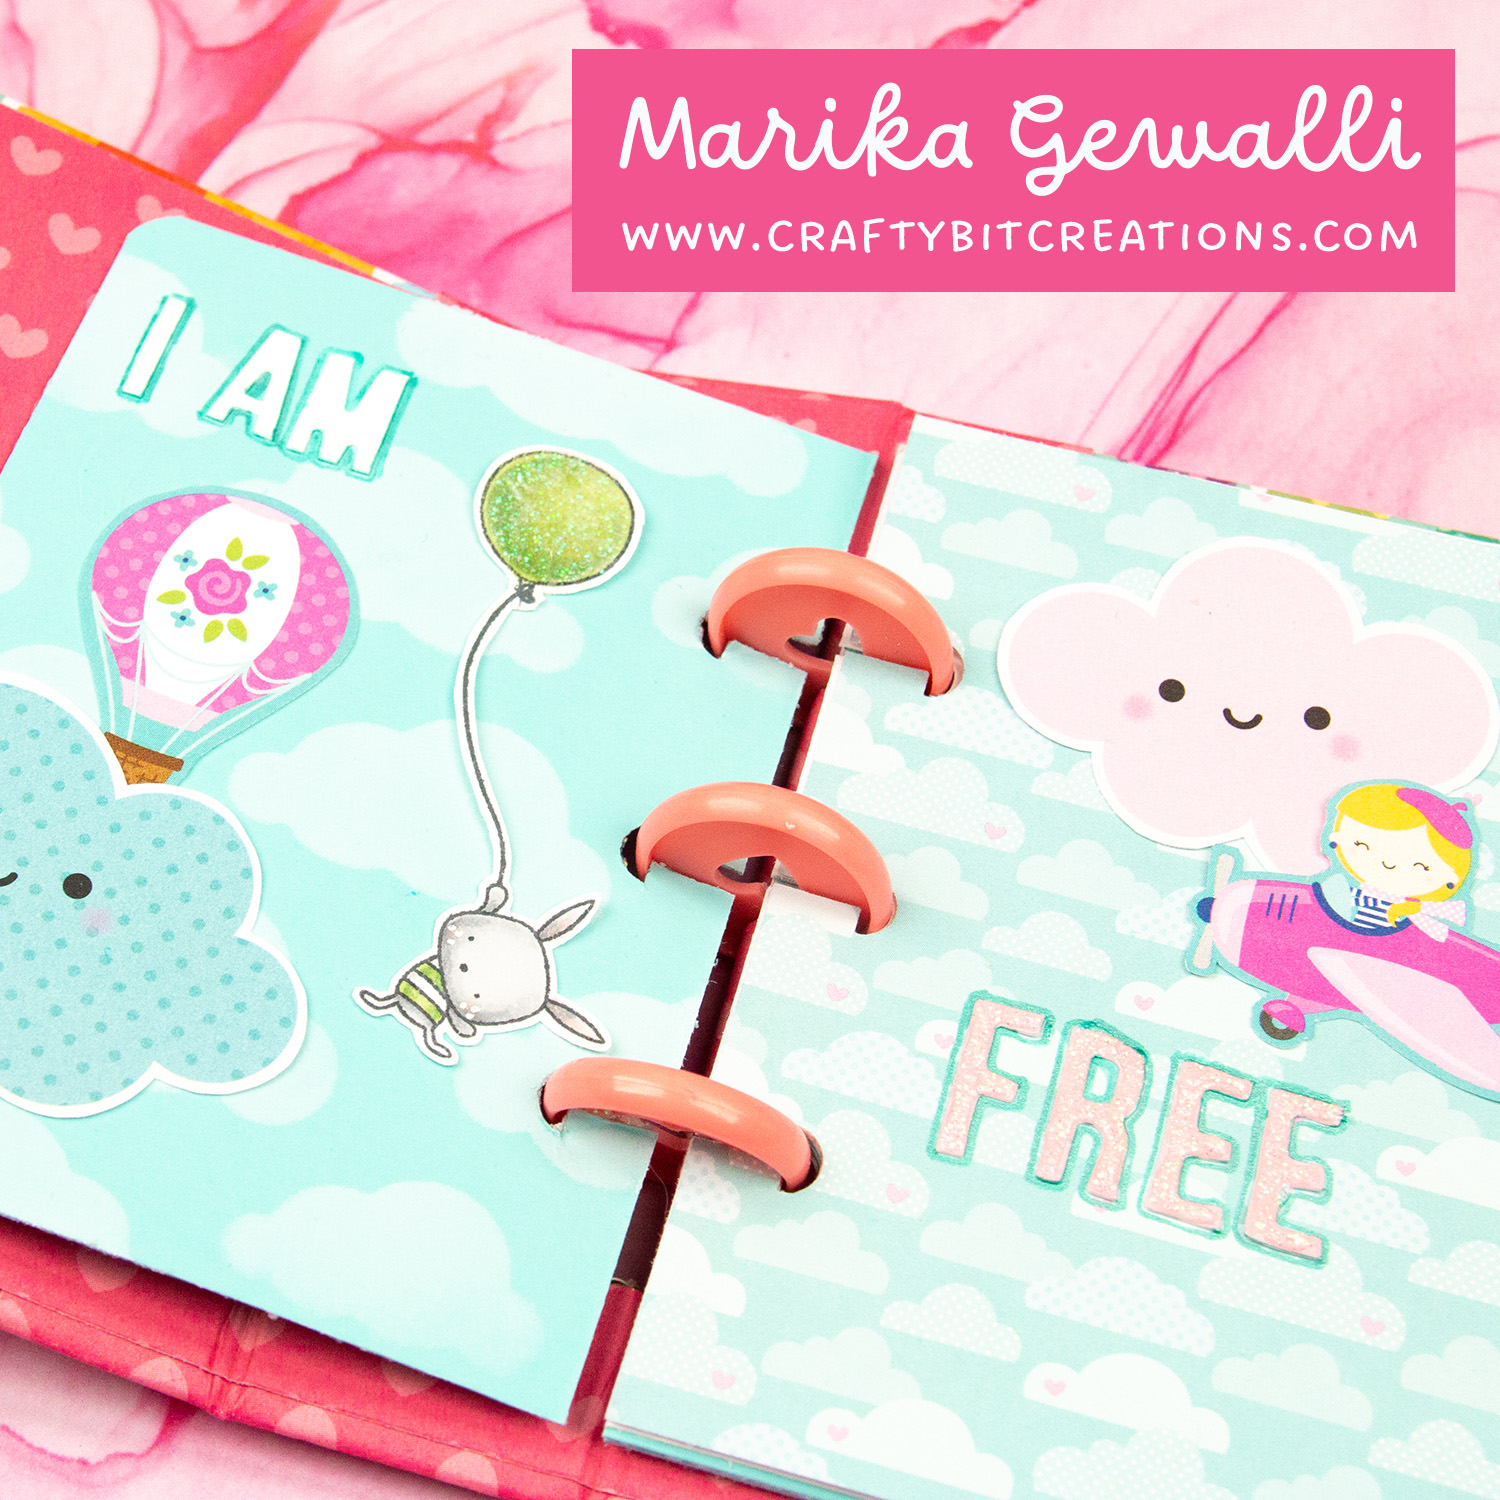
I did make two layouts while I was on it. And now all I want to do is to continue to work in it, so look forward to more videos in the future with more layouts. I also found a hole in my craft stash, I need more little sentiments that is more for journaling than greeting cards. I have so many ideas! To see all the layouts I have done so far you can find them HERE.
Cardboard: Spine: 2 pieces measuring 3/4″ x 1″ Back: 1 piece measuring 3 1/4″ x 4 1/4″ Front:1 piece measuring 3 1/4″ x 4 1/4″ with a rectangle measuring 3/4″ x 2 3/4″ cut out of the 4 1/4″ side, see schema above.
Pattern paper: Outside: one piece measuring 5 1/4″ x 8 1/2″, Inside one piece measuring 4 1/8″ x 7 1/2″ Spine: one piece measuring 2 3/4″ x 5 1/4″ Clasp: one piece measuring 1 1/2″ x 5″ cut down to size later, one piece measuring 1″ x 5″ cut down to size later.
When possible affiliate links are used, this means that I receive a small commission when products are purchased through the links (at no extra cost to you) I use the money to support my blog and youtube channel. If you like my projects and tutorial please consider supporting me by clicking through these links when you shop. Thanks!
Supplies:
Tonic MOONSTONE Nuvo Glimmer Paste: SSSSBC Nuvo White Blizzard: SSSAMZ Nuvo – Adhesive Tape Runner – Maxi: SSSAMZSBC We R Memory Keepers Crop-A-Dile Disc Power Punch: SSSAMZSBC DBD Cute and Crafty 12 x 12 Paper Pack: SSSAMZSBC DBD Petite Prints 12 x 12 Paper Pack Cute and Crafty: SSSSBC Happy Planner Mini Discs Value Pack: AMZSBC Create A Smile Alphabet Stickers: CAS MFT Sno Cone Premium Dye Ink Pad: MFTSSS Simon Says Stamp Cardstock 100# SURF BLUE: SSS MFT High Flying Adventure: MFTSSS MFT Fairy-Tale Friendship: MFTSSS Birthday Chicks: MFT Newton’s Nook Designs CLOUDY SKY Stencil: SSS Simon Says Stamp Pigment Ink Pad WHITE: SSS Doodlebug LOTS OF LOVE Odds and Ends Ephemera Die Cut Shapes: SSSSBC
Early January I placed an order with Scrapbook.com, sadly it got stuck in the Swedish mail system. Four weeks and five phone calls later they finally arrived. At the same time my Tonic Studios order came so thought I combine them as a little haul. And as usual, future projects with these supplies you can find for Tonic Studios HERE and Scrabook.com HERE.
When possible affiliate links are used, this means that I receive a small commission when products are purchased through the links (at no extra cost to you) I use the money to support my blog and youtube channel. If you like my projects and tutorial please consider supporting me by clicking through these links when you shop. Thanks!
Supplies:
Tonic MOONSTONE Nuvo Glimmer Paste: SSSSBC Nuvo White Blizzard: SSSAMZ Red Line Tape: SSSAMZSBC Tonic MOONSTONE Nuvo Glimmer Paste: SSSSBC Nuvo – Adhesive Tape Runner – Maxi: SSSAMZSBC Nuvo – Stamp Cleaning Solution: SBC Nuvo – Stamp Cleaning Pad: SSSSBC MINC Toner Reactive Foil Gold – Discontinued: AMZSBC We R Memory Keepers Crop-A-Dile Disc Power Punch: SSSAMZSBC DBD Made With Love 12 x 12 Paper Pack: SSSAMZSBC DBD Hippity Hoppity 12 x 12 Paper Pack: AMZSBC DBD Fairy Garden 12 x 12 Paper Pack: SSSAMZSBC DBD Cute and Crafty 12 x 12 Paper Pack: SSSAMZSBC DBD Petite Prints 12 x 12 Paper Pack Cute and Crafty: SSSSBC Doodlebug Design Cute and Crafty Essentials Kit: AMZSBC Glue Dots Mini: SSSAMZSBC Lawn Fawn Scent With Love Stamp set: SSSAMZSBC Happy Planner Mini Discs Value Pack: AMZSBC Distress Ink Gathered Twigs: SSSAMZSBC Distress Oxide Ink Speckled Egg: SSSAMZSBC Distress Oxide Ink Prize Ribbon: SSSAMZSBC Distress Ink Prize Ribbon: SSSAMZSBC Distress Oxide Ink Salvaged Patina: SSSAMZSBC Distress Ink Salvaged Patina: SSSAMZSBC
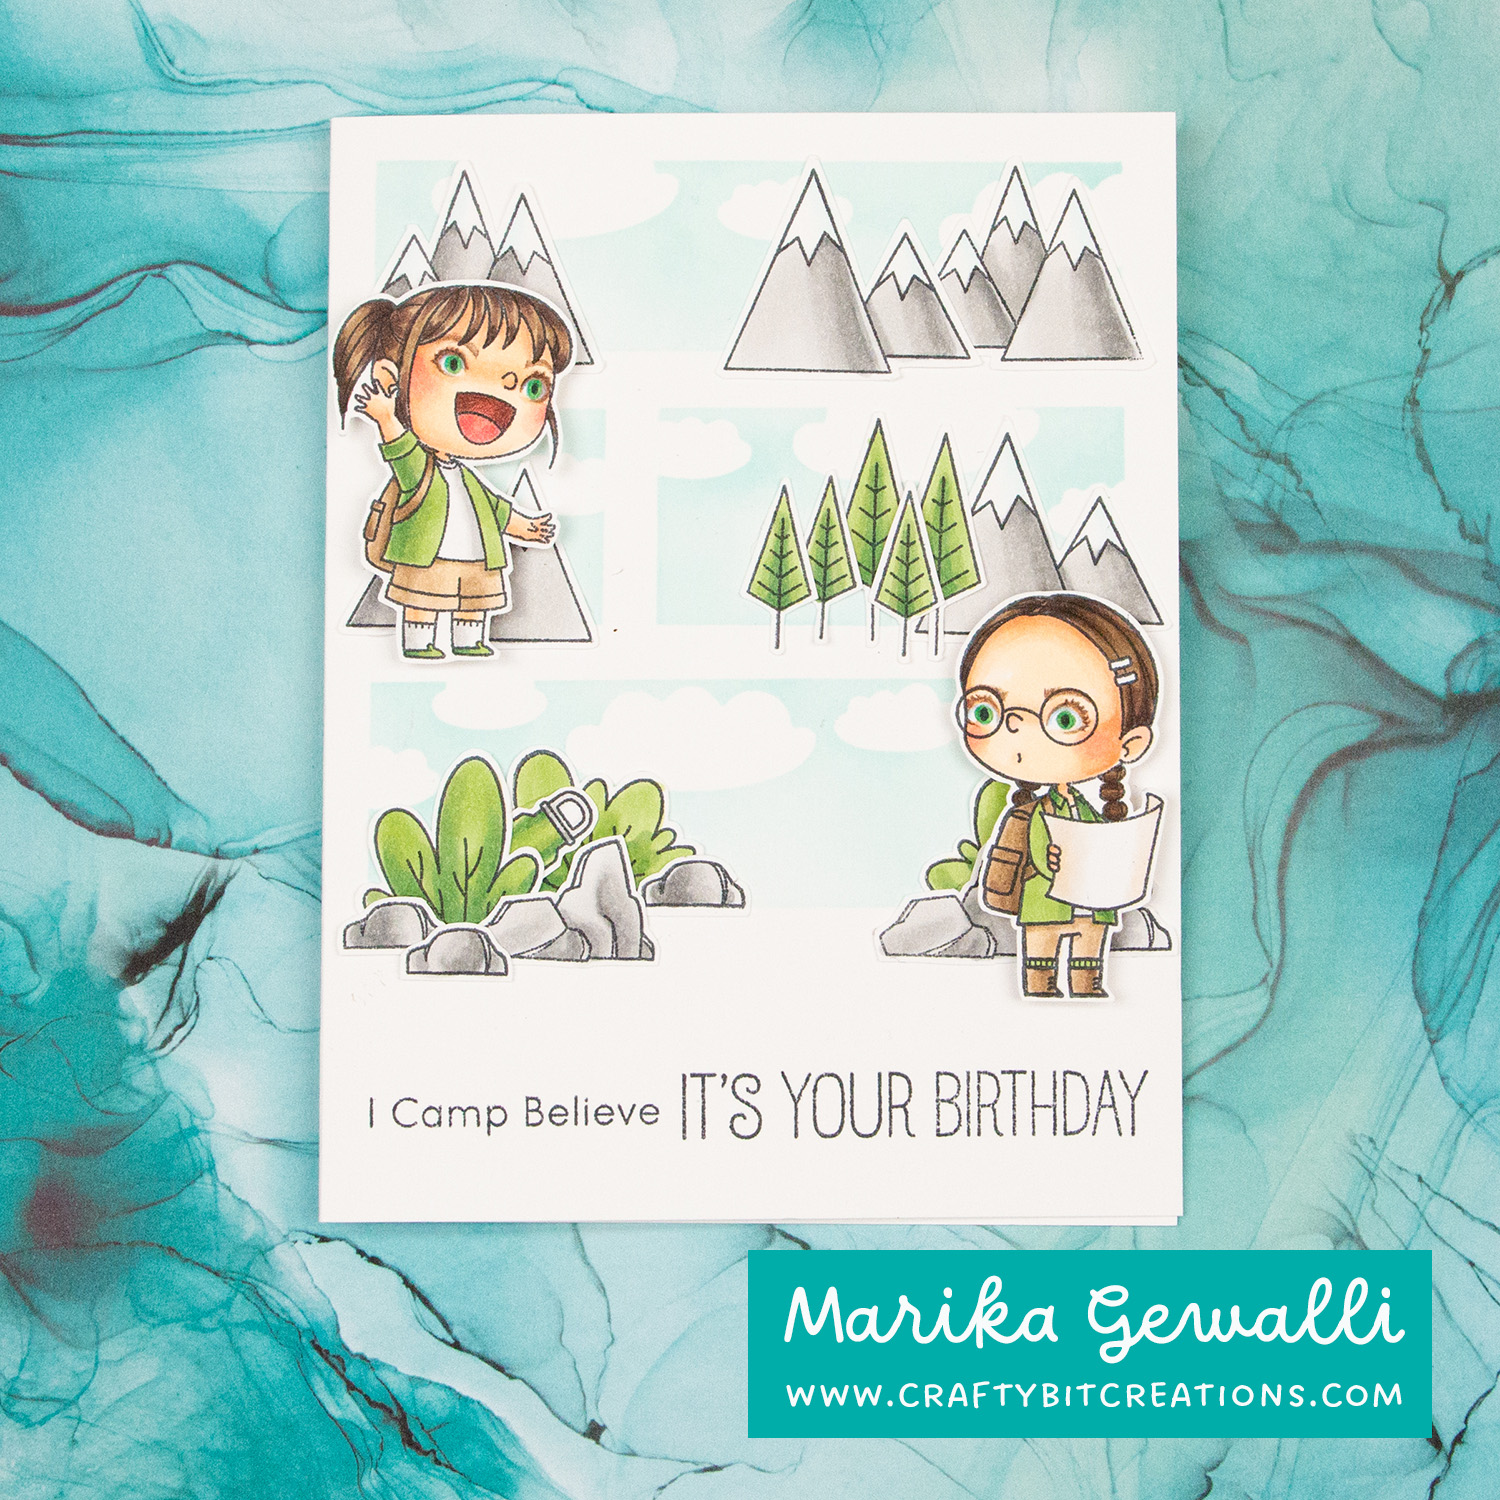
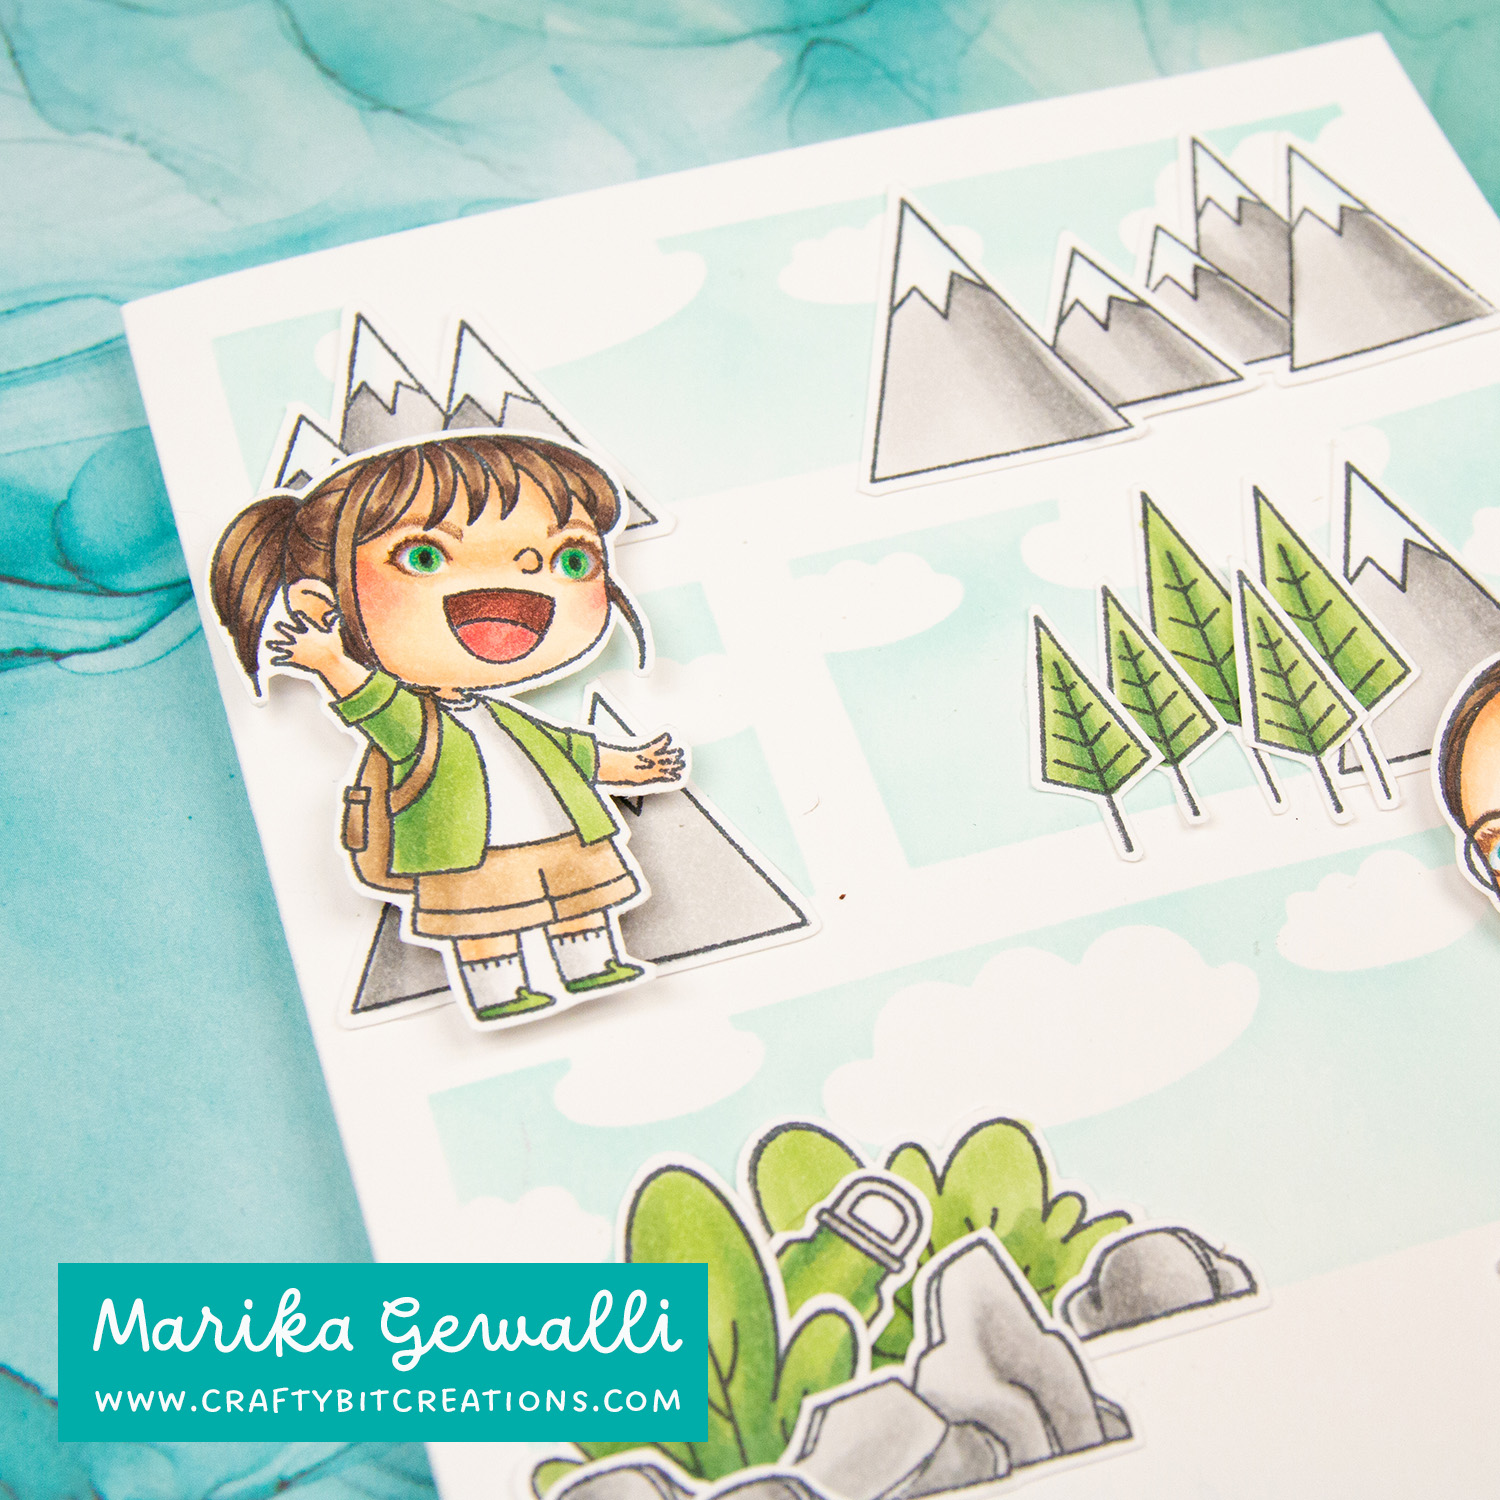
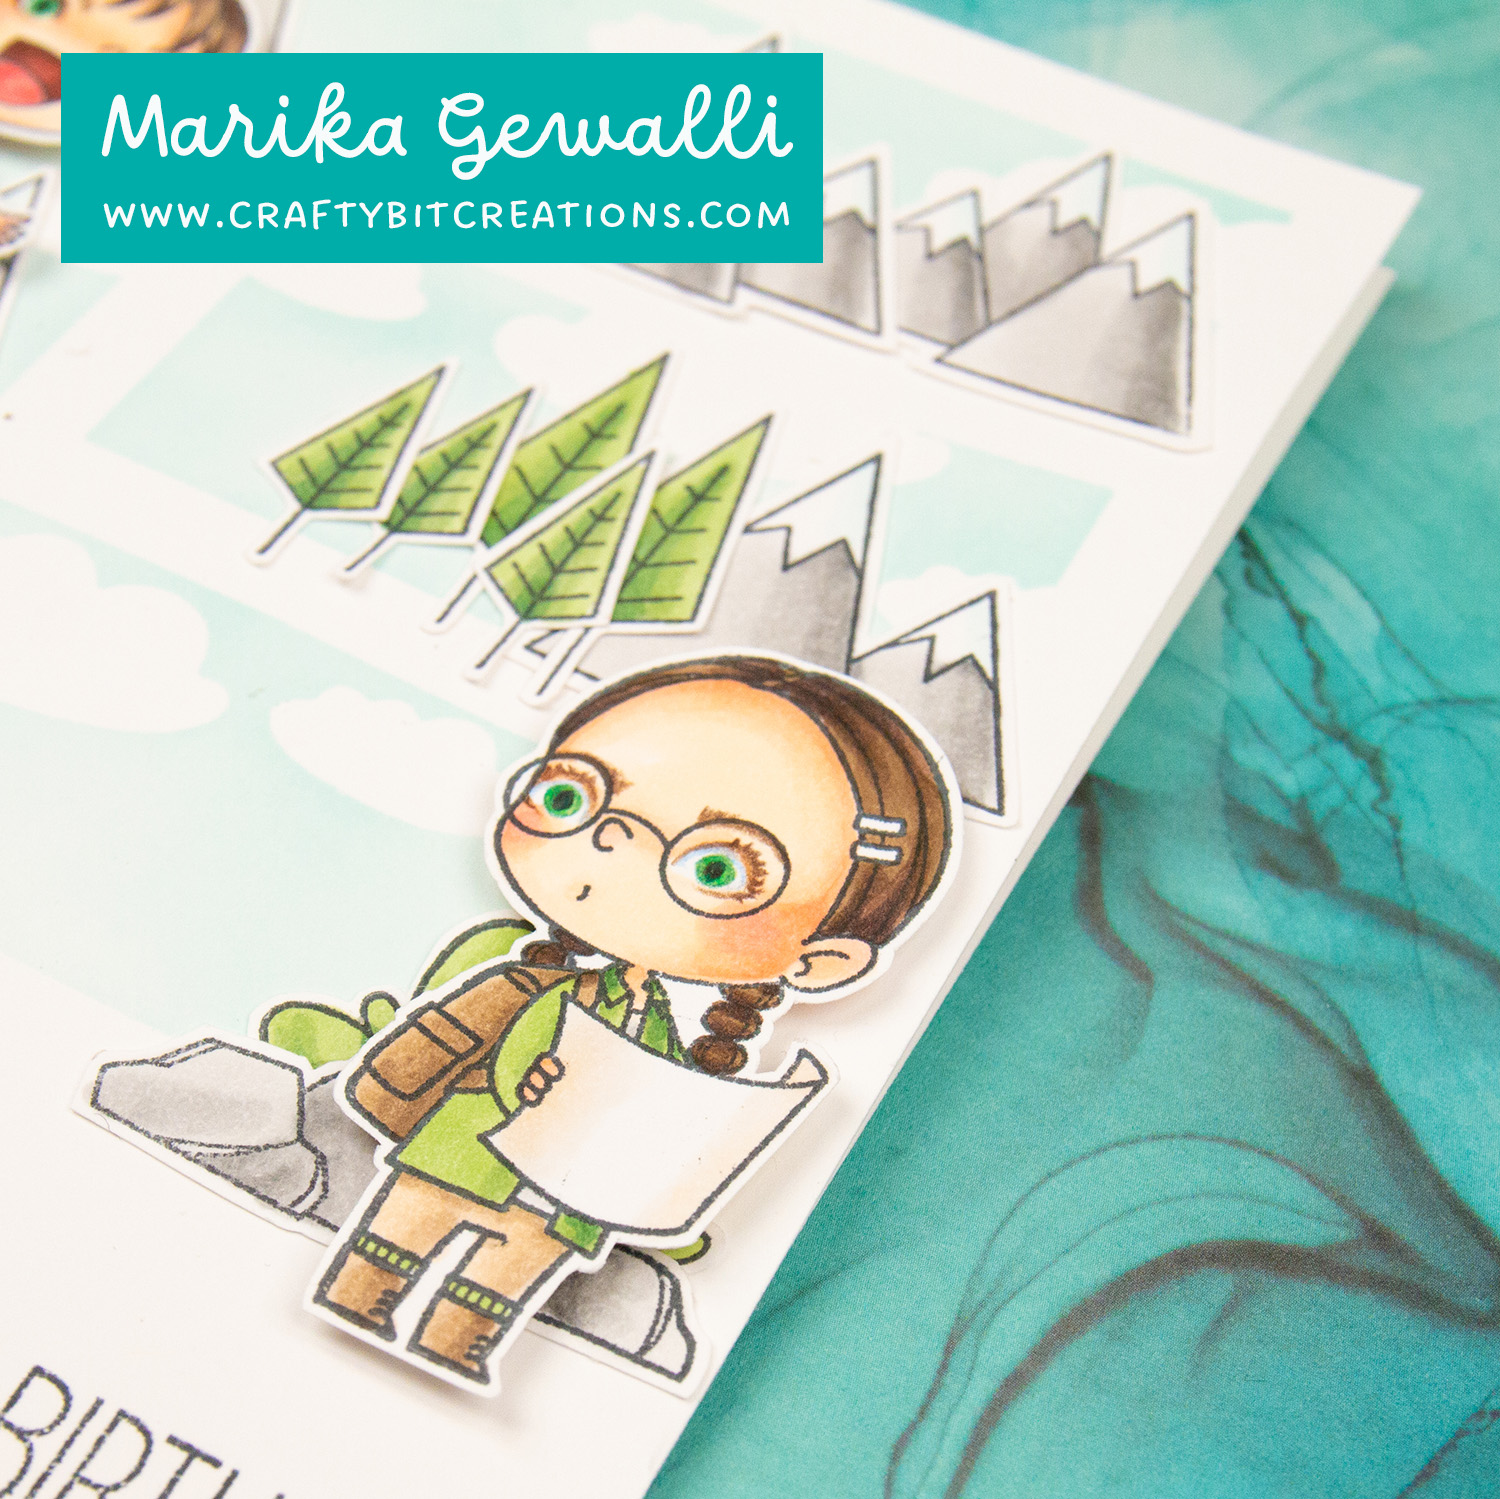
Going into every sketch challenge I have a little list of supplies to pick from to have a head start before I see how the sketch look. With this weeks sketch challenge 581, that all flu out of the door. When I saw the challenge I saw the way I wanted to make the card in my head immediately. I just needed to use the Adorable Adventure stamp set. Happily enough the stamps fitted perfectly with the different levels of the sketch. Then we had the color scheme, which was the easiets. Have been using the G40s and E40s a lot lately and they fitted the images perfectly, I added the Ts for the grey and whites and finally B0000 for the snow on the mountains.
For the base of the levels I used my new favorite ink color, Sno Cone to blend over some cloud masks I made with the Cloud Trio Die-namics. Before blending I also masked off the card base so I only had the three different stripes. I then colored up a whole bunch of stamped images from the Adorable Adventure and fussy cut them out. I placed them on the different levels and then I stamped a sentiment on the bottom.
If you wan’t to see my entries to previous sketch challenges you can find them HERE.
When possible affiliate links are used, this means that I receive a small commission when products are purchased through the links (at no extra cost to you) I use the money to support my blog and youtube channel. If you like my projects and tutorial please consider supporting me by clicking through these links when you shop. Thanks!
I love card kits! I get to play with a bunch of supplies that is perfectly put together. Many times also products that I might not myself have chosen, I have found some of my favorite craft supplies this way. Coming back to crafting, I saw the new Love Card Kit from Simon Says Stamp. It was filled to the brim with goodness, from among others Doodlebug Designs which definitely is one of my favorite paper companies.
So I decided to pick it up. And instead of making a regular haul video I made a video making multiple cards from the kit. I have so many pieces left of those Doodlebug Deigns Odds and Ends Ephemera Die Cut Shapes, I could probably make 20-30 mini cards more. But I decided to stop at 6 different cards. You can find all my kit posts over HERE. There might not be so many right now, but I’m already waiting for another kit and more will follow.
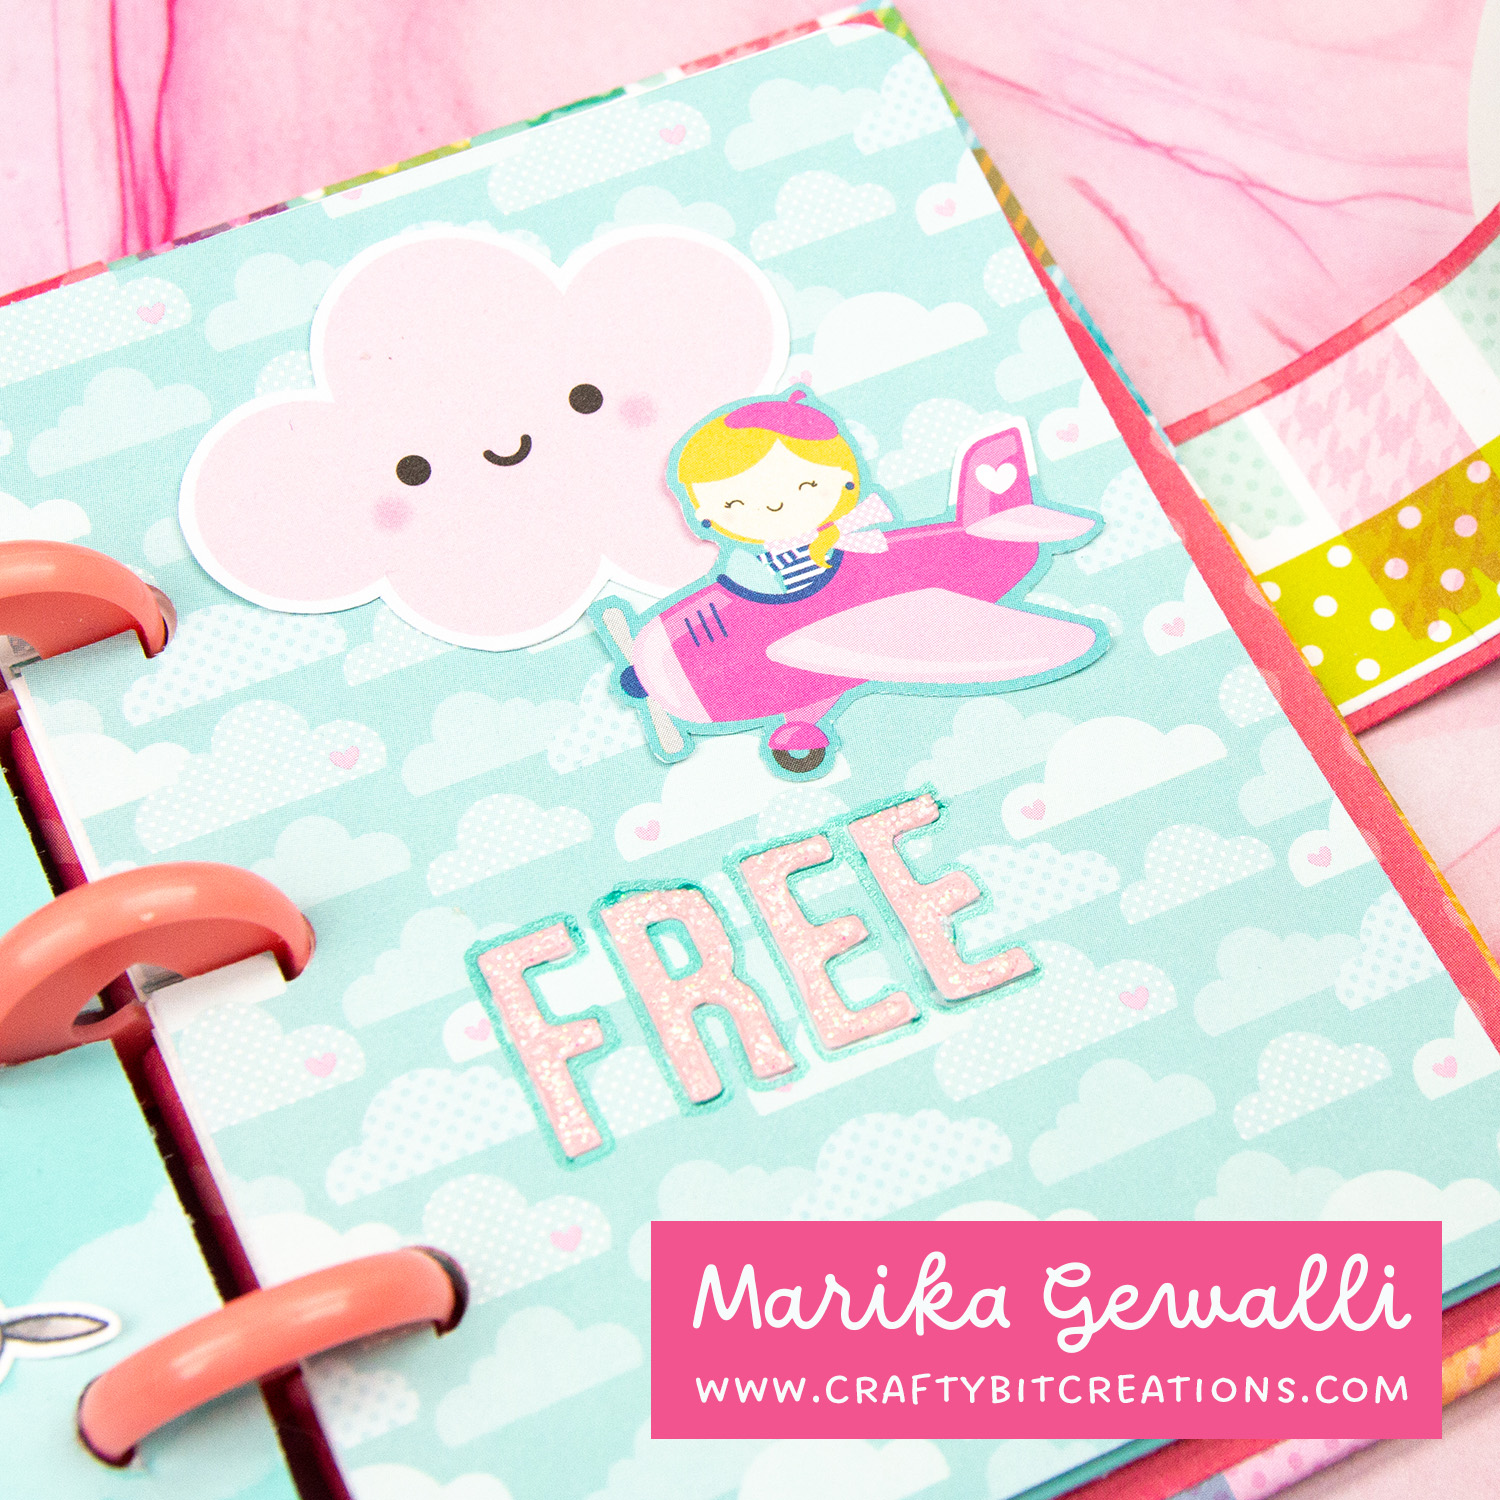
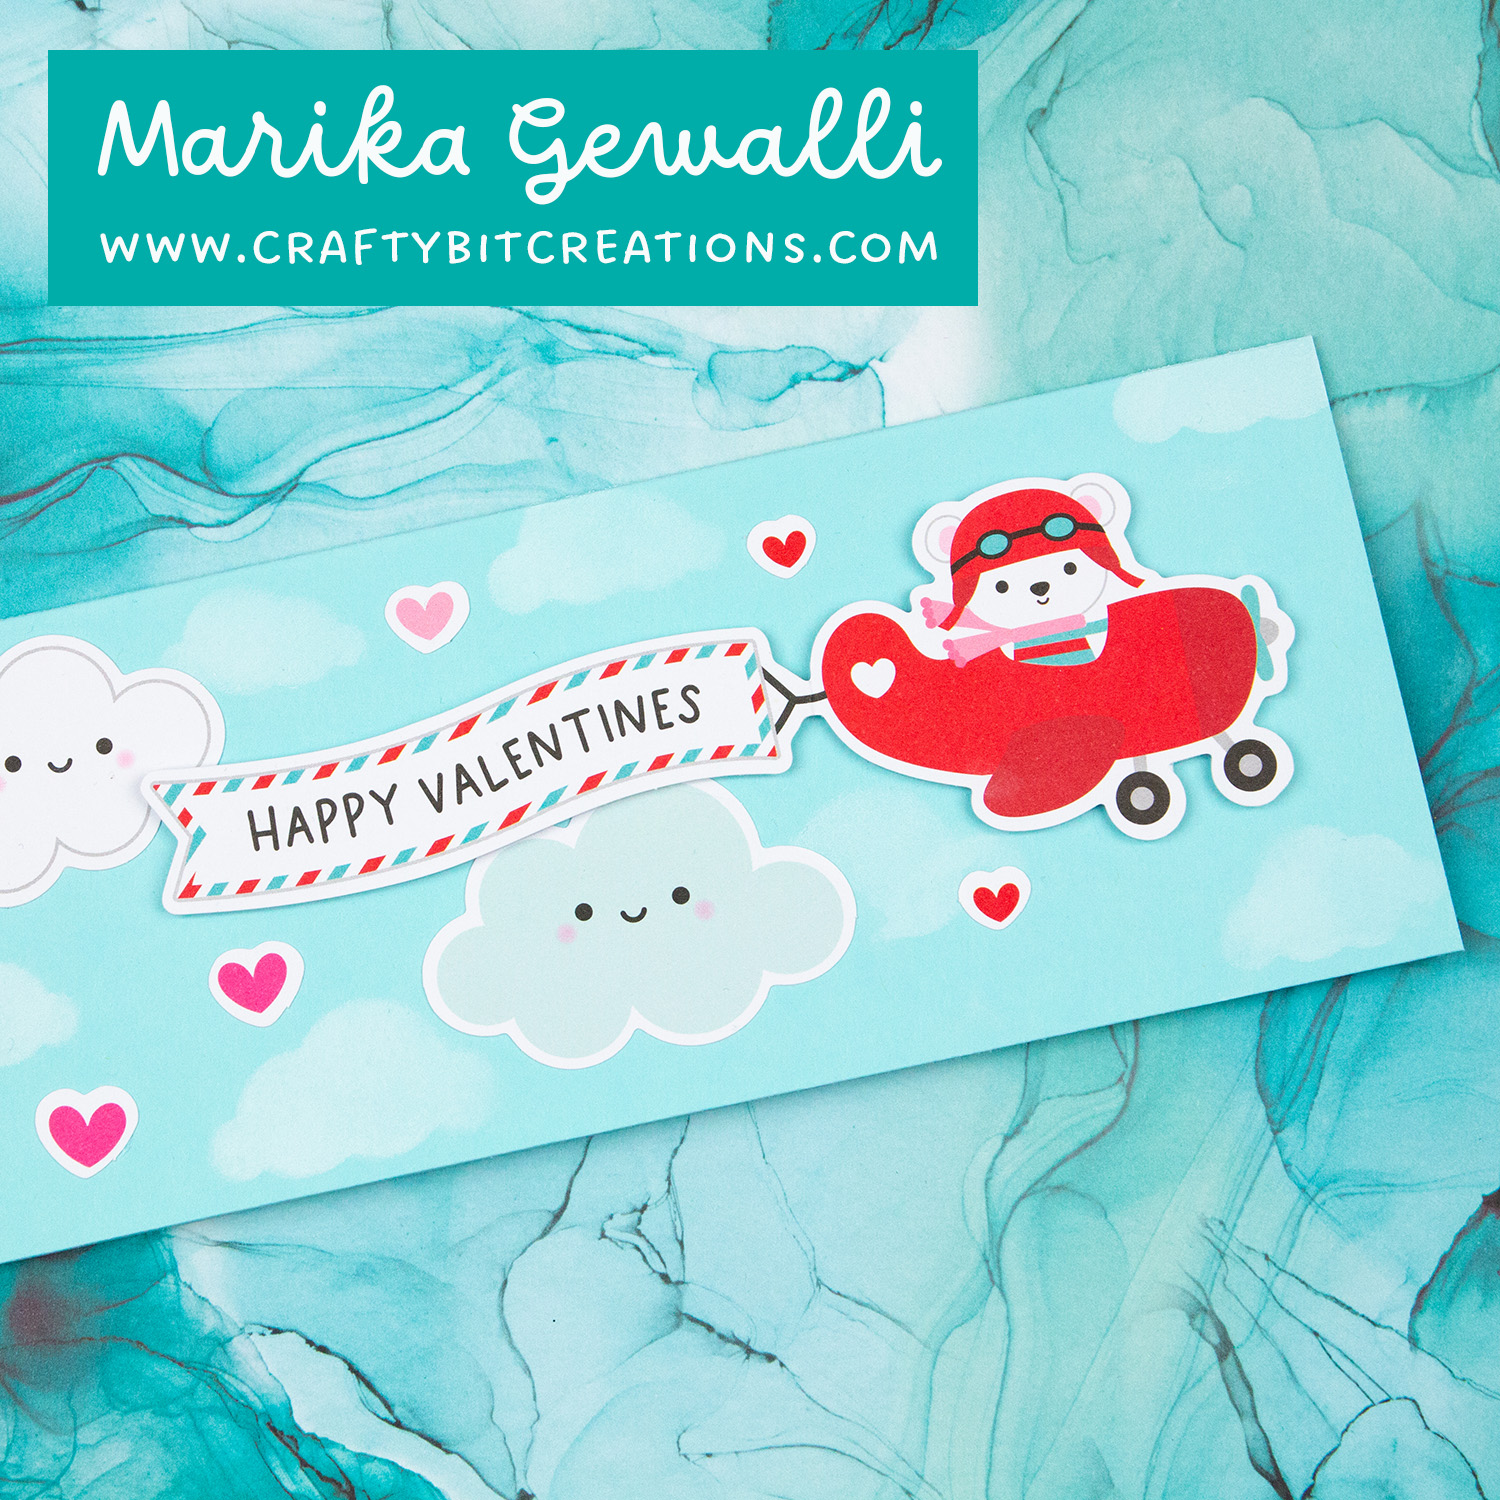
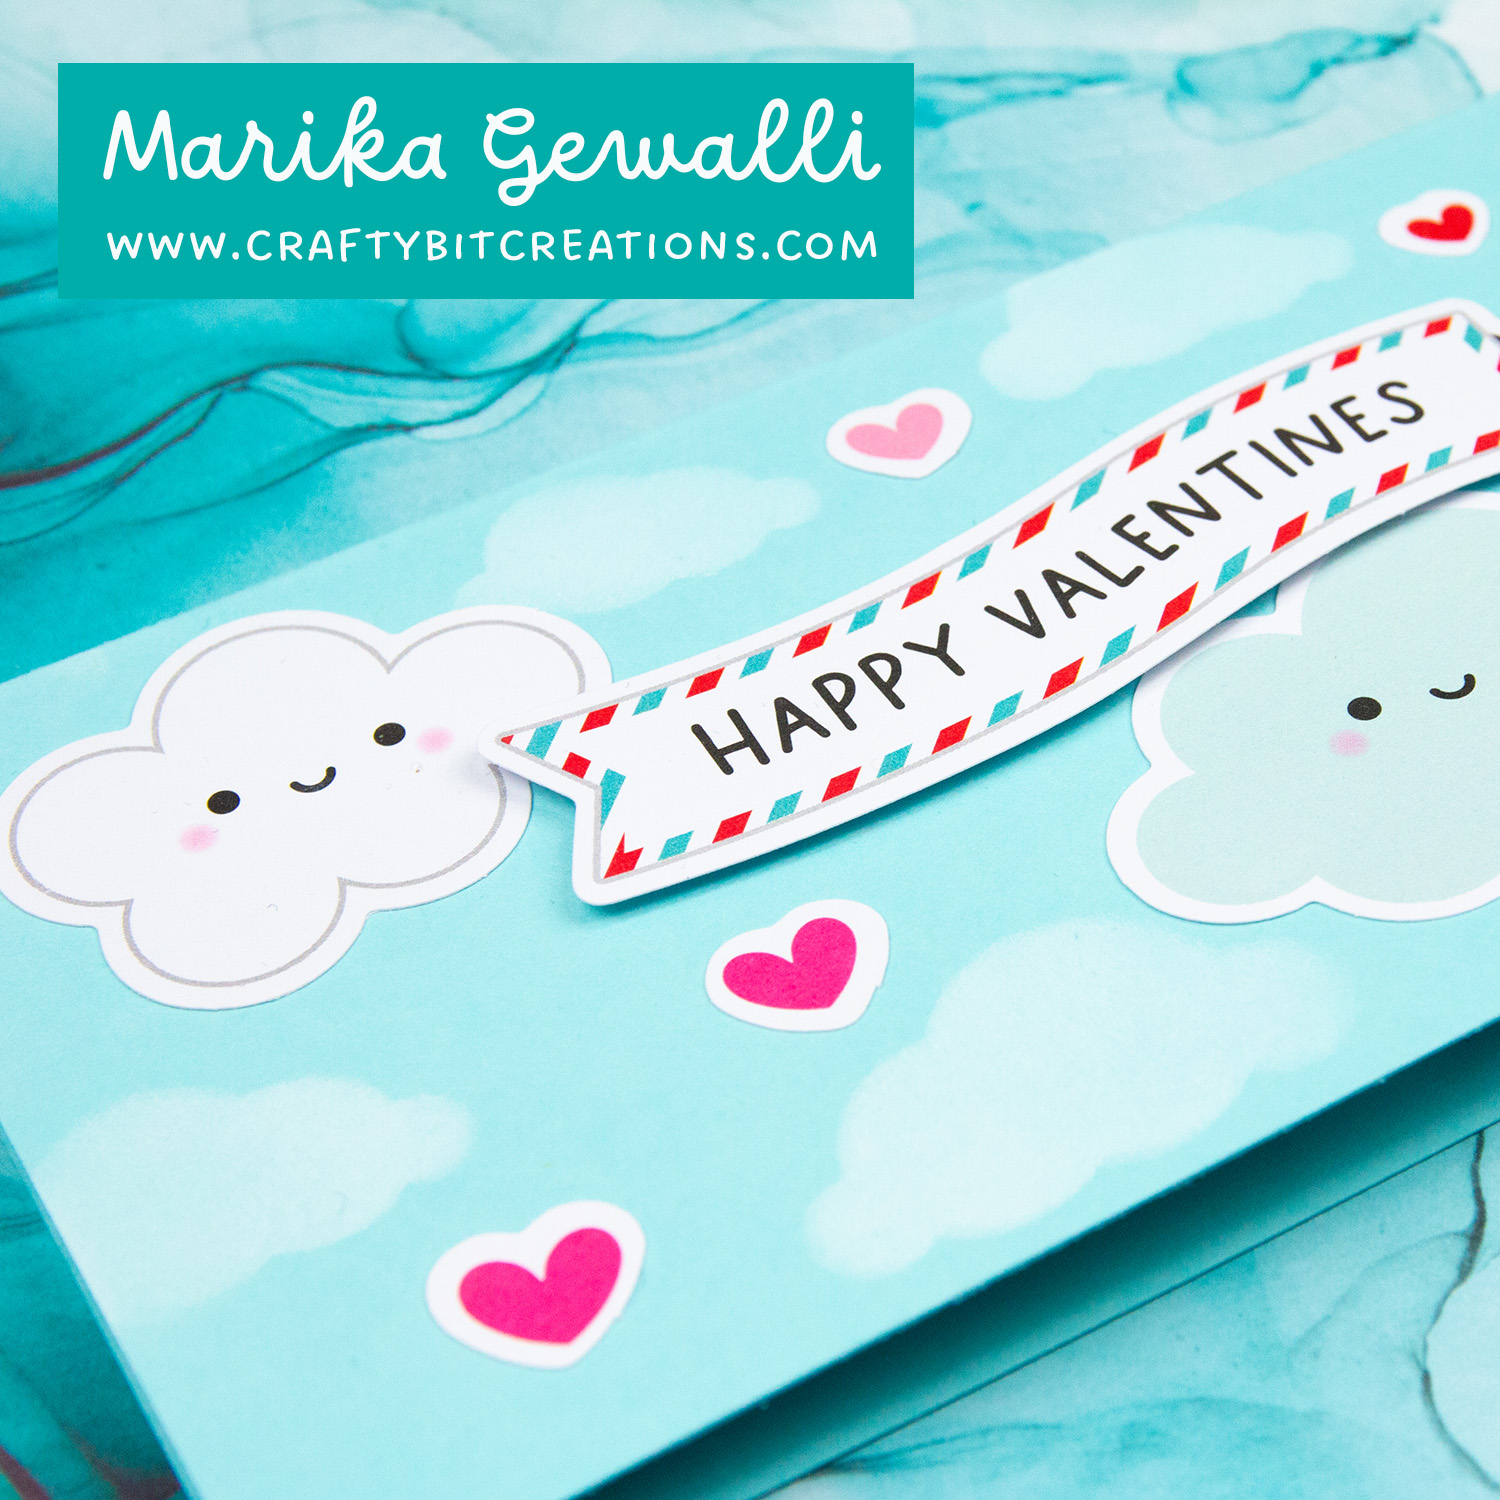
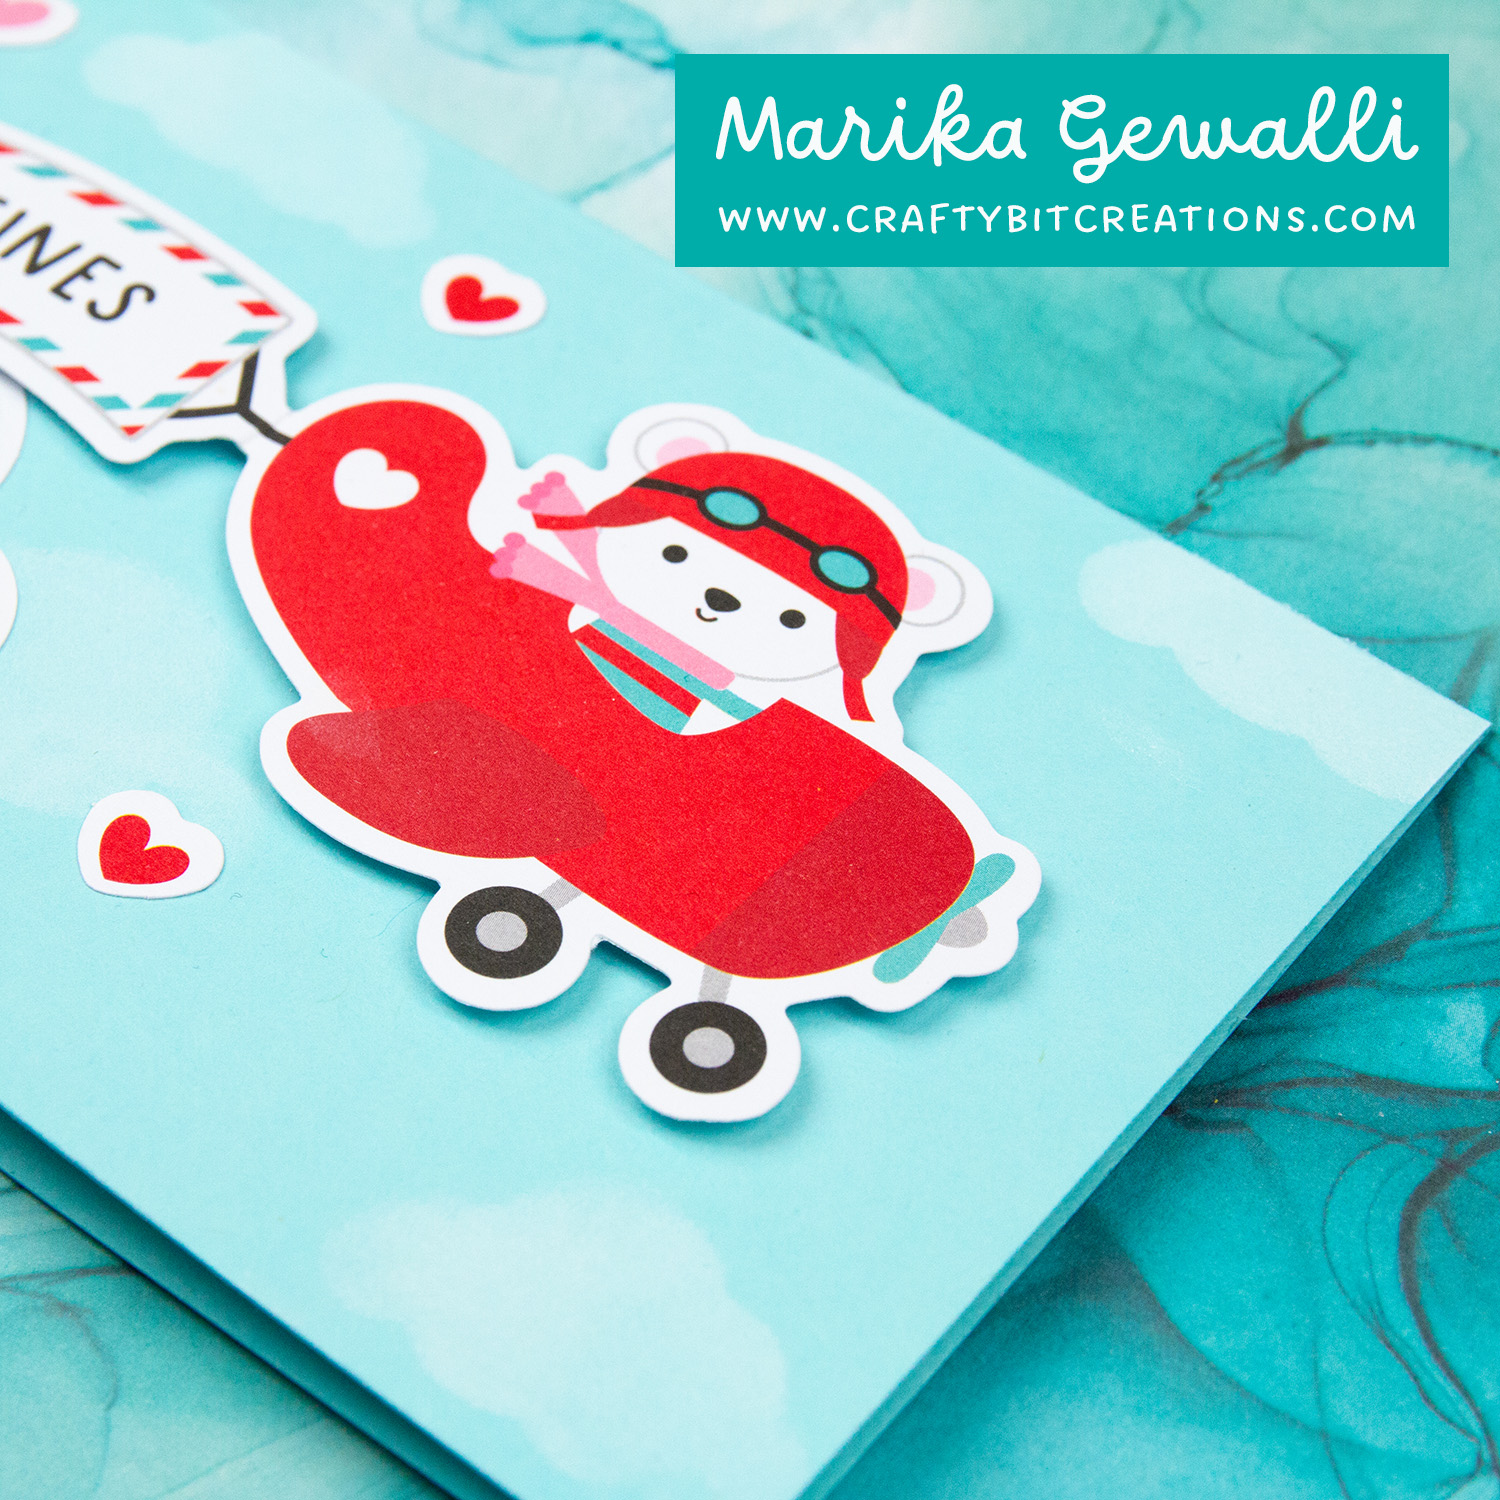
I knew precisely where to start. When I saw the cute airplane with the flag after I knew I needed to make a card with it. And due to it’s share size I needed a slimline card. So I took the Surf Blue Cardstock and cut a 7″ x 8 1/2″ piece and then scored it lengthwise at 3 1/2″. I added the airplane and it’s flag on the card with foam squares and then sprinkled some ephemera clouds and hearts around it, and glued them directly to the cardstock. I then realized that I felt it needed something more, so I pulled out a cloud stencil and some Simon Says Stamp White Pigement Ink, and did some ink blending. I masked out the ephemera pieces where needed. The little white airy clouds was just what the card needed.
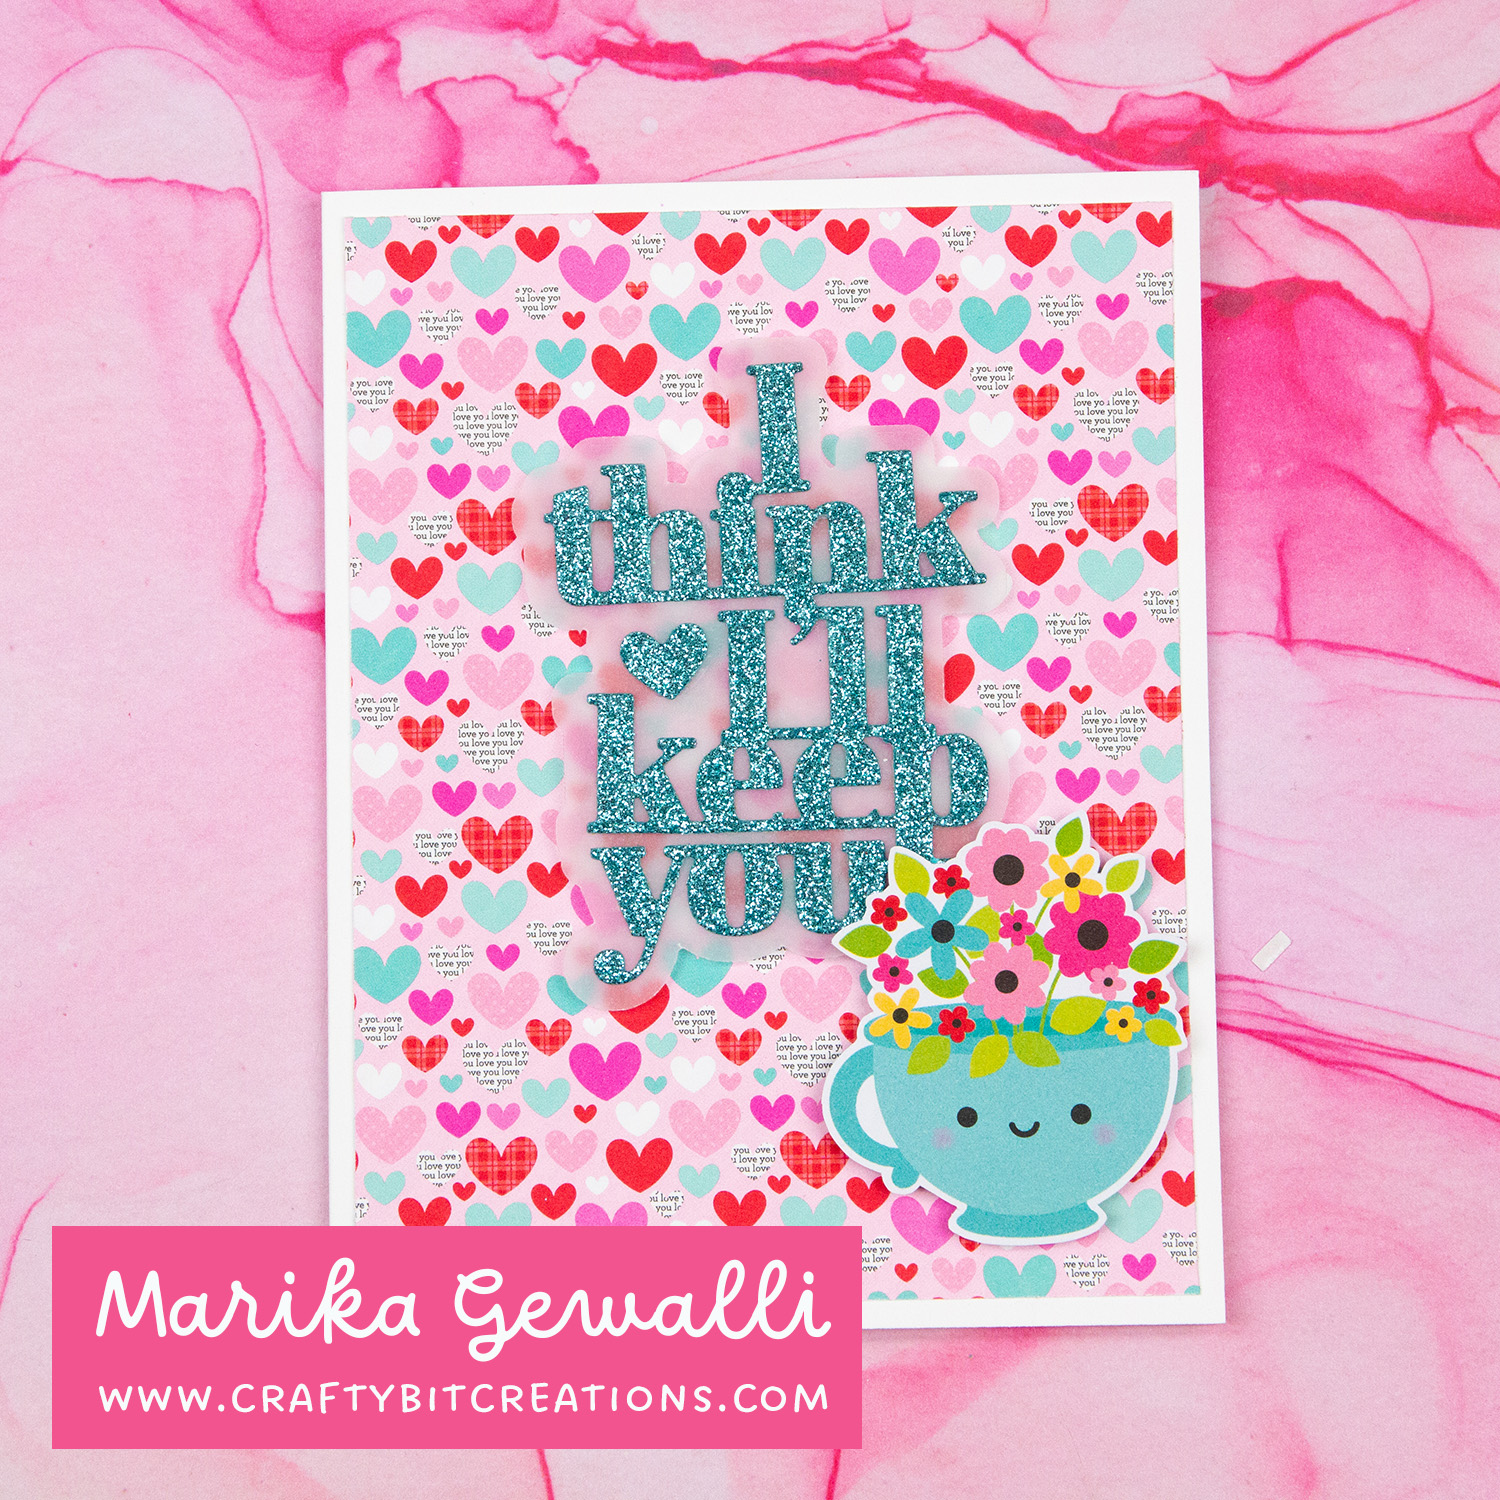
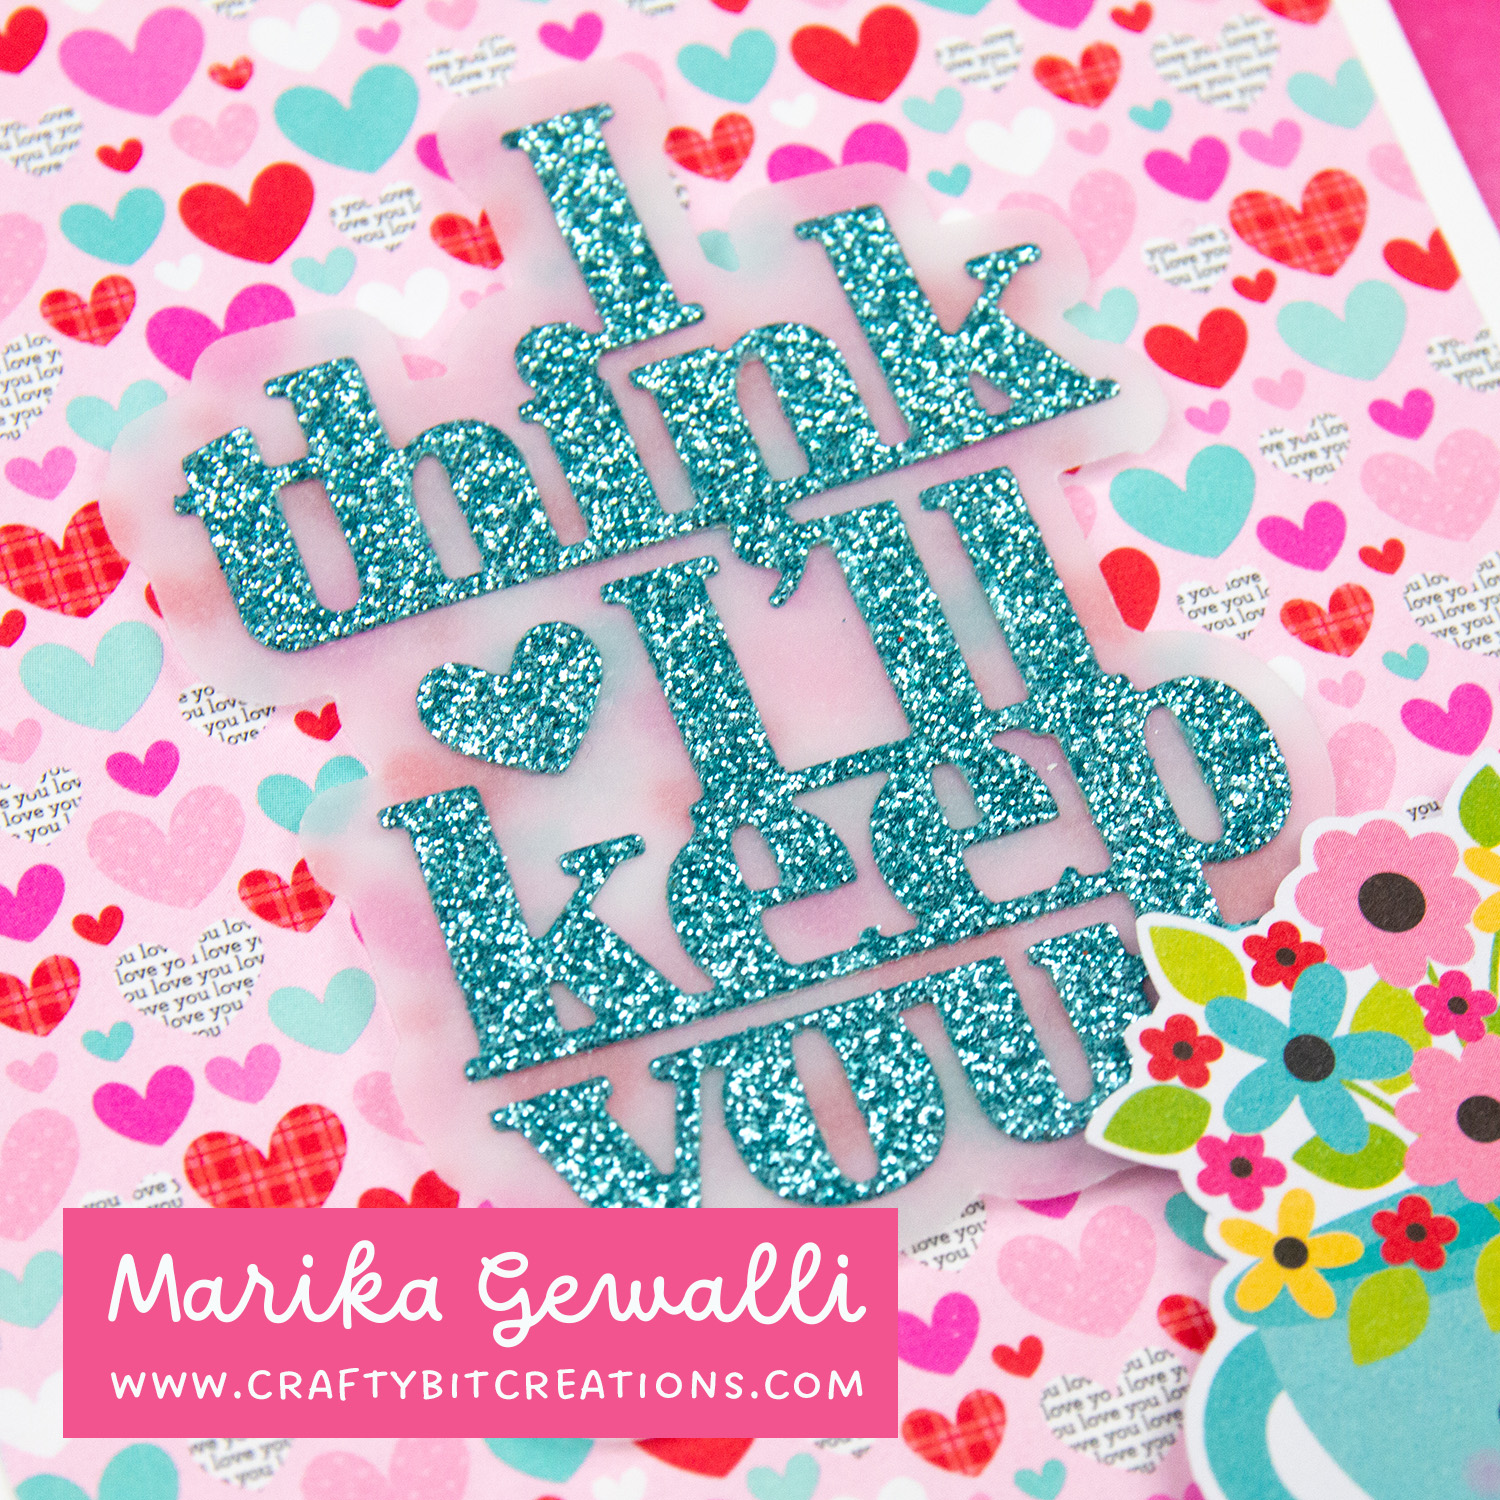
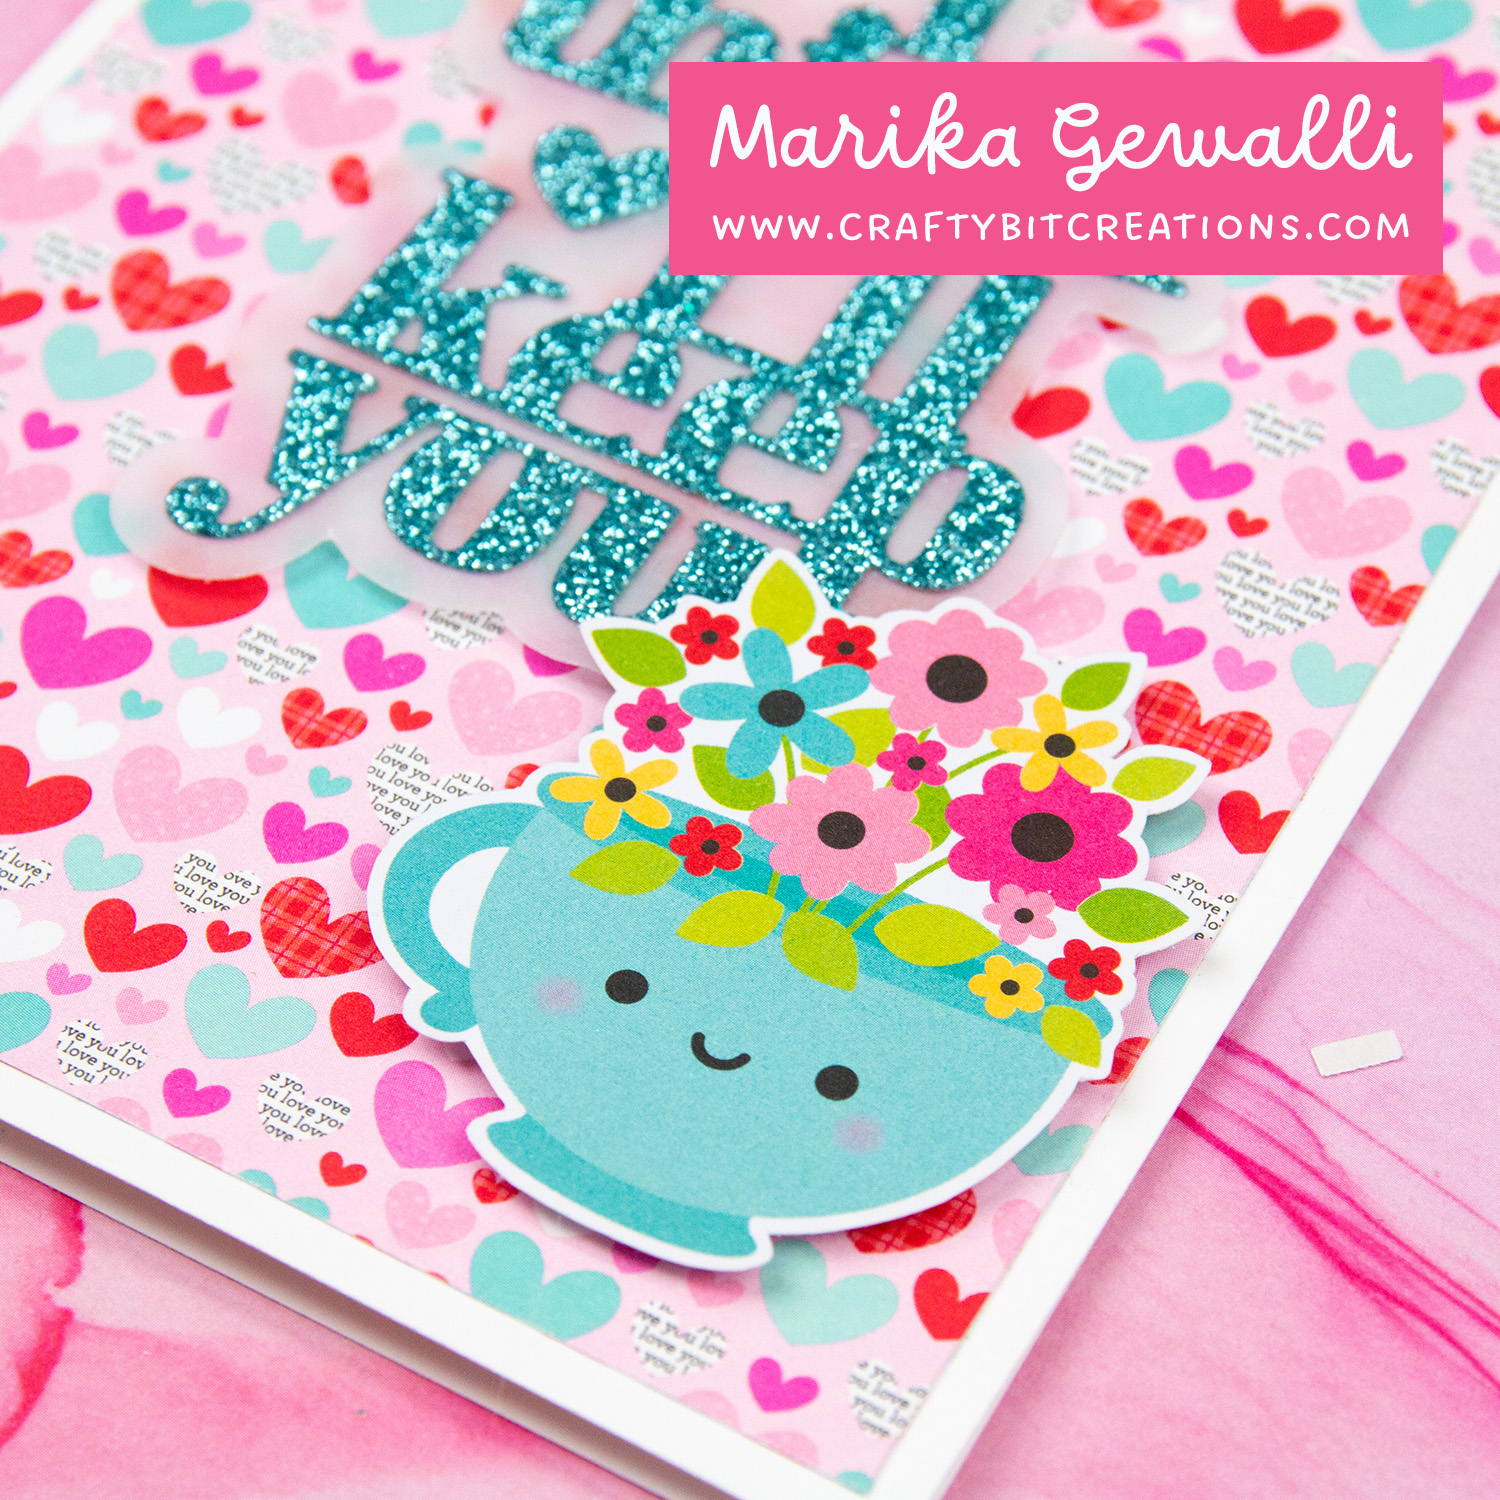
The second thing on my little pile next to me was the A2 envelope and the sentiment die. I had an idea but I must be true and say this time I didn’t delivery. But I know what I would change to make it better. First I would use a lighter glitter card stock or I would use the Surf Blue card stock for the letters. Secondly I would use a white card stock instead of the vellum to make the sentiment pop a little bit more from the pattern paper. And finally I would either place the sentiment a little bit off so that the teacup would have more room or chosen a smaller die cut.
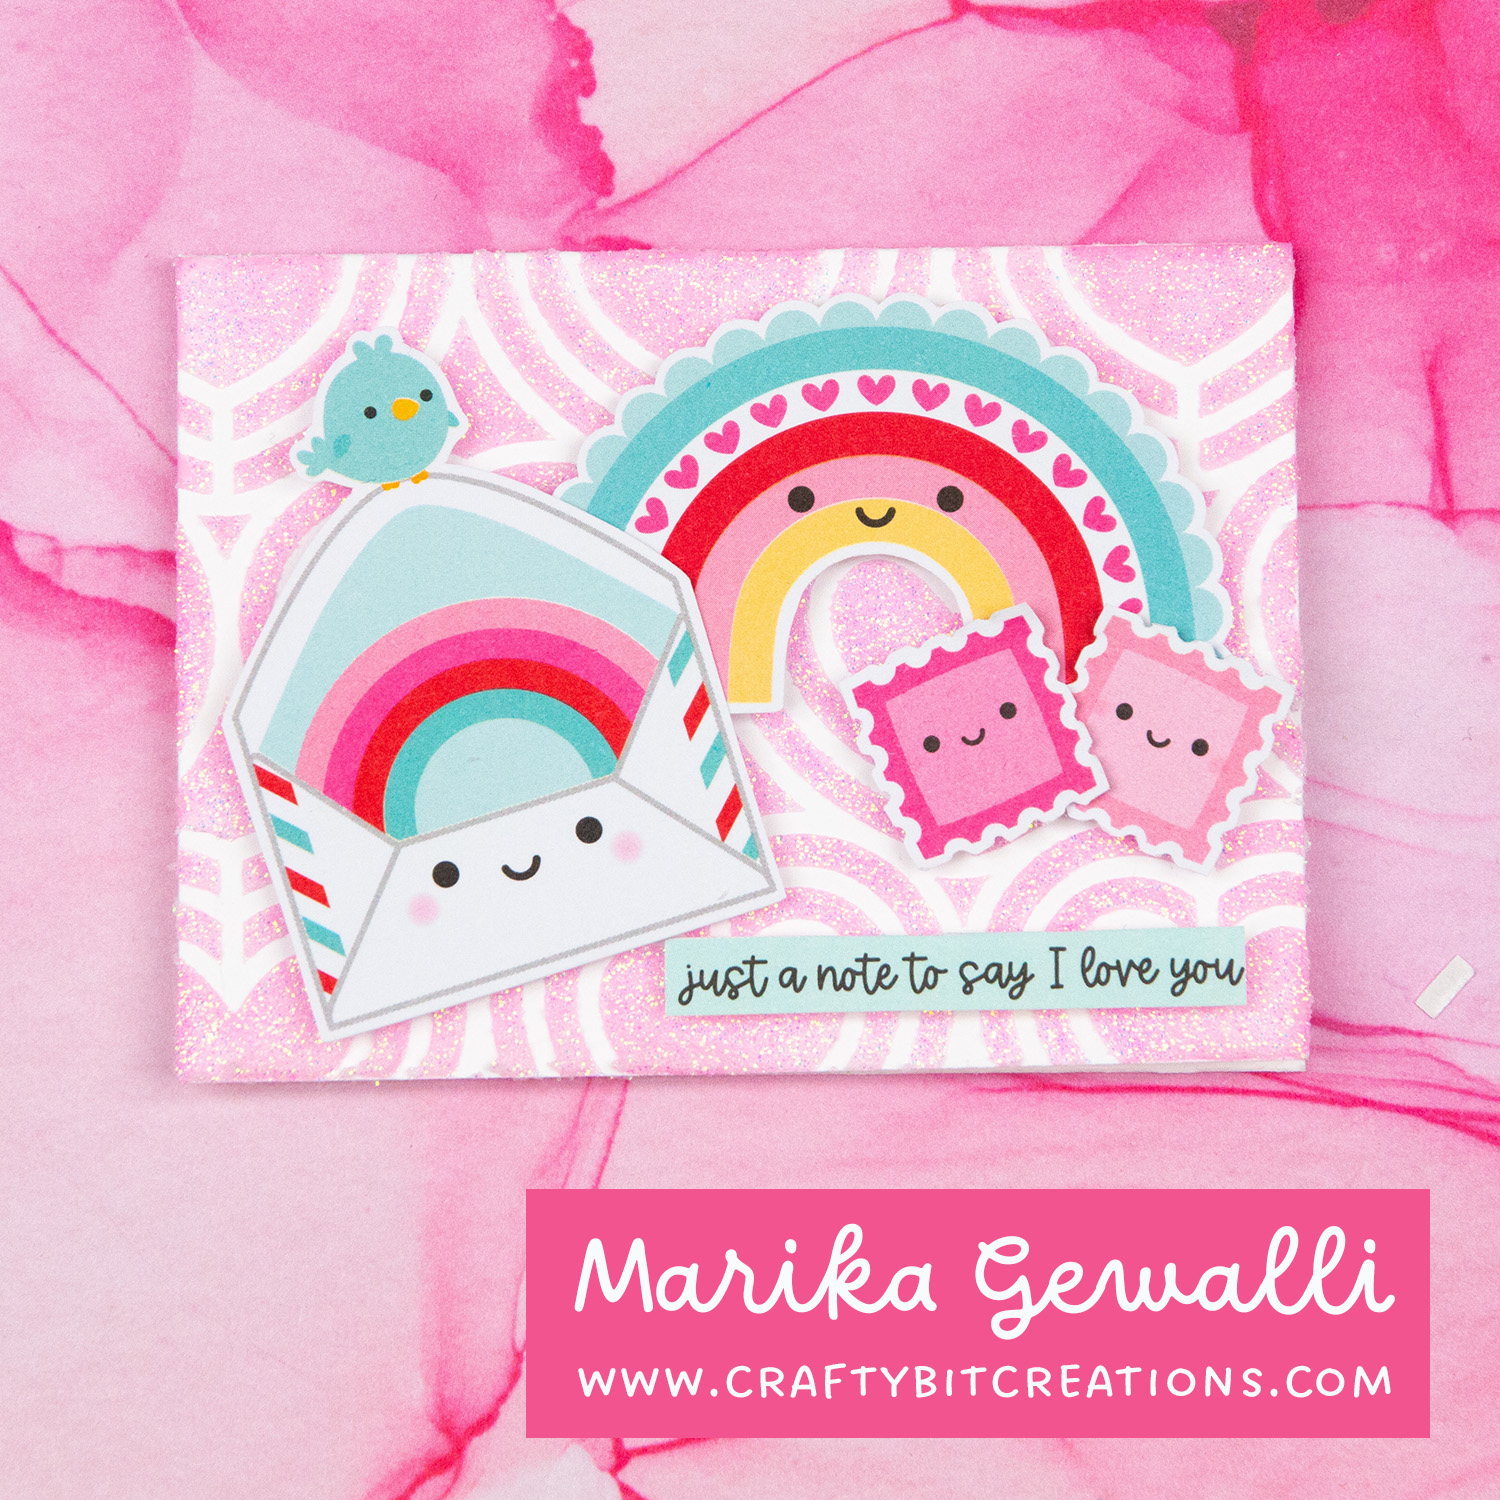
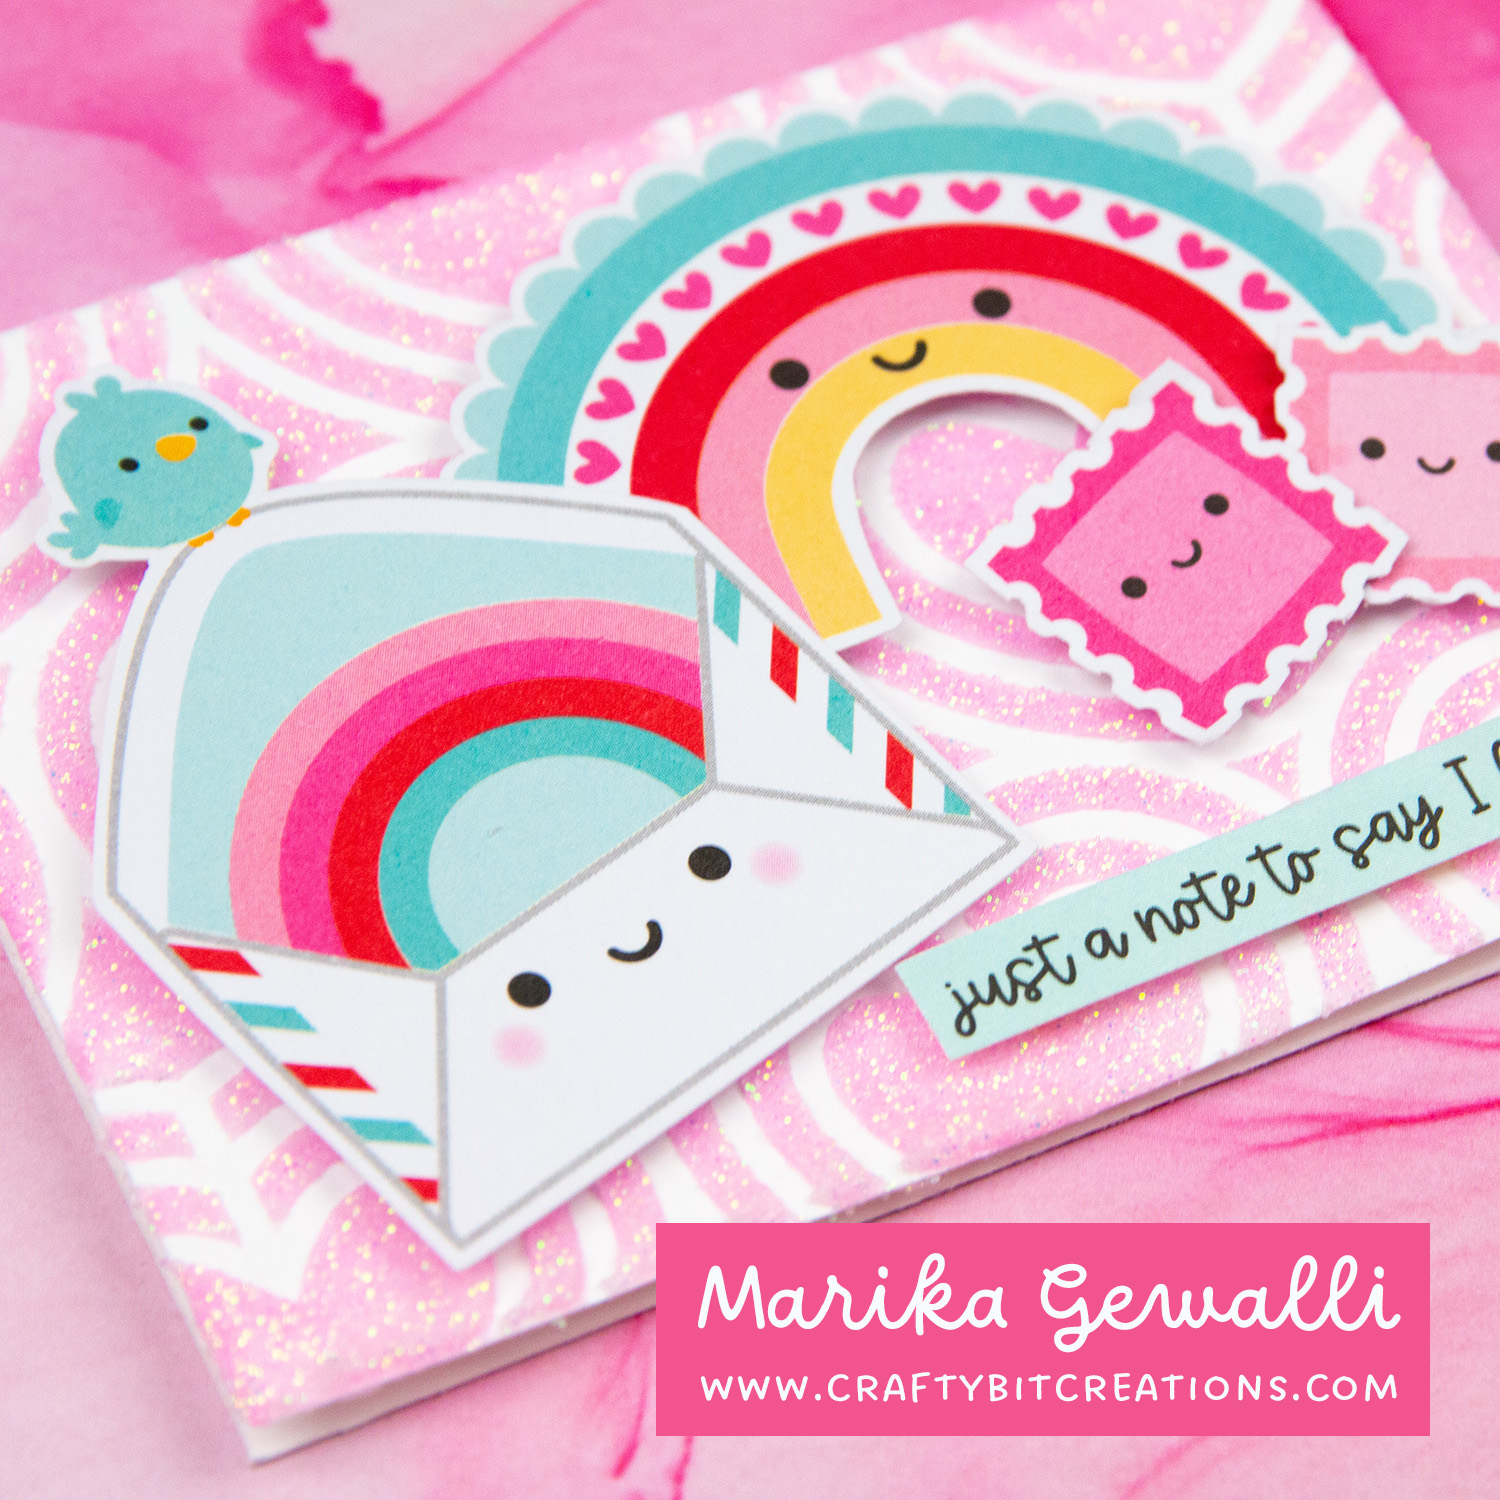
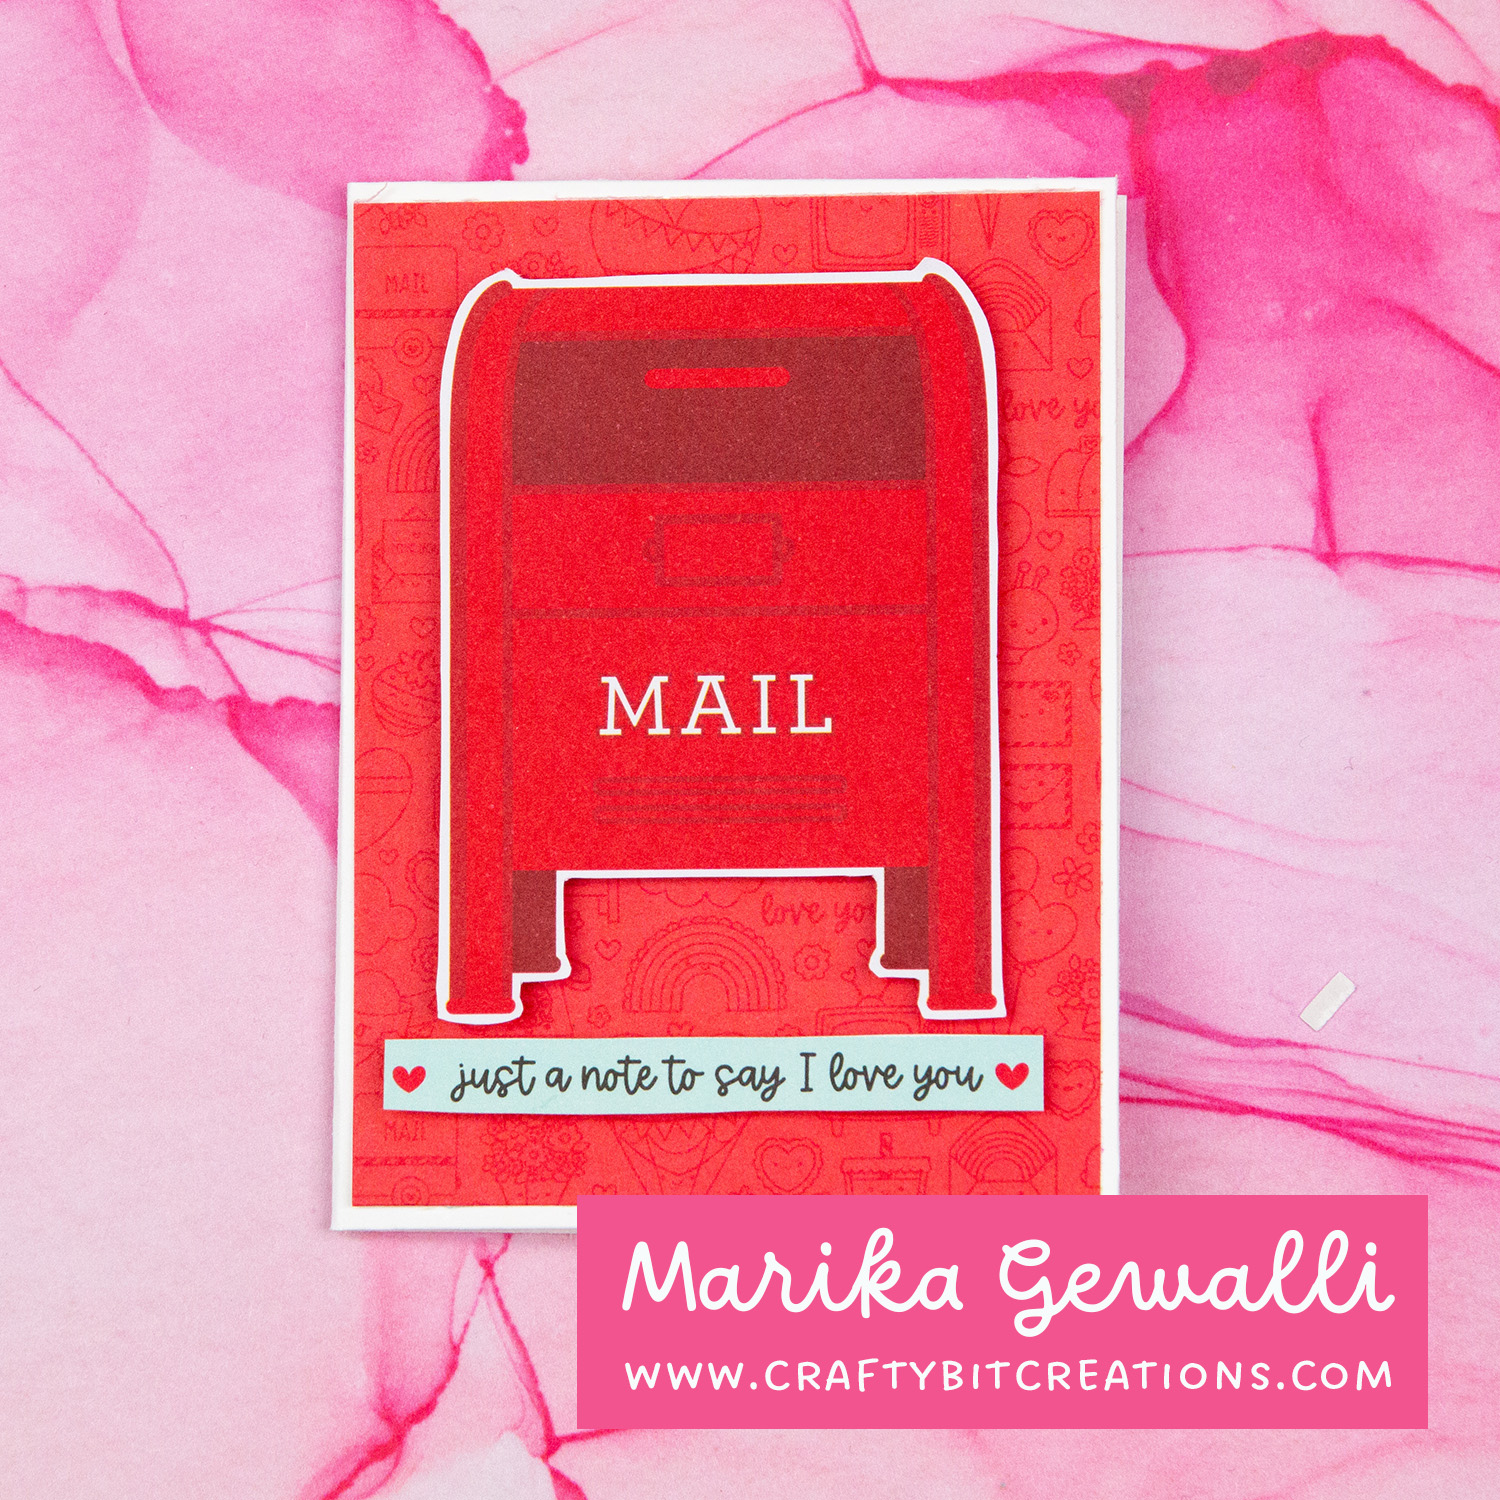
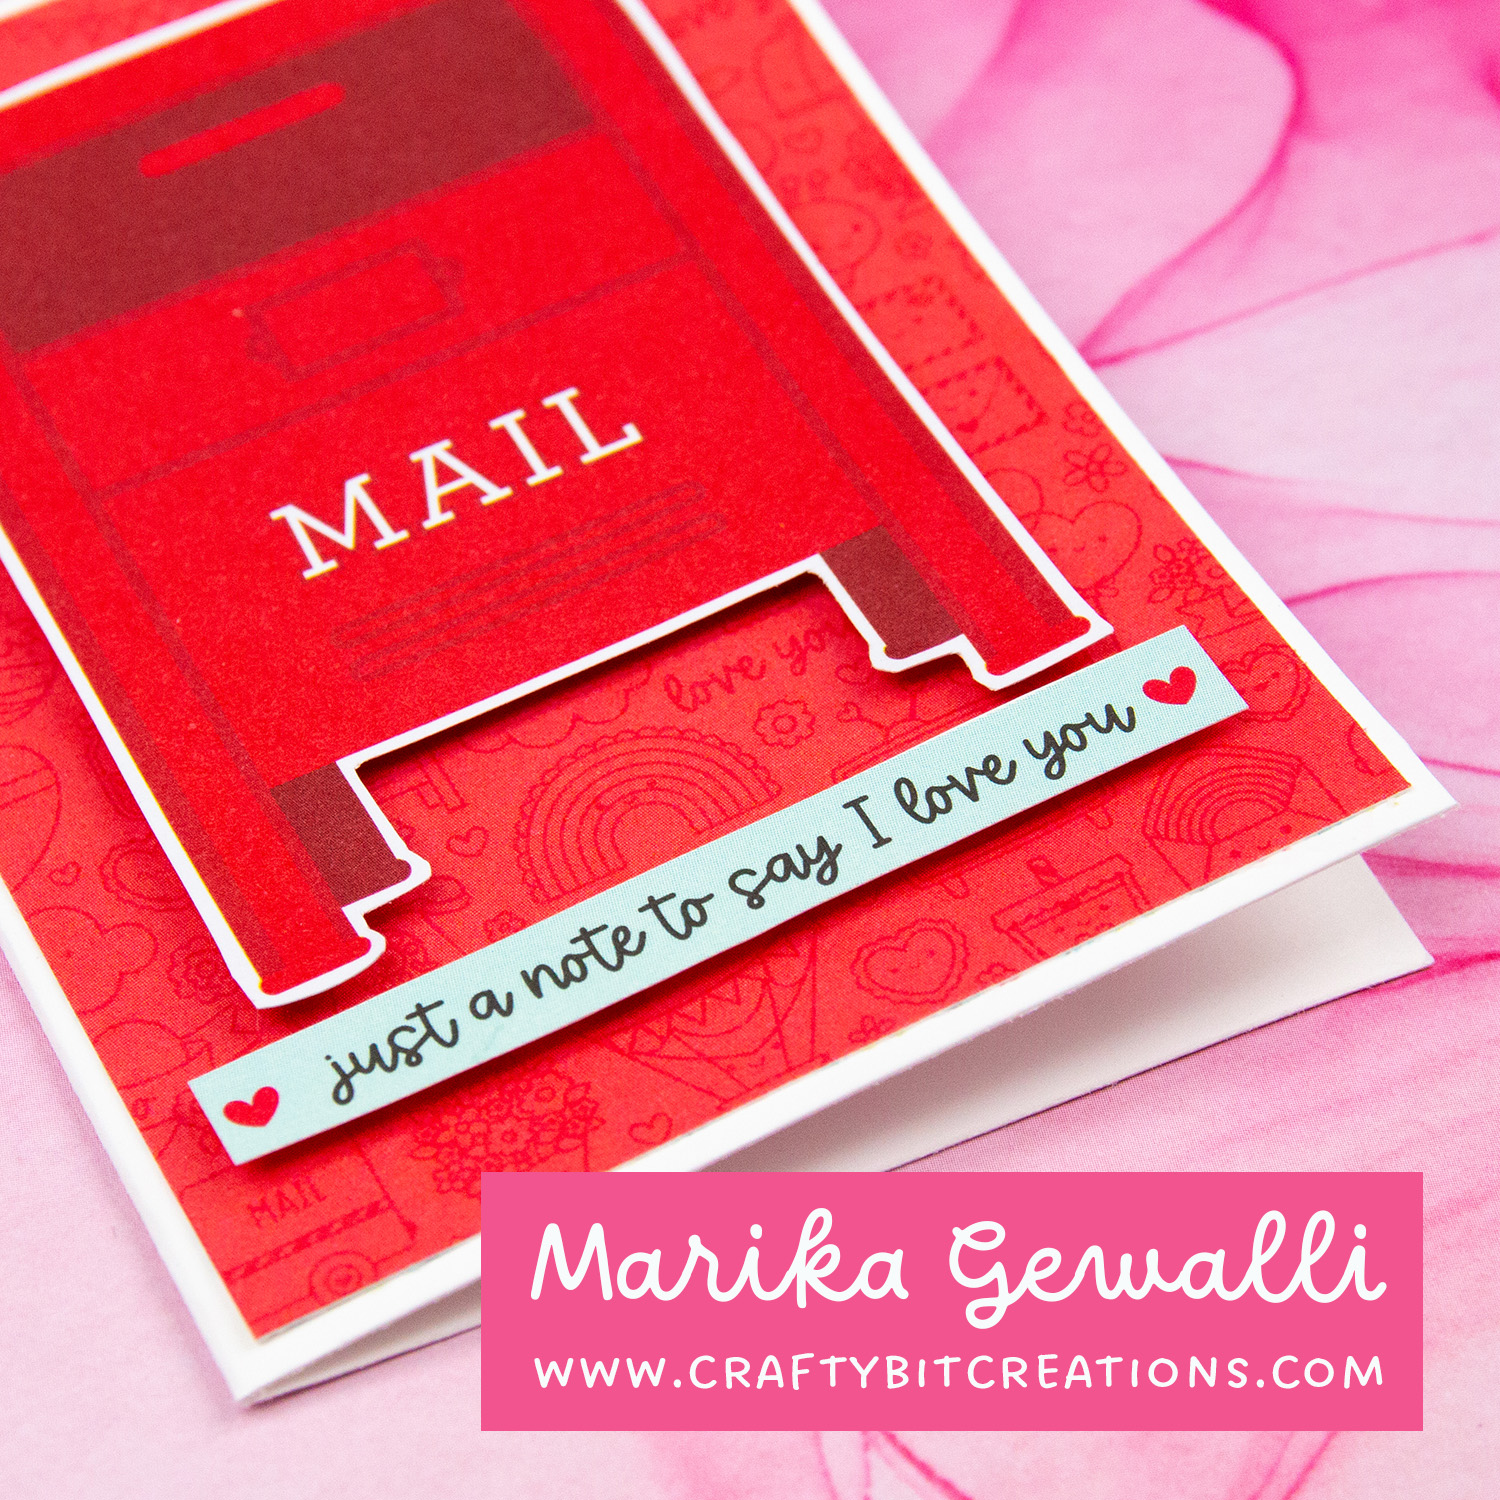
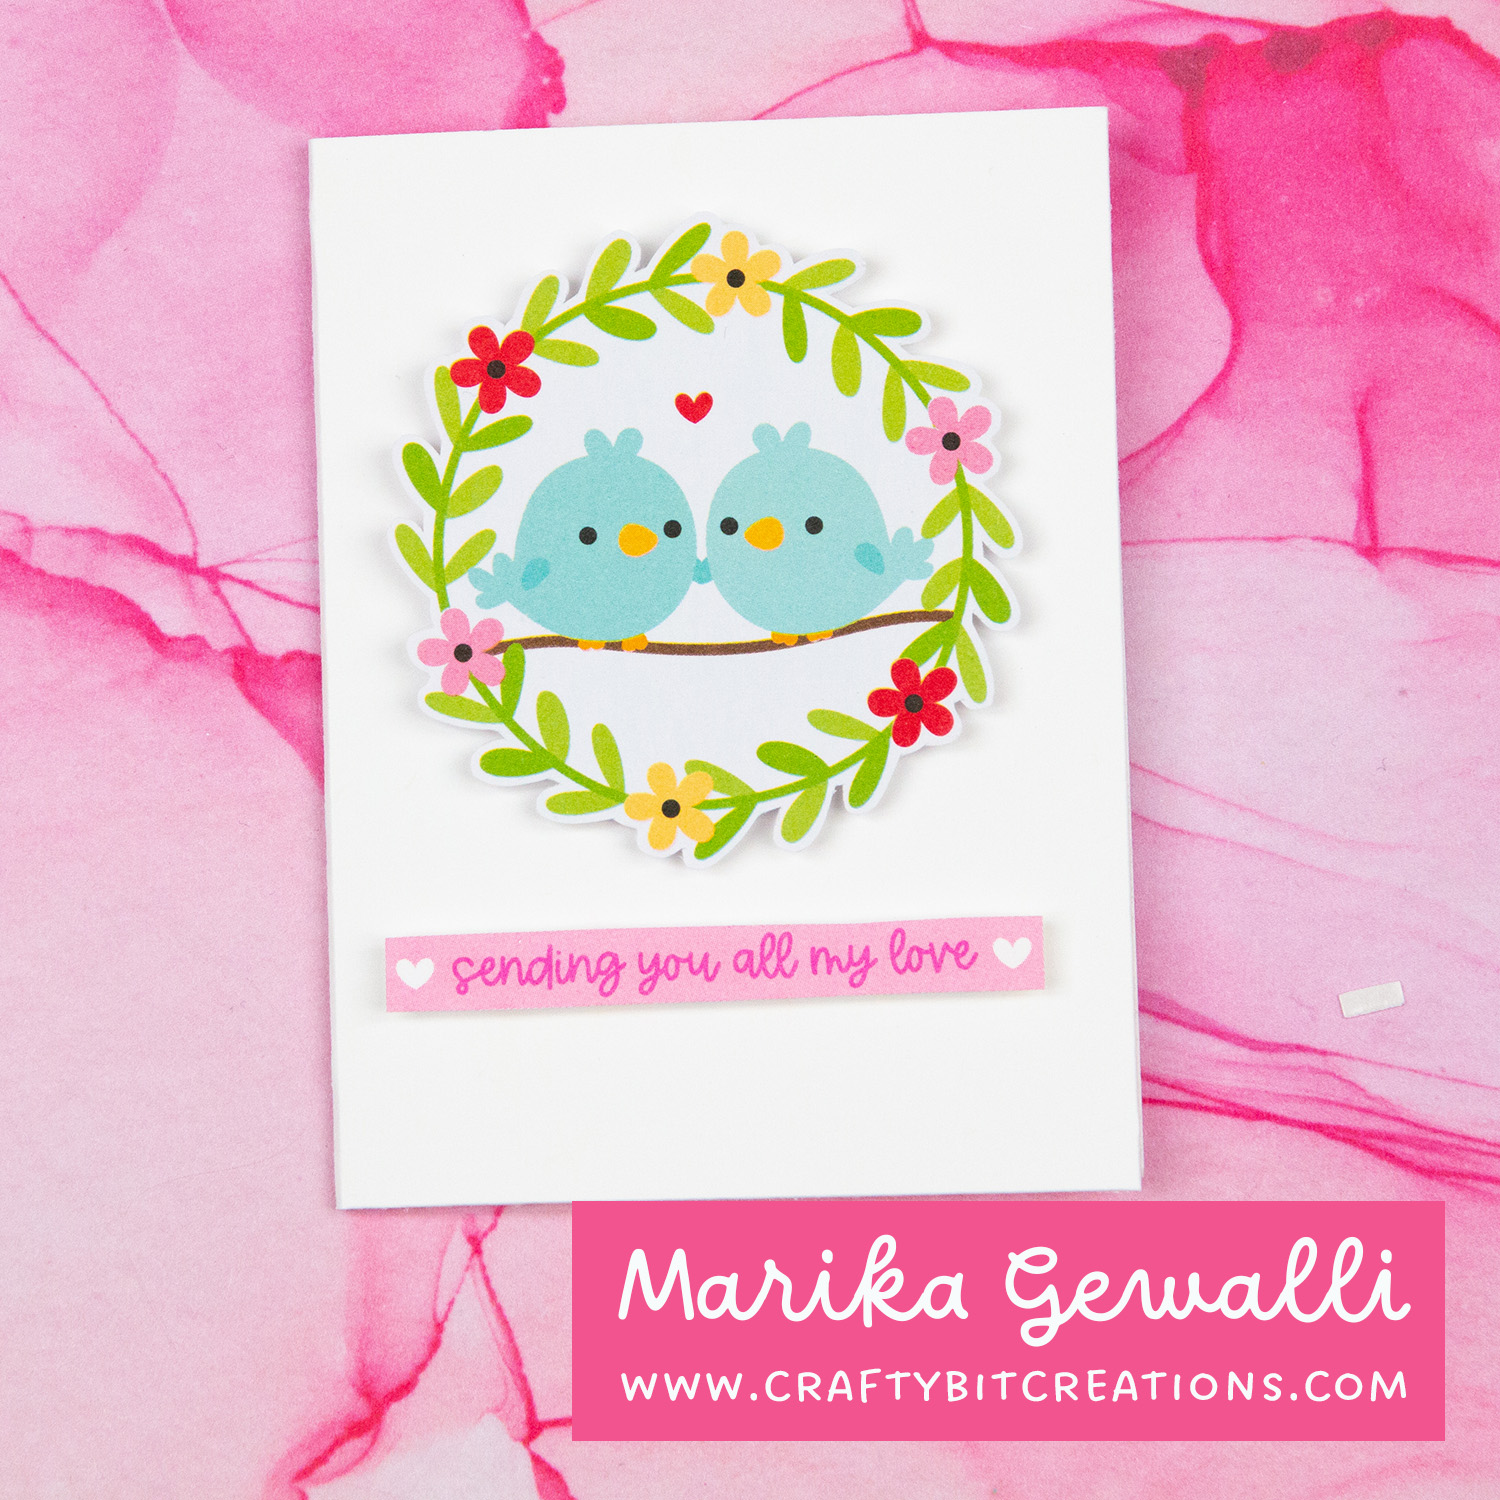
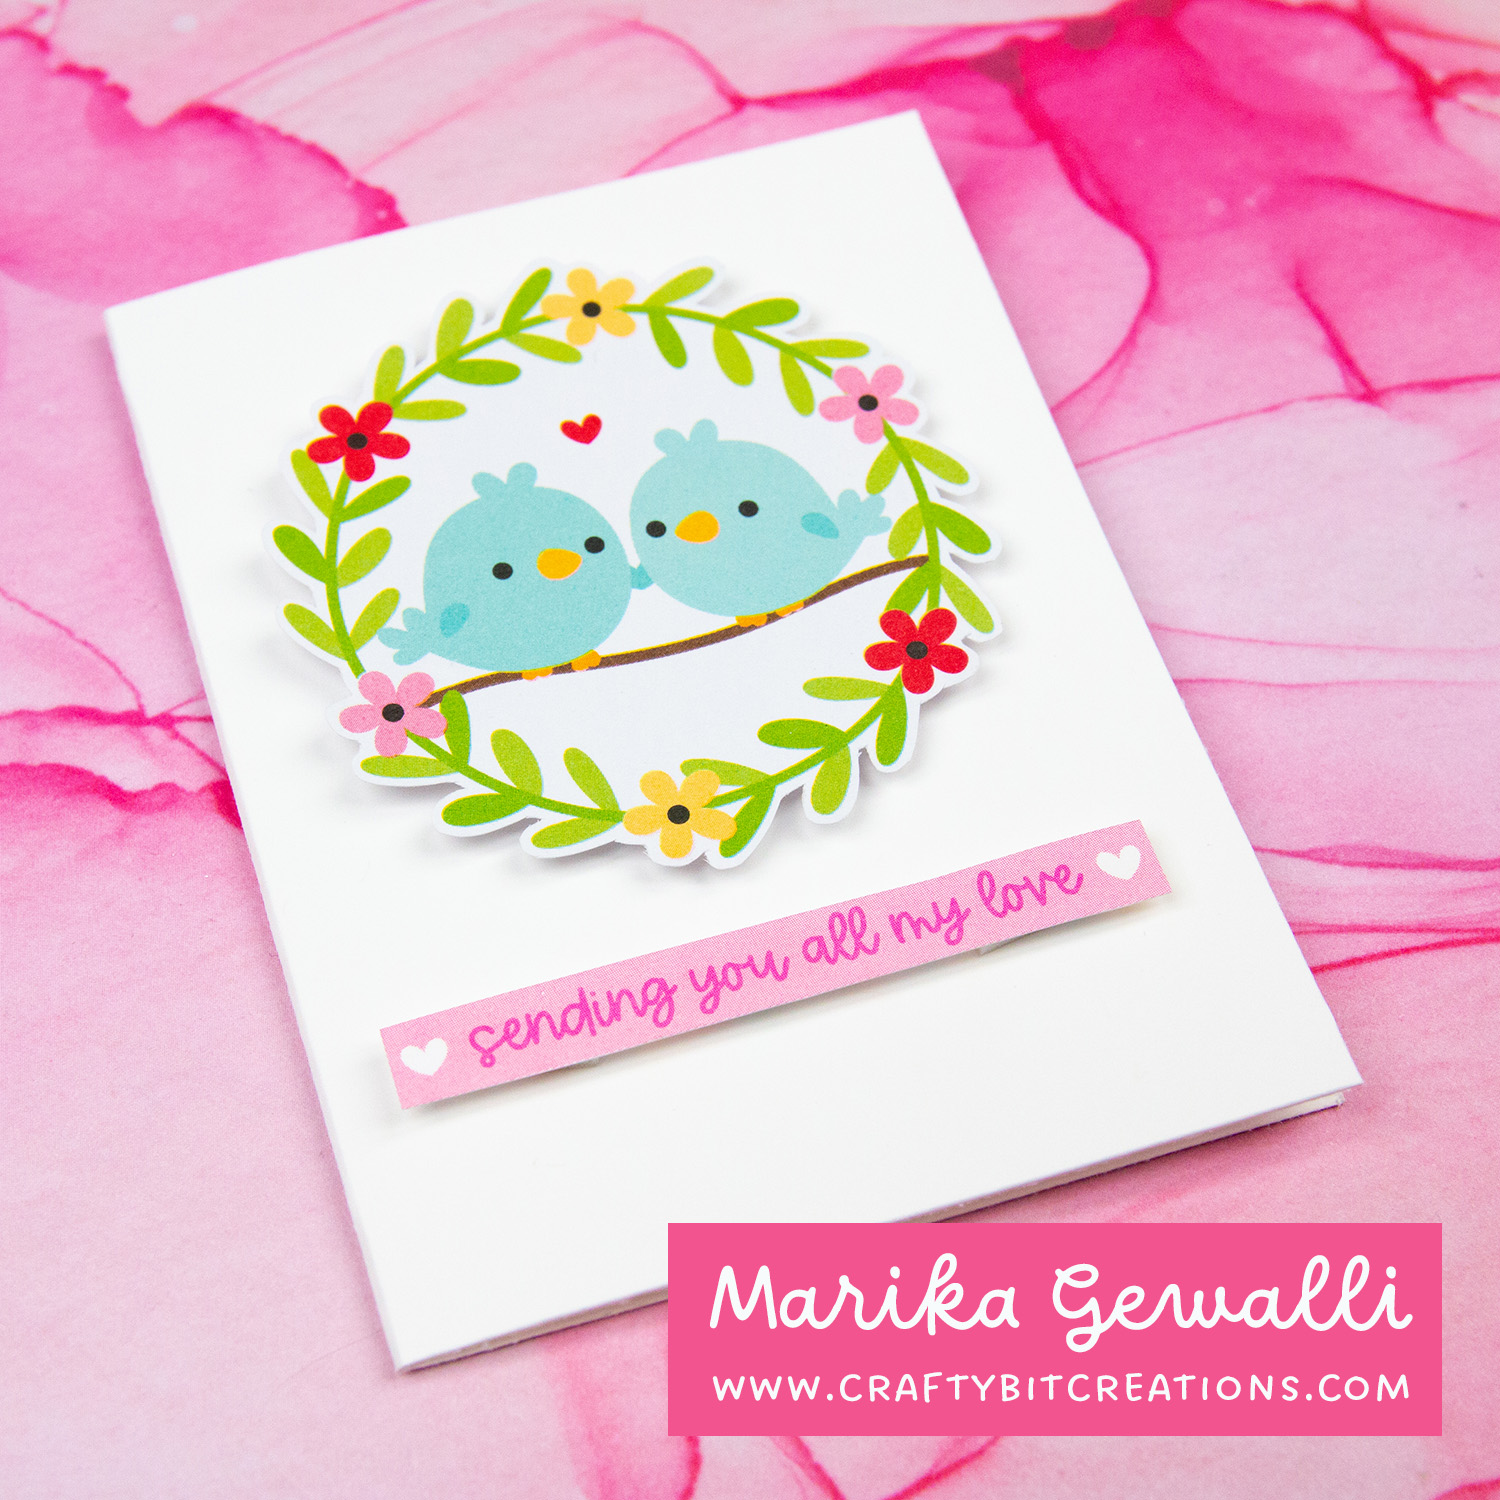
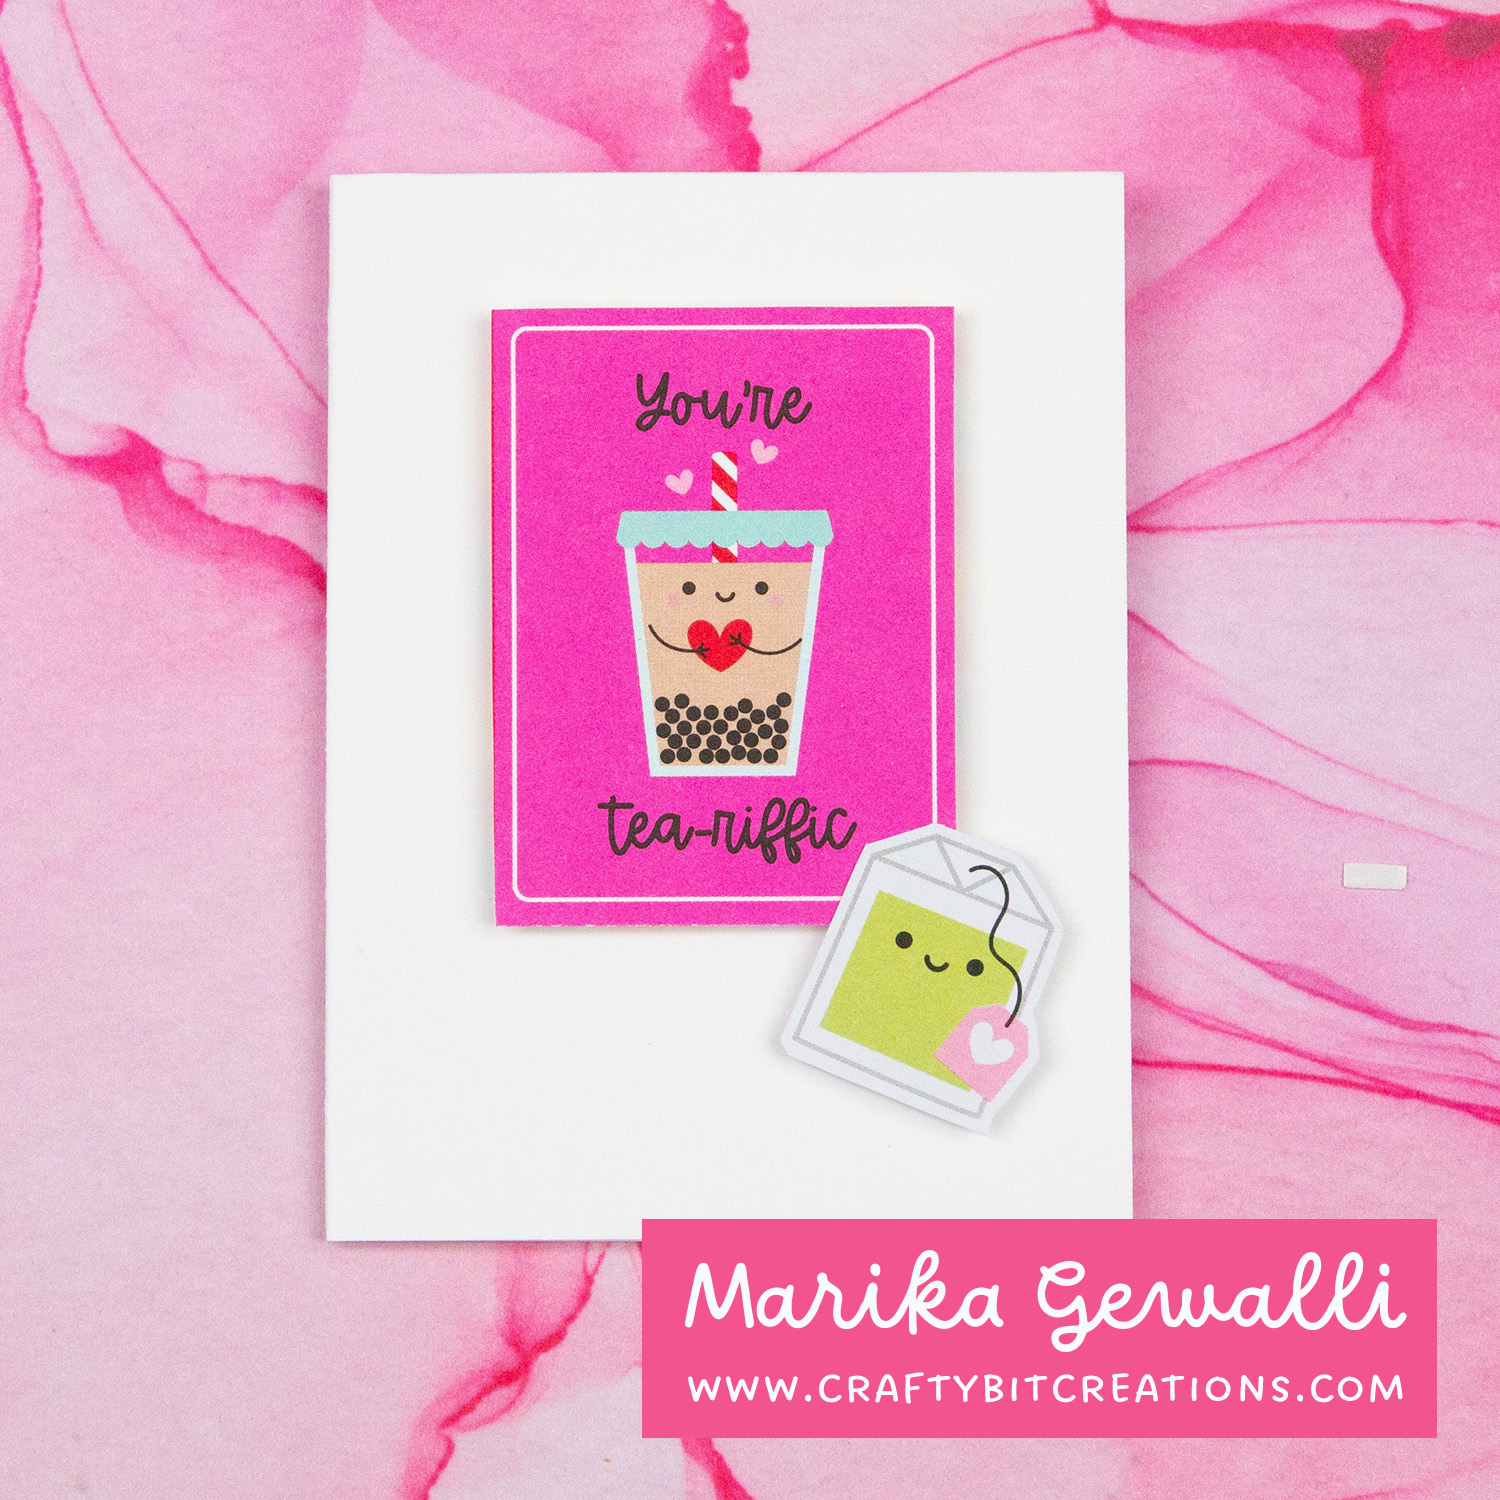
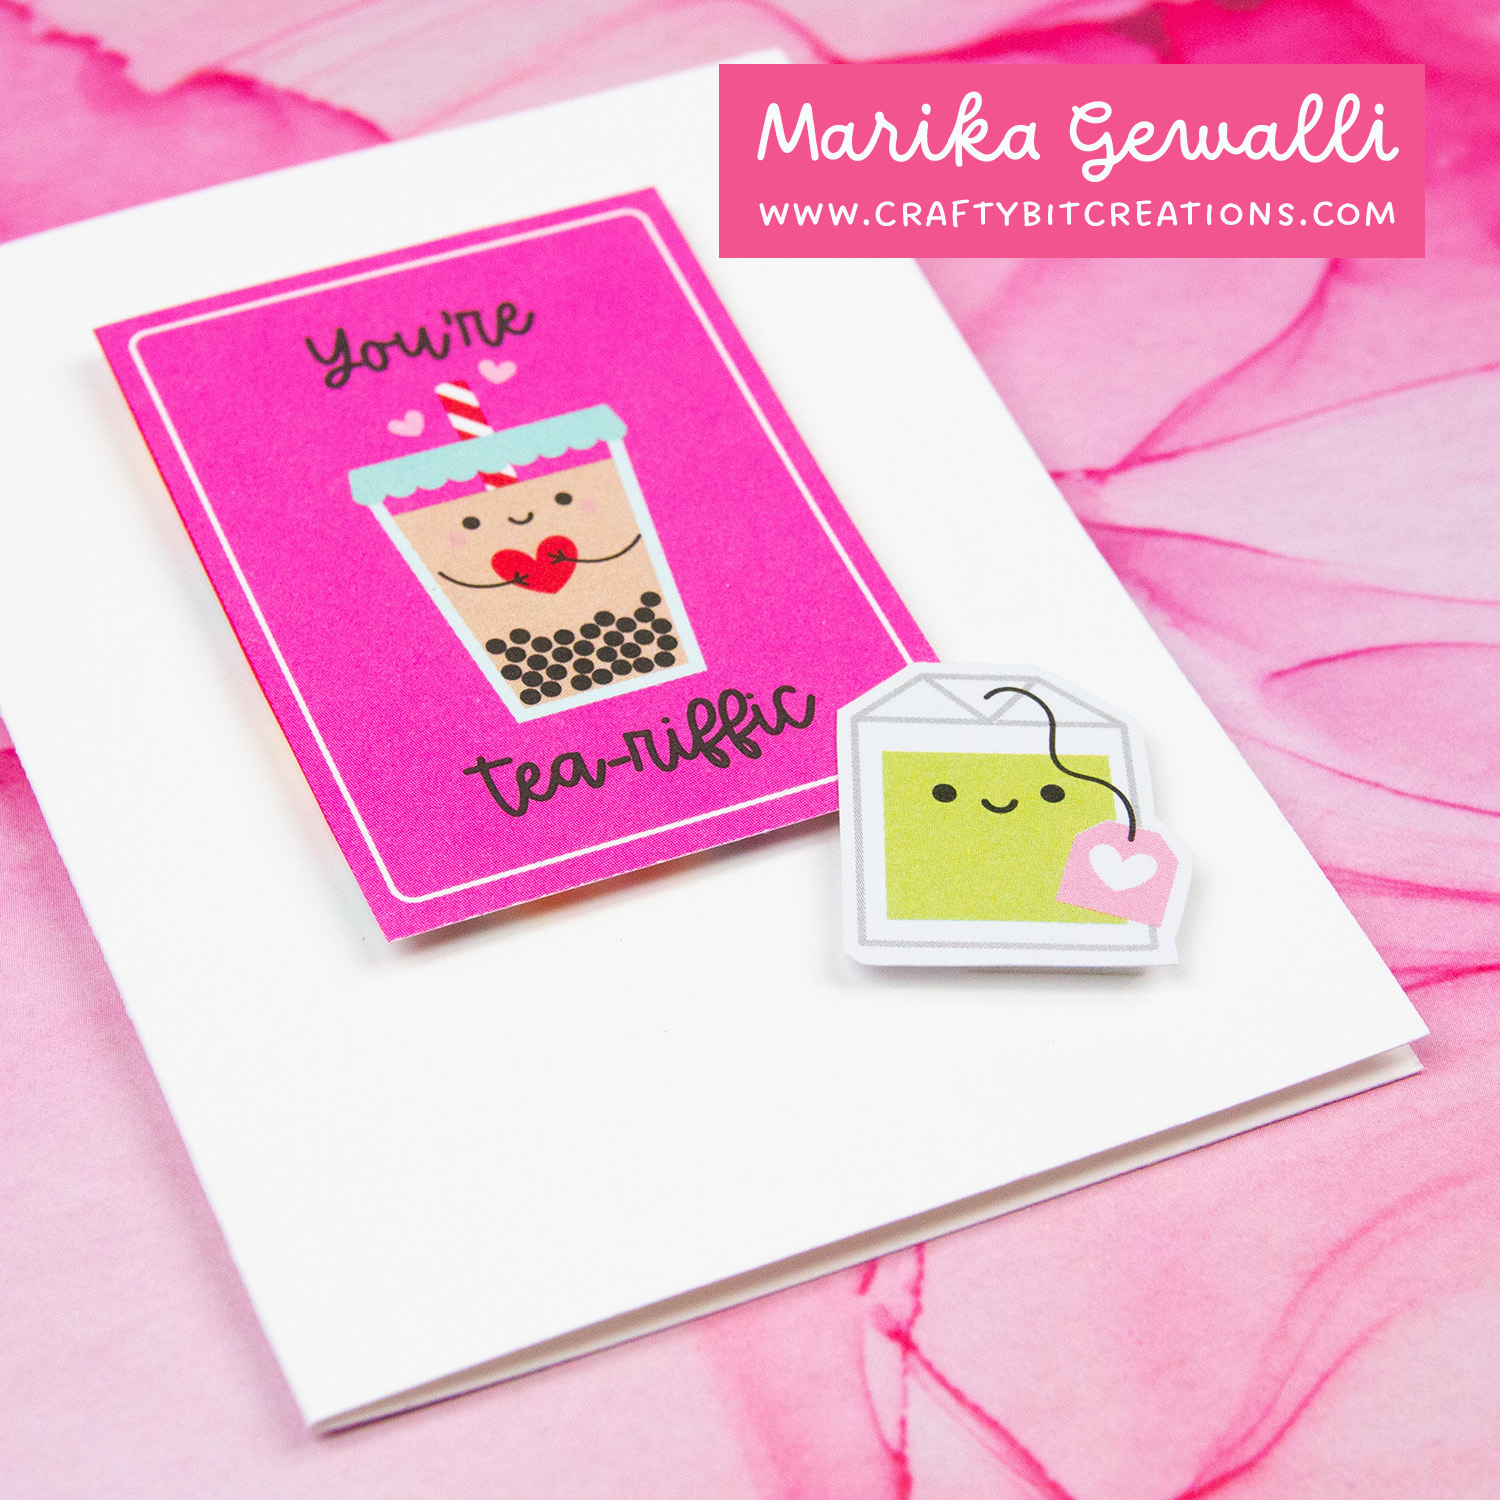
Then I had the little envelopes and loads of little diecuts left. Also the pattern paper had one sheet of strips and one sheet of cards. So I cut the strips and the cards out. Then I made mini card bases by cutting pieces of 5 1/4″ x 3 1/2″ and scoring them at 2 5/8″. The first of the cards I used the cute heart stencil. I blended some kitsch flaming distress oxide ink over it and then spread some Moonstone Nuvo Glimmer Paste. After letting it dry I added a bunch of cute die cuts on it and cut a piece of the strips that had a sentiment on it. For card two I took a red pattern paper and made a layer that was 1/8″ smaller in both directions than the card base. I topped that with a red mailbox and a sentiment strip. For card three I found a wreath with two birds that fit perfectly on the card and I found one of the strips that worked great together with the wreath. The last card I used one of the cards I cut out from the pattern paper, and I combined it with a little tea bag. And that was all!
When possible affiliate links are used, this means that I receive a small commission when products are purchased through the links (at no extra cost to you) I use the money to support my blog and youtube channel. If you like my projects and tutorial please consider supporting me by clicking through these links when you shop. Thanks!
Supplies:
Card Kit:
Simon Says Stamp Card Kit HAPPY MAIL Love: SSS Simon Says Clear Stamps HAPPY MAIL: SSS Doodlebug LOTS OF LOVE 6×6 Inch Paper Pad: SSSSBC Doodlebug LOTS OF LOVE Odds and Ends Ephemera Die Cut Shapes: SSSSBC Simon Says Stamp I THINK I’LL KEEP YOU Wafer Dies: SSS Simon Says Stamp Stencil HEART CHAIN: SSS Pretty Pink Posh RED HEART CONFETTI Embellishments: SSS American Crafts BURLAP CLUTCH: SSSSBC Simon Says Stamp Ultra Smooth CRAFT GLUE STICK: SSS Tim Holtz Idea-ology HEARTS Adornments: SSSSBC Simon Says Stamp Cardstock 100# DOLL PINK: SSS Simon Says Stamp Cardstock 100# COTTON CANDY: SSS Simon Says Stamp Cardstock 100# SURF BLUE: SSS Neenah 110 LB SMOOTH SOLAR WHITE s: SSS Simon Says Stamp Envelopes SLIMLINE COTTON CANDY: SSS Simon Says Stamp Envelopes MINI WHITE: SSS
Extras:
Tim Holtz Distress Oxide Ink Pad KITSCH FLAMINGO: SSSSBC Tonic MOONSTONE Nuvo Glimmer Paste: SSSSBC Concord & 9th RAINBOW GLITTER 8.5×11 Paper Pack: SSS Newton’s Nook Designs CLOUDY SKY Stencil: SSS Simon Says Stamp Pigment Ink Pad WHITE: SSS
Found so many fun things in the My Favorite Things February Release that I just had to pick up! Well not that we have to pick up any craft supplies, but you know things I thought would make real fun cards. So I made a little video showing what I got. You can also find all project I do with these supplies on the link: https://craftybitcreations.com/tag/mft-february-haul-2022/ . I will continuously update that link as I dive more into this release and create more cards and projects.
When possible affiliate links are used, this means that I receive a small commission when products are purchased through the links (at no extra cost to you) I use the money to support my blog and youtube channel. If you like my projects and tutorial please consider supporting me by clicking through these links when you shop. Thanks!
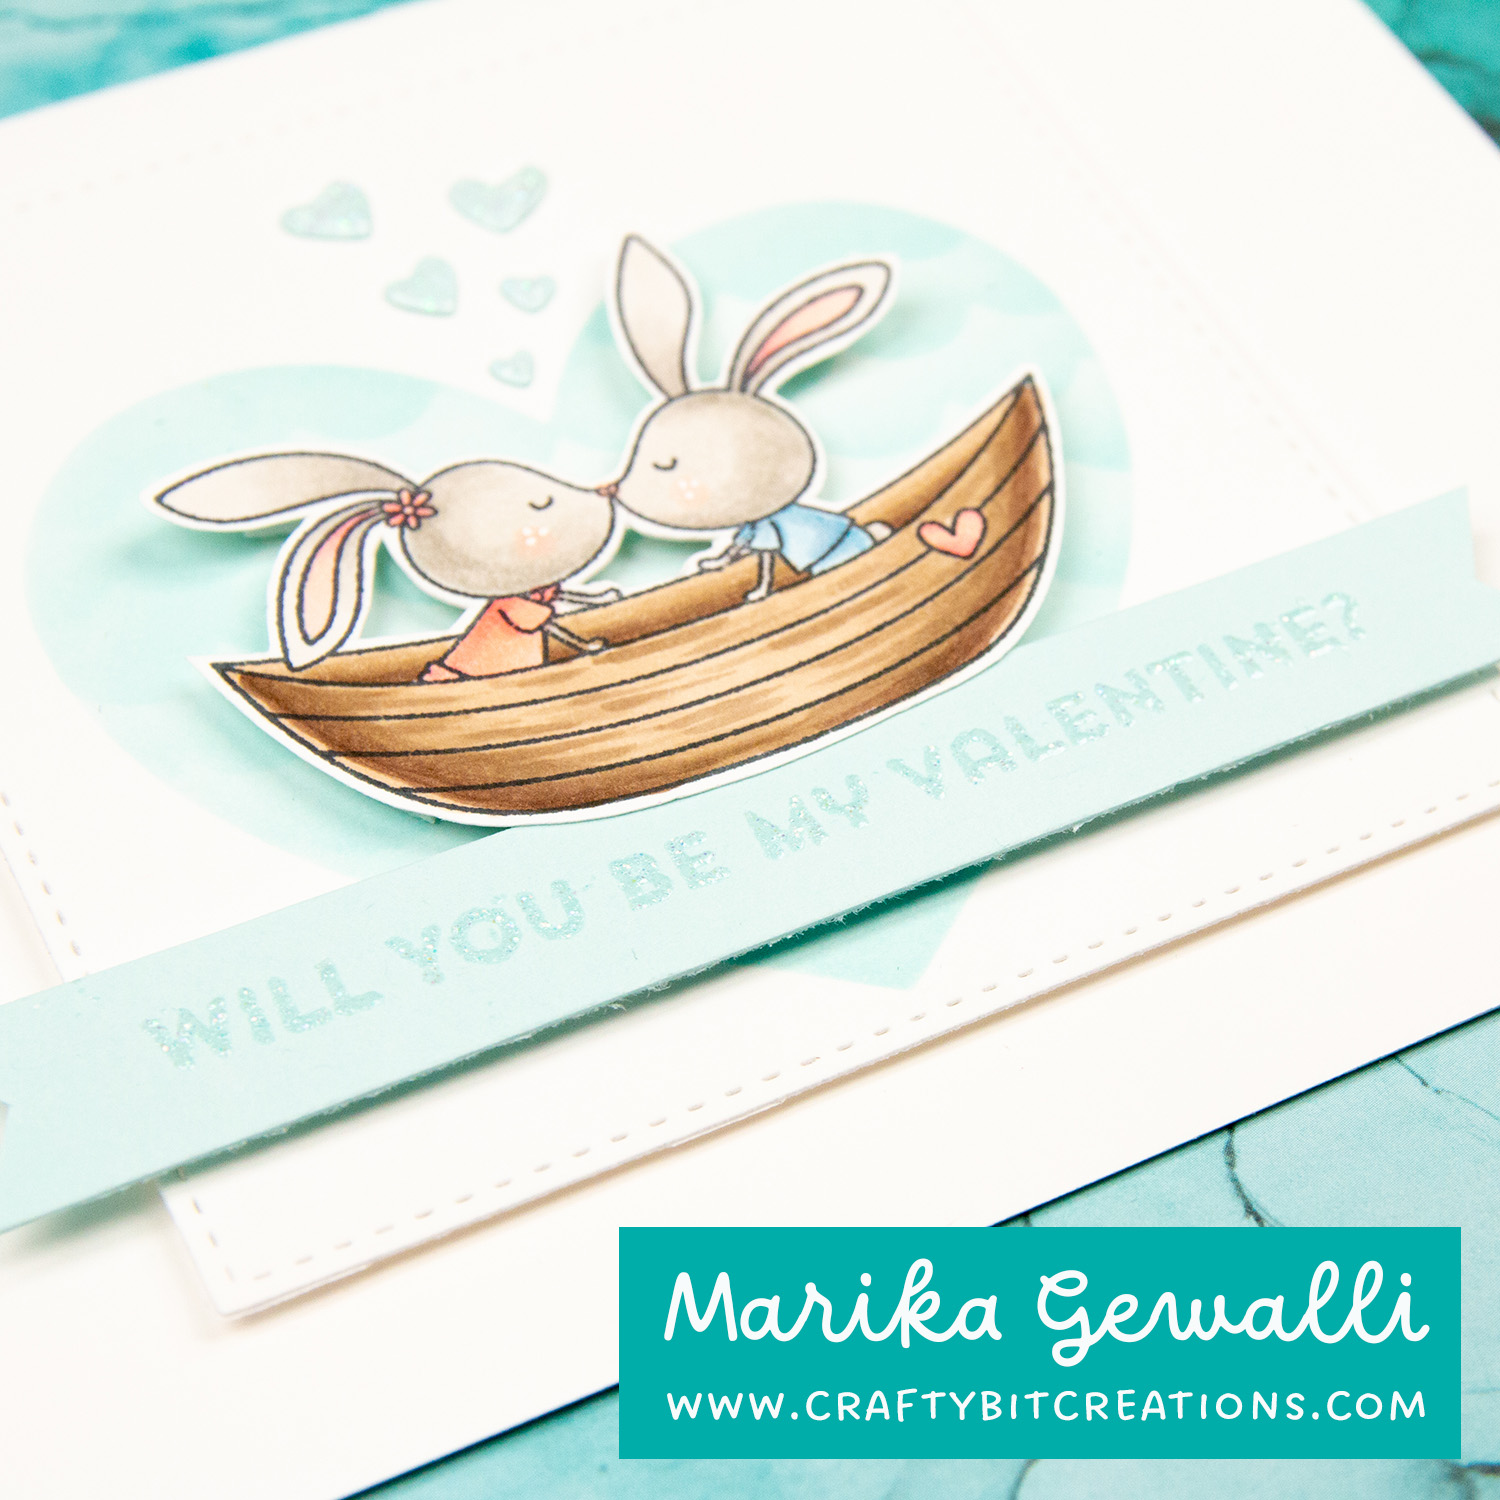
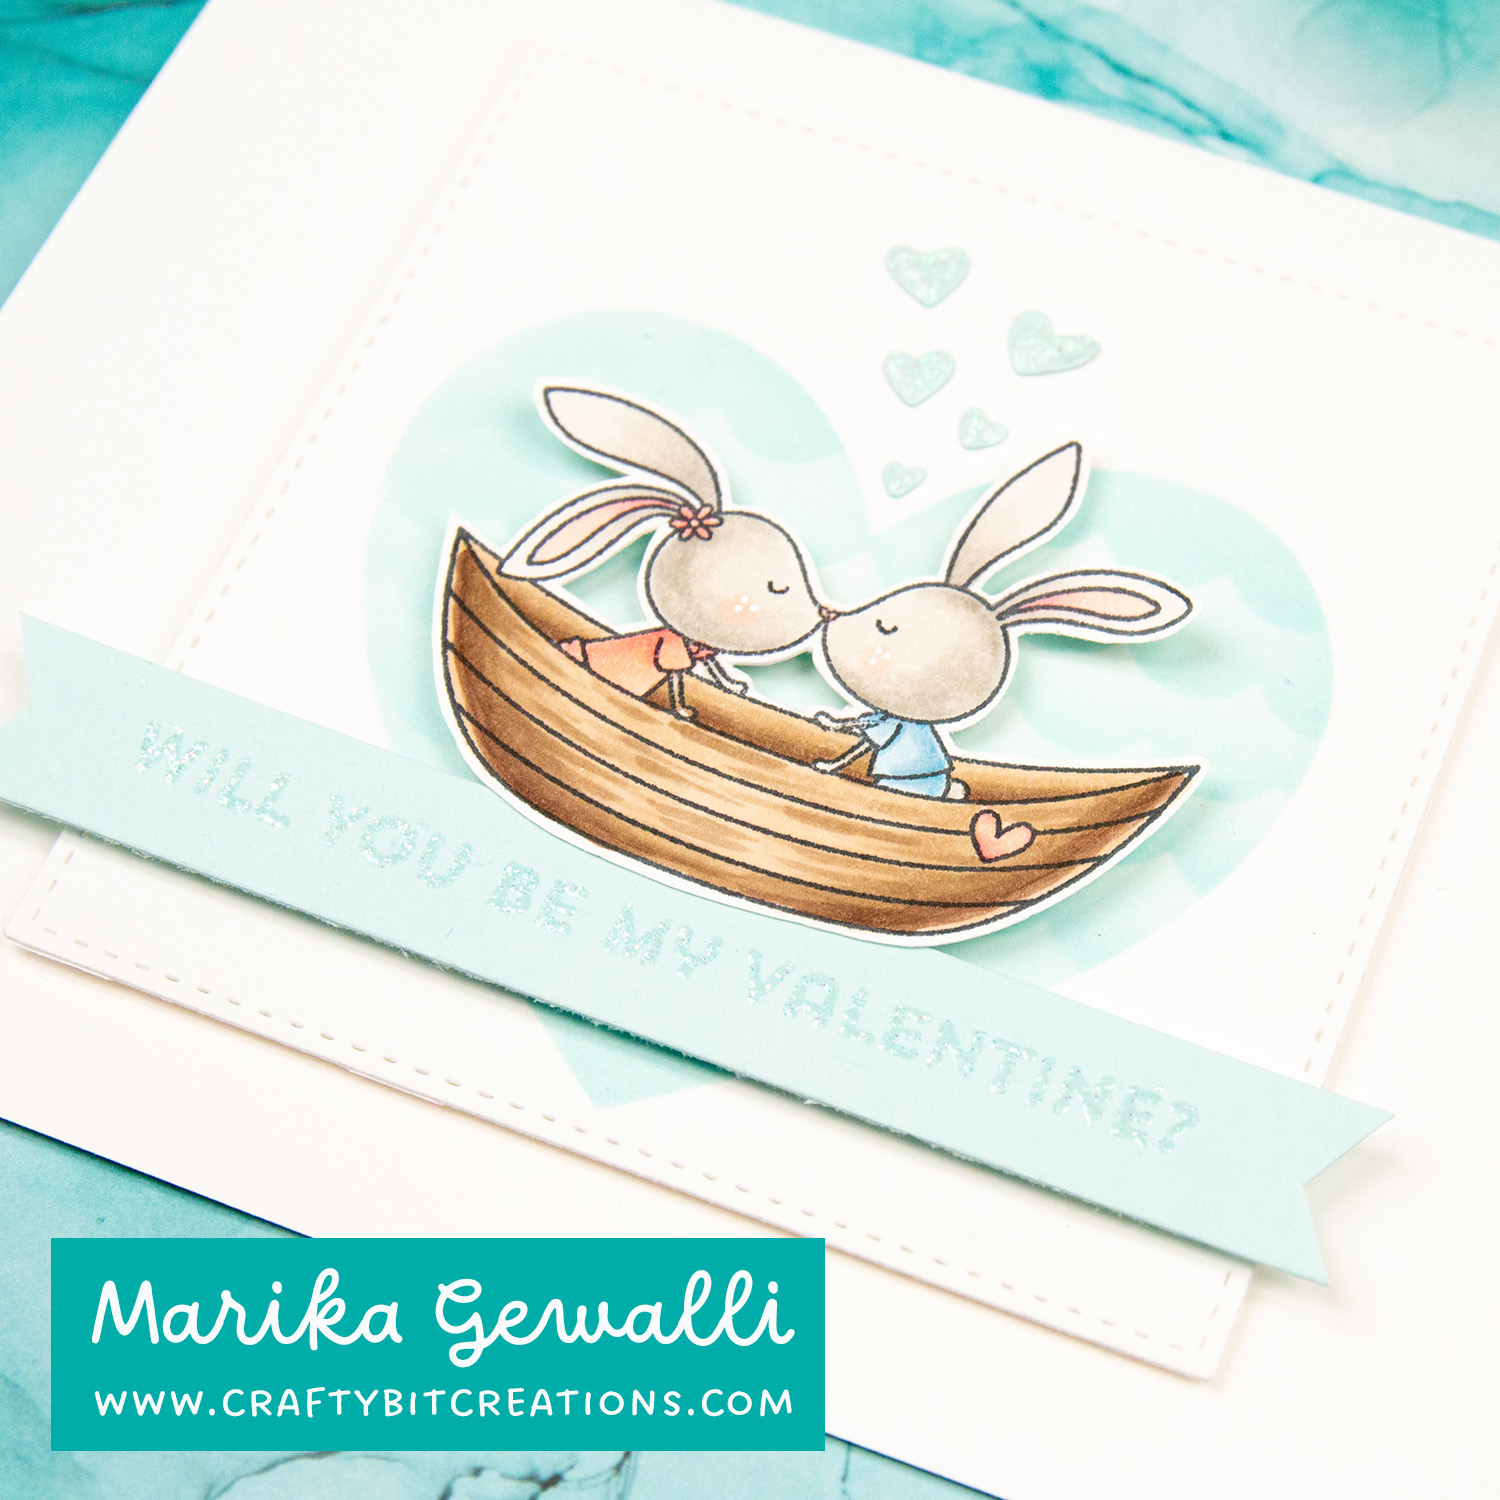
Sometimes a card takes minutes, sometimes days and sometimes even weeks. I have had the basic idea of what I wanted for awhile. It wasn’t until I saw this weeks sketch challenge 580 over at My Favorite Things that the last piece come together.
I picked up some new stamps in January, and I stamped them and colored them in front of the tv. I have already used the bears from the same stamp set, but I really liked how I colored up the bunnies in the boat. So I have been waiting to use that image. I did try last week to make something with them, but the card wasn’t balanced and I decided to use another image.
But this time it all came together. I also got to use two new stencils I hadn’t used yet. If you don’t recognise the little waves in the heart, that is because that haul is coming up on Wednesday. Hope you enjoy the card and if you wanna see how I interpreted previous challenges you will find them HERE.
Supplies:
When possible affiliate links are used, this means that I receive a small commission when products are purchased through the links (at no extra cost to you) I use the money to support my blog and youtube channel. If you like my projects and tutorial please consider supporting me by clicking through these links when you shop. Thanks!
MFT Im So in Love with You, Still: MFTSSS MFT Stitched Square STAX Die-namics: MFTSSS MFT Heart Extraordinaire Stencil: MFTSSS MFT Classic Edges Stencil: MFTSSS MFT Sno Cone Card Stock: MFT MFT Sno Cone Premium Dye Ink Pad: MFTSSS Nuvo White Blizzard: SSS MFT Tag Builder Blueprints 5 Dies: MFTSSS Neenah Solar White 80lb: SSSAMZSBC Blending Brushes: MFTSSSAMZSBC Fiskars Trimmer : SSSAMZ Foam Squares: SSSAMZSBC MFT On-Point Precision Glue Pen: MFT
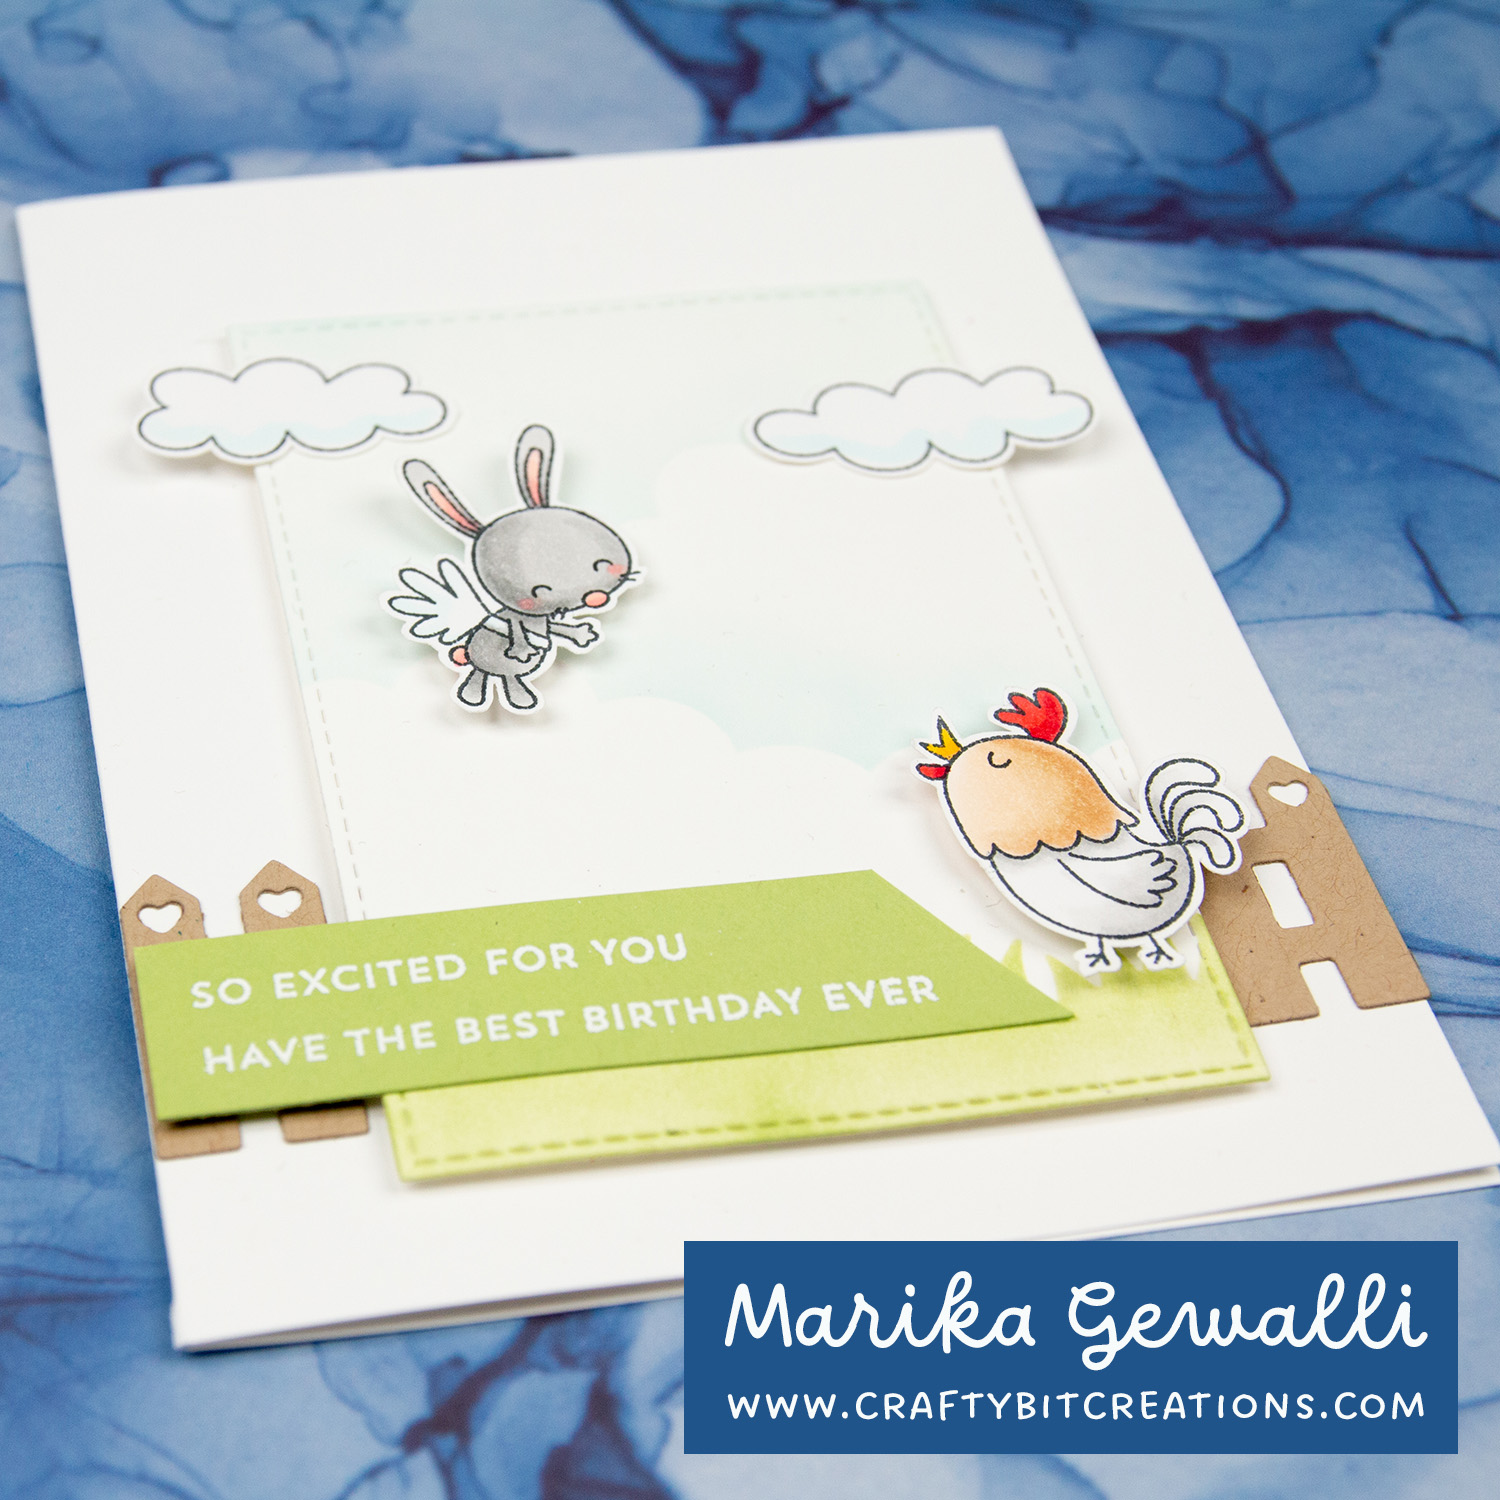
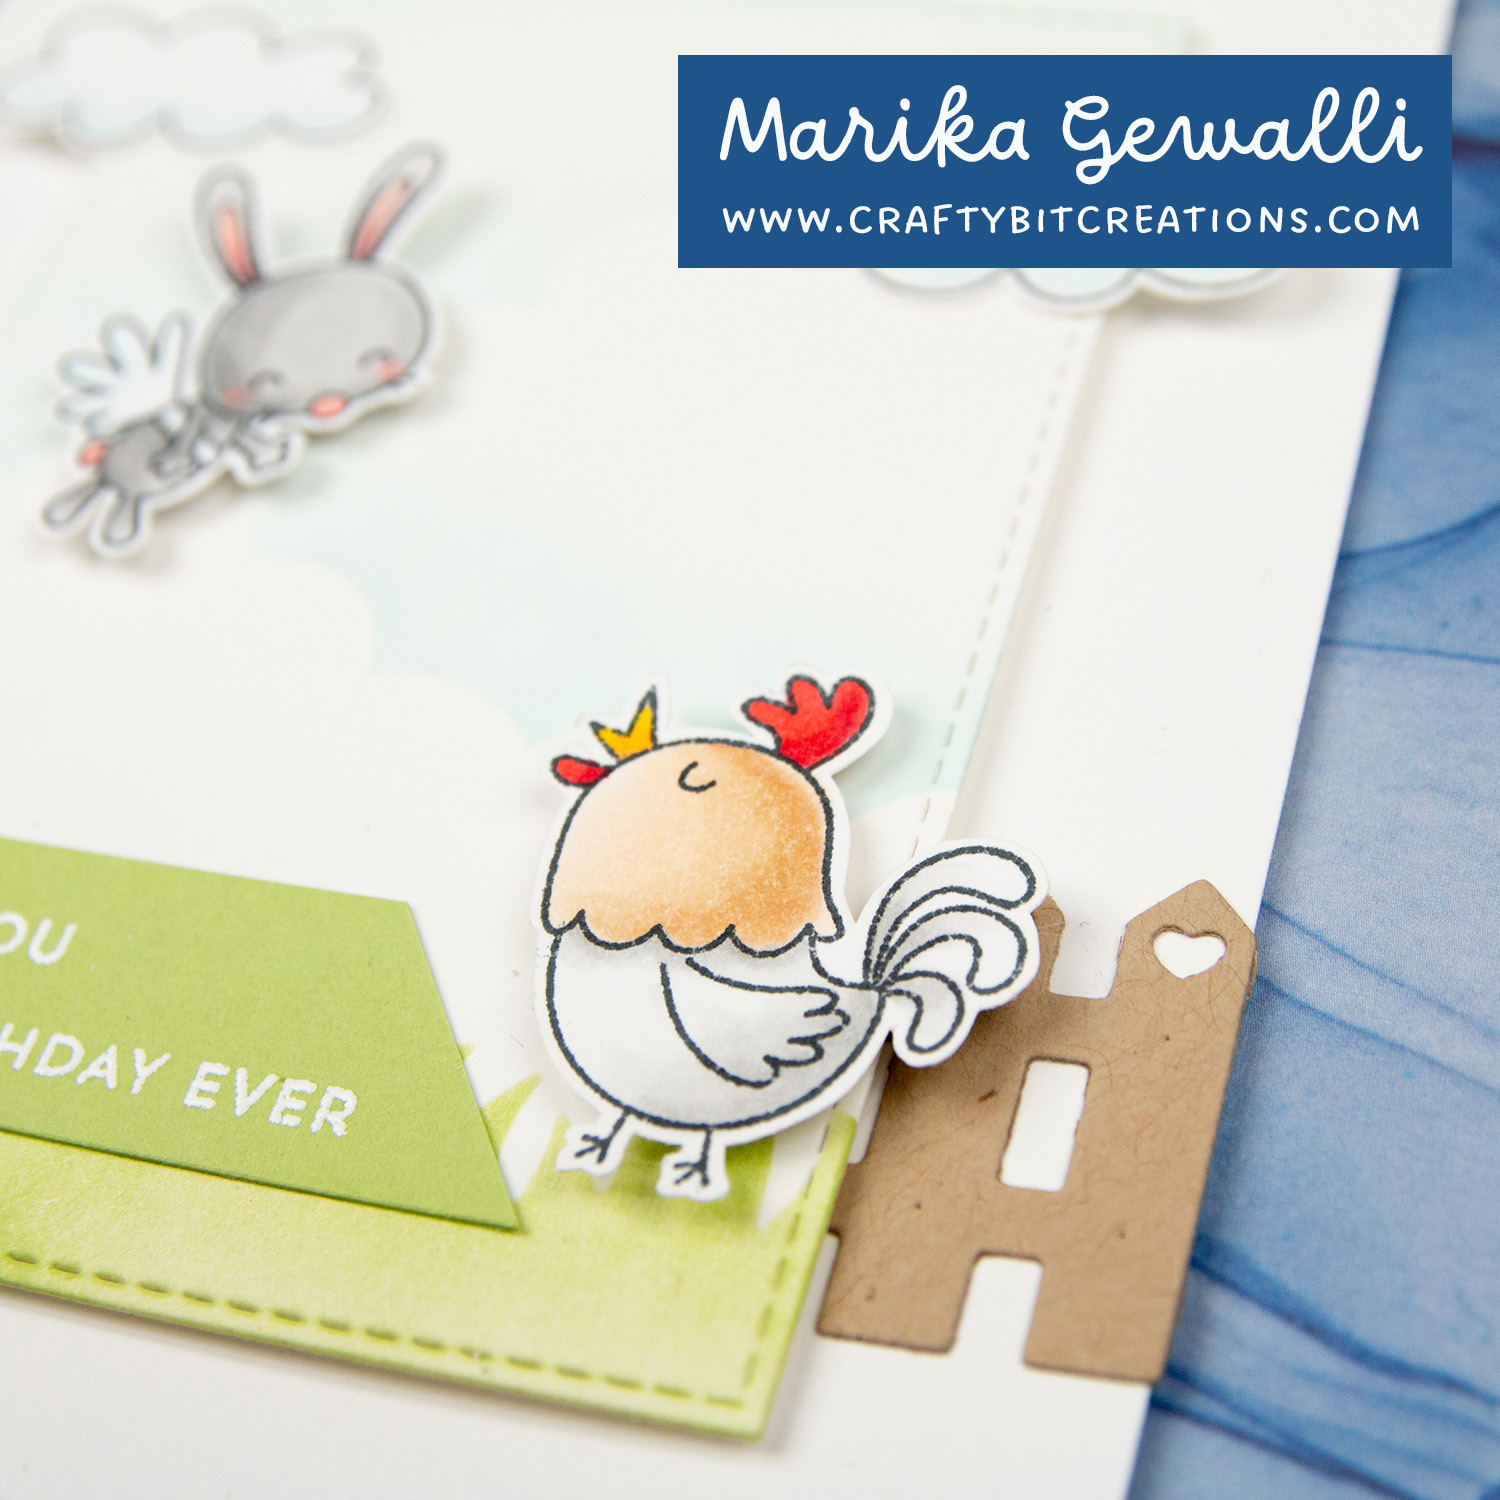
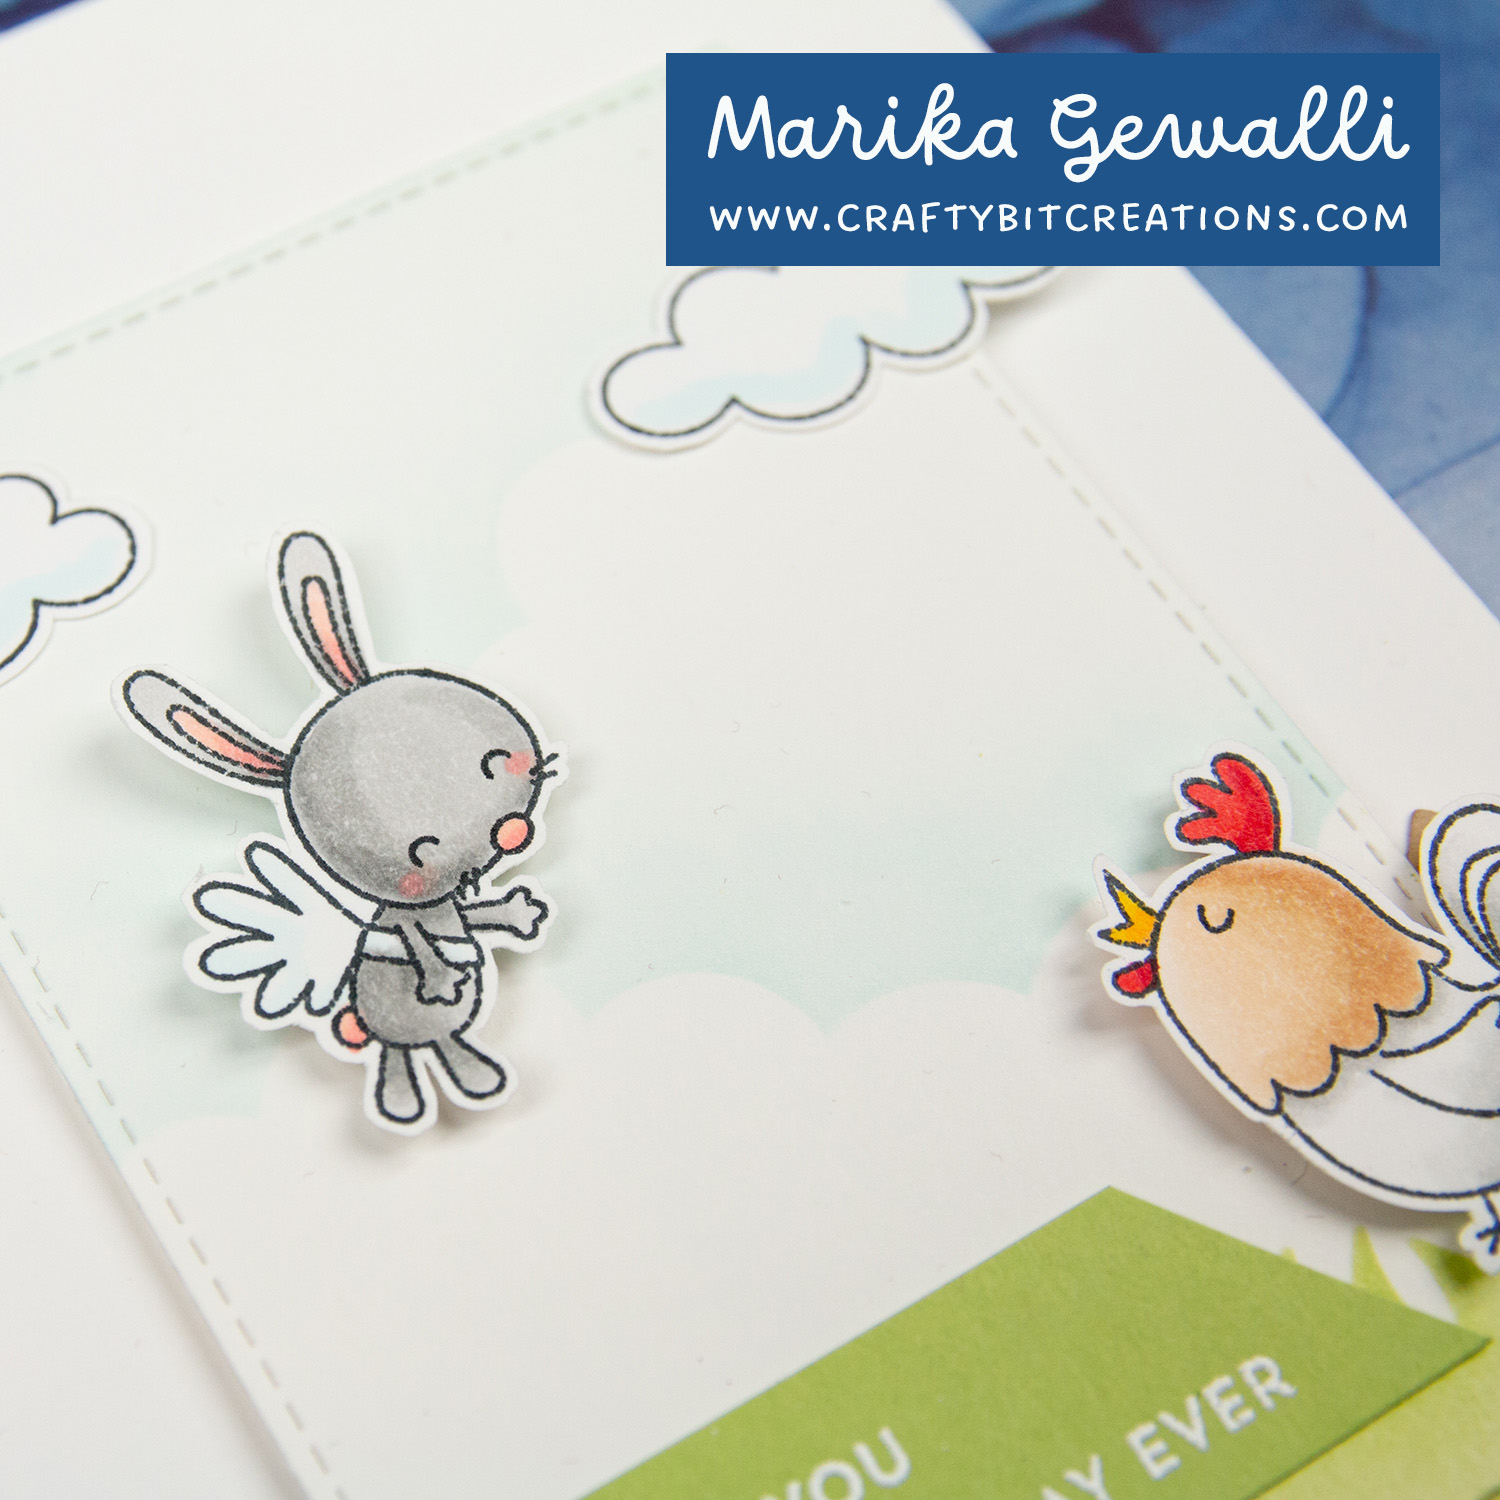
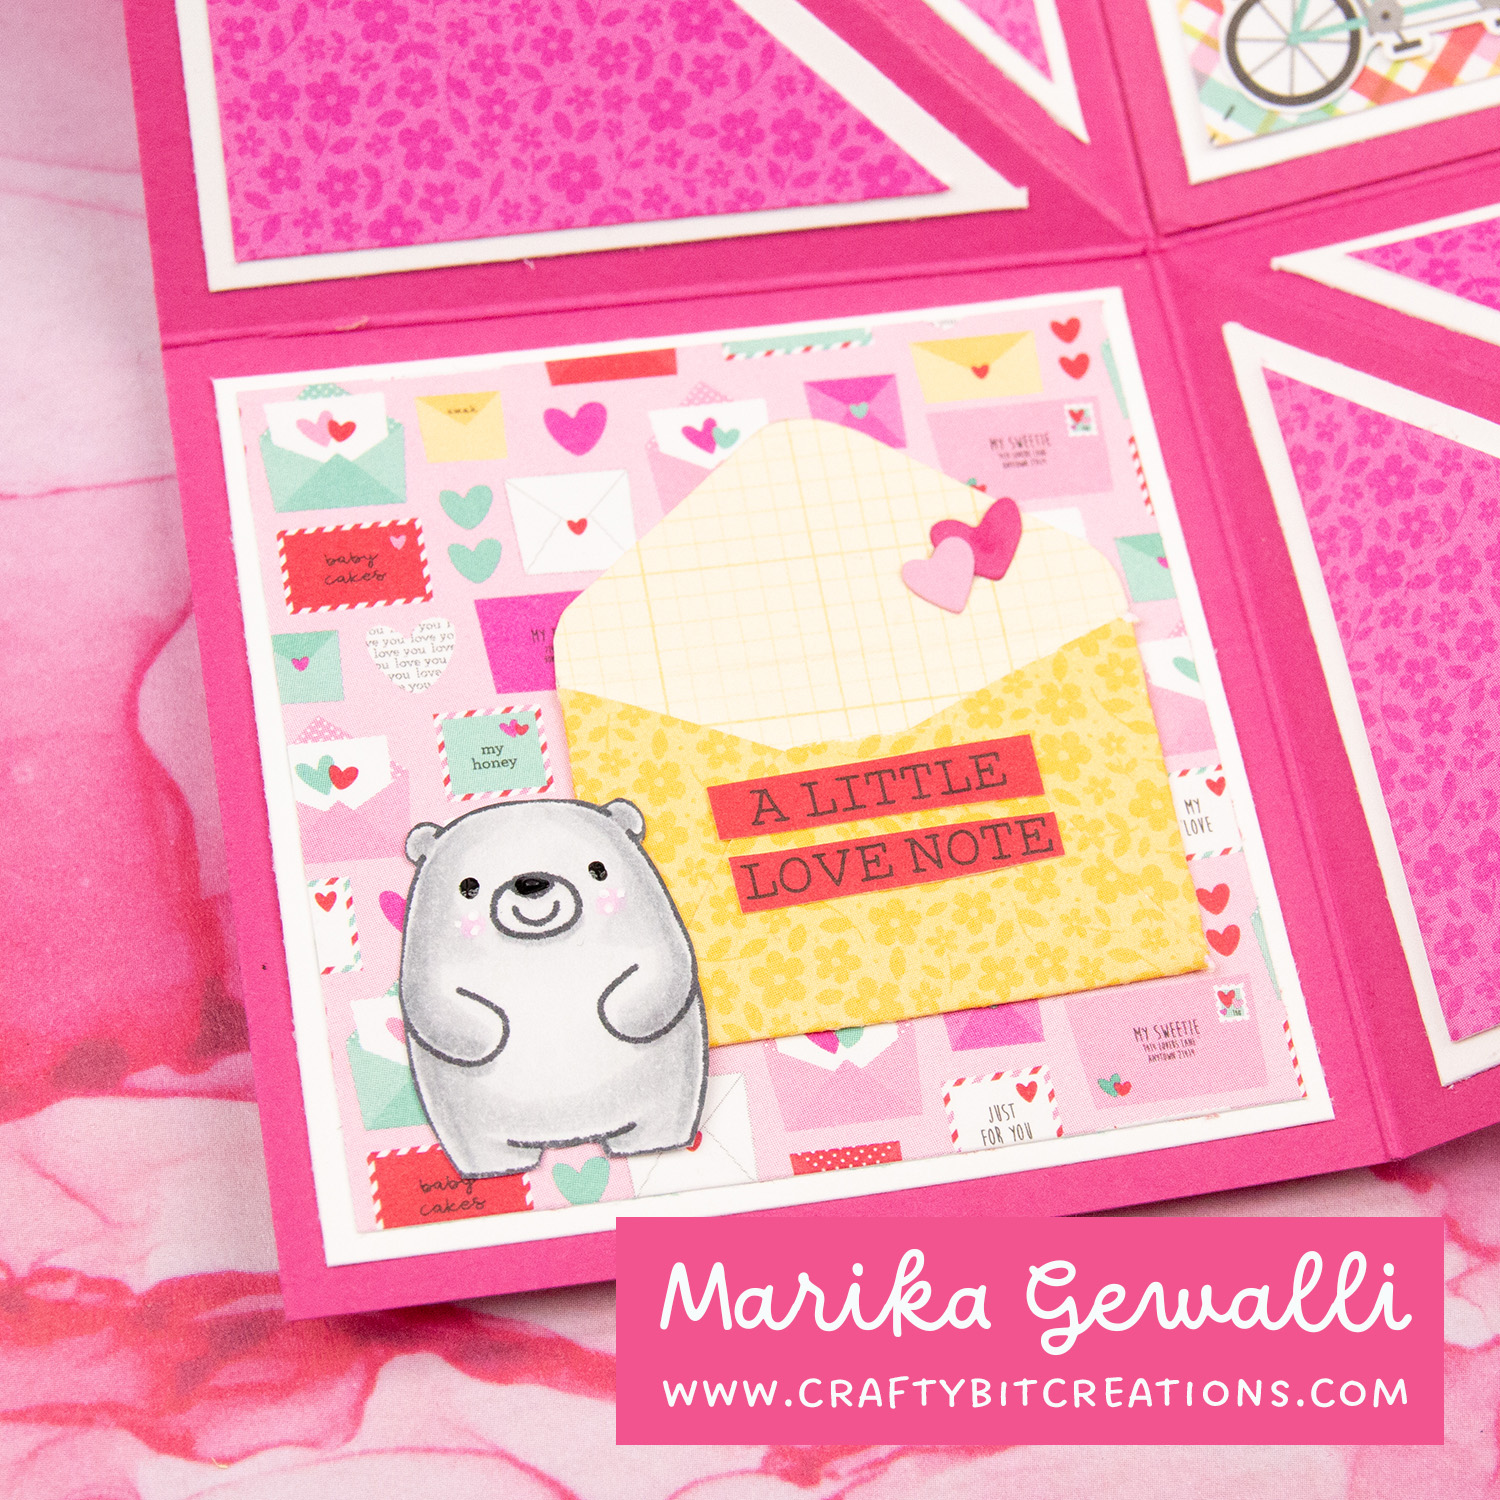
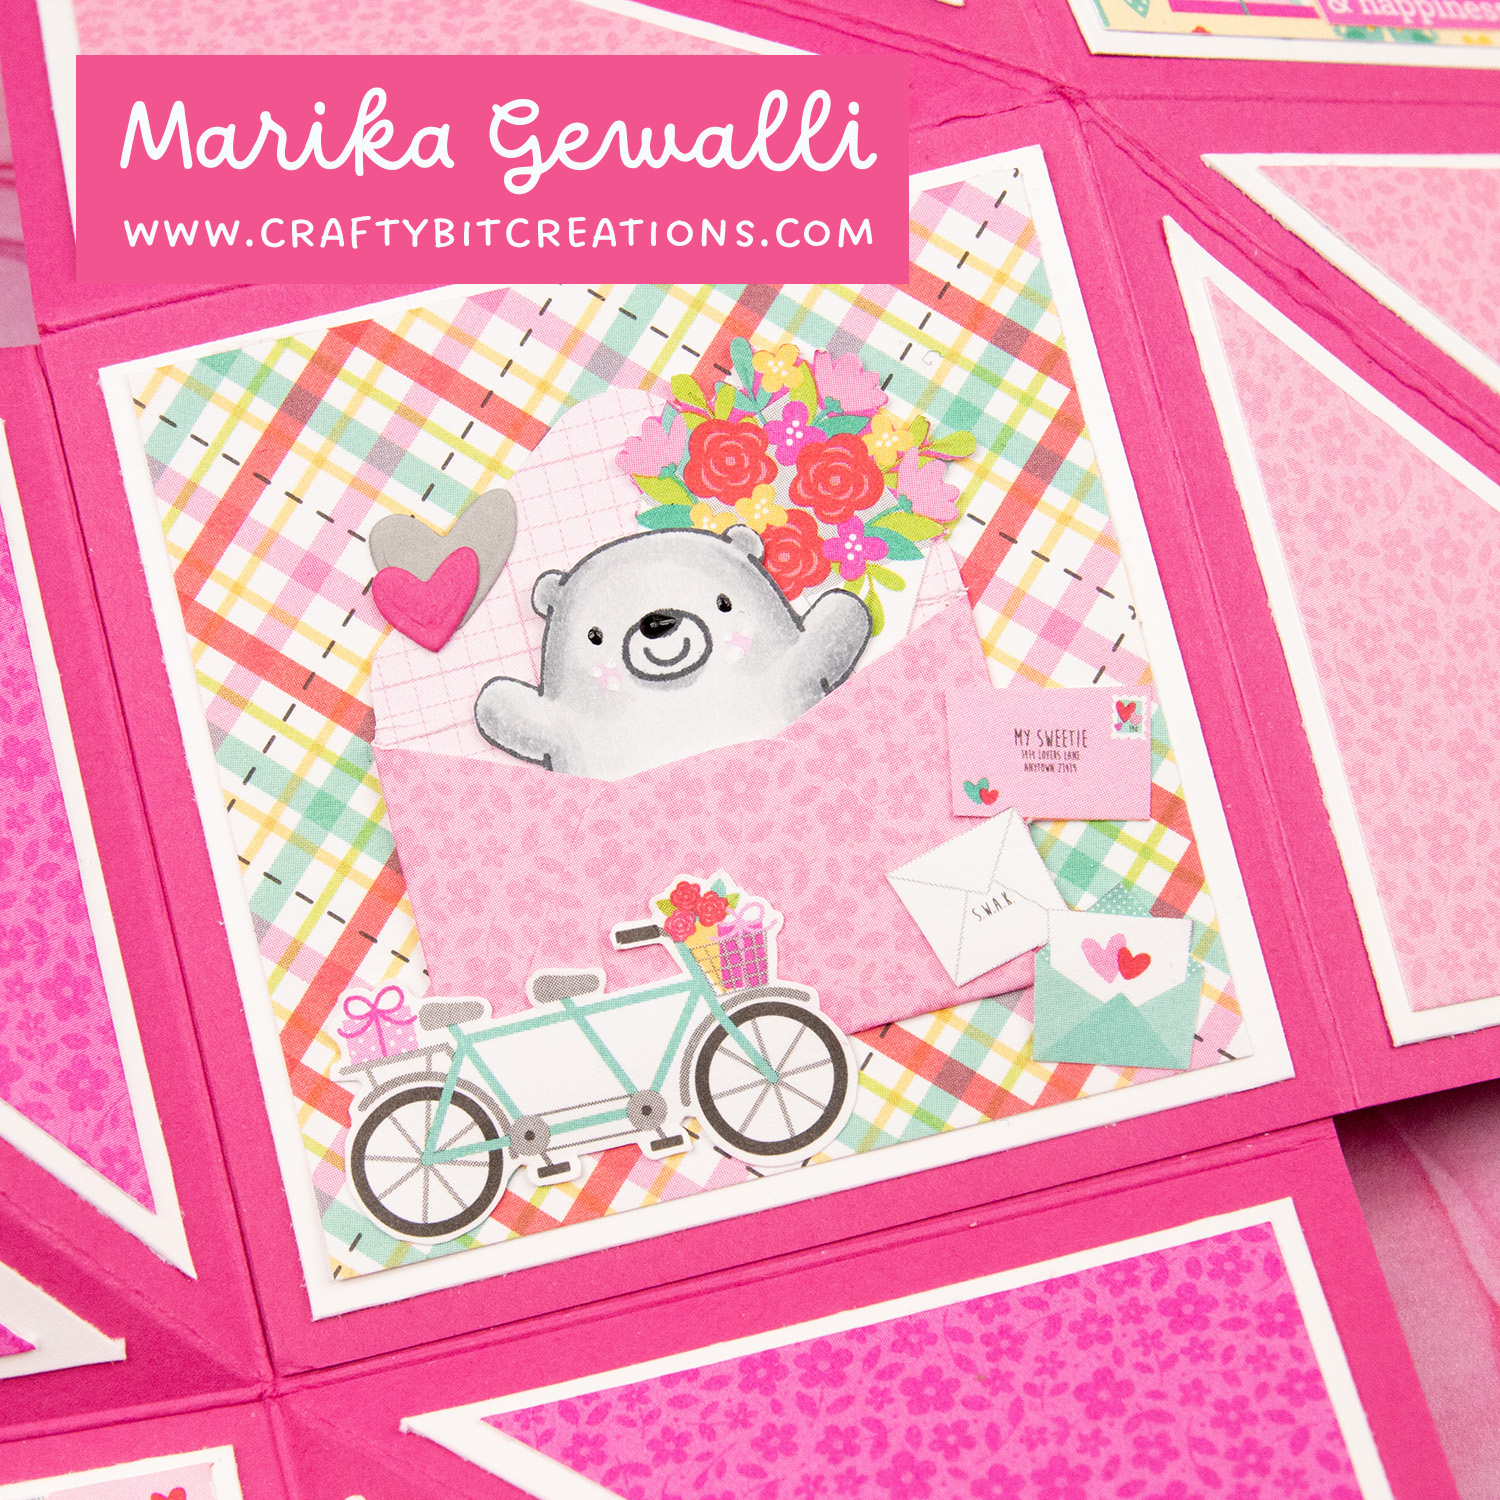
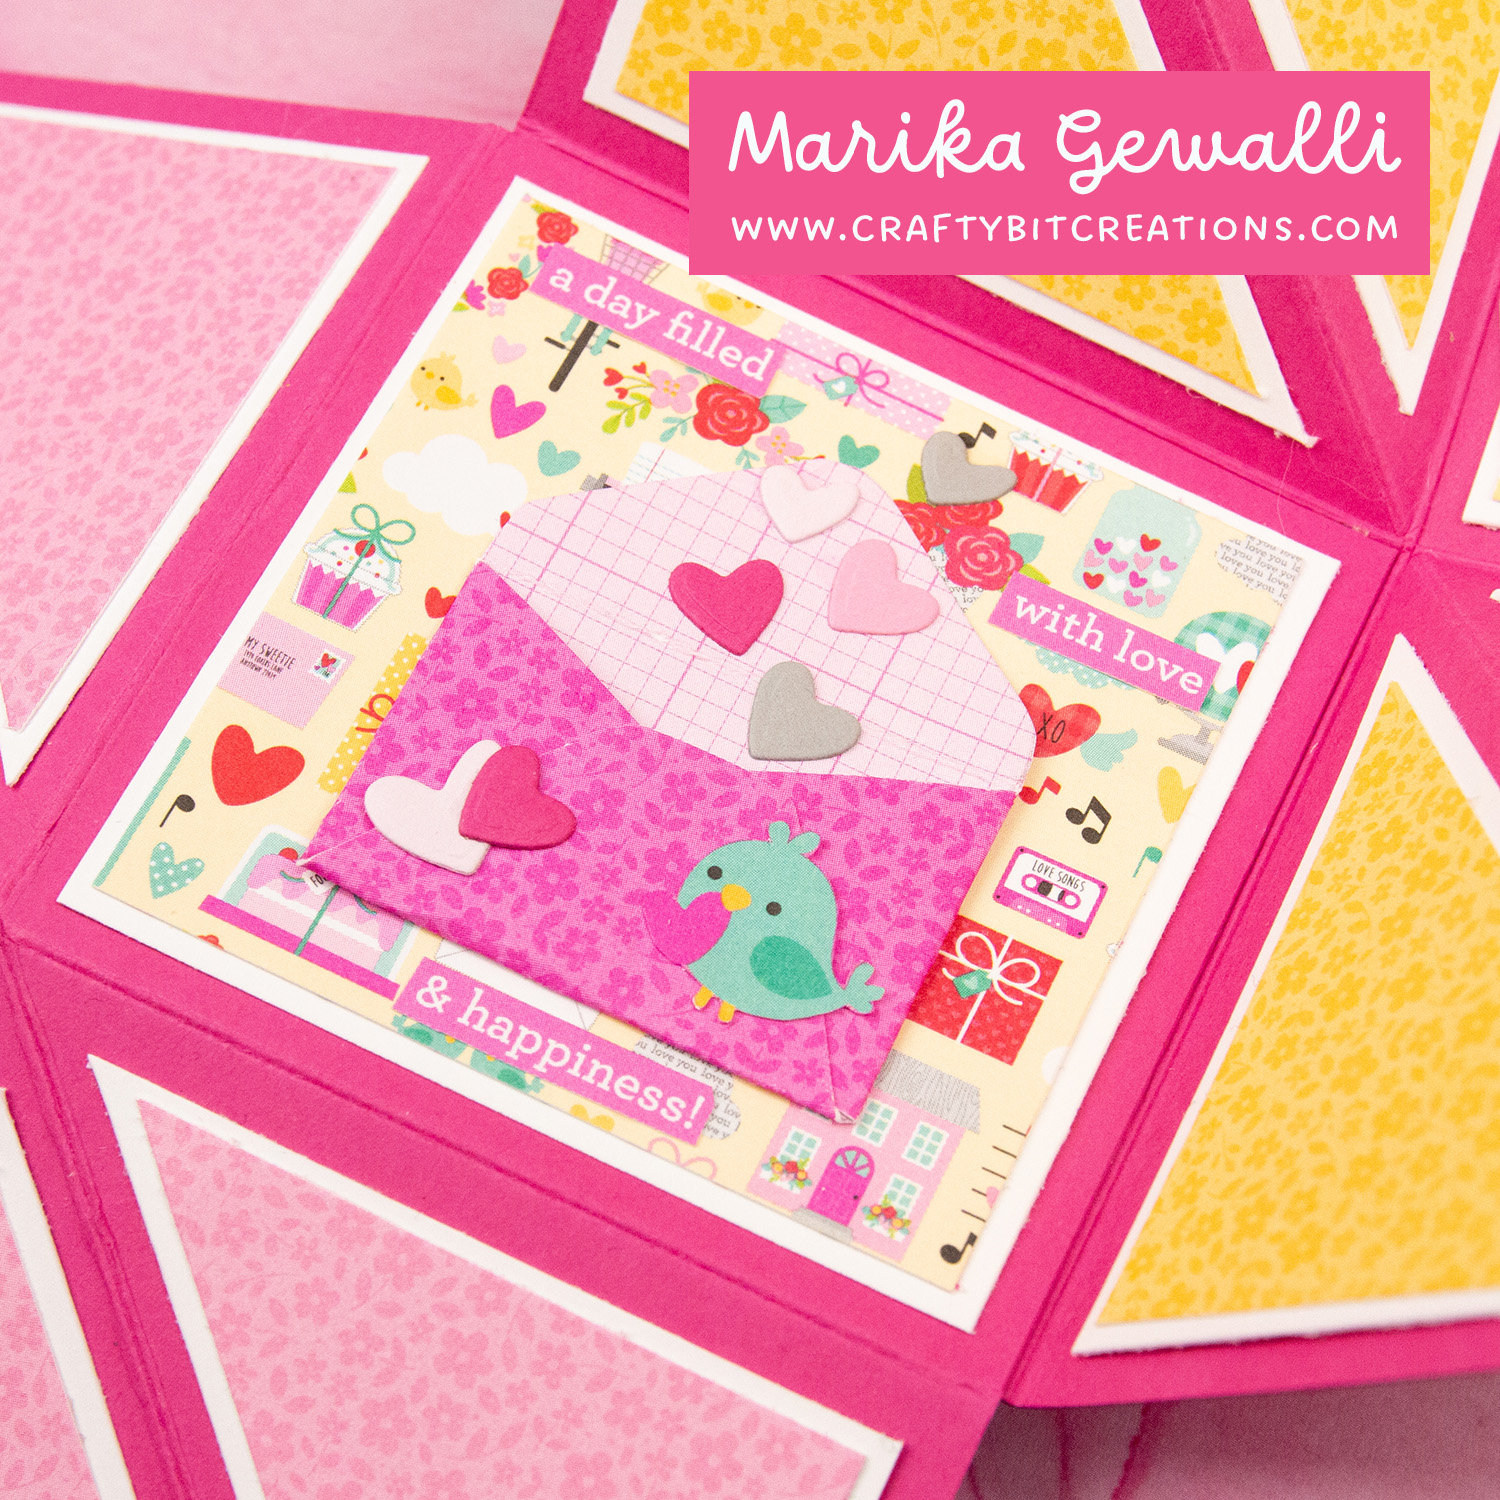
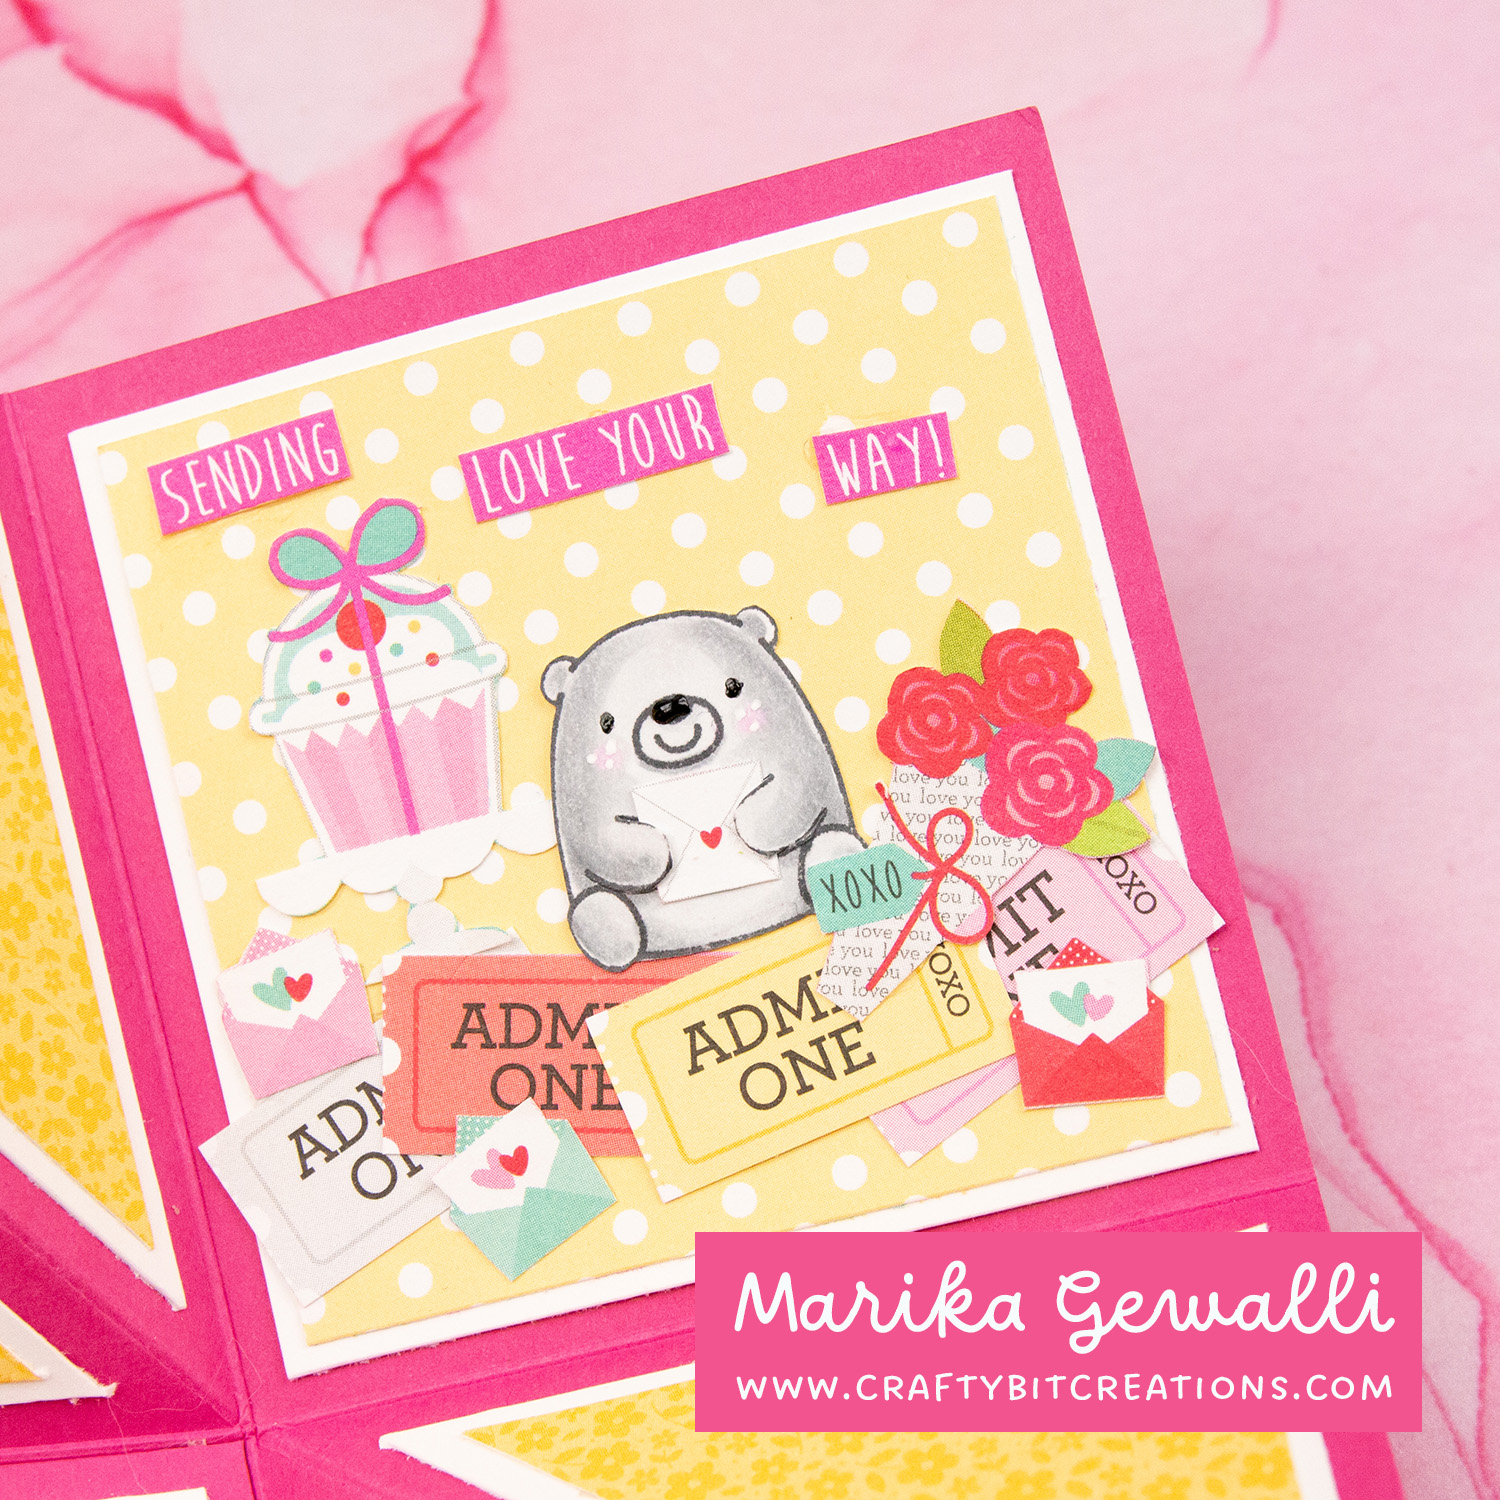
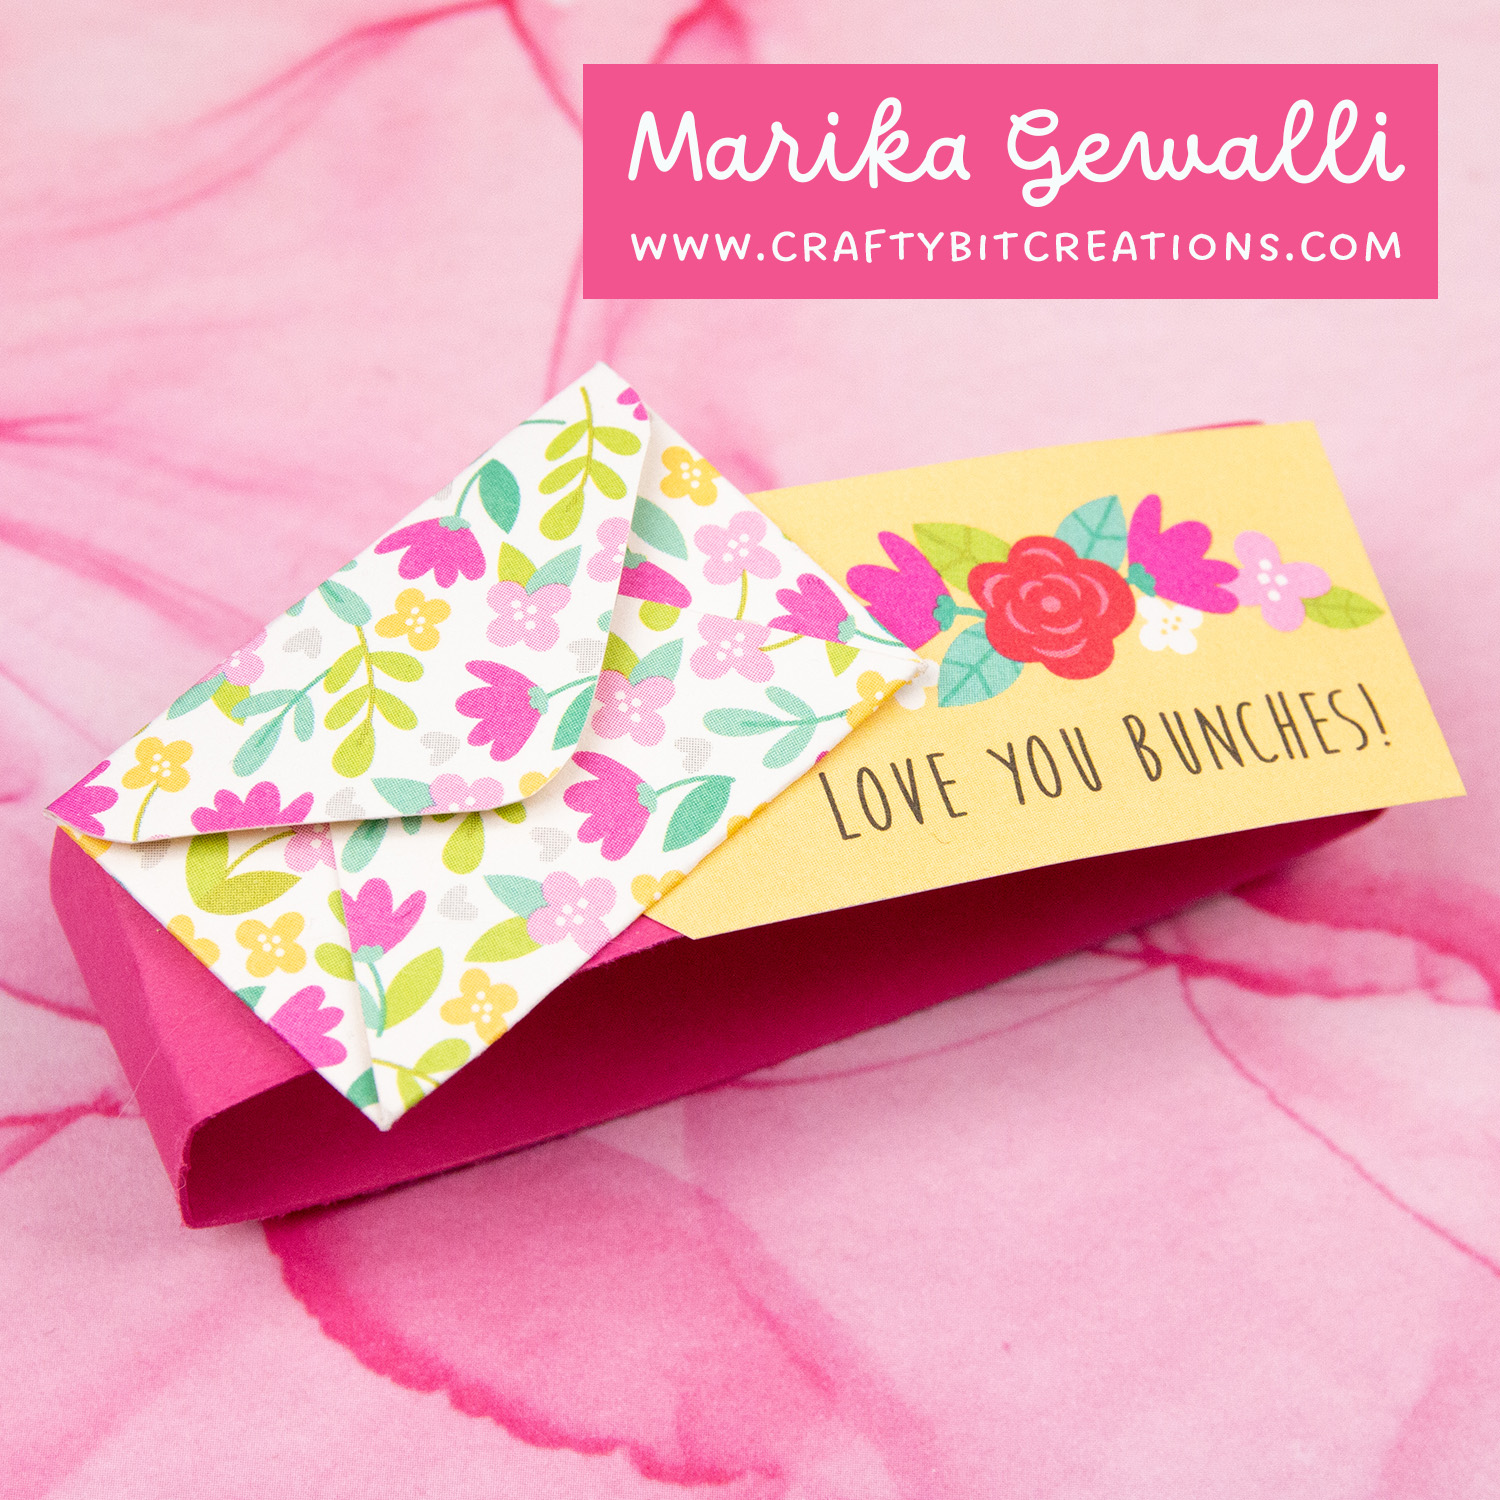
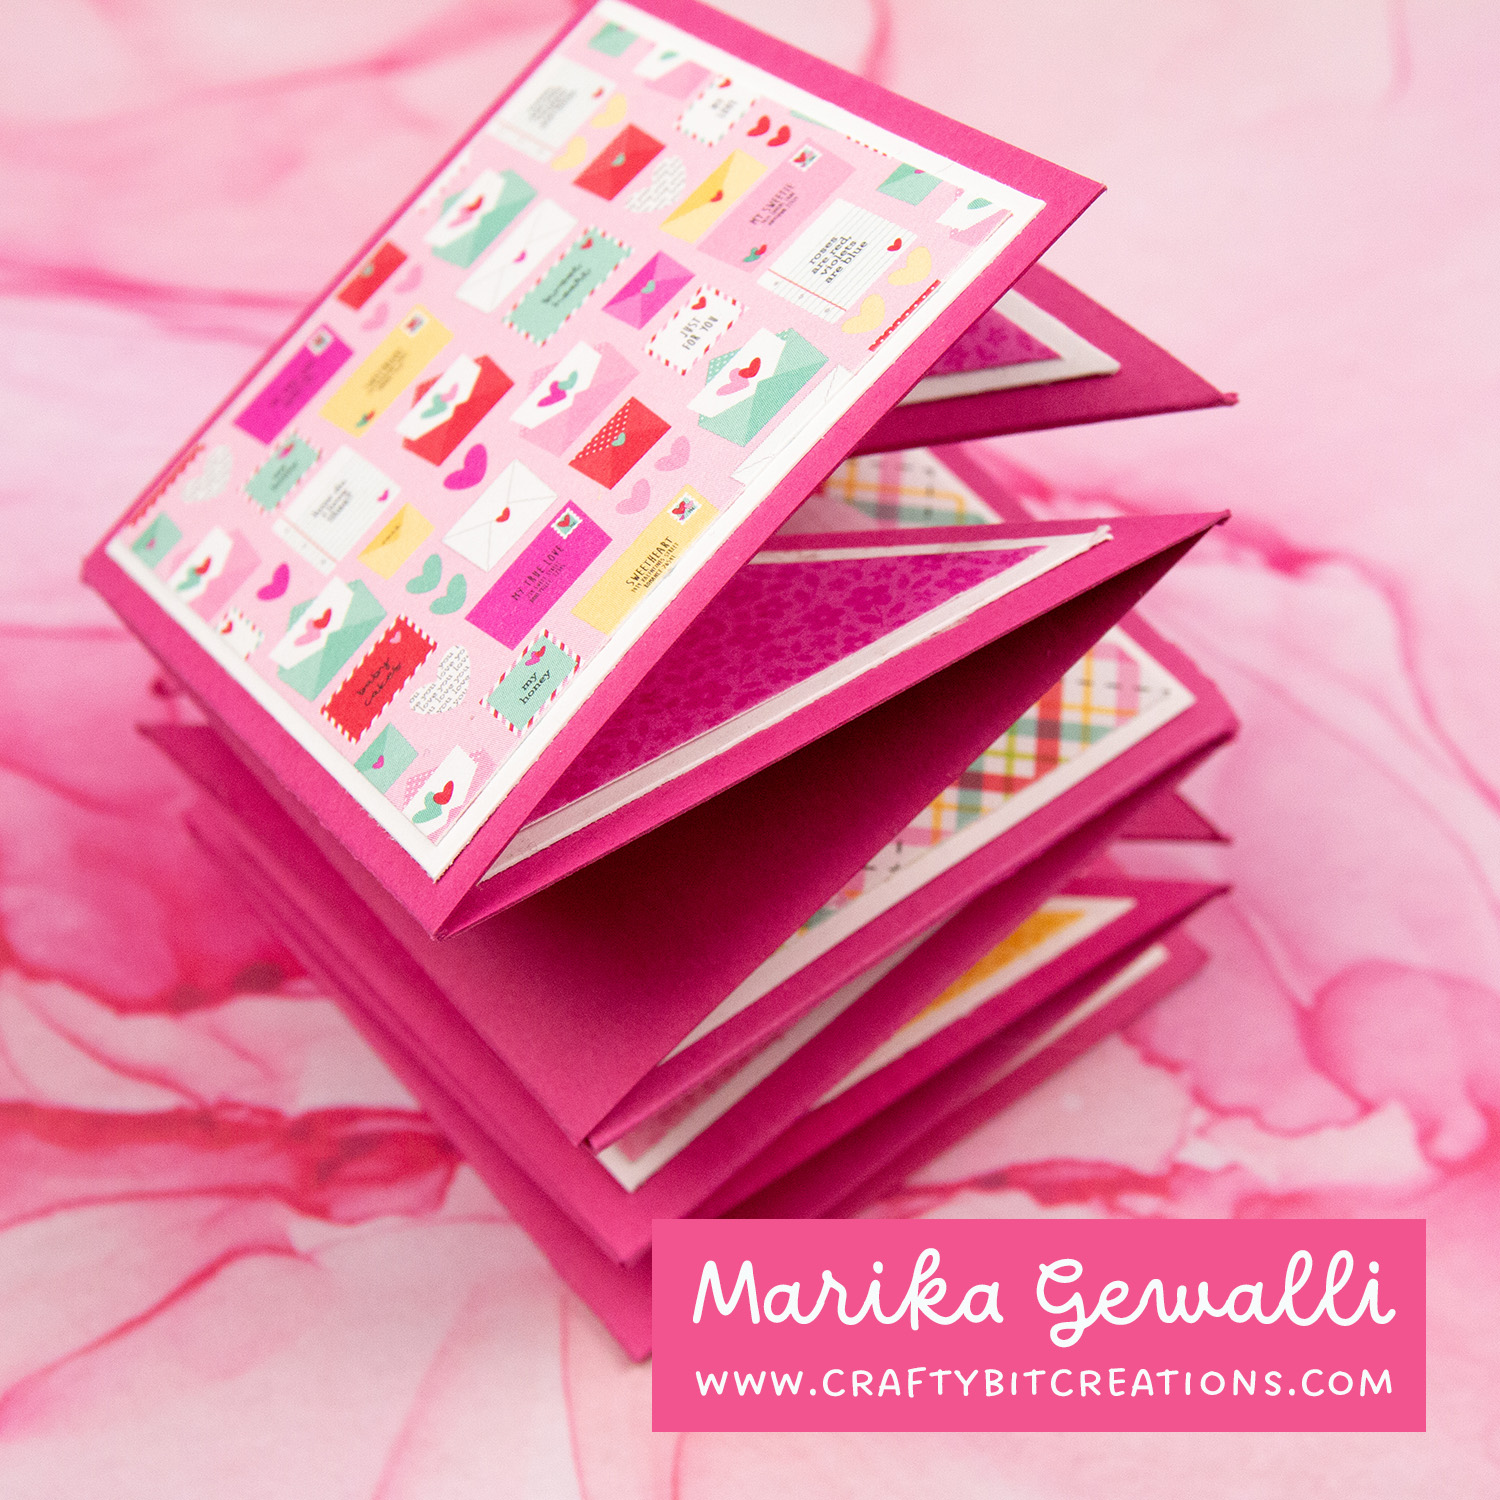
I love an interacting card, but sometimes you want an easy construction and put all your time into decorating. I have been wanting to play with all the little extra tags, borders etc that you can find in the Doodlebug Designs pattern paper packs. And then I saw an exploding card over at instagram and I knew that would be the perfect canvas.
The pattern paper is filled with little letters, so I felt I really needed a teeny tiny envelope to add as decoration. So I went into illustrator and designed one. It took a couple of tries but I really like how it came out. And you can pick up the template and cutting files HERE.
Instructions:
Card: Cut three pieces of card measuring 5 1/2″ x 5 1/2″. Score at 2 3/4″ at both sides. Score diagonally once. Burnish all score lines. Glue together the pieces, overlapping one of the unscored squares with another. See video for more details.
Bottom Layer: In your bottom layer color, cut five pieces that measure 2 1/2″ x 2 1/2″. Then cut six pieces that measure 2 1/4″ x 2 1/4″ and then cut those pieces diagonally so you have 12 triangles.
Top Layer: In your pattern paper, cut five peices that measure 2 3/8″ x 2 3/8″. Then cut six pieces that measure 2″ x 2″ and then cut those pieces diagonally so you have 12 triangles.
Layer all the pieces and decorate as see fit.
When possible affiliate links are used, this means that I receive a small commission when products are purchased through the links (at no extra cost to you) I use the money to support my blog and youtube channel. If you like my projects and tutorial please consider supporting me by clicking through these links when you shop. Thanks!
Supplies:
MFT Bitty Bears: MFTSSS MFT Ripe Raspberry Card Stock: MFT MFT Tag Builder Blueprints 5 Dies: MFTSSS DD Love notes: SBC DD Lots of Love: SSSSBC DD Floral-Graph Rainbow Petite Print: SSSSBC Neenah Solar White 80lb: SSSAMZSBC Large Score Board: SSSAMZSBC Fiskars Trimmer : SSSAMZ Sookwang Tape 1/4”: SSSAMZ MFT On-Point Precision Glue Pen: MFT
Have you ever wondered when to change your copic nibs? In todays video I show two different times when you should change your nibs, and one time when it won’t help. I also show how to replace your nibs on your copic marker.
When possible affiliate links are used, this means that I receive a small commission when products are purchased through the links (at no extra cost to you) I use the money to support my blog and youtube channel. If you like my projects and tutorial please consider supporting me by clicking through these links when you shop. Thanks!
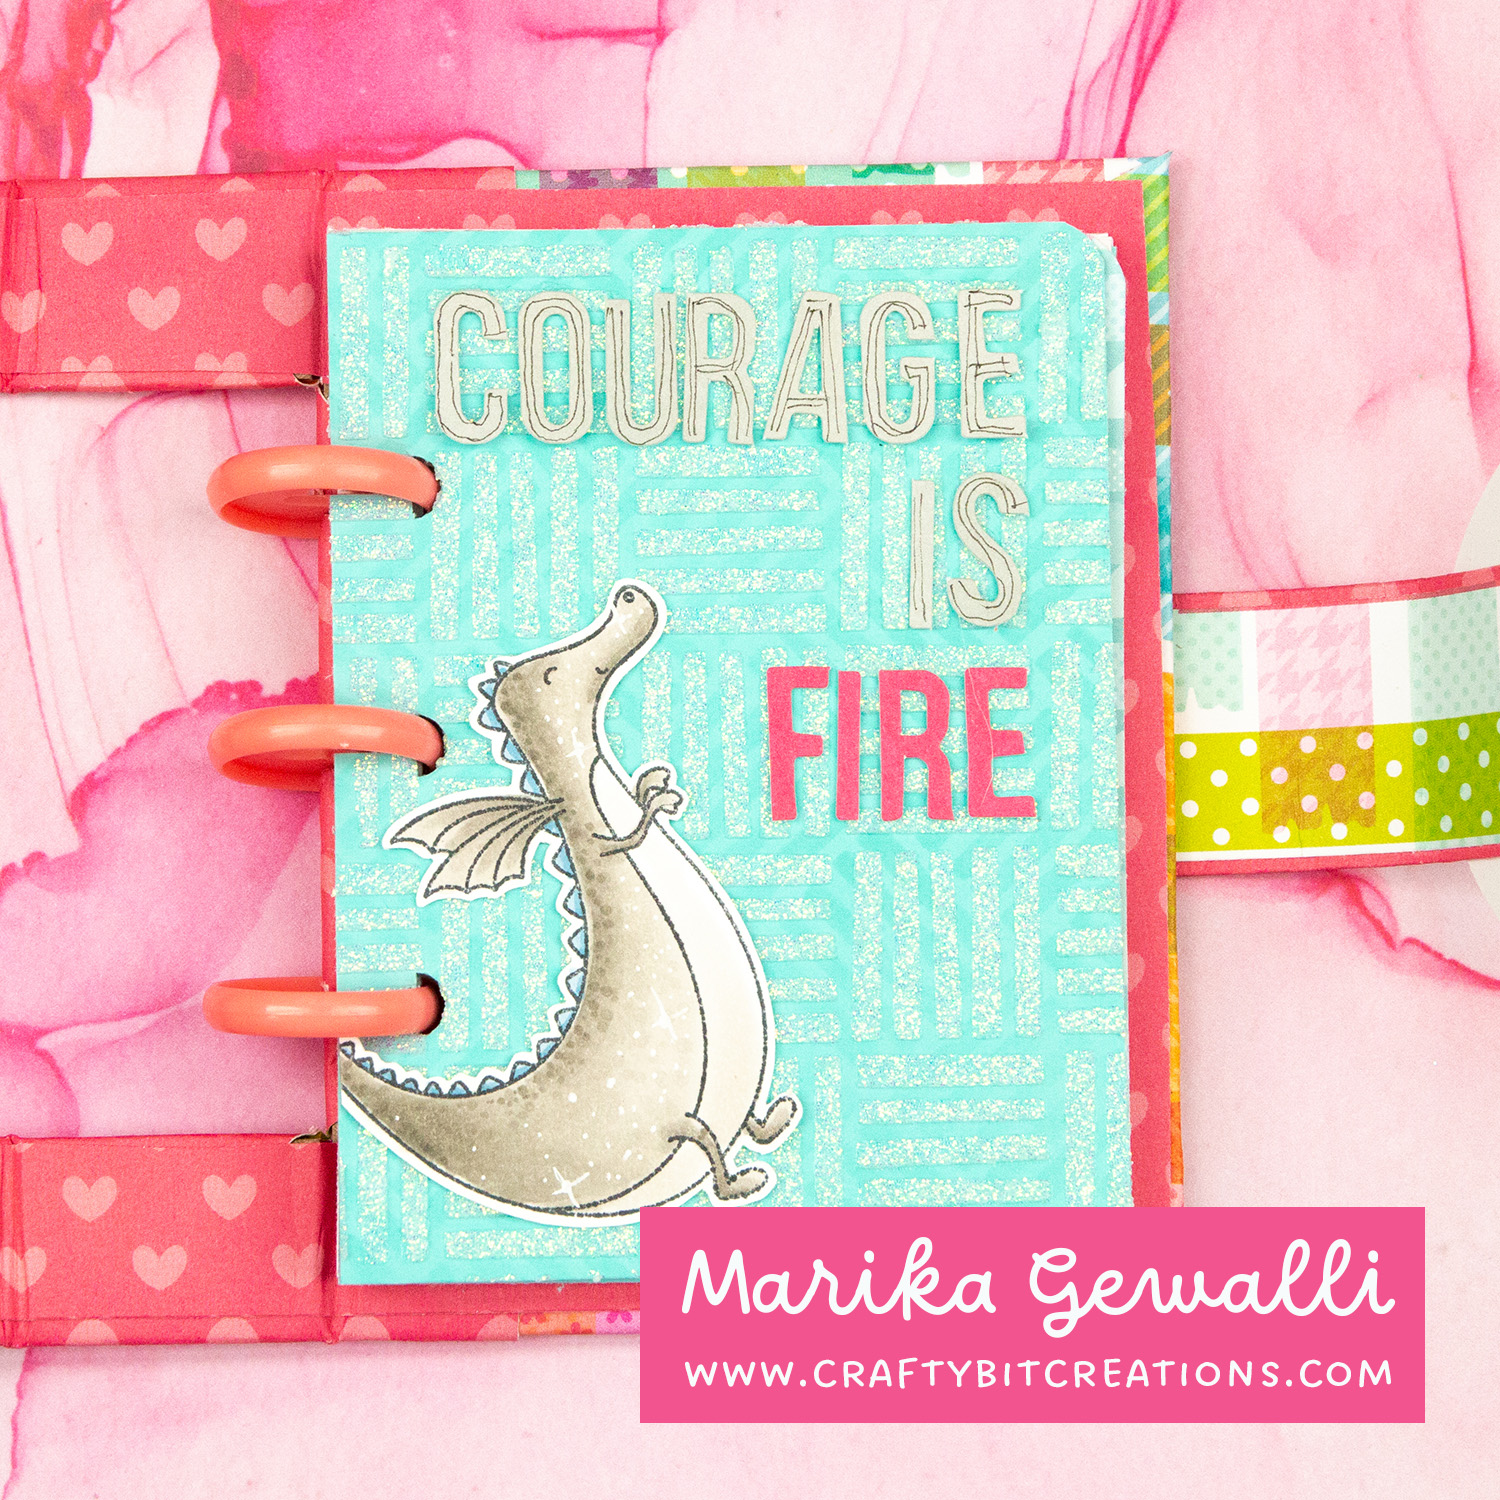
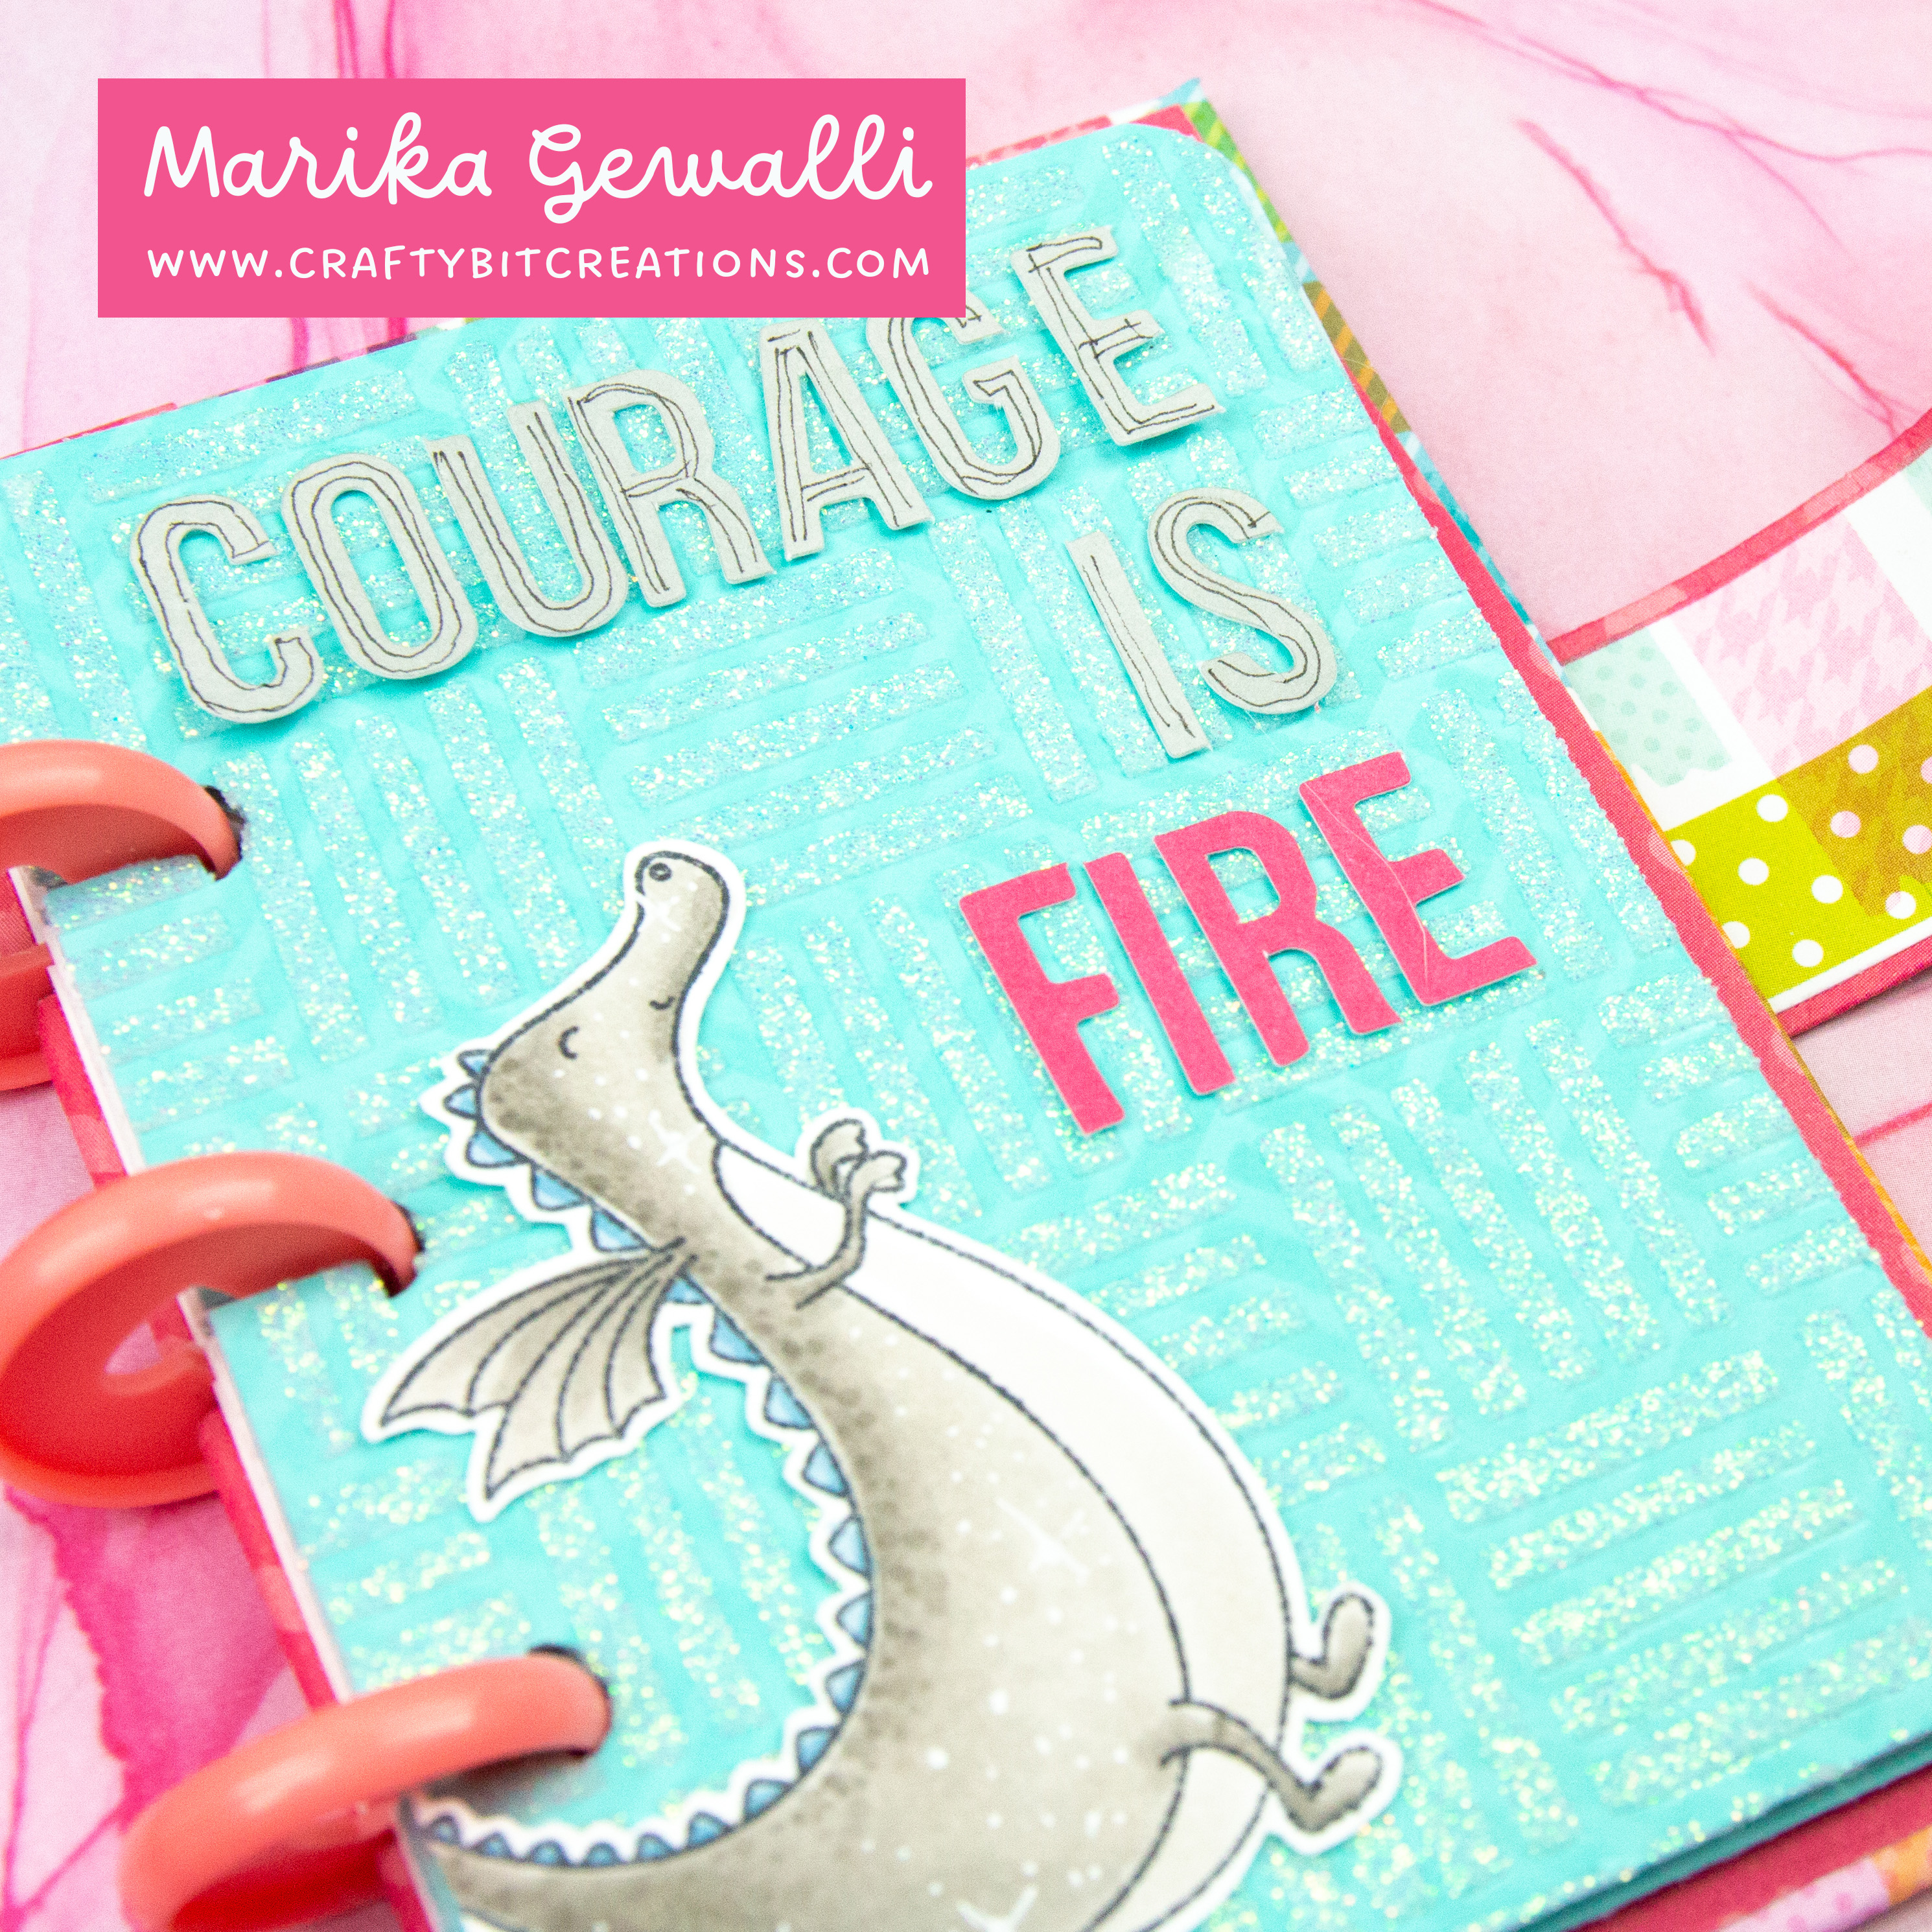
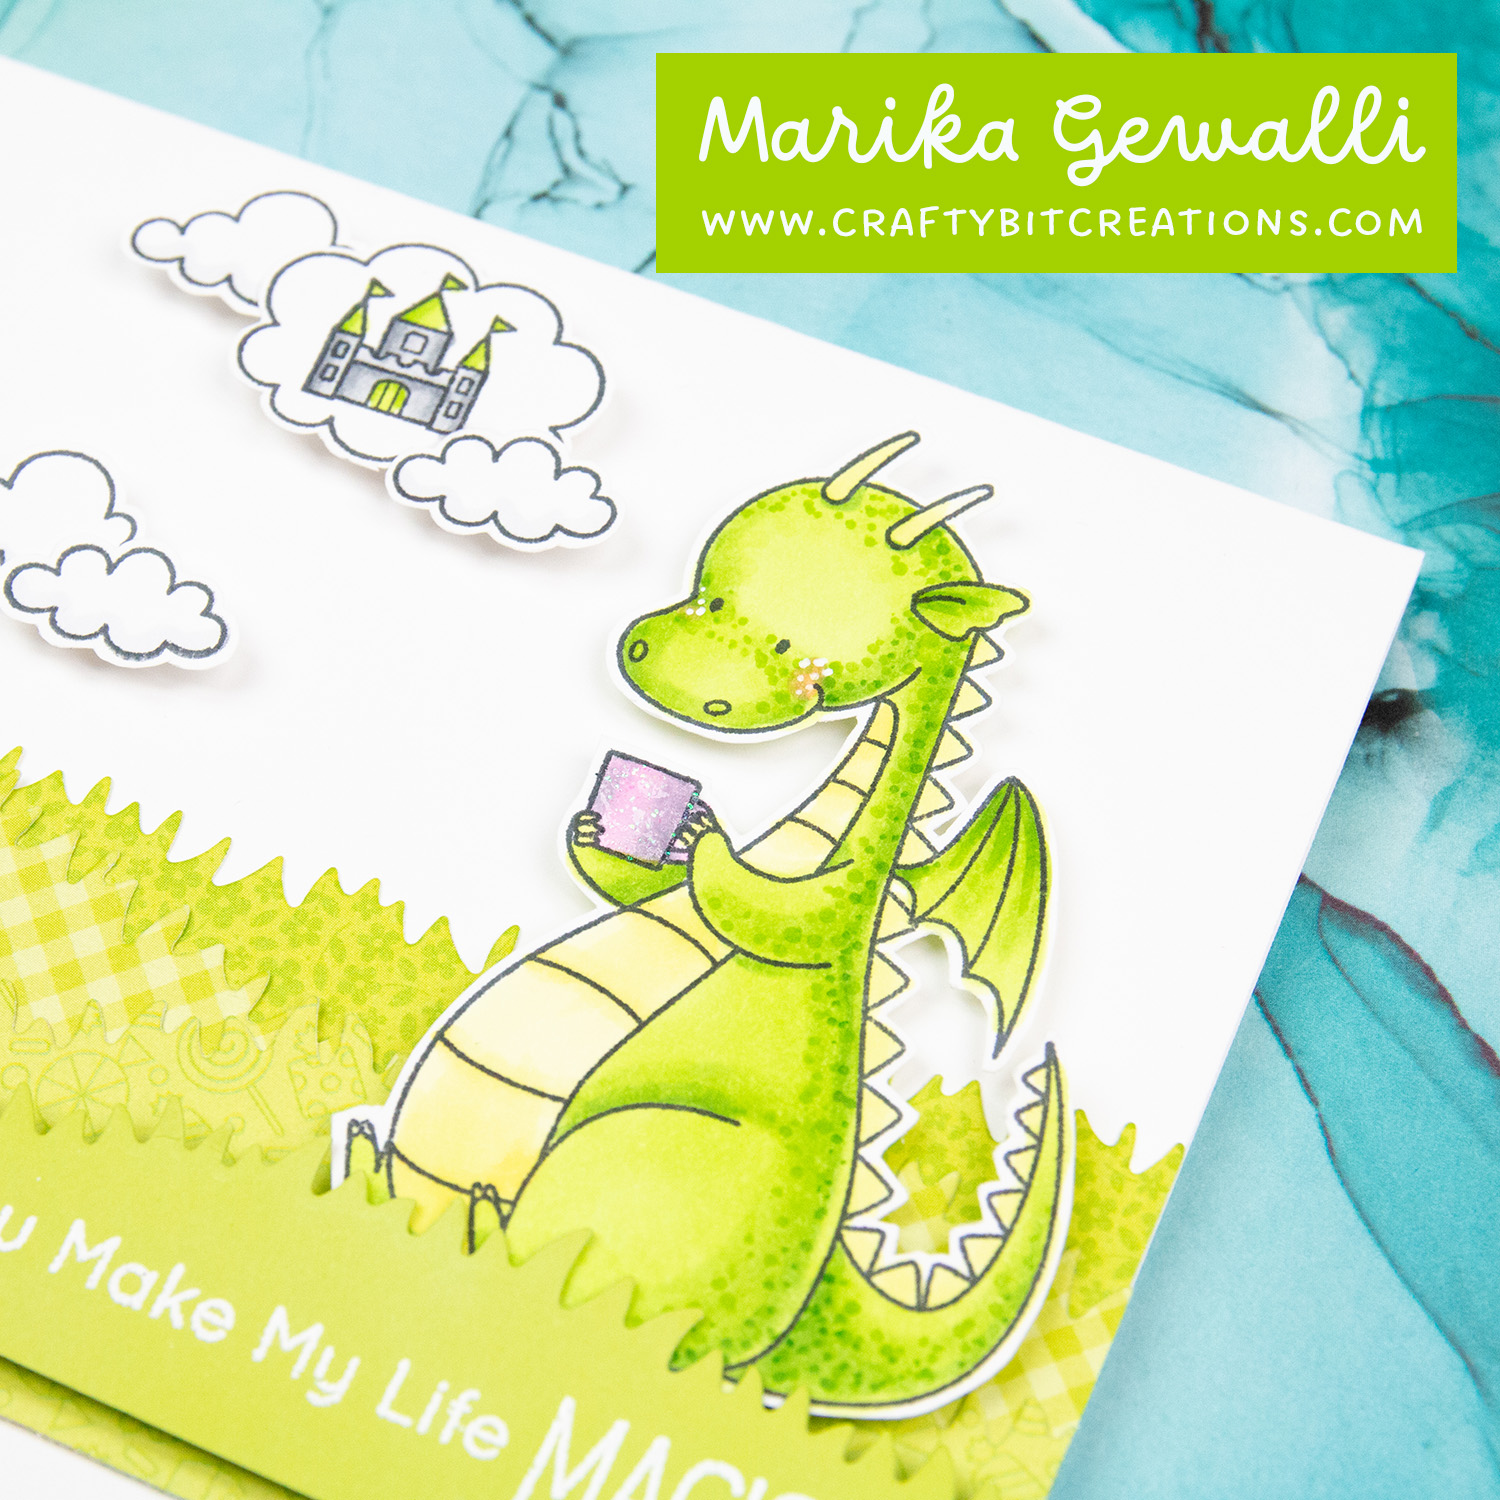
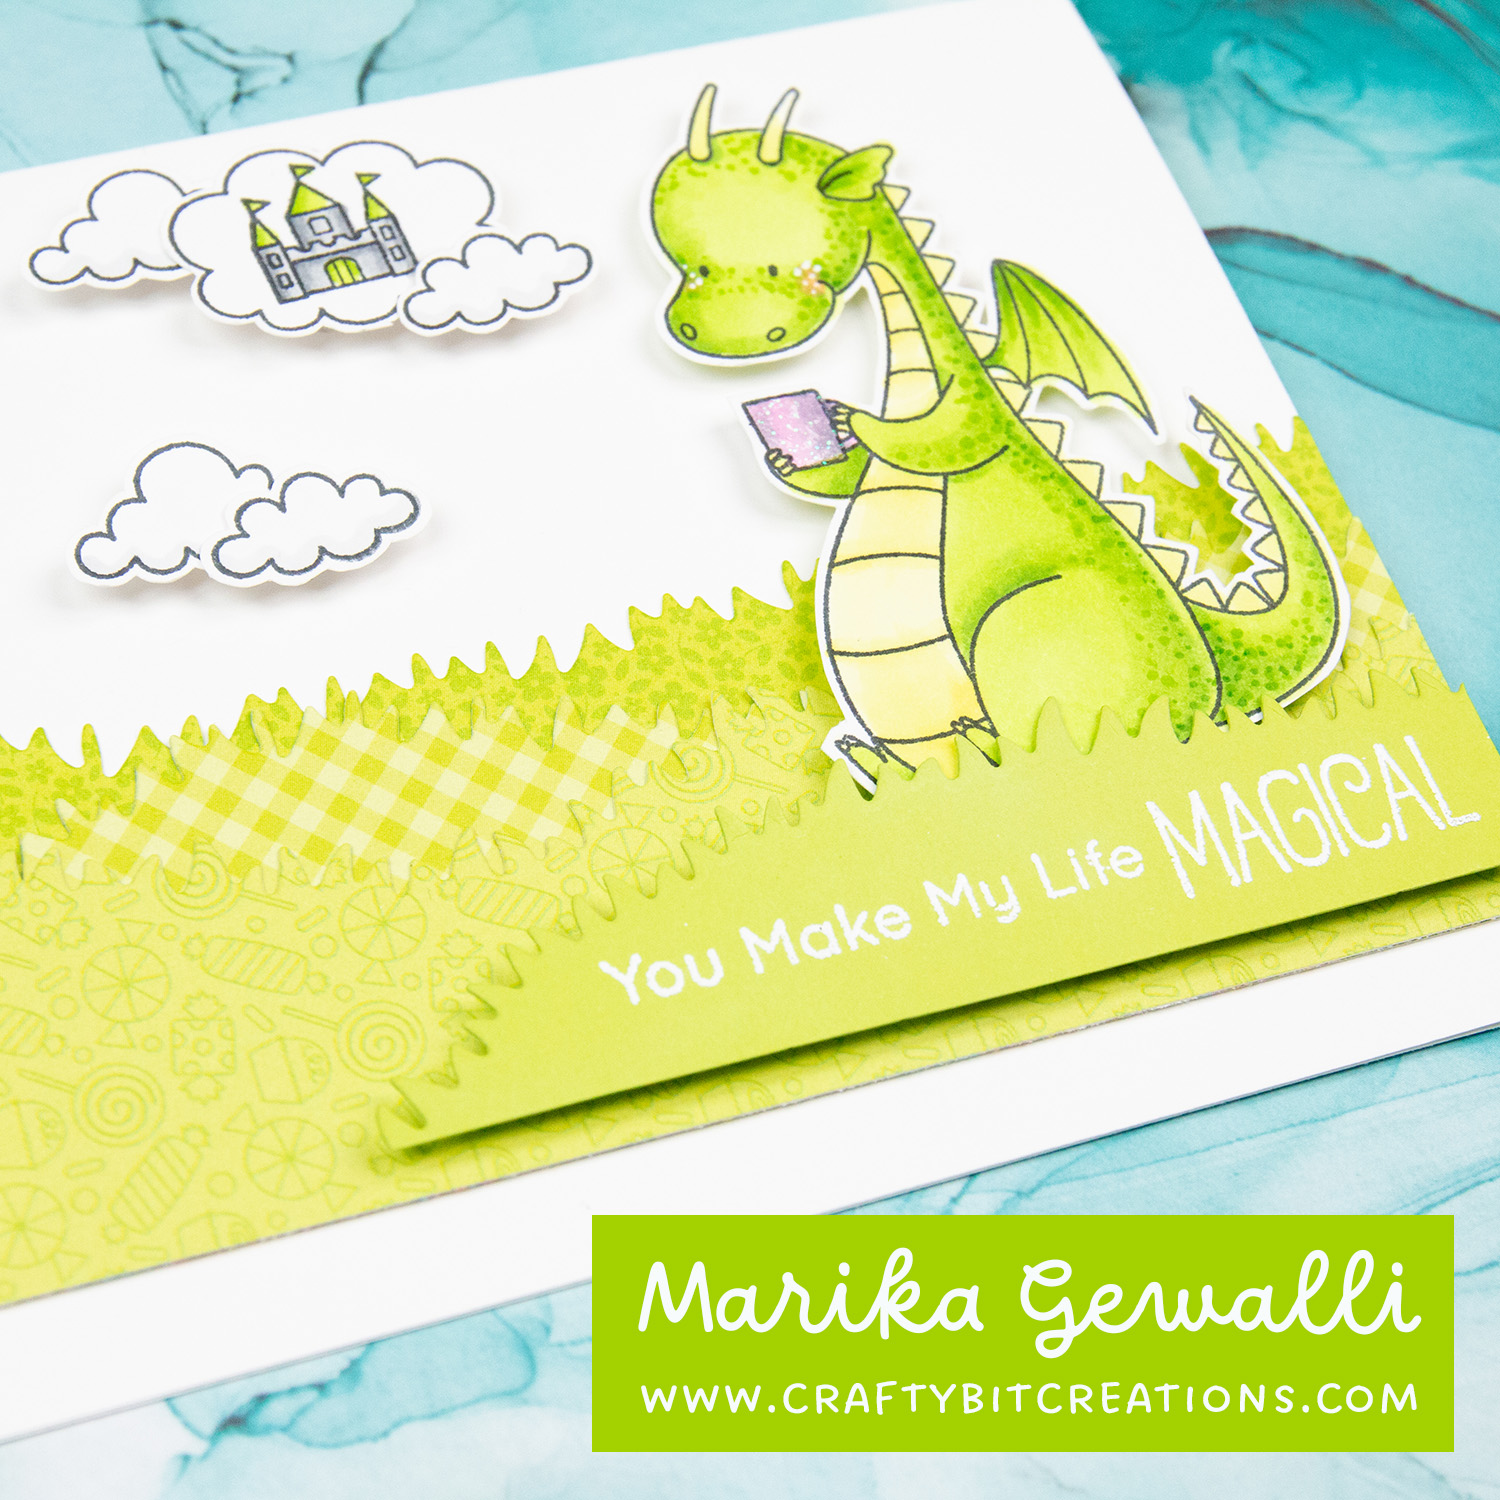
It’s Monday so here is my next entry into My Favorite Things Sketch Challenge, nummer 579. This time around I ended up both turning the sketch upside down and mirrored it. All because I wanted to use this specific dragon from the Magical Friends stamp set.
I wanted to use some strong and bright colors again. It’s been my vibe these past few weeks so why stop a winning concept, well I at least like my creations. So I made a green dragon. And when coloring something that big, like this dragon, sometimes your blends won’t blend as well as for small images. A quick and effective way to hide the bad blend is dots! This also is a cute effect for a dragon as it looks a little like it’s scales.
Hope you like my card! What in card making makes you inspired? For me it’s color!
When possible affiliate links are used, this means that I receive a small commission when products are purchased through the links (at no extra cost to you) I use the money to support my blog and youtube channel. If you like my projects and tutorial please consider supporting me by clicking through these links when you shop. Thanks!
Supplies:
MFT Magical Friends: MFTSSS MFT Magical Dragons: MFTSSS MFT Slimline Grassy Hills Die-namics: MFTSSS Neenah Solar White 80lb: SSSAMZSBC MFT Limelight Card Stock: MFT DD Hey Cupcake 6×6 Pattern Paper Pack: SSSSBC DD Gingham-Linen Rainbow Petite Print: SSSSBC DD Floral-Graph Rainbow Petite Print: SSSSBC Nuvo White Blizzard: SSS Hero Arts White Embossing Powder: SSSAMZSBC MFT On-Point Precision Glue Pen: MFT