Hi Everyone! In todays tutorial I will show you 4 different ways to use 3D Gloss Gel by Prima for backgrounds. I love using pastes and gels to add texture to my backgrounds, it’s that small change that makes the big difference that I love!
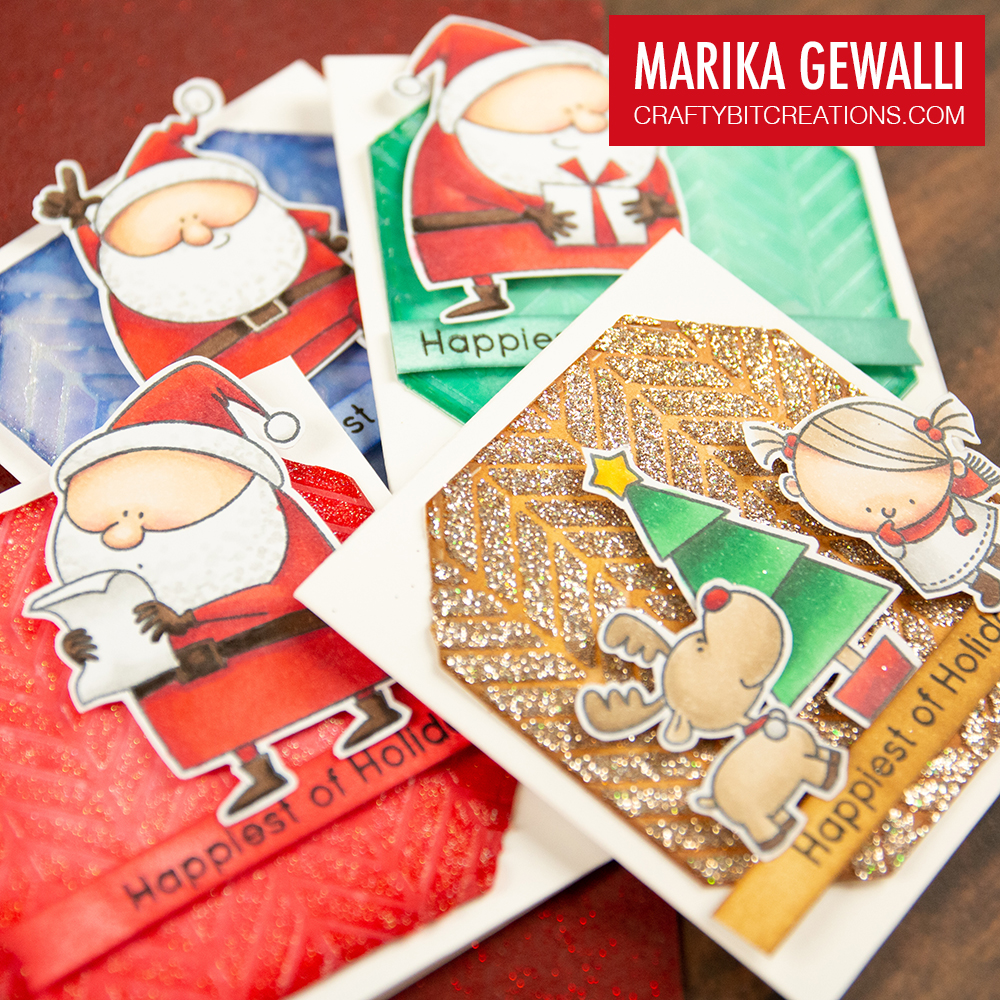
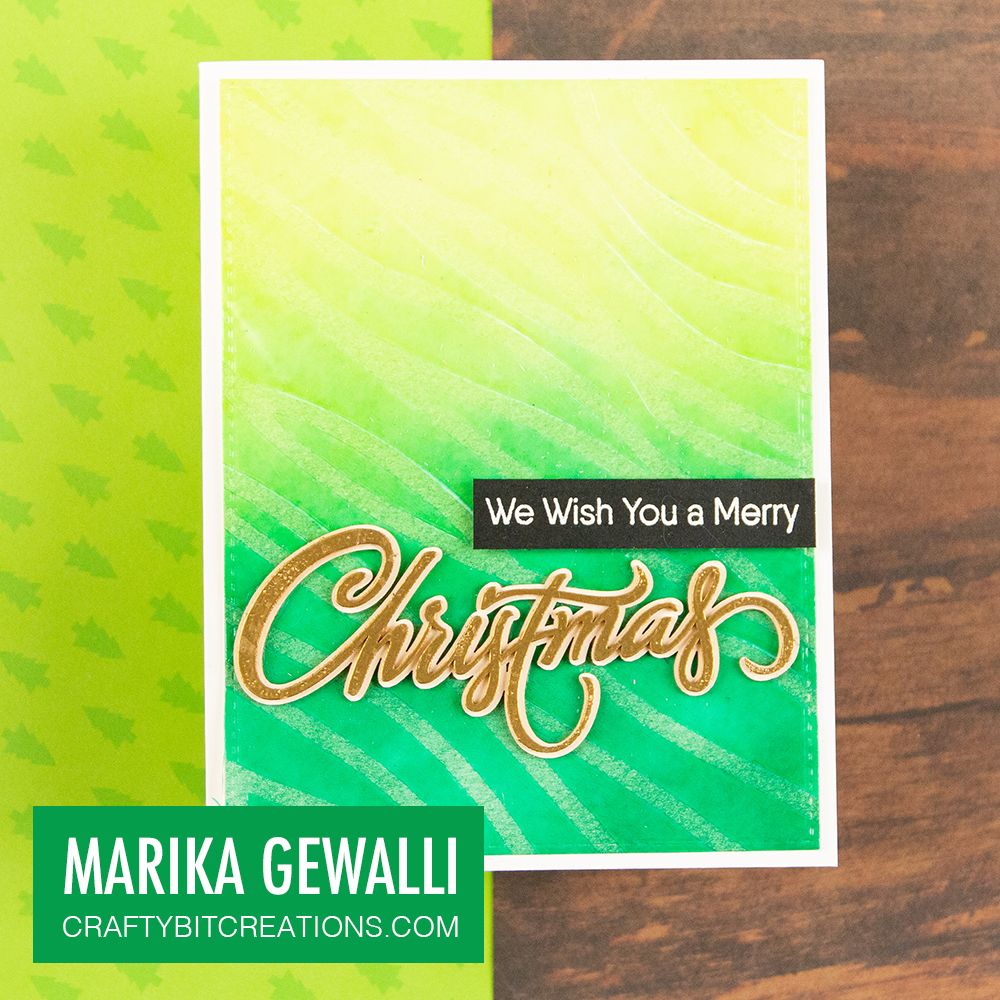
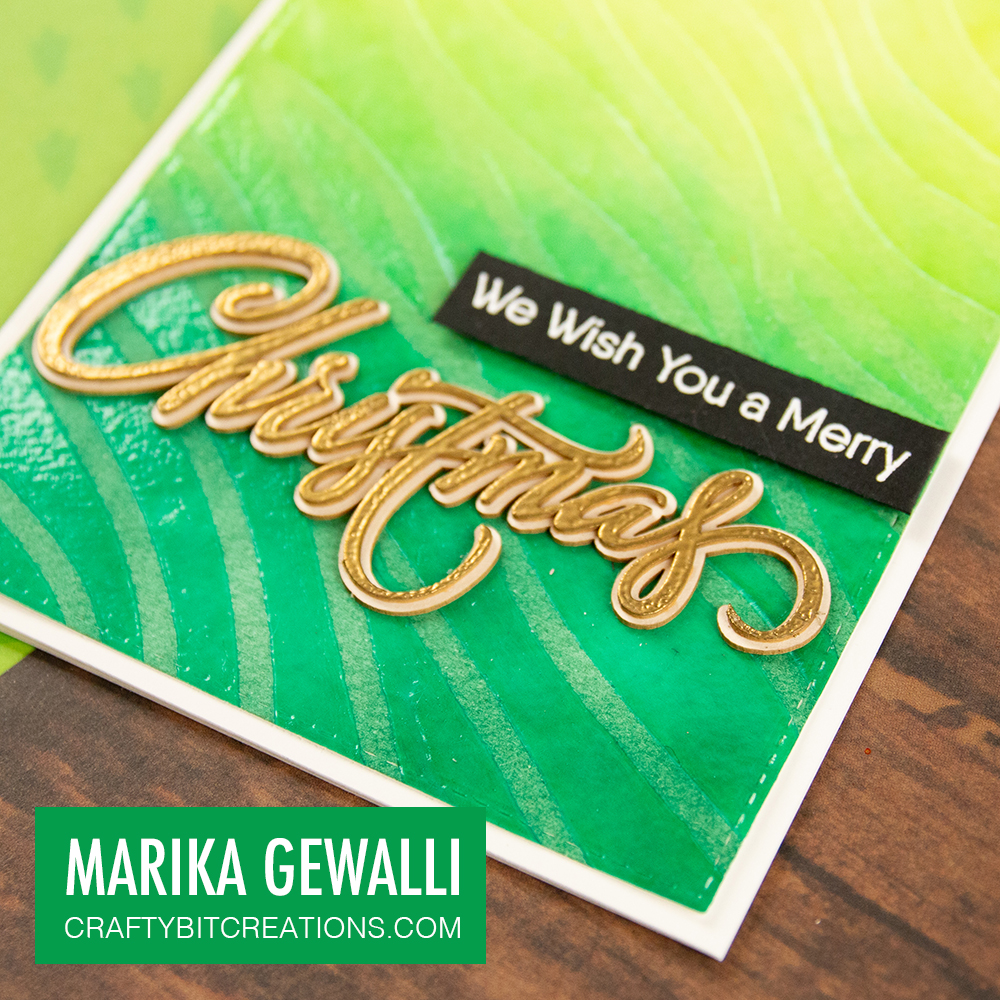
For my cards today I’ve chosen to try different ways to add glitter, to make it pop a little better I’ve ink blended the background diets in different colors, using one lighter and one darker. I also choose to use the same stencil for all of the backgrounds to make the differences between the different techniques a little bit clearer. And to finish them off I’ve used some of the stamps I coloured up for the 30 day colouring challenge that is going on throughout November. If you wanna see the colouring of all of those images I will be sharing that in a couple of colouring videos coming up later in November/December.
So back to the backgrounds, the first background is on a green diecut. I start out using the Gloss Gel on it’s own, I did use that on my card last week, but felt it would be a great for comparison to have it here too, and also I love the simplicity of it.

The second card is on the blue diecut, here I added shimmer underneath the 3D Gloss Gel, of course I didn’t really take in consideration that the shimmer pen would react with the distress ink and the full impact of that didn’t show until the gloss dried. It did give a cool effect, but maybe not was I was after.

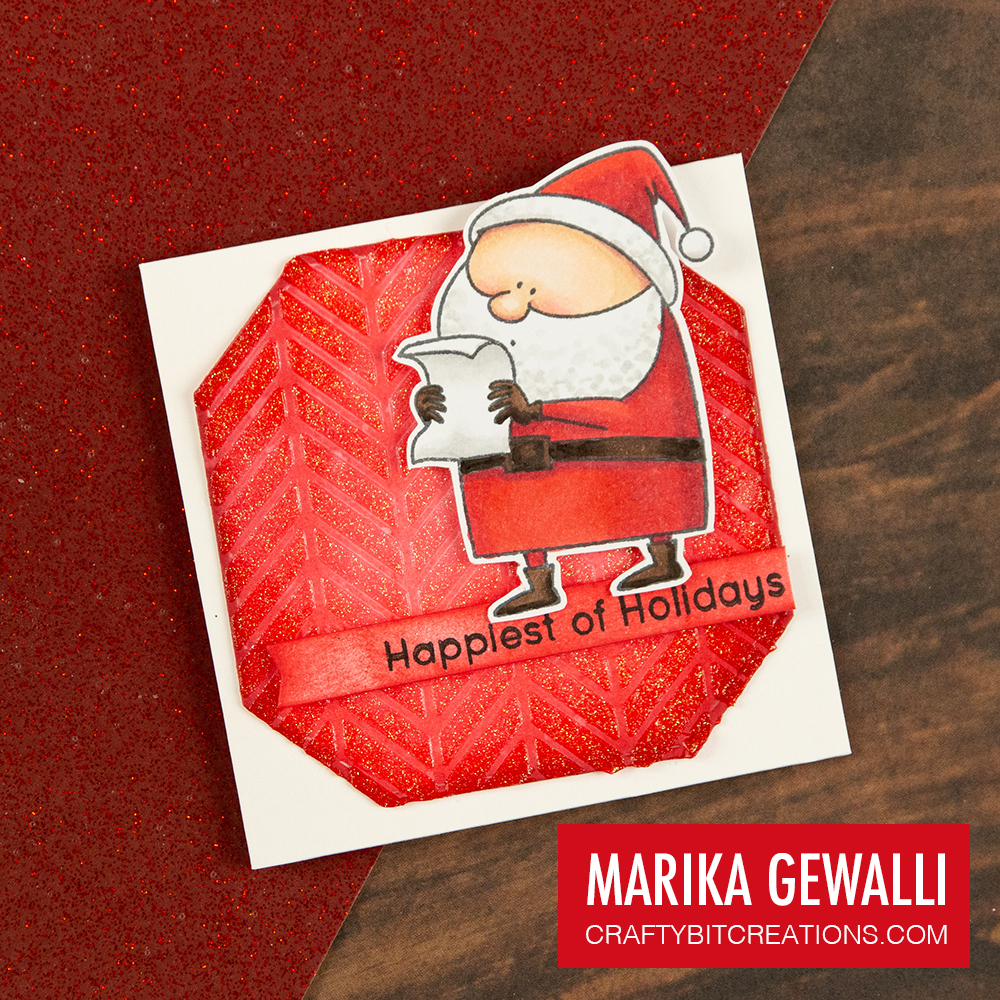
The third card I mixed in glitter into the gel, I really really liked the result, this also reduces the need to buy all the different glitter pastes as you can mix any kind of glitter into your paste! I ended up making two card with this mainly because I mixed a little bit to much, so the left over I spread on an extra background diecut. I think I like the white on white effect the most, however it doesn’t photograph that well.

For the fourth and last card I added the glitter on top of the gel. I think I loved this background the most, however the glitter do transfer a bit, so if you don’t like getting glitter everywhere this technique might not be for you.

If you read this long I want to thank you for visiting my blog and I would like to ask you if you have any other materials you want me to use for upcoming 4 ways tutorials? Hope you have an awesome day!
Copic:
E41, E42, E43, E44, E47, E49
R24, R46, R39,
E000, E00, E21, E11, E04, R30, R32
T0, T2, T4, 0
G03, G17, G29
Y08, Y38
Supplies:
When possible affiliate links are used, this means that I receive a small commission when products are purchased through the links (at no extra cost to you) I use the money to support my blog and youtube channel. If you like my projects and tutorial please consider supporting me by clicking through these links when you shop. Thanks!