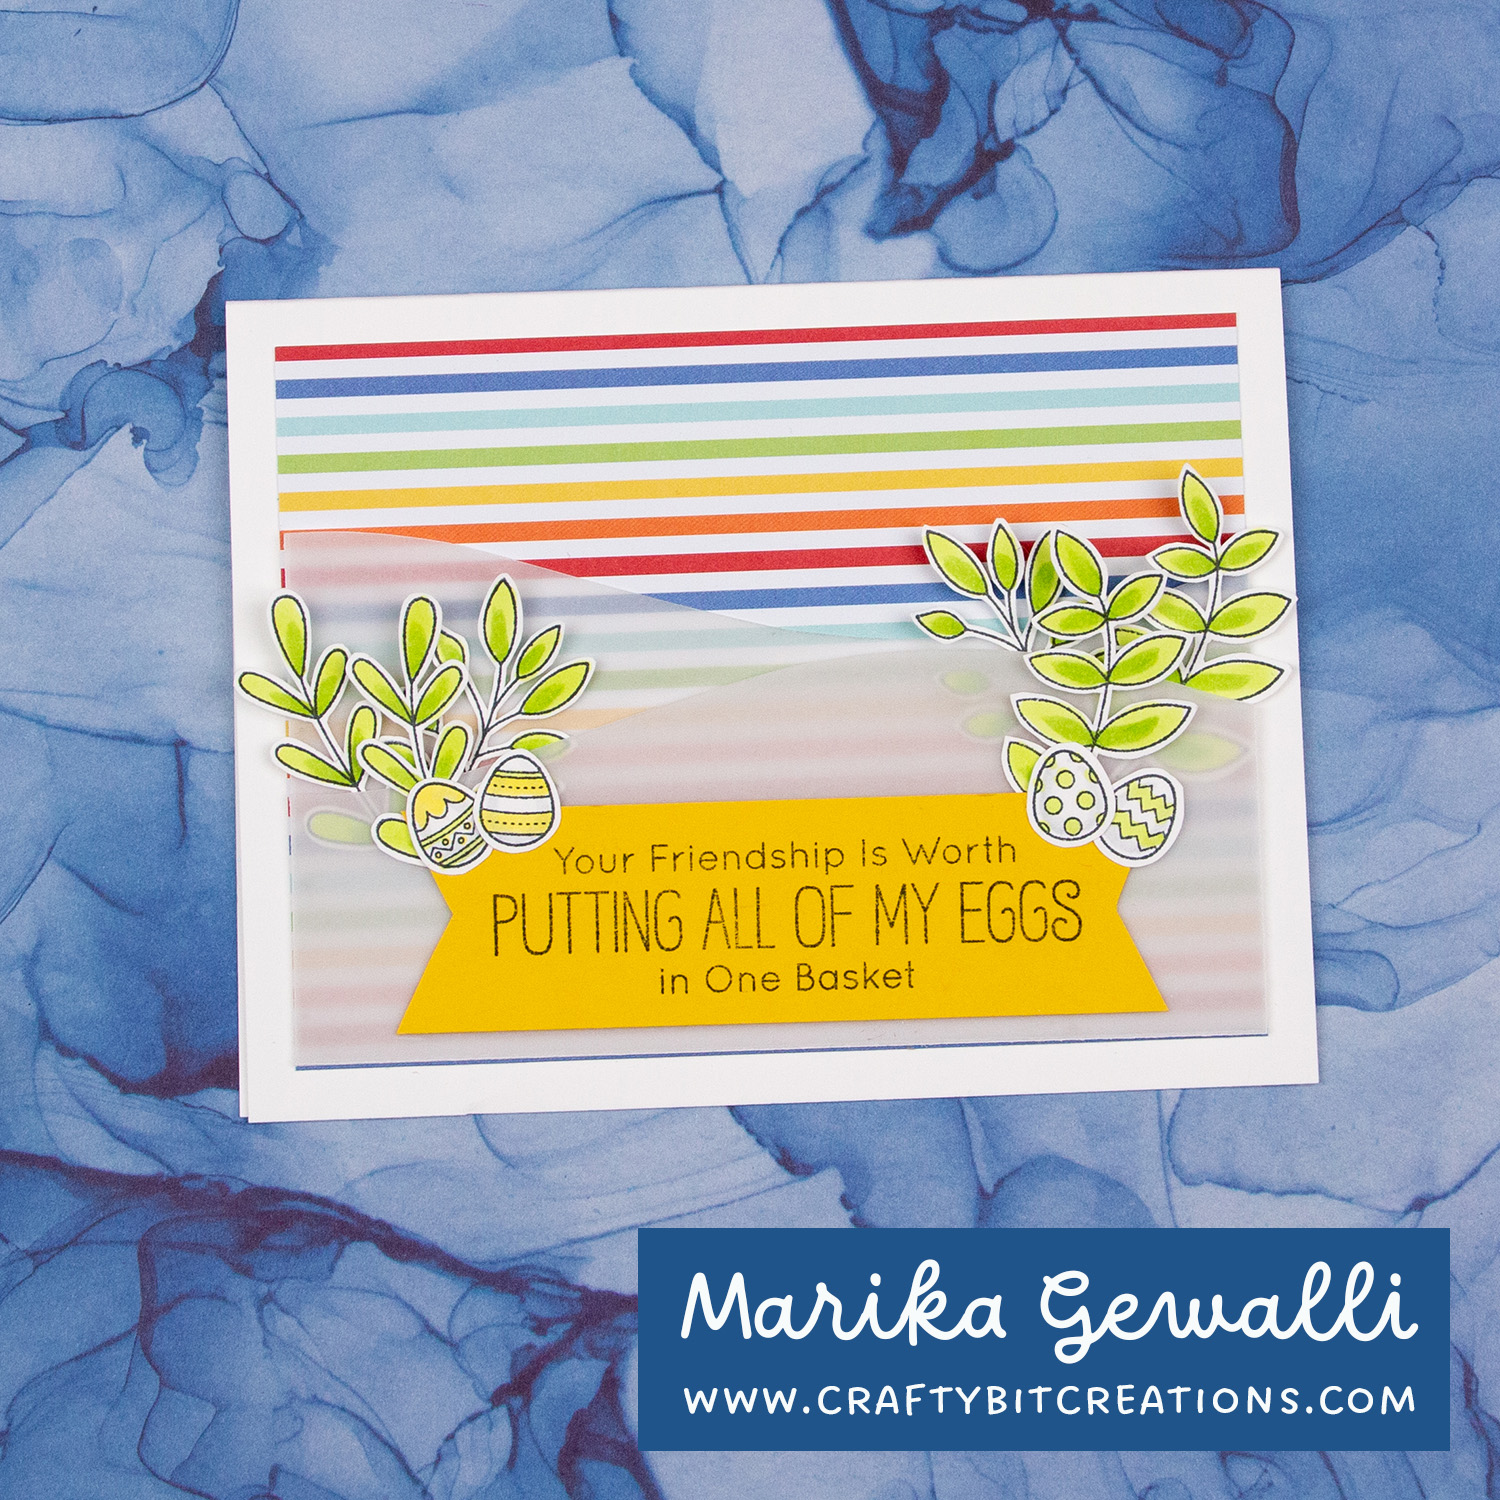
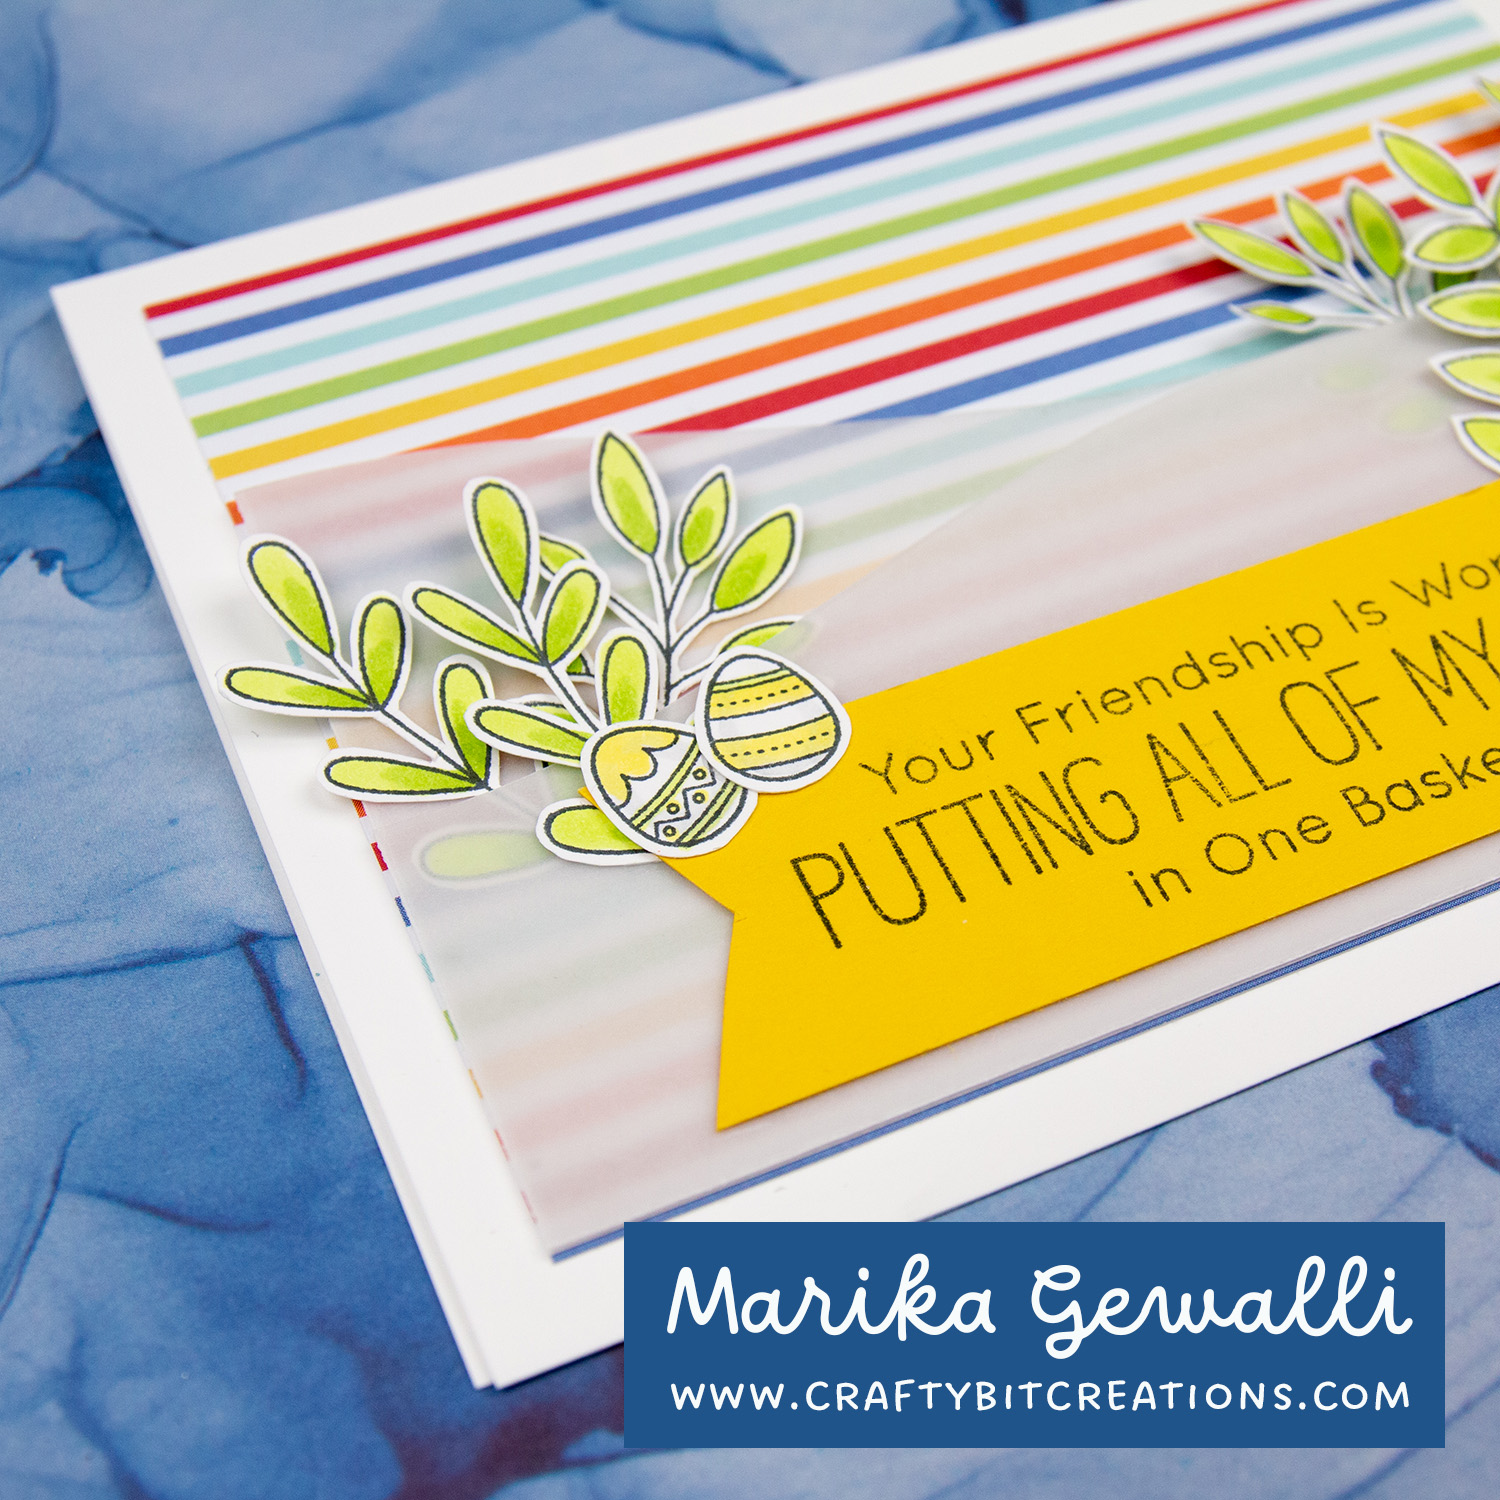
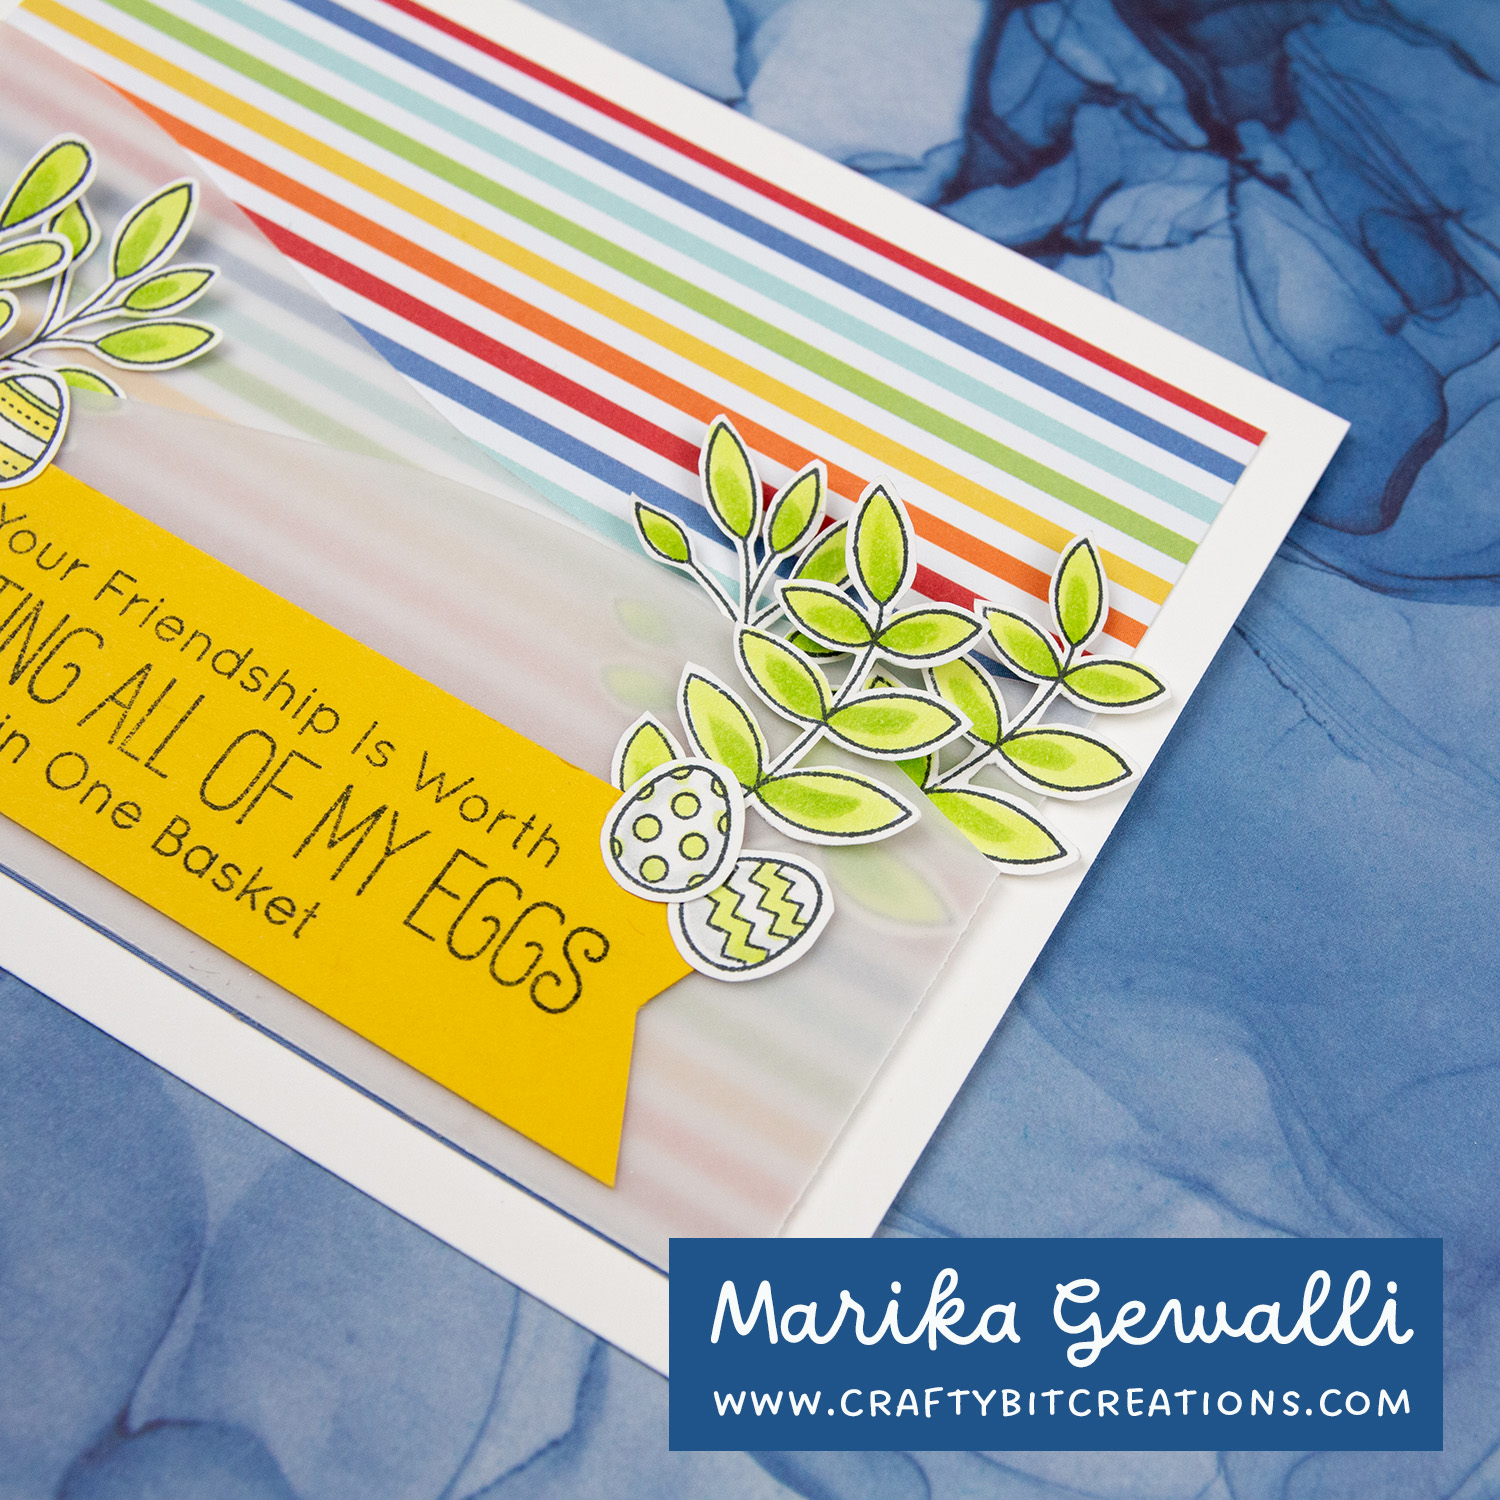
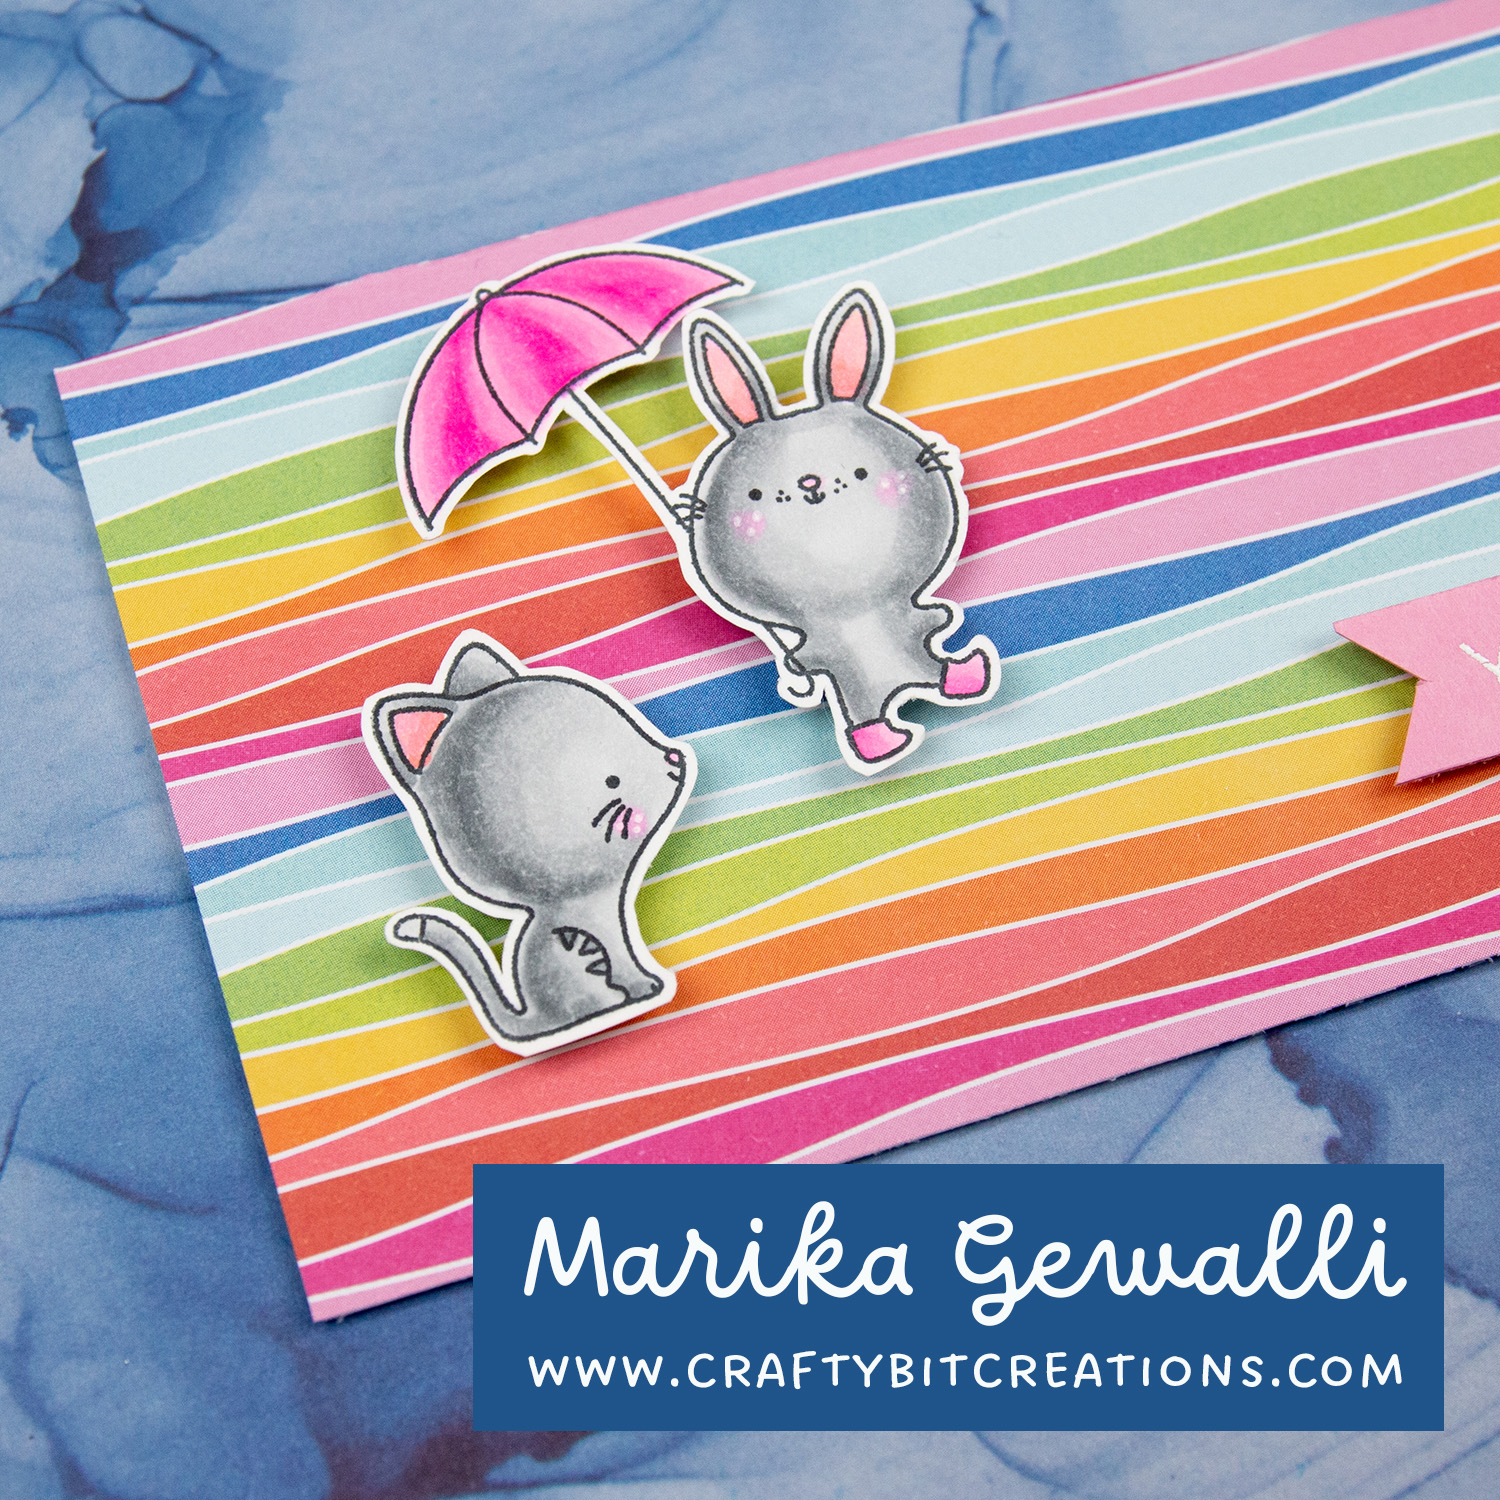
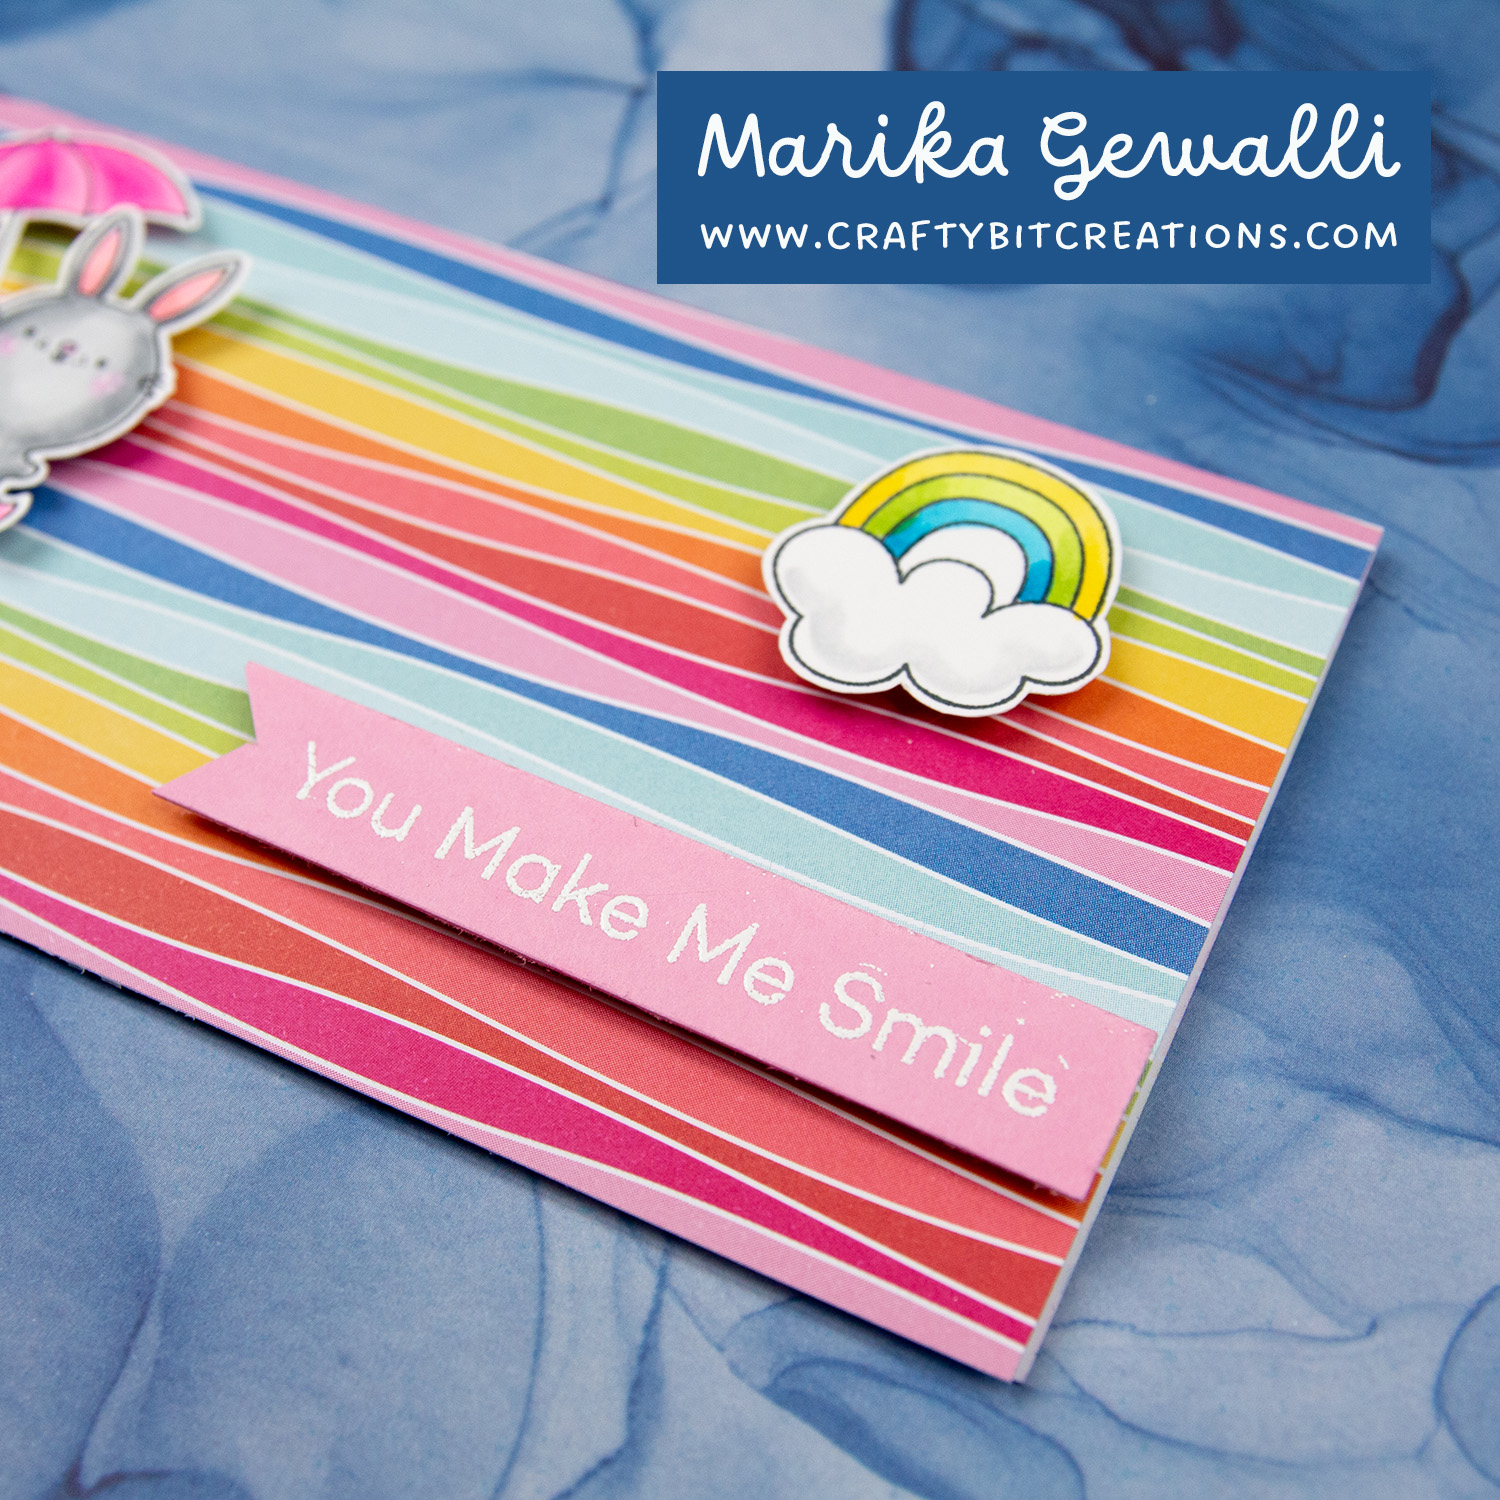
I completely love the Happy Patterns Paper Pad, it’s so bright and rainbow! It also have quite a lot of contrast with the bright colors together but also the bright white areas. I sometimes struggle using those kind of papers and I thought I’ll take the bull by it’s horns so to say. So today I’m showing you two ways of using bright pattern papper for my cards.
When possible affiliate links are used, this means that I receive a small commission when products are purchased through the links (at no extra cost to you) I use the money to support my blog and youtube channel. If you like my projects and tutorial please consider supporting me by clicking through these links when you shop. Thanks!
I’ve had this Feel Better stamp set in my stash for awhile now (sadly it’s retired). And the first time I colored it up when I just gotten it, I just couldn’t get it soft enough with my copic markers and I really didn’t like the result. But this time around I decided to try using my polychromos color pencils and I love how it came out.
The layout of the card is based on the My Favorite Things Sketch Challenge 586. And as the coloring ended being real soft I wanted to have an even softer background to make them stand out. So I used the smooching technique with two blues for the sky and two greens for the grass. I then splattered the same inks and a couple of darker in the same color scheme, so blues for the sky and greens for the grass. Both got some splatters of Ground Espresso as I love it. And finally I splattered some pearlescent watercolor just to get a little bit of glitter.
The sentiment is stamped in Vintage Timber Ink as I felt it would go great with the rest of the soft colors. And I finished the card by stamping the inside with the tissuebox and another sentiment. Hope you liked the card if you want to see the rest of my sketch challeges this year you can find them HERE.
Polychromos
Ivory, Light Flesh, Cinnamon, Bistre, Nougat, Walnut Brown, Black, Light Yellow Ochre, Caput Mortuum Violet, Red-Violet, Pink Carmine, Rose Carmine, Dark Flesh, Cold Grey IV, VI, Warm Grey I, II, III, IV, V, VI
When possible affiliate links are used, this means that I receive a small commission when products are purchased through the links (at no extra cost to you) I use the money to support my blog and youtube channel. If you like my projects and tutorial please consider supporting me by clicking through these links when you shop. Thanks!
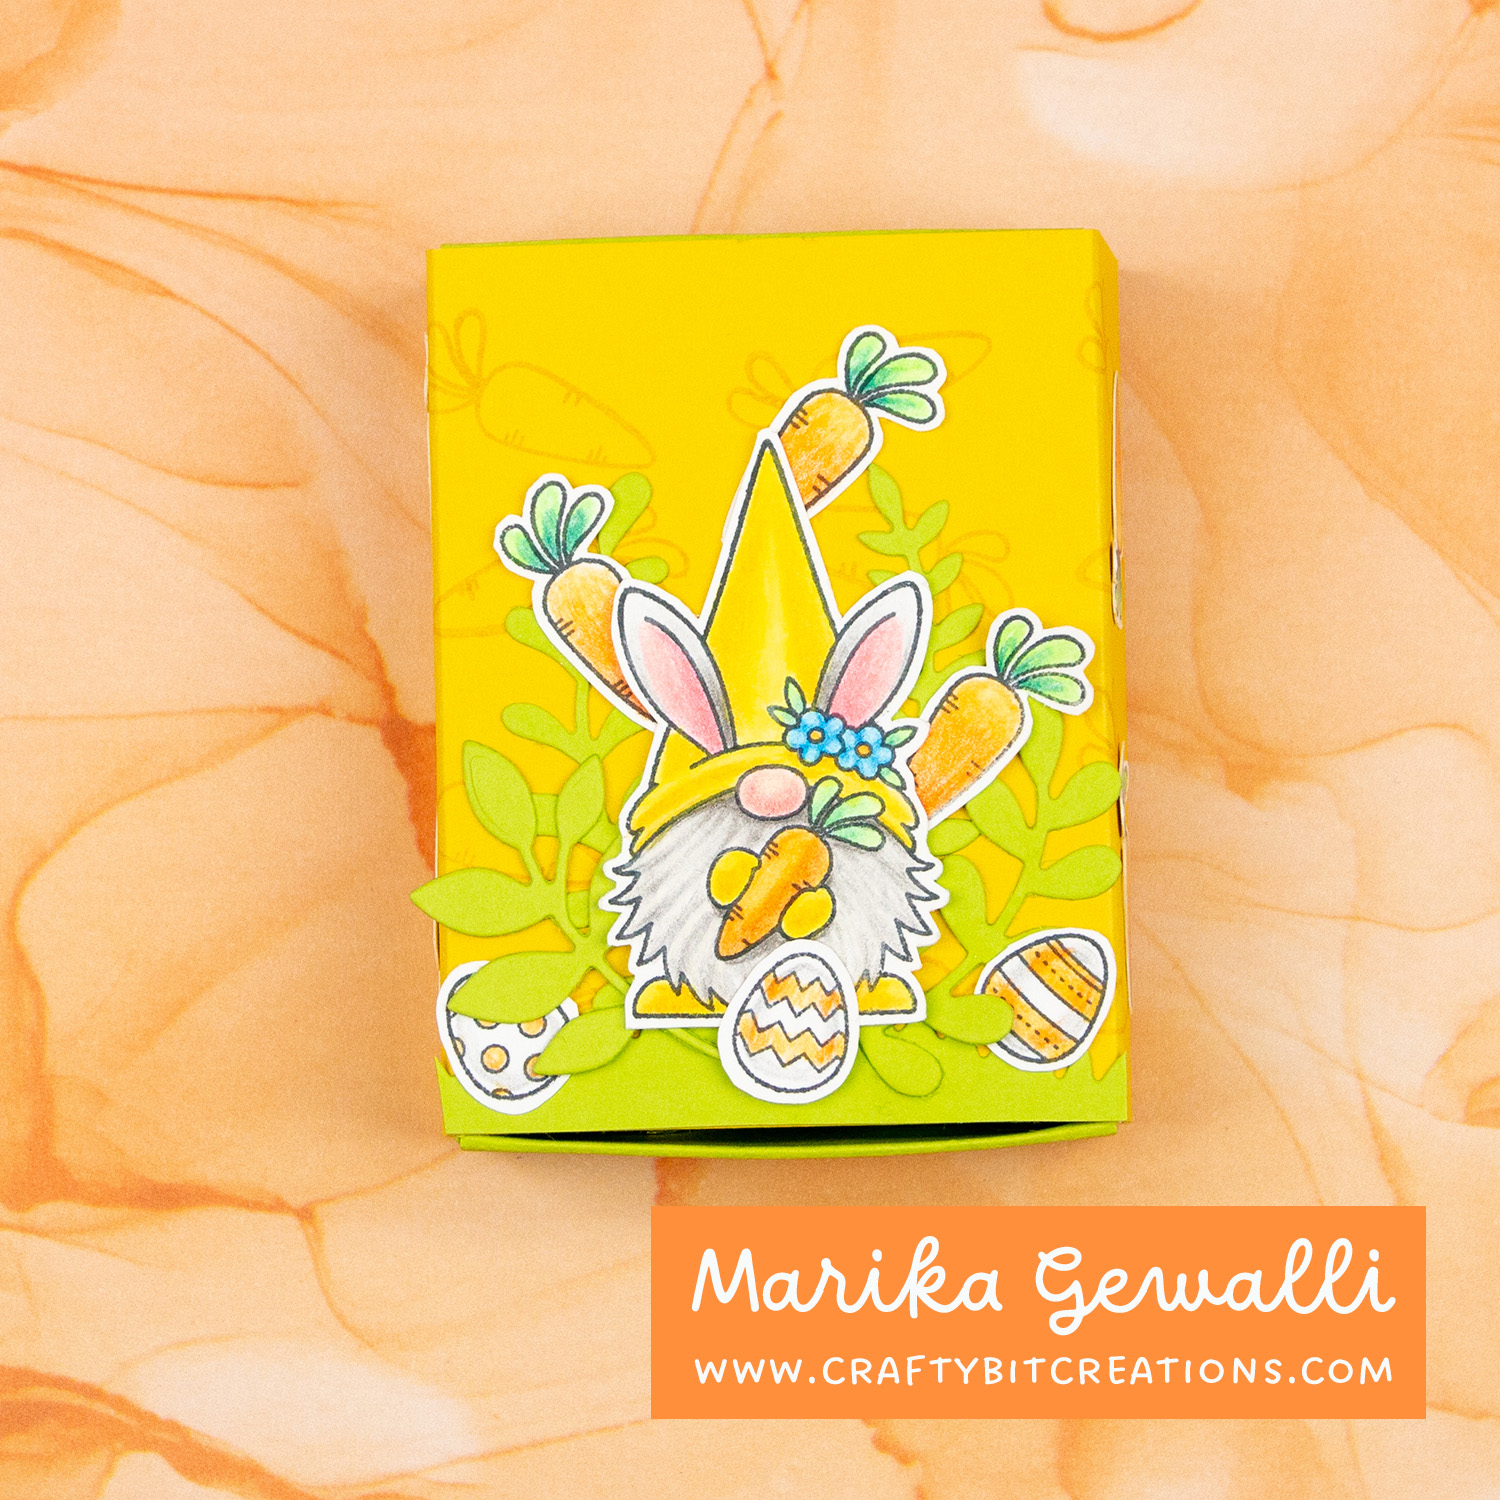
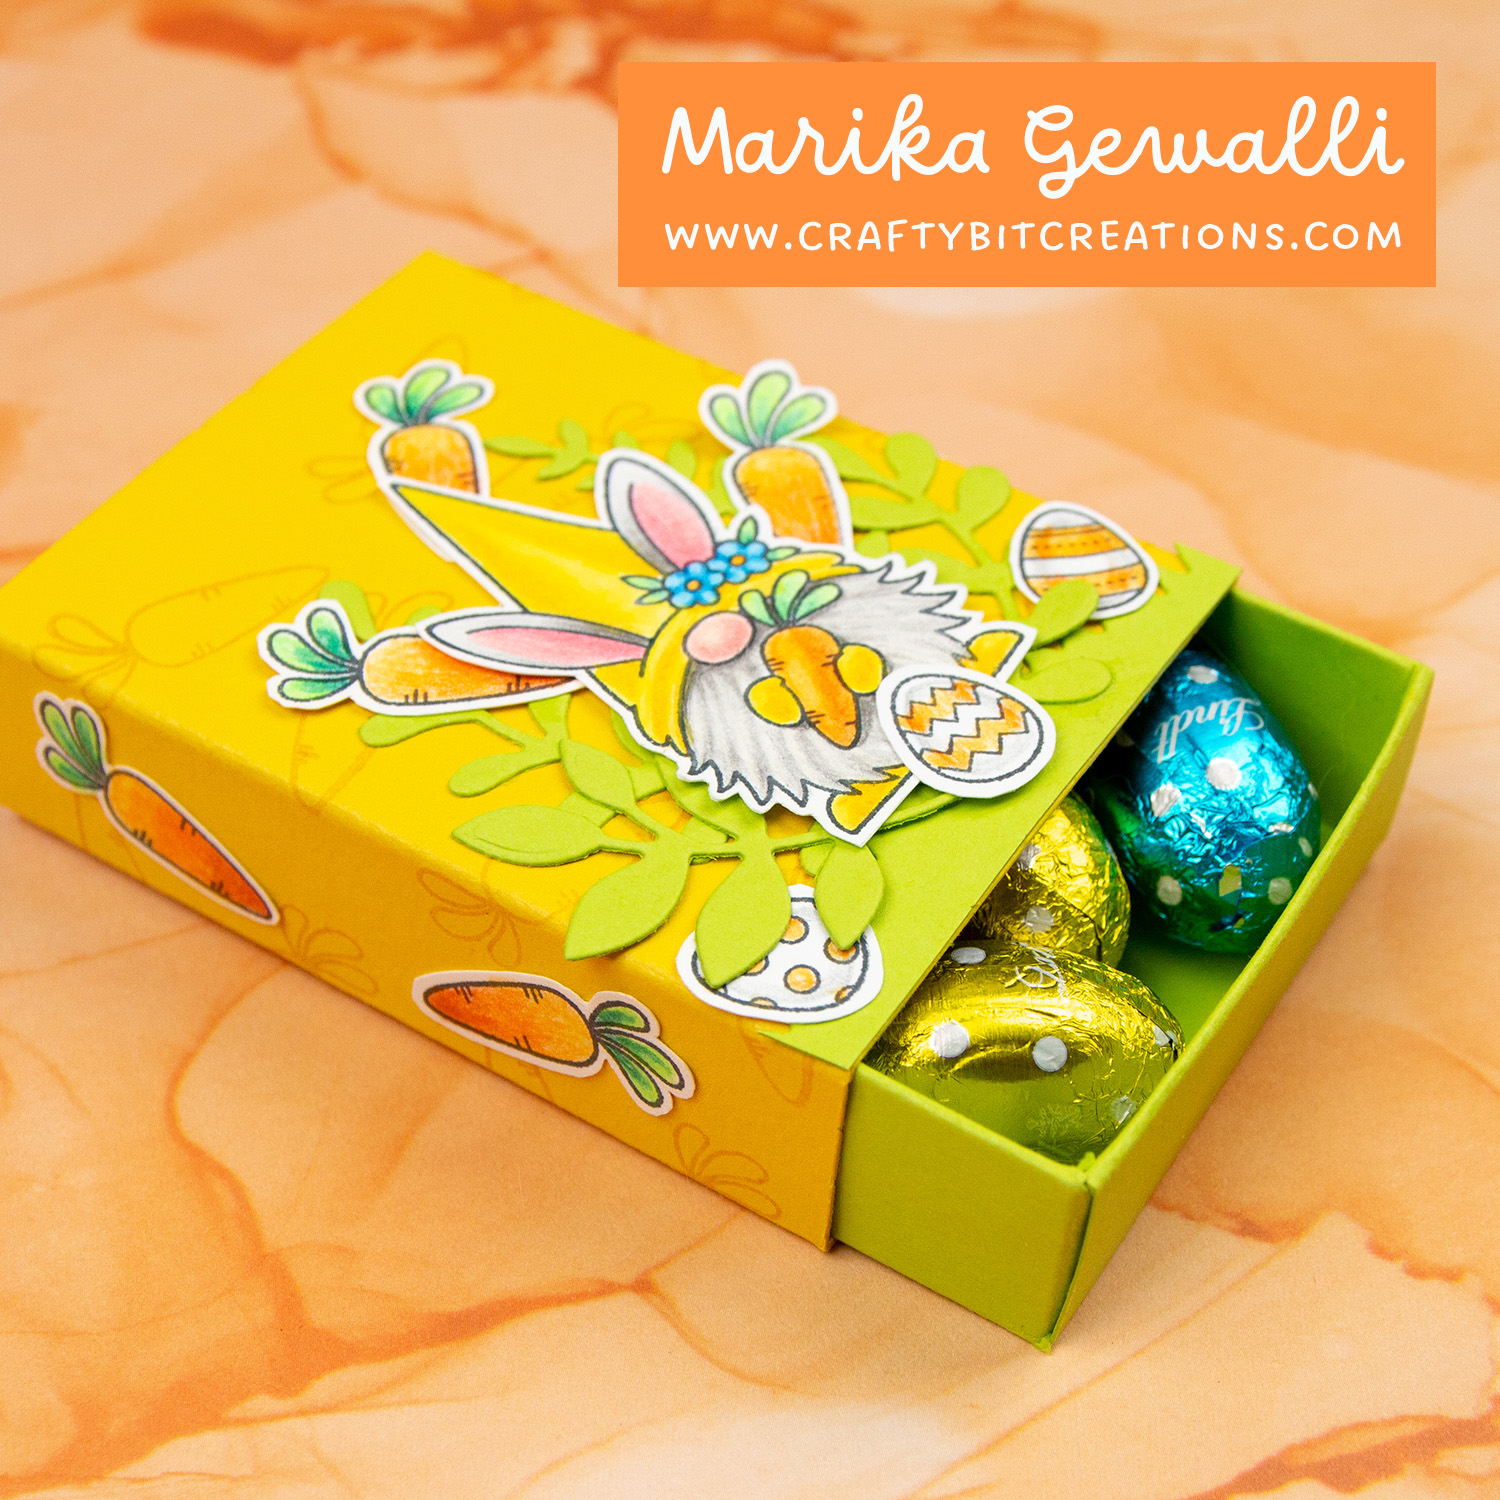
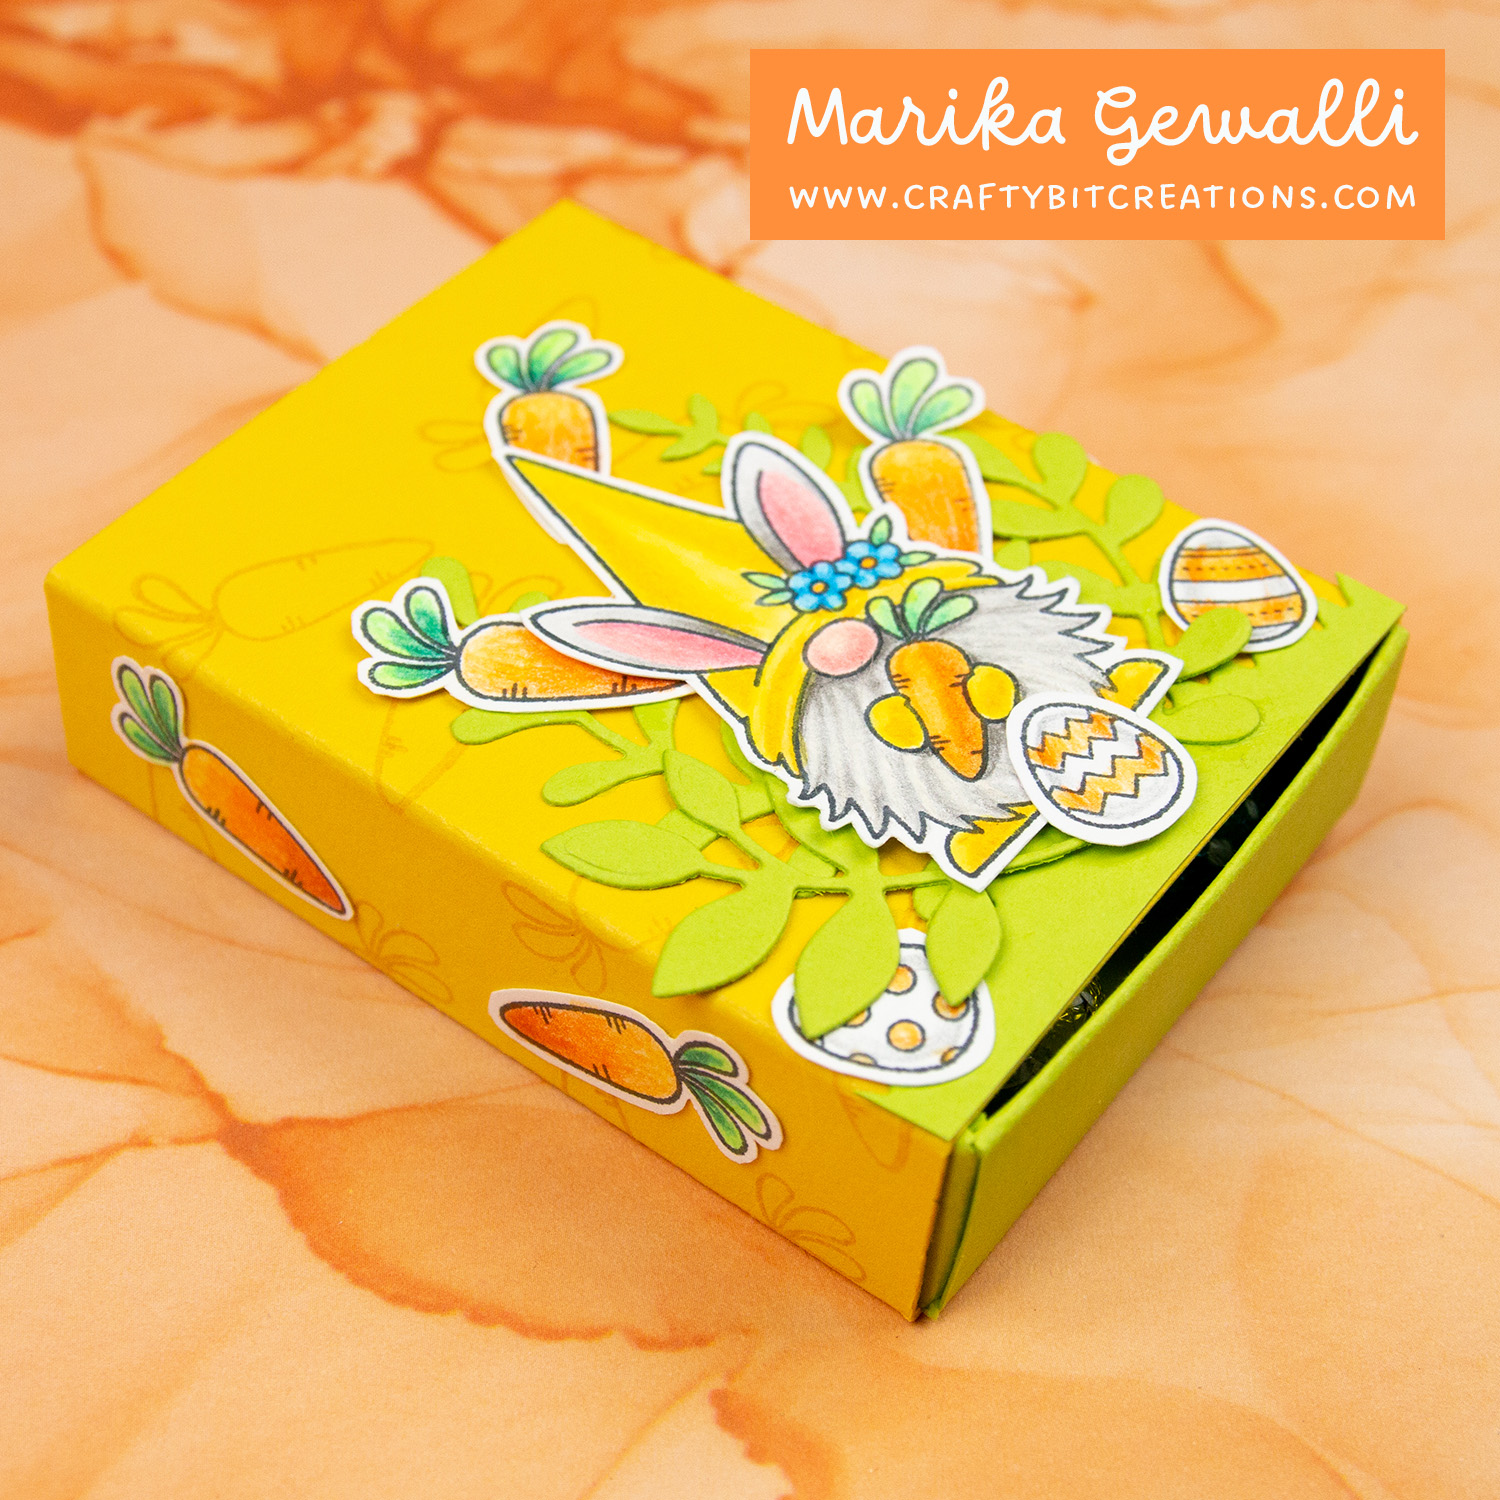
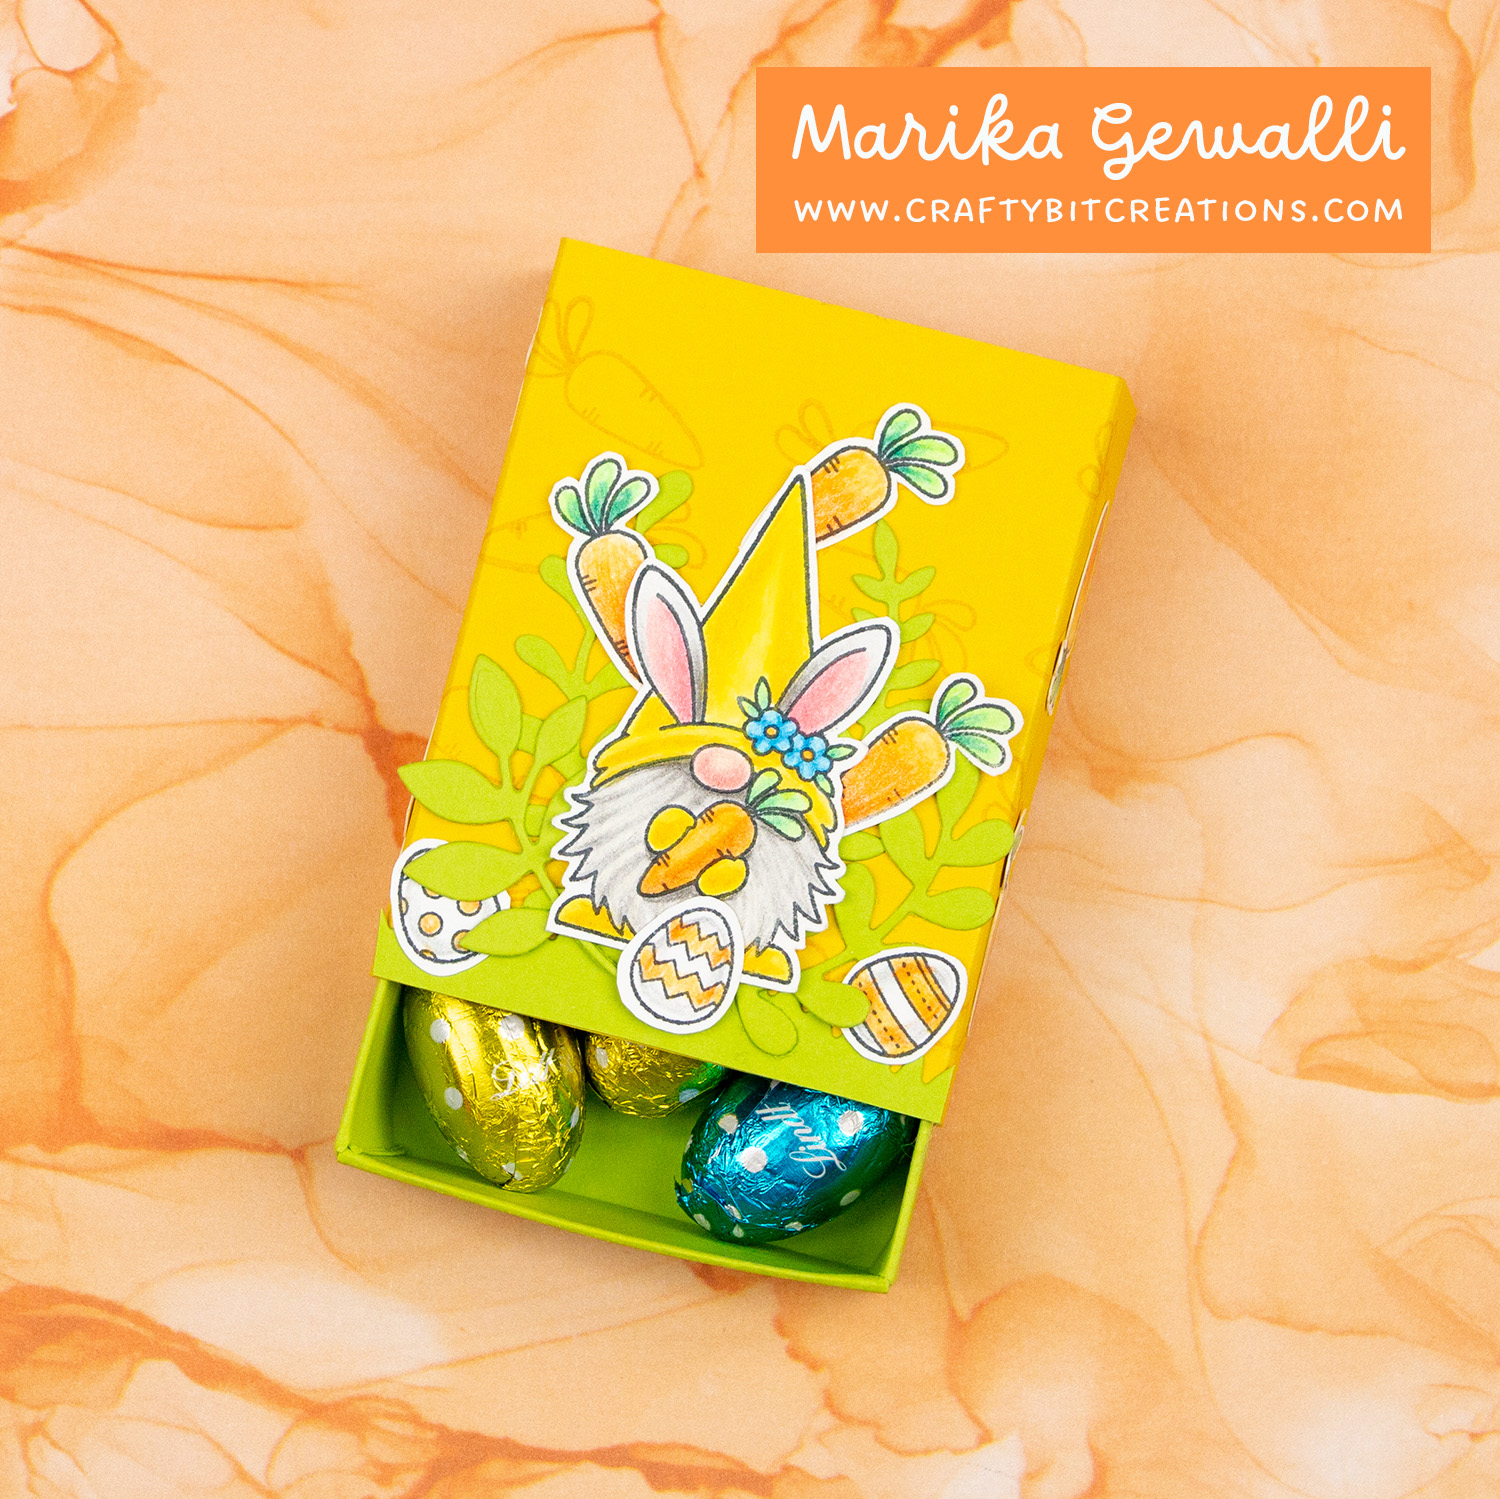
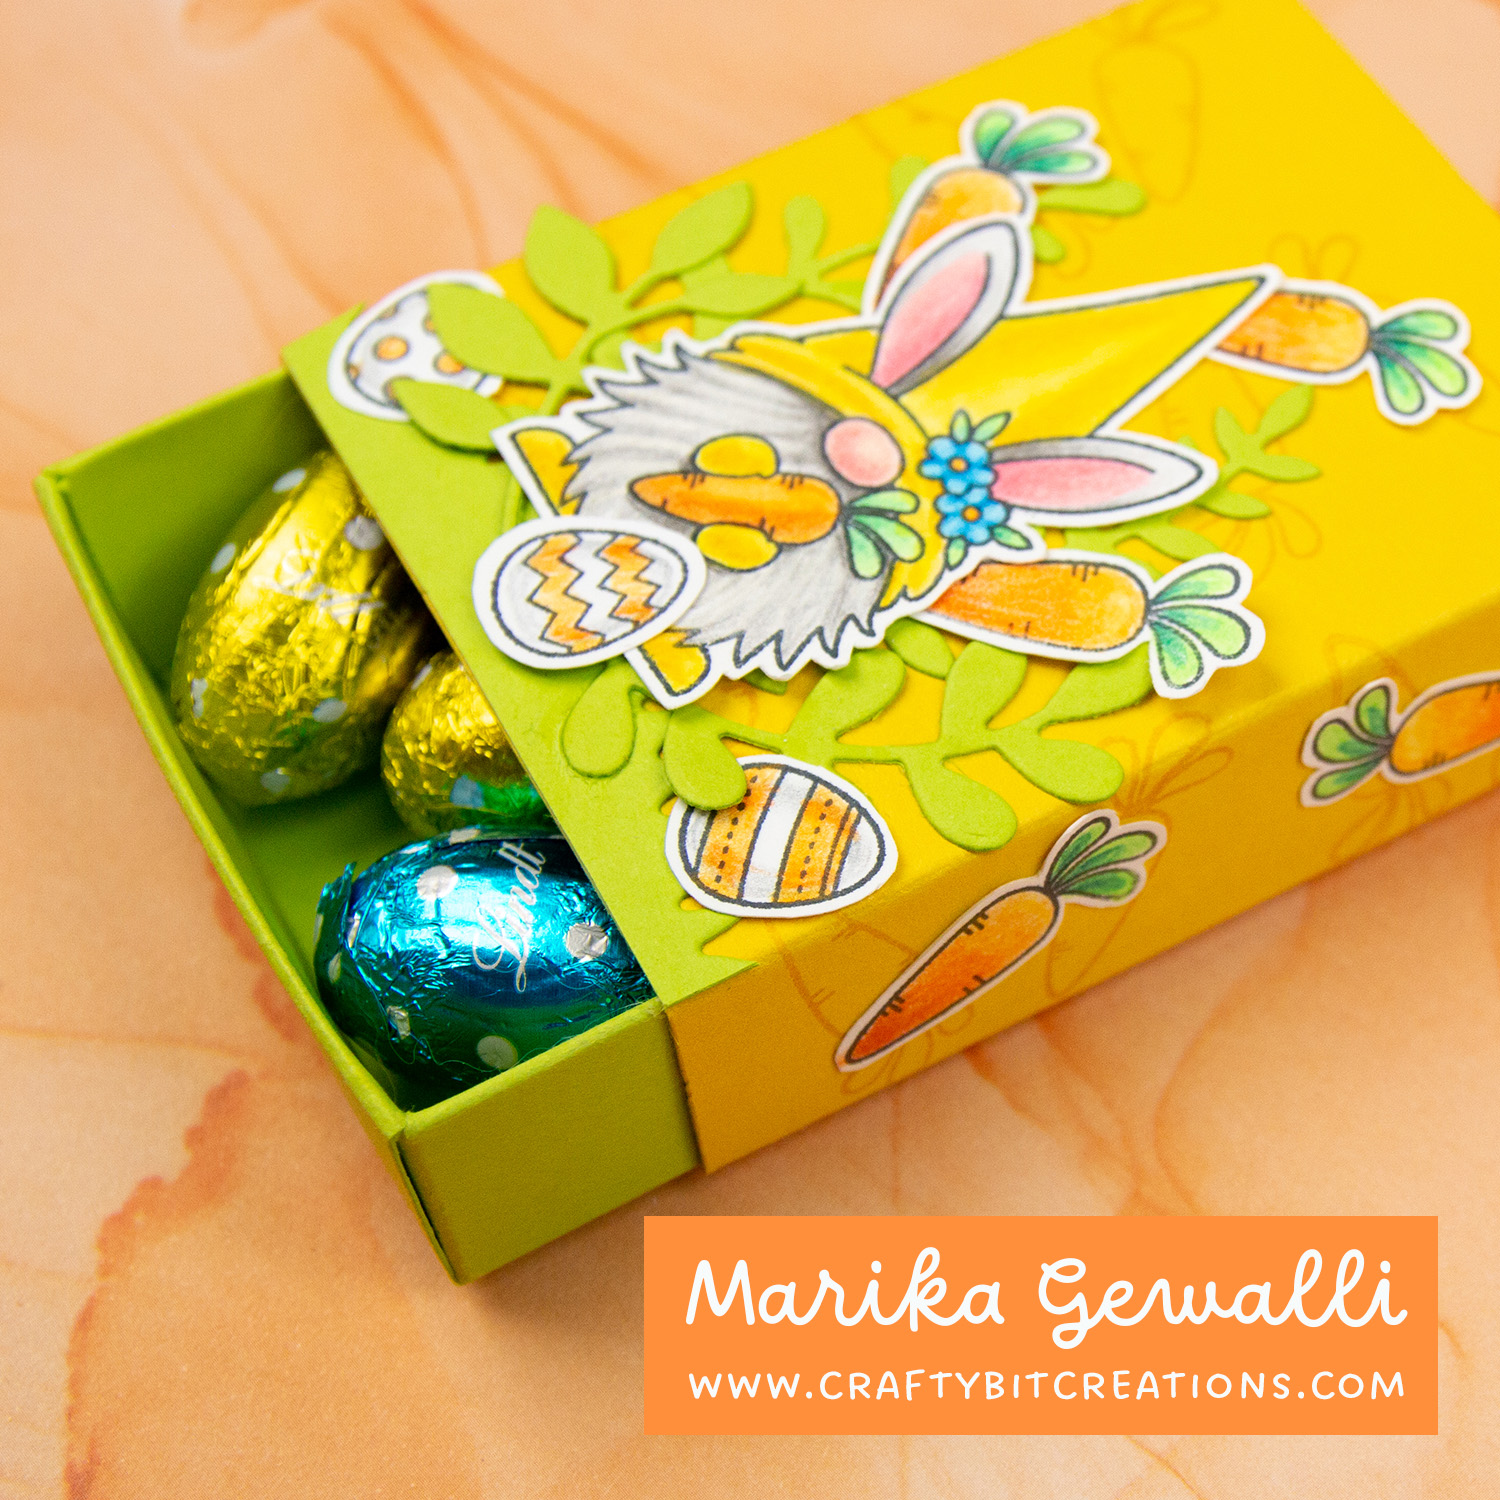
With easter coming closer and closer I thought I would show you how to make a mini easter matchbox. This matchbox is sized to fit 8 Lindth Chocolate Mini Eggs, and could be perfect for small table gifts on your easter lunch, or just to give as a little easter gift.
I started by coloring up a bunch of images from the Spring Gnome stamp set with my polychromos colored pencils. I think coloring is very soothing so I sat in front of the tv coloring away. I then cut the images out. For the box I use Lemon Drop Cardstock for the outer part and Limelight Cardstock for the drawer. To give the outside a little more interest I used the matching Lemon Drop Ink and stamped the cute little carrot all over it. After putting the box together I decorated it with my colored images and some diecuts from the Fab Foliage Die-namics.
You can find the templates, cutfiles and pdf for this box HERE.
Polychromos Colored Pencils
Cold Grey I, II, III, IV, VI, Light Flesh, Dark Flesh, Sanguine, Light Phtalo Blue, Light Green, Cobalt Blue-Greenish, Cinnamon, Light Chrome Yellow, Black, Terracotta, Light Yellow Ochre, Rose Carmine, Dark Chrome Yellow, Hookers Green, Ivory, Orange Glaze
When possible affiliate links are used, this means that I receive a small commission when products are purchased through the links (at no extra cost to you) I use the money to support my blog and youtube channel. If you like my projects and tutorial please consider supporting me by clicking through these links when you shop. Thanks!
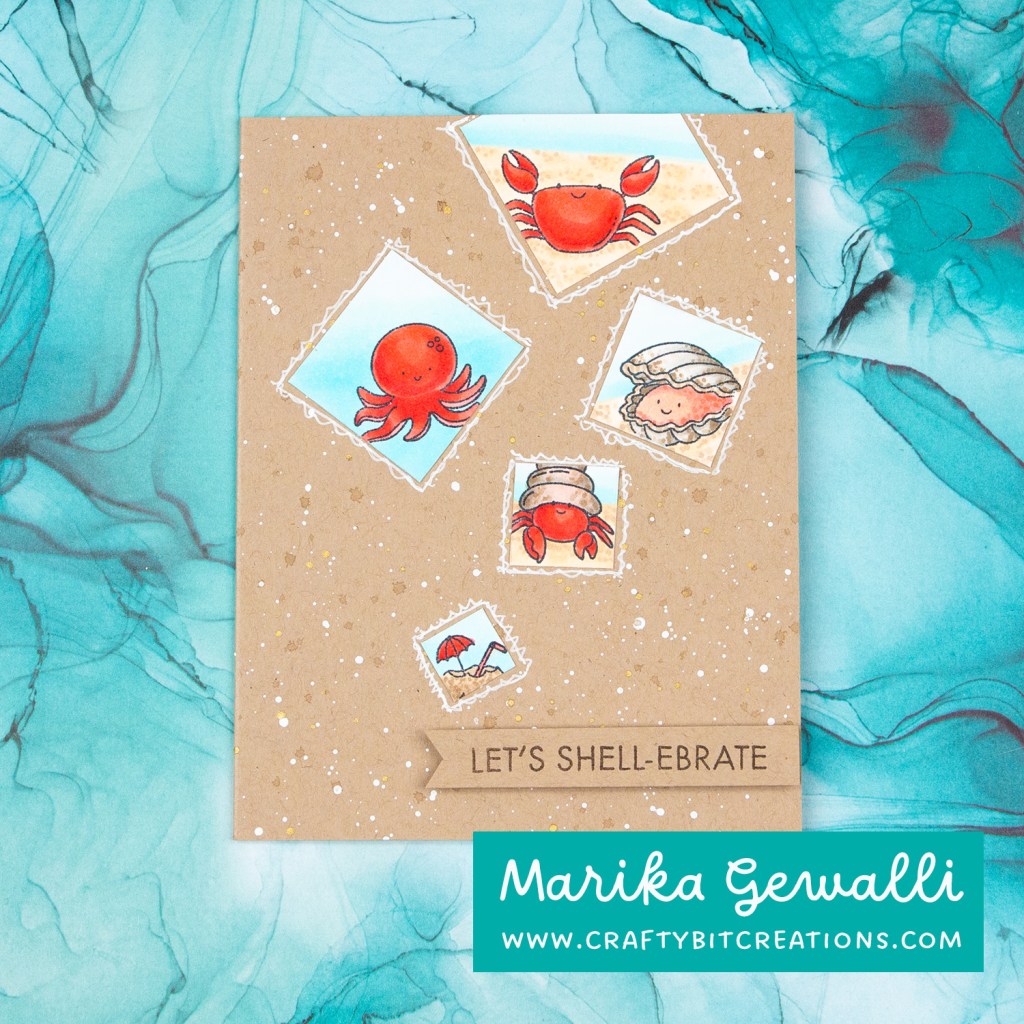
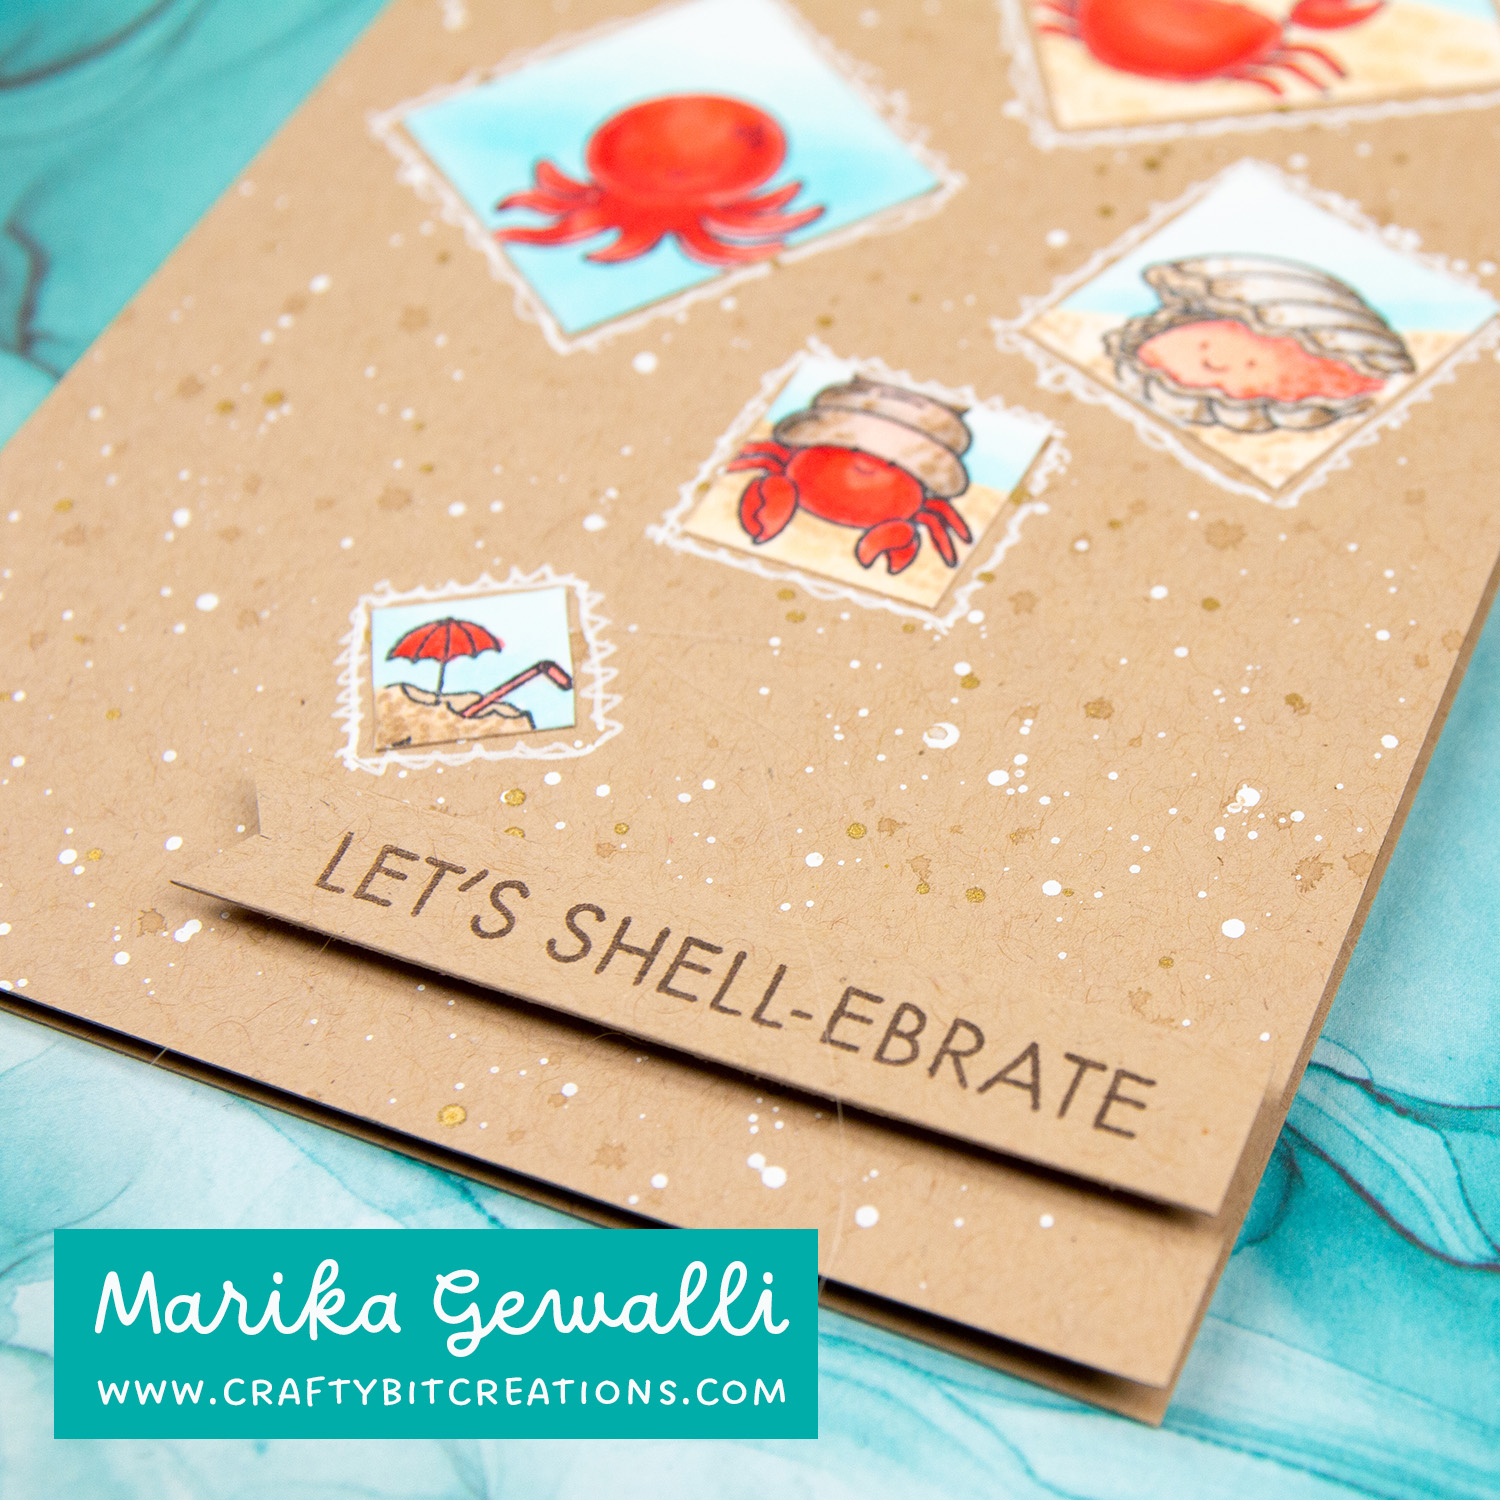
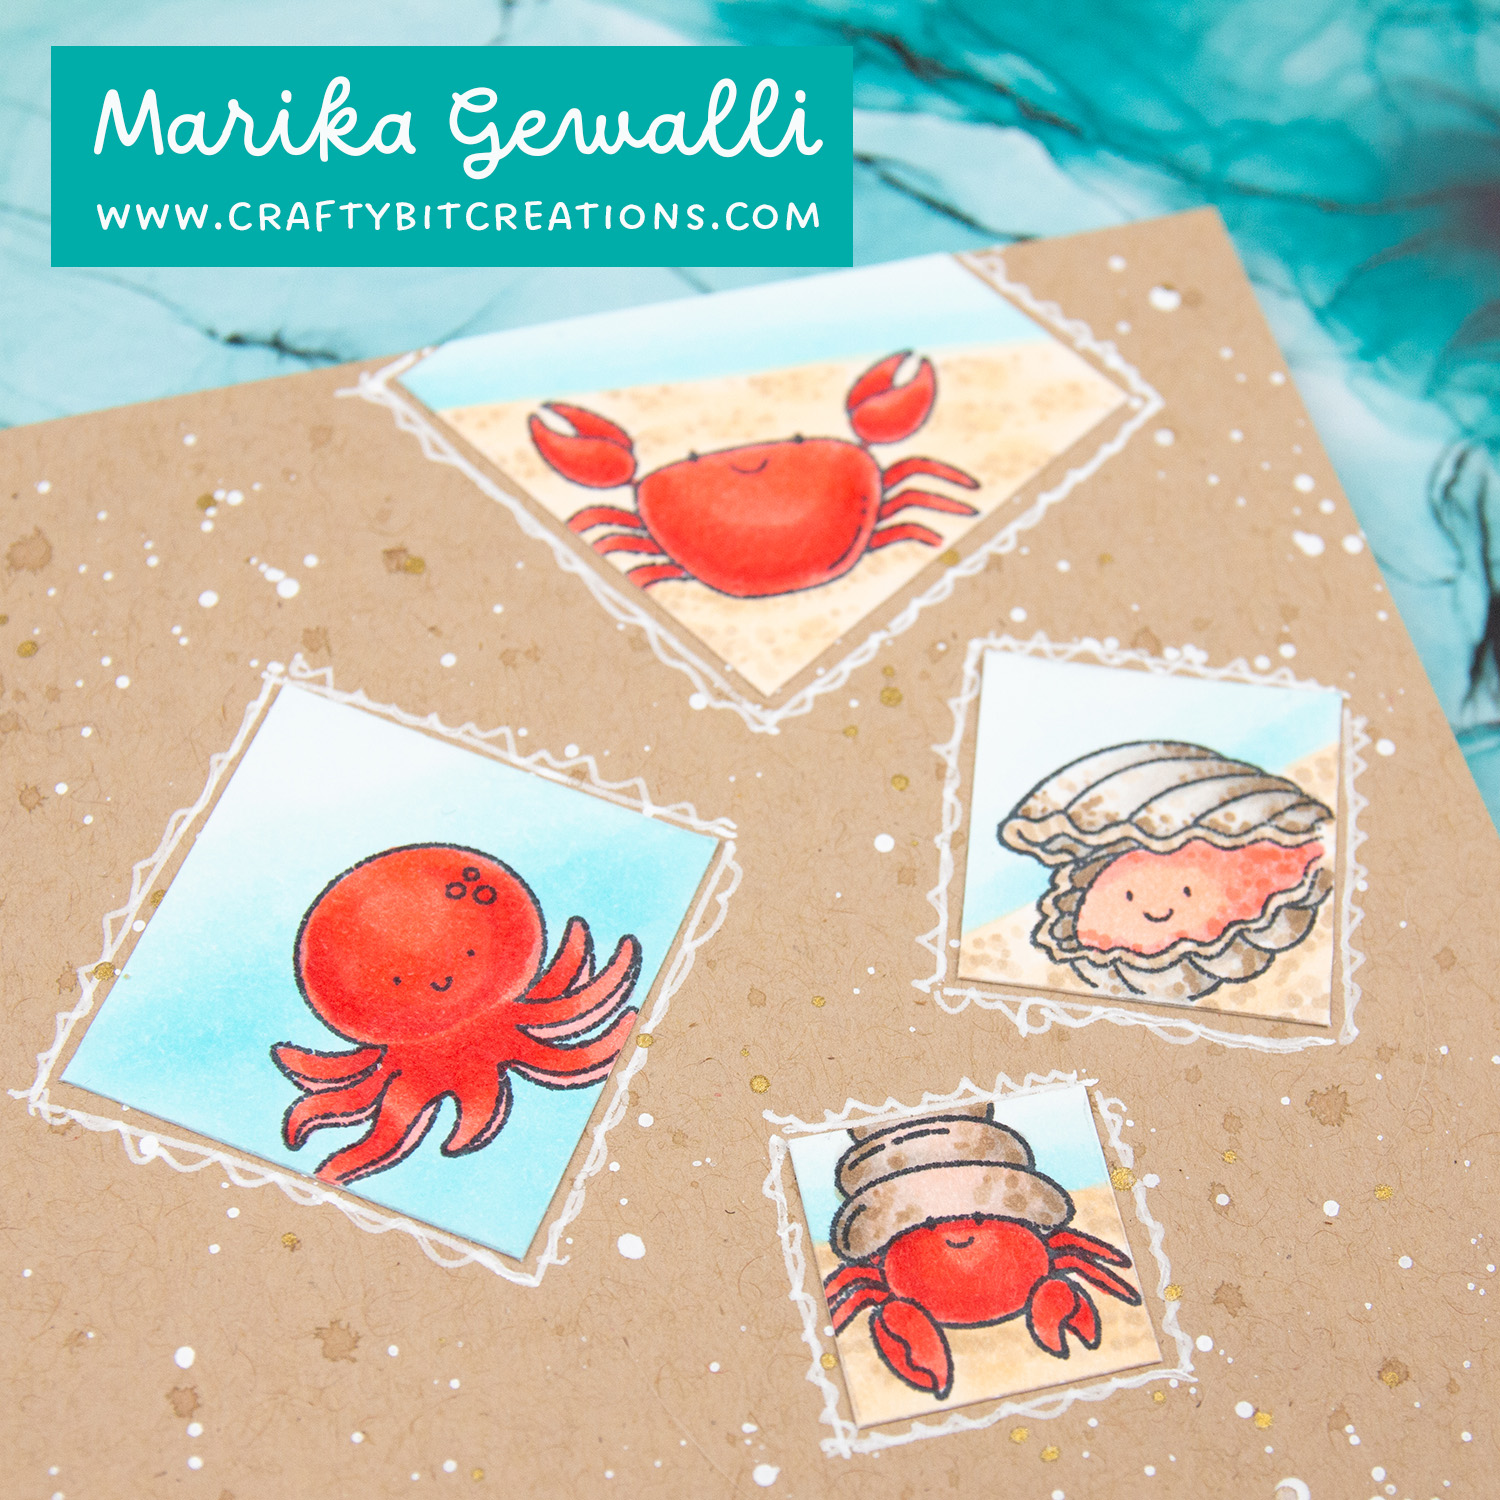
When working with sketch challenges I try think out of the box. Working with sketch challenge 585 I really had to think. I did try another one before settling on this one. When seeing the challenge my first thought went to bubbles or balloons but I felt that was so on the nose. After playing a bit I decided to go with squares that was falling. And into those squares I stamped some of the creatures from the IslandShell-ebrations Stamp Set.
When it come to the card base I decided that it would be fun to make it look like sand. So I grabbed a sheet of kraft card stock and made a card base out of that. But I wanted some more texture and decided to splatter some white gesso, some kraft ink and finally some golden watercolor. For my sentiment I used the kraft card stock just plain and then I stamped the sentiment with some Vintage Timber Ink as I wanted the sentiment to have a little more darkness than kraft on kraft. After attaching my squares I felt they needed something extra to stand out, and as I love white gel pen on craft I draw some scribbles around the images. And that is the card! How did you like it? Wanna see more challenge entries? You’ll find them HERE.
When possible affiliate links are used, this means that I receive a small commission when products are purchased through the links (at no extra cost to you) I use the money to support my blog and youtube channel. If you like my projects and tutorial please consider supporting me by clicking through these links when you shop. Thanks!
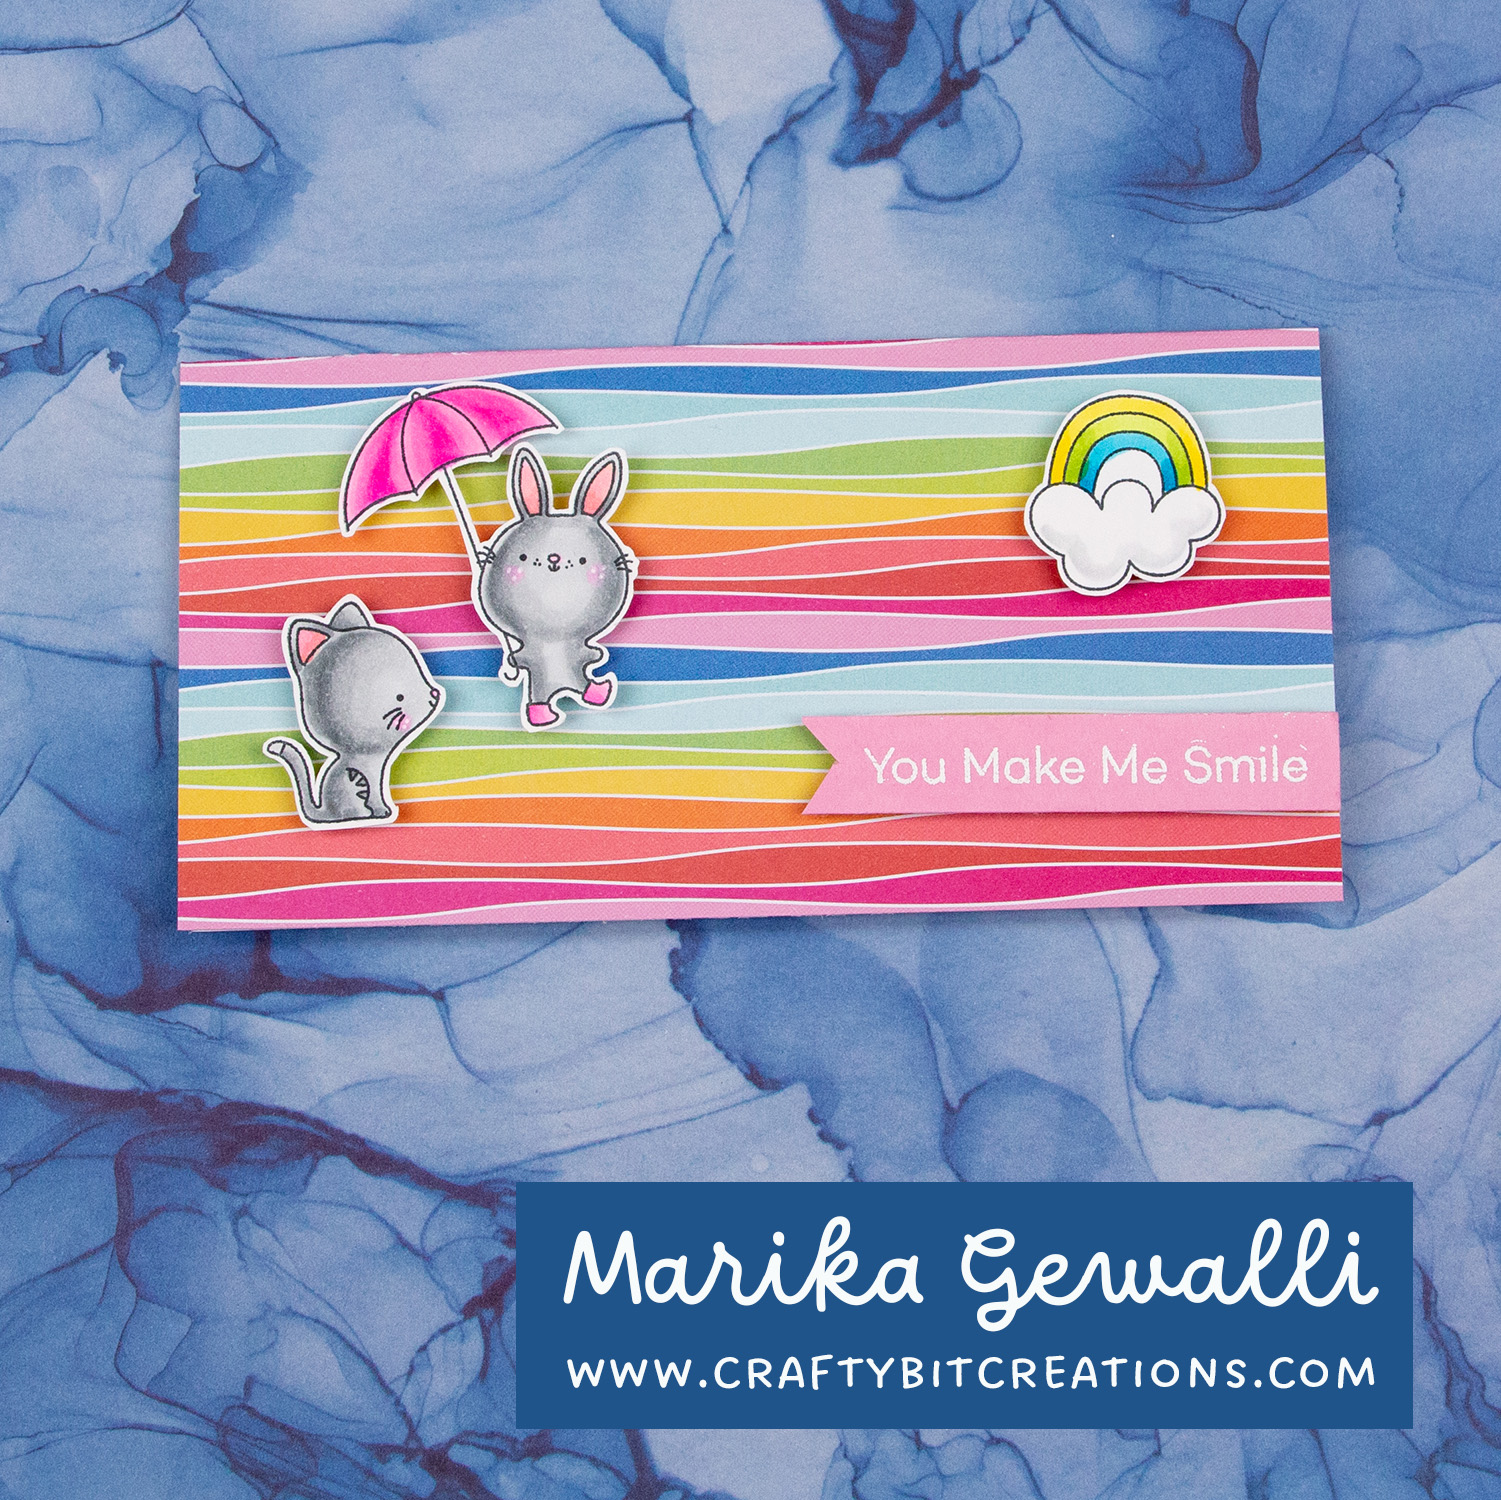
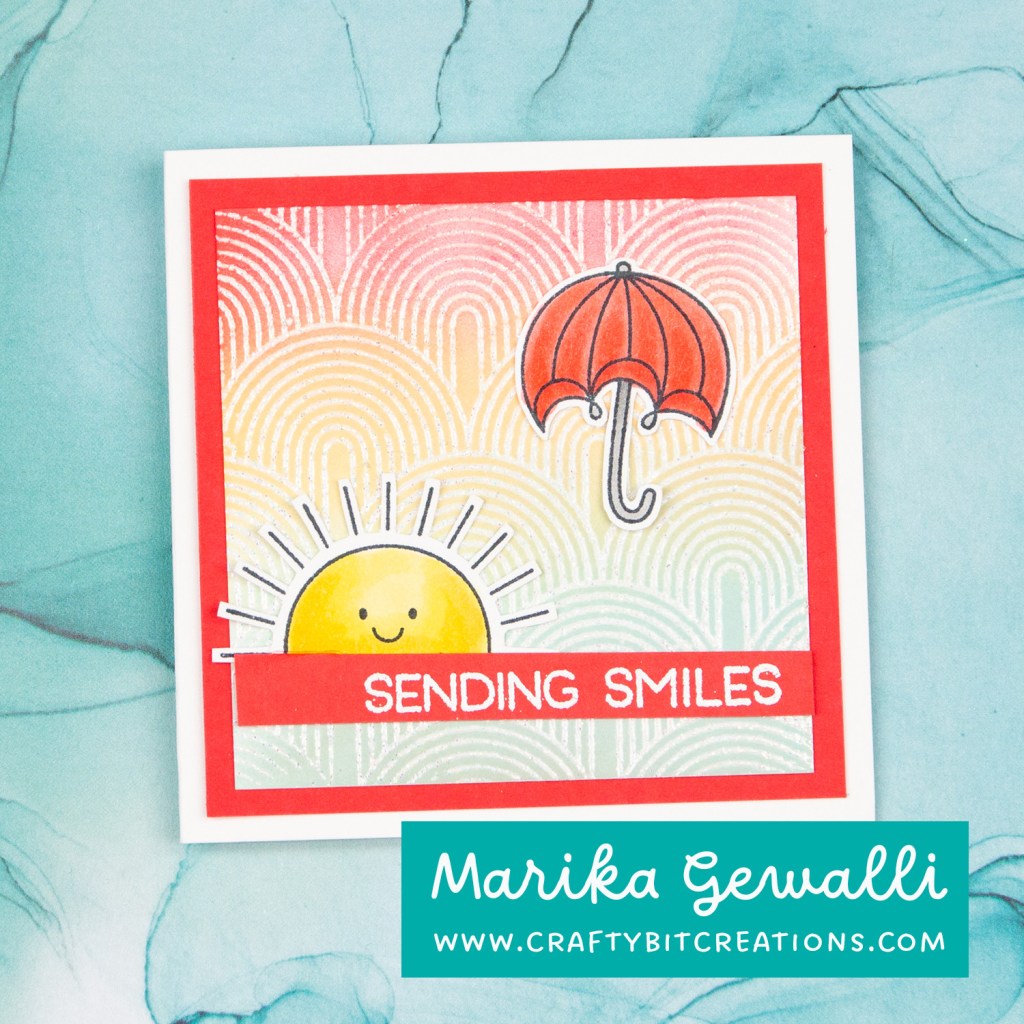
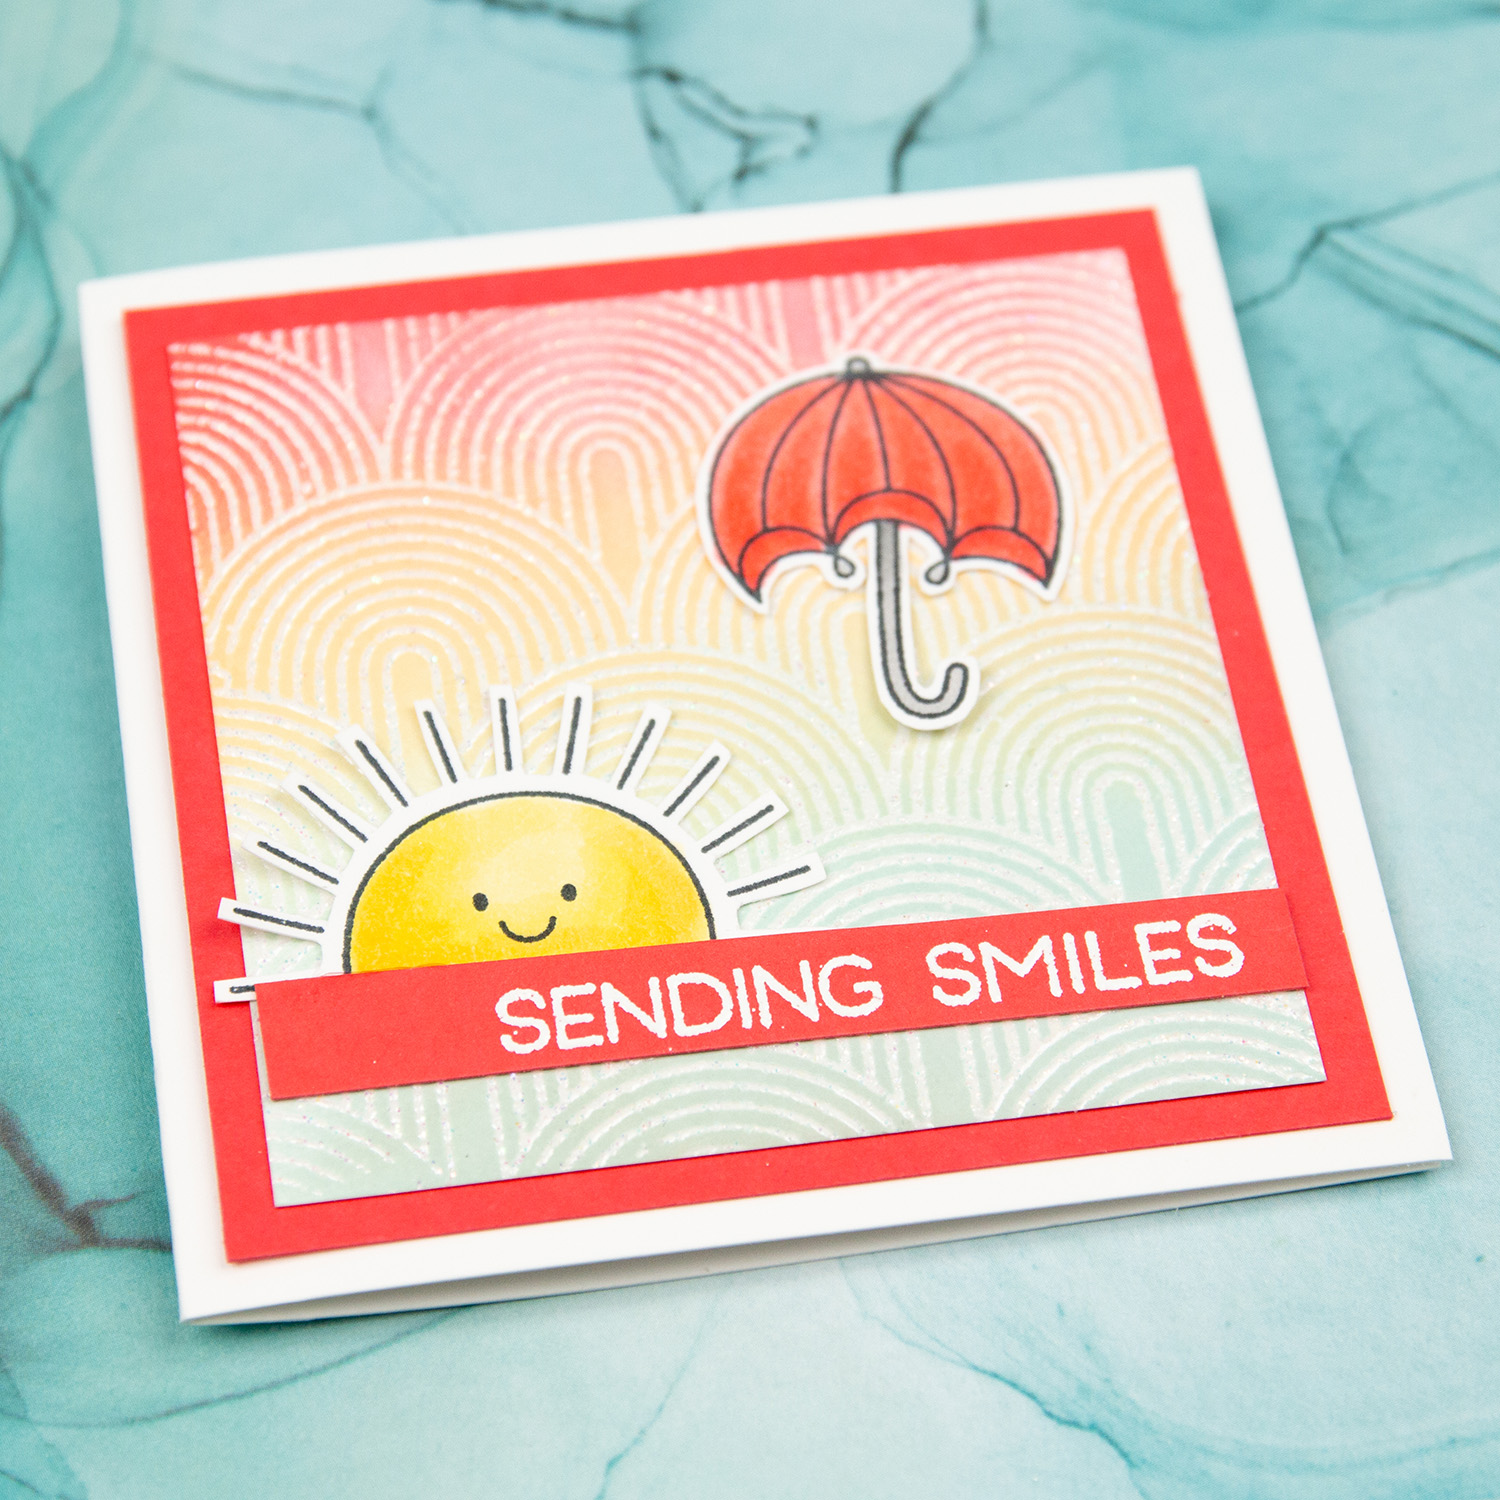
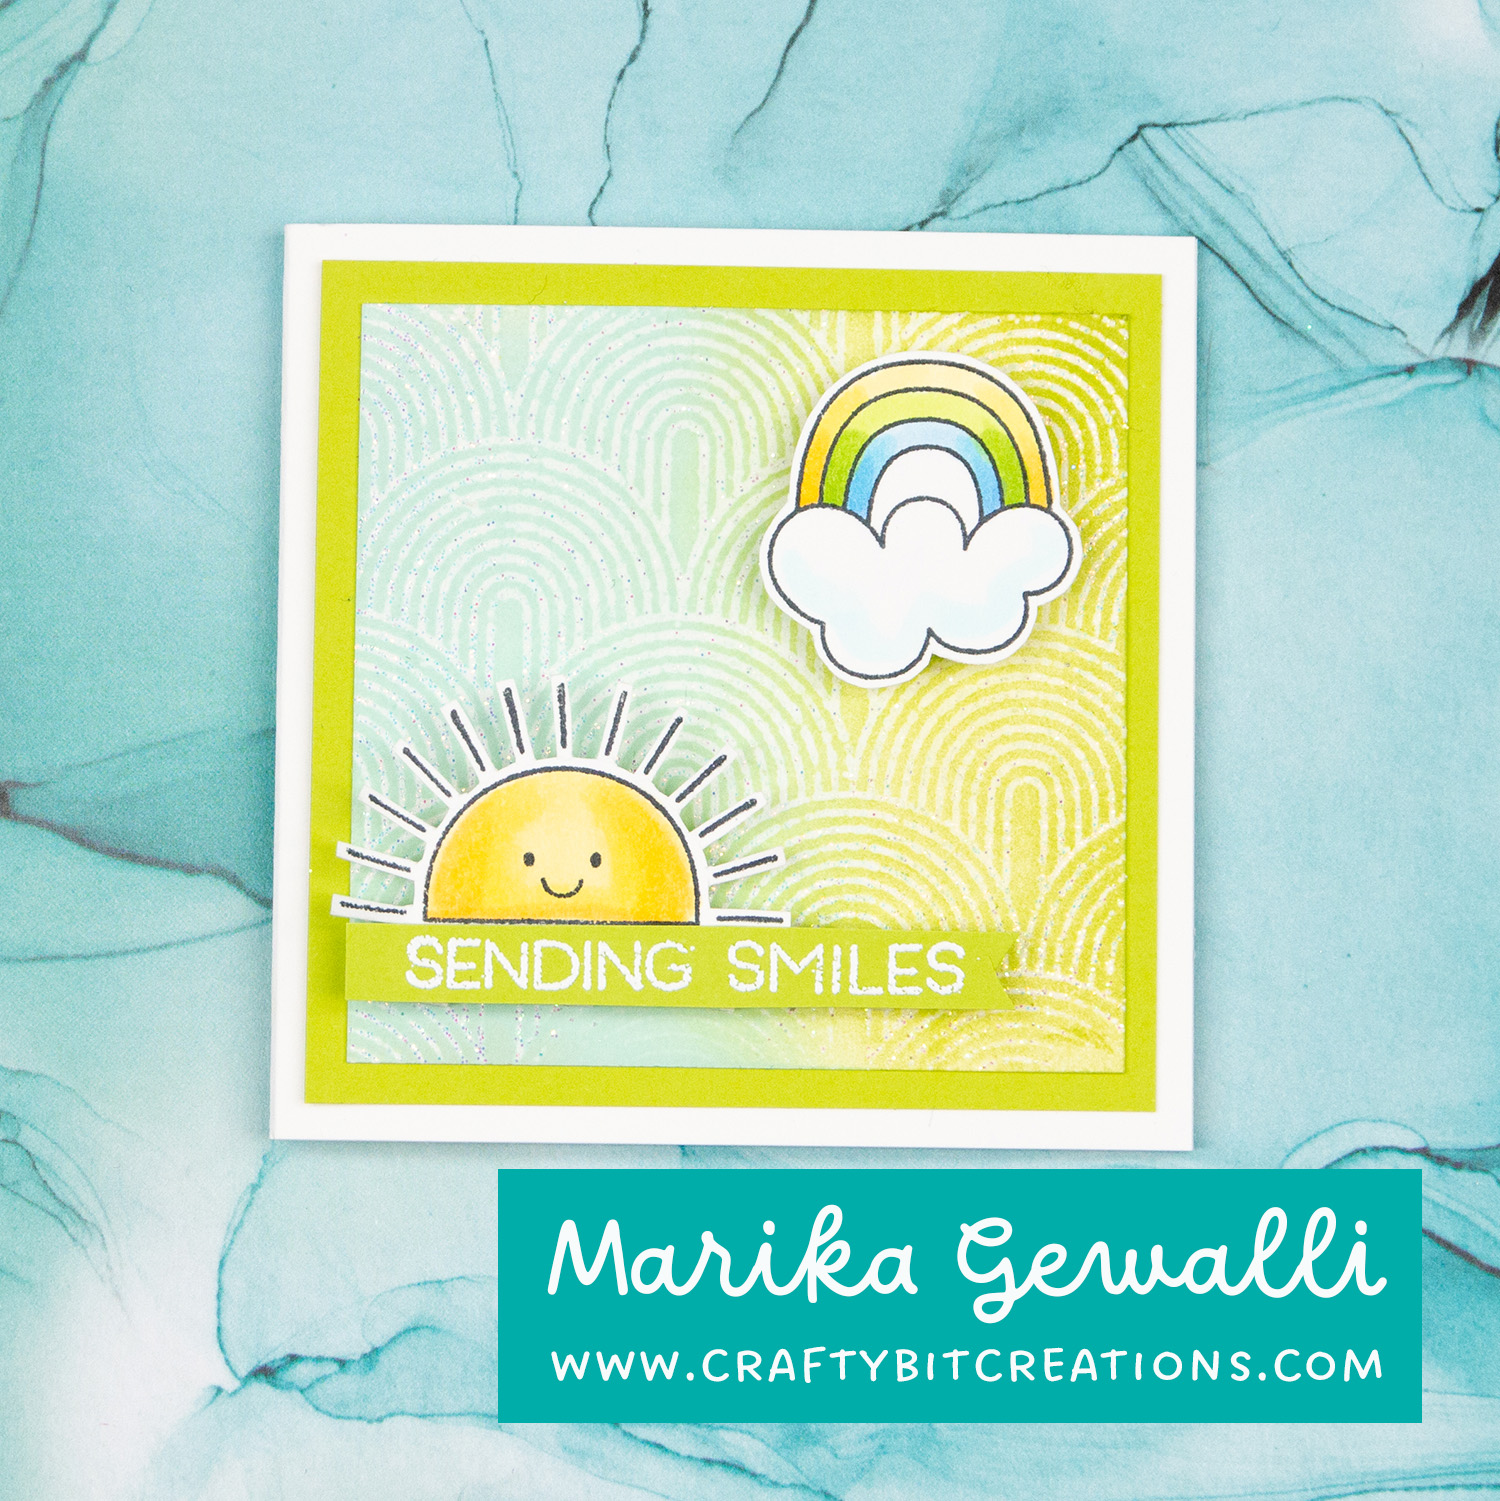
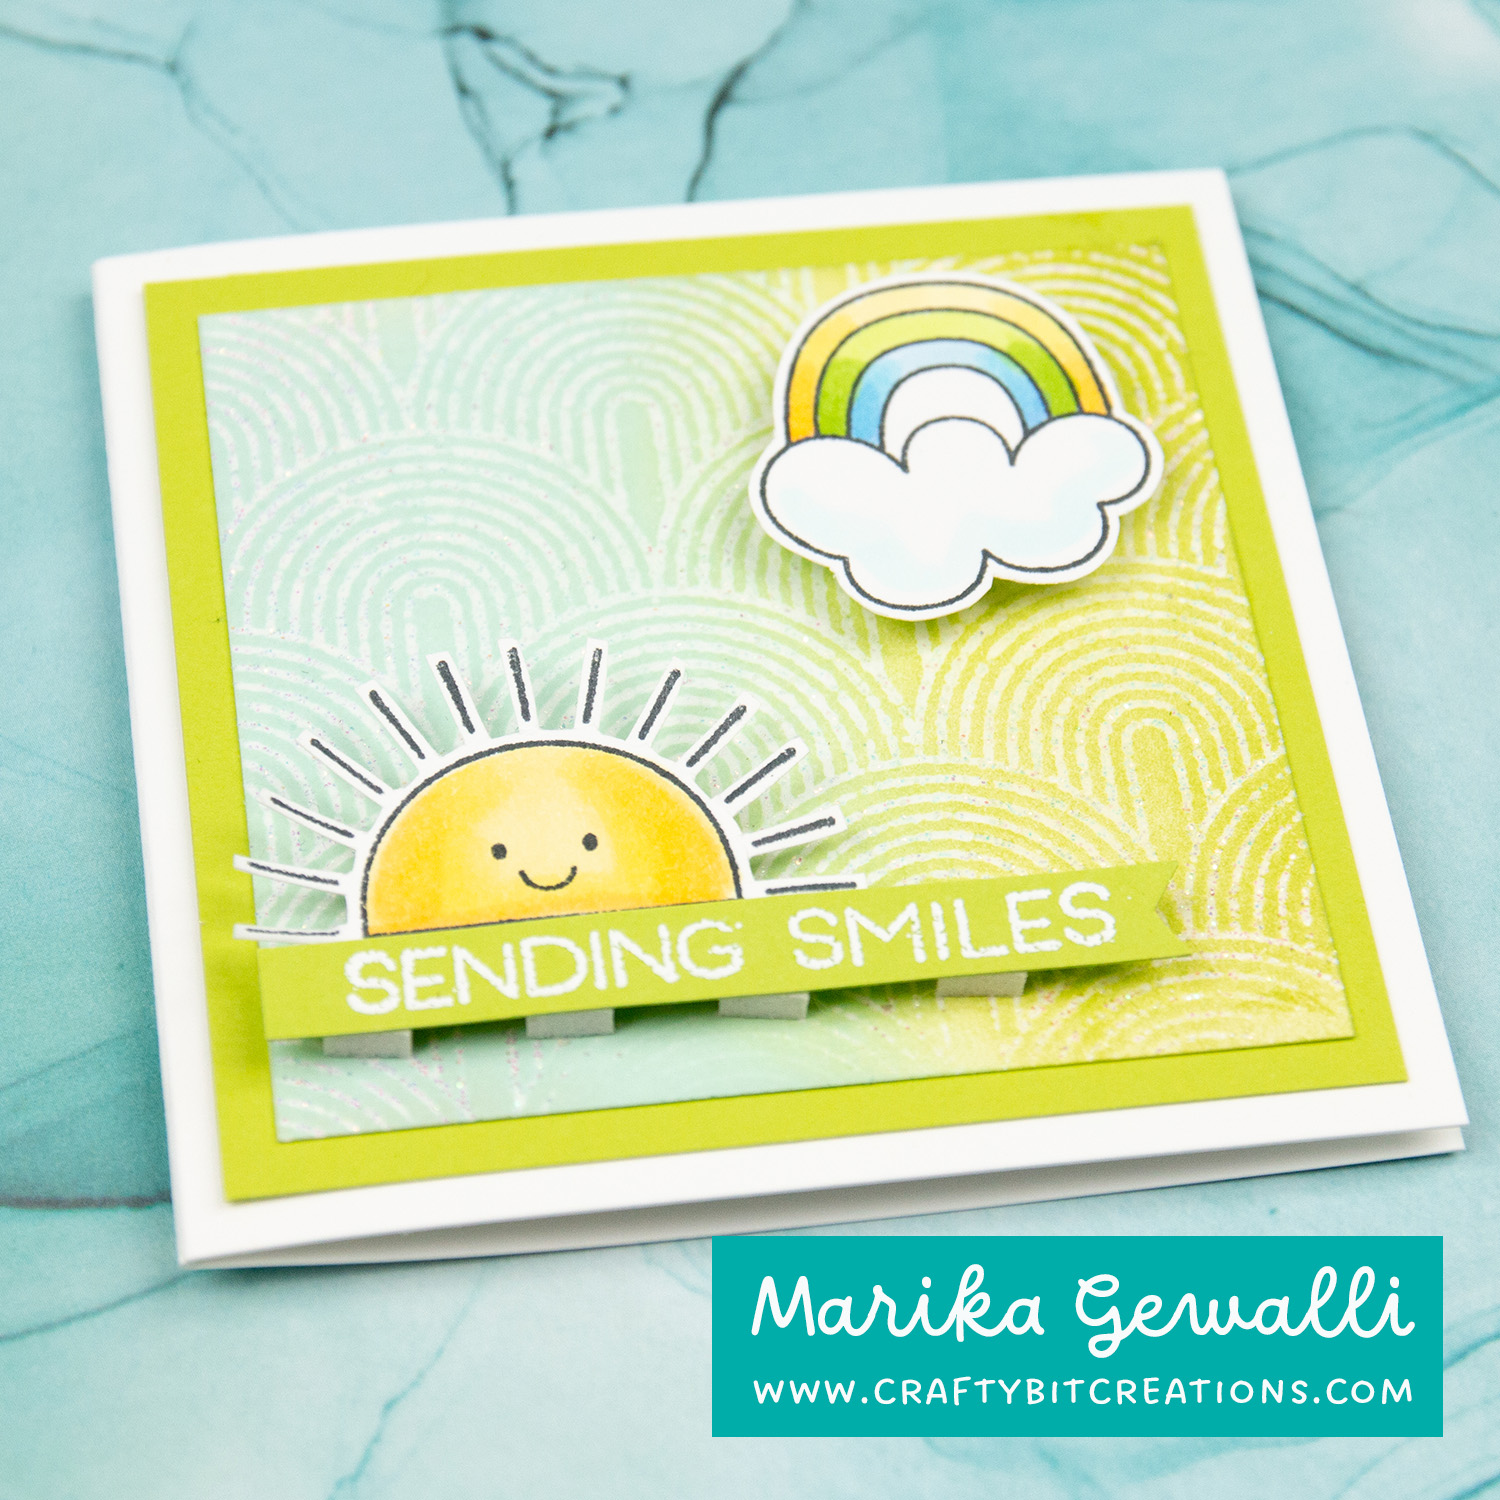
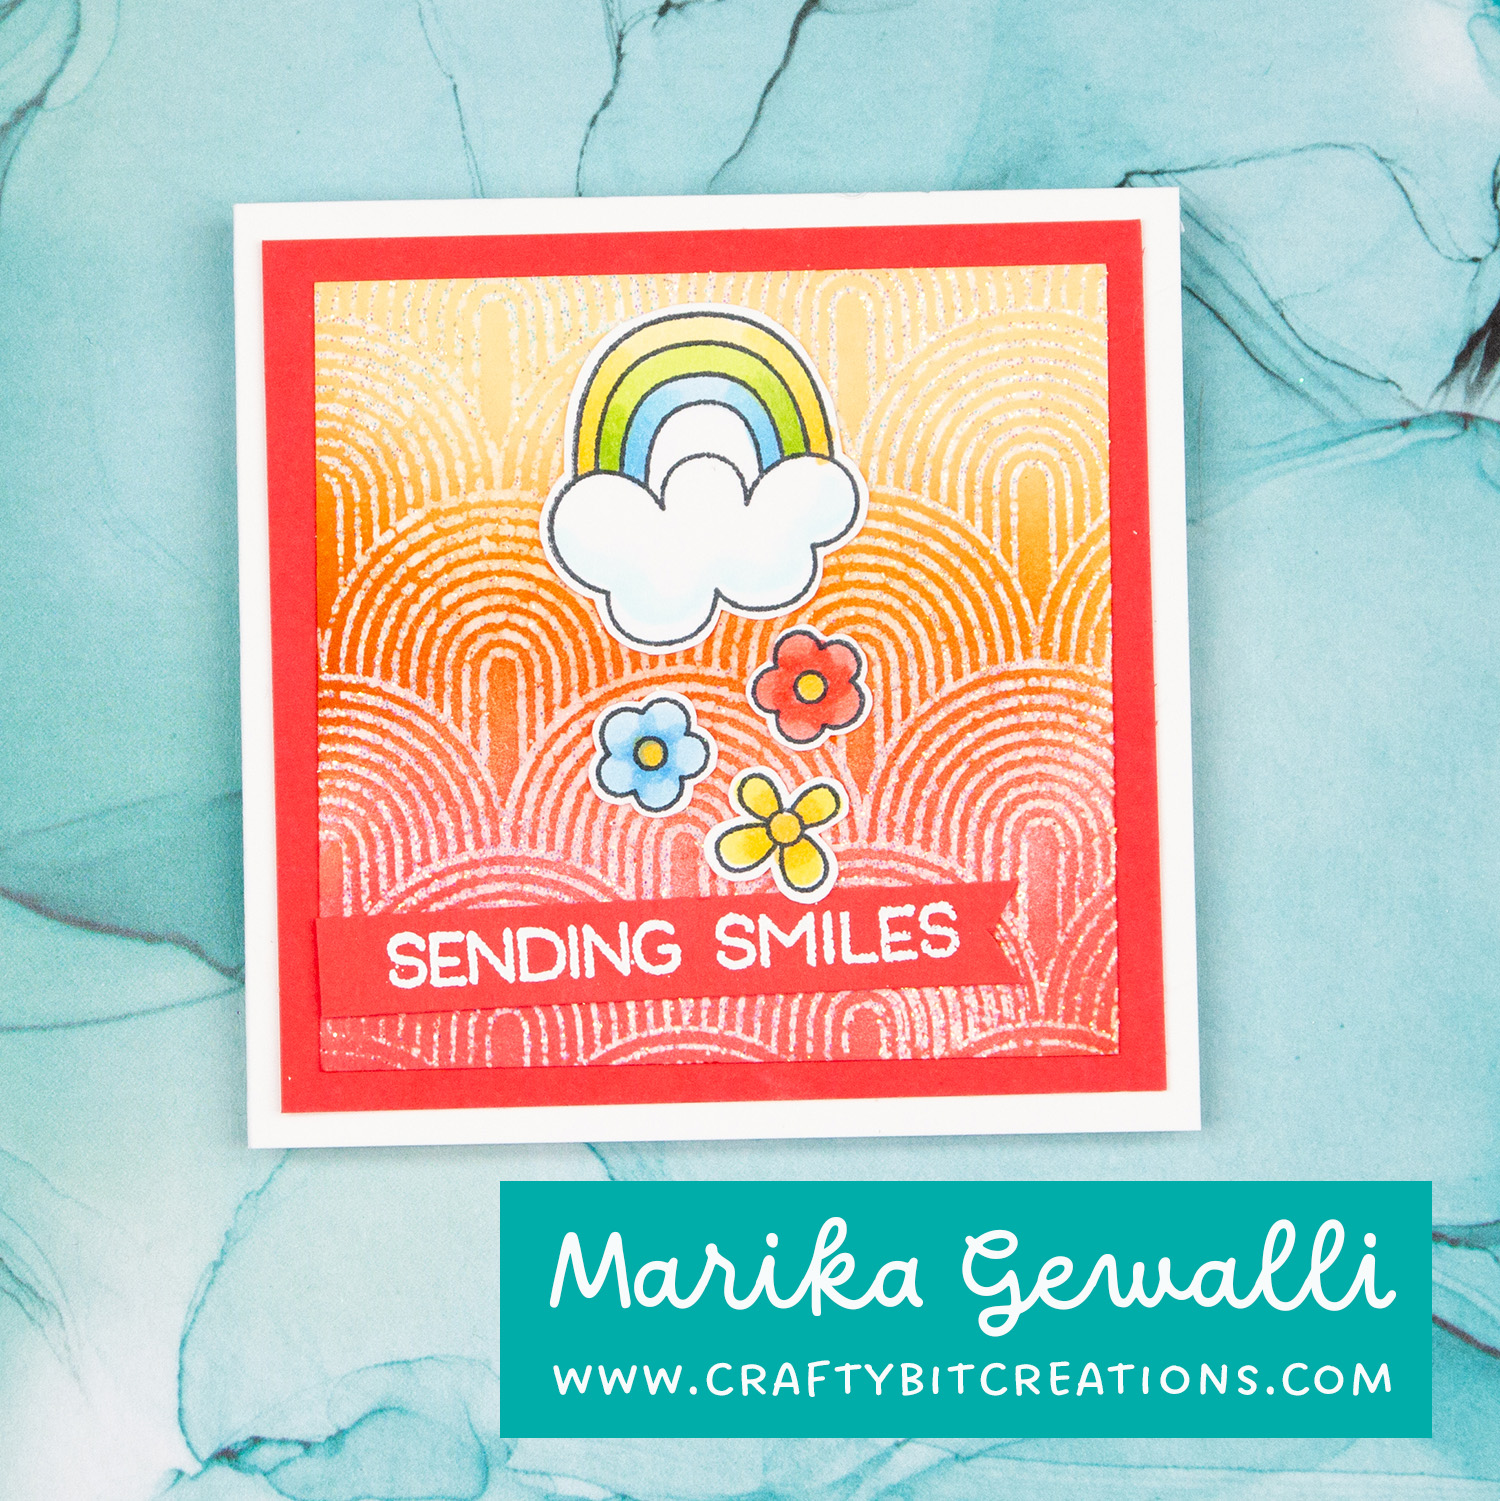
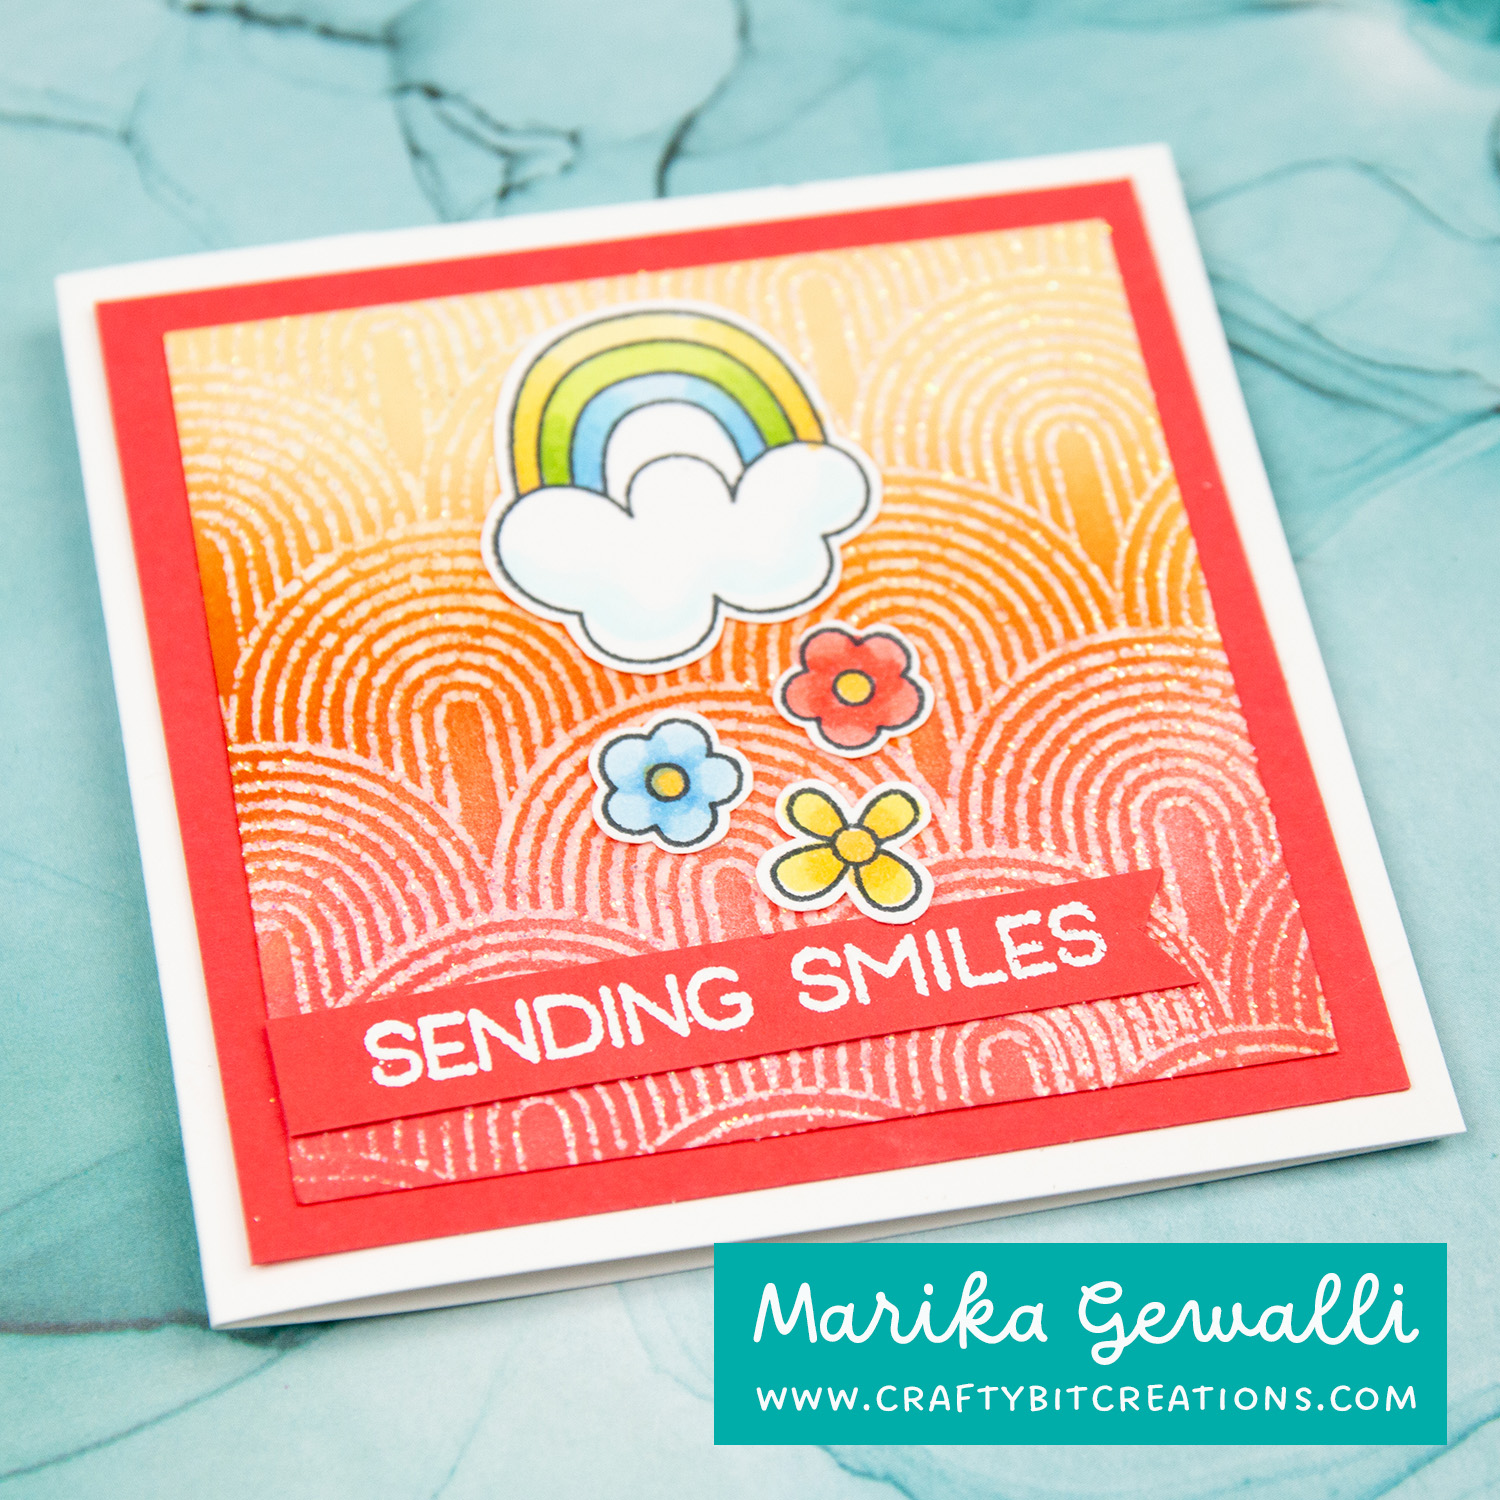
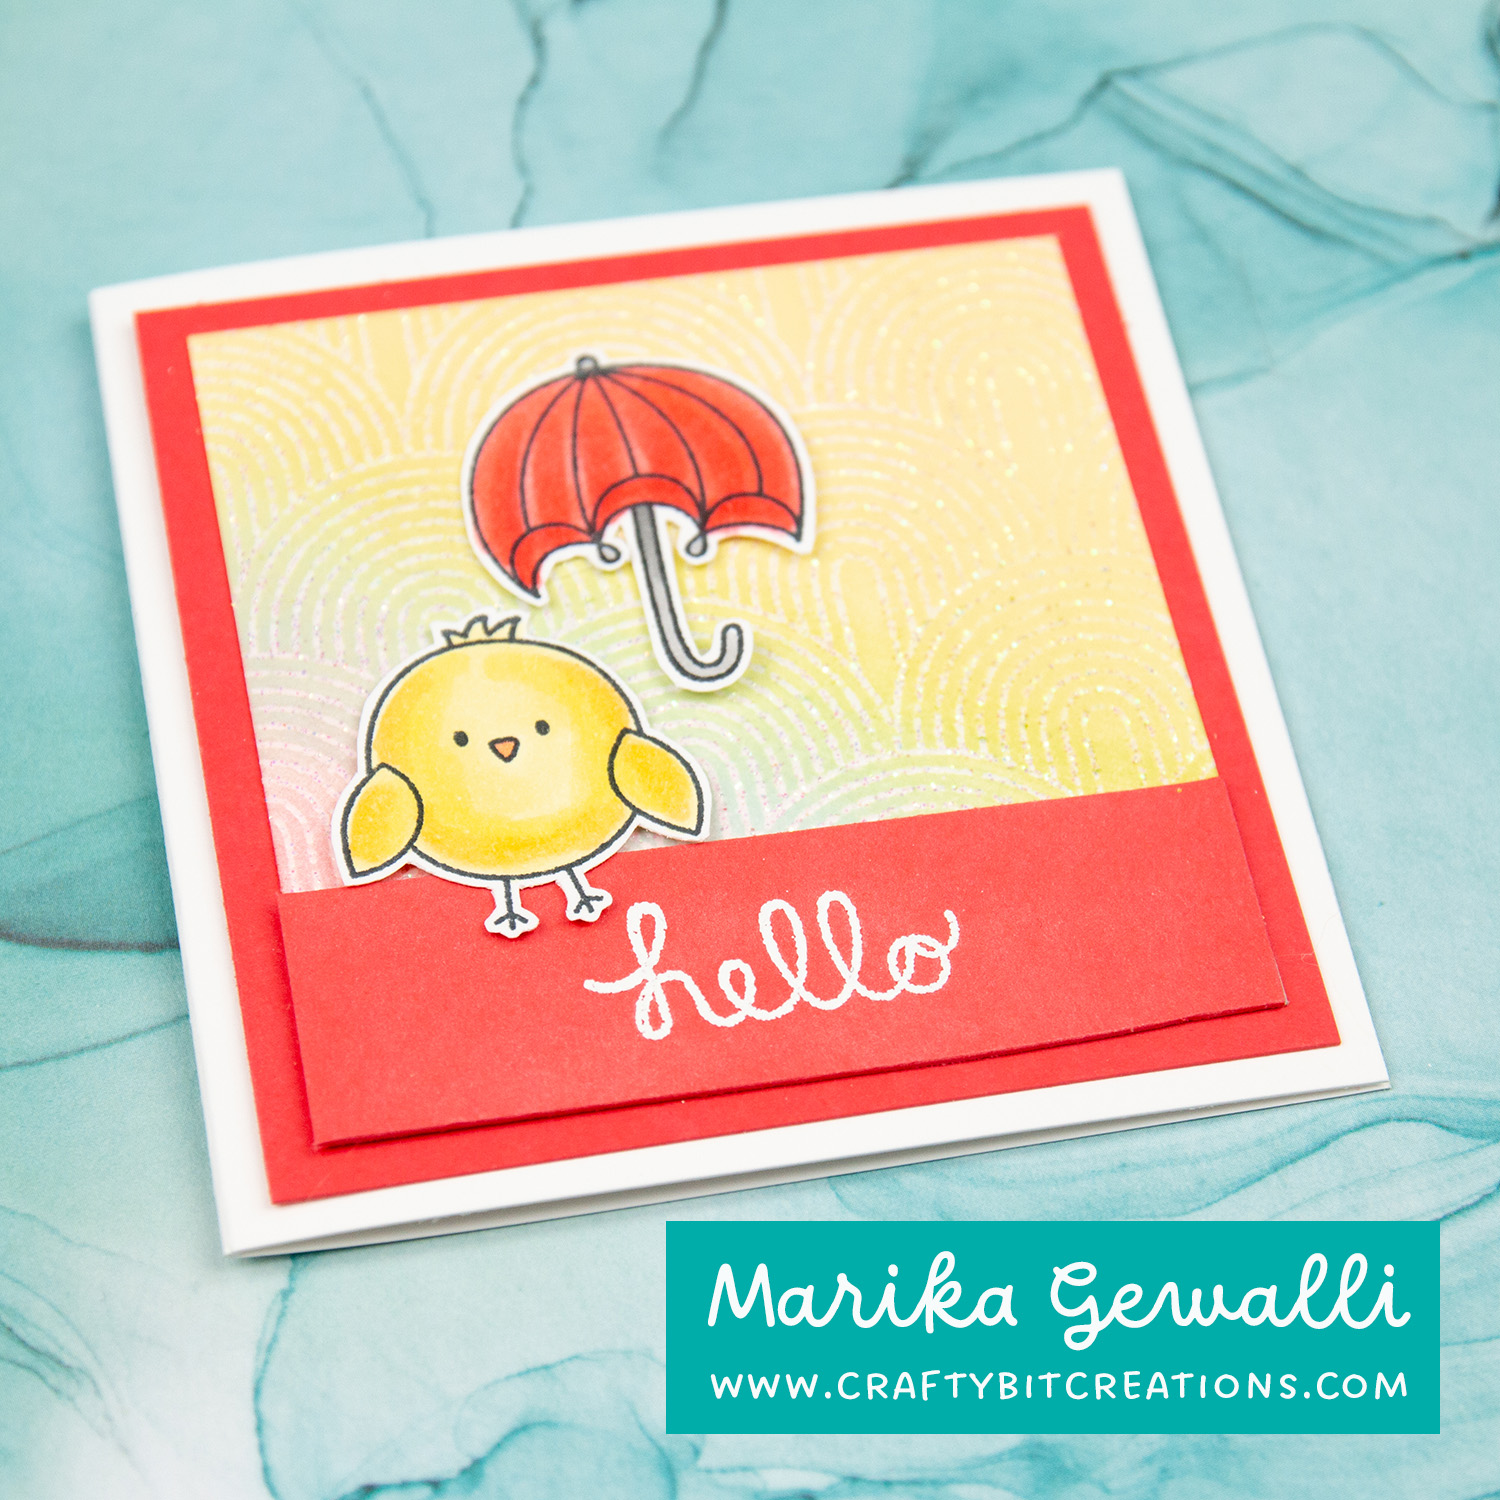
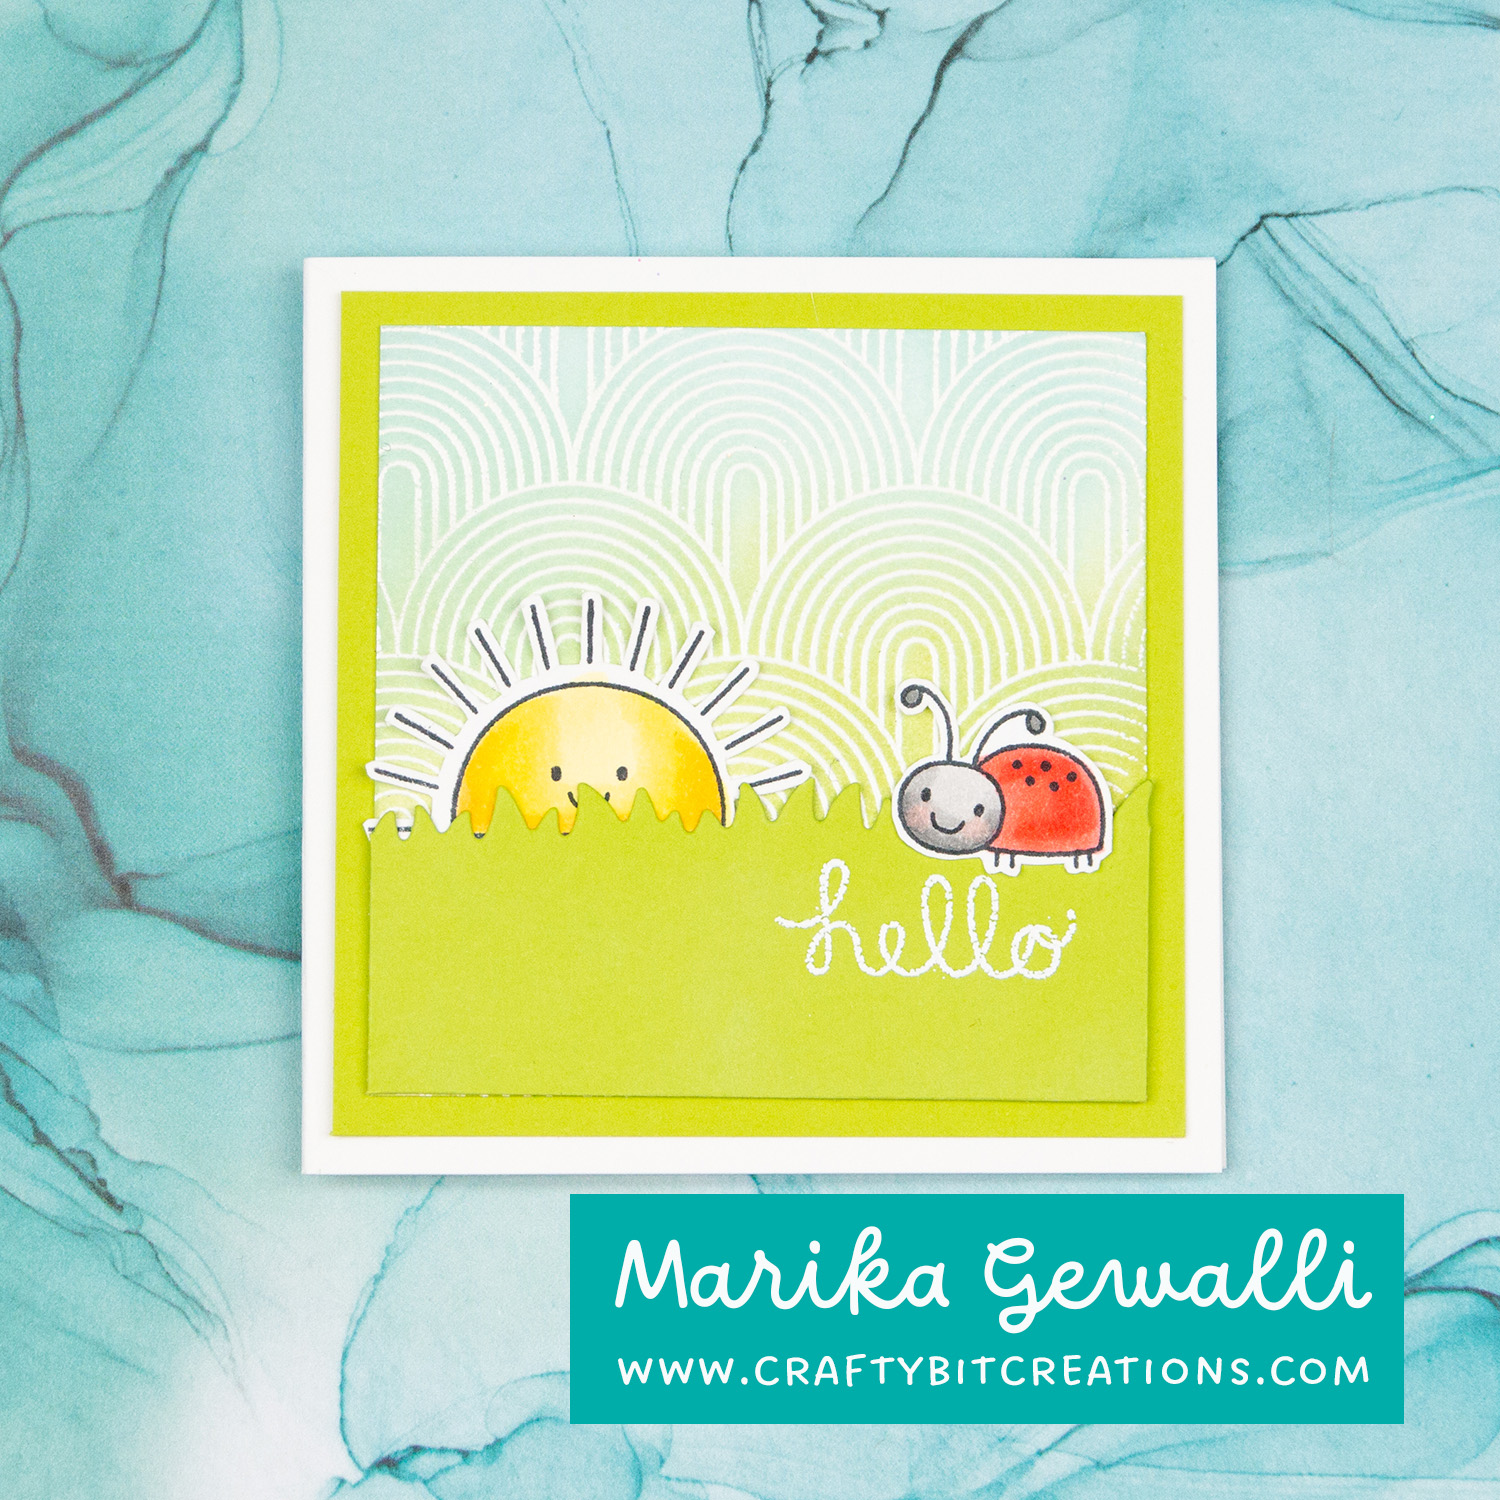
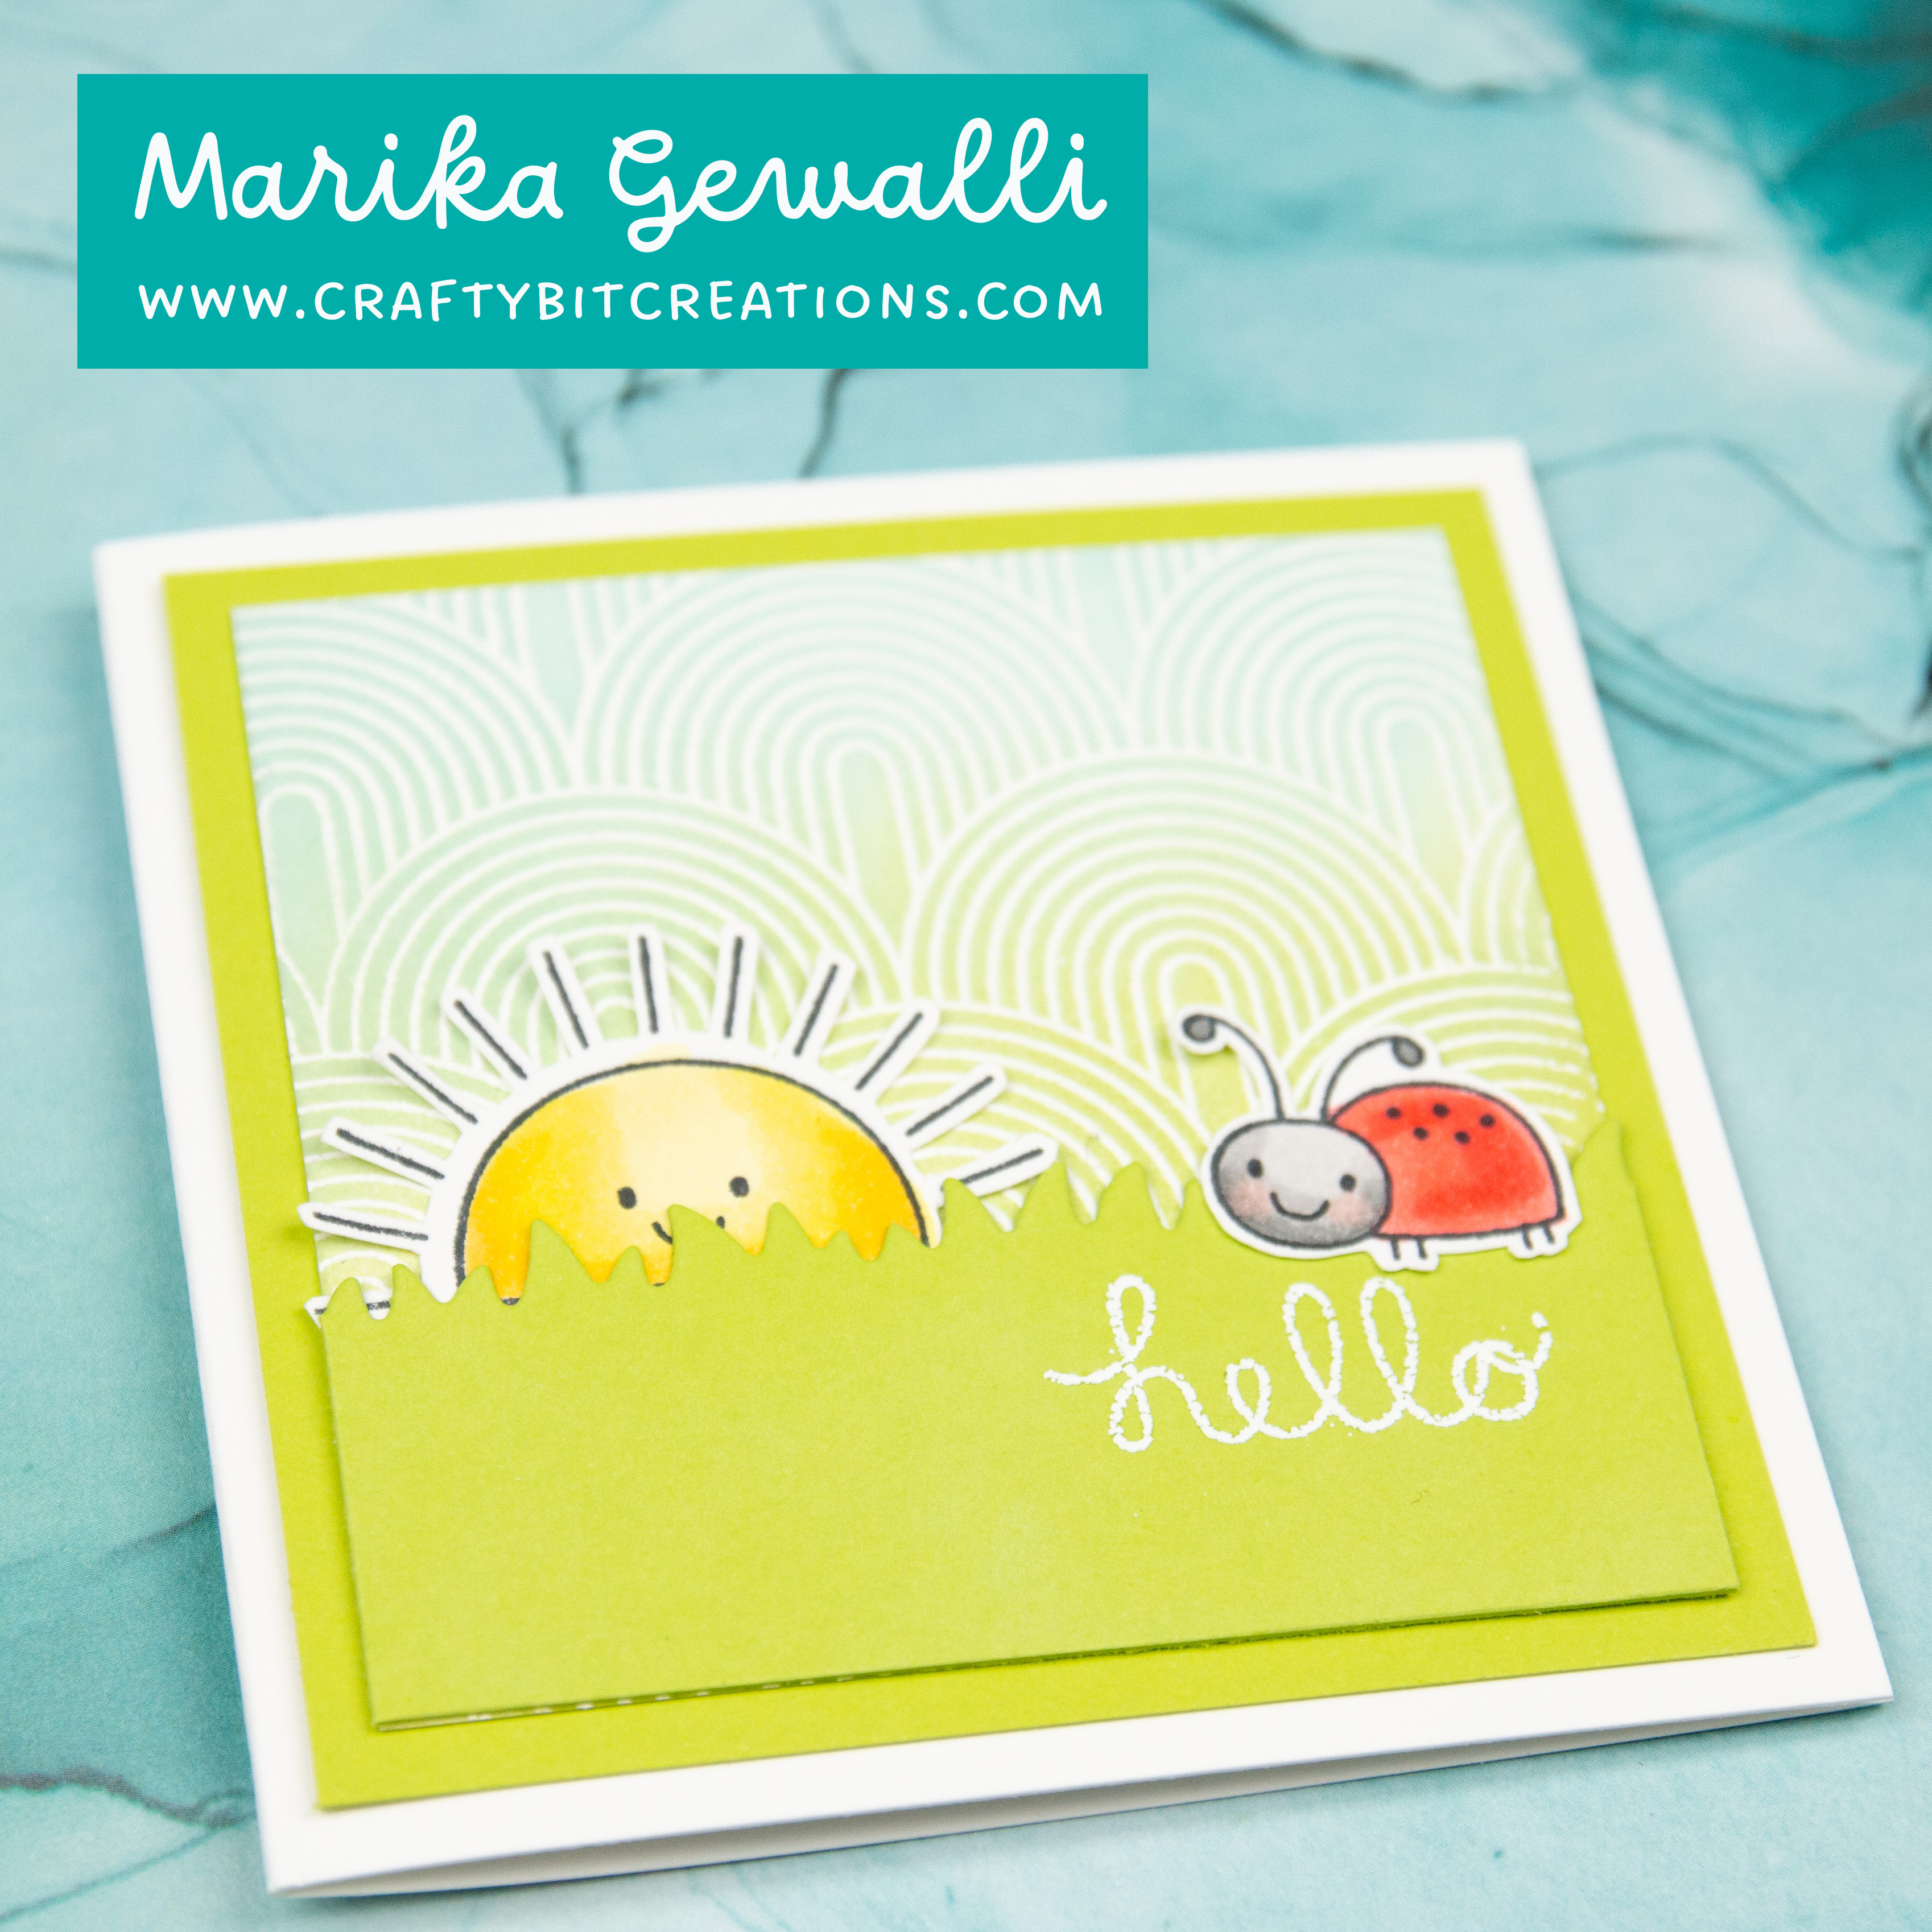
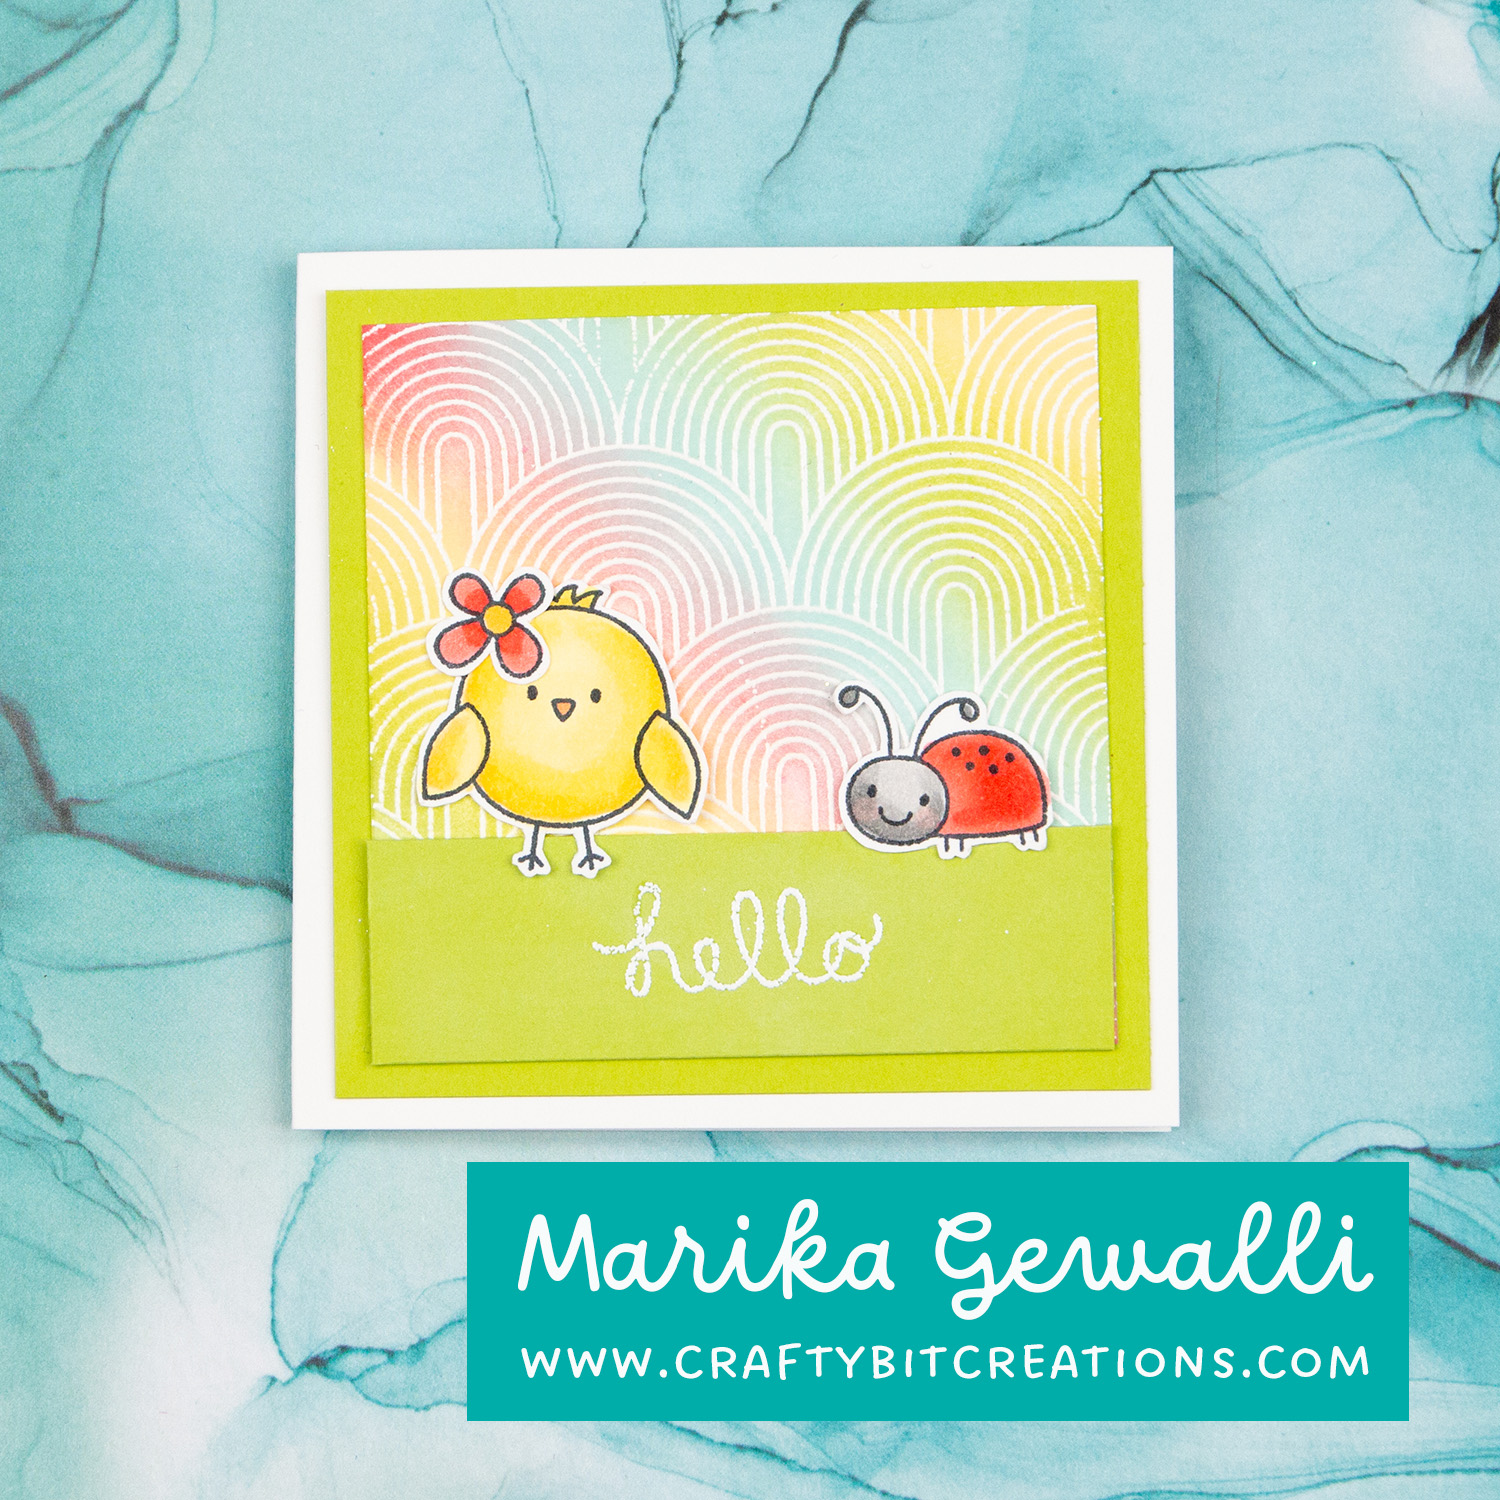
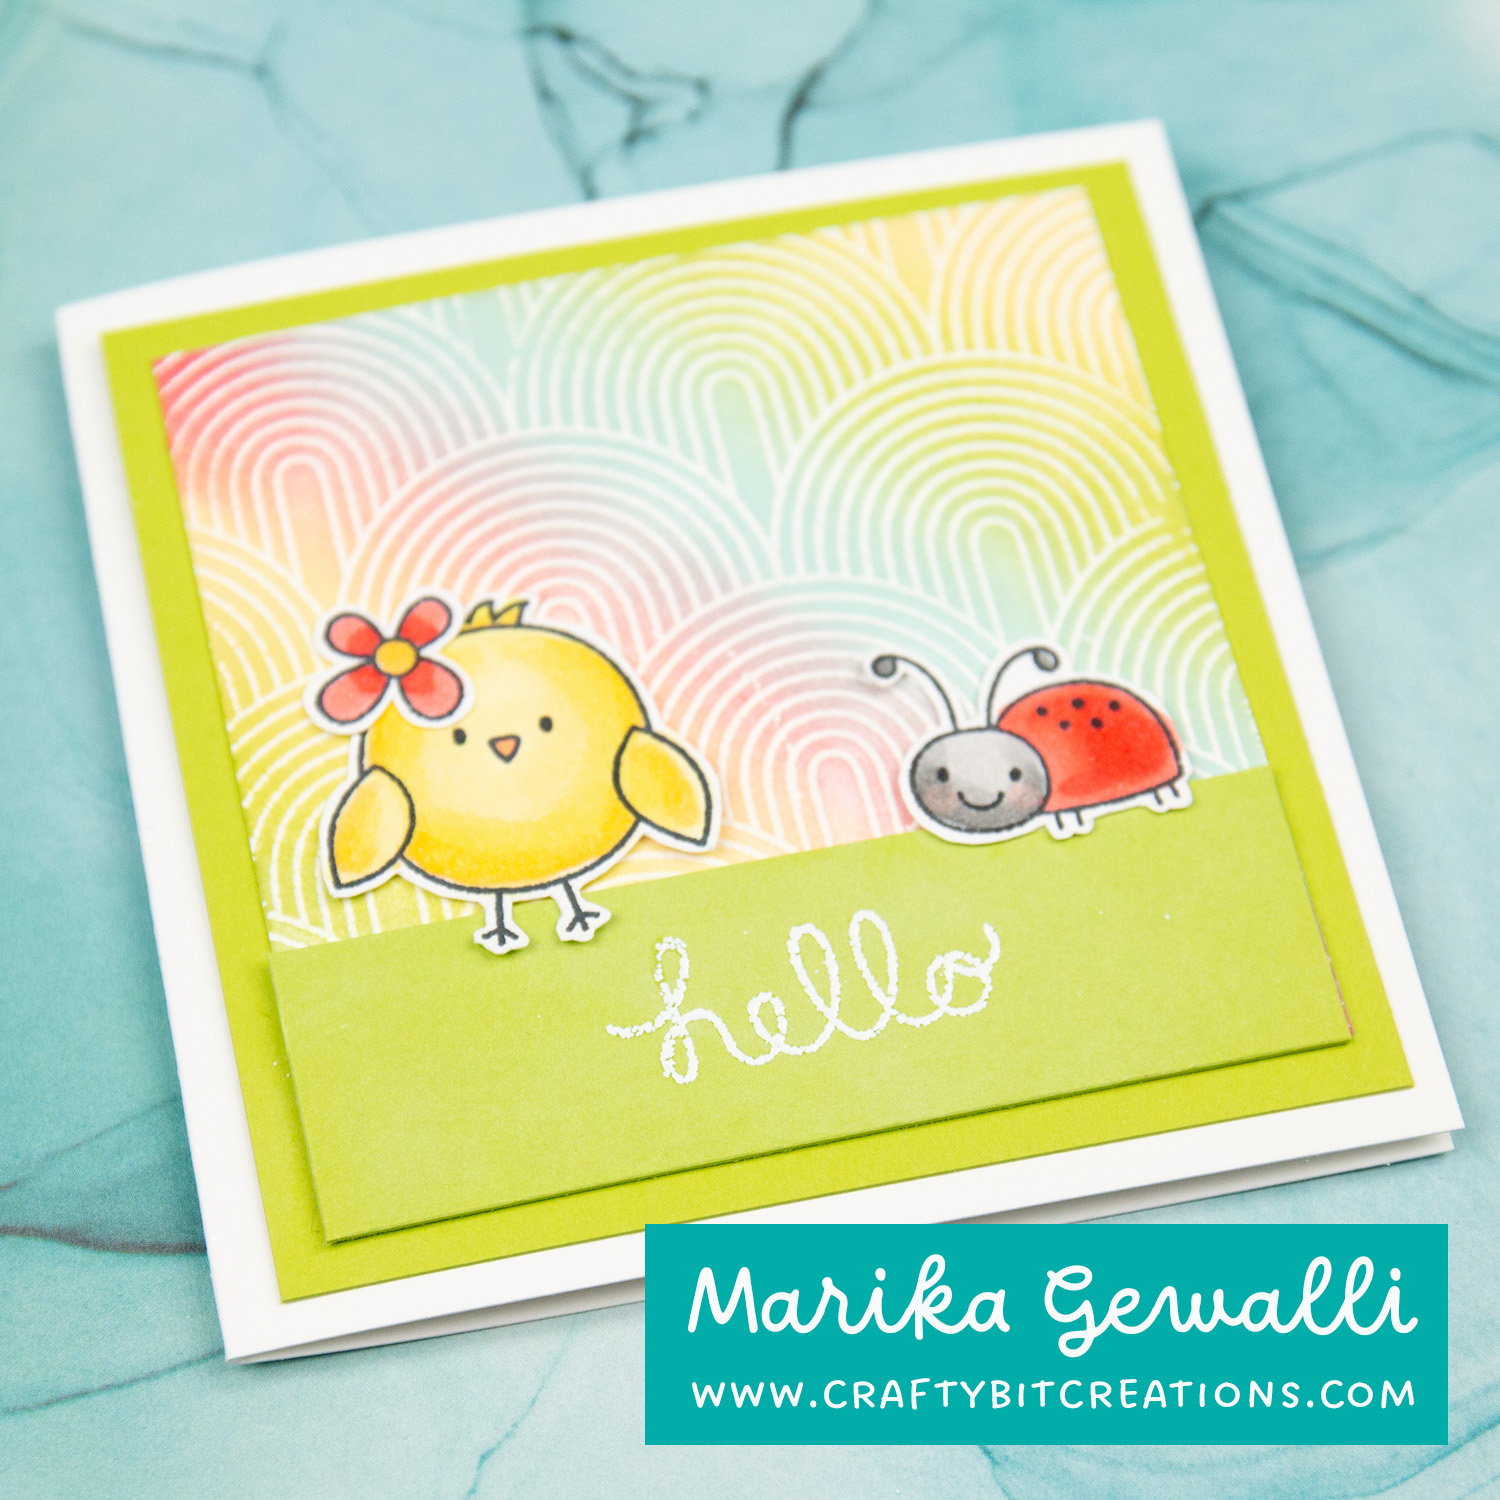
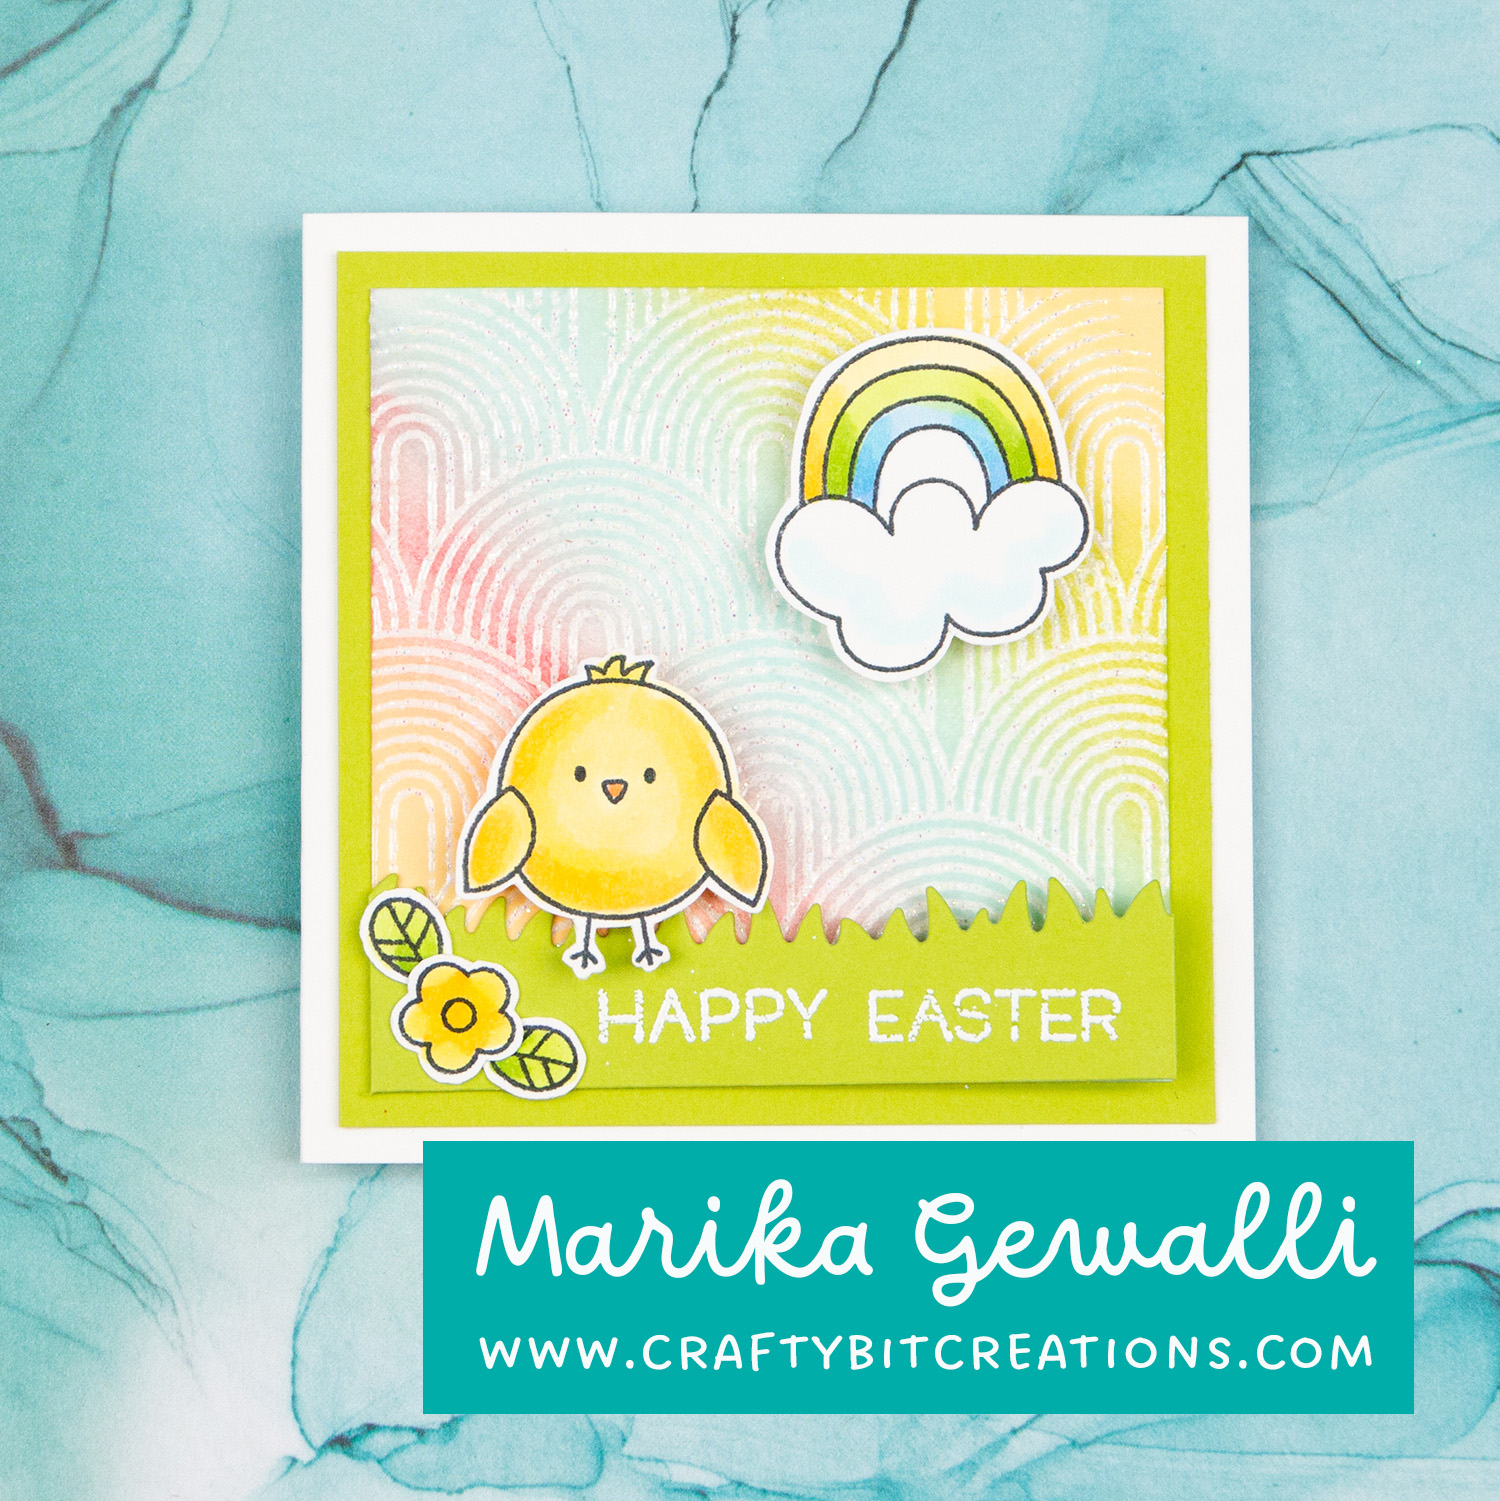
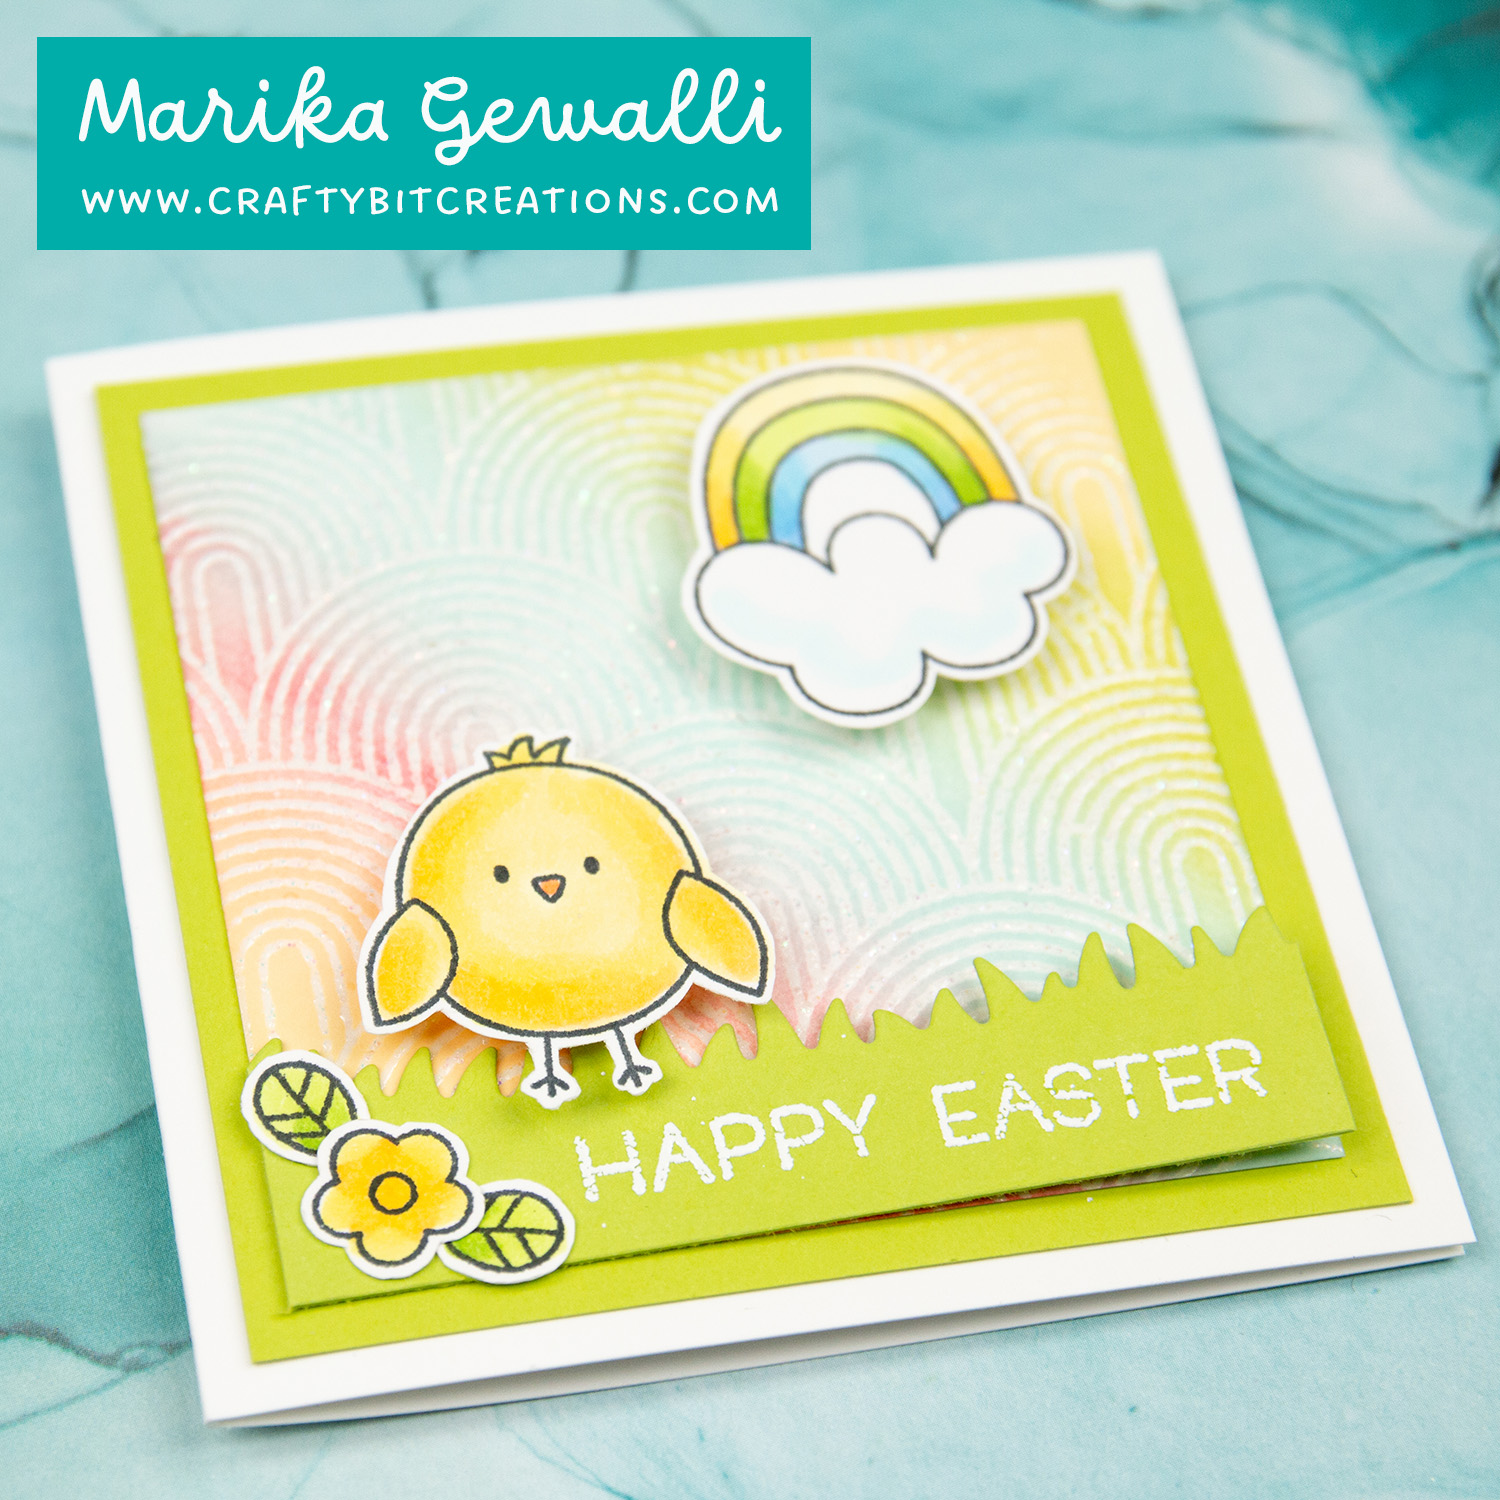
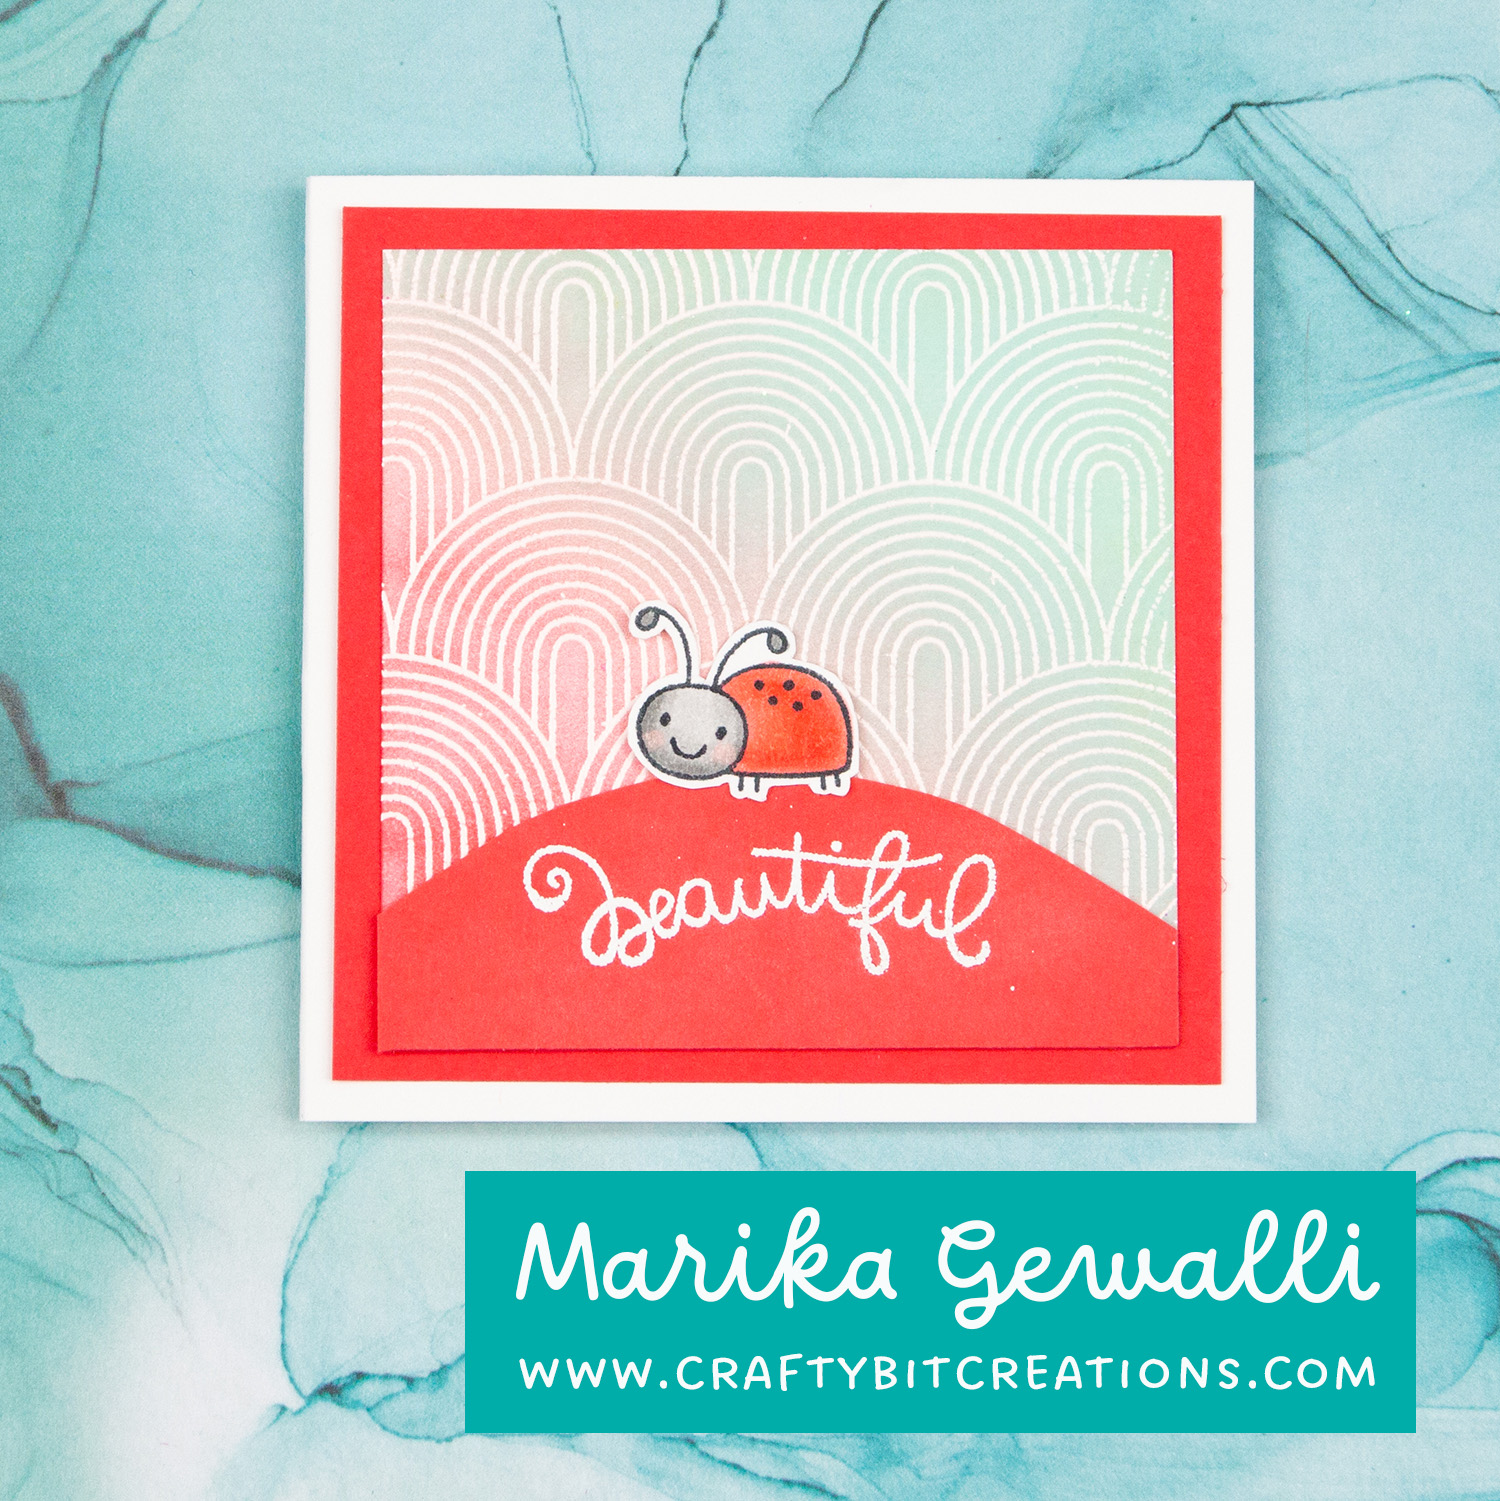
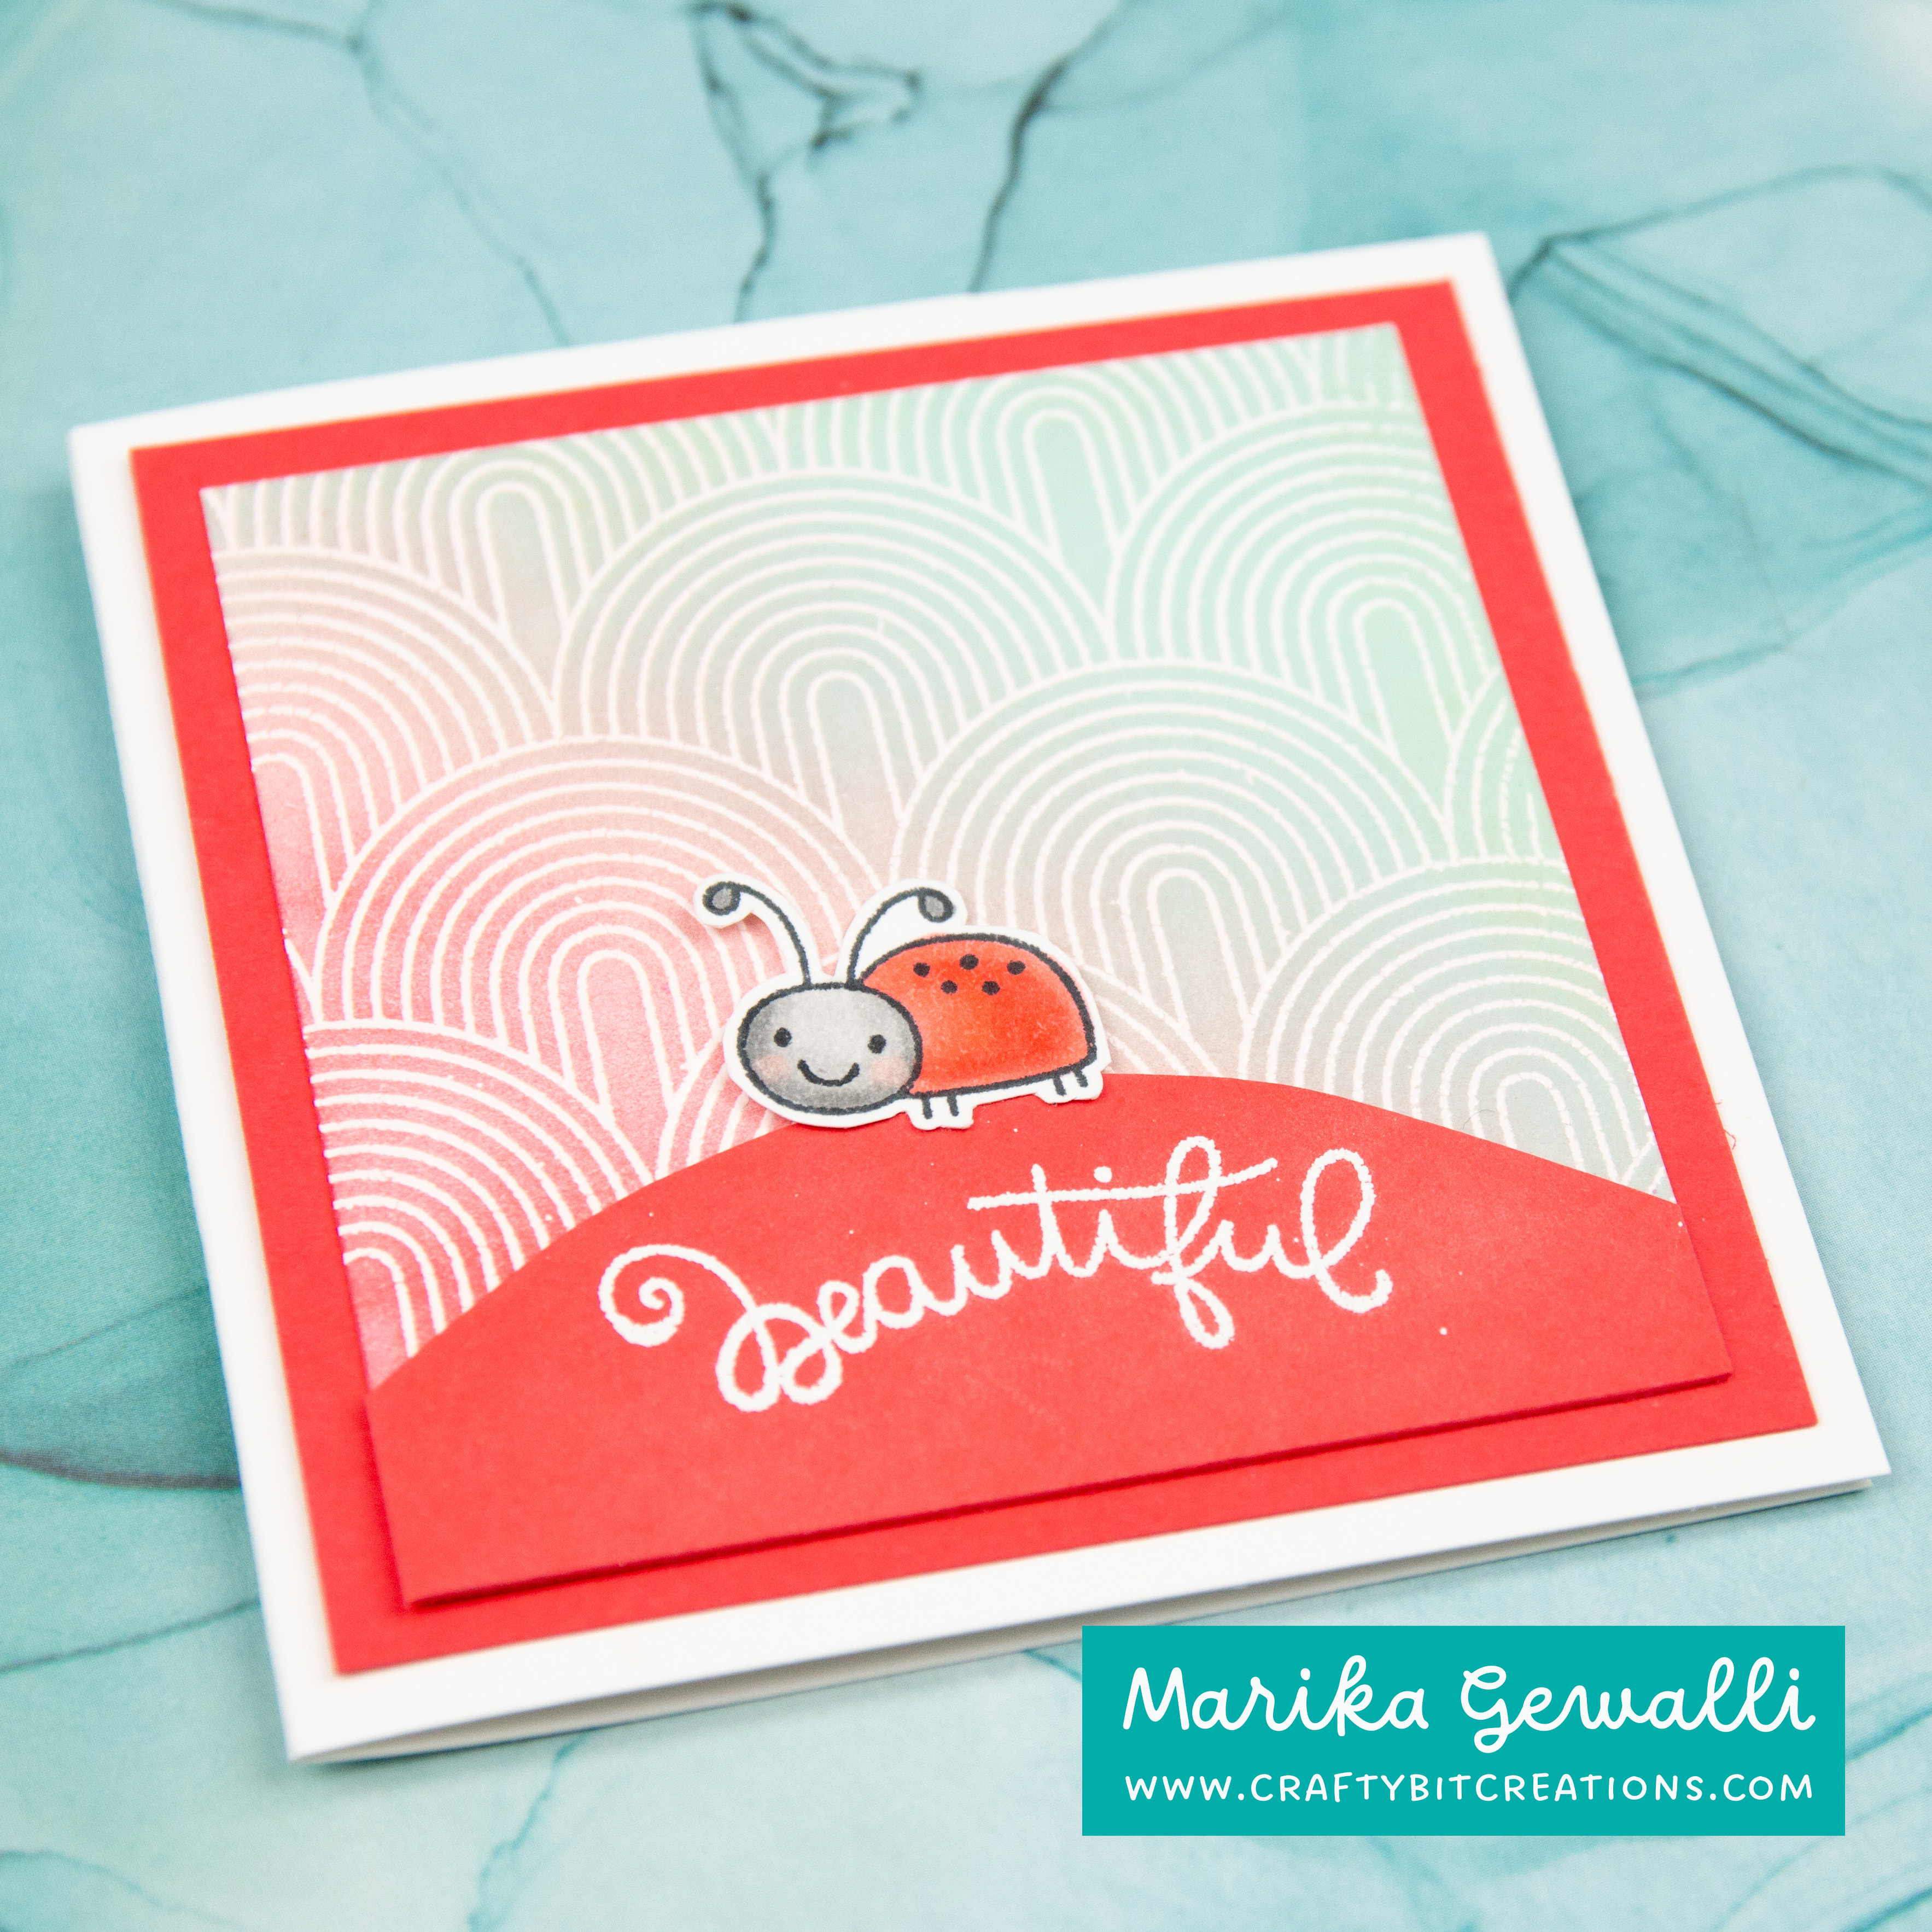
I wanted to dive into my new stamps I last week as soon as I got them. While recording the haul video I released on Wednesday I remarked that the Sending Sunshine & Smiles stamp set would be great for mini cards. And as I love mini cards I decided to make a mini spring cards tutorial. I decided to also use the Repeating Rainbow Background Stamp on all the cards because rainbows and spring goes hand in hand.
Hope you enjoy the tutorial! If you want to see more projects made from the March release you can find them HERE. That link will be updated continuously as I make new projects with the supplies.
When possible affiliate links are used, this means that I receive a small commission when products are purchased through the links (at no extra cost to you) I use the money to support my blog and youtube channel. If you like my projects and tutorial please consider supporting me by clicking through these links when you shop. Thanks!
Even though I told myself that I wouldn’t pick anything up from the My Favorite Things March release, when it finally was announced I knew that I couldn’t hold myself to that. Think my favorite stamp set is Bubbly Birthday, I just can’t say no to mermaids. But all of the stamps I picked up gives me so many ideas! What was your favorite product of the release? Too see what I have done with the release you can see a collection HERE, which will be updated as I create with these supplies.
When possible affiliate links are used, this means that I receive a small commission when products are purchased through the links (at no extra cost to you) I use the money to support my blog and youtube channel. If you like my projects and tutorial please consider supporting me by clicking through these links when you shop. Thanks!
When I saw this weeks sketch I knew that I wanted to use the You Make My Heart Race stamp set. It was so fun going back and playing with the Tiddly Ink stamps. I was blessed to join their GDT for 4 months in 2015 (this was before they started designing for My Favorite Things).
The sketch challenge 584 is wavy layers with a circle in the top left corner. So I decided to make a very simple scene. In retrospect I wish I chosen brighter colors however I didn’t have time this weekend to remake it. For the wavy layers I used the Slimline Drifts & Hills Stencil, I drew with a pencil and then cut them out. If I had the snowdrift dies I would have used them, would have been easier and I would have gotten a stitched border. I blended some Bundle Sage Oxide Ink over the hills and then splattered Peeled Paint, Forest Moss and Ground Espresso Oxide Inks over it.
When possible affiliate links are used, this means that I receive a small commission when products are purchased through the links (at no extra cost to you) I use the money to support my blog and youtube channel. If you like my projects and tutorial please consider supporting me by clicking through these links when you shop. Thanks!
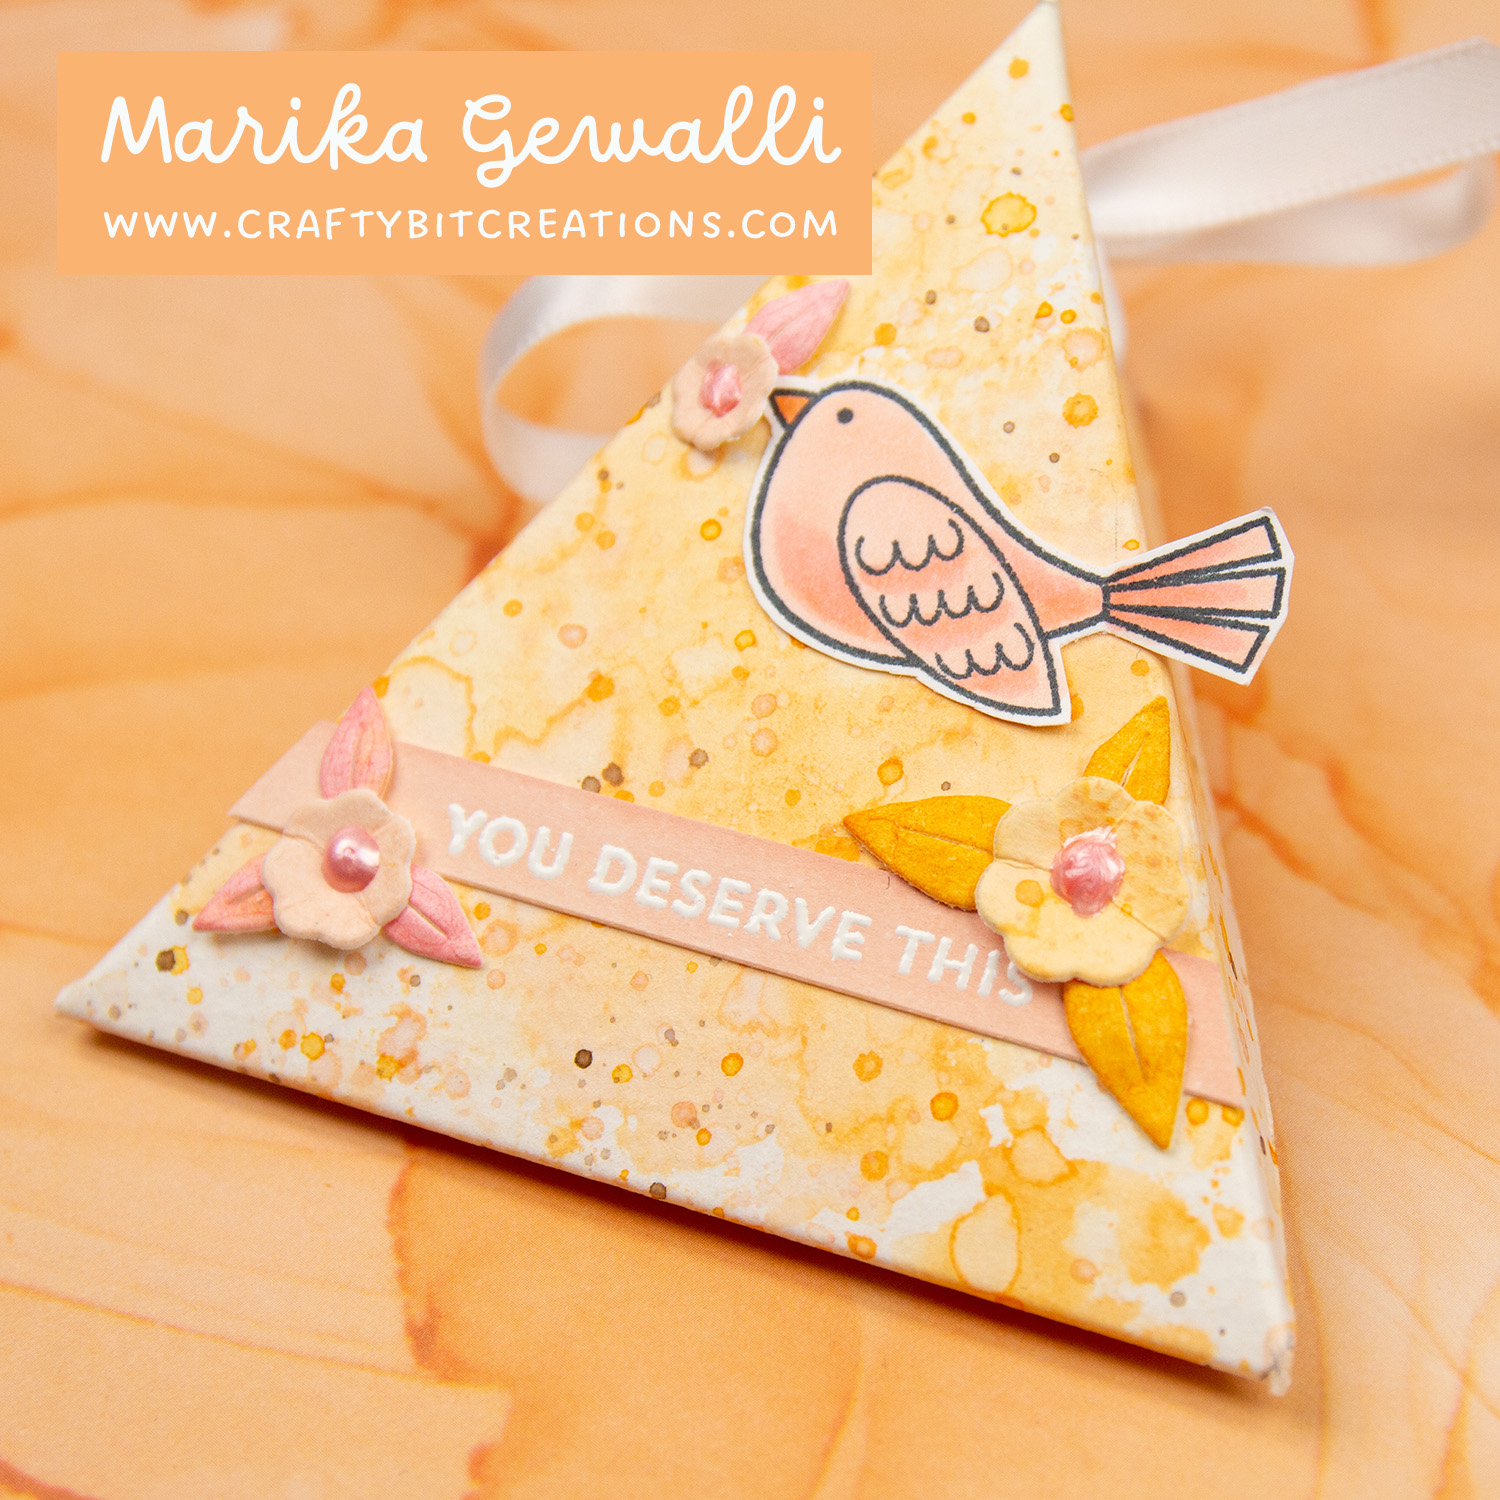
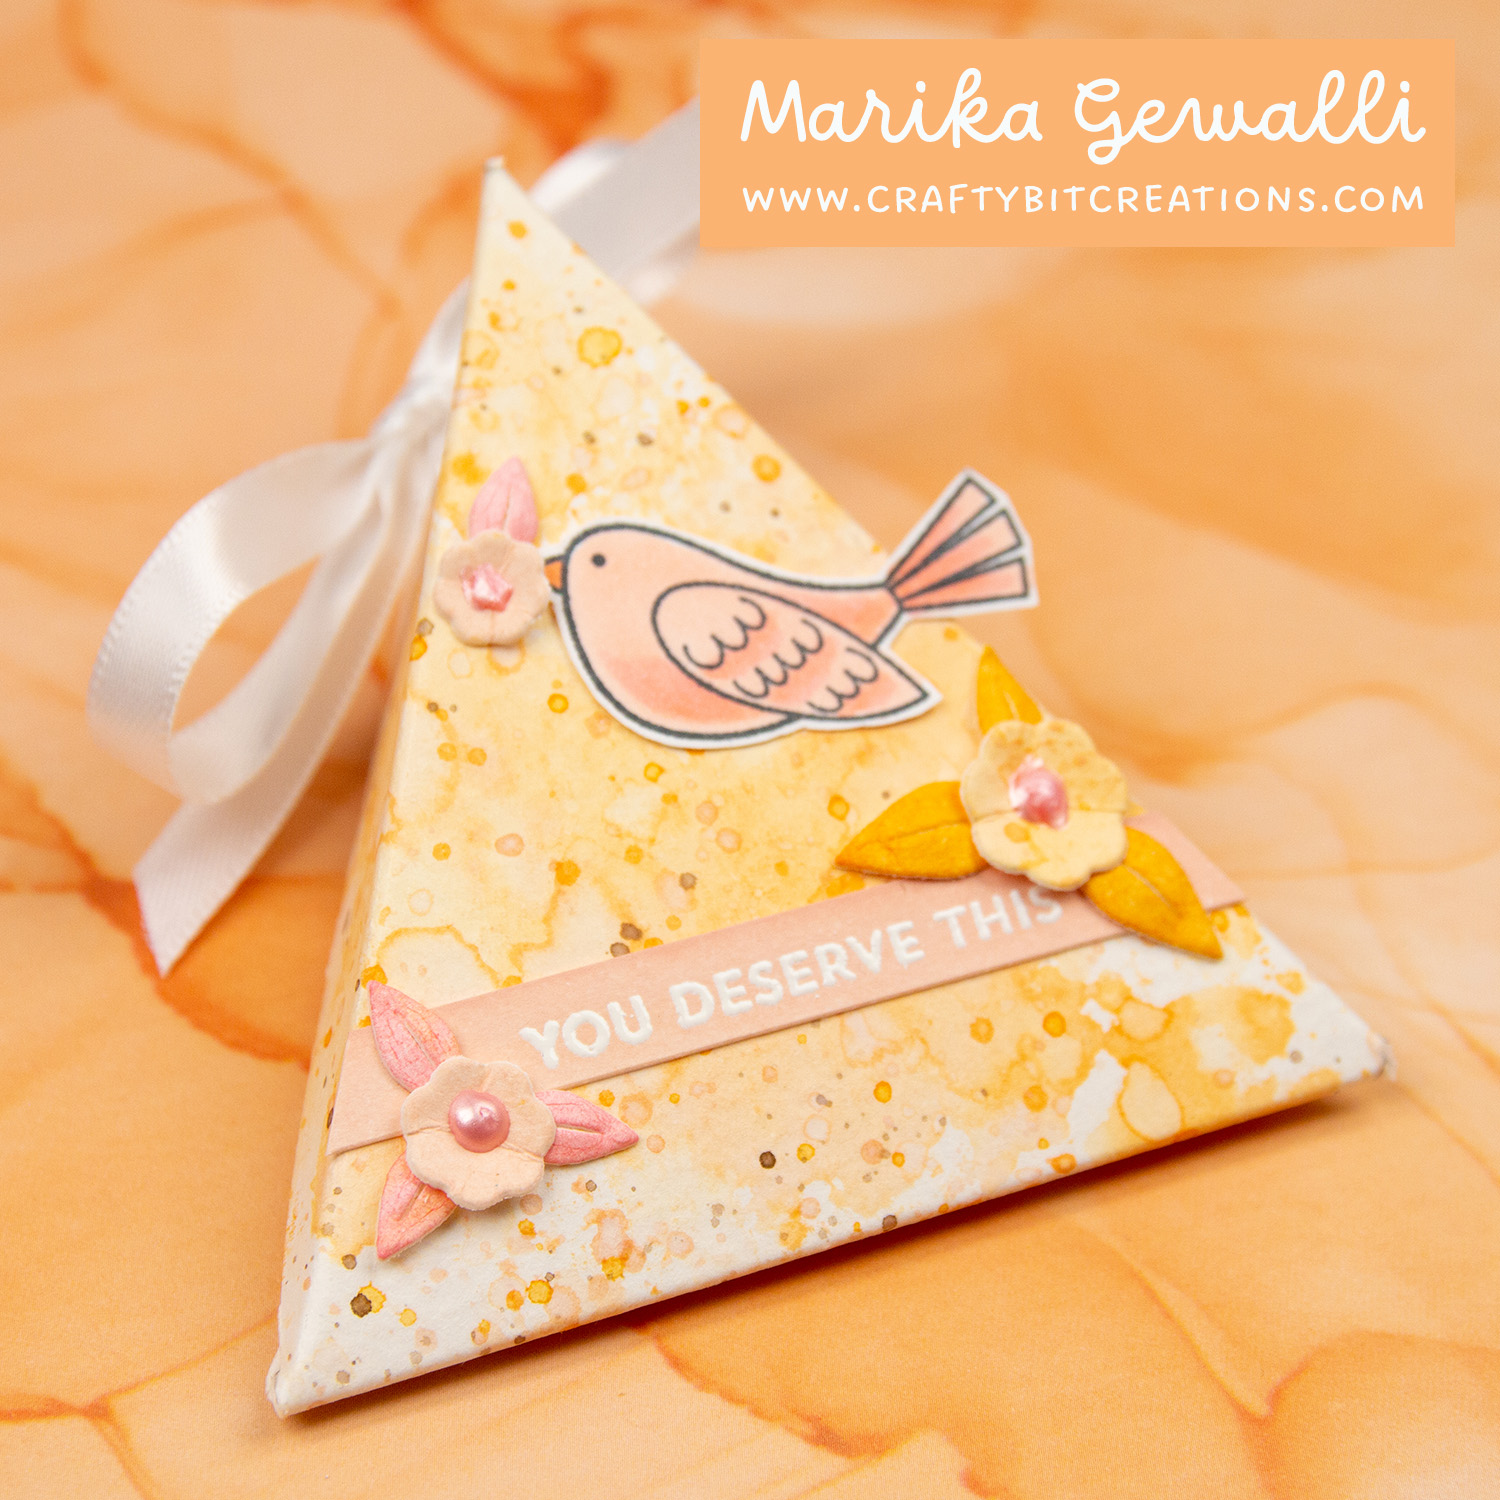
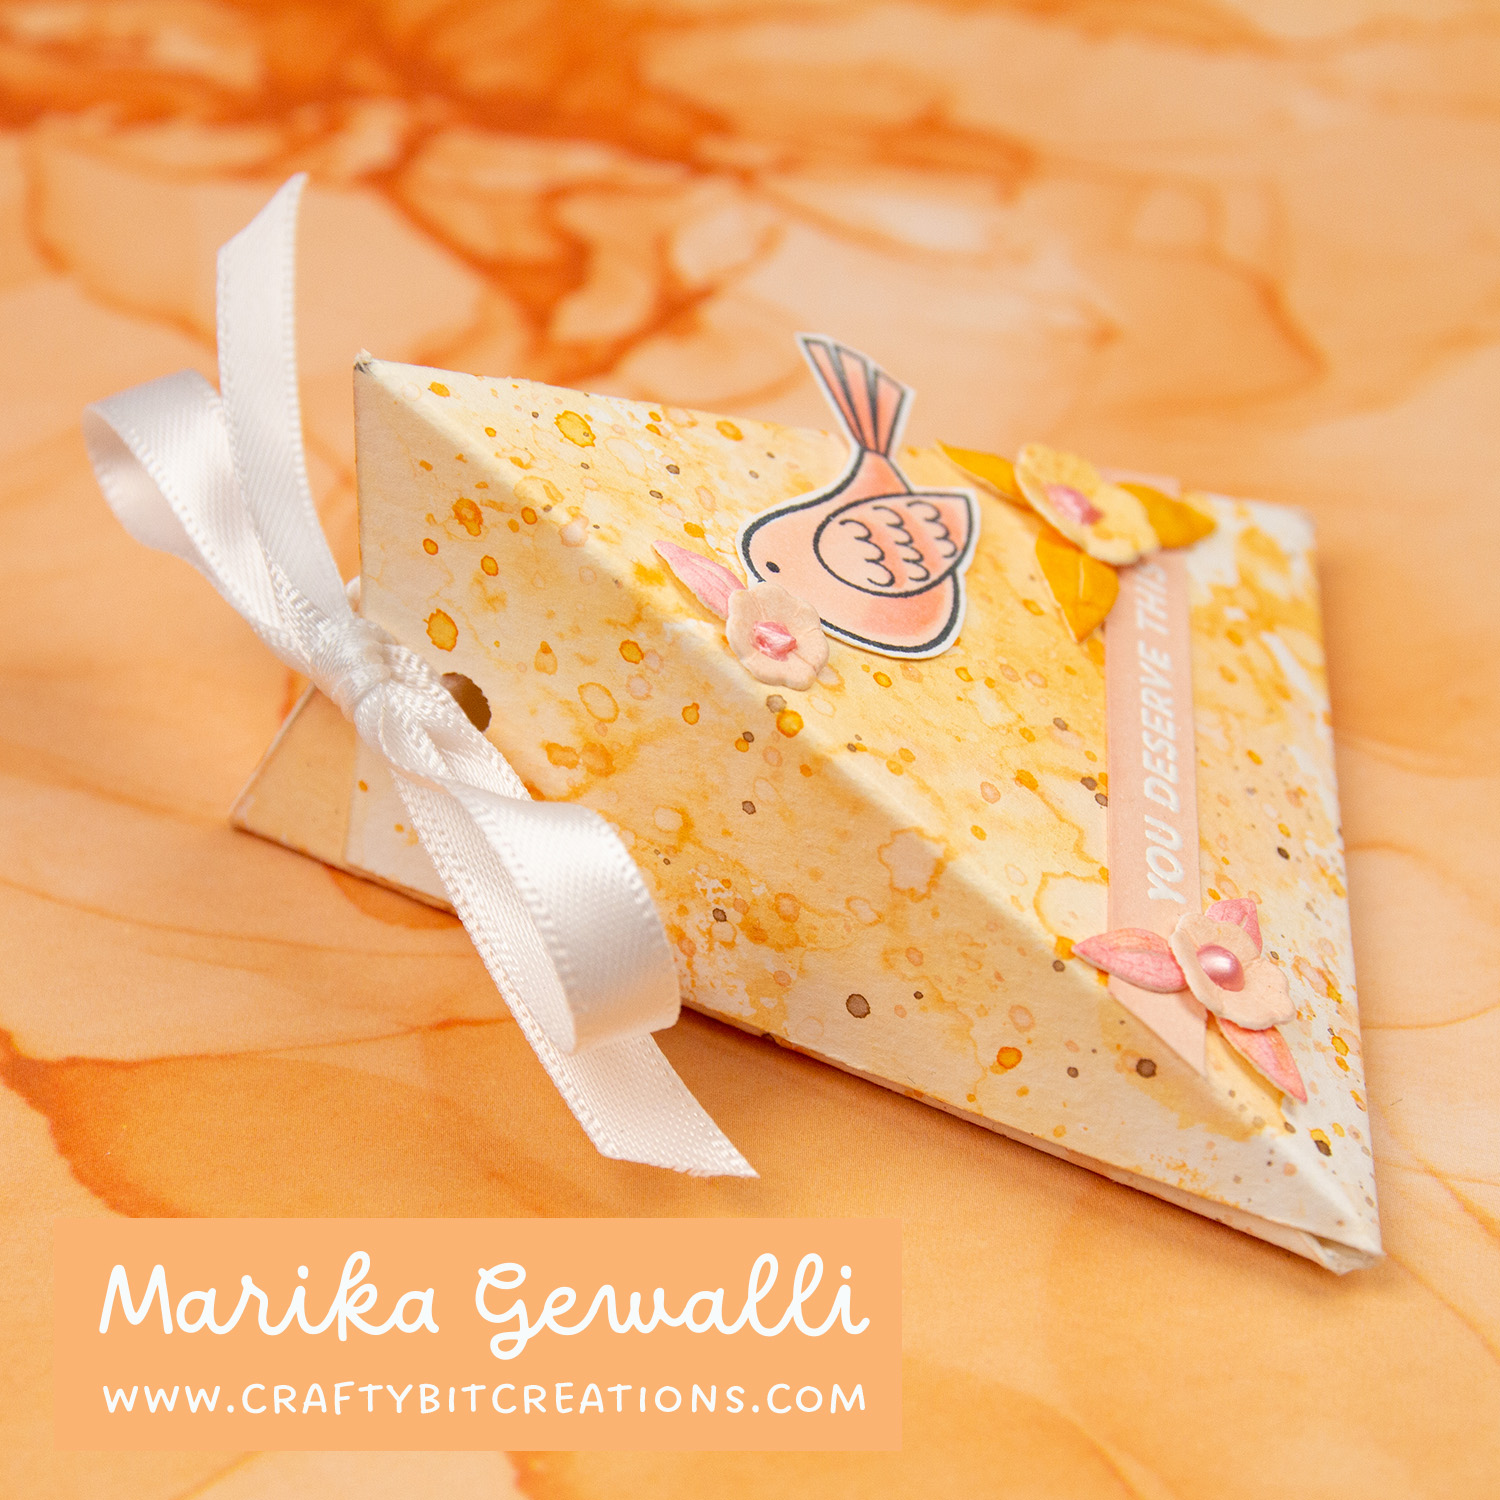
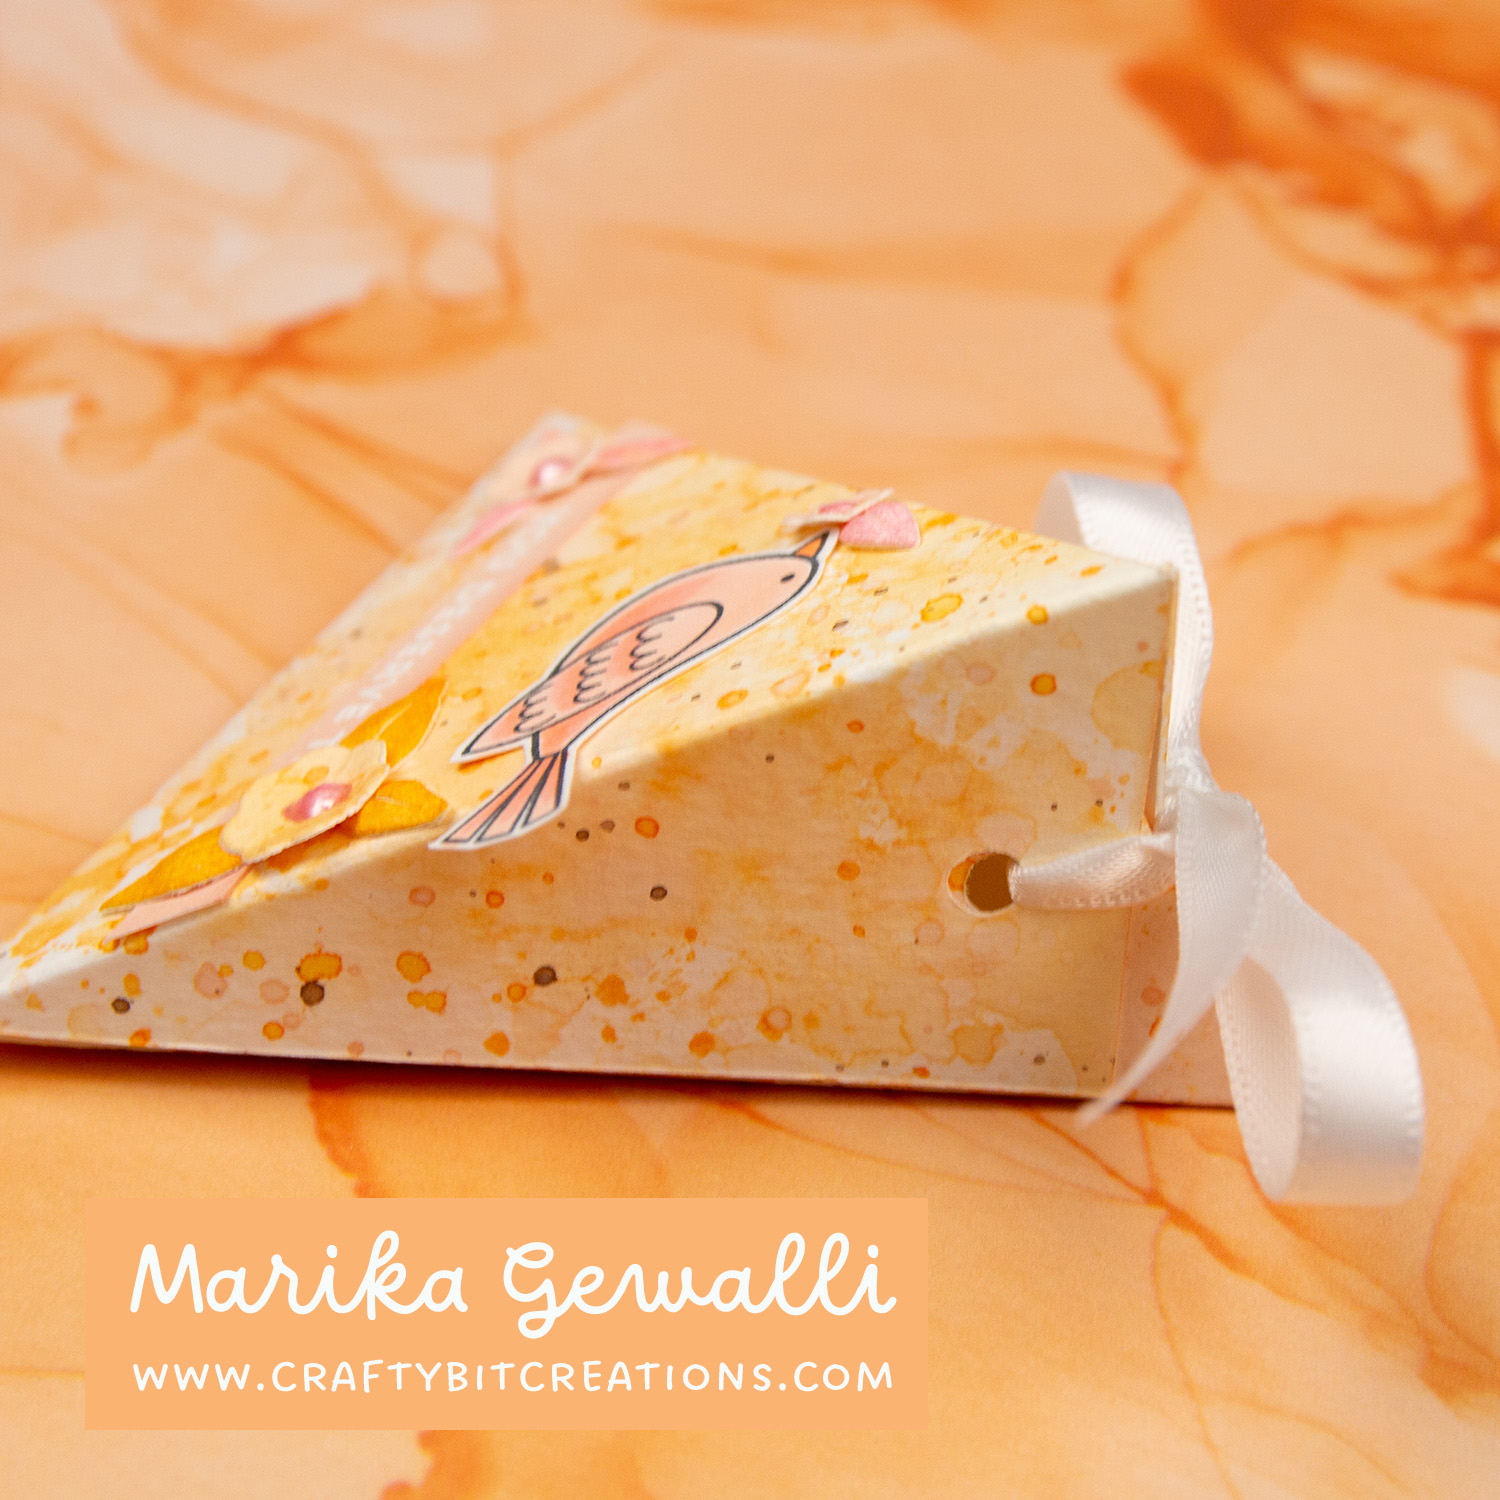
I love cute little boxes, and this Mini Triangle Box is just up my alley! I wanted to make a box that would use my 6″x6″ paper, however I also wanted to use the fun color scheme that I’ve been using all trough this week. And after deep diving into my pile of pattern papers I just couldn’t find one that was perfect for this project.
Instead of using something that wasn’t perfect, I made my own. I used Montval 100% Cotton watercolor cardstock, 200gsm. And created the background with a real fun smooching technique, which you can see in the video below. And below you can also find a schema and you can find it as a PDF HERE, and if you want cutting files you can find them HERE. If you want to know what papers and products to use for smooching you can find a video HERE that explains it.
When possible affiliate links are used, this means that I receive a small commission when products are purchased through the links (at no extra cost to you) I use the money to support my blog and youtube channel. If you like my projects and tutorial please consider supporting me by clicking through these links when you shop. Thanks!
Supplies
Birds of a Feather Die-namics: MFTSSS Beautiful Branch Die-namics: MFTSSS Neenah 110 LB SMOOTH SOLAR WHITE s: SSS Distress Ink Tattered Rose: SSS Distress Ink Dried Marigold: SSSSBC Distress Ink Worn Lipstick: SSSSBC Distress Ink Spiced Marmalade: SSSSBC Dinstress Ink Ground Espresso: SSS Distress Oxide Ink Tattered Rose: SSSSBC Distress Oxide Dried Marigold: SSSSBC Brushes: SSSAMZSBC Mini Blending: SSSAMZSBC Gina K Designs Sheer Satin Fancy Ribbon White and Silver: SBC Tonic SHIMMERING ROSE Nuvo Crystal Drops: SSSAMZ Tim Holtz Heat It Craft Tool US: SSSAMZSBC Tim Holtz Heat It Craft Tool EU: SSSAMZ Tim Holtz Heat It Craft Tool UK: SSSAMZ
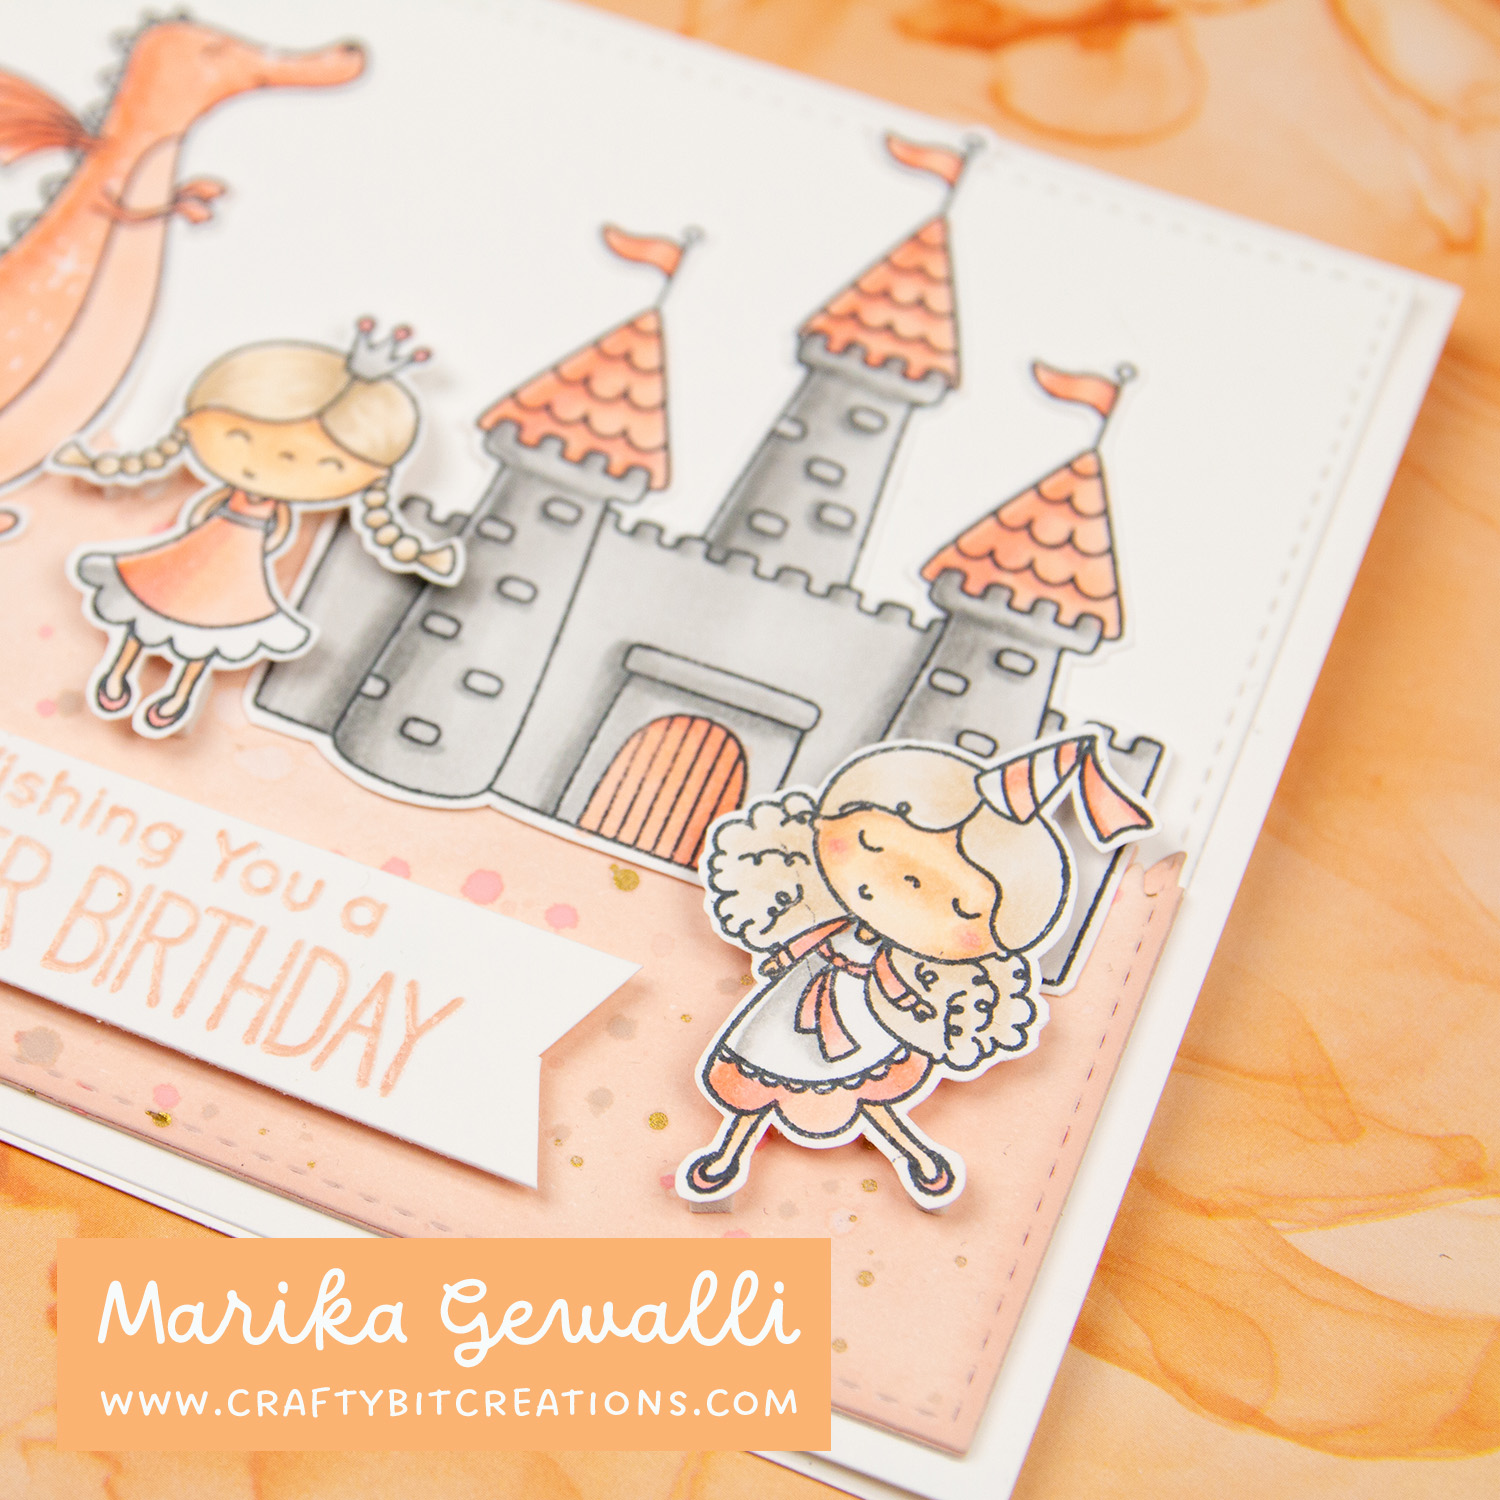
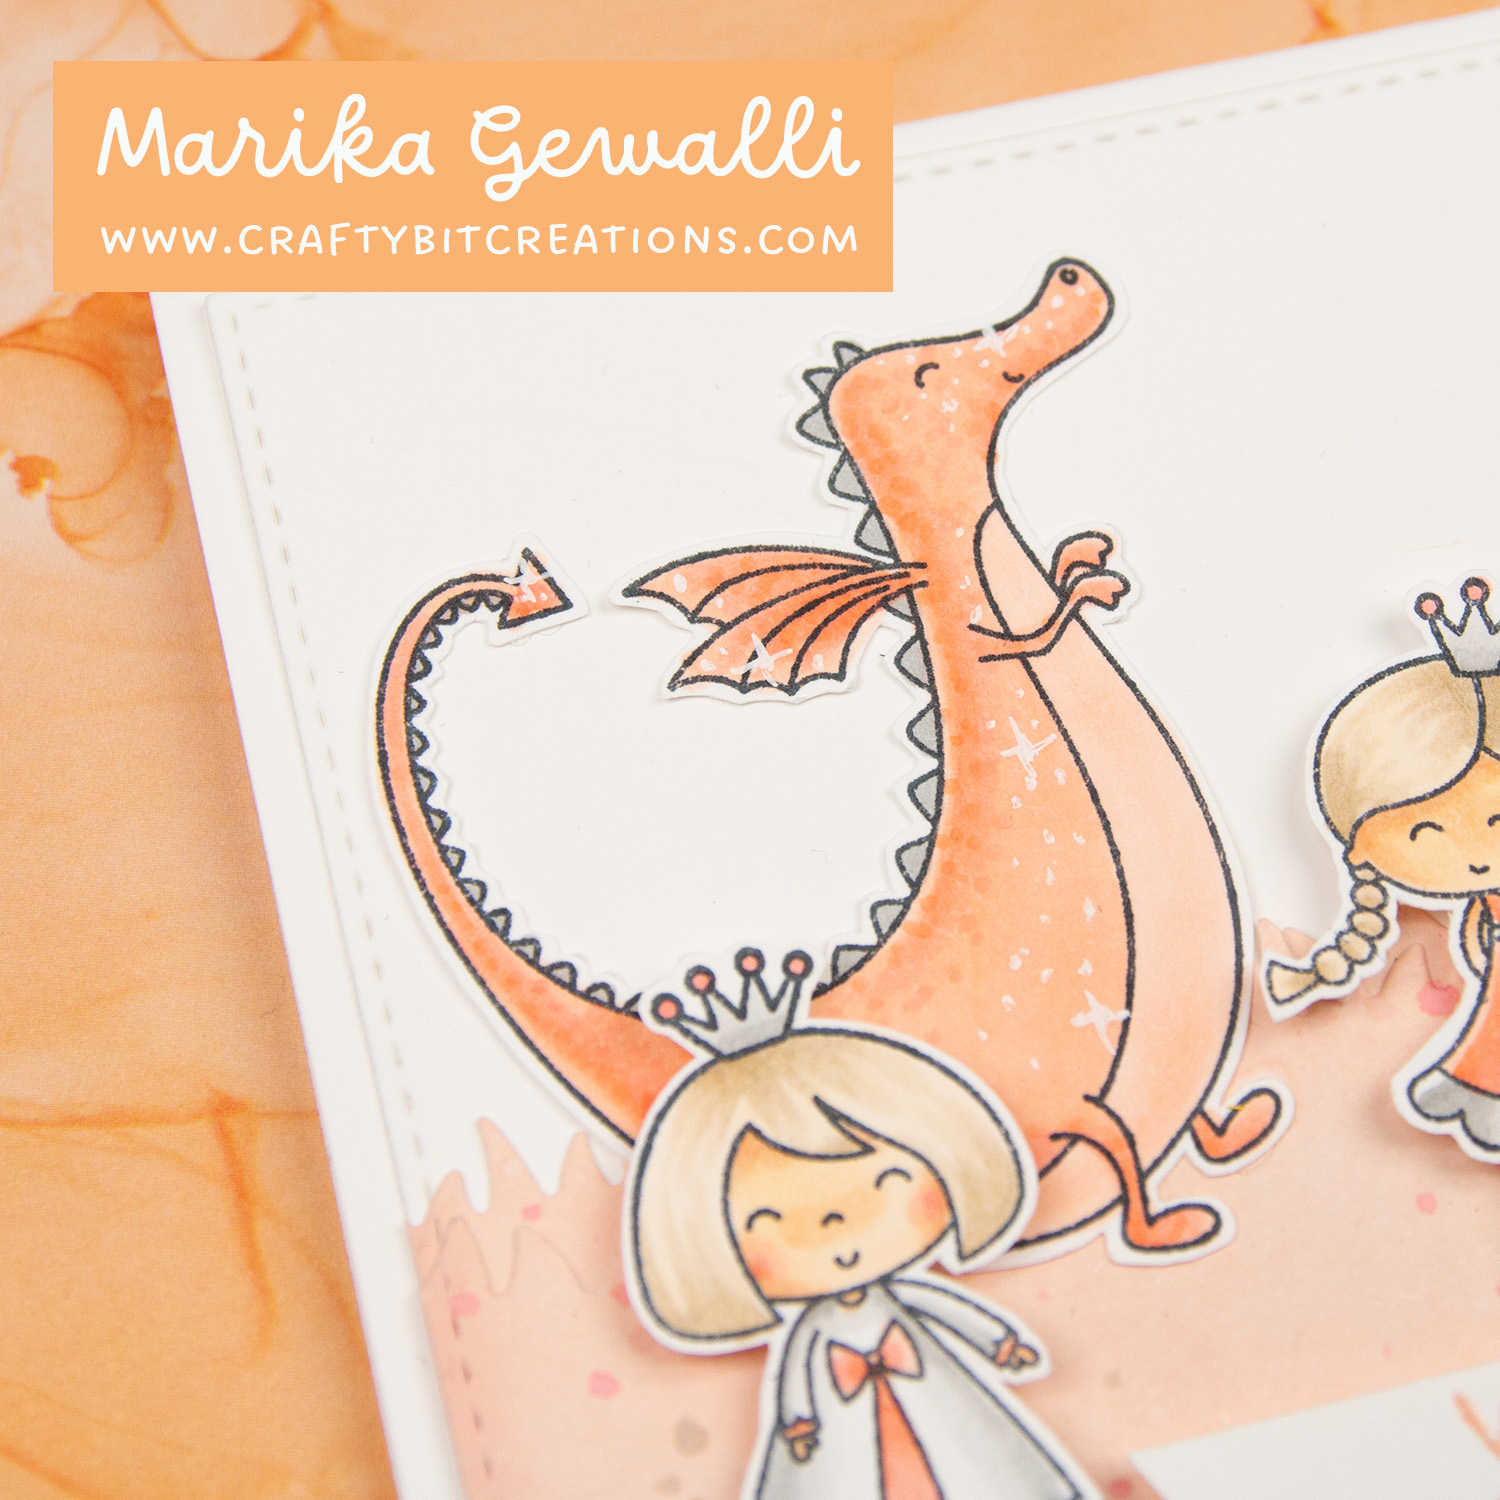
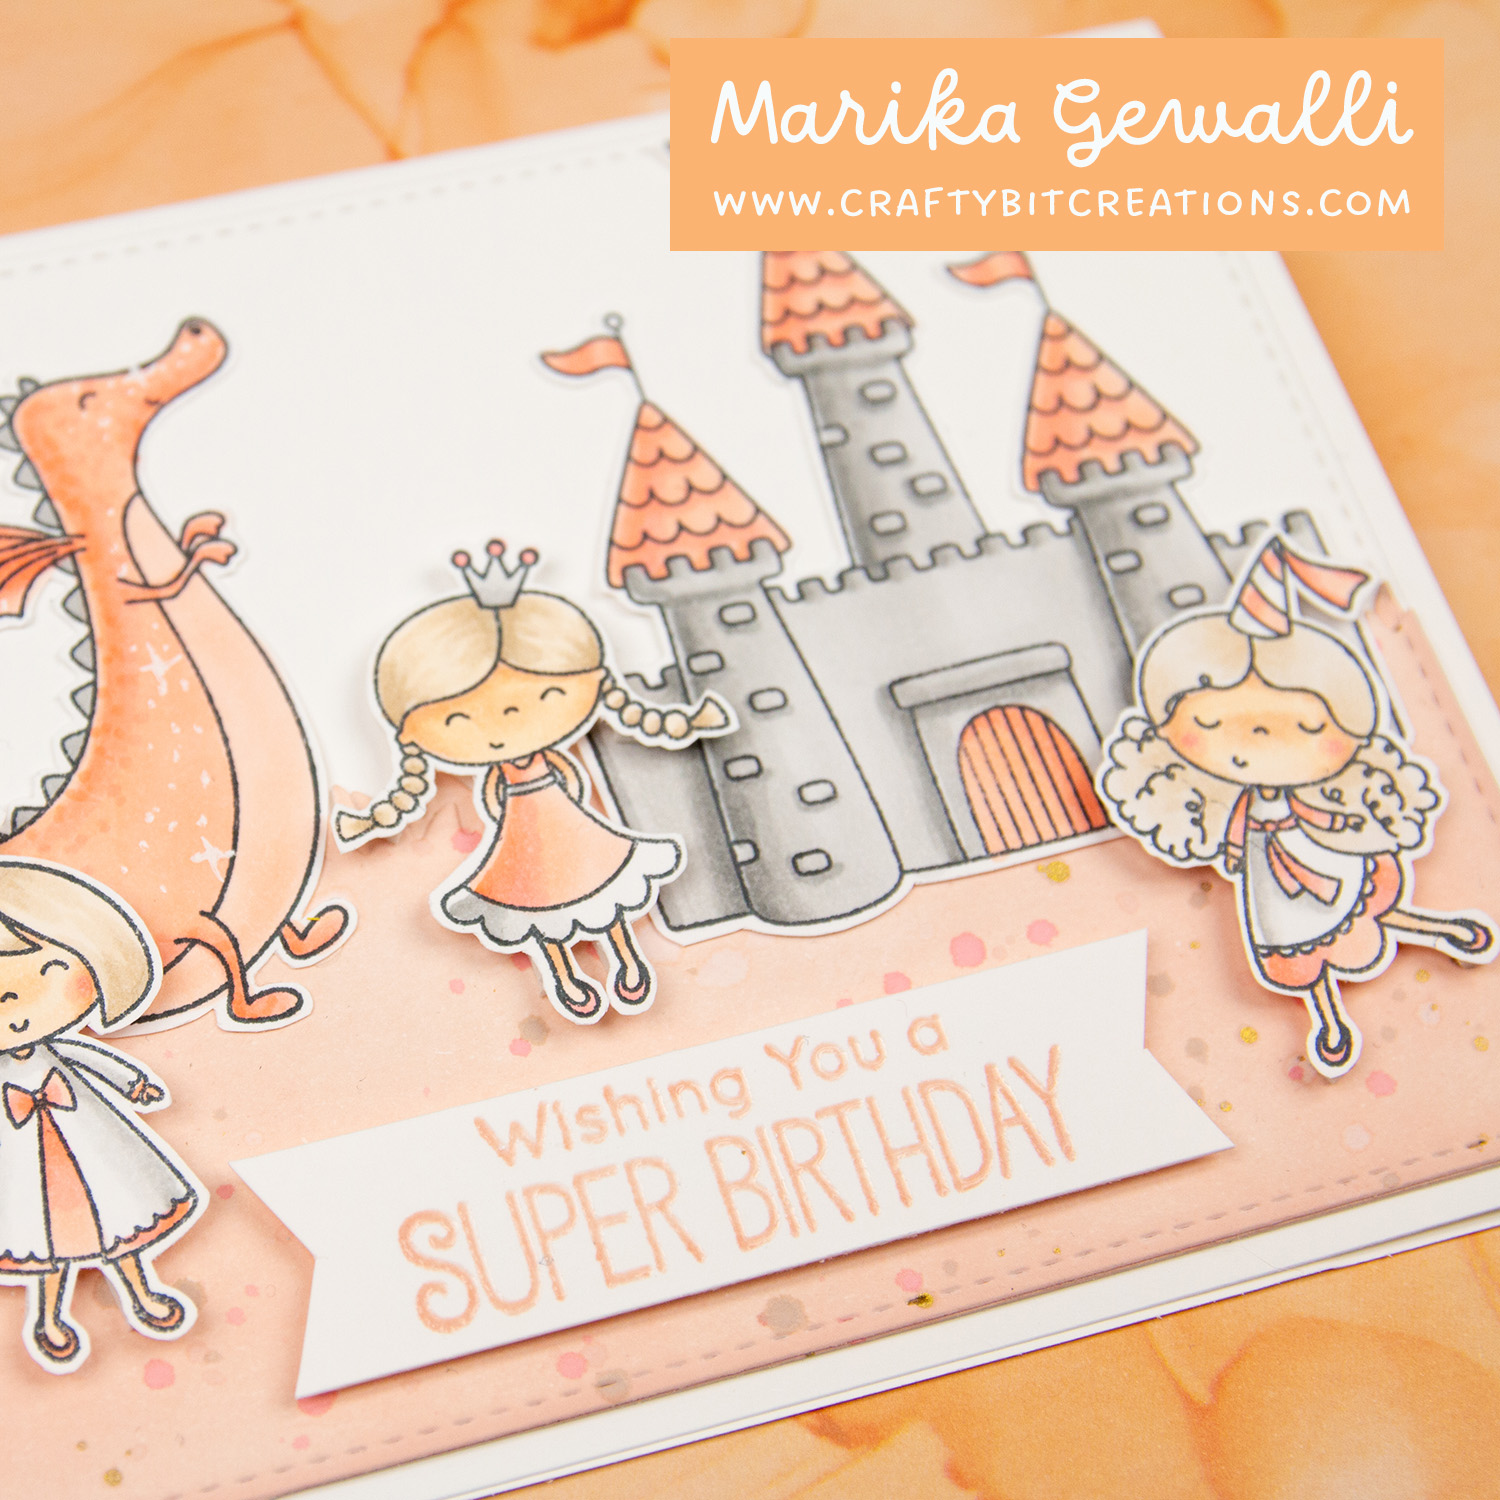
I love doing build a scene cards, and this one was no exception. And when I saw the Fairy-tale Friendship Stamp Set, I just know I needed to have it. There is nothing so cute as dragons and princesses. With the added castle this stamp set is perfect for build a scene cards.
I finally made a sentiment by stamping a sentiment from the You’re Super Stamp Set in Tattered Rose Distress Ink three times. Then I used Versamark Ink to stamp it a fourth time and heat embossed it in clear embossing powder. And then I put the scene together and the card was done!
When possible affiliate links are used, this means that I receive a small commission when products are purchased through the links (at no extra cost to you) I use the money to support my blog and youtube channel. If you like my projects and tutorial please consider supporting me by clicking through these links when you shop. Thanks!
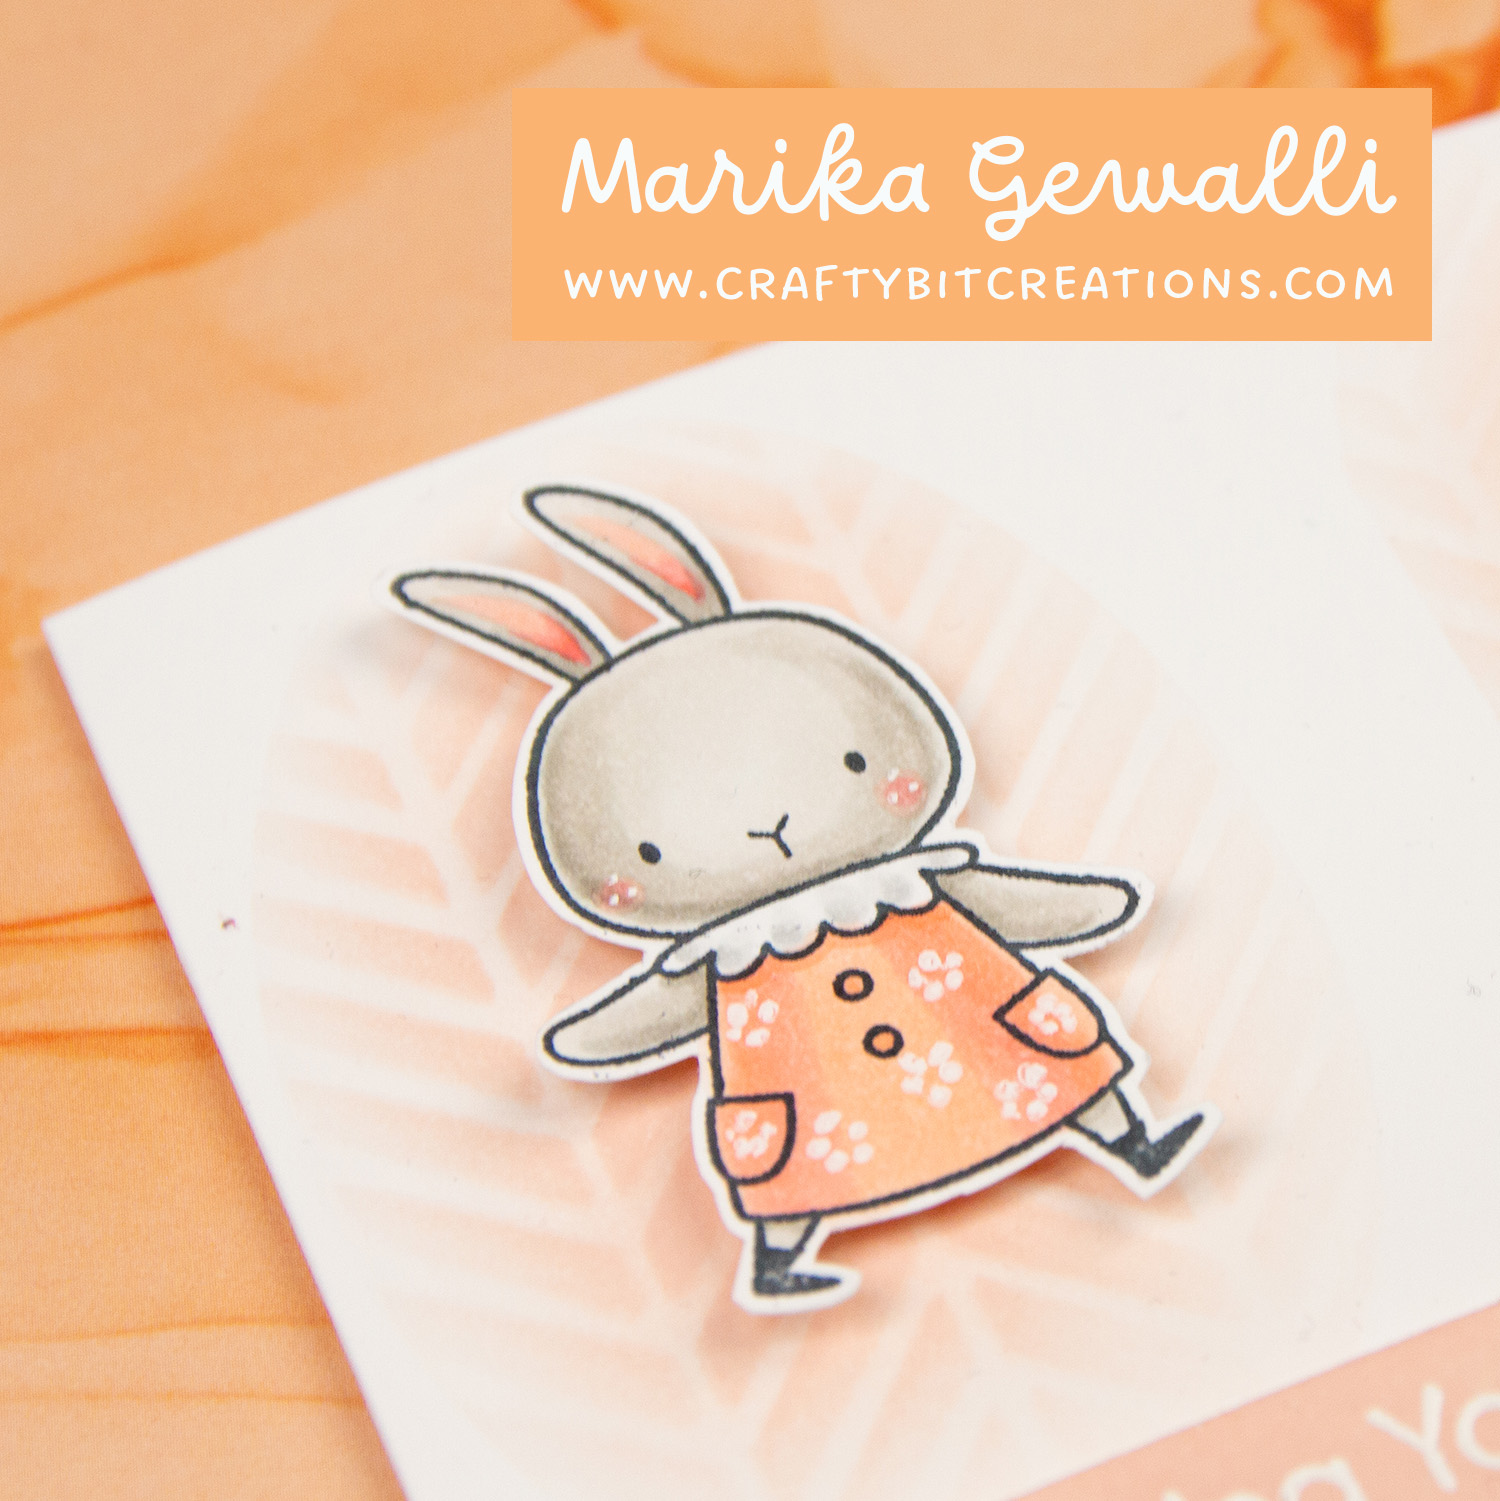
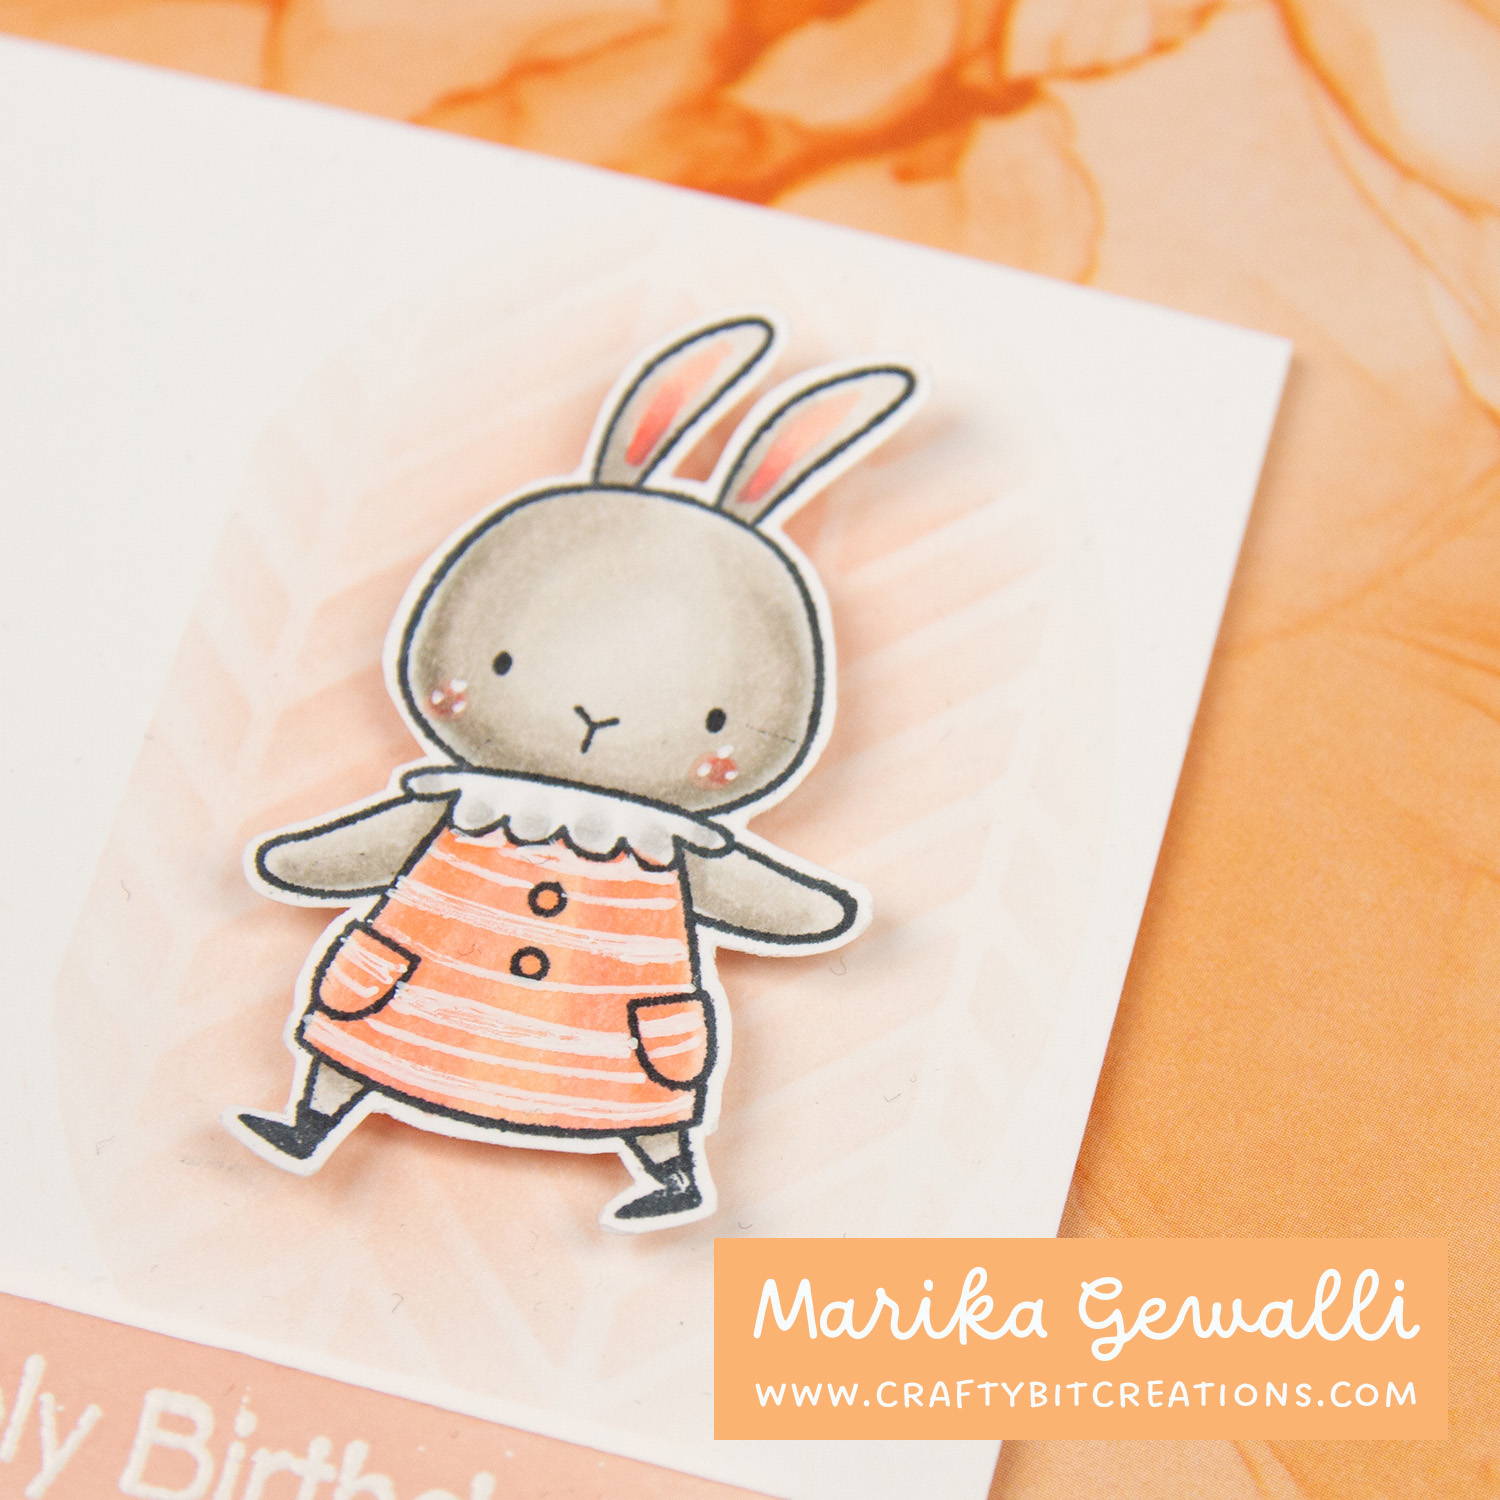
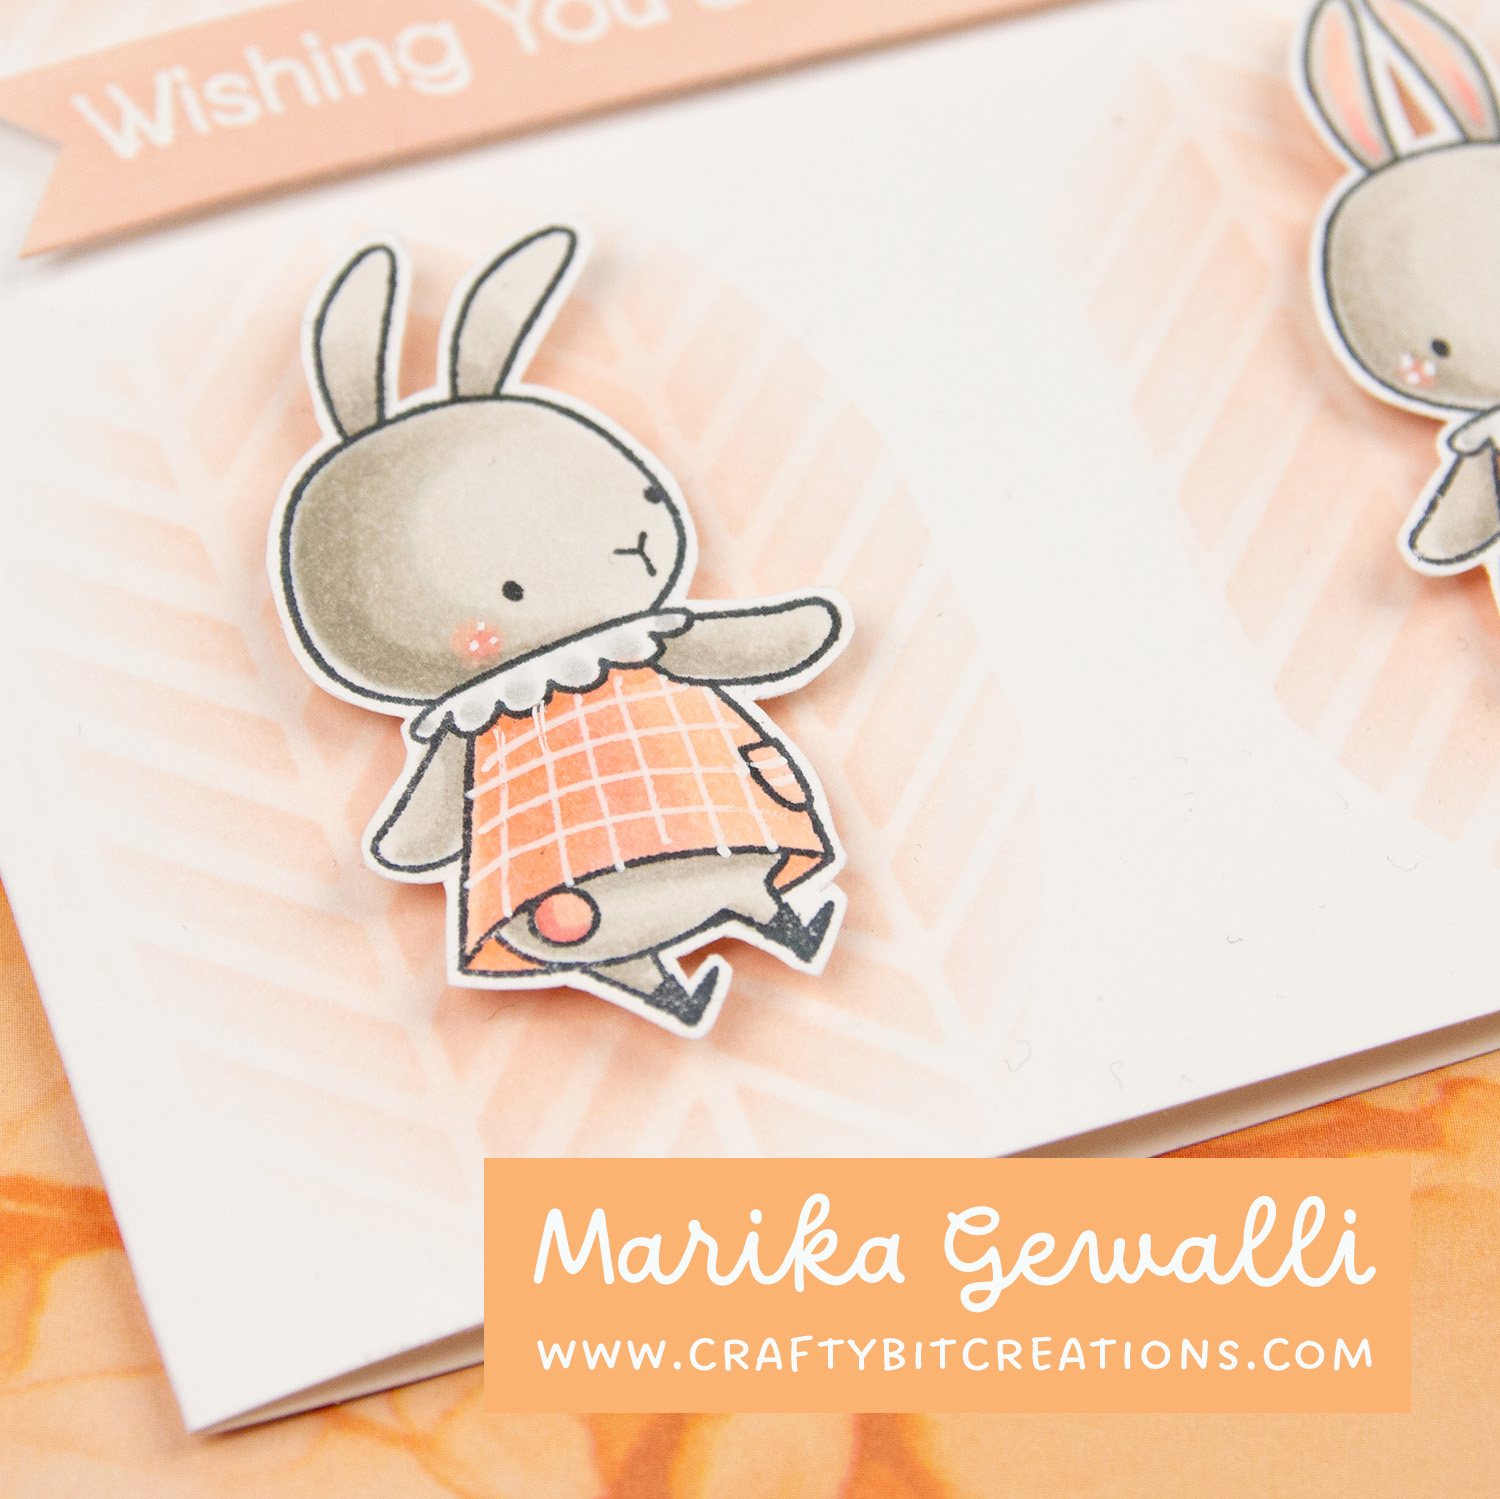
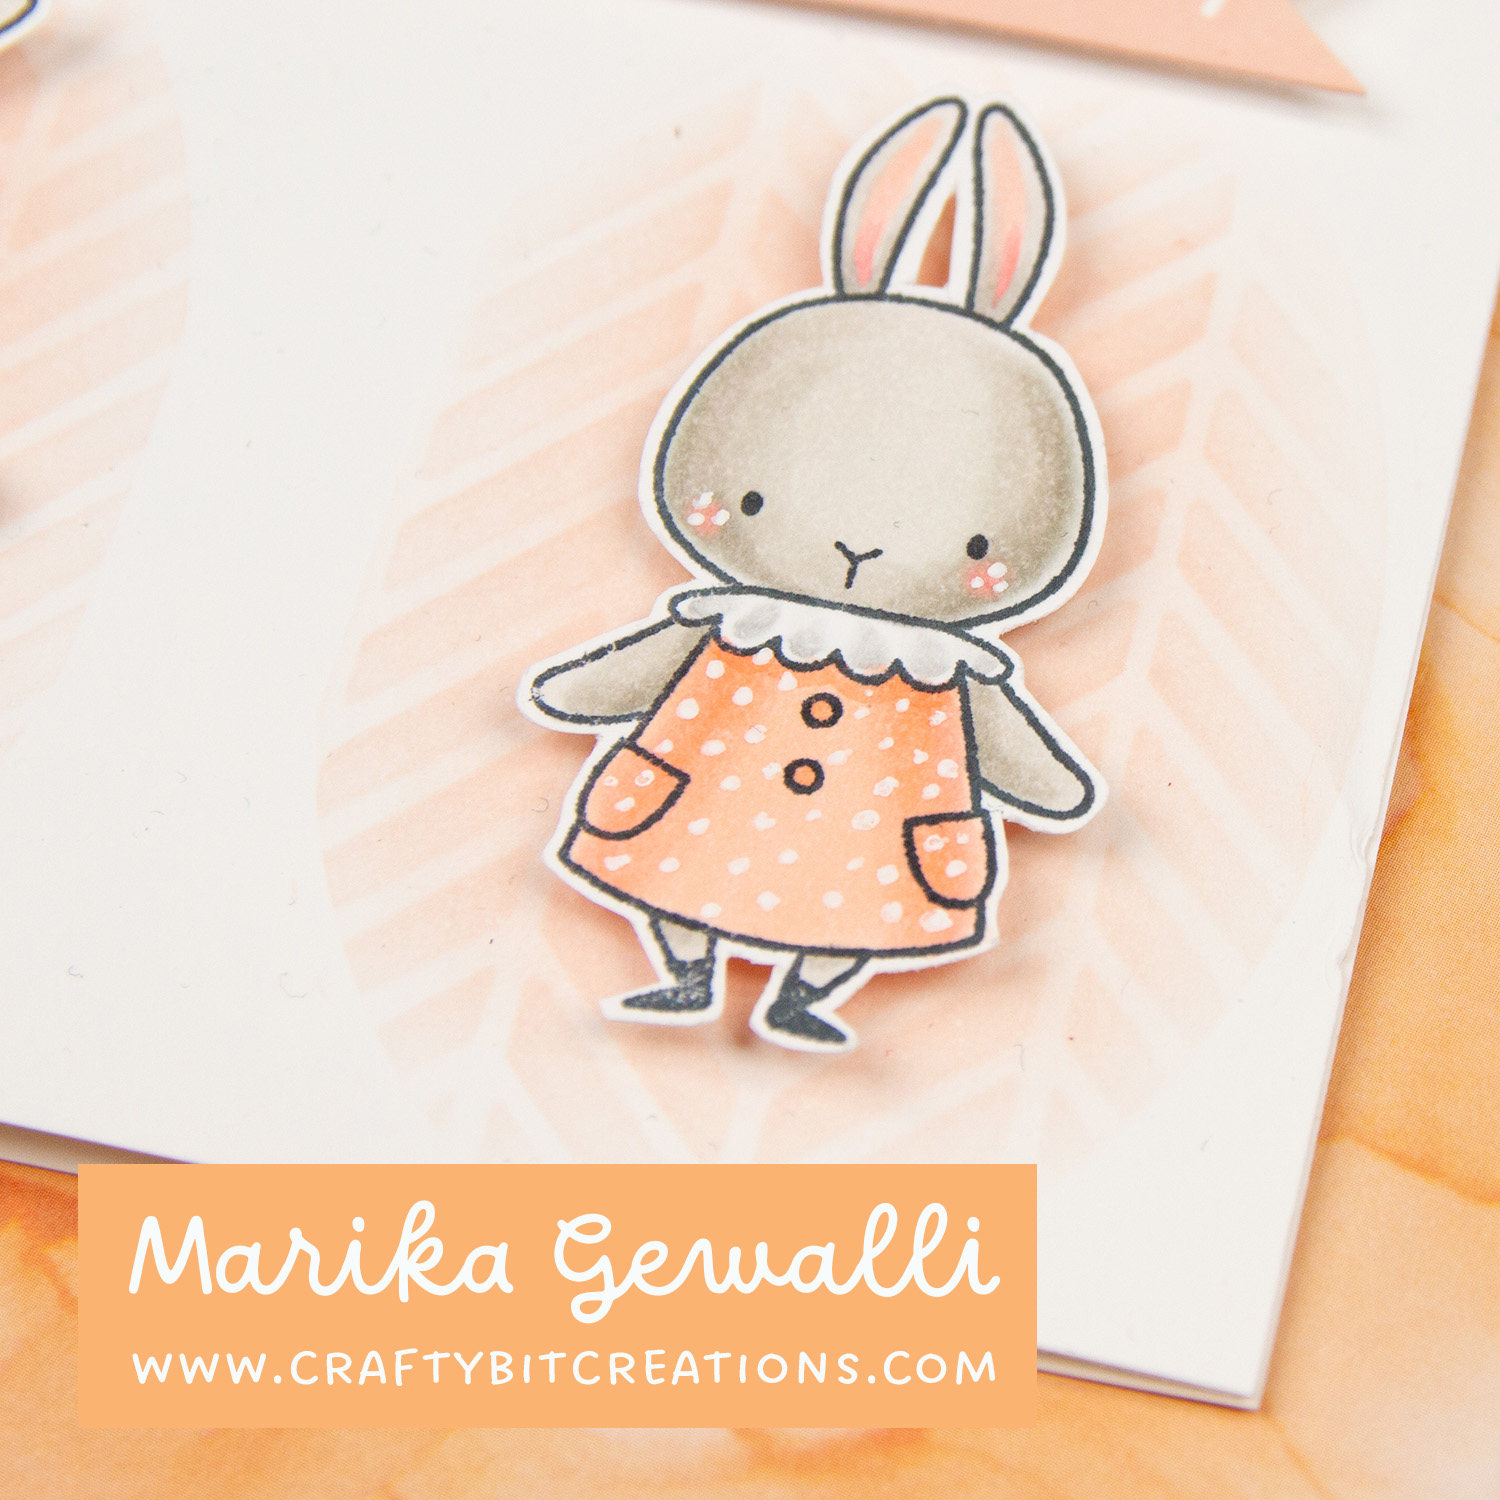
For todays Sketch Challenge 583 I made a card with some old and loved stamp set. On top of the new stamps I bought, I have a little stack of stamps that I found in my stash that I just want to play with soon. This card started in that stack. I have started to sit in my sofa and color in the evenings, just to have something to do and also practise my coloring. Which also mean that I test out new color combinations.
This time around I choose the cutest little bunnies from the Somebunny stamp set, and after coloring I wanted to play around with my white gel pen to add some patterns. When the Sketch Challenge 583 was announced I decided that I wanted to use my colored up bunnies.
To match the style that I have been playing with lately I decided to use Tattered Rose Distress Ink for blending, mostly because it matched perfectly with the coloring of those cute bunnies dresses. And instead of making squares in the corners I blended some ovals over an old MFT stencil and then blended a little bit on top of that blending with out the stencil just to soften the pattern. And added on bunny in each corner.
To finish it off I white embossed a sentiment on some neenah, blended the Tattered Rose Ink over it and cut it to a flag. I mounted it on foam squares in the middle of the card.
If you want to see more cards from previous Sketch Challenges you can find them HERE.
When possible affiliate links are used, this means that I receive a small commission when products are purchased through the links (at no extra cost to you) I use the money to support my blog and youtube channel. If you like my projects and tutorial please consider supporting me by clicking through these links when you shop. Thanks!