Uncategorized

Sketch Challenge 593 – So Cool

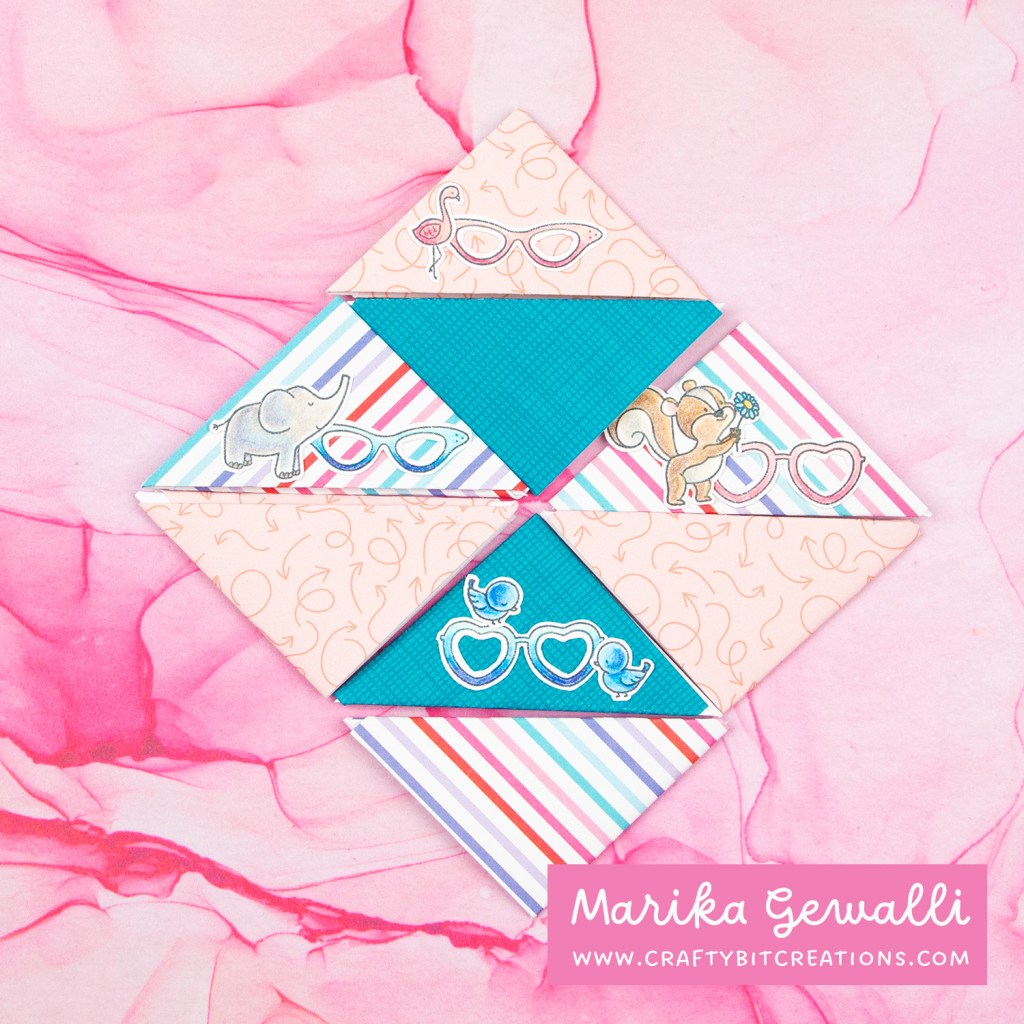
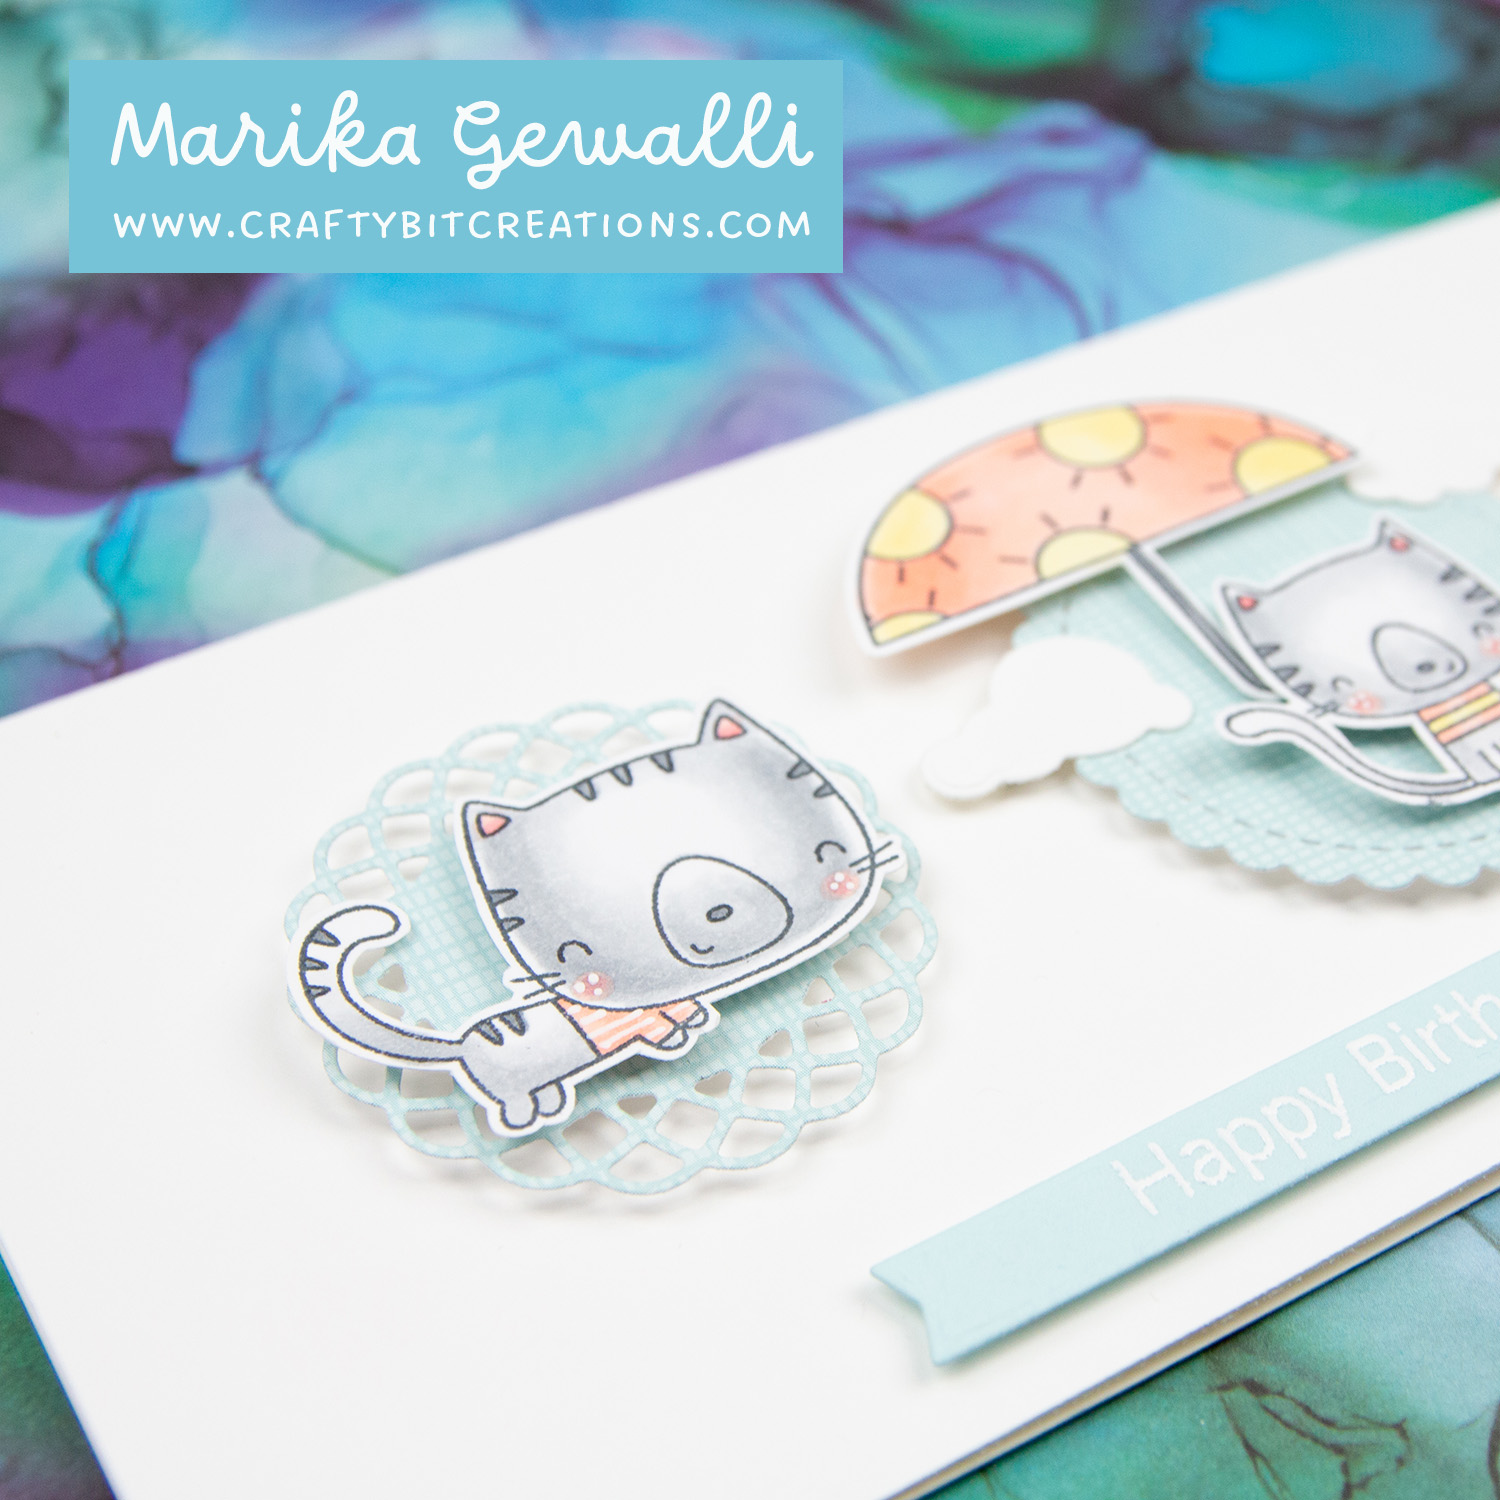
Sketch challenge 593 from My Favorite Things is a fairly simple one that really would work perfectly for a scene. However I have been wanting to play with the SPECtacular stamp set. And while I was putting away the stamp pile on my desk from last weeks creations, I picked up the You’re My Sunshine and saw the cute cat with the glasses and realised it would work perfectly with the SPECtacular stamp set.

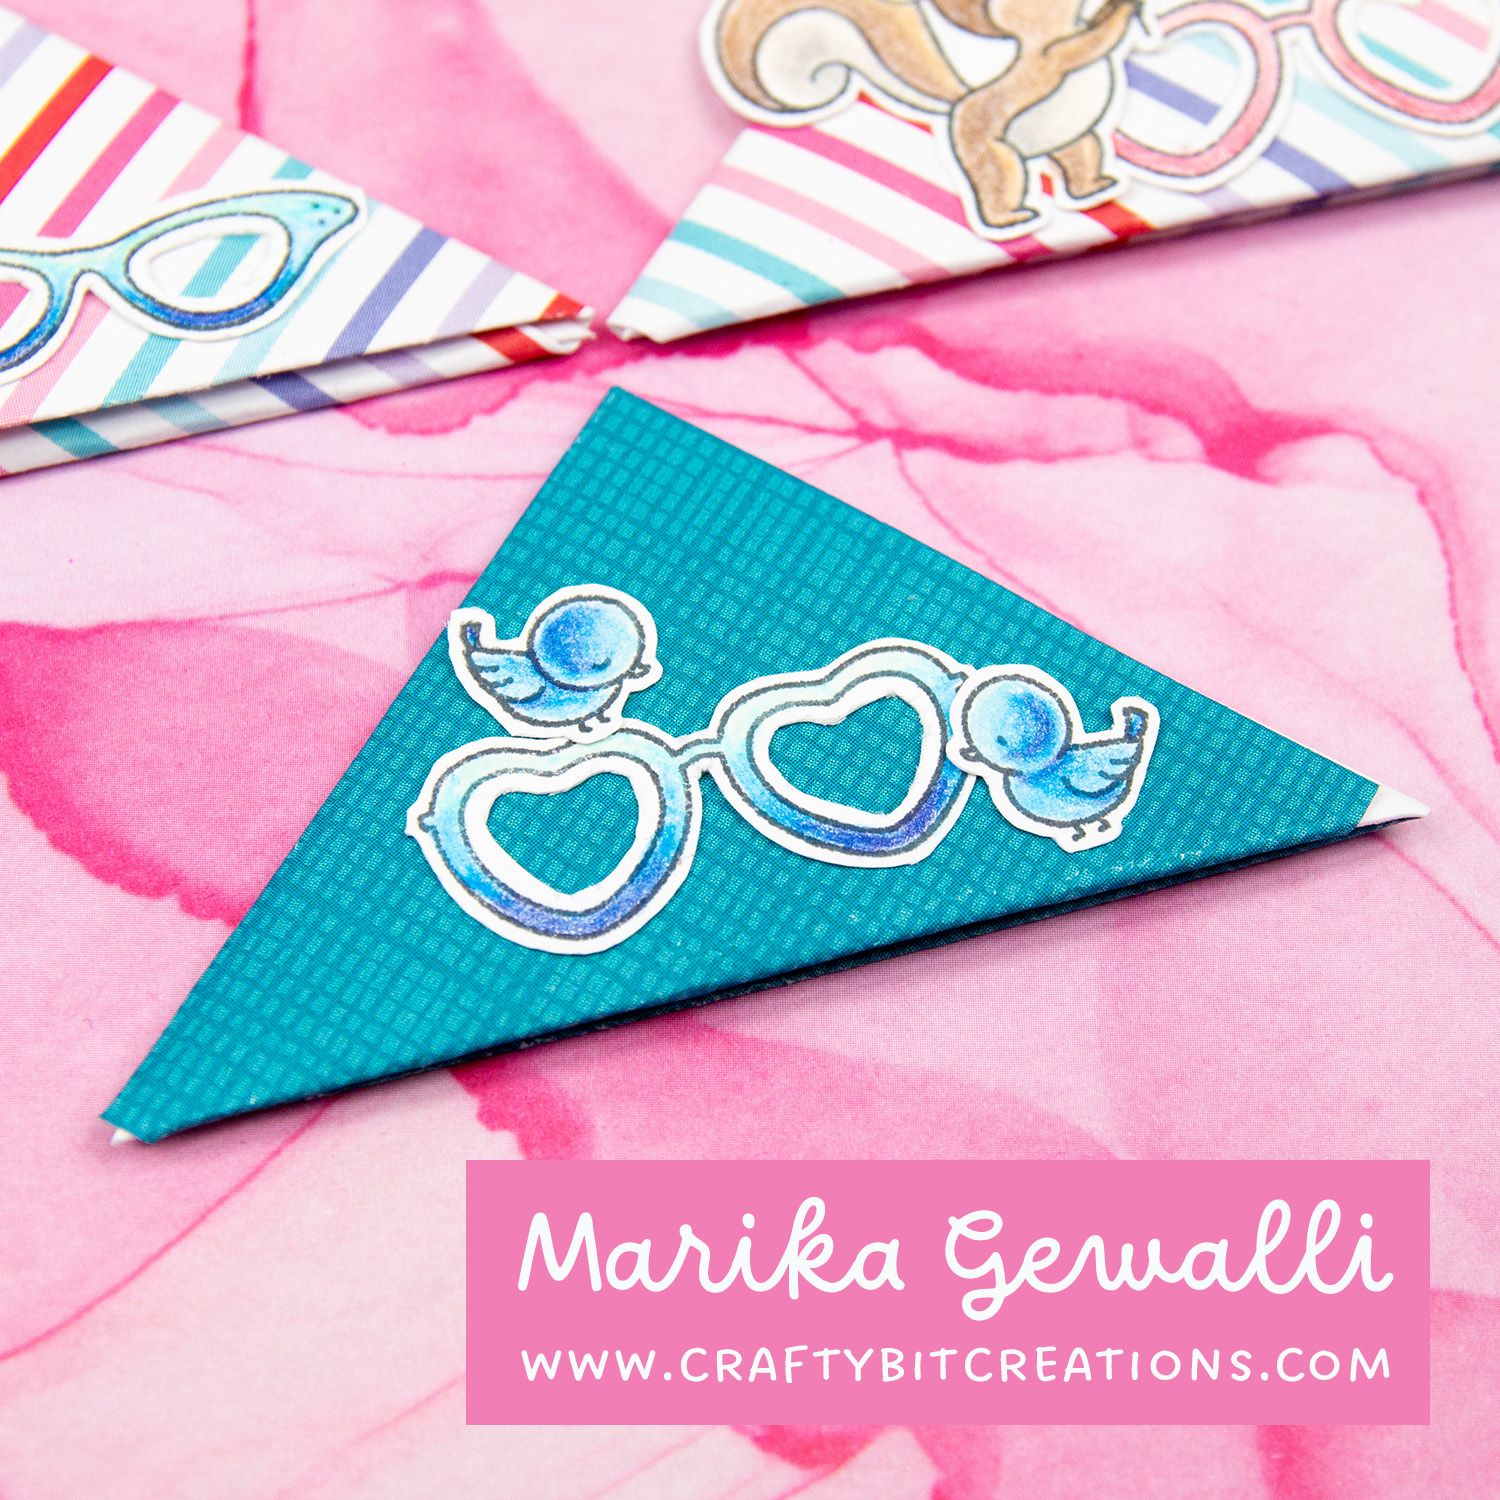
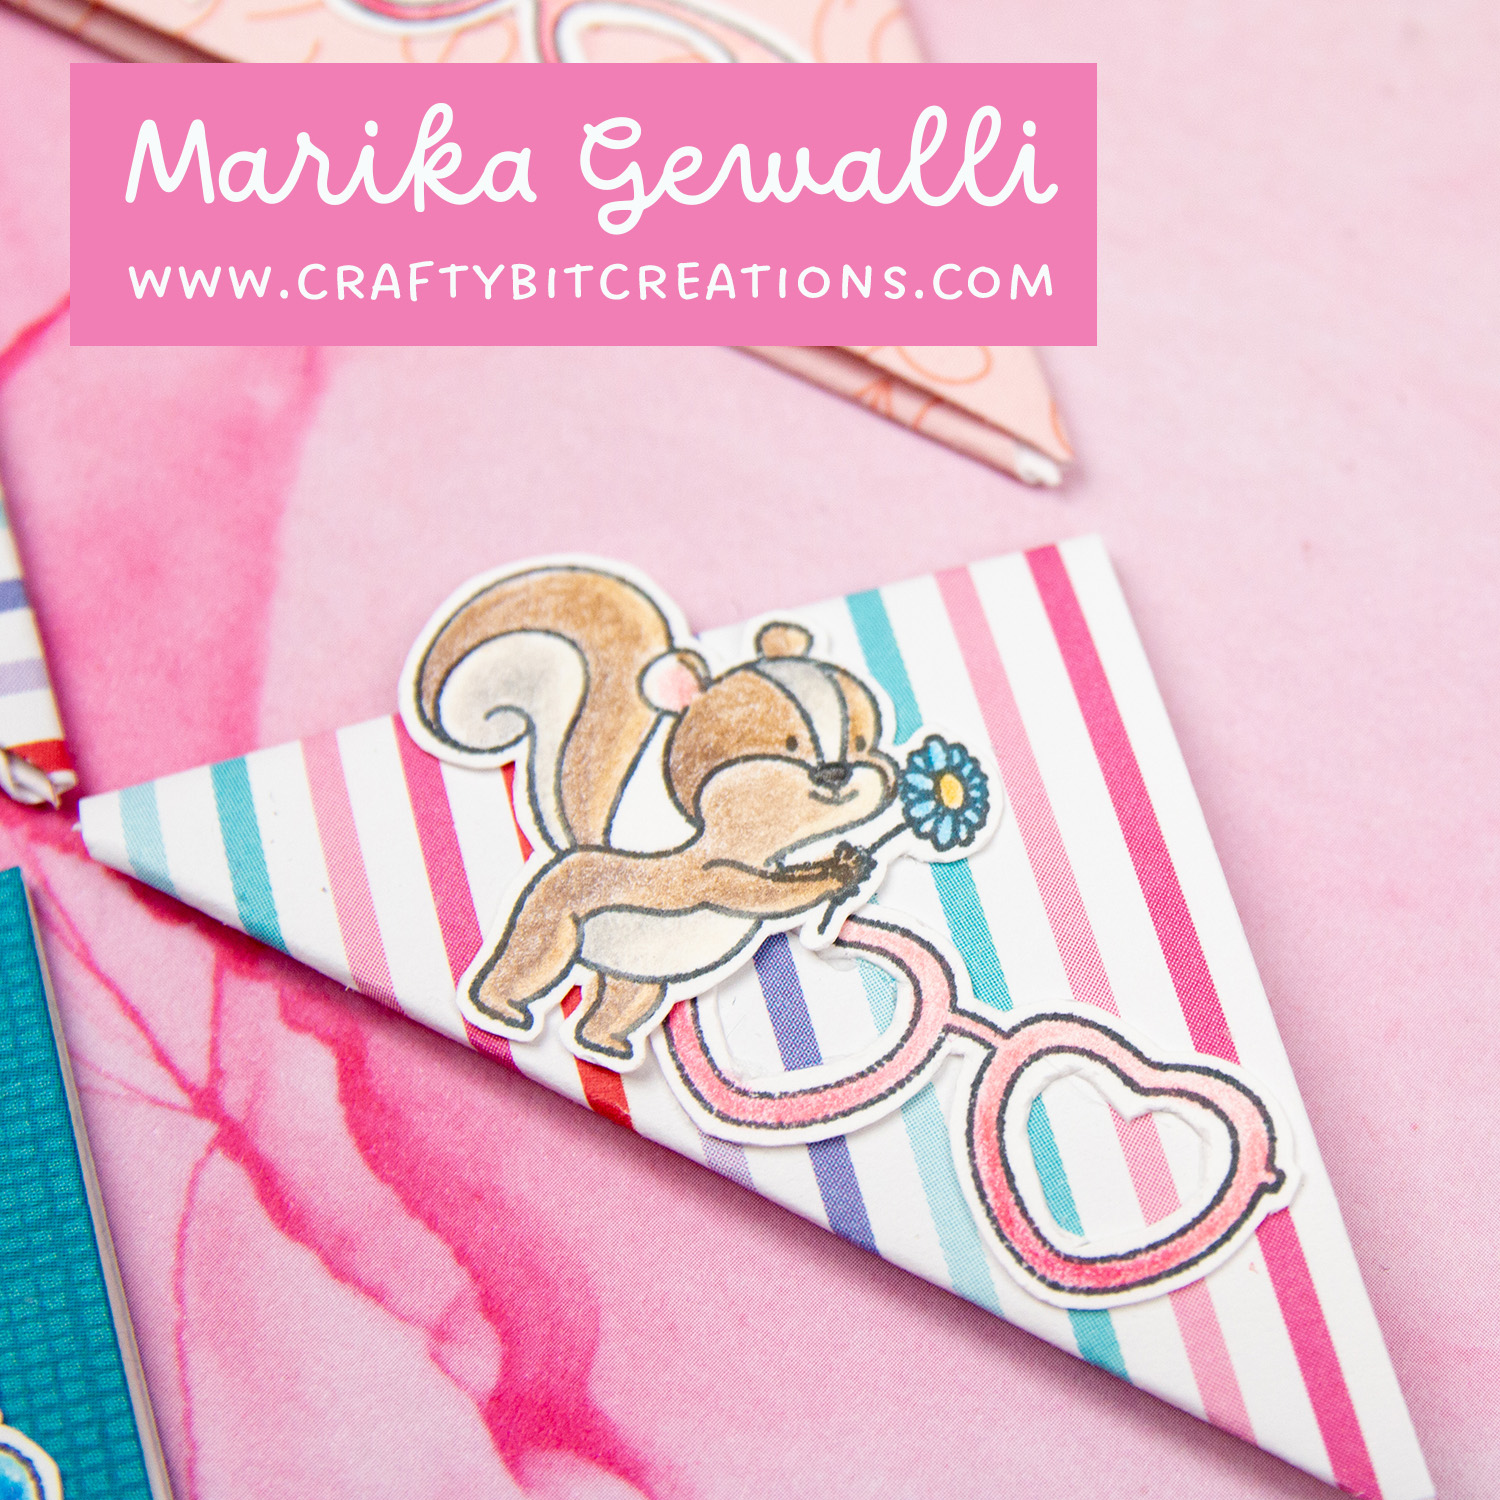
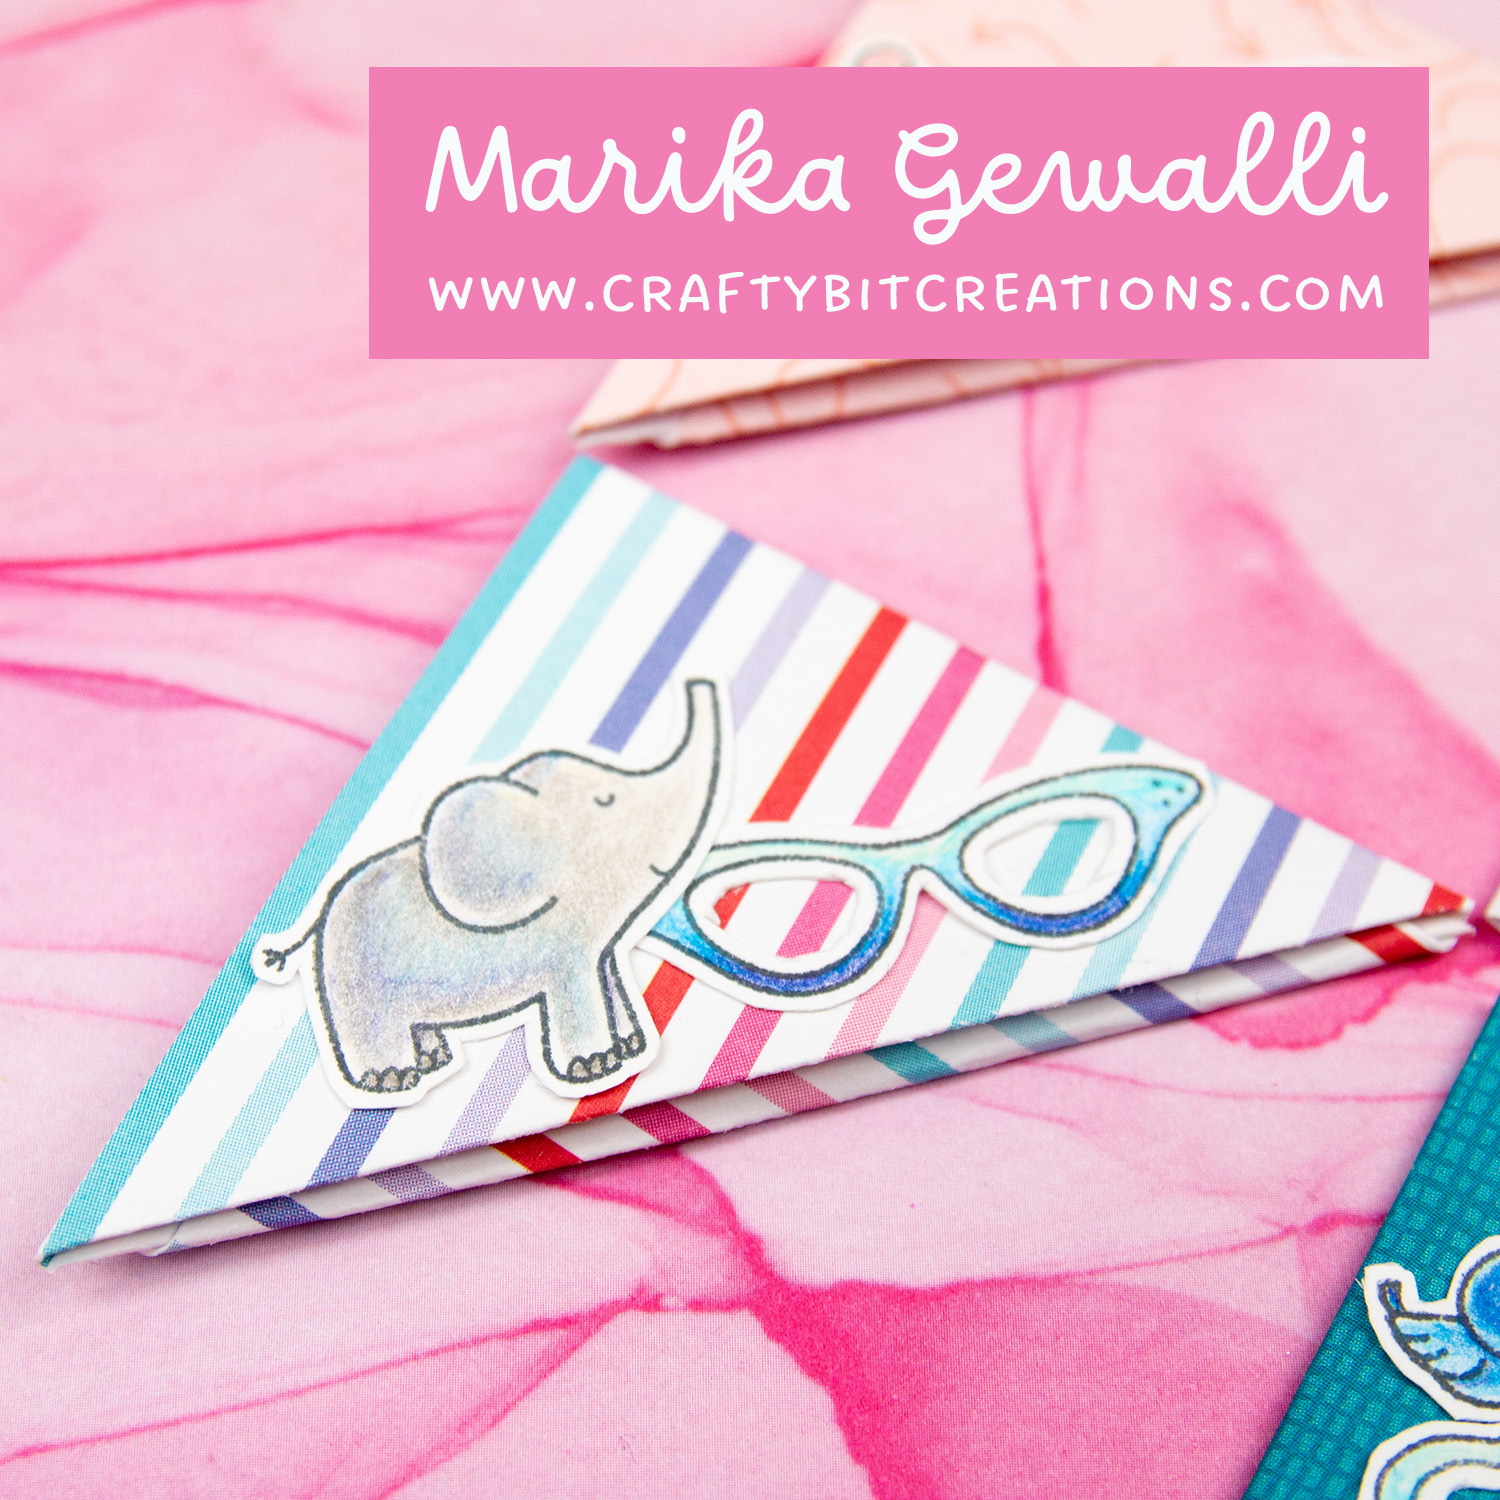
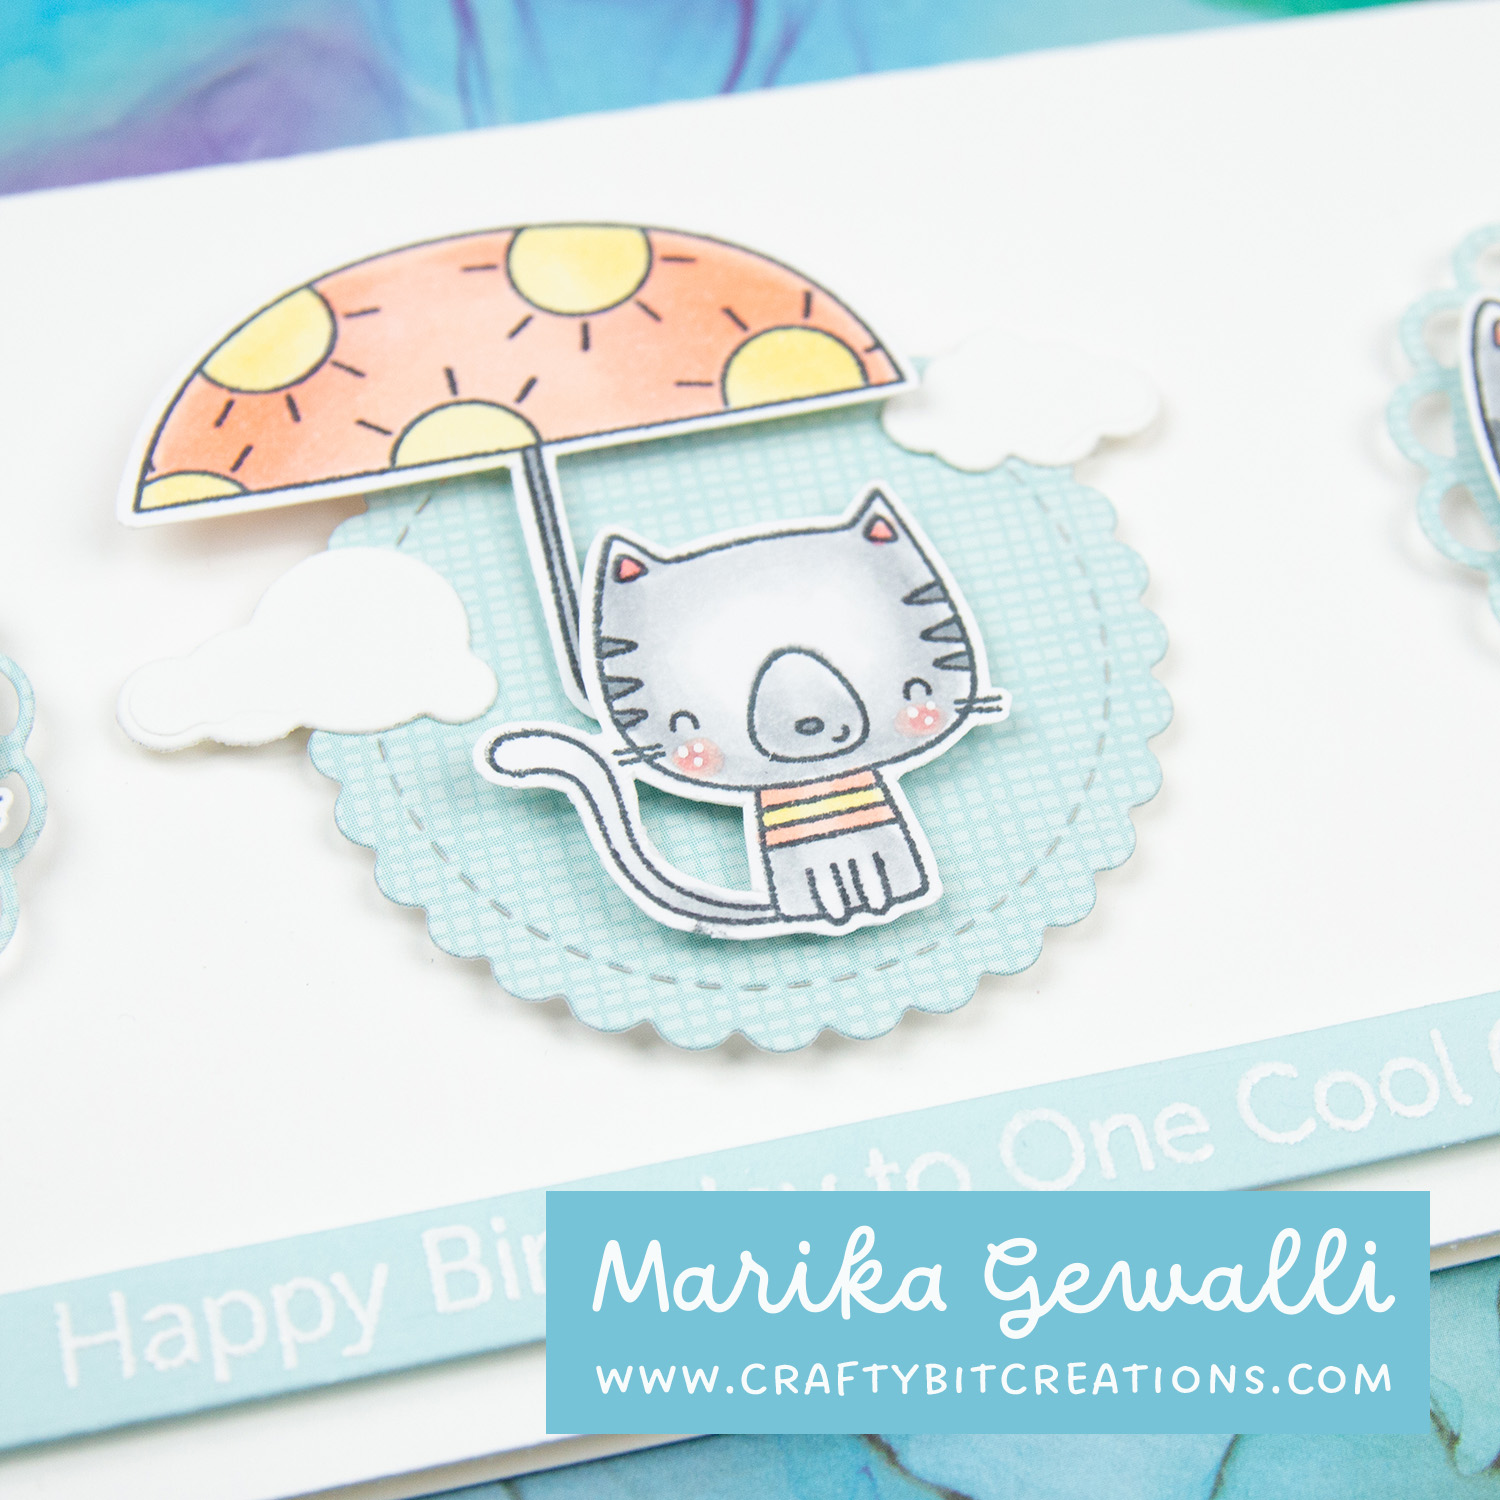
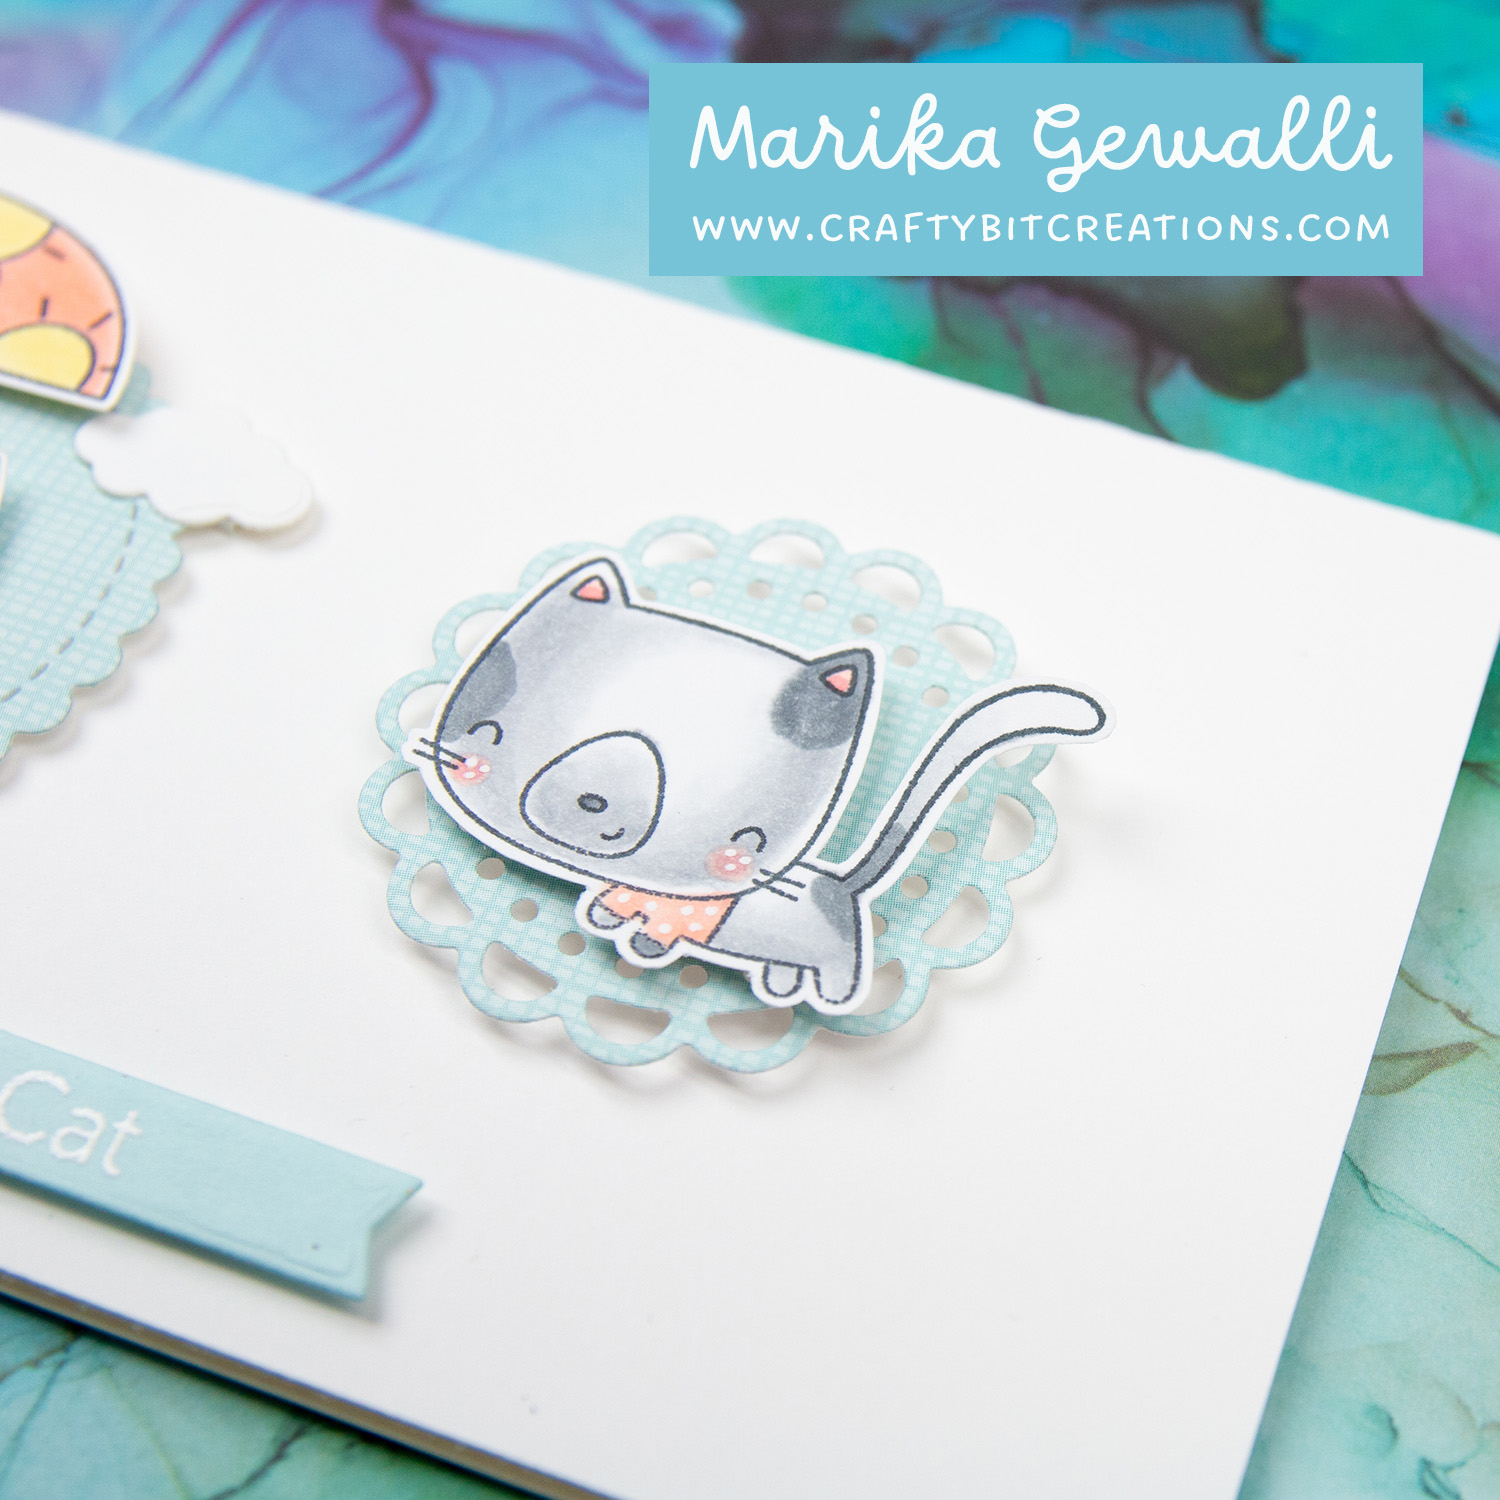
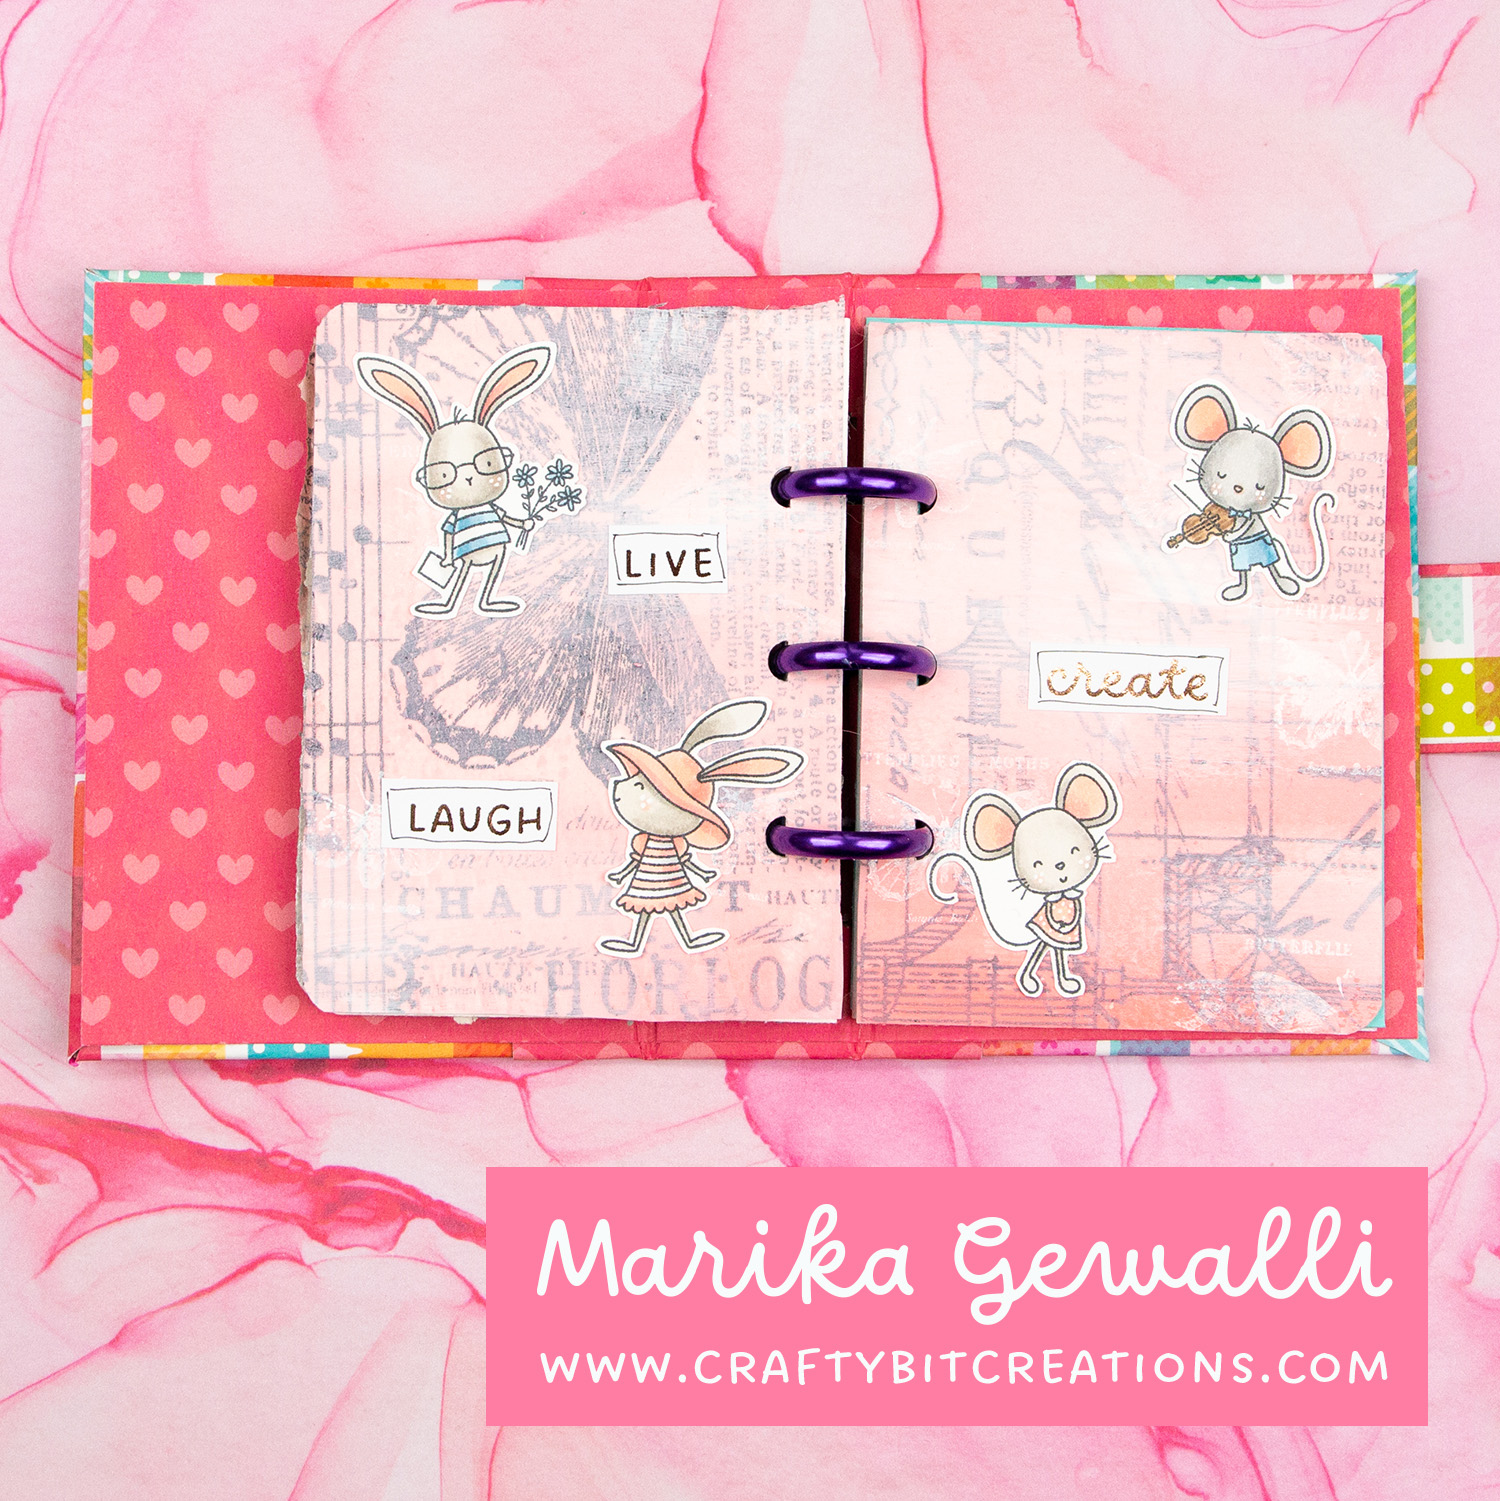
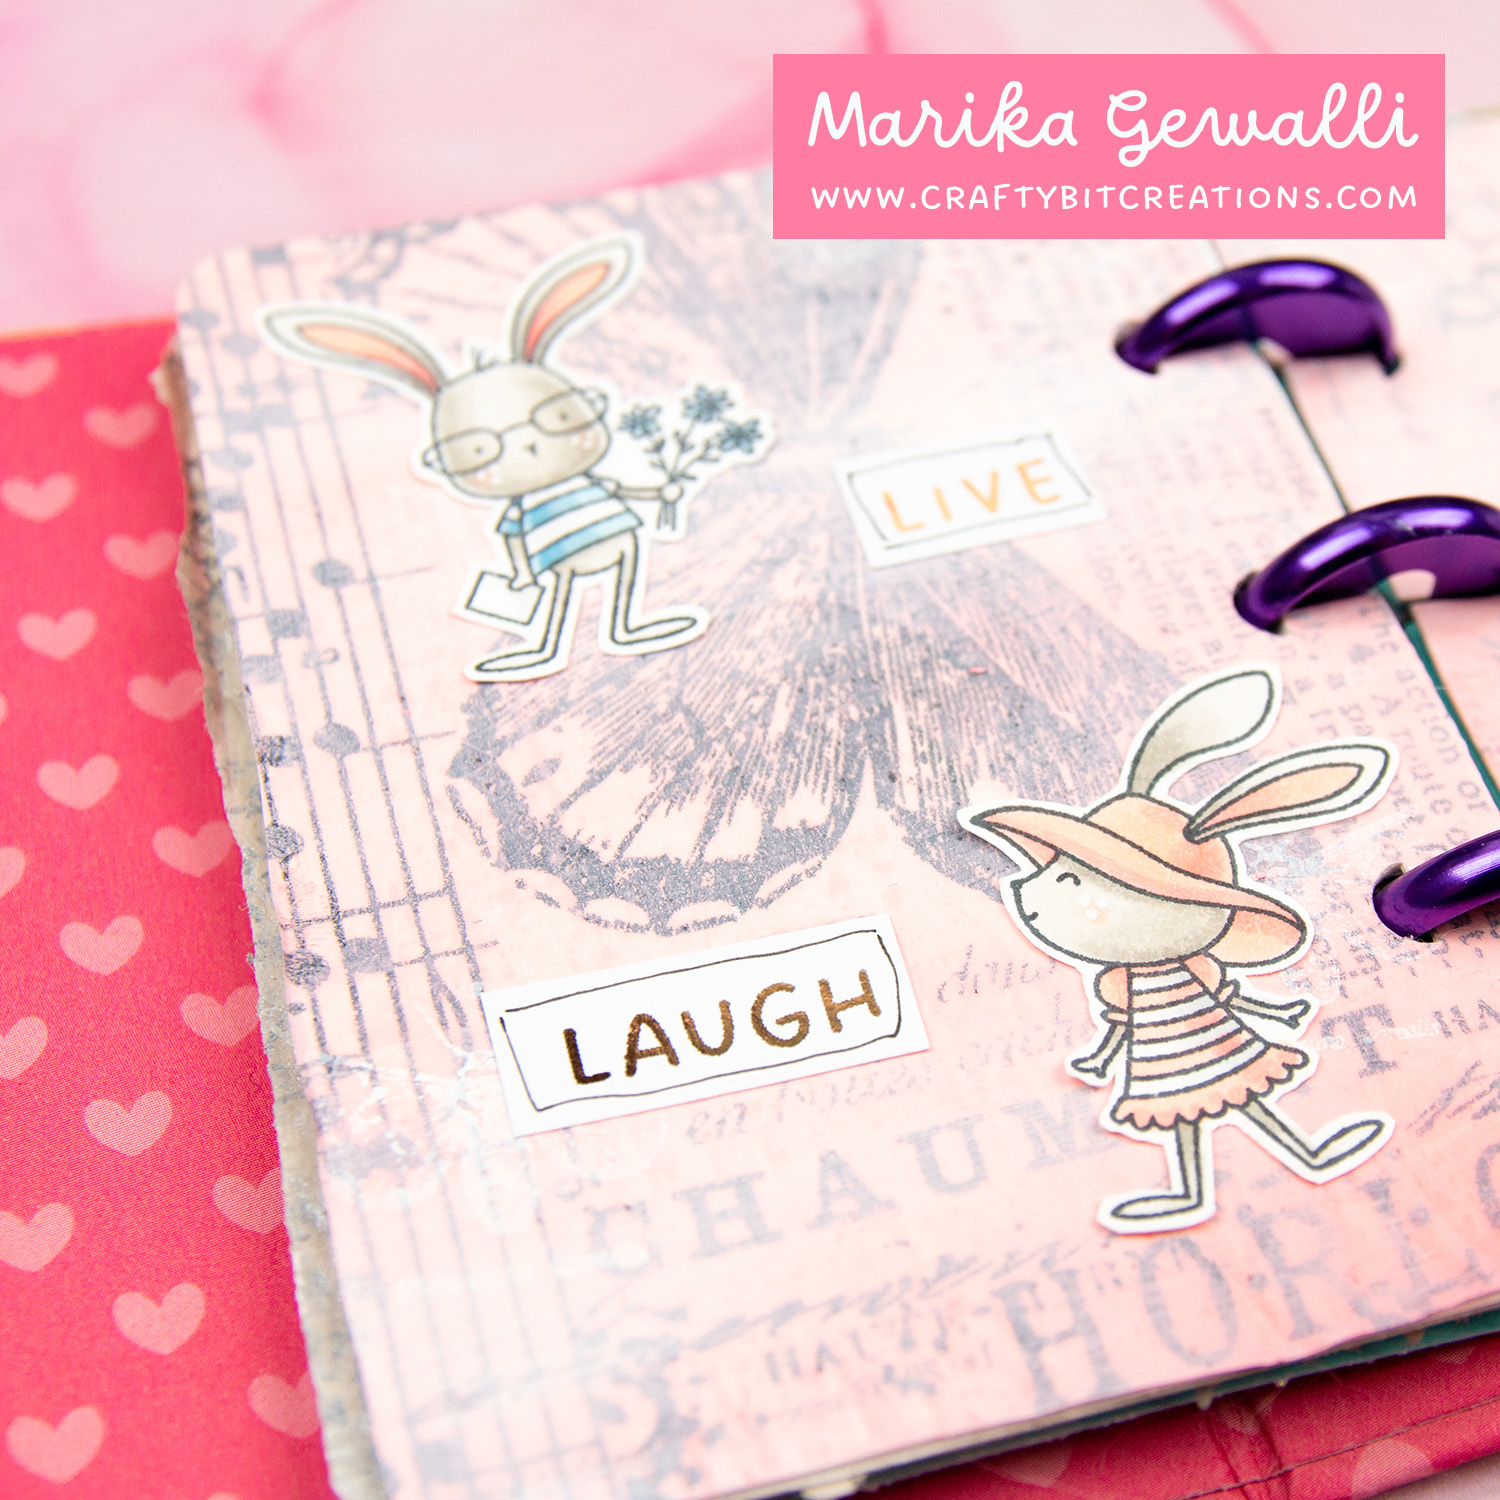
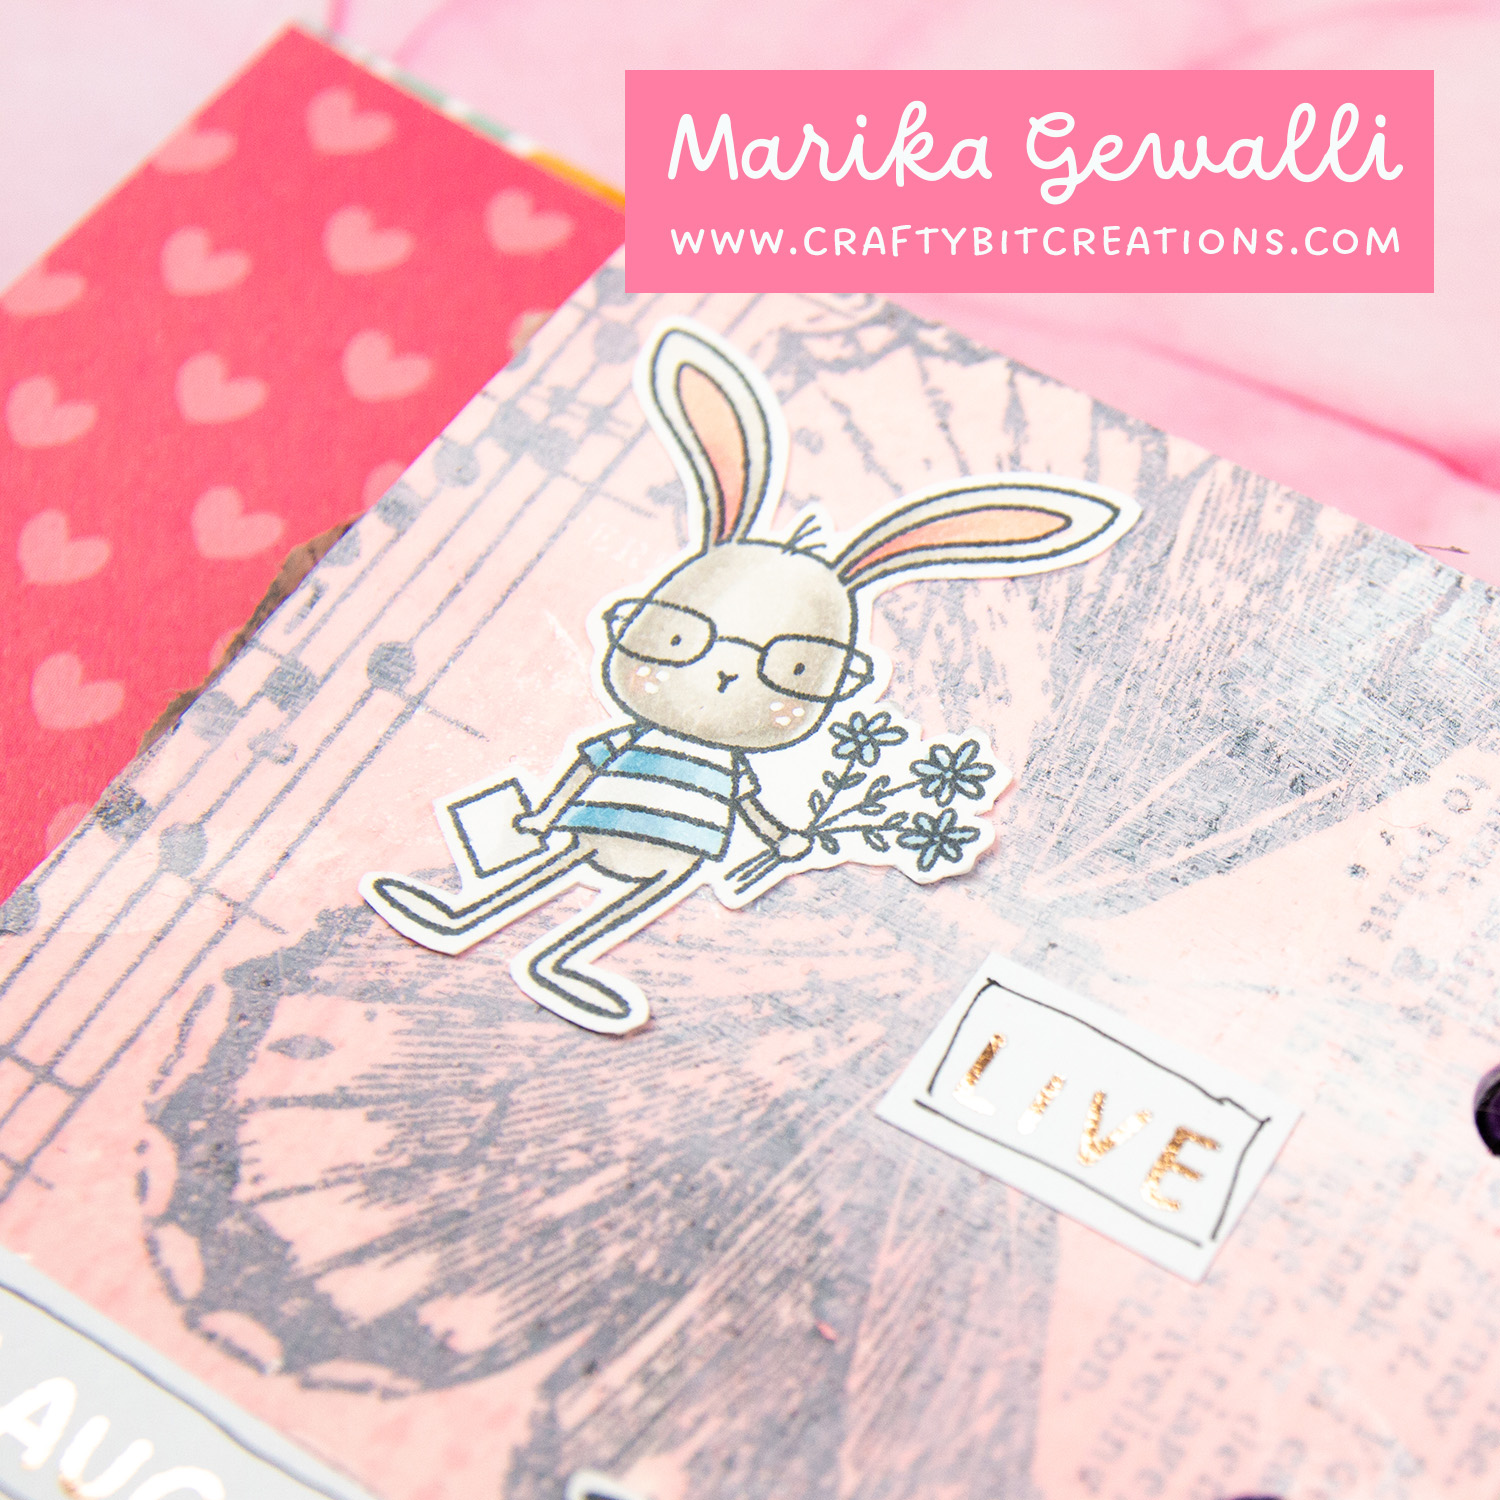
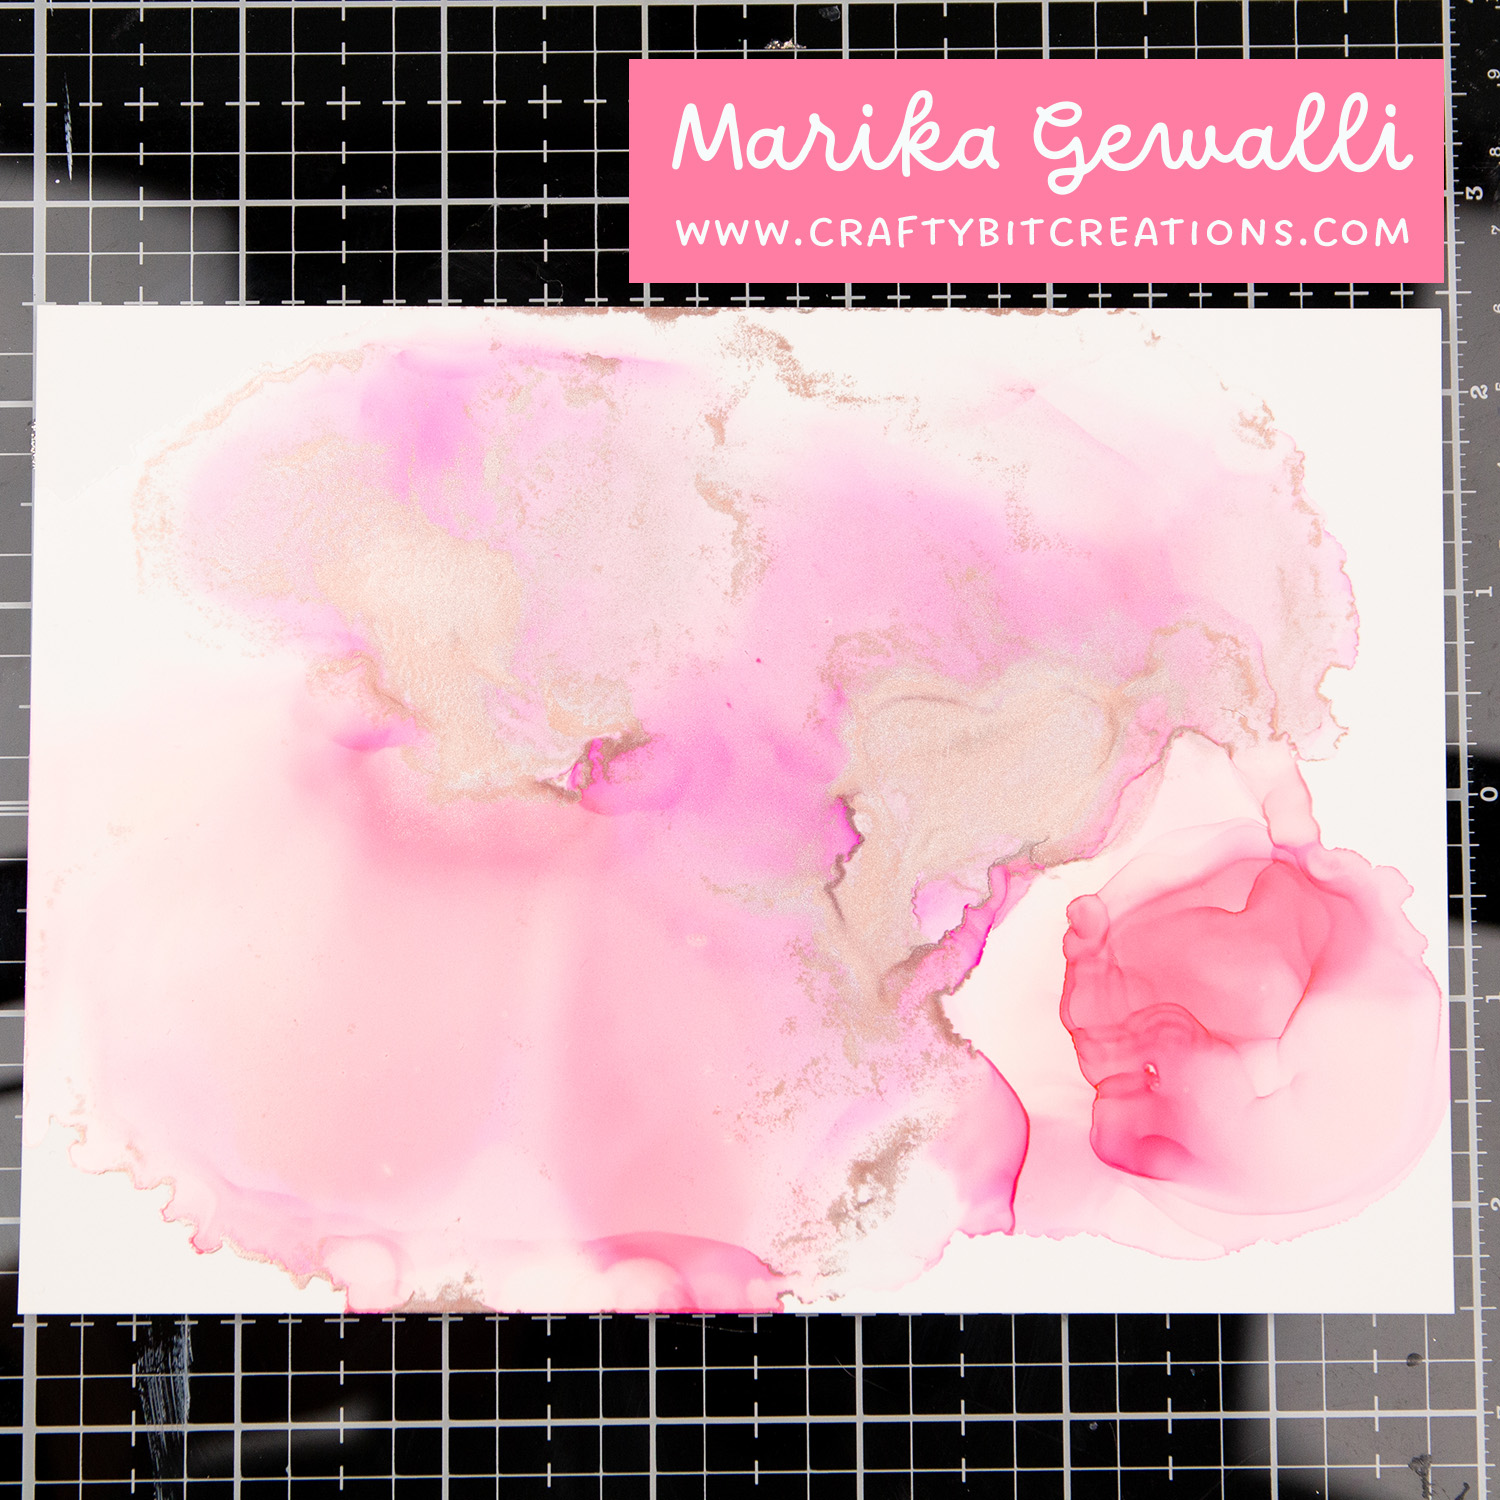
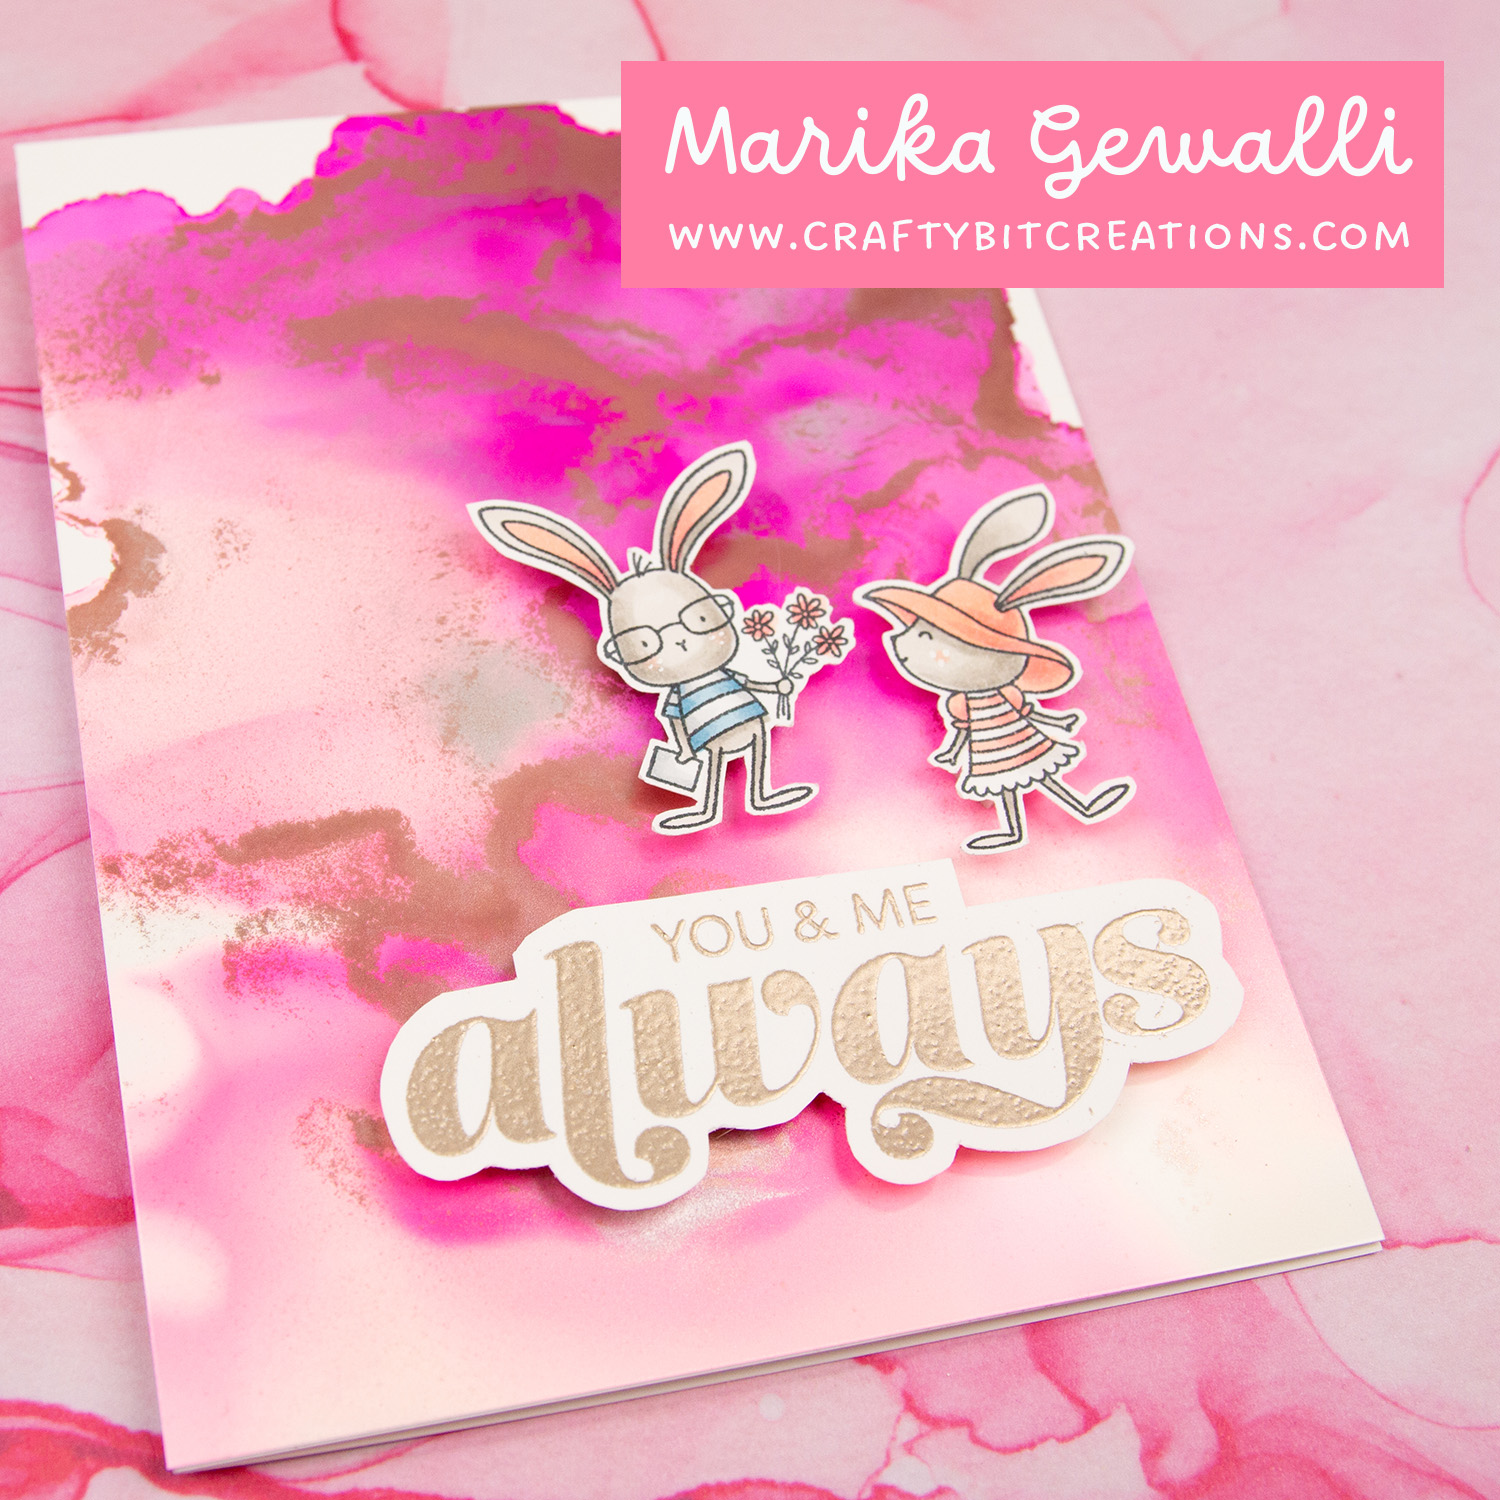
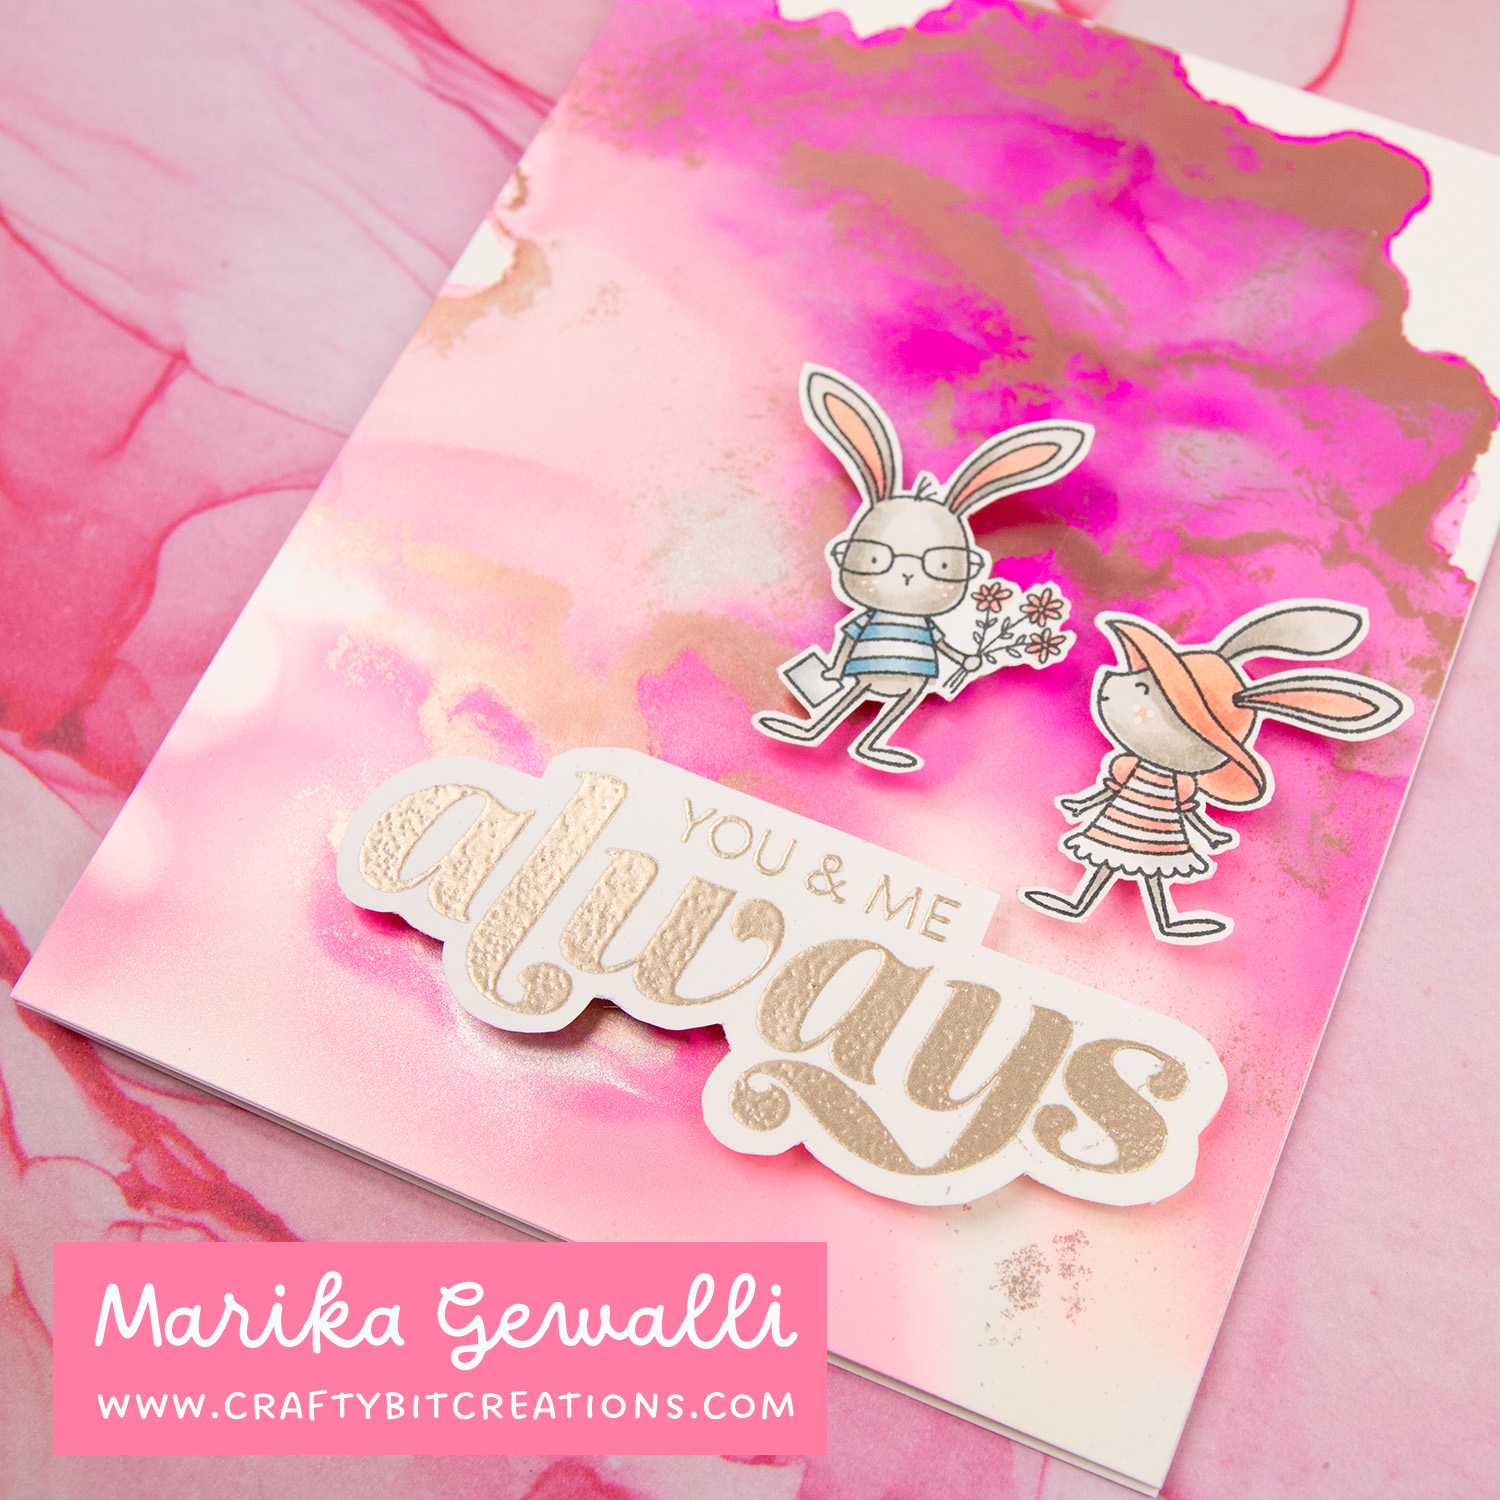
So instead of doing a scene I just used the glasses from SPECtacular stamp set and creating my own background with Lazy Day ink over Lazy Day and Smooth White card stock. Stamping the Be Cool sentiment from the SPECtacular stamp set on a Lazy Day card stock flag in Lazy Day Ink and adding some dimension with my white gel pen. And adding that to the left on the card, then adding the Copic colored cat on the right. And to finish it off I added some self-adhesive crystals sprinkled around the card.

If you want to see more of my sketch challenge entries, you can find them HERE

Copic

Cat: N0, N1, N3, N4, R30
Scarf: B91, B93, N1
Glasses: E44

When possible affiliate links are used, this means that I receive a small commission when products are purchased through the links (at no extra cost to you) I use the money to support my blog and youtube channel. If you like my projects and tutorial please consider supporting me by clicking through these links when you shop. Thanks!

Supplies

MFT SPECtacular: MFT SSS
MFT You’re My Sunshine: MFT SSS
MFT Smooth White Card Stock: MFT
MFT Lazy Day Card Stock: MFT
MFT Lazy Day Premium Dye Ink Cube: MFT SSS
Foam Squares: SSS AMZ SBC
Self-Adhesive Pearls: SSS SBC
Uncategorized

Origami Box Tutorial

Do you like me have loads of 6×6 pattern paper pads? These little origami boxes are super easy to make and takes one sheet of double sided pattern paper. They are super fun to make and I just couldn’t stop myself and have at least 10 of them laying on my table. As usual when making boxes I have a schema below that you can use together with the video tutorial. And if you want to see more box videos you can see all I have HERE.

When possible affiliate links are used, this means that I receive a small commission when products are purchased through the links (at no extra cost to you) I use the money to support my blog and youtube channel. If you like my projects and tutorial please consider supporting me by clicking through these links when you shop. Thanks!

Supplies

DD Hey Cupcake 6×6 Pattern Paper Pack: SSS SBC
Doodlebug LOTS OF LOVE 6×6 Inch Paper Pad: SSS SBC
MFT On-Point Precision Glue Pen: MFT
Large Score Board: SSS AMZ SBC
Uncategorized

Baby Basket Tutorial

When creating the Easter Basket earlier this month I had in the back of my mind that this would be perfect as a Baby Basket. Perfect to hold a little gift for a mother to be, or as party gift for attending people at a baby shower. I had so much fun choosing the pattern papers and matching card stock for this project. Below you can find a video Baby Basket Tutorial and a schema with measurements for cutting and scoring for the baby basket. If you want to see more baskets and boxes you can find all I have made HERE.

You can find a PDF of above schema HERE.

When possible affiliate links are used, this means that I receive a small commission when products are purchased through the links (at no extra cost to you) I use the money to support my blog and youtube channel. If you like my projects and tutorial please consider supporting me by clicking through these links when you shop. Thanks!

Supplies

Happy Patterns Paper Pad: MFT SSS
MFT Poppin’ Polka Dots Paper Pad: MFT SSS
MFT Rainbow Love Paper Pad: MFT SSS
MFT Pretty in Plaid Paper Pad: MFT SSS
Pawsome Prints Paper Pad: MFT
Mini Brads: MFT SSS SBC
MFT Sno Cone Card Stock: MFT
Sookwang Tape 1/4”: SSS AMZ

Uncategorized

Sketch Challenge 590 | Make Waves

The sketch challenge 590 is out on My Favorite Things. I had saved the Bubbly Birthday for May but this sketch was just too perfect for them to not use them. I colored one of them and then combined the mermaid with the Island Shell-ebration stamp set as they go so good together!

For the background I used my favorite ink color Sno Cone and blended it over the Classic Edges Stencil in a square that I masked out with the background die from the Blueprints 27 and some masking paper. I did buy the Classic Edges Stencil to use it for waves. I also added some splatters in Caribbean Sea Ink, Cornflower Ink, White Gesso and some Silver Shimmering Water color for texture. Not sure about that choice, but I’m ok with it.

I finished it off with my usual white heat embossed sentiment on colored cardstock. This time I choose to go with the Summer Splash Cardstock and I love the contrast. If you want to see the other my favorite sketch challenges I have entered you can find them HERE.

When possible affiliate links are used, this means that I receive a small commission when products are purchased through the links (at no extra cost to you) I use the money to support my blog and youtube channel. If you like my projects and tutorial please consider supporting me by clicking through these links when you shop. Thanks!

Supplies

MFT Bubbly Birthday: MFT SSS
MFT Island Shell-ebration: MFT SSS
Blueprints 27 Die-namics: MFT
MFT Sno Cone Premium Dye Ink Cube: MFT SSS
MFT Classic Edges Stencil: MFT SSS
MFT Caribbean Sea Premium Dye Ink Cube: MFT SSS
MFT Cornflower Premium Dye Ink Cube: MFT SSS
MFT Card Stock Summer Splash: MFT
Hero Arts White Embossing Powder: SSS AMZ SBC
Versamark: SSS AMZ SBC
Uncategorized

Origami Corner Bookmark Tutorial

I had so much fun making these origami corner bookmarks. They are quick and easy and don’t even need tapes or glues. After you made a few you will not stop making these, well I didn’t stop. I have made about 10 of them so far but I know I will be making more.

The bookmarks are an easy fold and you can make three out of one sheet of 6×6 paper. I do recommend using thinner paper as there is a couple of folds and thicker paper will be harder to fold, and the last piece that you end up sticking into the bookmark can be very hard to bend if the paper is of the thicker varient.

I ended up decorating a couple of these with some small stamps, and I think they ended up being adorable! The stamps are from the latest release by My Favorite Things and if you want to see more things I have made with the release you can find them HERE.

When possible affiliate links are used, this means that I receive a small commission when products are purchased through the links (at no extra cost to you) I use the money to support my blog and youtube channel. If you like my projects and tutorial please consider supporting me by clicking through these links when you shop. Thanks!

Supplies

Happy Patterns Paper Pad: MFT SSS
Colorful Canvas Paper Pad: MFT SSS
MFT SPECtacular: MFT SSS
MFT Top of the World: MFT SSS
MFT Shout It from the Rooftops: MFT SSS
MFT On-Point Precision Glue Pen: MFT
Uncategorized

Sketch Challenge 589 | Cool Cat

The My Favorite Things Sketch Challenge 589 was a fairly simple one. It was well balanced and I this time around I felt I wanted to stay in the box. I have these gorgeous dies, that sadly is retired, that are circles and have some details. I cut them from the Colorful Canvas Paper Pad and choose to go with the Sno Cone matching paper. And I thought that they would be perfect to add as backgrounds, backgrounds for these super cute cats from the newly released You’re My Sunshine stamp set. I really thought that they would be perfect as there is two cats in the same size that is facing each other and one that is facing straight.

The straight facing cat is a little small though, so I also stamped up the umbrella to give the center piece a little bit more. I did mask in the sun from the stamp set on the umbrella to give that some more details. To finish of the center piece I added some clouds from the Cloudy with a Chance of Rain Die-namics that was the free with $60 in this months release. For the sentiment I went with “Happy Birthday to one Cool Cat” which I white heat embossed onto some Sno Cone cardstock and cut it out with a flag die from the Blueprints 27 Die-namics. If you want to see the other challenges that I have joined you can find them HERE.

When possible affiliate links are used, this means that I receive a small commission when products are purchased through the links (at no extra cost to you) I use the money to support my blog and youtube channel. If you like my projects and tutorial please consider supporting me by clicking through these links when you shop. Thanks!

Supplies

MFT Sunshine Friends: MFT SSS
Colorful Canvas Paper Pad: MFT SSS
MFT Sno Cone Card Stock: MFT
Hero Arts White Embossing Powder: SSS AMZ SBC
Uncategorized

2 Mini Art Journal Layouts

I’m a big fan of Vicky Papaioannou and her style of art journals. The are a perfect mix of messy and control. So decided to use that style but in a mini format and with my stamps and coloring that I love. My mini art journal will be a hodge podge of different styles as I play and learn, but I’m ok with that. My word of the year is creativity and that is what I will embrase.

Todays two layouts started with my left over images. I always color a bunch more images than I need when I do a project, so that I have them there if I feel I need to pivot. And I save all of those images in little bowls on my craft table. Well they are starting to become a lot so I decided to use some of them up.

I love the little stones and mountains (that comes from a recently retired stamp set) so the first layout got a pumice stone background together with a postage tissue paper as the idea was travel. I did add a circus artist as he was on a unibike, but I did cut off his hat to make it look more travel related.

For my second layout I started with the sentiment “Love, Laugh, Create” from my own Sentiment Strip cards (which you can buy from HERE) and decided to use the violin playing mouse. I did also add the bunnies from the same stamp set to fill out the place. For color I used abandoned coral paint mixed with some white gesso to mimic tattered rose, and I painted that over the “Melange” tissue paper that I had.
If you want to see more art journal layouts I have made you can find all of them HERE

When possible affiliate links are used, this means that I receive a small commission when products are purchased through the links (at no extra cost to you) I use the money to support my blog and youtube channel. If you like my projects and tutorial please consider supporting me by clicking through these links when you shop. Thanks!

Supplies

MFT You’re the Main Event: MFT SSS
MFT Im So in Love with You, Still: MFT SSS
Dina Wakley White Gesso: SSS AMZ
Tim Holtz Distress Paint Abandoned Coral: SSS AMZ
Tim Holtz Stampers Anonymous Moth Study: SSS AMZ SBC
Tim Holtz Distress Paint Pumice Stone: SSS
Idea-ology – Tim Holtz – Collage Paper – Entomology: SSS AMZ SBC
Idea-ology – Tim Holtz – Collage Paper – Travel: SSS AMZ SBC
Craftybit Creations – Sentiment Strips – Positivity: ETZ

Uncategorized

Soft Alcohol Ink Backgrounds

I have all of these alcohol inks in my stash but I never use them. One of the reason is that I only bought the inks (and some mixatives) and when using them on yupo you only get very colorful results. And I felt that my backgrounds was so over powering, I wanted a more soft alcohol ink background.

But a little while ago I picked some Alcohol Blending Solution and a alcohol ink air blower and I finally found some time to play with them. And it was so much fun! The only regret I have is that I didn’t pick up more yupo paper, as now I’m all out and I just want to make more backgrounds!

To get soft backgrounds there is a couple of things you want to do. The first is pour a nice blob of alcohol blending solution on your yupo, this will help the ink move faster (it’s like when you cover your watercolor cardstock in water before going in with your watercolors). Then you add a drop or two of your ink of choice and then start blowing. When you gotten a nice layer started you can add alloys and continue to blow around the ink and the alloys. A little goes a long way. For more tips see the video!

Which background was your favorite? My favorite is a tie between the Mermaid one and the Indigo one.

When possible affiliate links are used, this means that I receive a small commission when products are purchased through the links (at no extra cost to you) I use the money to support my blog and youtube channel. If you like my projects and tutorial please consider supporting me by clicking through these links when you shop. Thanks!

Supplies

Tim Holtz Alcohol Inks Gumball: SSS AMZ SBC
Tim Holtz Alcohol Inks Fiesta: SSS AMZ SBC
Tim Holtz Alcohol Inks Flamingo: SSS AMZ
Tim Holtz Alcohol Inks Dandelion: SSS AMZ SBC
Tim Holtz Alcohol Inks Valencia: SSS AMZ
Tim Holtz Alcohol Inks Indigo: SSS AMZ SBC
Tim Holtz Alcohol Inks Mermaid: SSS AMZ SBC
Alcohol Blending Solution: SSS AMZ SBC
Alcohol Ink Air Blower: SSS AMZ SBC
Tim Holtz Yupo Paper 5 x 7: SSS AMZ SBC
Ranger Liquid Platinum Embossing Powder: SSS AMZ SBC
MFT Straight from the Heart: MFT SSS
MFT Im So in Love with You, Still: MFT SSS
Uncategorized

Easter Mini Clutch Box Tutorial

This is my last easter project for the year, I hope you have enjoyed them. This is an easter mini clutch box and they are made to fit 6 Lindt Mini Chocolate Eggs. But they can fit anything small that you could think of. You can also go the clutch version or add a “handle” and make it a purse.

You can follow the template above or you can download the pdf HERE and the free templates & cut files HERE. If you enjoy the tutorial and want to see more you can find all of my boxes with video tutorials, templates and cut files HERE.

Copic

YG11, YG23, YG01, YG25, B12, B23

When possible affiliate links are used, this means that I receive a small commission when products are purchased through the links (at no extra cost to you) I use the money to support my blog and youtube channel. If you like my projects and tutorial please consider supporting me by clicking through these links when you shop. Thanks!

Supplies

MFT Floral Whimsy: MFT SSS
MFT Sending Sunshine and Smiles: MFT SSS
Happy Patterns Paper Pad: MFT SSS
MFT Something Blue Card Stock: MFT
MFT Something Blue Premium Dye Ink Cube: MFT SSS
MFT Sour Apple Card Stock: MFT
MFT Sour Apple Ink: MFT SSS
Fiskars Trimmer : SSS AMZ
Cutter Bee Scissors: SSS AMZ SBC
Sookwang Tape 1/4”: SSS AMZ
We R Memorykeepers Corner Chomper: SSS AMZ SBC
Twine: SSS AMZ SBC
MFT On-Point Precision Glue Pen: MFT
top image to present the content
Uncategorized

Mini Easter Basket Tutorial

As easter is coming closer and closer, I have another easter project for you. This mini easter basket is super simple to make and perfect as a little easter table gift, or something to make for a child. I have filled mine with Lindt mini chocolate eggs, but as long as it is small you can fill it with anything. It even can hold a regular egg.

What you need to make this is half a sheet of cardstock. Cut it at 5″. The 5″ piece should be cut to 5 1/4″ and the 1/2″ piece should be cut to 6″. For assemble instructions see the video below and the schema.

front view of kraft easter basket decorated with branches, some copic colored stamped eggs, a stamped and copic colored bird and some diecut flowers. Filled with Lindt chocolate eggs

You can also download the schema as a pdf HERE

When possible affiliate links are used, this means that I receive a small commission when products are purchased through the links (at no extra cost to you) I use the money to support my blog and youtube channel. If you like my projects and tutorial please consider supporting me by clicking through these links when you shop. Thanks!

Supplies

Spring Gnomes: MFT SSS
Birds of a Feather Die-namics: MFT SSS
MFT Fab Foliage Die-namics: MFT SSS
MFT Kraft Cardstock: MFT
MFT On-Point Precision Glue Pen: MFT
Large Score Board: SSS AMZ SBC
Fiskars Trimmer : SSS AMZ