
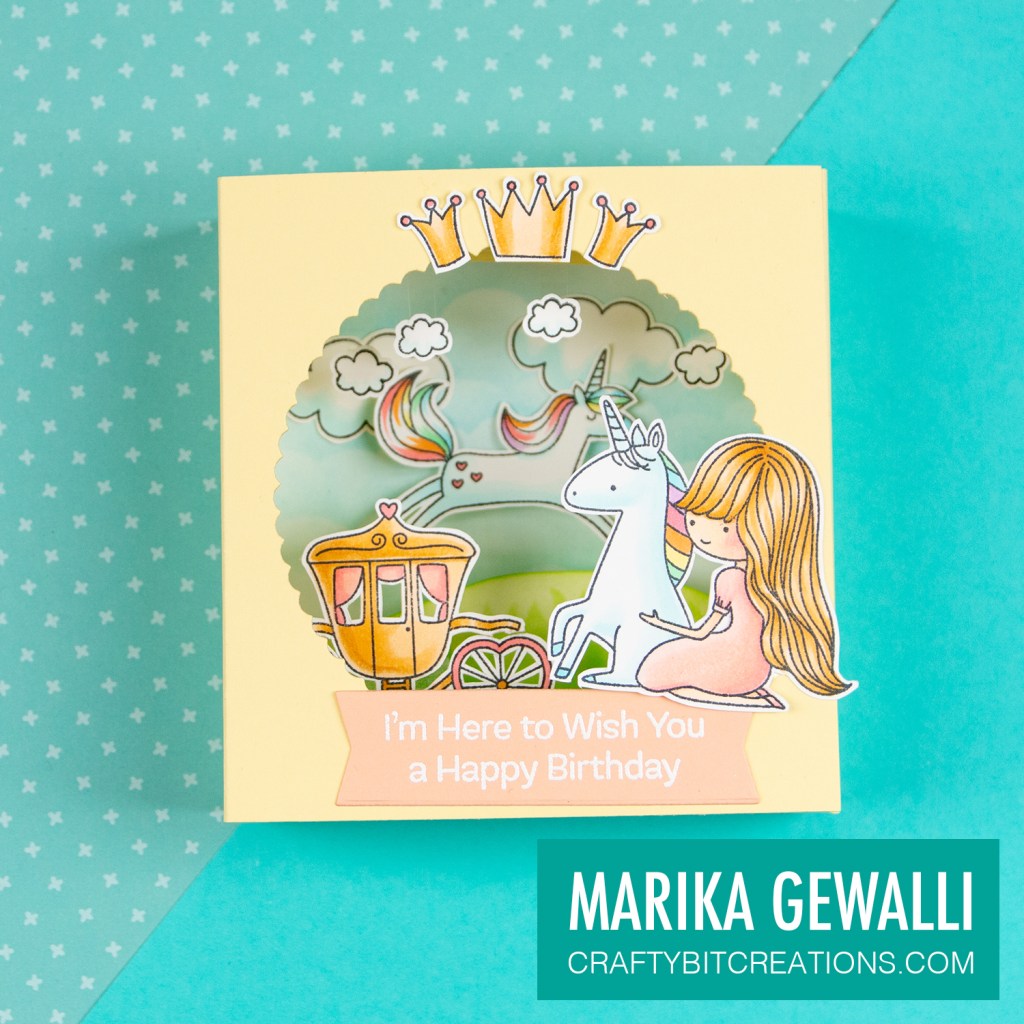
Hi! Today I made a shadow box with unicorns and princesses, everything I love! The video tutorial goes through how to cut, score and put everything together, but I have also made an instruction sheet that you can see below and you can find it as a pdf HERE.
Making a shadow box means some measuring and scoring and if you find that hard (or boring), there is dies out there. One that also flattens to an A2 card size like the box I have done is the one from MFTStamps.
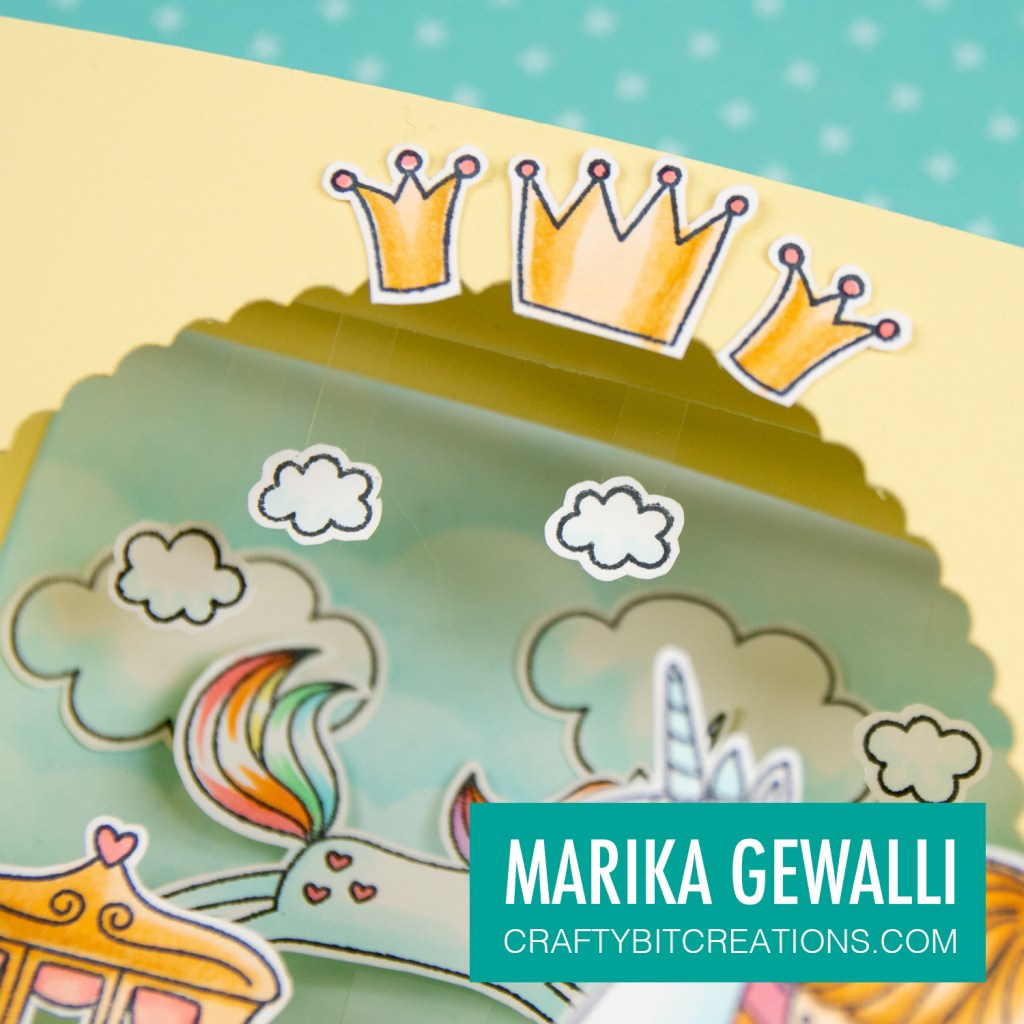
In the video below you can follow along on how I did my box out of less than one sheet of letter sized card stock. Also you can see how I decorated it using stamps from the Pretty Princess and Friendly Unicorn Stamp sets. You can find all the products used listed below, and there you also find all the copics used to color the stamps. Which you can see how I did in the second video.
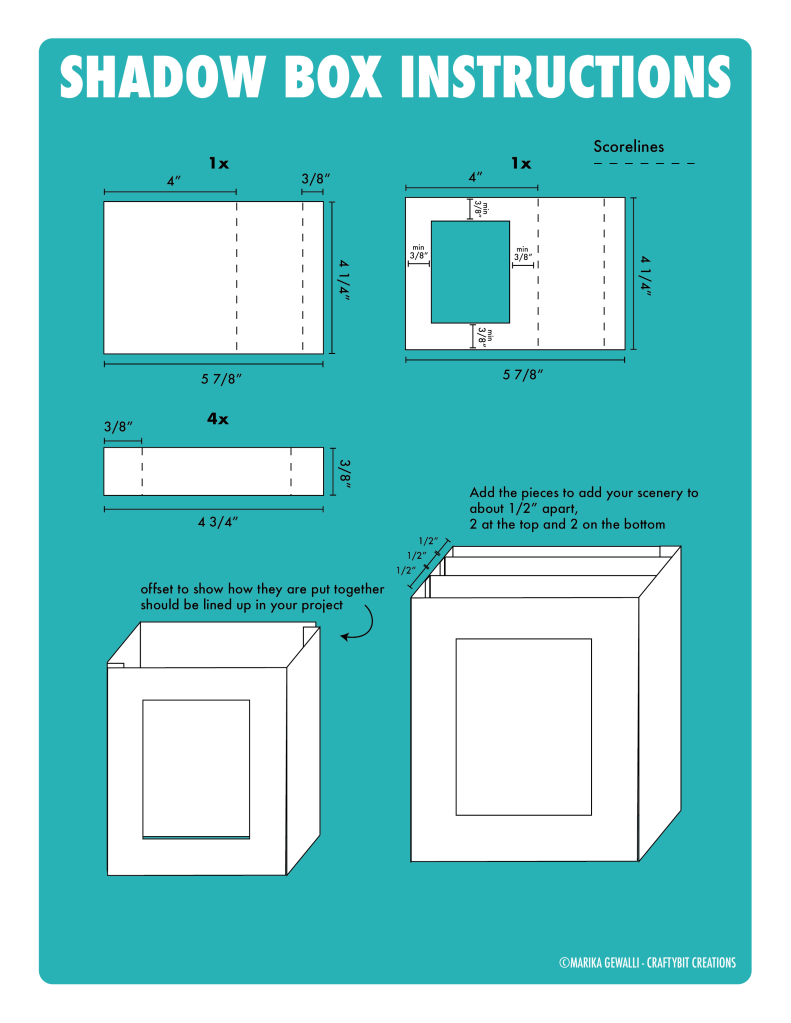
For the shadow box I cut out 2 pieces measuring 5 7/8″ by 4 1/4″ for the back and front, and 4 pieces measuring 3/8″ by 4 3/4″, 2 for upper delimiters and 2 for bottom delimiters. The 5 7/8″ by 4 1/4″ should be scored on the long side at 4″ and at 5 1/2″, and the delimiters should be scored at 3/8″ on both ends. Before putting together the card, take one of the bigger pieces and cut a hole out of the 4″ part of it. Make sure that the hole has a minimum of 3/8″ to all edges so that the tabs aren’t seen from the other side. I used a die for this as I wanted to have cute scalloped edges for my window. Putting together the card, use a strong tape so that it stays together, I use sookwang tape. You can follow the instructions below and I have made a pdf that you can download HERE.
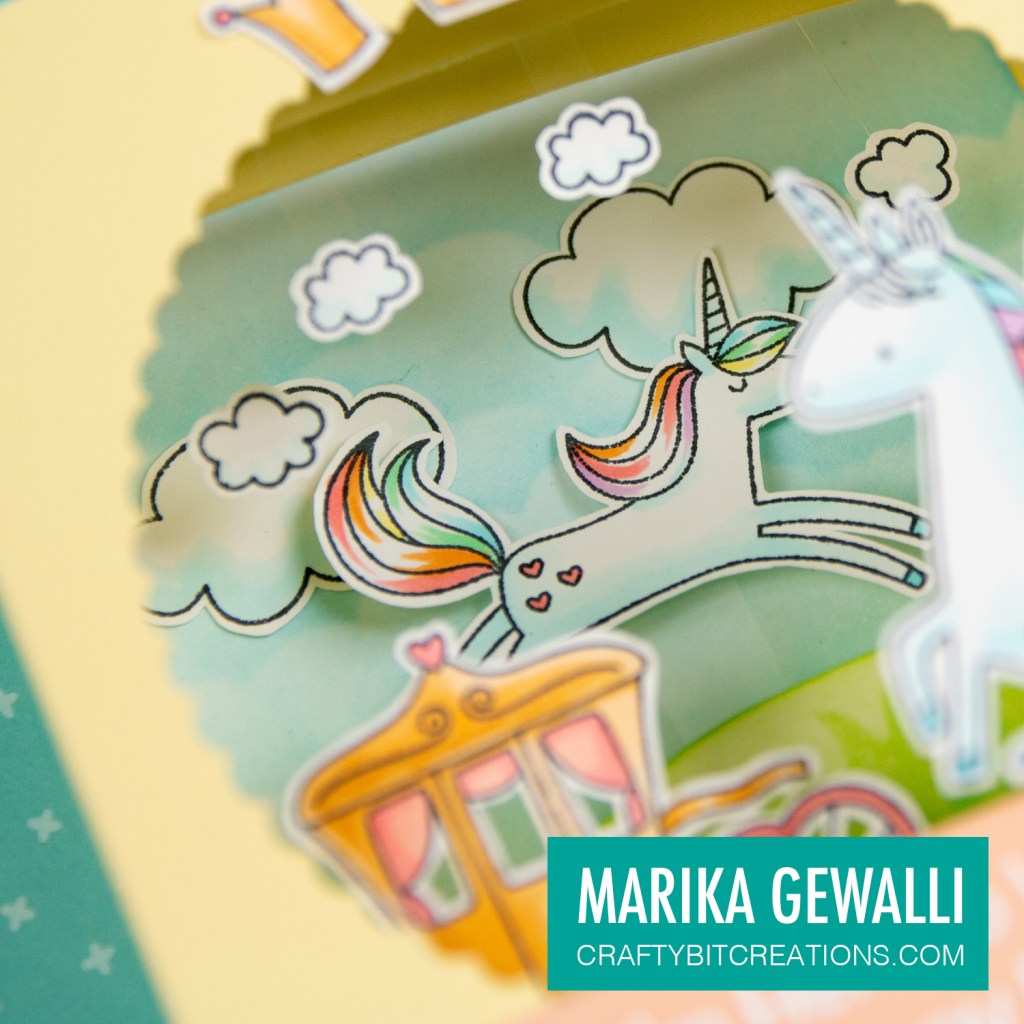
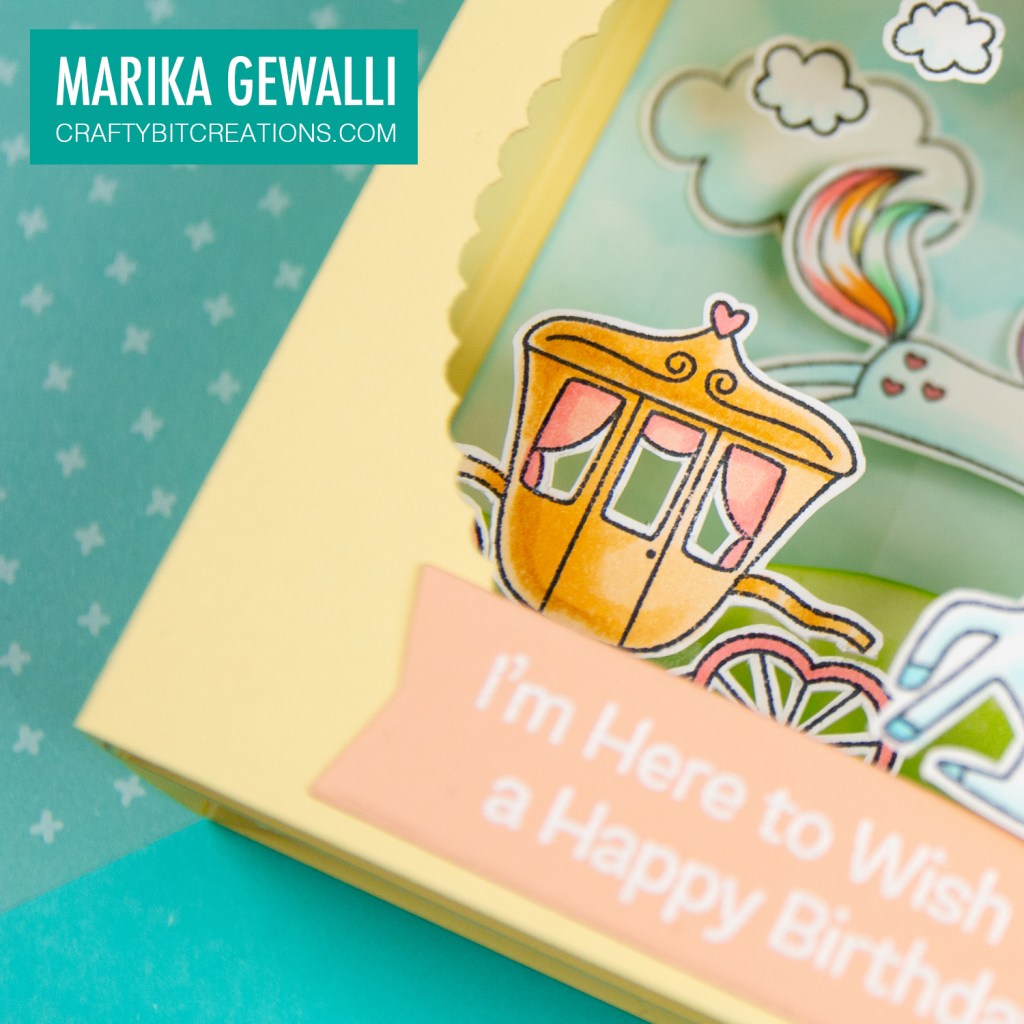
After putting together the shadowbox it’s now time to decorate! I used stamps from the Pretty Princess and Friendly Unicorn stamp set. I colored them with copic markers and then cut them out (there is dies, but I prefer to fussy cut). Then blending Tumbled Glass and Cracked Pistachio Distress Inks over the for Mini Cloud Edges stencil the backdrop and Cracked Pistachio and Twisted Citron Distress Inks over the Grassy Edges stencil to give some dimension and texture. For the hanging clouds and the back unicorn and chariot I used acetate to fasten them so that it’s harder to see how they are attached. To finish it off I ended up white heat embossing a sentiment on some Peach Bellini card stock.

Hope you enjoyed the tutorial and I’ll see you back here soon! Happy Crafting!
Copic:
E21, E00, E50, R32, R30, YR23, YR21, YR20, R000, B0000, B000, Bo1, G02, Y13, YR12, V12
When possible affiliate links are used, this means that I receive a small commission when products are purchased through the links (at no extra cost to you) I use the money to support my blog and youtube channel. If you like my projects and tutorial please consider supporting me by clicking through these links when you shop. Thanks!
Supplies:
 https://linkdeli.com/widget.js?id=f5e8378456858c916708
