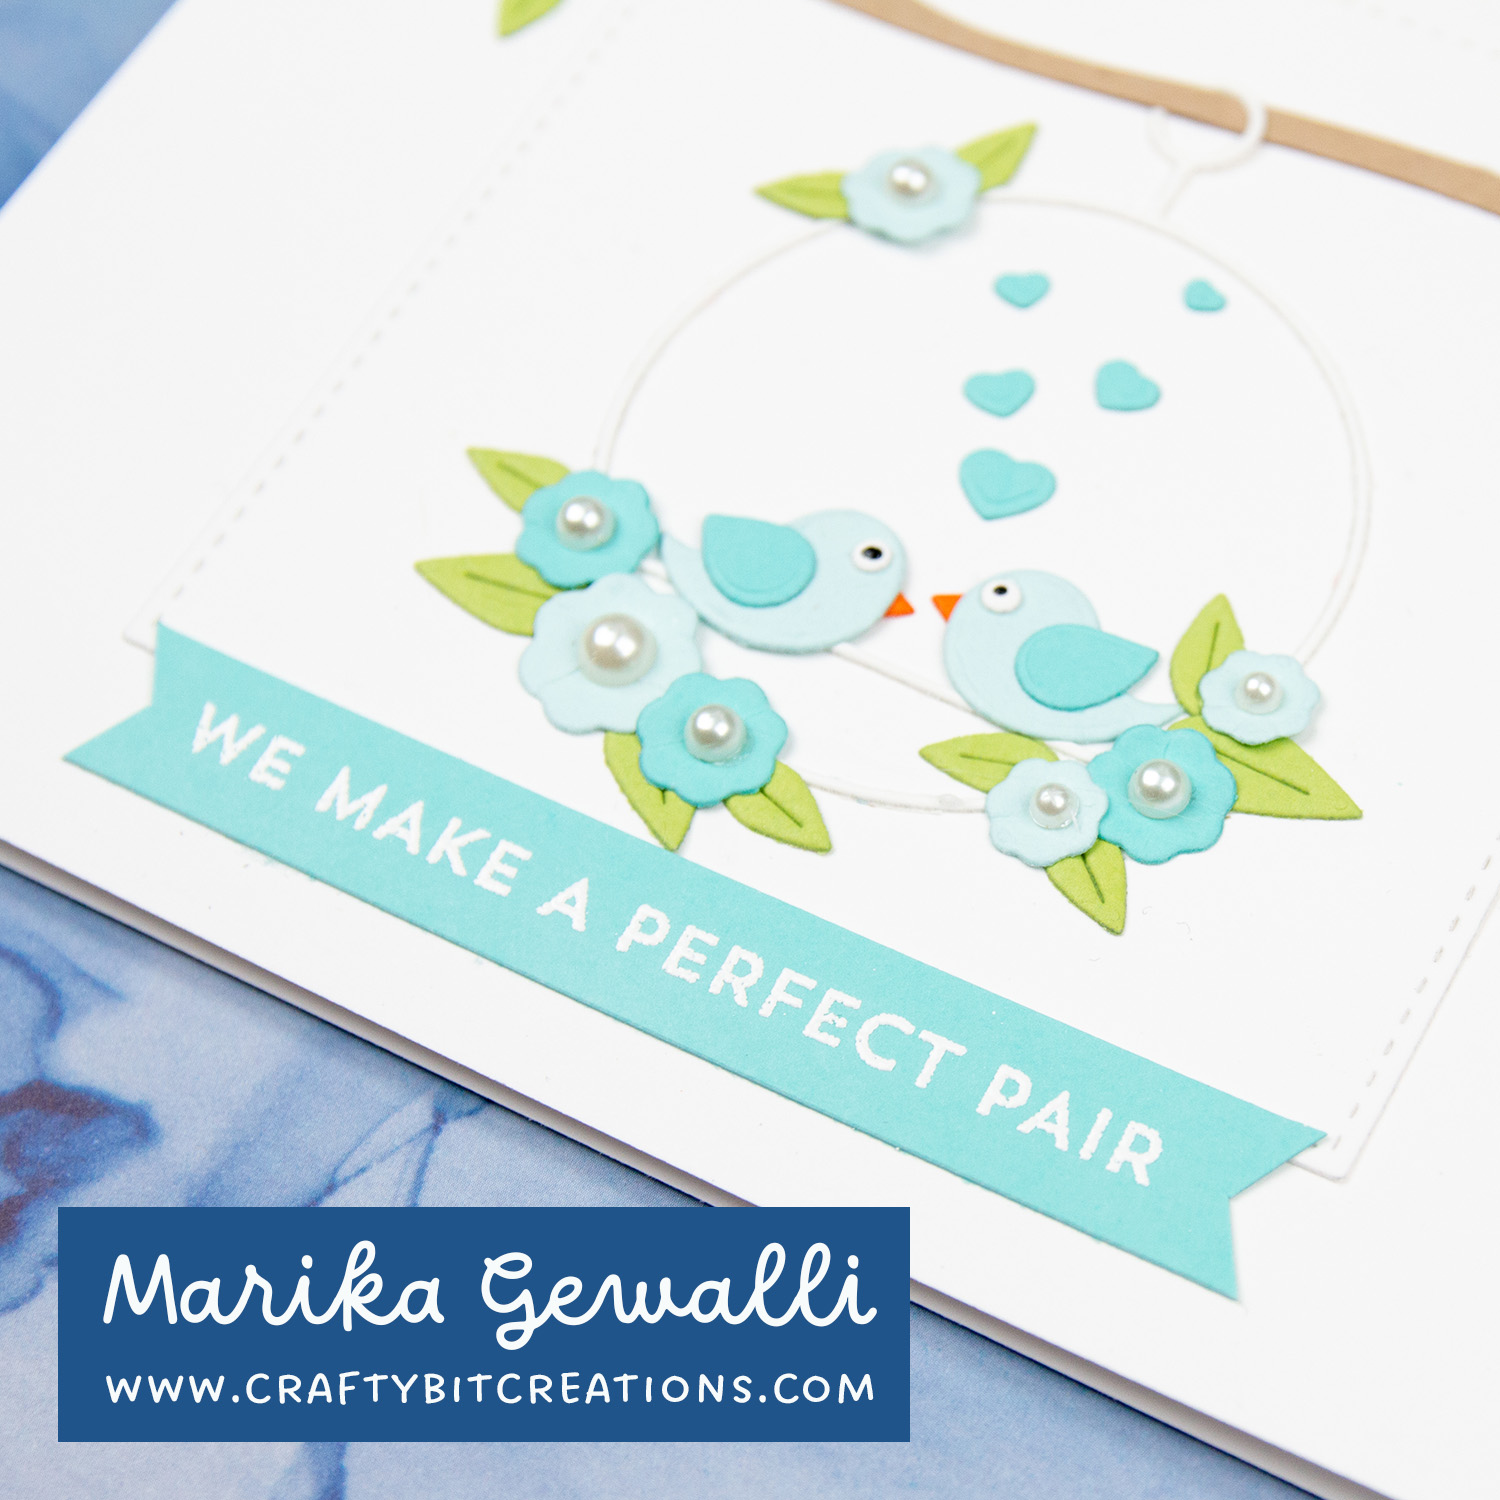
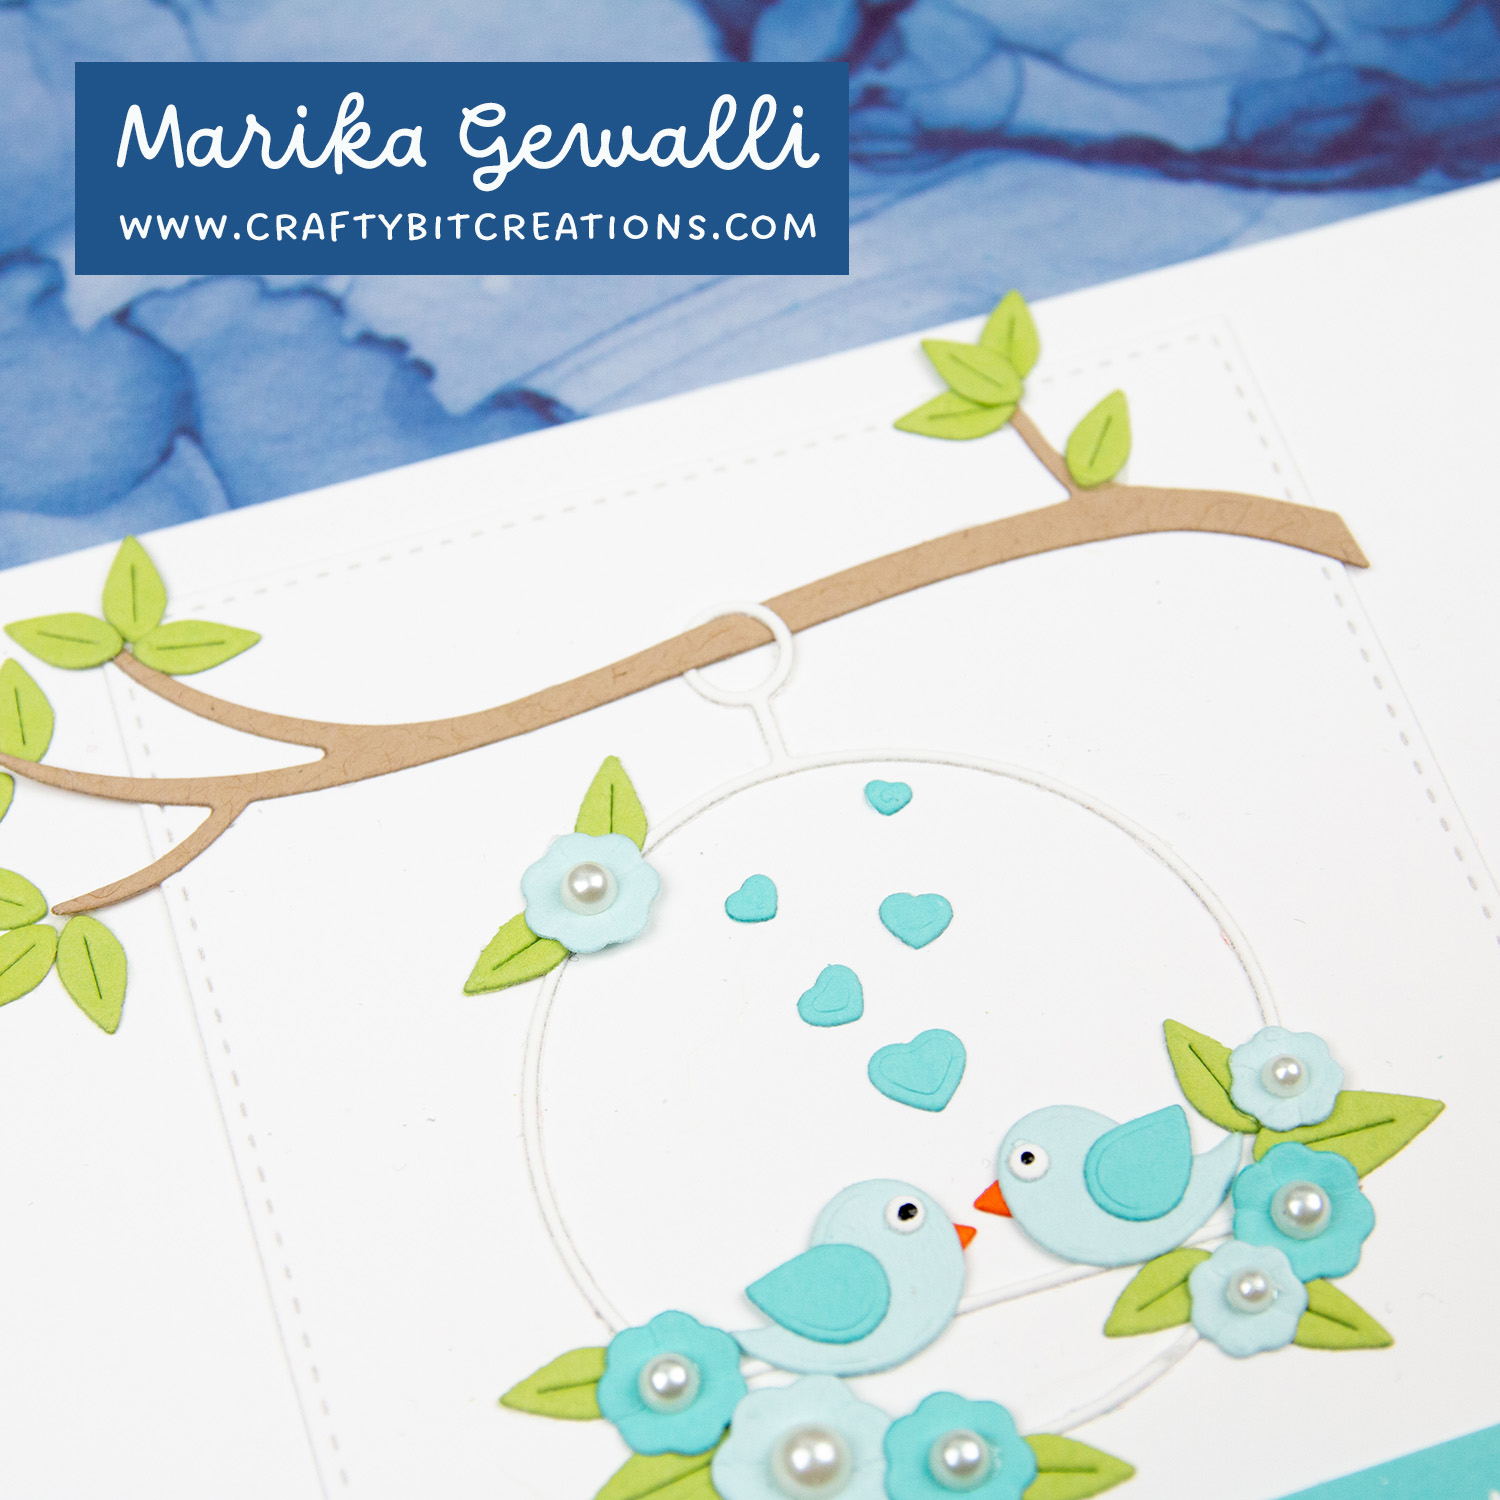
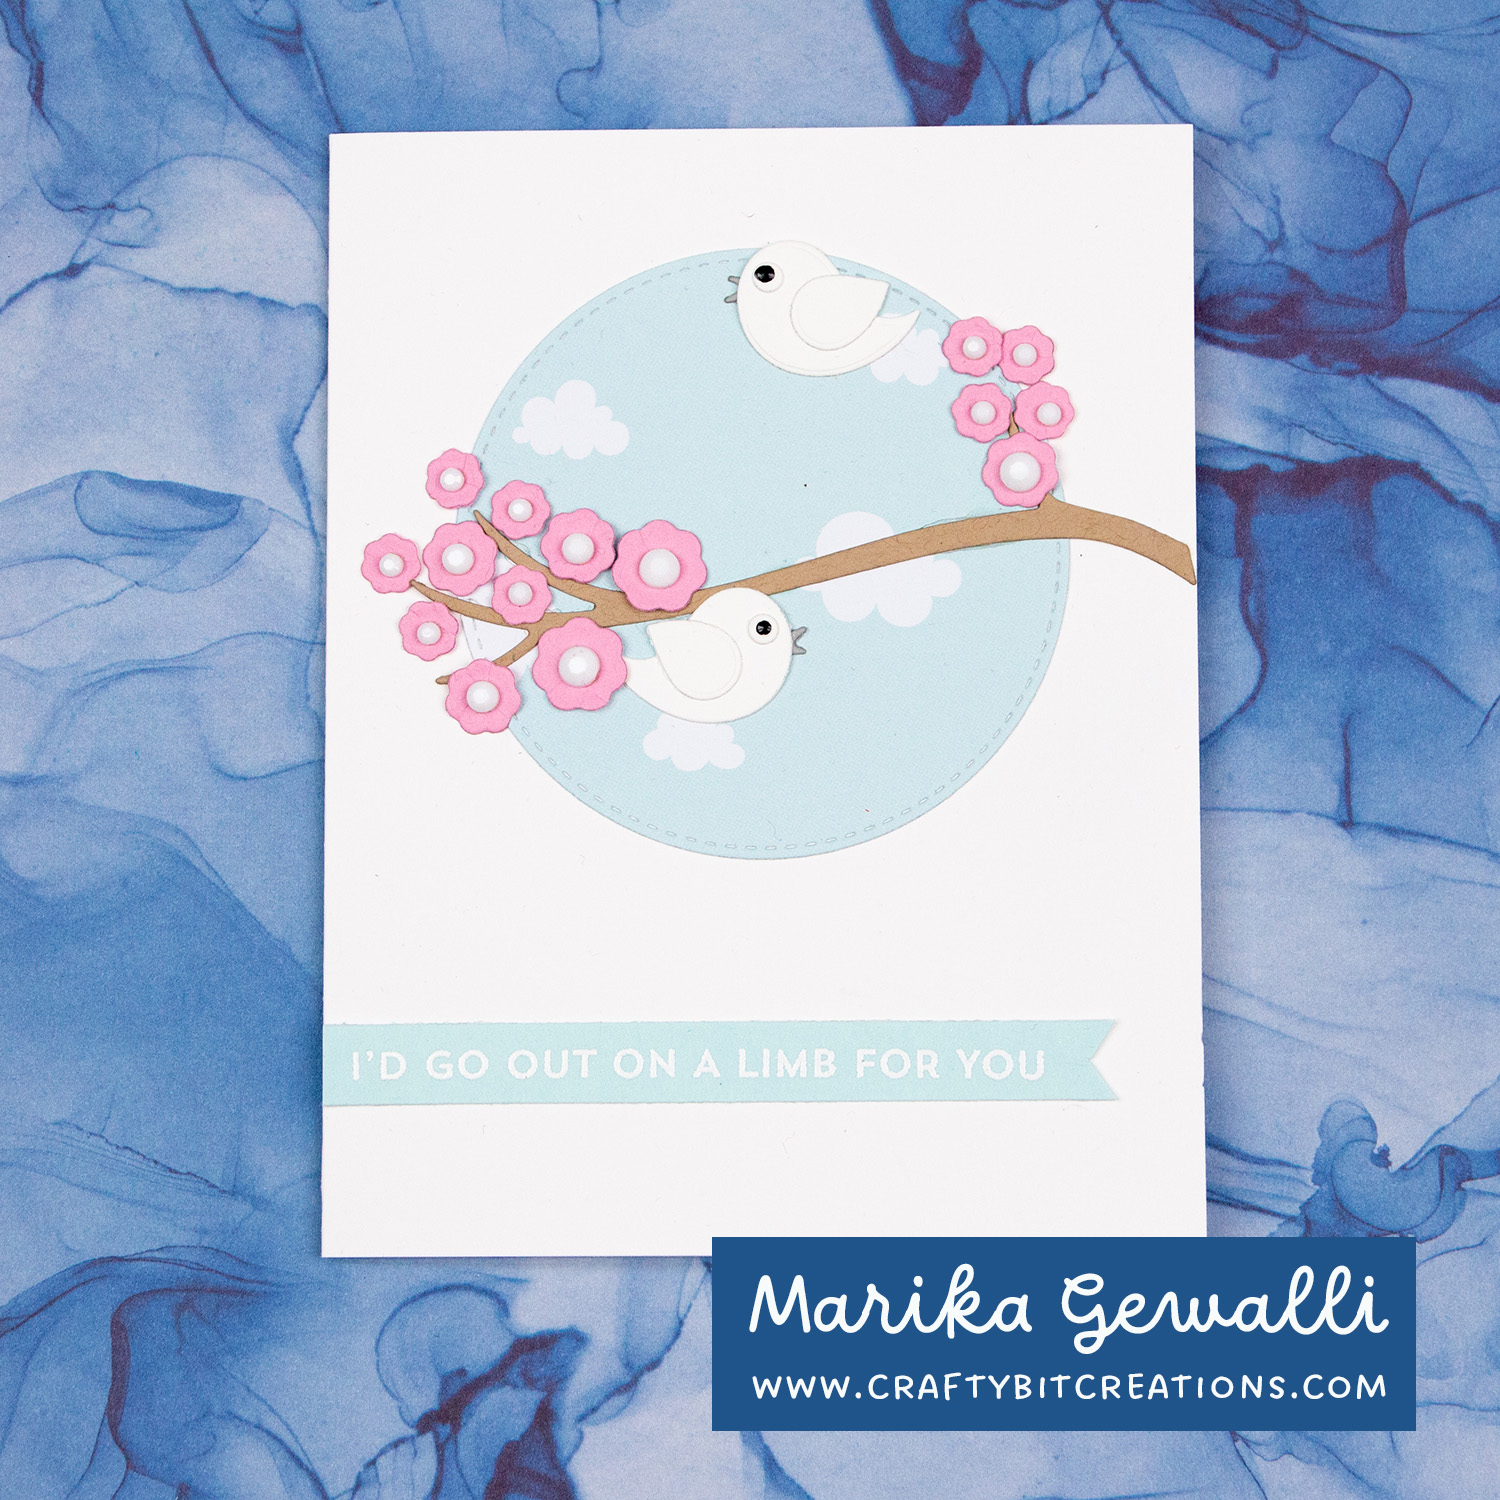
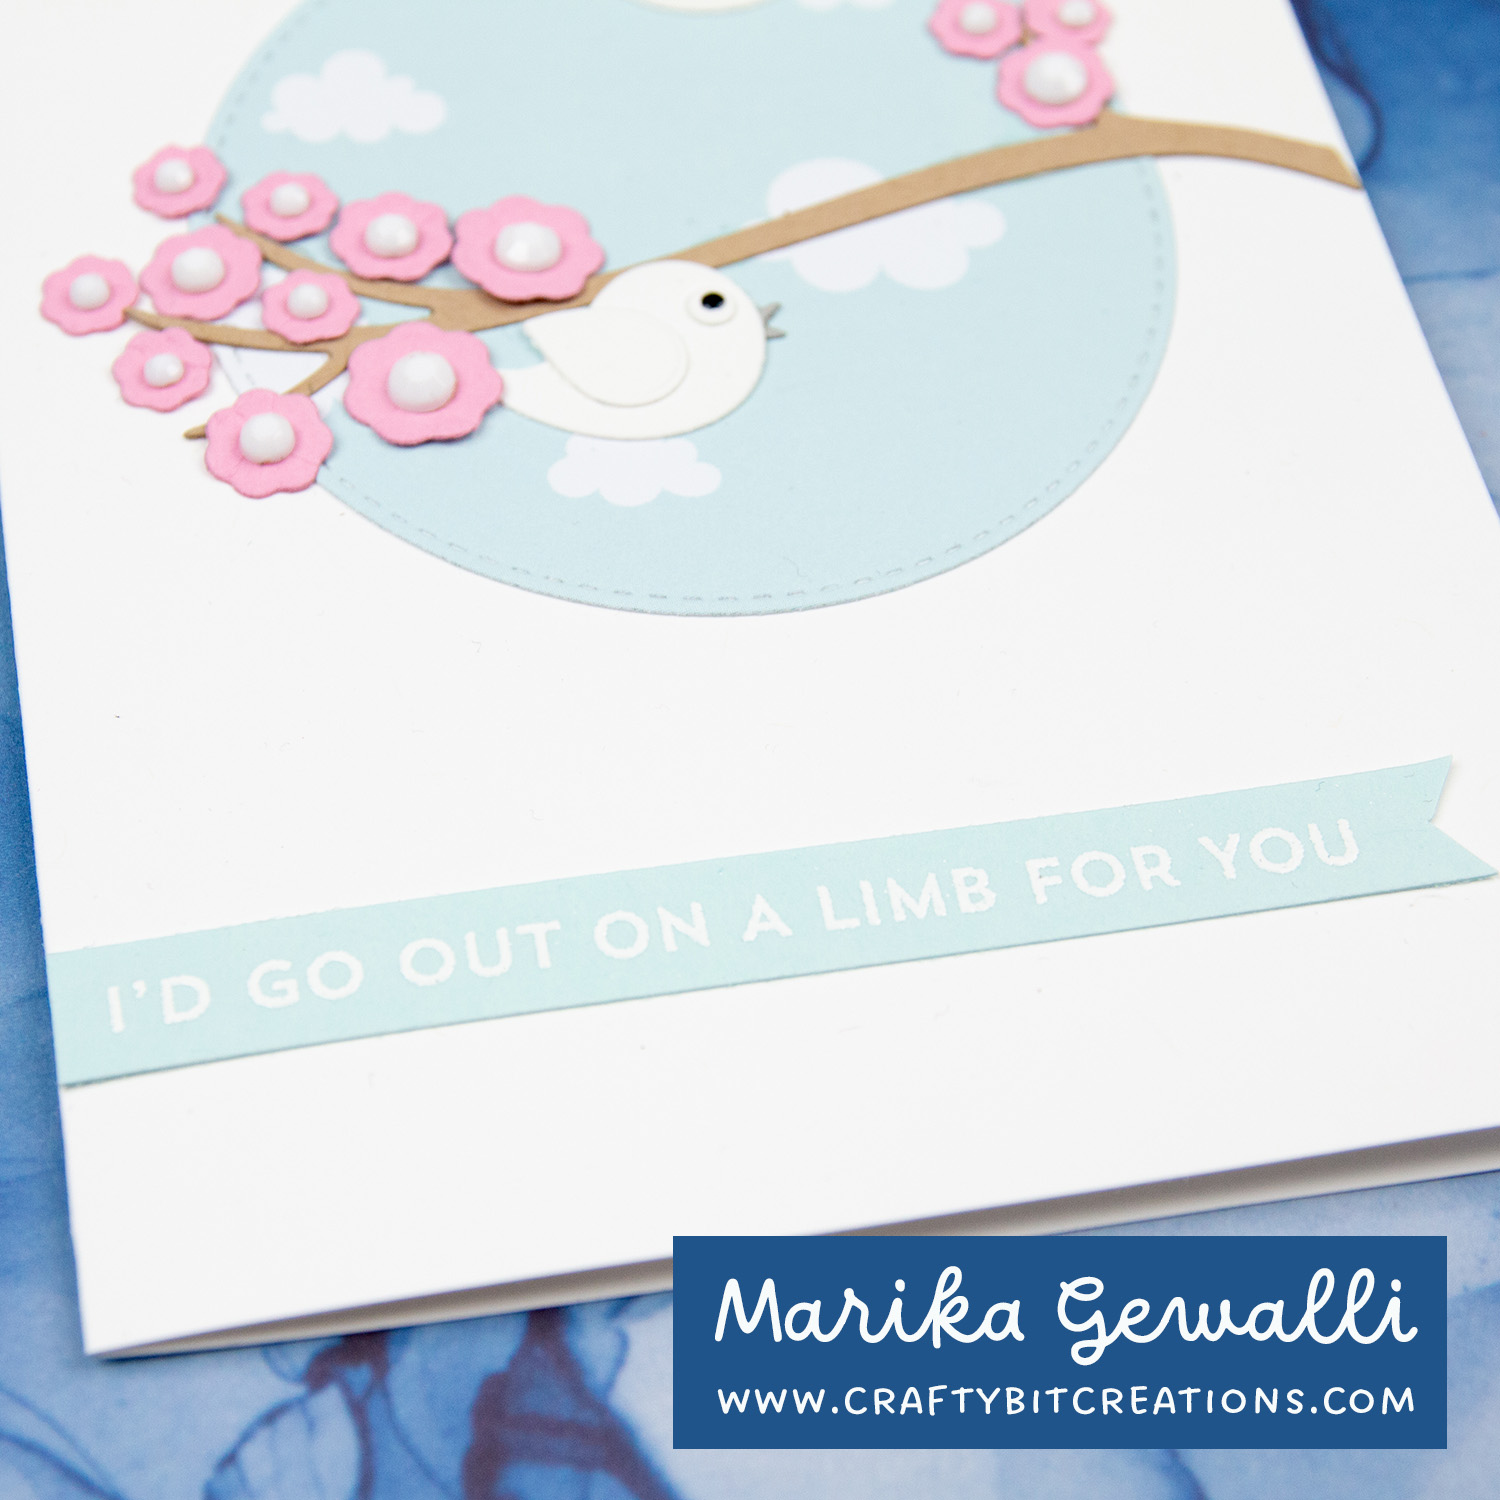
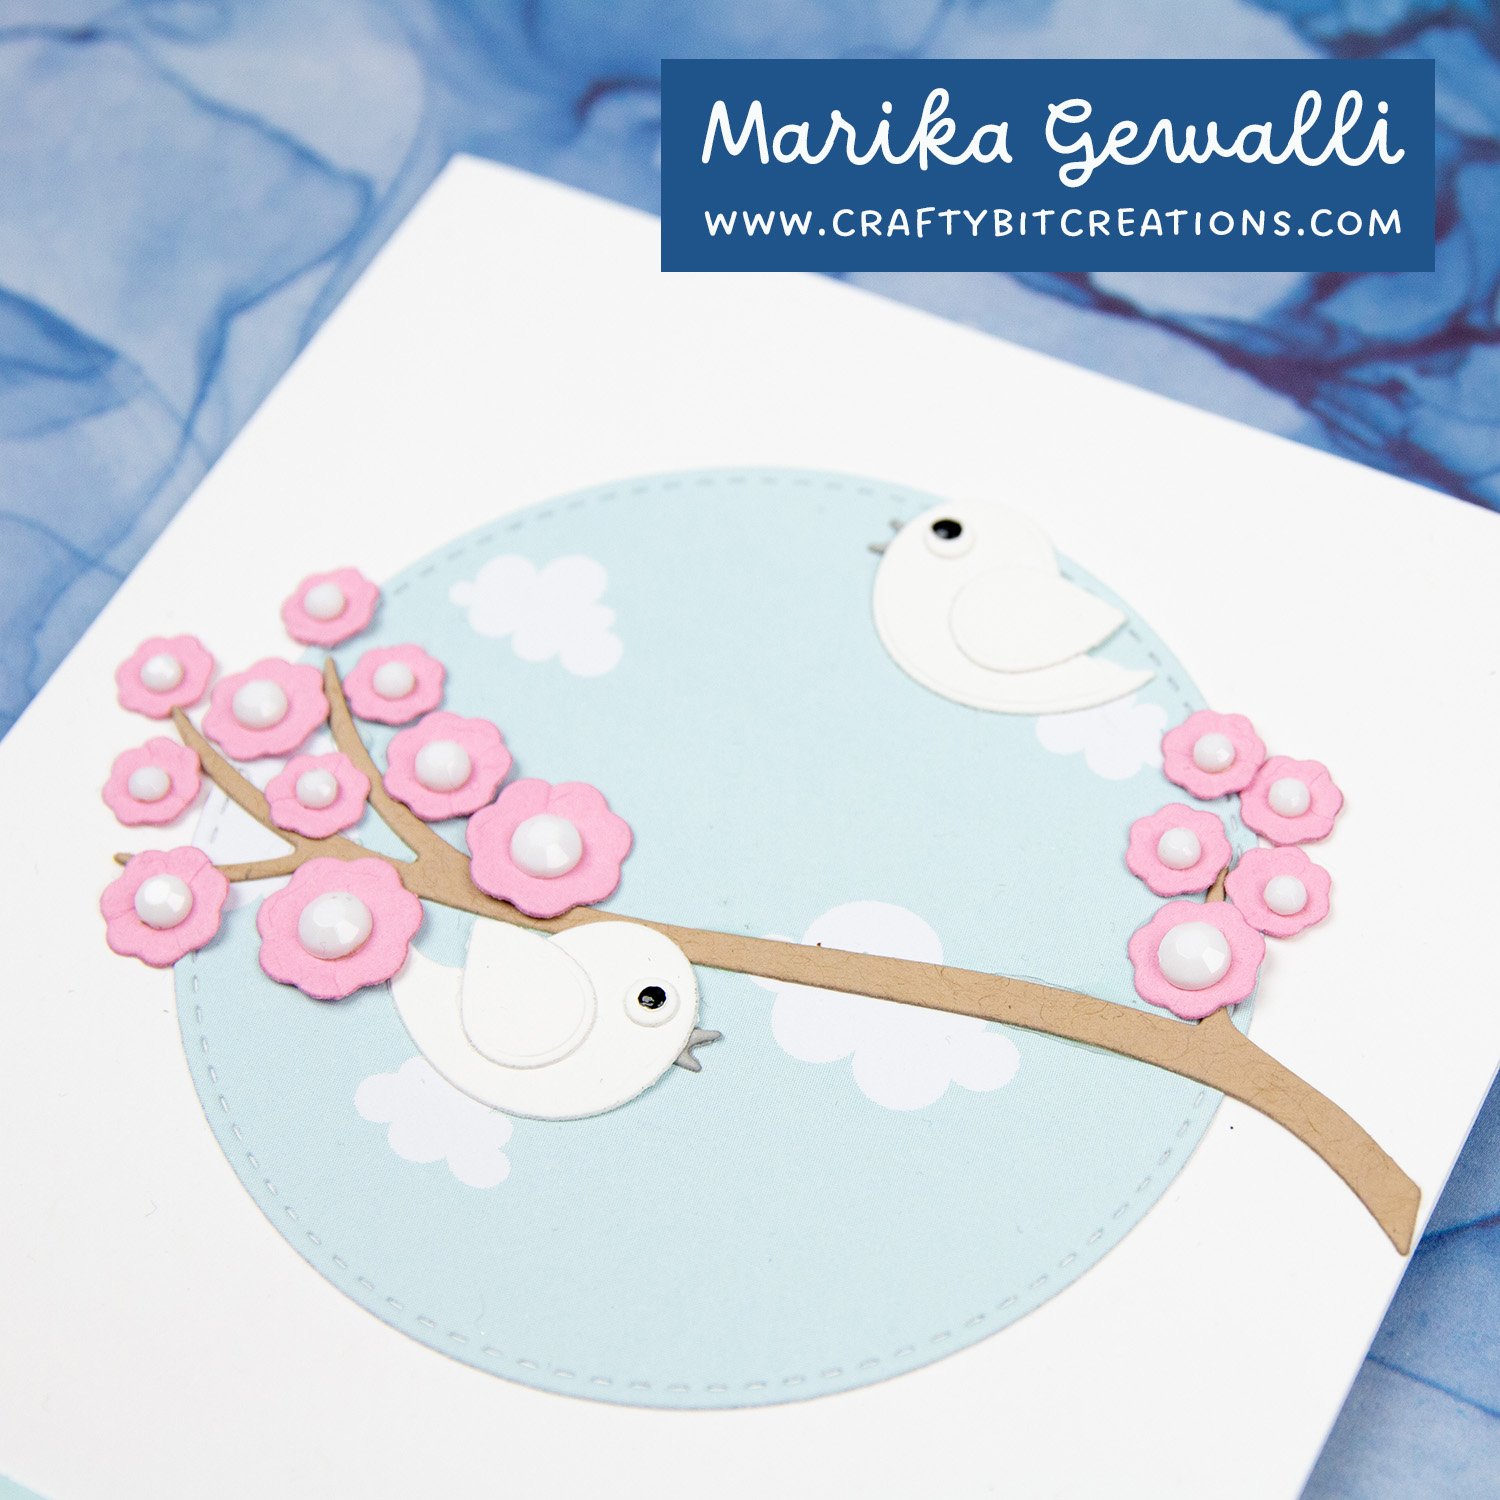
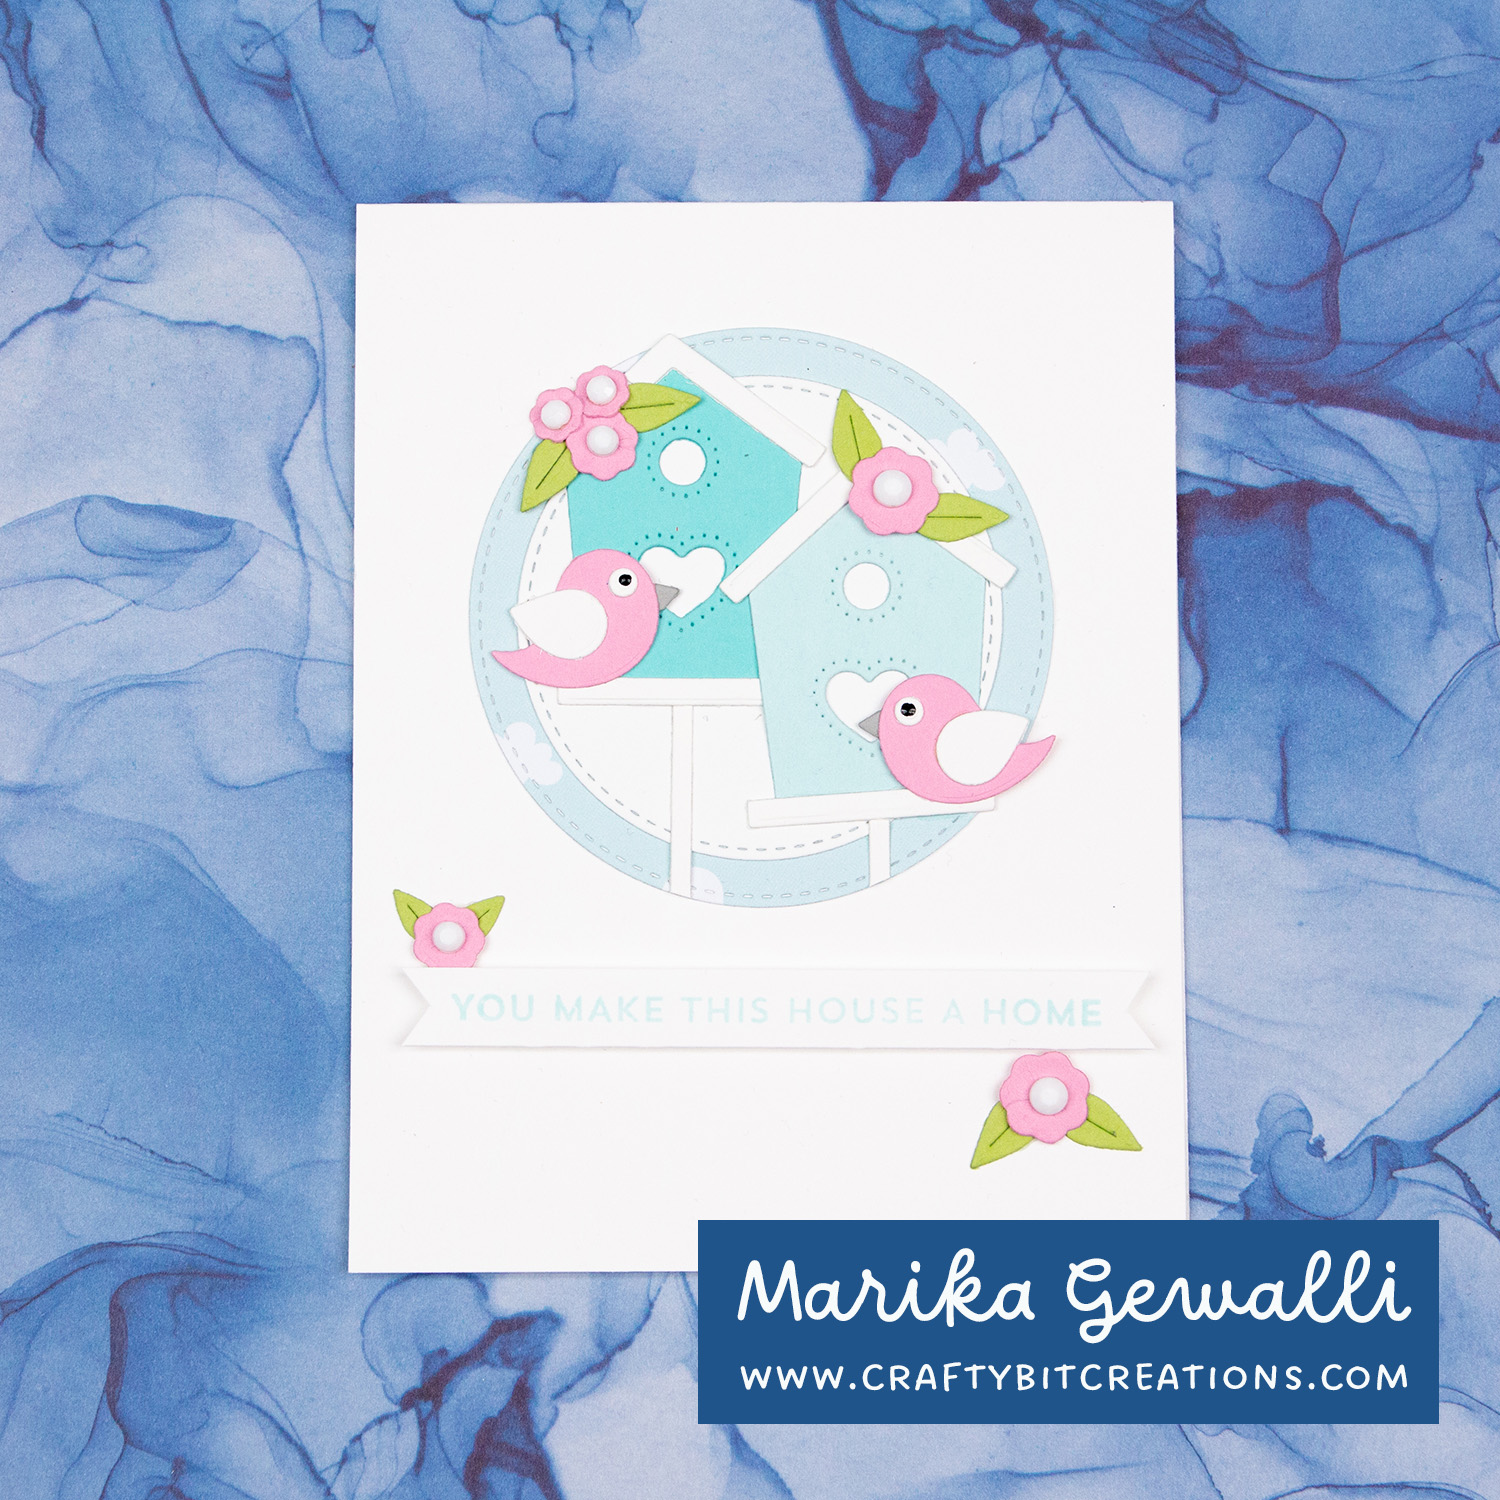
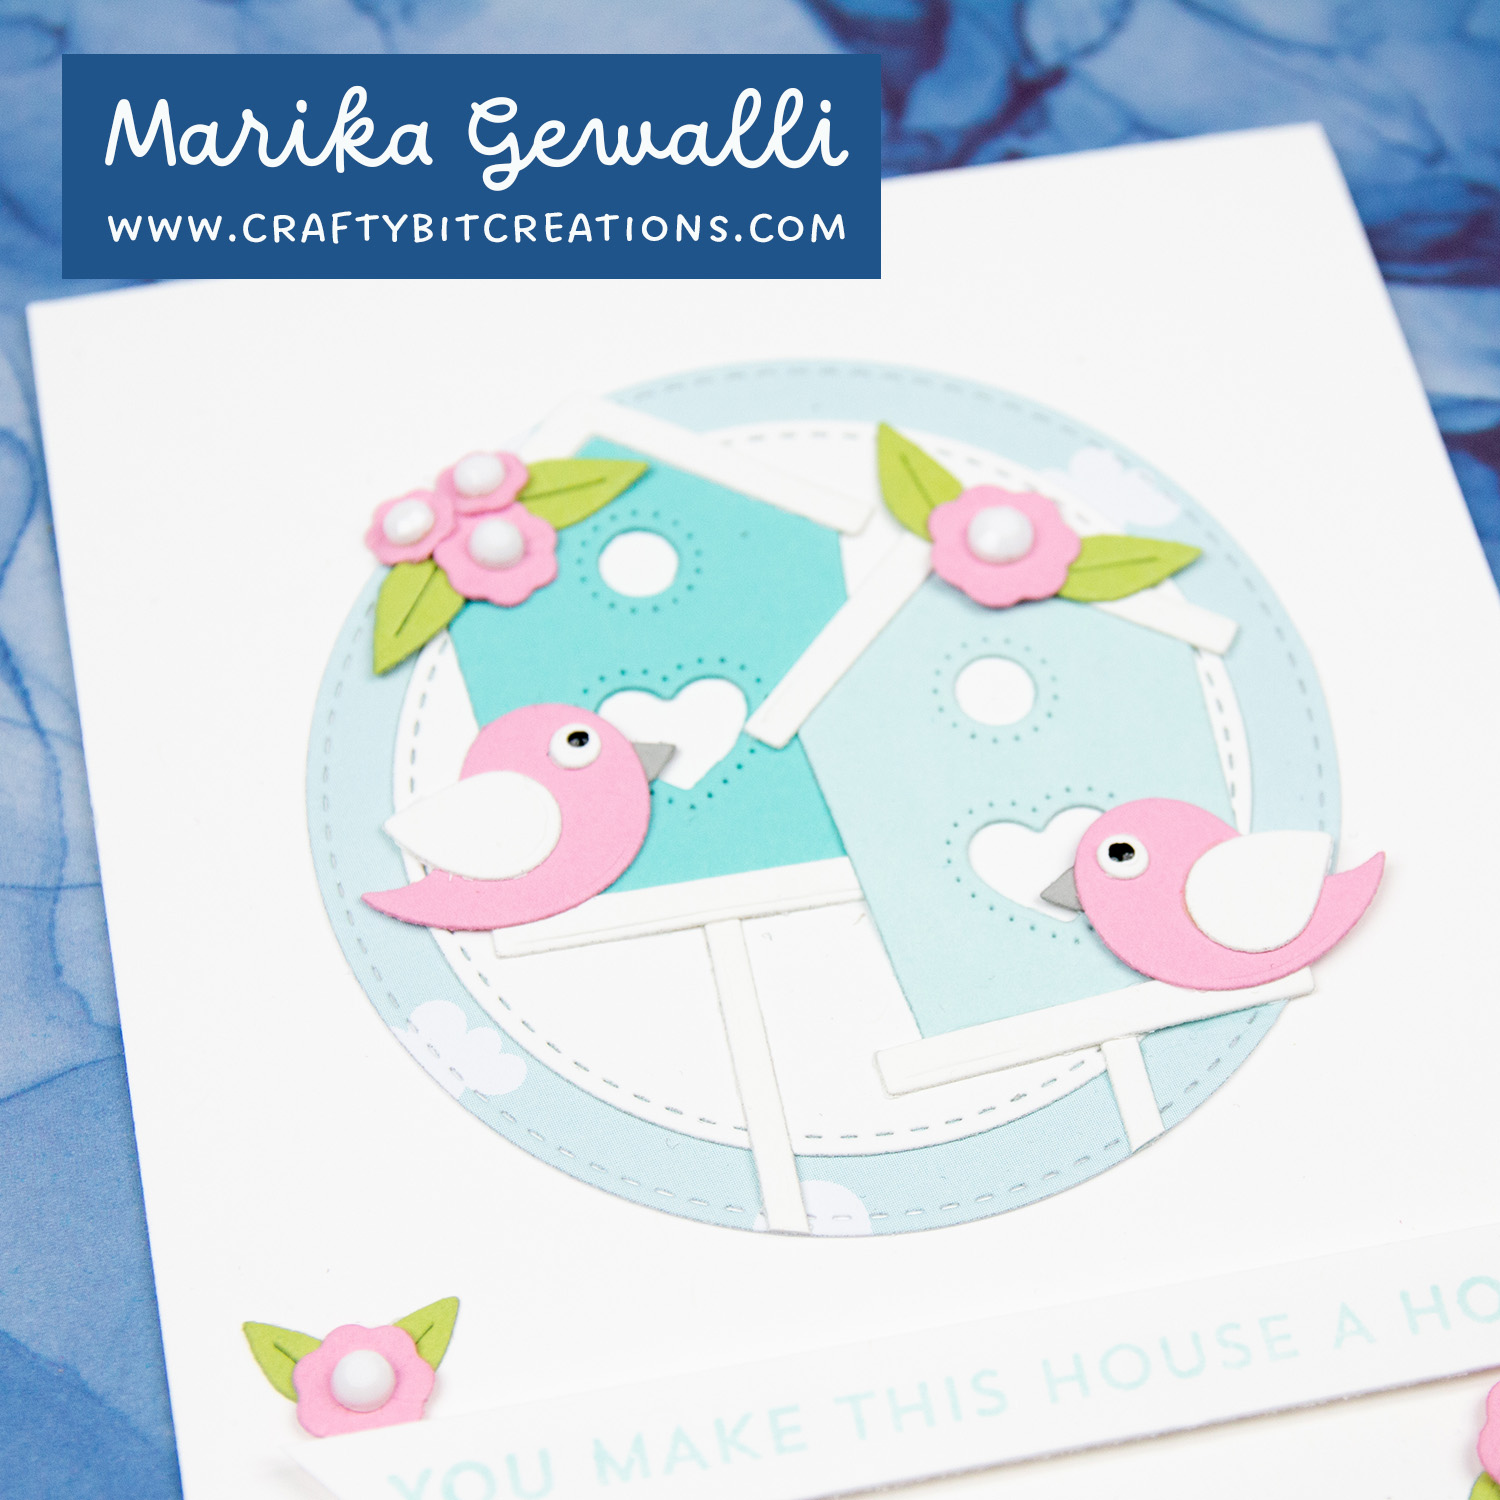
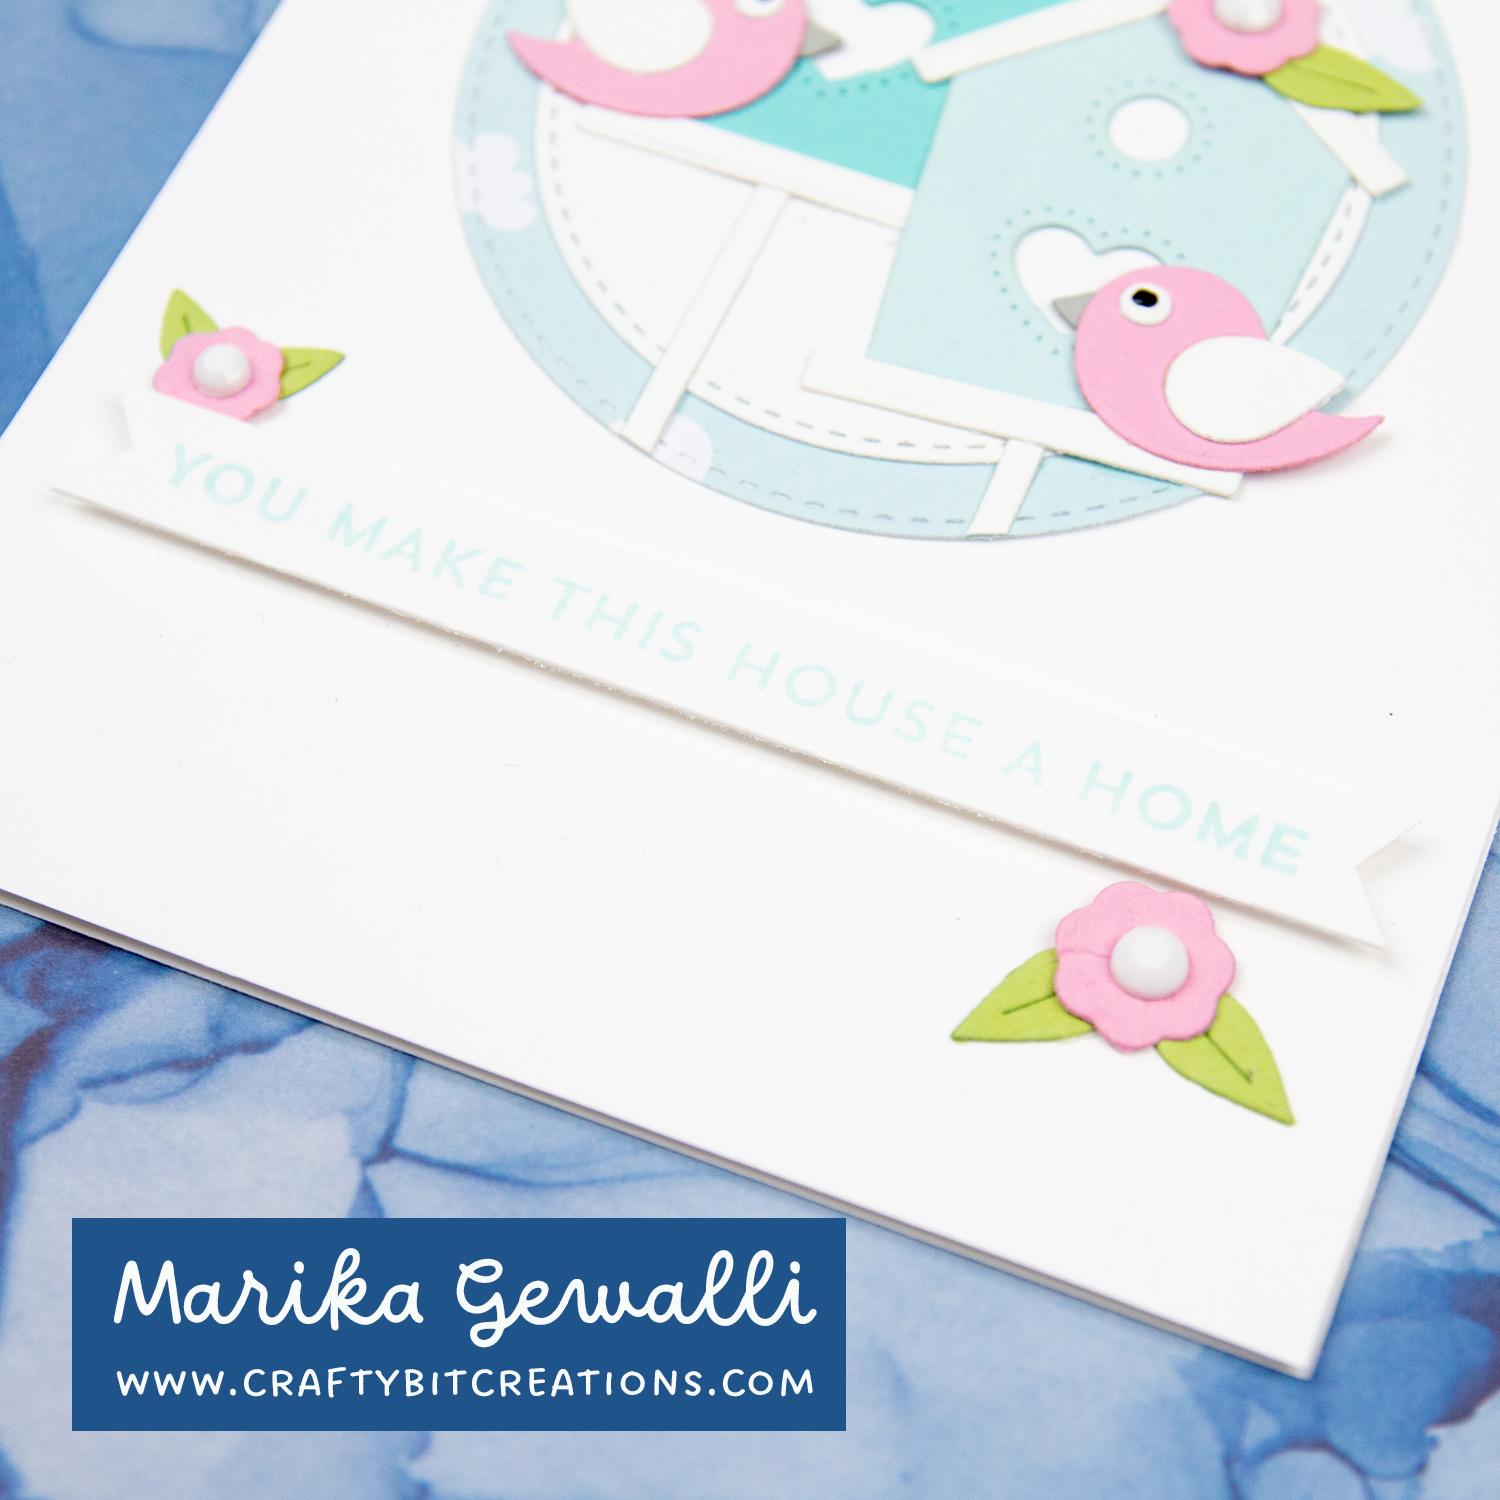
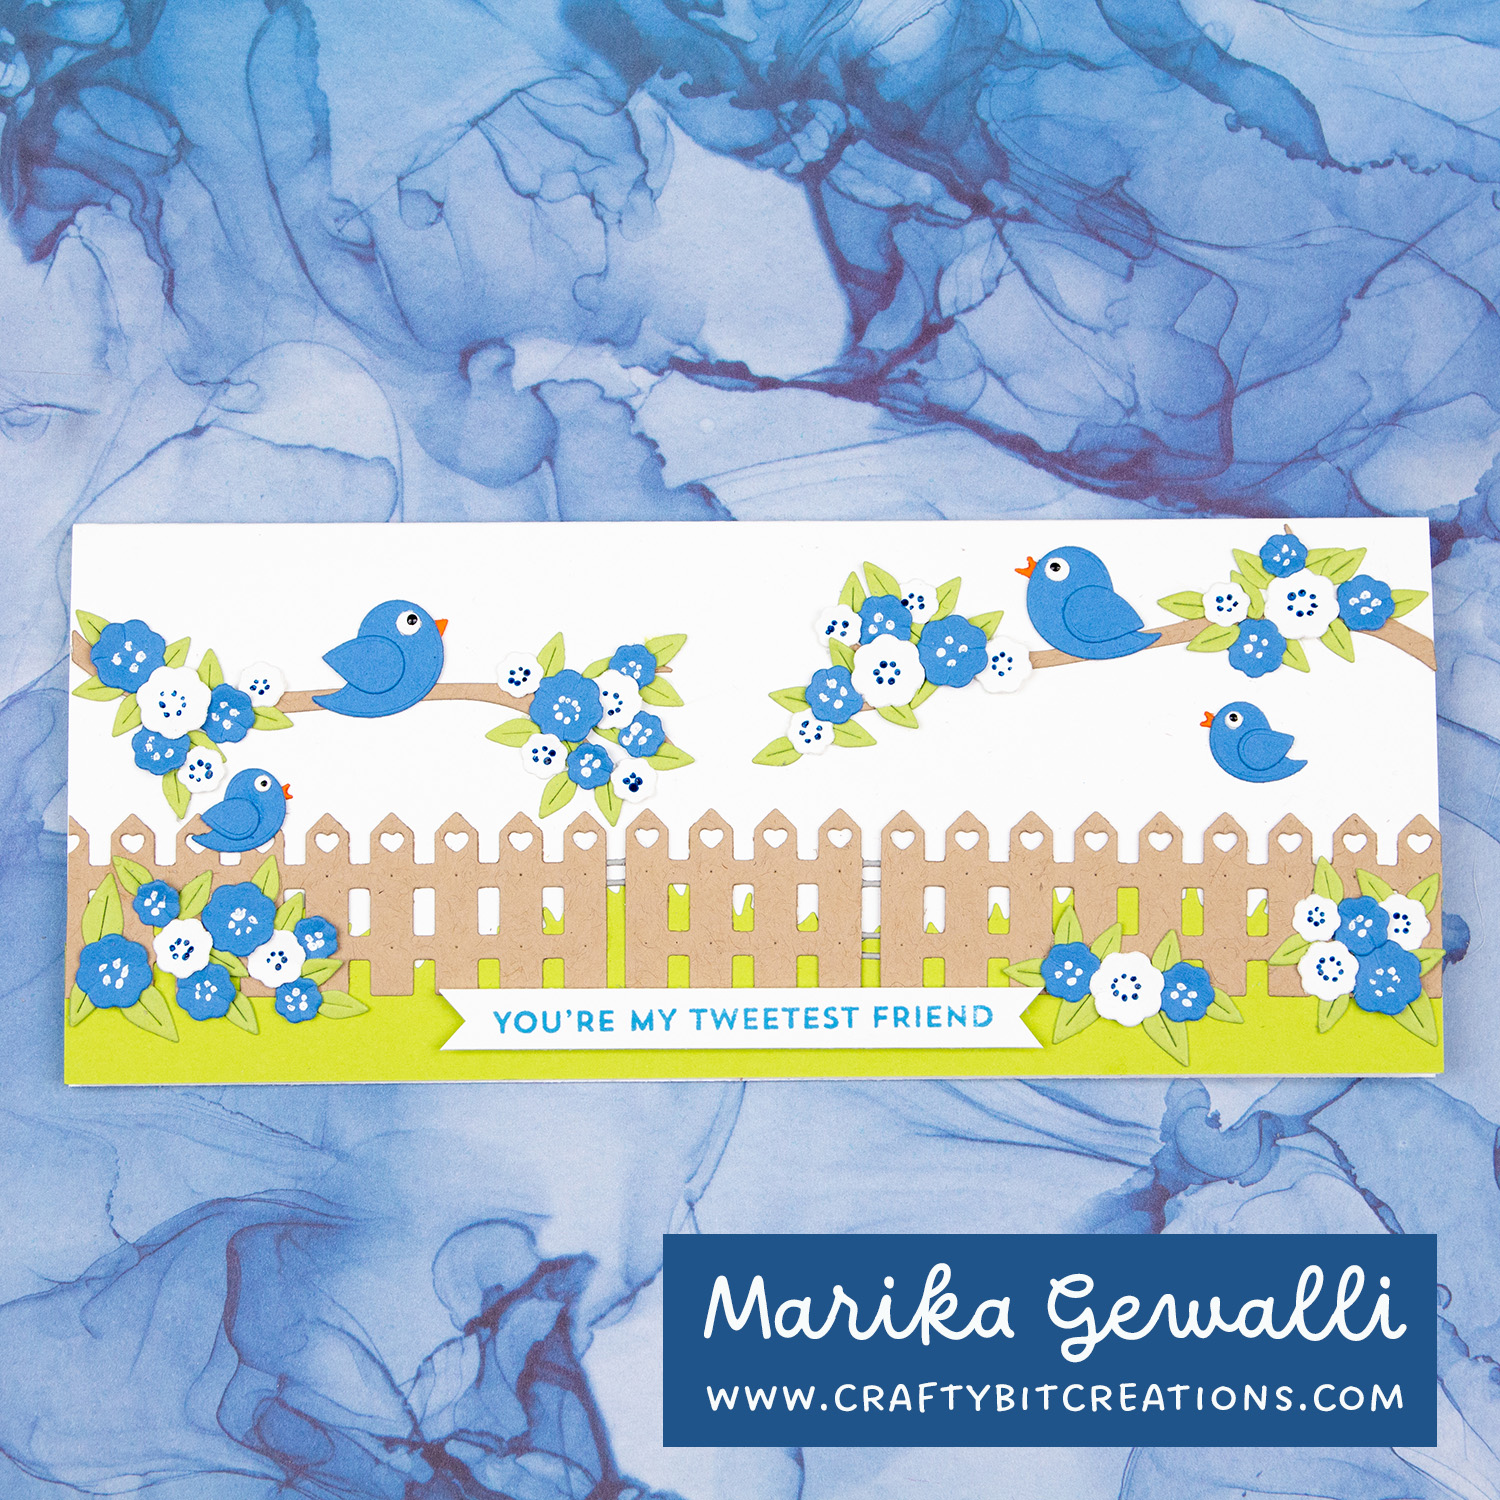
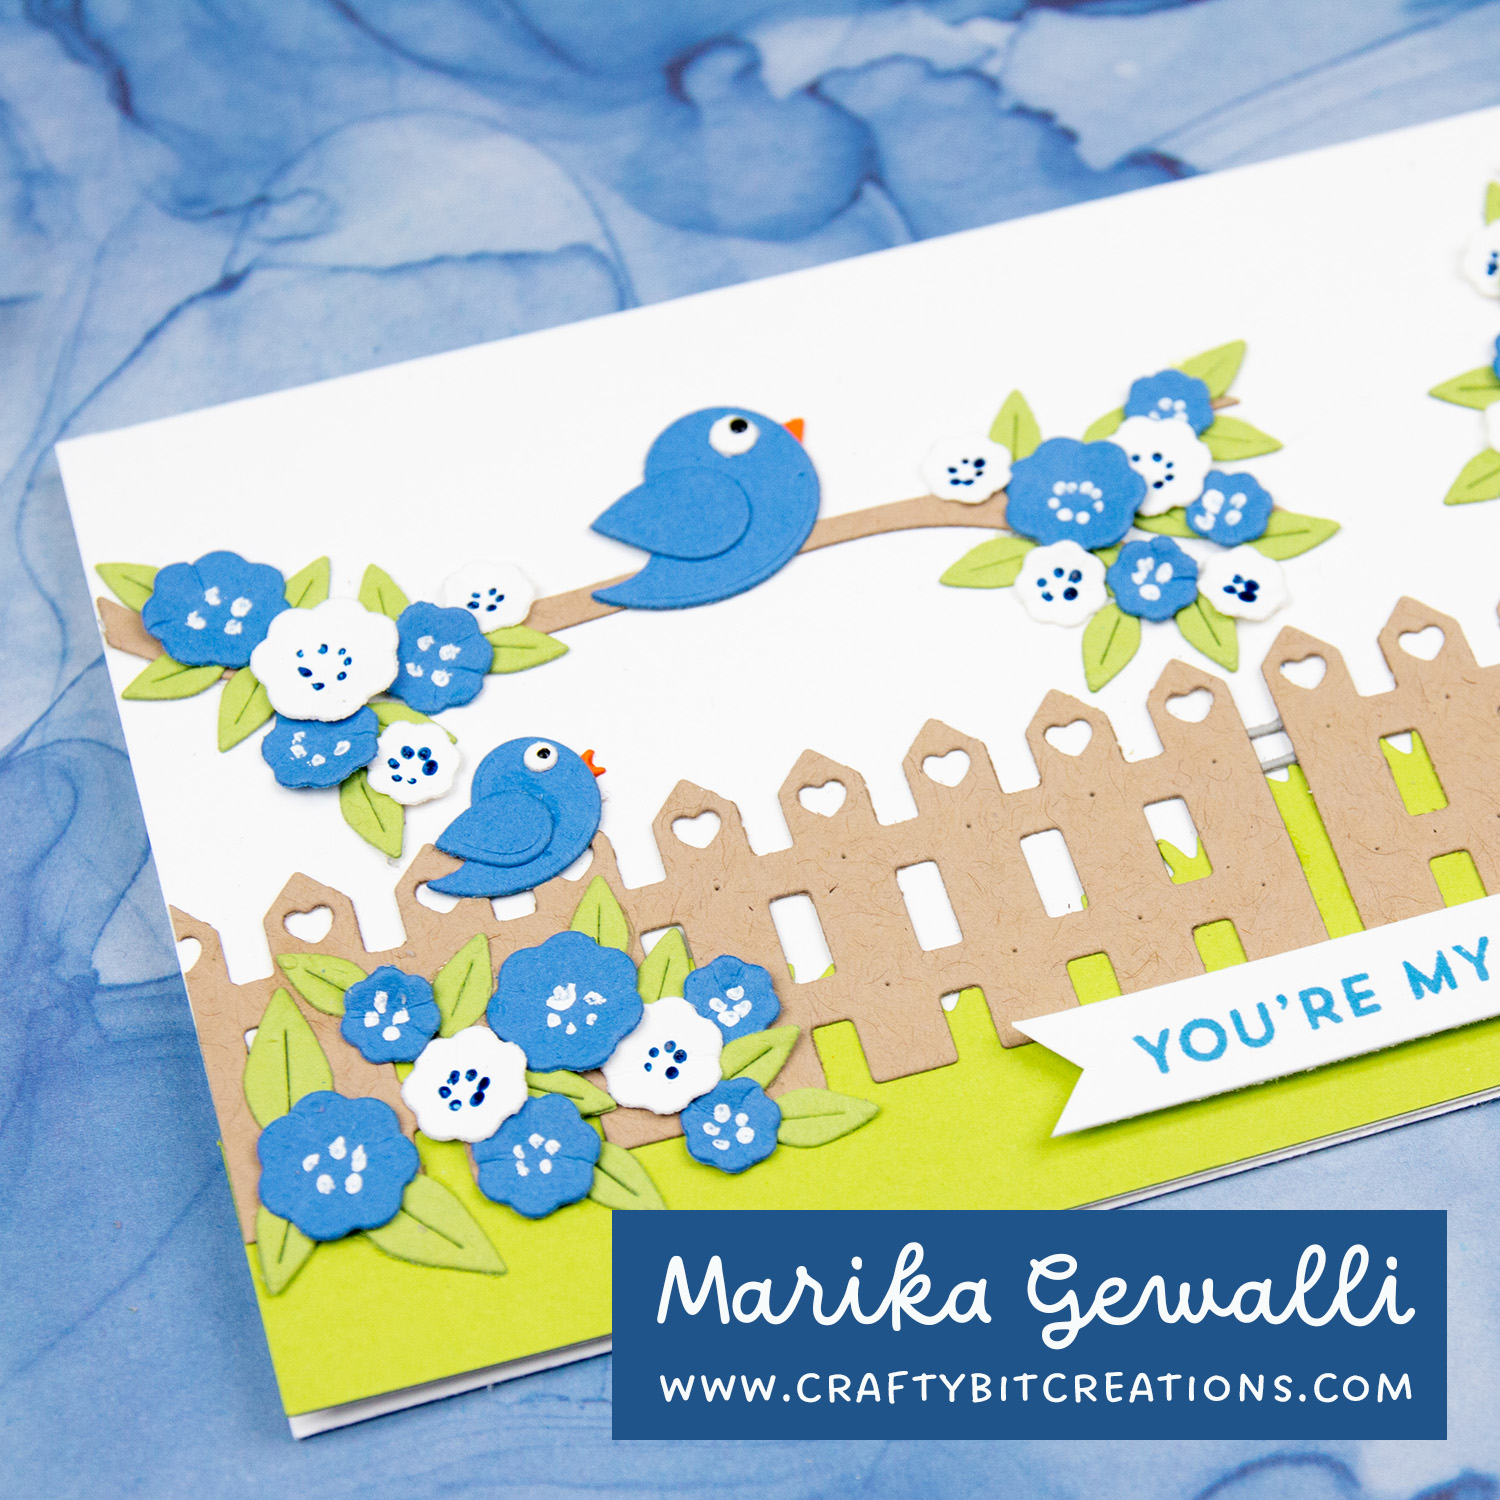
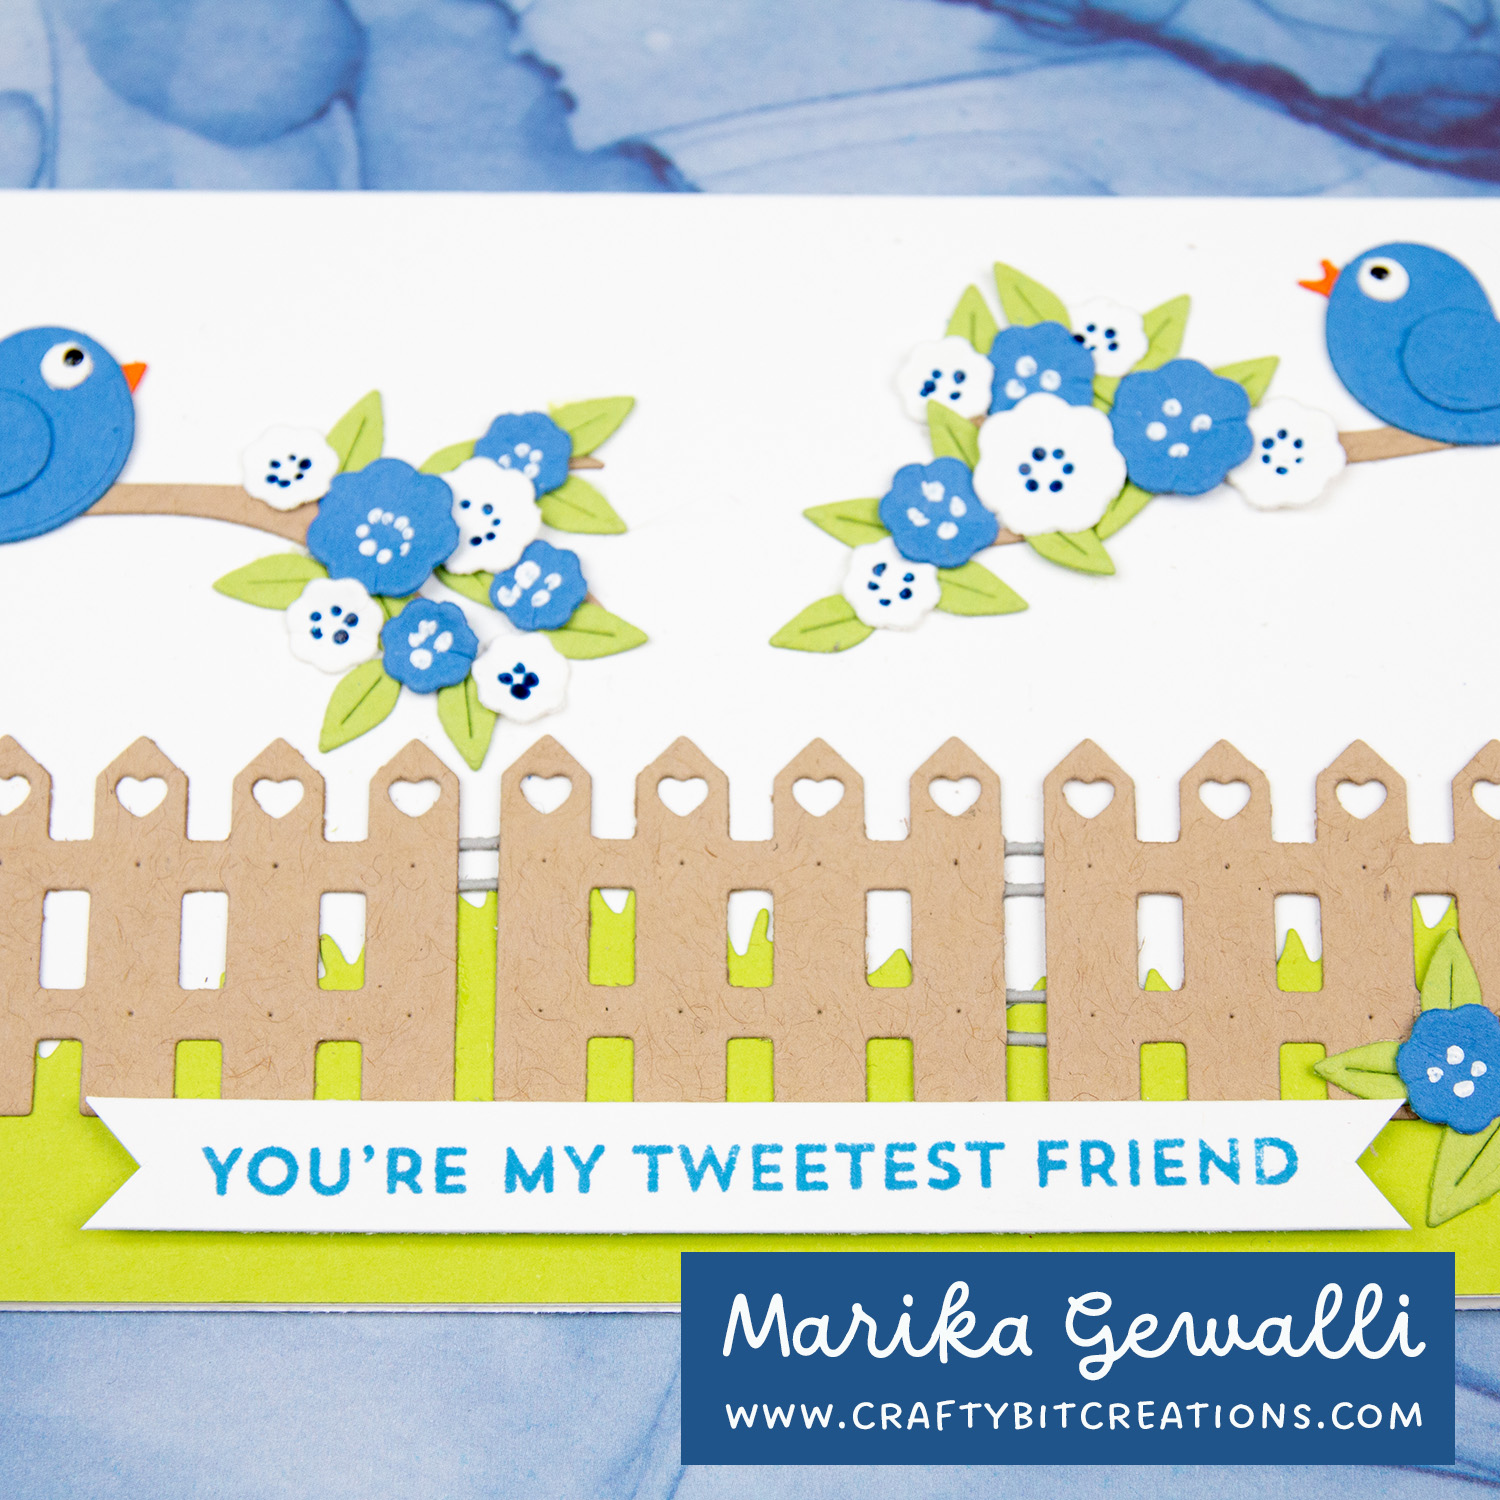
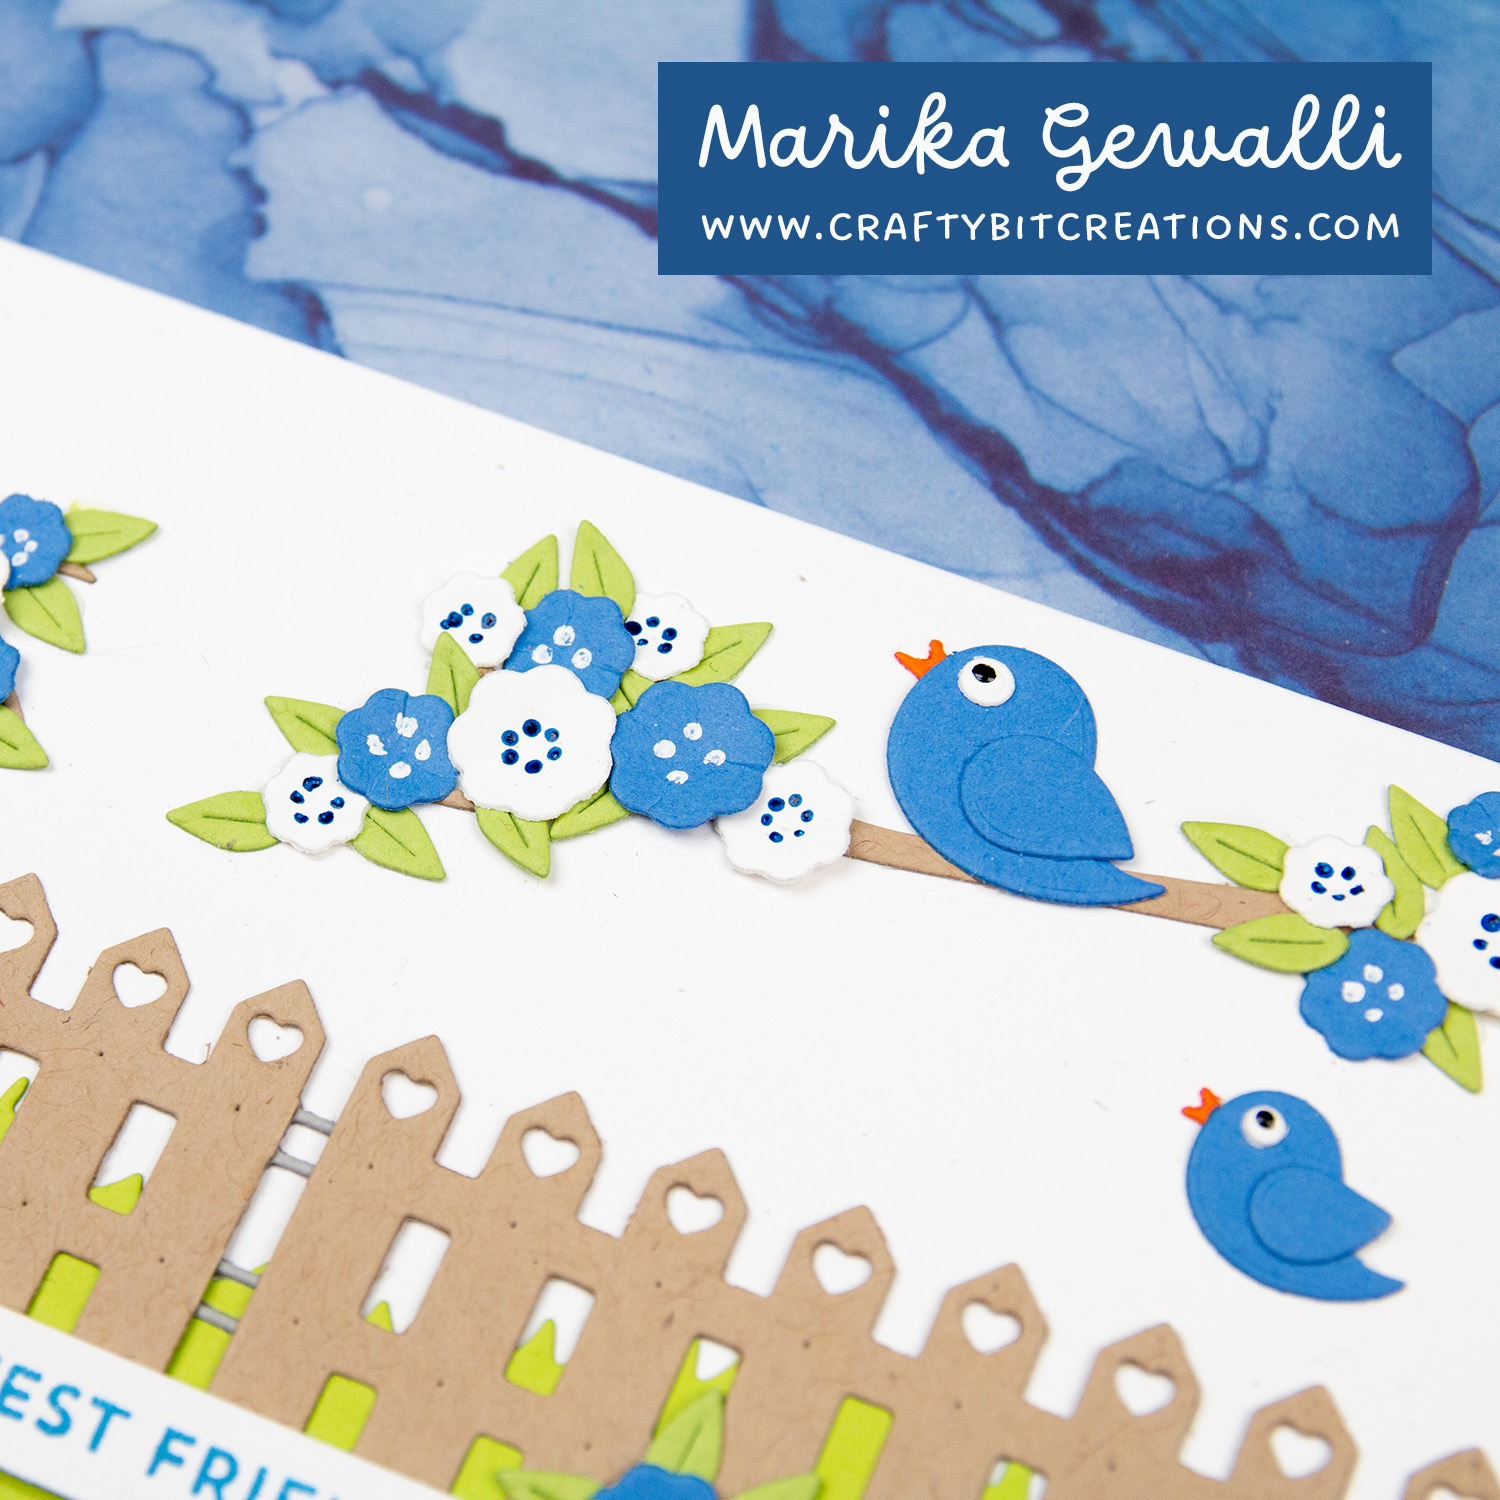
I love birds, I think I got it from my father. So when the Tweet Greetings Card Kit was announced I just knew I needed to pick it up. And I also felt that the add-ons fitted perfectly with the kit so just had to pick it up.
I could have made loads and loads of cards with the kit, I had so many ideas. But I stopped at four so that I would have time to edit the video. Also the video would be hours long if I didn’t stop there. But hope you enjoy the versions I made. My favorite is definitely the slimline card. Which one is our favorite?
When possible affiliate links are used, this means that I receive a small commission when products are purchased through the links (at no extra cost to you) I use the money to support my blog and youtube channel. If you like my projects and tutorial please consider supporting me by clicking through these links when you shop. Thanks!
Supplies
Tweet Greetings Card Kit: MFT Tweet Greetings stamp set: MFTSSS Birds of a Feather Die-namics: MFTSSS Home Tweet Home Die-namics: MFTSSS Happy Patterns Paper Pad: MFTSSS MFT Smooth White Card Stock: MFT MFT Cotton Candy Card Stock: MFT MFT Moroccan Spice Card Stock: MFT MFT Orange Zest Card Stock: MFT MFT Lemon Drop Card Stock: MFT MFT Limelight Card Stock: MFT MFT Sour Apple Card Stock: MFT MFT Sno Cone Card Stock: MFT MFT Card Stock Summer Splash: MFT MFT Something Blue Card Stock: MFT MFT Kraft Cardstock: MFT MFT Black Licorice Cardstock: MFT MFT A2 Stitched Circle STAX Die-namics: MFTSSS MFT Stitched Square STAX Die-namics: MFTSSS MFT Sno Cone Premium Dye Ink Pad: MFTSSS MFT Something Blue Premium Dye Ink Pad: MFTSSS Self-Adhesive Pearls: SSSSBC Neenah Solar White 80lb: SSSAMZSBC Wendy Vecchi PERFECT STYLUS: SSSAMZSBC
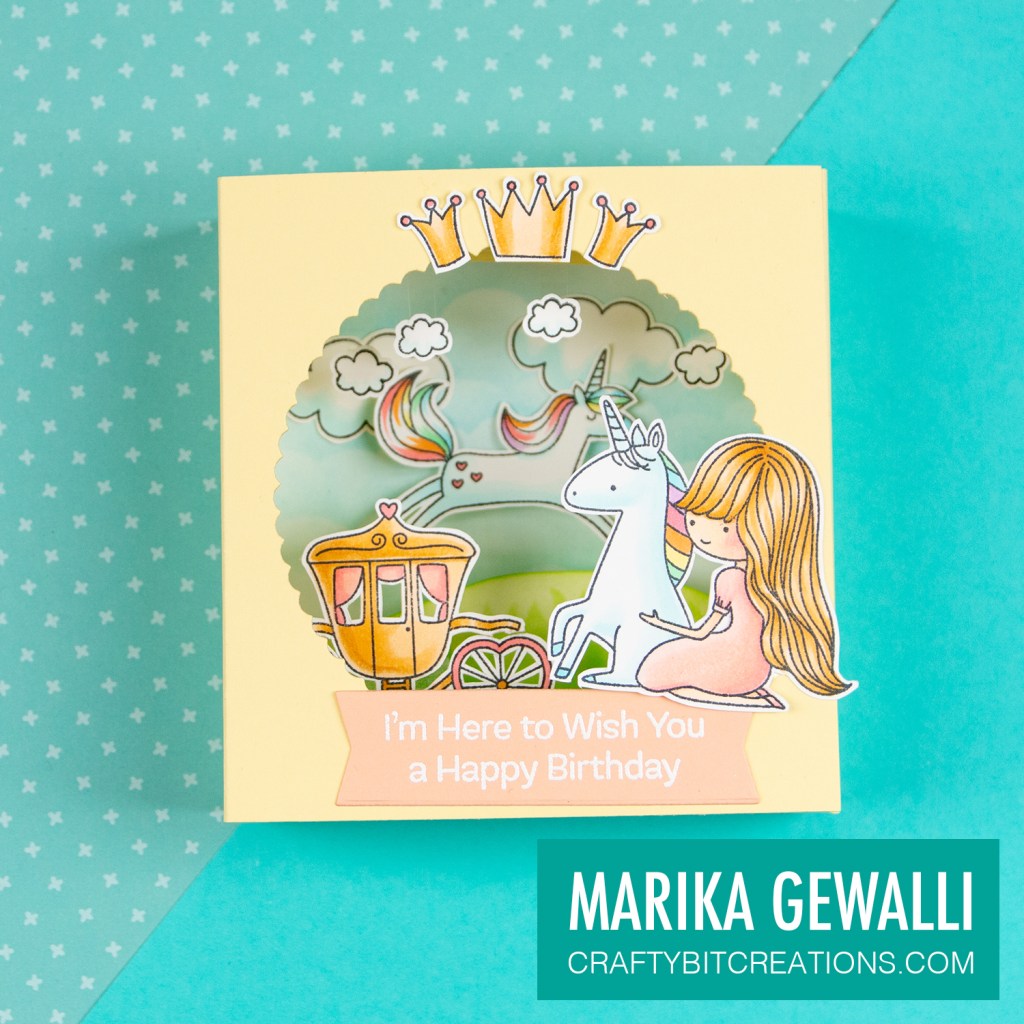
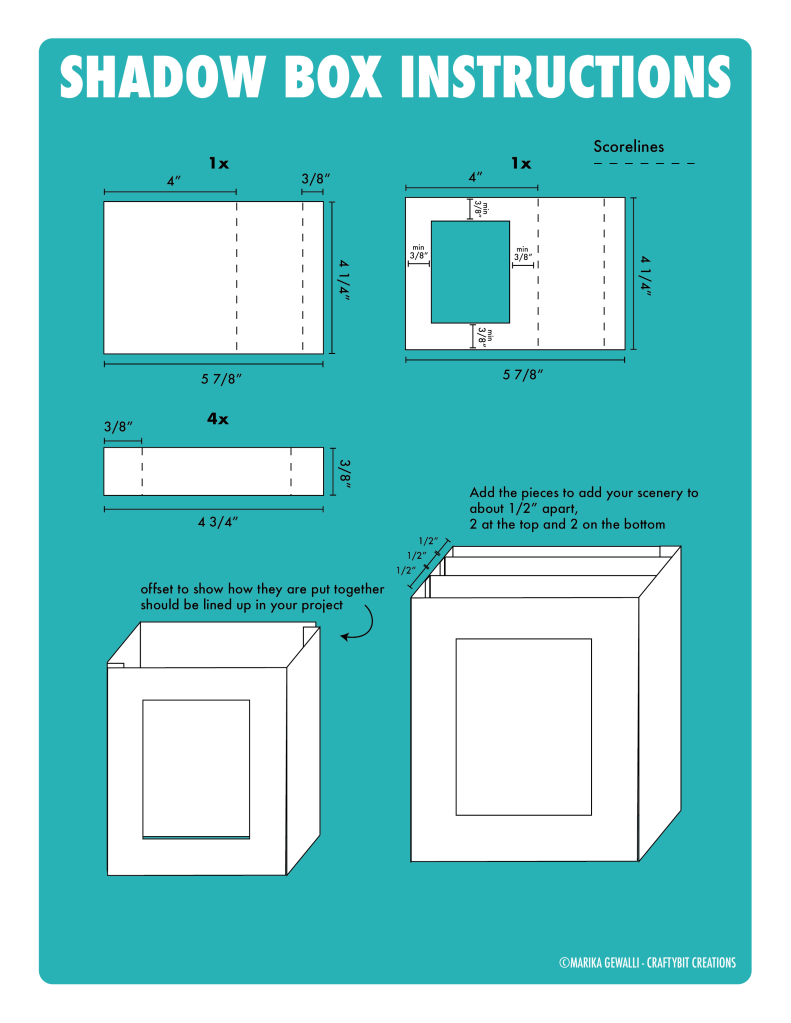
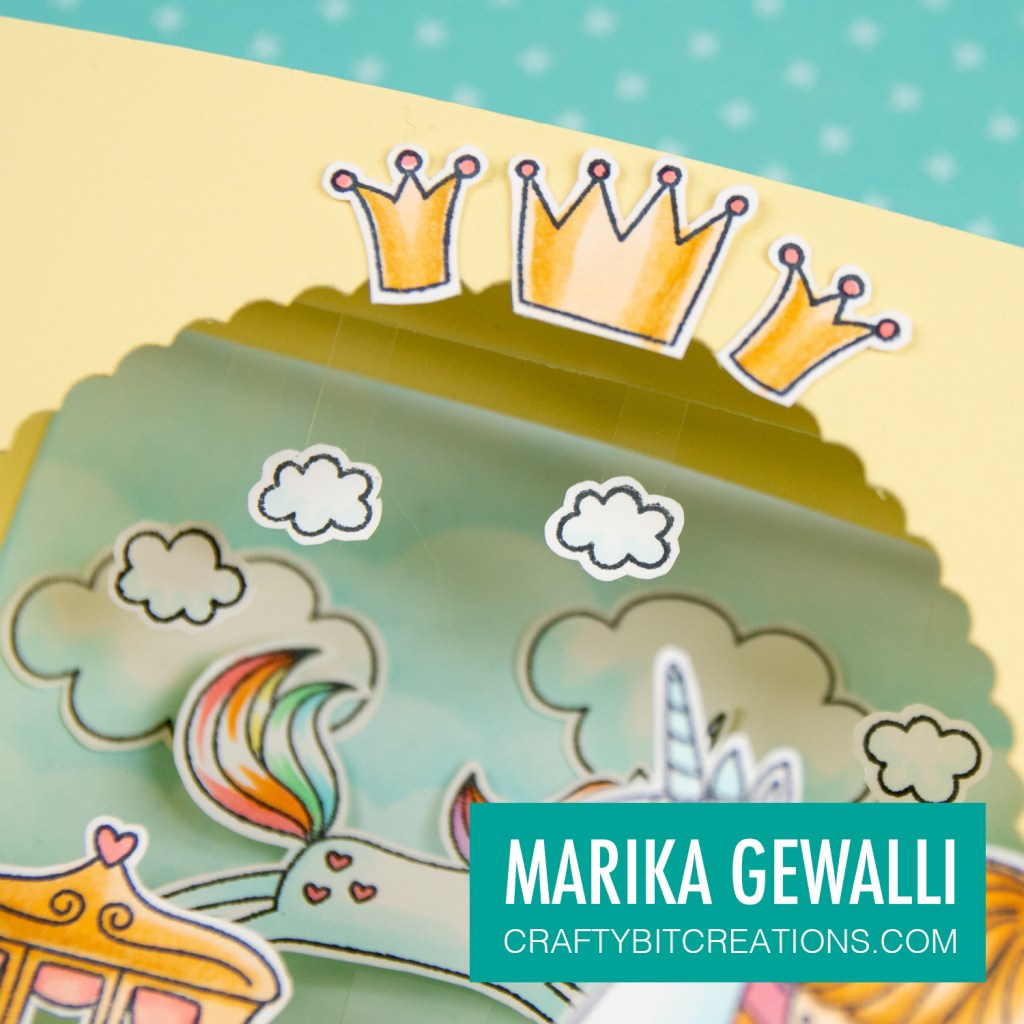
Hi! Today I made a shadow box with unicorns and princesses, everything I love! The video tutorial goes through how to cut, score and put everything together, but I have also made an instruction sheet that you can see below and you can find it as a pdf HERE.
Making a shadow box means some measuring and scoring and if you find that hard (or boring), there is dies out there. One that also flattens to an A2 card size like the box I have done is the one from MFTStamps.
In the video below you can follow along on how I did my box out of less than one sheet of letter sized card stock. Also you can see how I decorated it using stamps from the Pretty Princess and Friendly Unicorn Stamp sets. You can find all the products used listed below, and there you also find all the copics used to color the stamps. Which you can see how I did in the second video.
For the shadow box I cut out 2 pieces measuring 5 7/8″ by 4 1/4″ for the back and front, and 4 pieces measuring 3/8″ by 4 3/4″, 2 for upper delimiters and 2 for bottom delimiters. The 5 7/8″ by 4 1/4″ should be scored on the long side at 4″ and at 5 1/2″, and the delimiters should be scored at 3/8″ on both ends. Before putting together the card, take one of the bigger pieces and cut a hole out of the 4″ part of it. Make sure that the hole has a minimum of 3/8″ to all edges so that the tabs aren’t seen from the other side. I used a die for this as I wanted to have cute scalloped edges for my window. Putting together the card, use a strong tape so that it stays together, I use sookwang tape. You can follow the instructions below and I have made a pdf that you can download HERE.
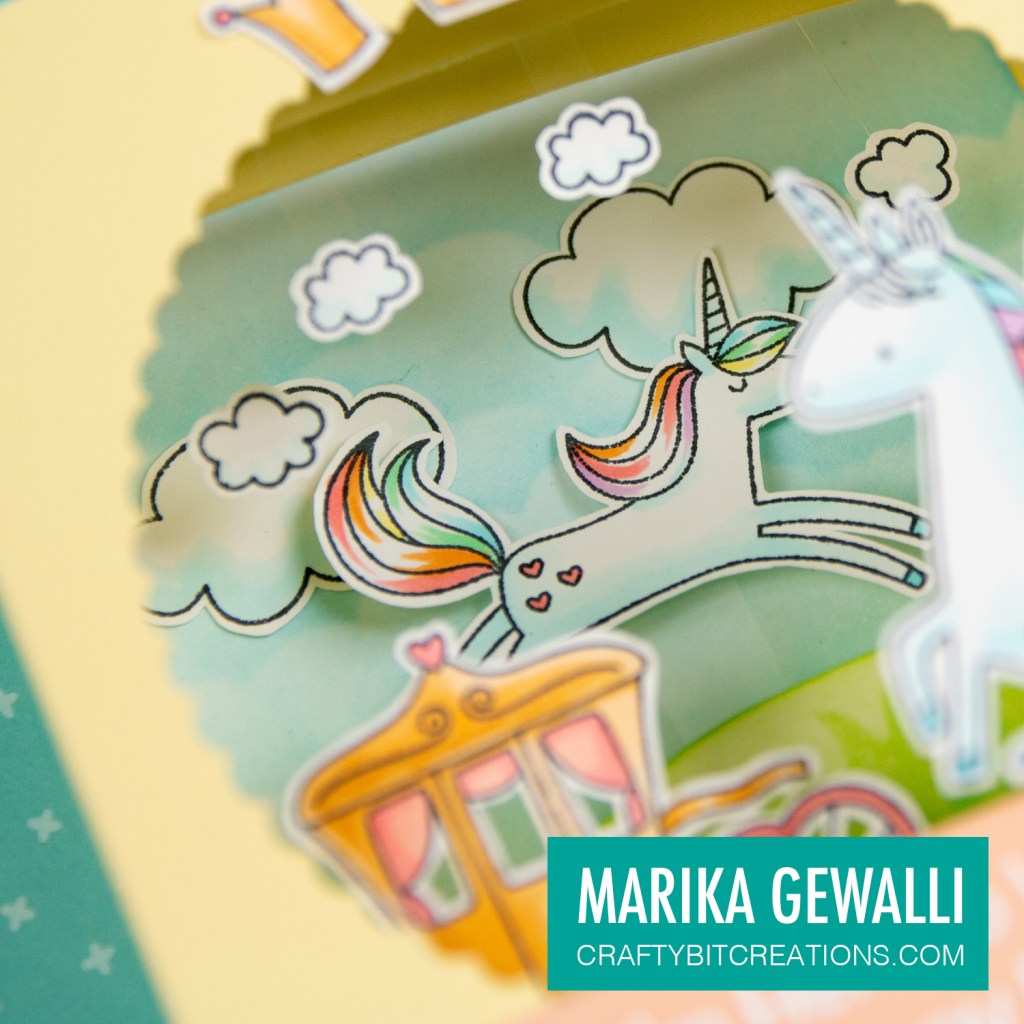
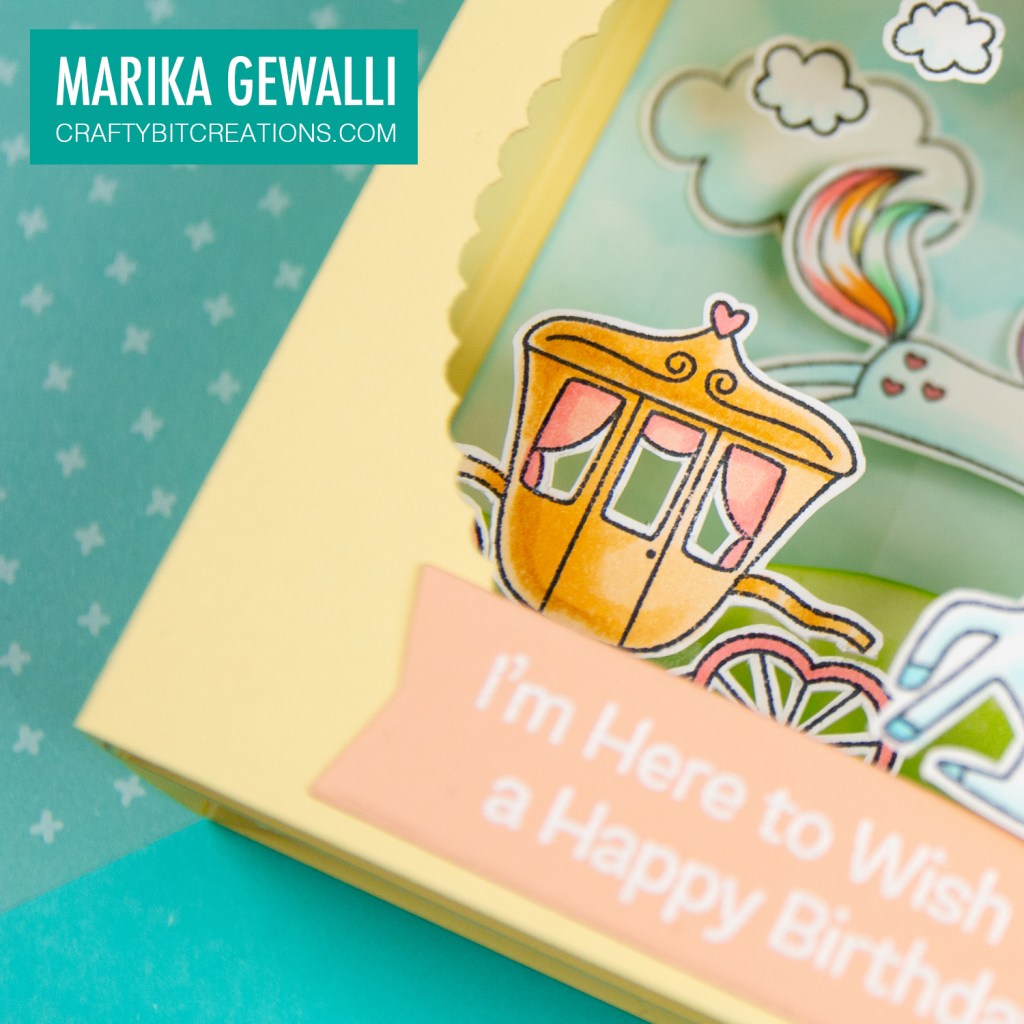
After putting together the shadowbox it’s now time to decorate! I used stamps from the Pretty Princess and Friendly Unicorn stamp set. I colored them with copic markers and then cut them out (there is dies, but I prefer to fussy cut). Then blending Tumbled Glass and Cracked Pistachio Distress Inks over the for Mini Cloud Edges stencil the backdrop and Cracked Pistachio and Twisted Citron Distress Inks over the Grassy Edges stencil to give some dimension and texture. For the hanging clouds and the back unicorn and chariot I used acetate to fasten them so that it’s harder to see how they are attached. To finish it off I ended up white heat embossing a sentiment on some Peach Bellini card stock.
Hope you enjoyed the tutorial and I’ll see you back here soon! Happy Crafting!
When possible affiliate links are used, this means that I receive a small commission when products are purchased through the links (at no extra cost to you) I use the money to support my blog and youtube channel. If you like my projects and tutorial please consider supporting me by clicking through these links when you shop. Thanks!
Today it is all about creating a masked blended background with distress inks and oxide inks, using dies and stamps with masking paper to mask out the area. The card is finished off with stamps by My Favorite Things colored in the no-line coloring technique with copic markers.
For the card base I went with a square base measuring 4 1/4″ by 4 1/4″. The first part of the mask was cut with a stitched mod square die out of a 4 1/4 strip of masking paper, so that the mask can cover the card base and a little over to the backside as it will not be folded when I blend.
I also stamped a couple of the clouds and a moon from the Witch Way Is The Candy stamp set onto another piece of masking paper and then cut them out with my scissors. These I placed towards the upper left corner in a little arrangement of three.
I did the blending first with the distress inks in the colors Festive Berries and Wilted Violet, but as I was working on Neenah card stock and I went in with a little to heavy hand I just couldn’t get a good blend, so I finally decided to just take out my oxide inks in the same colors and then just blend on top. The oxide inks are a little bit easier to blend and they are also more opaque so it hid a little bit of the original blending. I finished it off with some water droplets flicked with my fingers and then padded off with a paper towel, to add a little bit of texture.
I then finished off the outside with some fussy cutted images, that I had colored in the no-line coloring technique, fastened with some foam tape. And a stamped sentiment. For the inside I stamped a sentiment, used my left over images and then I added splatters as I accidentally gotten some ink on the inside while blending and though it would hide it a bit.
You can follow a long with both the coloring and the card progress in the videos below. And under that you find links to all the products I used and a list of the copics I used to color the images. Hope you have a great day!
When possible affiliate links are used, this means that I receive a small commission when products are purchased through the links (at no extra cost to you) I use the money to support my blog and youtube channel. If you like my projects and tutorial please consider supporting me by clicking through these links when you shop. Thanks!
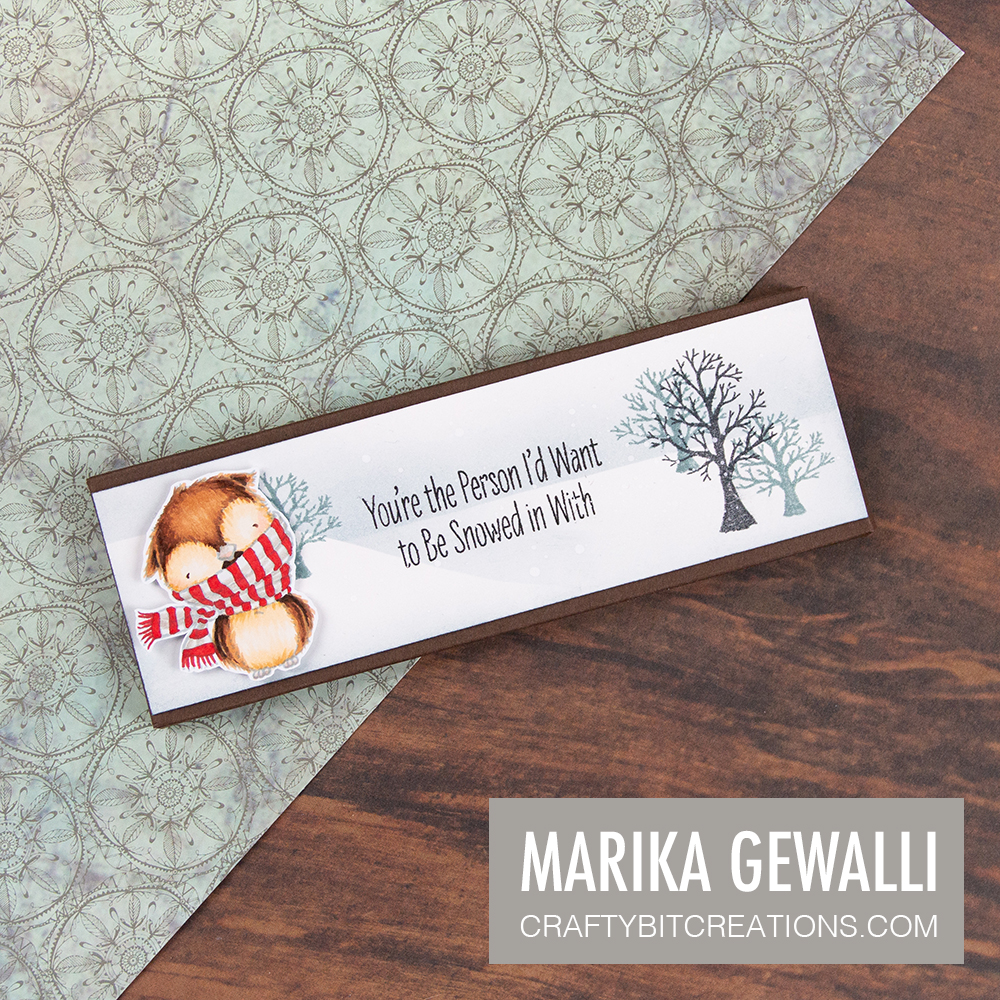
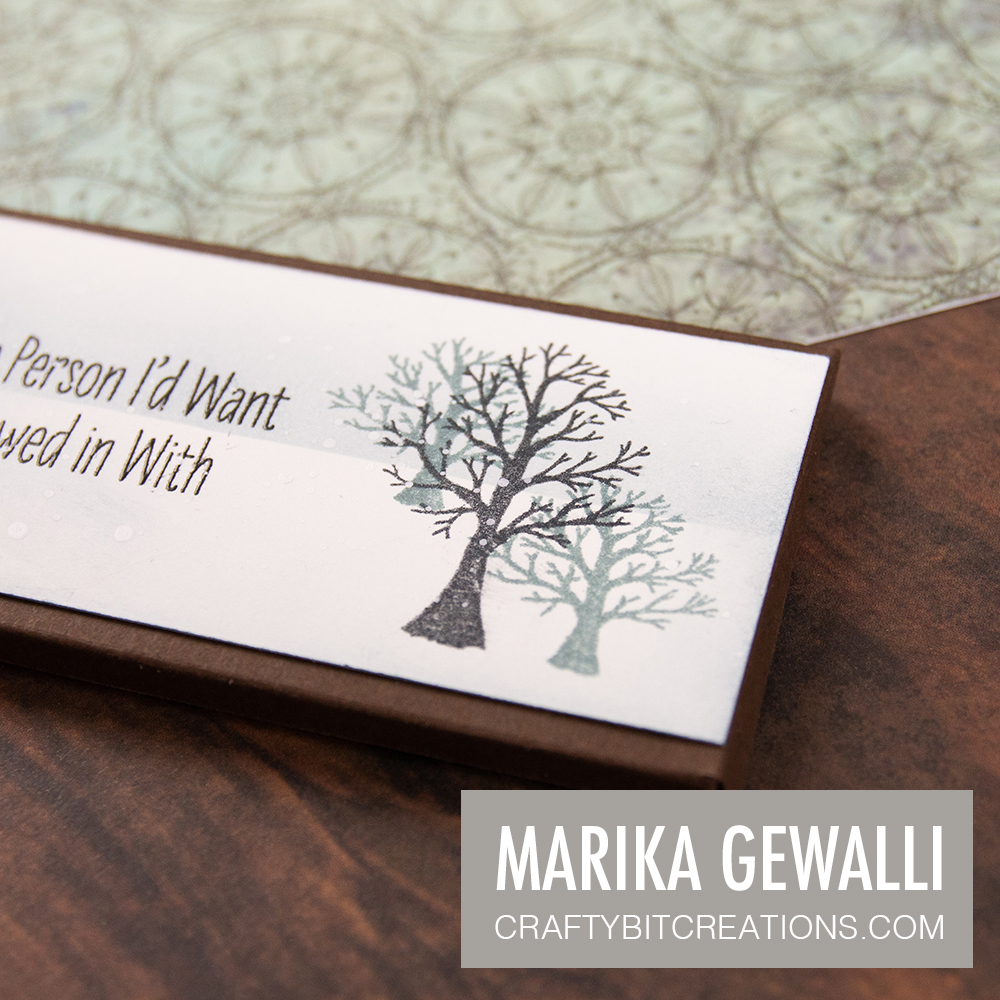
Hi everyone! I love making custom packaging to small gifts, and even something as simple as a Hersey Chocolate Bar can become a great present if you put a little time in creating the box and decorate it.
The box itself is pretty straight forward to create, I made a blueprint with all the measurements for you if you want to recreate it. You can either just save the .png by right clicking on it or if you want a little higher quality you can download the the pdf HERE.
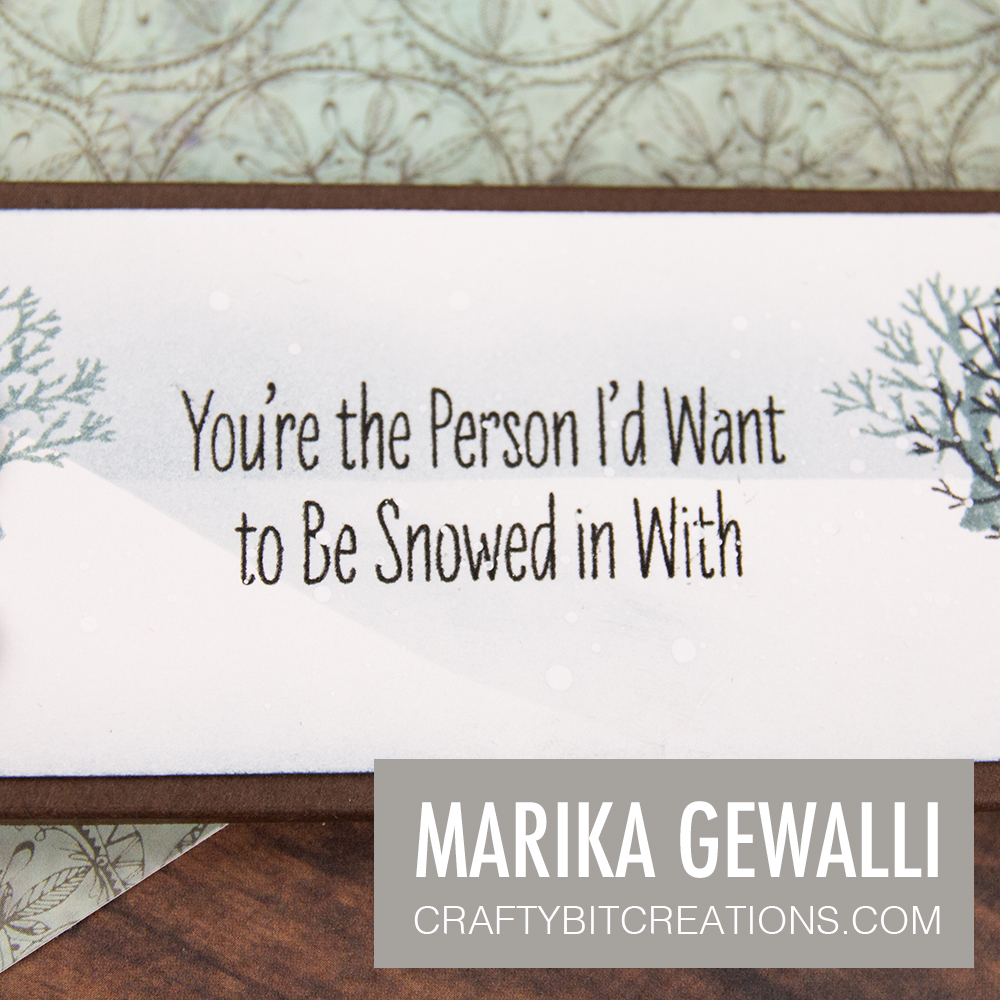
To decorate the box I decided to go with a small scene created with the Warm & Feathered Hugs stamp set. When creating it it was inches of snow outside and super cozy and all I wanted was to stay indoors and craft. I’ve used a blended layering technique to create some depth in the scene, I also stamped the trees in grey and black to give the trees some depth to. The lighter the tree the further away it feels. For the sentiment I stamped it in the blackest ink I have, and then added some clear embossing powder to make it stand out just a little bit extra.
To finish it up I used one of the owls, coloring in a no-line coloring technique to be able to give the feathers that whispy feeling. I also kept the owl in neutral colors, adding a pop of red to make the eye being pulled there first.
When possible affiliate links are used, this means that I receive a small commission when products are purchased through the links (at no extra cost to you) I use the money to support my blog and youtube channel. If you like my projects and tutorial please consider supporting me by clicking through these links when you shop. Thanks!
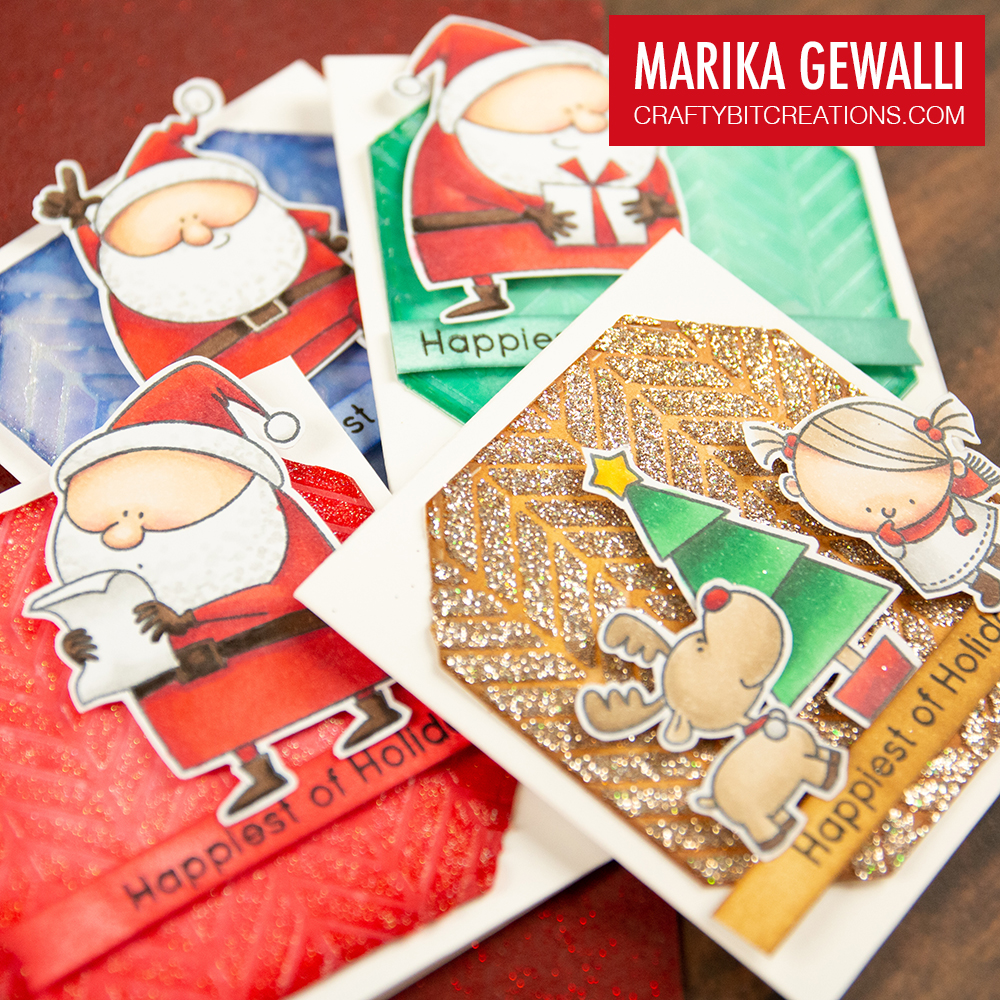
Hi Everyone! In todays tutorial I will show you 4 different ways to use 3D Gloss Gel by Prima for backgrounds. I love using pastes and gels to add texture to my backgrounds, it’s that small change that makes the big difference that I love!
For my cards today I’ve chosen to try different ways to add glitter, to make it pop a little better I’ve ink blended the background diets in different colors, using one lighter and one darker. I also choose to use the same stencil for all of the backgrounds to make the differences between the different techniques a little bit clearer. And to finish them off I’ve used some of the stamps I coloured up for the 30 day colouring challenge that is going on throughout November. If you wanna see the colouring of all of those images I will be sharing that in a couple of colouring videos coming up later in November/December.
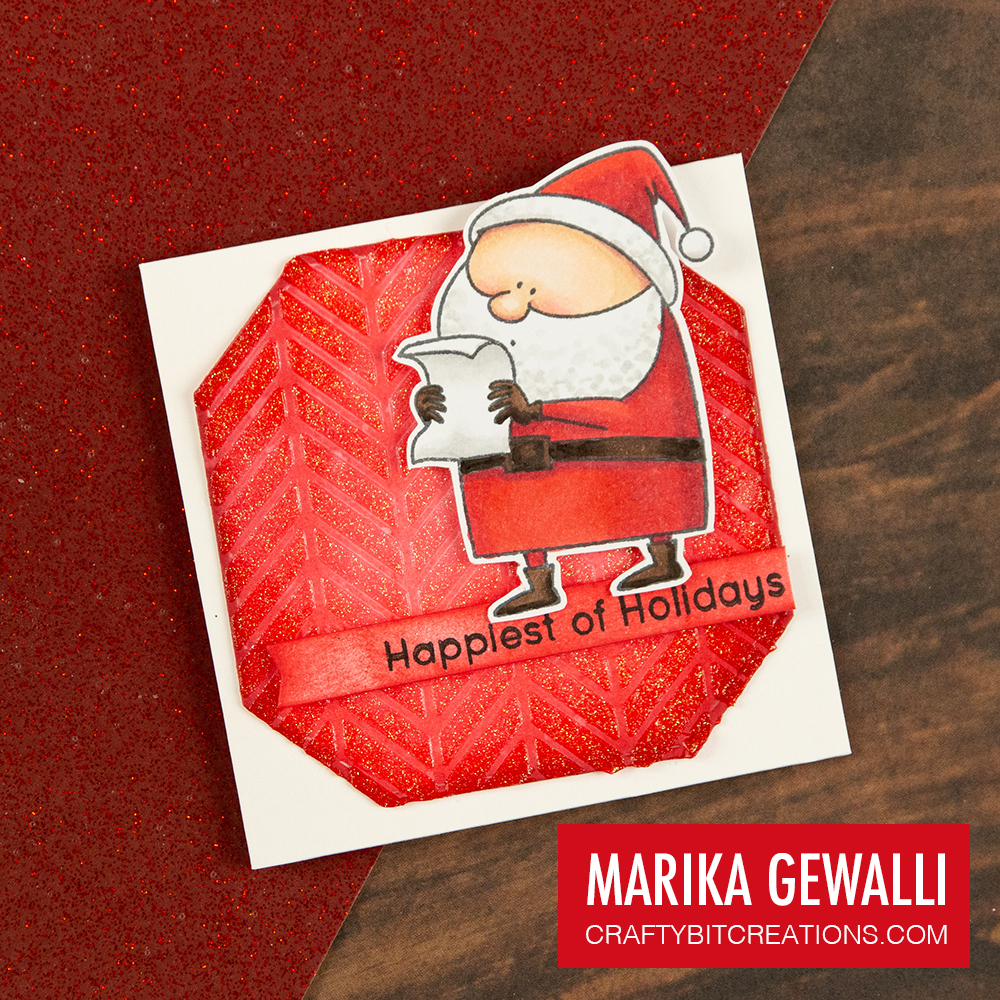
So back to the backgrounds, the first background is on a green diecut. I start out using the Gloss Gel on it’s own, I did use that on my card last week, but felt it would be a great for comparison to have it here too, and also I love the simplicity of it.
The second card is on the blue diecut, here I added shimmer underneath the 3D Gloss Gel, of course I didn’t really take in consideration that the shimmer pen would react with the distress ink and the full impact of that didn’t show until the gloss dried. It did give a cool effect, but maybe not was I was after.
The third card I mixed in glitter into the gel, I really really liked the result, this also reduces the need to buy all the different glitter pastes as you can mix any kind of glitter into your paste! I ended up making two card with this mainly because I mixed a little bit to much, so the left over I spread on an extra background diecut. I think I like the white on white effect the most, however it doesn’t photograph that well.
For the fourth and last card I added the glitter on top of the gel. I think I loved this background the most, however the glitter do transfer a bit, so if you don’t like getting glitter everywhere this technique might not be for you.
If you read this long I want to thank you for visiting my blog and I would like to ask you if you have any other materials you want me to use for upcoming 4 ways tutorials? Hope you have an awesome day!
When possible affiliate links are used, this means that I receive a small commission when products are purchased through the links (at no extra cost to you) I use the money to support my blog and youtube channel. If you like my projects and tutorial please consider supporting me by clicking through these links when you shop. Thanks!