Uncategorized

Last Make It Crafty Blog Hop

It’s with tears in my eyes I’m writing this. Zoe is closing down Make It Crafty. Zoe took me under her wing and into her Design Team in 2013 and there I have stayed. She have taught me so much about coloring and she’s a big part of why I and how I evolved my crafting footprint here on the internet.

So today we are doing a last blog hop, to celebrate what has been. On every blog in the hop you can win a surprise gift from Zoe. On my blog I want you to tell me you favorite digi stamp you have gotten from the Make It Crafty store.

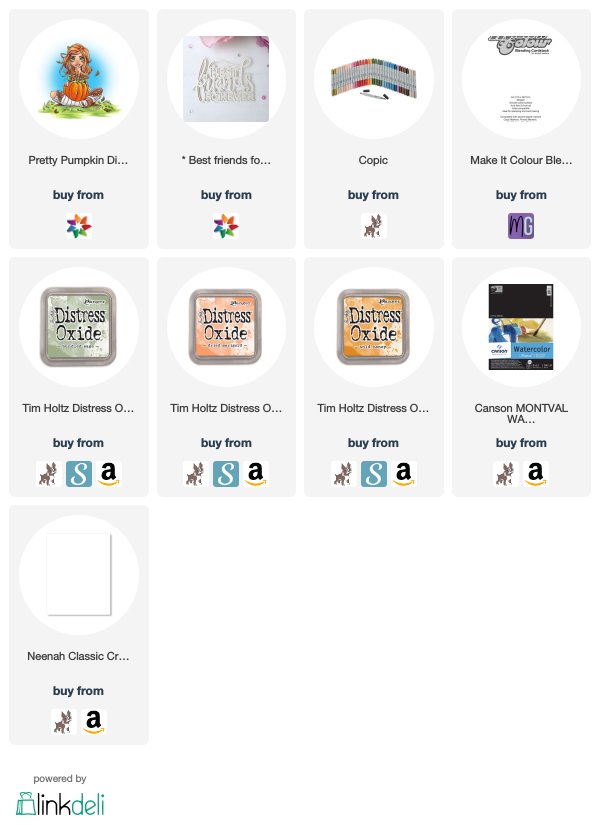
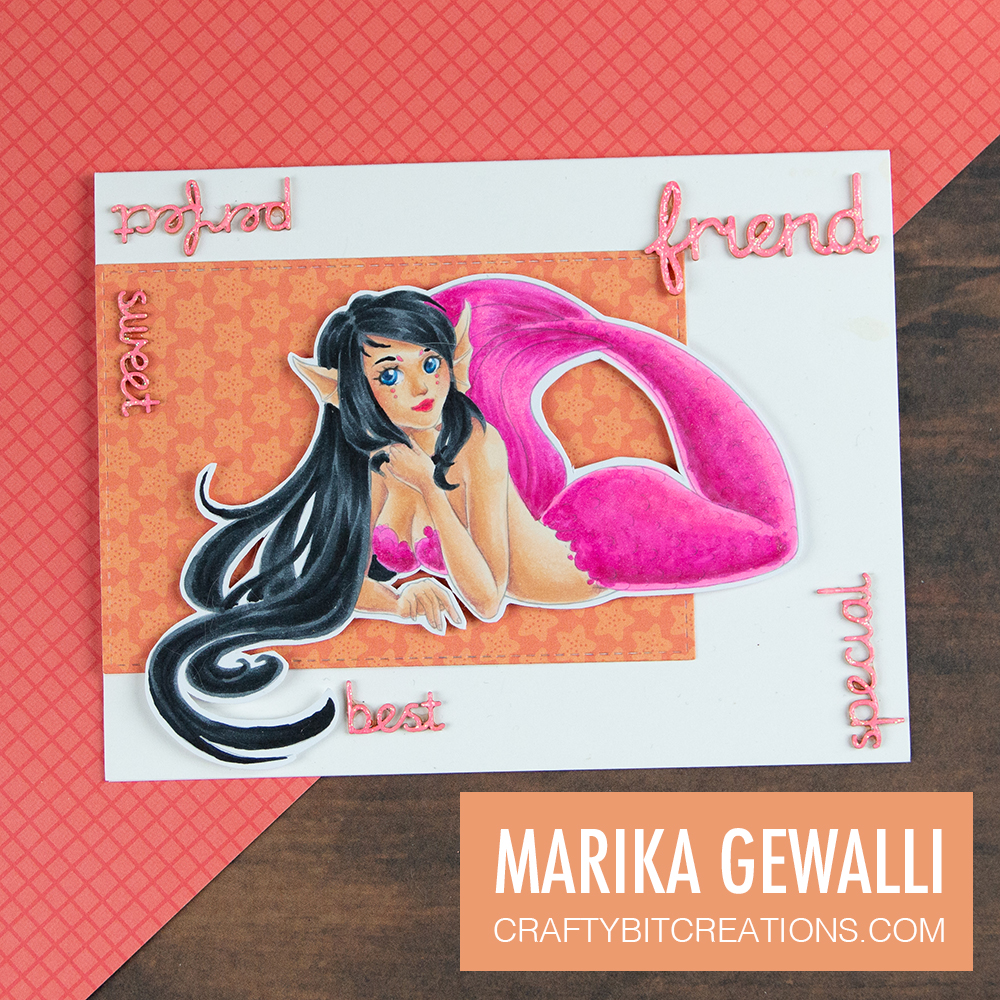
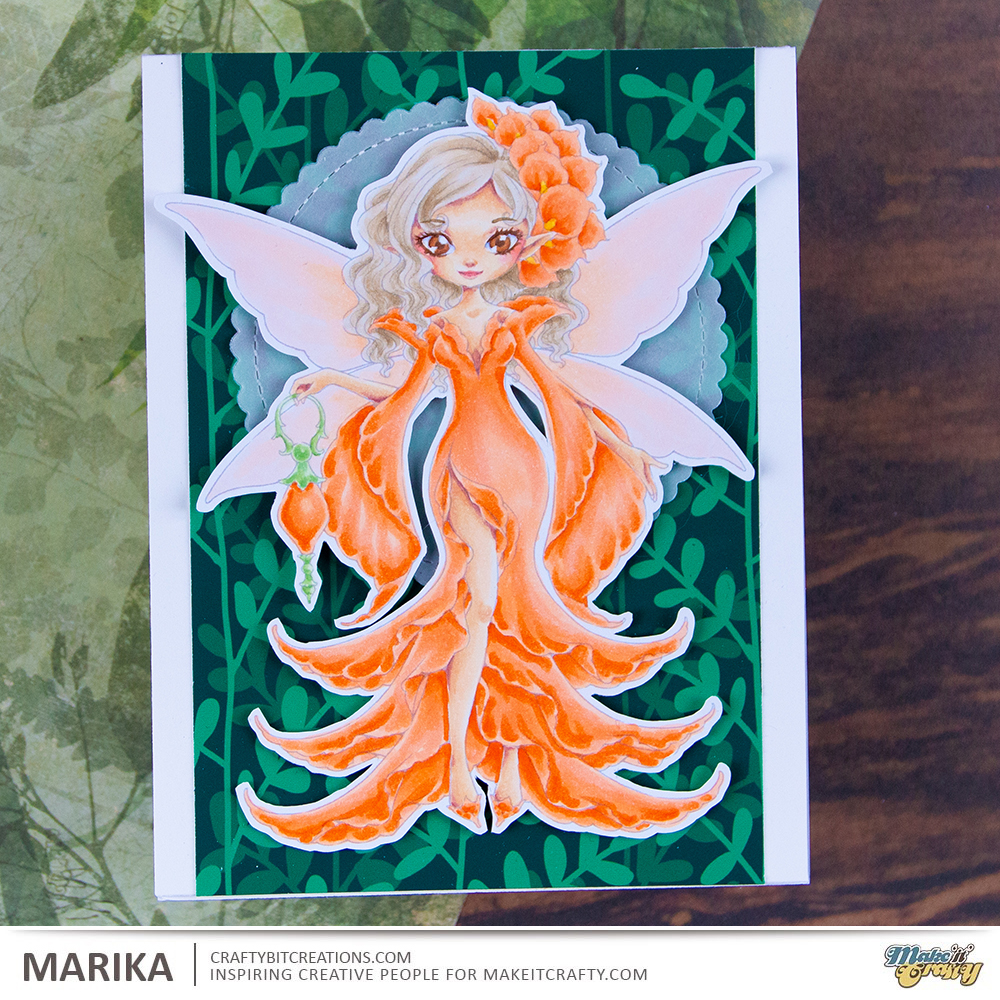
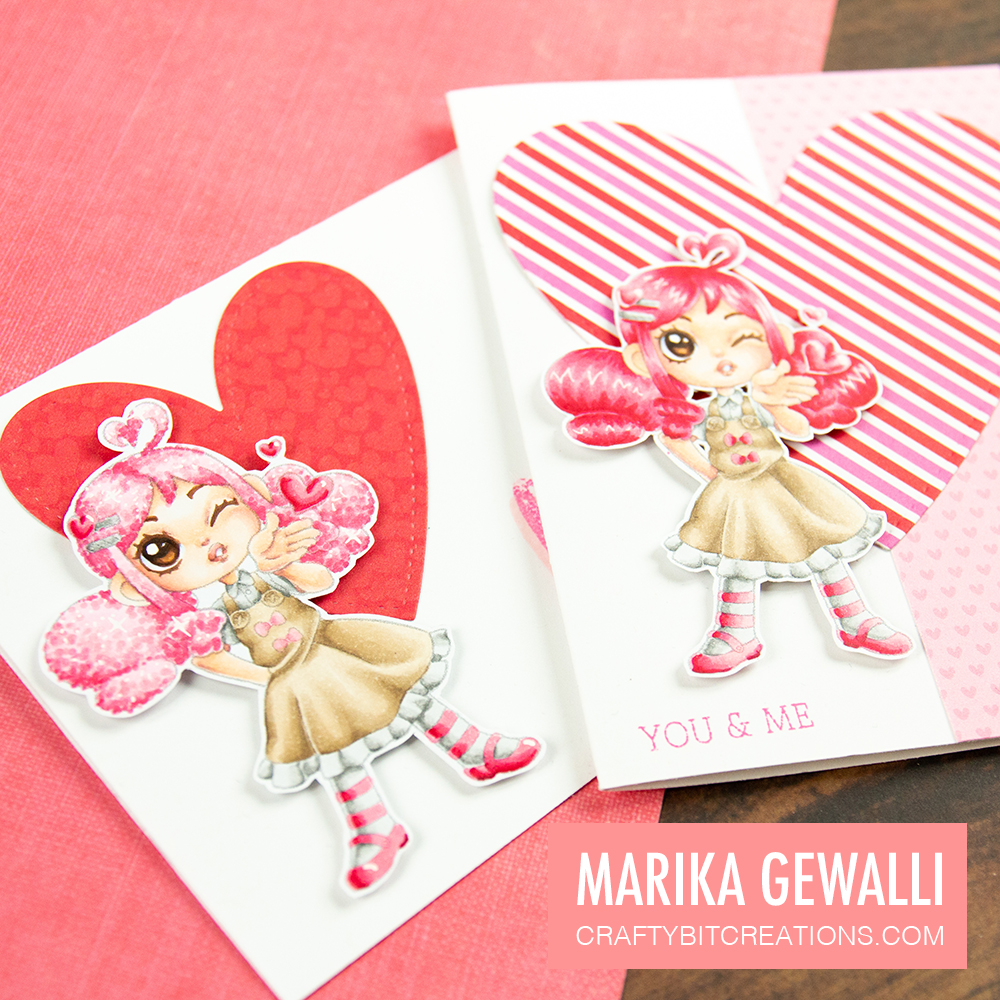
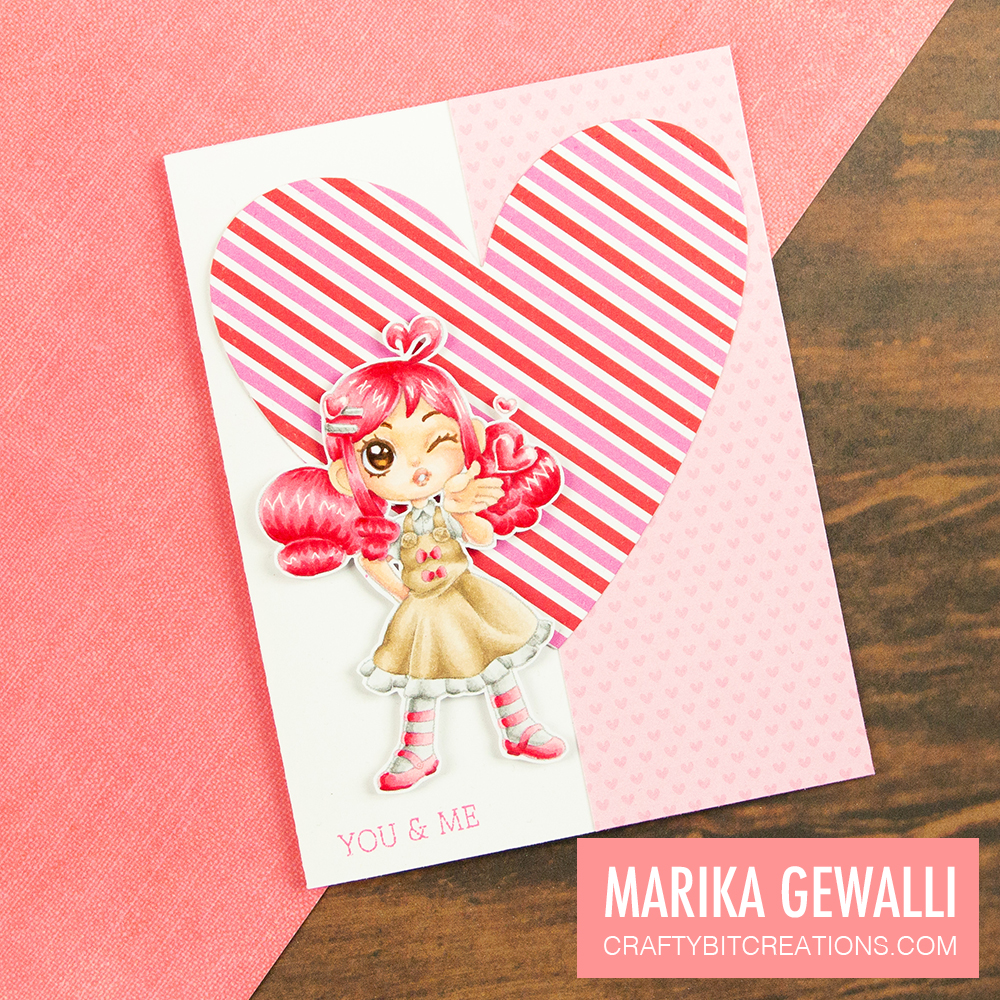
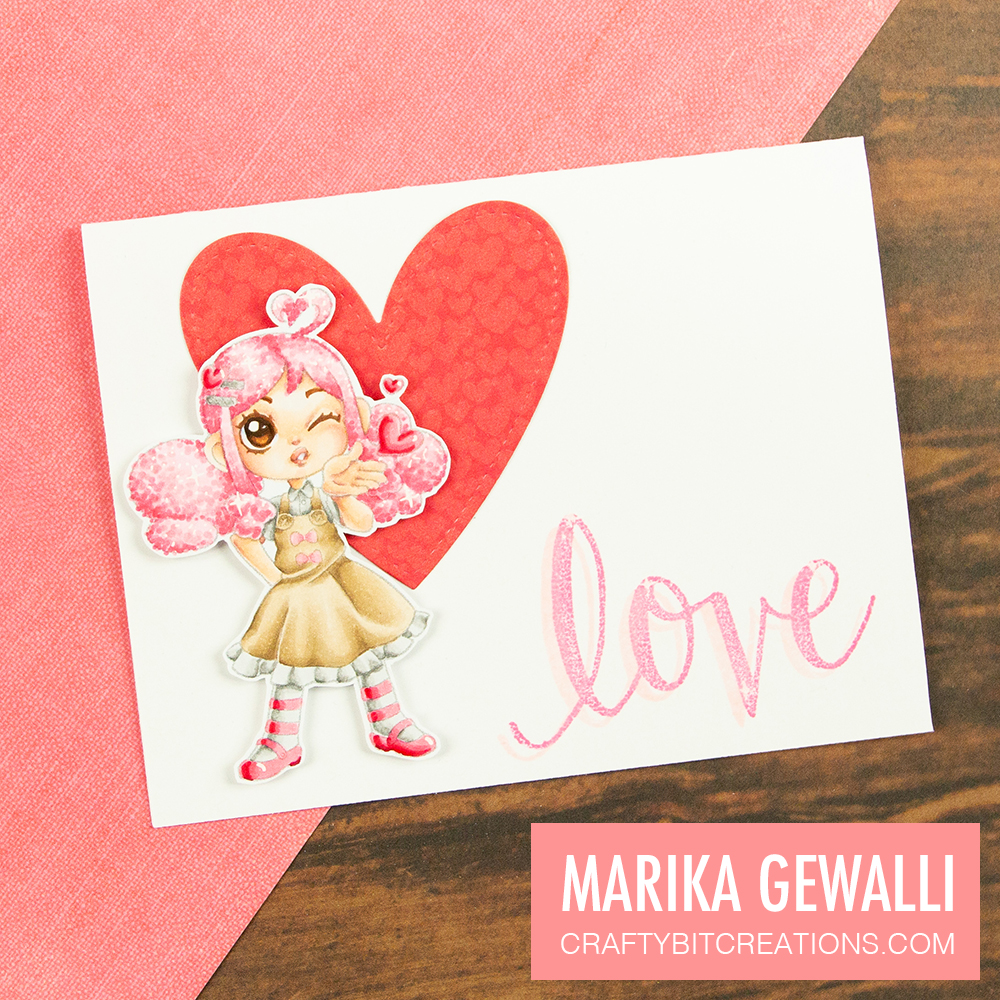
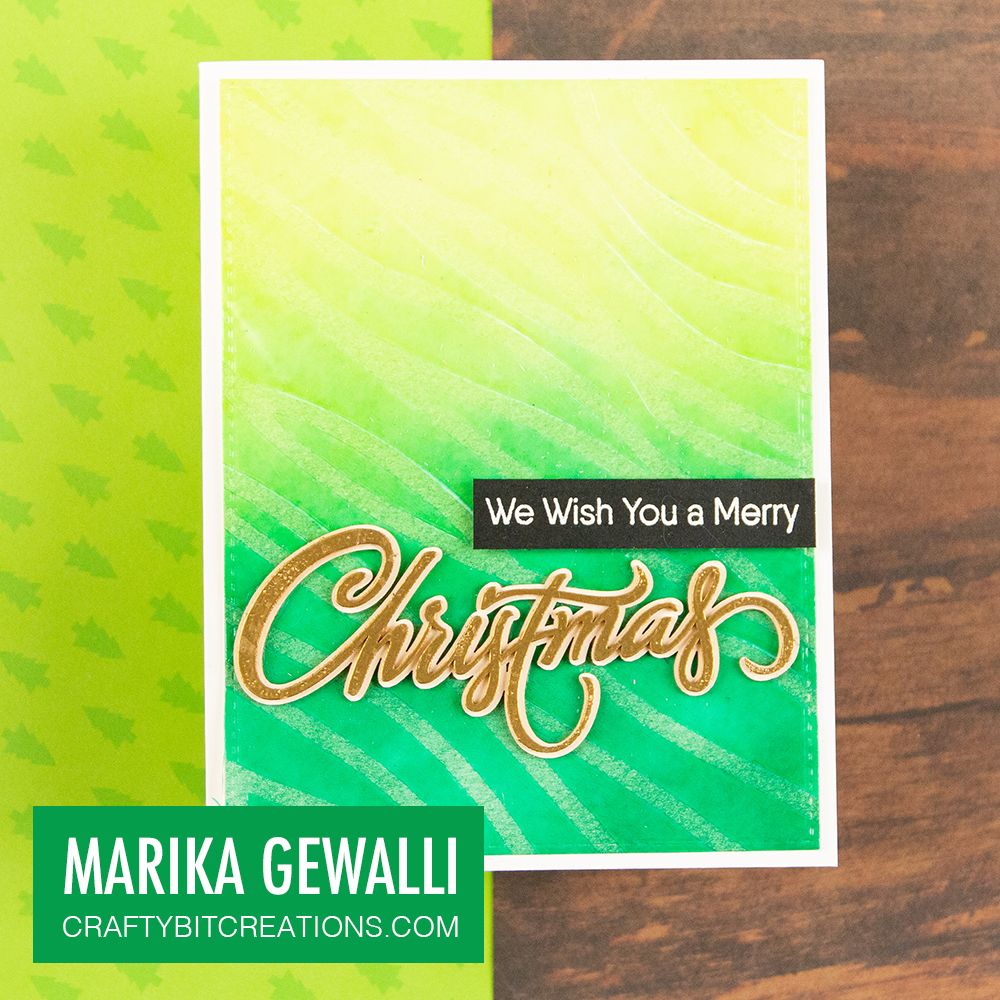
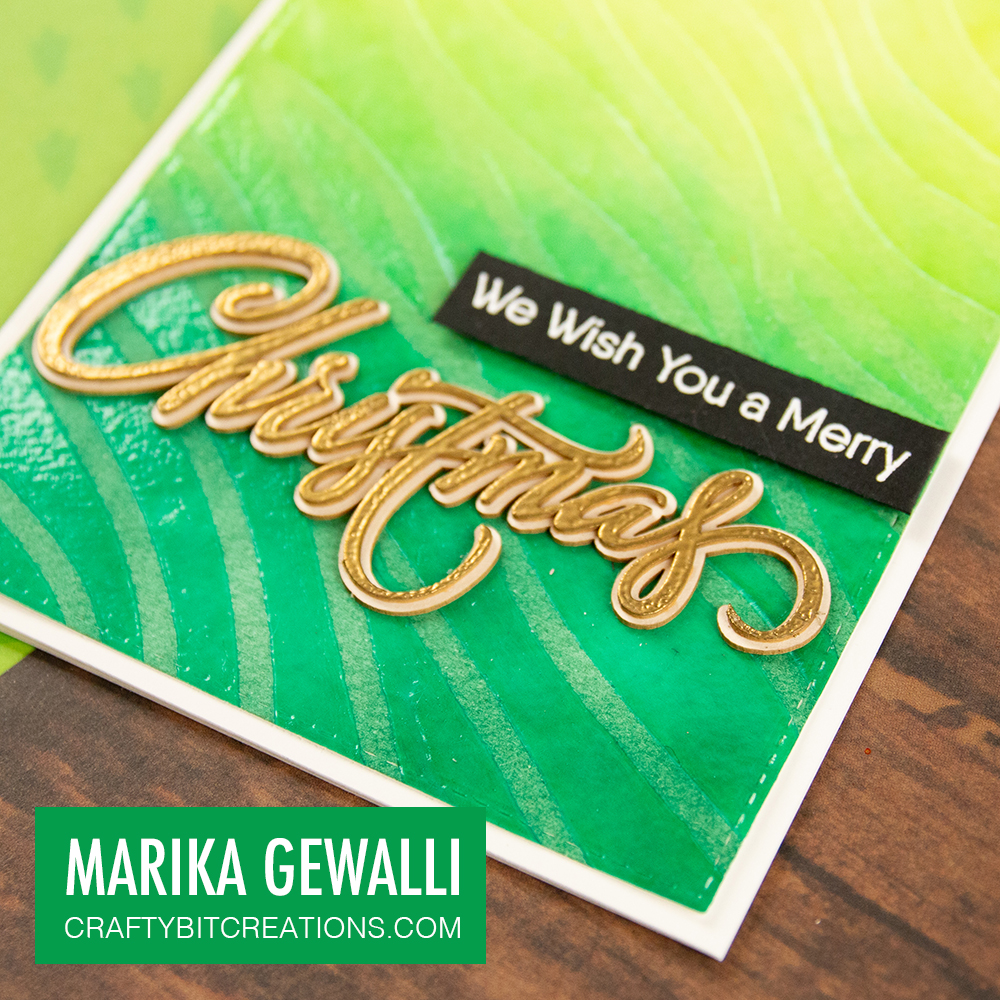
The card I have done for this blog post is made with the free with purchase fairies, that you will get with any purchase from the Make It Crafty store until it’s closed.

As with many of my cards, it’s simple and created to showcase the stamp more than anything. It’s an A2 card base, with a stitched rectangle out of latte cardstock. I cut out the snowflakes and the sentiment out of some white glitter cardstock and filled up the background. To make the fairy stand out a little bit extra I cut out a stitched hexagon in some vellum to put behind the fairy.

Bloghop List:

Andrea – https://craftyandrea.blogspot.com/2019/11/final-make-it-crafty-blog-hop-faries.html
Delphine – https://stampandcolour.com/en/make-it-crafty-last-hop/
Lucy – https://loopylass2010.blogspot.com/2019/11/goodbye-make-it-crafty.html
Marika – You are here – https://craftybitcreations.com/2019/11/27/last-make-it-crafty-blog-hop
Nicoletta – https://i-love-scrapbooking.blogspot.com/2019/11/make-it-crafty-last-hop.html
Rosemary – https://rosemaryscreations.blogspot.com/2019/11/make-it-crafty-goodbye-blog-hop.html
Sadia – https://sadilla.blogspot.com/2019/11/make-it-crafty-last-make.html
Make It Crafty – http://www.makeitcrafty.com/store-blog/?p=19557

Design Teams, Make It Crafty

Pretty little pumpkin

I just love fall! Christmas has always been my favorite holiday with the smell of pine and spices. But since Pumpkin Spice came to Sweden, surprisingly enough it was just a couple of years ago, curtesy of Starbucks, fall has slowly become my favorite.

Here in Sweden the leaves are slowly turning orange and red, and right now is that perfect mid stage where some is still green and none is brown. And even though I did use this very stamp last year. I felt I wanted to use it again. This time using the no-line coloring technique and also choosing a very different pumpkin color. Have seen these awesome different ones that exist in the states and decided that a greenish one would be cool.

The background is made the same way as last year and I combined it with another chipboard piece. This year I used a layered saying turning it into a friendship card fit for fall. I didn’t do a video this time around just cuddled up with my copic markers and let them lead the way. My absolute favorite part is the face, the softness of the no-line coloring and the added detail of the color pencil and white gelpen just made it pop.

I hope you are enjoying fall and all its bounty. Until next time I hope you have an awesome day!

When possible affiliate links are used, this means that I receive a small commission when products are purchased through the links (at no extra cost to you) I use the money to support my blog and youtube channel. If you like my projects and tutorial please consider supporting me by clicking through these links when you shop. Thanks!

Supplies:

https://linkdeli.com/widget.js?1559654439292

Copic:

E50, E00, E21, E11, E04, R30, R32, G12, G21, G24, G43, G46, G94, G29, YG61, YG63, YR21, YR31, Y17, Y38, B60, B63, W0, W2, W4, 0

Uncategorized

Christmas In July – Masculine Christmas Card Tutorial

Oh gosh! It’s been ages! More than a month to be exact. Last post was the start of the 30 Day Coloring Challenge, and I did not finish it. I thought that my energy was coming back but was hit with some really stressful news (don’t worry it’s all fixed now) so I got sick and haven’t been able to craft at all since. But I’m back today with a Christmas in July card.

I did record this in December but didn’t have time to edit it before I went on vacation, and I finally did! I really really love how the coloring came out so I’ve been eager to share it with you.

The stamp is a digital stamp from Make It Crafty called Waving Santa. I went with the standard Christmas colors, and the card actually went very masculine when I finished it and again really liked the finished card. The background is a masked background stamp from Simon Says Stamp together with a sentiment stamp from My Favourite Things. Super simple but still packs a punch.

I also decided to make a real-time coloring video from the coloring as I had more things to say about the coloring that would fit in a standard card video. Hope you enjoy them both! In the coloring video I bring up a bunch of coloring people I love, so thought I would link them here too 🙂

Jennifer: http://just4funcrafts.com/
Zoe: http://makeitcrafty.com/crafts-blog/
Rhea: https://passionatepapercreations.blogspot.com/
Faye: http://www.stampinfluffnstuff.co.uk/
Stephen: http://stampinsteve.blogspot.com/
Barbara: http://forgottenscraps.blogspot.com/

Copic:

E000, E00, E21, E11, E04, R30, R32, B24, B37, B63, W00, W1, W3, E42, E43, E44, E47, R24, R37, R39, R89

Supplies:

When possible affiliate links are used, this means that I receive a small commission when products are purchased through the links (at no extra cost to you) I use the money to support my blog and youtube channel. If you like my projects and tutorial please consider supporting me by clicking through these links when you shop. Thanks!

https://linkdeli.com/widget.js?1559654439292
Uncategorized

No-Line Coloring Mermaids!

Hi! I have totally fallen in love with the no-line coloring technique, Zoe over at Make It Crafty started it years ago and it came back about a year ago. I was very hesitant, even a little bit scared of trying. But now that I have, I just can’t stop!

I love the softness that it creates, but in todays card (and video) I’m trying it out with some more stronger colors to see if it works. And I kind of like it! Also this is another mermaid creation as I love mermaids and during may in the art world people do mermay, and I decided to join is this year, so all my creations will be mermaid inspired this month.

Copic:

E50, E00, E21, E11, E04, R30, R32
B60, B63
B21, B23, B37, B39
FRV1, RV04, RV06, RV09
C6, C8, C10, 100

When possible affiliate links are used, this means that I receive a small commission when products are purchased through the links (at no extra cost to you) I use the money to support my blog and youtube channel. If you like my projects and tutorial please consider supporting me by clicking through these links when you shop. Thanks!

Supplies:

https://linkdeli.com/widget.js?1552642647875
Uncategorized

Birthday Card Tutorial | No-Line Coloring

Hi everyone! In todays video tutorial I’m showing you how to use the no-line coloring technique on Jojo a digital stamp by Make It Crafty. And how to use that image for a more neutral birthday card.

Jojo is a part of a the Petal Sprites Collection which contains 6 equally cute characters. I did say I thought I had colored every character in this series, but after looking at it I had confused it with another collection and I now have 5 more adorable characters to make into cards!

I’ve used a very soft color combination, and a keen eye can see I used the same colores for the Bluebell fairy from the bloghop earlier this week. Well I did record this video awhile ago so it’s actually the other way around. I just fell in love with the blue purples and I might continue to use it more, maybe.

However the no-line coloring technique is something that most definitely will be used a lot more. It makes the images so much more dimensional and at the same time so much more soft. I still color images with lines to as I do believe that both ways have their own place in card making. The trick with no-line coloring is to make the lines soft enough so when the coloring is done you hardly can see the lines, while keeping them dark enough so you can see them when you are coloring. For me that is printing them with a 20% opacity when I’m using digis, or using London Fog Memento ink for when they are stamps. Another trick is to print/stamp one with black ink on some printer paper to have on the side for reference.

And then finally we have the card making. I knew I wanted to use a Make it Crafty chippy, but I didn’t have any matching happy in my stash (really need to place a new order soon) so I kept with the Birthday one and used my Birdie Brown Alphabet & Numbers Die-namics to write the word happy. I decided to color both the chippy and the diecuts with my markers to perfectly match the coloring. And that was how I put it all together!

If you have come this far, thank you so much for reading my blog, do you have any Make It Crafty Stamps that you want me to make a card with next? Comment down below.

Copic:

E50, E00, E21, E11, E04, R30, R32
E33, E23, E25, E59
BV02, BV13, BV04
N0, N2, N4
E50, E51, 0G43, G46

When possible affiliate links are used, this means that I receive a small commission when products are purchased through the links (at no extra cost to you) I use the money to support my blog and youtube channel. If you like my projects and tutorial please consider supporting me by clicking through these links when you shop. Thanks!

Supplies:

https://linkdeli.com/widget.js?1552642647875
Uncategorized

Fairy Bloghop

————- Winners Update ————————————
Congratulations to our three winners, randomly selected from three different blogs along the way. 

Sandra from Nicoletta’s blog
Fabulous coloring, love the new digi’s!!! Adorable!

Marjeta from Rosie’s blog
As always amazing colored image. Whole card is fantastic.

Henriëtte from Delphine’s blog
Ohh WoW Delphine, what a stunning colouring on this awesome Fairy. I love that you put her in a frame, it also would be a lovey pressent this way. Thank you so much for sharing.

Please contact Zoe via http://www.makeitcrafty.com/contact-us.html and let her know which one is your favourite fairy.
——————————————————————————-

Yay! We are so excited to share the gorgeous new Flower Fairies from Make it Crafty with you. It has been quite a while since we’ve released new images, that we thought it was worthy of a blog hop and of course a give away. 🙂

It’s just a quick hop, with of course gorgeous colouring to inspire you, so be sure to leave a comment on each blog post so that we know you ‘hopped’ on by. PLUS there are three secret giveaways along the way and if you win, you will be able to choose to keep your favourite fairy!

So without further ado, let me show you the cards I have made, I loved them all and just couldn’t choose so I made cards with them all!

Fairy Bluebell Digi Stamp

Fairy Lily Digi Stamp

Fairy Tulip Digi Stamp

Thank you so much for joining us on this fun little blog hop and I hope you’ll have a quick chance to leave a comment before you continue hopping. I may just be the lucky one hiding a little fairy for you. 😉

Blog Hop List

Of course if you can not wait to find out if you are a winner, be sure to head on over and snap up your favourite fairy now and Zoe will be more than happy to refund you should you win!

Uncategorized

Blowing Kisses | Clean & Simple Valentine Cards

Good morning everyone! It’s been awhile! I apparently went on a three month hiatus, it wasn’t really planned. I ran out of time preparing for my three week vacation in December and when I got home life and mostly health sort of got in my way. But I finally sat down to do some coloring and gosh did I enjoy it, so I thought I would share the cards I ended up doing.

I did record everything so I also got a video tutorial for you, (I’m on a roll!). When I sat down I decided to work towards my only DT right now. Have been stepping down from most of them, feeling that I’ve not been dependable I decided to just do my own thing. However Make It Crafty was my first DT and when Zoe asked me to stay on I couldn’t say no, I do love her stamps and chippies and her!

I’m using Bailey Blowing Kisses Digi, and decided to print her out with some different opacity, going from 100% down to 25% to decided on which was my favorite. And I think I decided that 25% is a real nice one. Next time I might get even lower to see if I can do true no-line coloring.

After not coloring for three months! Gosh that is a long time, I thought starting in my comfort zone would be a good bet, not making it too hard on myself,. So I gave Bailey some pink hair and kept the rest of the image more neutral letting her expression and her har do the talking. I ended up coloring two images as I really wanted to try another kind of hair texture after the first one. I ended up using the footage from the second one as it was my favorite, who doesn’t love glittery hair?

To finish it off I made two very clean and simple cards. Really trying to make the image the star of the card, and with the softness that was created by having lighter lines, making the cards really simple made the images pop a lot more.

If you have any questions or comment please don’t hesitate to contact me, either through the comment form down below, by email or through social media. You find all the links both above and below.

Copic:
E000, E00, E21, E11, E04, R30, R32, E41, E42, E43, E44, E49, E33, E25, E59, T0, T2, T4, RV10, RV21, RV13, RV25, RV29

Supplies:

When possible affiliate links are used, this means that I receive a small commission when products are purchased through the links (at no extra cost to you) I use the money to support my blog and youtube channel. If you like my projects and tutorial please consider supporting me by clicking through these links when you shop. Thanks!

https://linkdeli.com/widget.js?1549439153802
Uncategorized

Clean & Simple Christmas – Upgrade the Background

Hi Everyone! Marika here with another card and tutorial. Todays card is based on a wonderful chipboard sentiment from Make It Crafty. I wanted it to be the main part of the card so I concentrated on making the background simple and clean to make that sentiment pop just a little bit extra. 

After doing the ink blending I felt that it was a little bit to clean, I wanted to add some more texture to it. So I whipped out a stencil from Create A Smile Stamps and one of my newest purchases, a tub of 3D Glossy Gel from Prima. The glossy gel is like a texture paste but in gel form so it makes a very soft and glossy texture and that paired perfectly with texture from the watercolour card stock I used for the blending. 

To finish it up I picked out a sentiment from Tweet Holidays by My Favourite Stamps that ended in Christmas, and then cut the Christmas away and letting my chipboard word being that last word. It was a real fun card to make and relatively quick, not counting the drying time of that gel tho.

Supplies:

When possible affiliate links are used, this means that I receive a small commission when products are purchased through the links (at no extra cost to you) I use the money to support my blog and youtube channel. If you like my projects and tutorial please consider supporting me by clicking through these links when you shop. Thanks!