Uncategorized

How to color hair – Polychromos

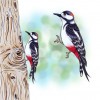
When making colouring tutorials there is so many different ways, so many different genres, that is sometimes hard to decide what to show. This is the follow up tutorial on the skin tutorial. I really enjoyed the process on this image and really wanted to share it with you.

MIC-Milas-Love-Heart-Blog

This style is a storybook-esk style that is heavily inspired by Jane Allen, she has a magic way with copics and pencils. However here I’ve chosen to only use pencils. Working with pencils are slower medium, you want to work with layers and build up the colour. This storybook style leaves a lot of white from the paper to keep the softness, and there for it is very important to have a very light hand, almost no pressure at all on the pen.

For more details about the colouring see my video below. Hope you enjoy it! If you haven’t seen my skin tutorial you can find it HERE and if you rather work in copics I have a skin tutorial HERE.

Polychromos:
Walnut Brown, Nougat, Burnt Umber, Bistre, Brown Ochre
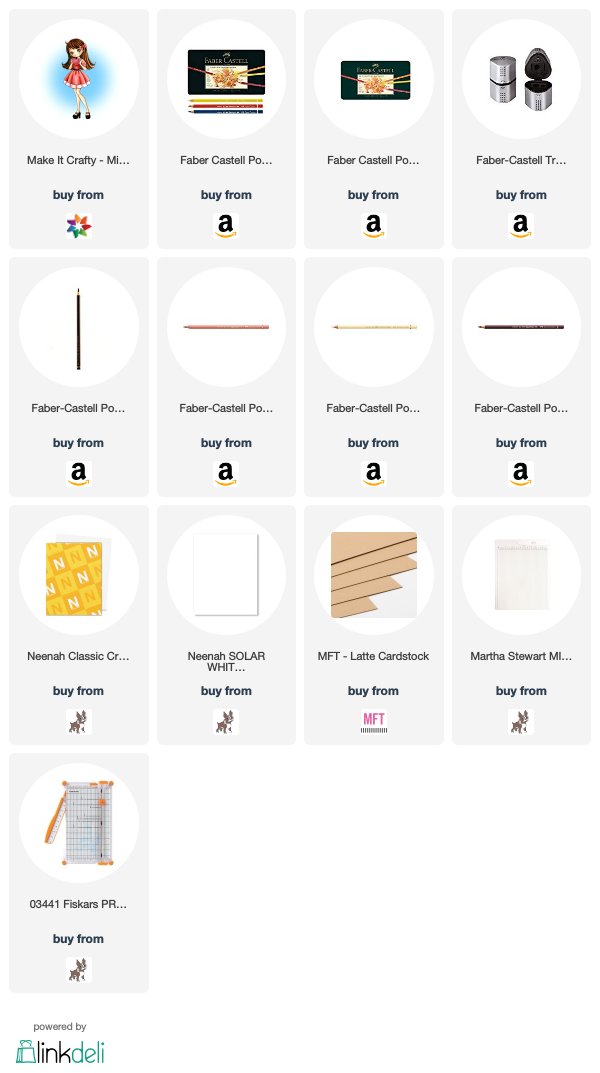
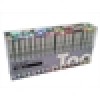
Supplies:

When possible affiliate links are used, this means that I receive a small commission when products are purchased through the links (at no extra cost to you) I use the money to support my blog and youtube channel. If you like my projects and tutorial please consider supporting me by clicking through these links when you shop. Thanks!

https://linkdeli.com/widget.js?1549439153802
Uncategorized

Skin Tutorial – Polychromos Coloured Pencils

Hi Guys!

I got so much nice response on my how to colour skin with Copic so thought I would follow it up with a how to colour skin with Polychromos. Polychromos is coloured pencils made by Faber Castell. They are oil-based and there for will go on a little bit lighter than Prismacolor pencils, which are wax based. I love my Polychromos as I feel I get better control with them, but with that said you can get similar results with any kind of coloured pencils. The key is to be very light handed and work in layers, loads of layers.

MIC-Milas-Love-Heart-Blog

In this tutorial I’m after a storybook feel and therefor I don’t burnish my image nor do I use any kind of blending medium. Instead I’m very, very light handed so that I can get in many layers and still see the paper peaking through. To do that I also chosen to work with a paper with a little bit of tooth, the paper I’ve chosen is Neenah Solar White, it’s one of those great papers that can double as a marker paper, and my absolute favourite if I do a copic/coloured pencil mix. The image I’ve used is called Mila’s Love Heart and is by Make It Crafty, I have printed it with my Epson WF-3620 on 25% opacity so that the lines are very light.

Before I leave you with the video tutorial I want to do a little shout out to Jane Allen, who is the inspiration to this storybook style, she’s an incredible colourist and artist. You can find her creations over at Jane’s Box of Colours.

Polychromos
Walnut Brown
Caput Mortuum Violet
Nougat
Cinnamon
LightFlesh
Medium Flesh
Venetian Red
Warm Grey III, I
Burnt Umber
Bistre
Brown Ochre
Black

Supplies:

When possible affiliate links are used, this means that I receive a small commission when products are purchased through the links (at no extra cost to you) I use the money to support my blog and youtube channel. If you like my projects and tutorial please consider supporting me by clicking through these links when you shop. Thanks!

https://linkdeli.com/widget.js?1549439153802
Uncategorized

Happy Easter!

Happy Easter!

A couple of days ago I saw a post on instagram by the incredible talented Elaine aka Marker Geek where she had coloured an  Stamping Bella image with her Twinkling H20 water colours. And I was reminded that I own two small sets of those!

So I dug them out and had a blast! I also wanted to play along with the new Lawn Fawnatics challenge, interactive cards. And I choose to make a Pop-up box card. I made it as an easter card and hand delivered it to my Mother-In-Law, even tho the awesome thing with the Pop-up Box cards is that they fit flat in an envelope.

The awesome thing with the H20s is that they have mica in them, so they are super twinkly, sadly it is super hard to get that to show up on photos.

HappyEasterLF

Uncategorized

Woodpecker

Hi Guys!

Marika here with a new card! It’s my dads birthday tomorrow and of course I’m late out as usual. But I did want to make him a special card, and as he loves birds I just had to use the gorgeous Woodpecker. He comes as this and with a tree trunk, but I wanted to make a more abstract distress ink smooshed background, where the tree is more an idea than something solid.

I also chose to use a very tiny sentiment so that the woodpecker got to be in focus.

For more insight how I did it, you can watch the video below.

Copic:
White: Y000, Y000, C0, C2
Black: C6, C8, C10, 110, B63, B66, B69
Beak: B60, B63, B66, B69
Talons: W00, W2, W4
Red: R12, R05, R08

Supplies:

Uncategorized

Skin Tutorial

Hi Guys!

The long awaited skin tutorial is here! And with everything that has been long awaited I kind of are a little bit scared that you will be let down. That this is not at all what you wanted. So I really appreciate any tips and ideas that I can take with me to the next colouring tutorial that I make, and also please tell me if there is any other tutorials that you would like to see.

How-to-colour-copics-blog-collection

Todays image is a gorgeous one by The Greeting Farm, sadly this stamp-set was retired ages ago but it is one of those sets that I just can’t let go of.

How-to-colour-skin-blog-closeup

One of the biggest tip I can give you when starting out colouring skin, find a combination that is close to your own skin. We all see out reflections everyday and even if we don’t think about it we do register how light falls on us. It will be easier to colour with colours that we are exposed to everyday. When ever I colour other colour skin I use reference images, it helps me figure out how to best represent other colours. Hope this video help you out.

Uncategorized

How to park – Cross Stitch

A couple of months ago I was asked to show what parking is, how I park on my cross stitch projects. I did record the video but I never got to edit it. So I found myself having some time to spare today and decided it was time to get it out to you.

Parking is a way to organise your different threads on your projects while stitching. You “park” your threads and stitch row by row or column by column. Personally I found that with the parking I don’t need to fasten as many times and in the long run I stitch faster, also I love seeing the progress.

For more details see the video below.


Need needles? You can get them here: http://etsy.me/2nLRk1S

Uncategorized

Inspired by Lawn Fawnatics

Hi Guys!

I love challenges and when I started out crafting I did all the challenges. One of my favourite ones have been the ones containing Lawn Fawn products. So when Lawn Fawn announced that they where having a challenge blog, Lawn Fawnatics,  I got so excited.

LawnFawnatics_BlogBadge_1

Being that I was in Florida when the first challenge was announced I thought I wouldn’t have time to enter. But here is my entry, and the process video to go with it, and there is about a day to spare!

LF-Challenge-nr1-blog

The team of the challenge is Birthday and I decided to make a scene tag using loads and loads of fun lawn fawn products.

Copic:
White: W0, W2, W4, 0
Red: R37, R27, R24
Green: G02, G05, G16
Fox: YR16, YR18, E08, E19, E47

https://static.inlinkz.com/ppr.js
 

Uncategorized

30 Day Coloring Challenge – What coloring means to me.

Hi Guys!

So crafting has always been my therapy, a way to keep my hands busy while letting my brain sort out my feelings and thoughts. I’ve always had health issues, and for a long time I thought they all were due to stress, emotional problems. But I got help and they figured out that my emotional issues wasn’t that bad, that my health issues is due to something physical.

You might have noticed that I haven’t been sharing my crafts as I’ve used to, well I’ve gotten sicker and the doctors still don’t really know why. They have theories, theories that still needs to be verified and for the past five years I’ve gone through multiple doctors and even more theories that have proven not to pan out.

But I’ve still not given up, I’m still positive that one day they find what’s wrong and how to treat it. And I believe that my crazy crafting is one of the big reasons why I’m still sane.

My crafting goes in waves, in periods and depending on how much I can sit at a table vs sitting in the couch I will do different kind of crafts. For the past couple of days tho I’ve been laying down, I got a spinal tap to check if I got any inflammation in my central nervous system, and 5-10% of the people who get it get’s a tension headache that is only relieved by laying flat and it can take up to 10 days to go away. Of course I got it and I just can’t craft laying down!

So I sneak a couple of minutes here and there sitting up and stitching. However I have taken in a couple of my copics and some pre printed/stamped images to play around with, mostly just playing around with skin figuring out how to teach it to you and as soon as I can sit back at my craft table I’ll record that video that I promised to you for years!

Well today is 1st of march and the 1st day in The Daily Markers 30 Day Coloring Challenge, I’ve been participated every time and I really want to do it this time around too. Usually I say I’m supposed to do it every day, but with me being horizontal and also hoping to get away on that vacation I had planned for months, I’m not sure I will be able to, but I will try getting colouring everyday tho. I’ll be sharing my coloring over at instagram as I’ve been doing for every coloring challenge.

For todays coloring I’ve used Mila’s Love Heart, a digital stamp by Make It Crafty. A fun technique I love adding to pleated skirts is adding plaid textures, the way I do that is to first add the shadows with greys and after it dried I’m just adding the plaid lines, the grey beneath will also shadow your lines so then you don’t have to worry about shading every itty bitty line.

Uncategorized

Llama Tell You – One Layer Stamping

Hi Guys!

A long time awaited card video! I’m still struggling with my migraine but I’ve gotten one video done at least! Todays card is all about this adorable armadillo! I wanted to make a “one layer” card without masking, just stamp a little scene and then colour. When I do scenes I love to frame them with dies, so it’s not a completely one layer card, but almost. For step by step on how I made this card, see the video below.

Copic:
B0000, B000, B00, E50, E41, E42, E43, YG03, YG05, YG17, YG67, R20, R35, T0, T2, T4, 0

Supplies:

https://static.inlinkz.com/ppr.js

Uncategorized

Alpini Goes Polar Bear | Real-Time Colouring

Merry Christmas Everyone!

In Sweden we celebrate Christmas on Christmas Eve, but I just had to pop in with the Real-Time colouring version of Alpini Goes Polar Bear! Enjoy!

Copic:
Skin, hair: E40, E41, E42, 0
Light Green: G40, G43, G24
Dark Green: G24, G46, G28
Grey: W00, W1, W3, W5, W7, W9
Eyes: E44, E47, E49

Supplies:

https://static.inlinkz.com/ppr.js