Uncategorized

Mini Easter Matchbox

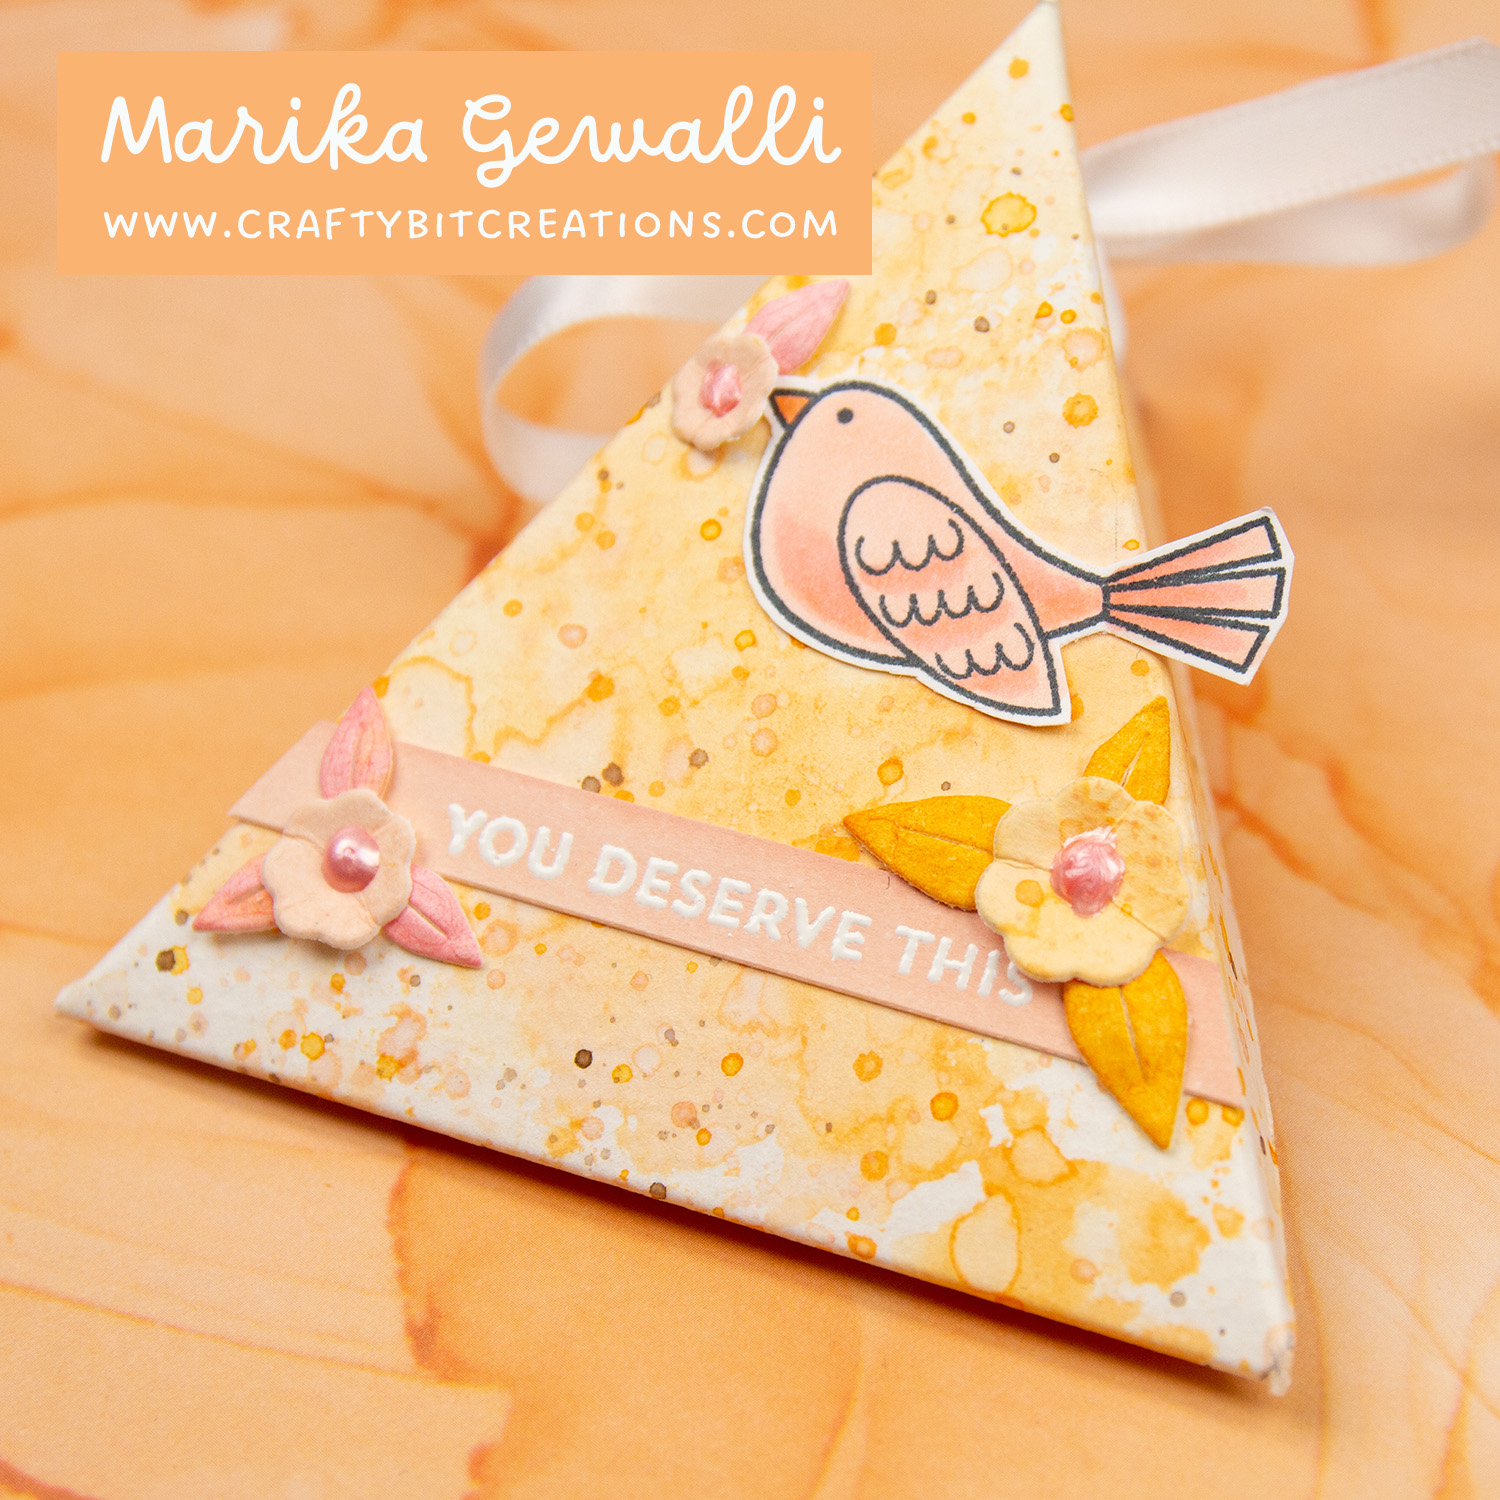
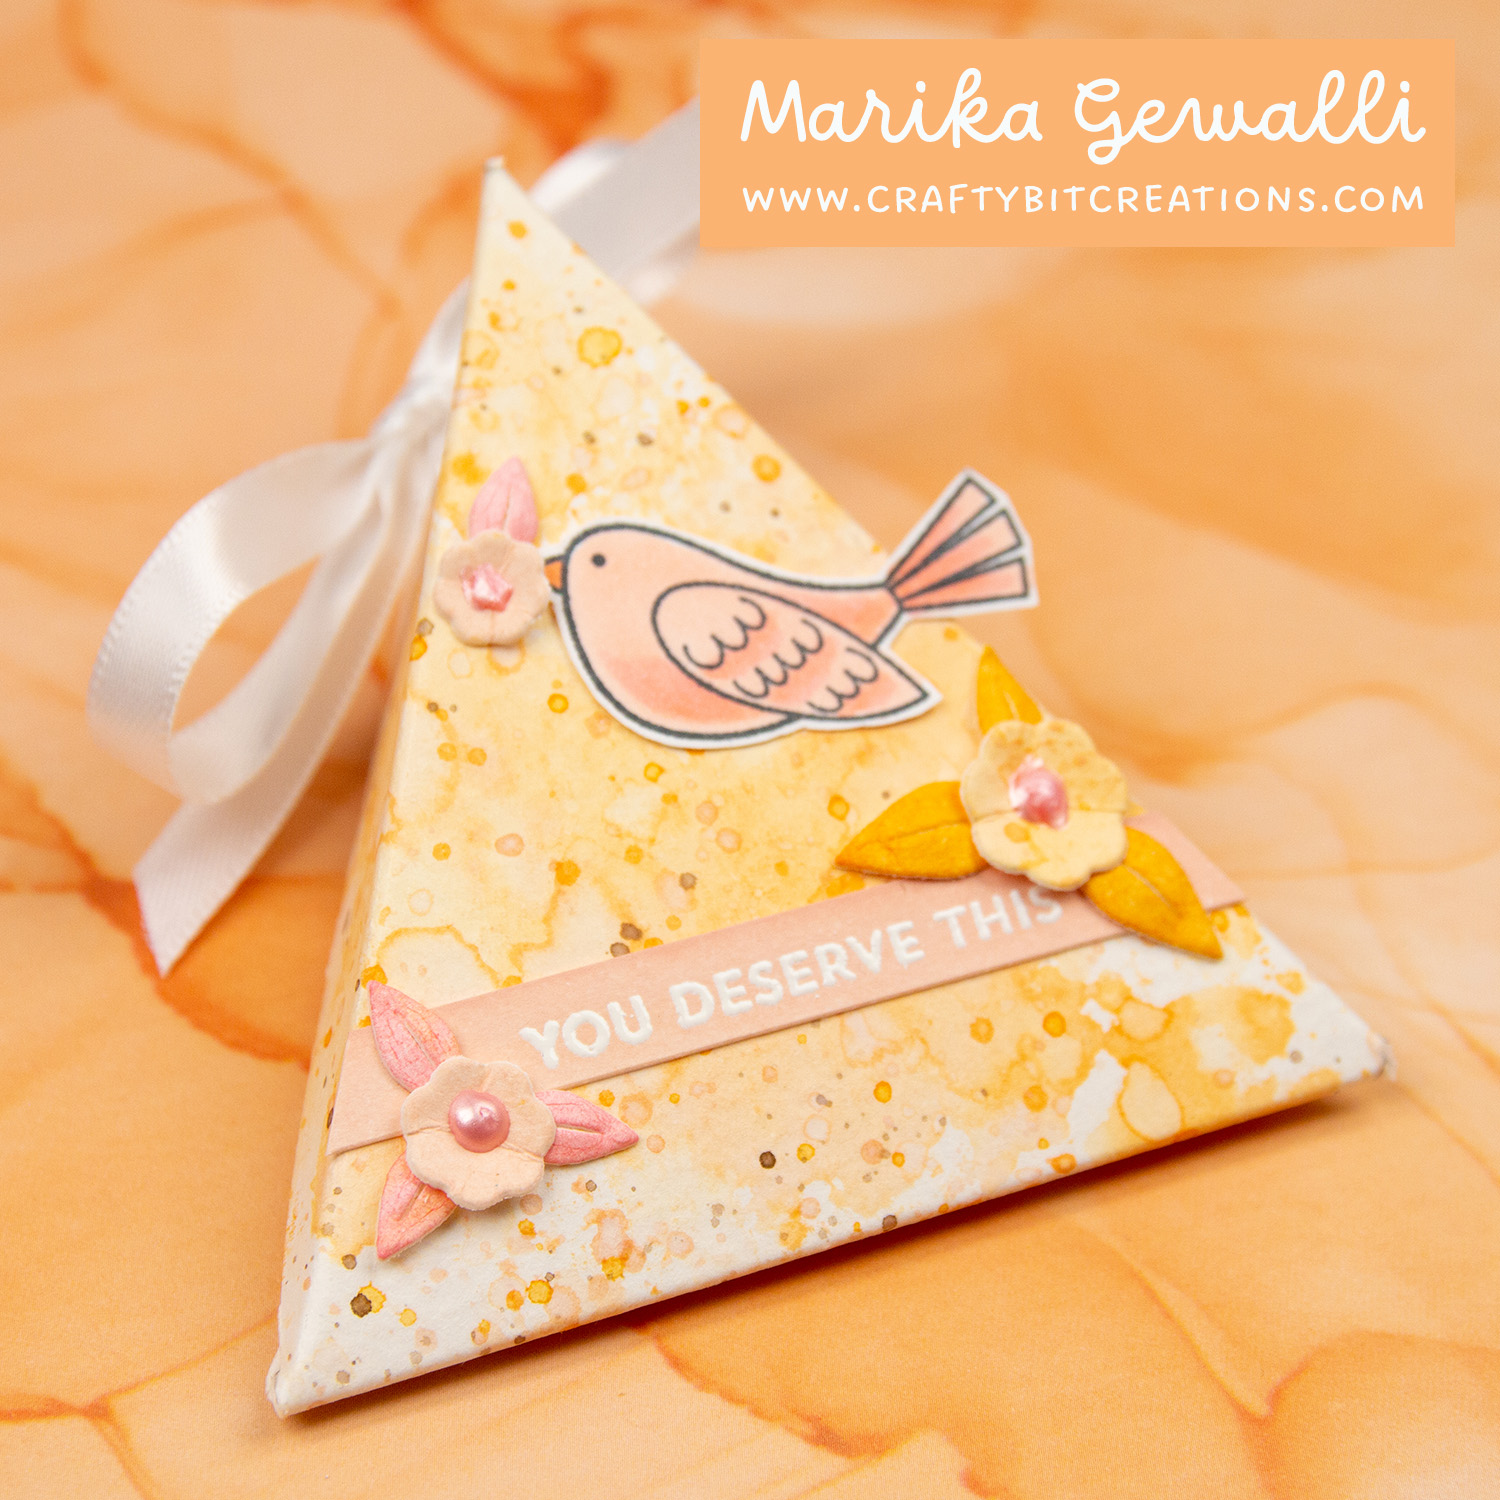
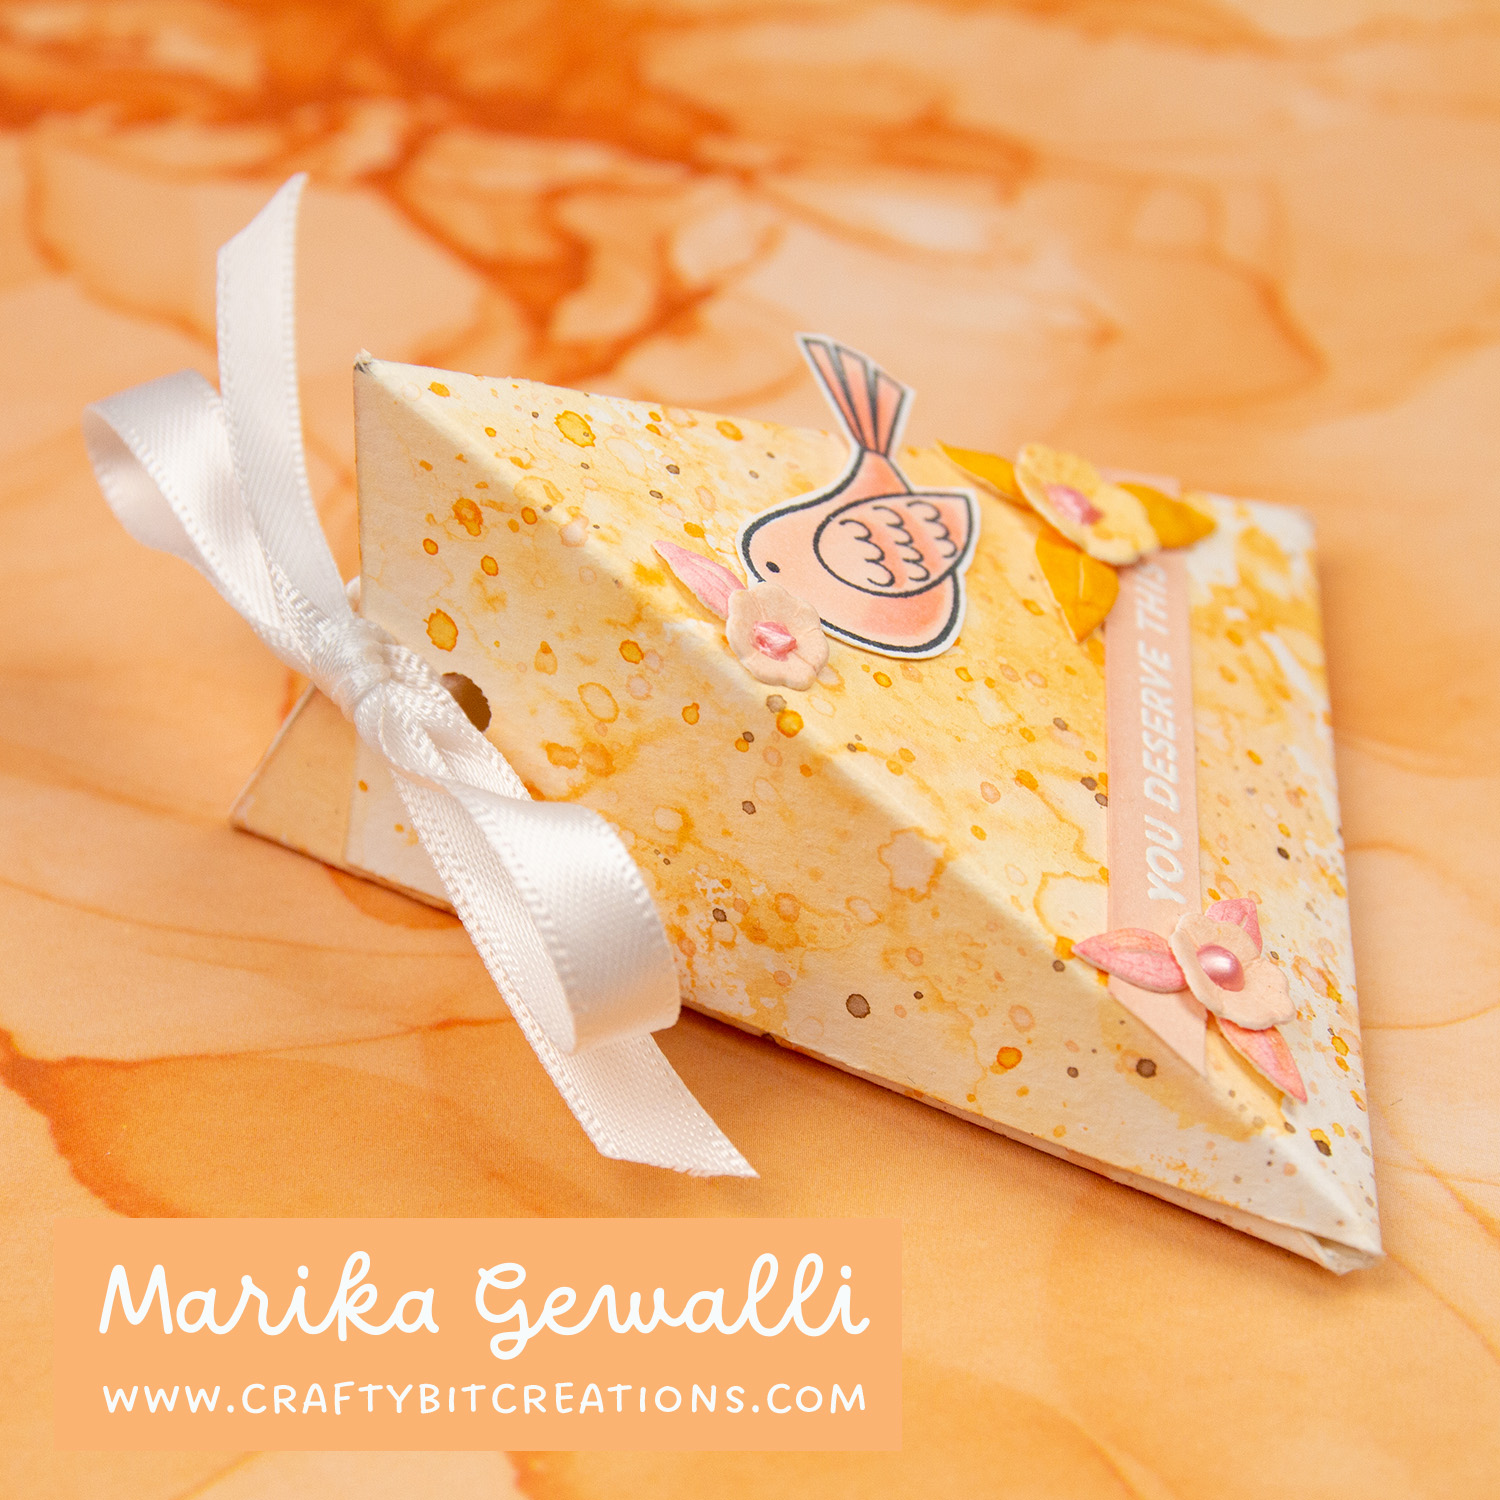
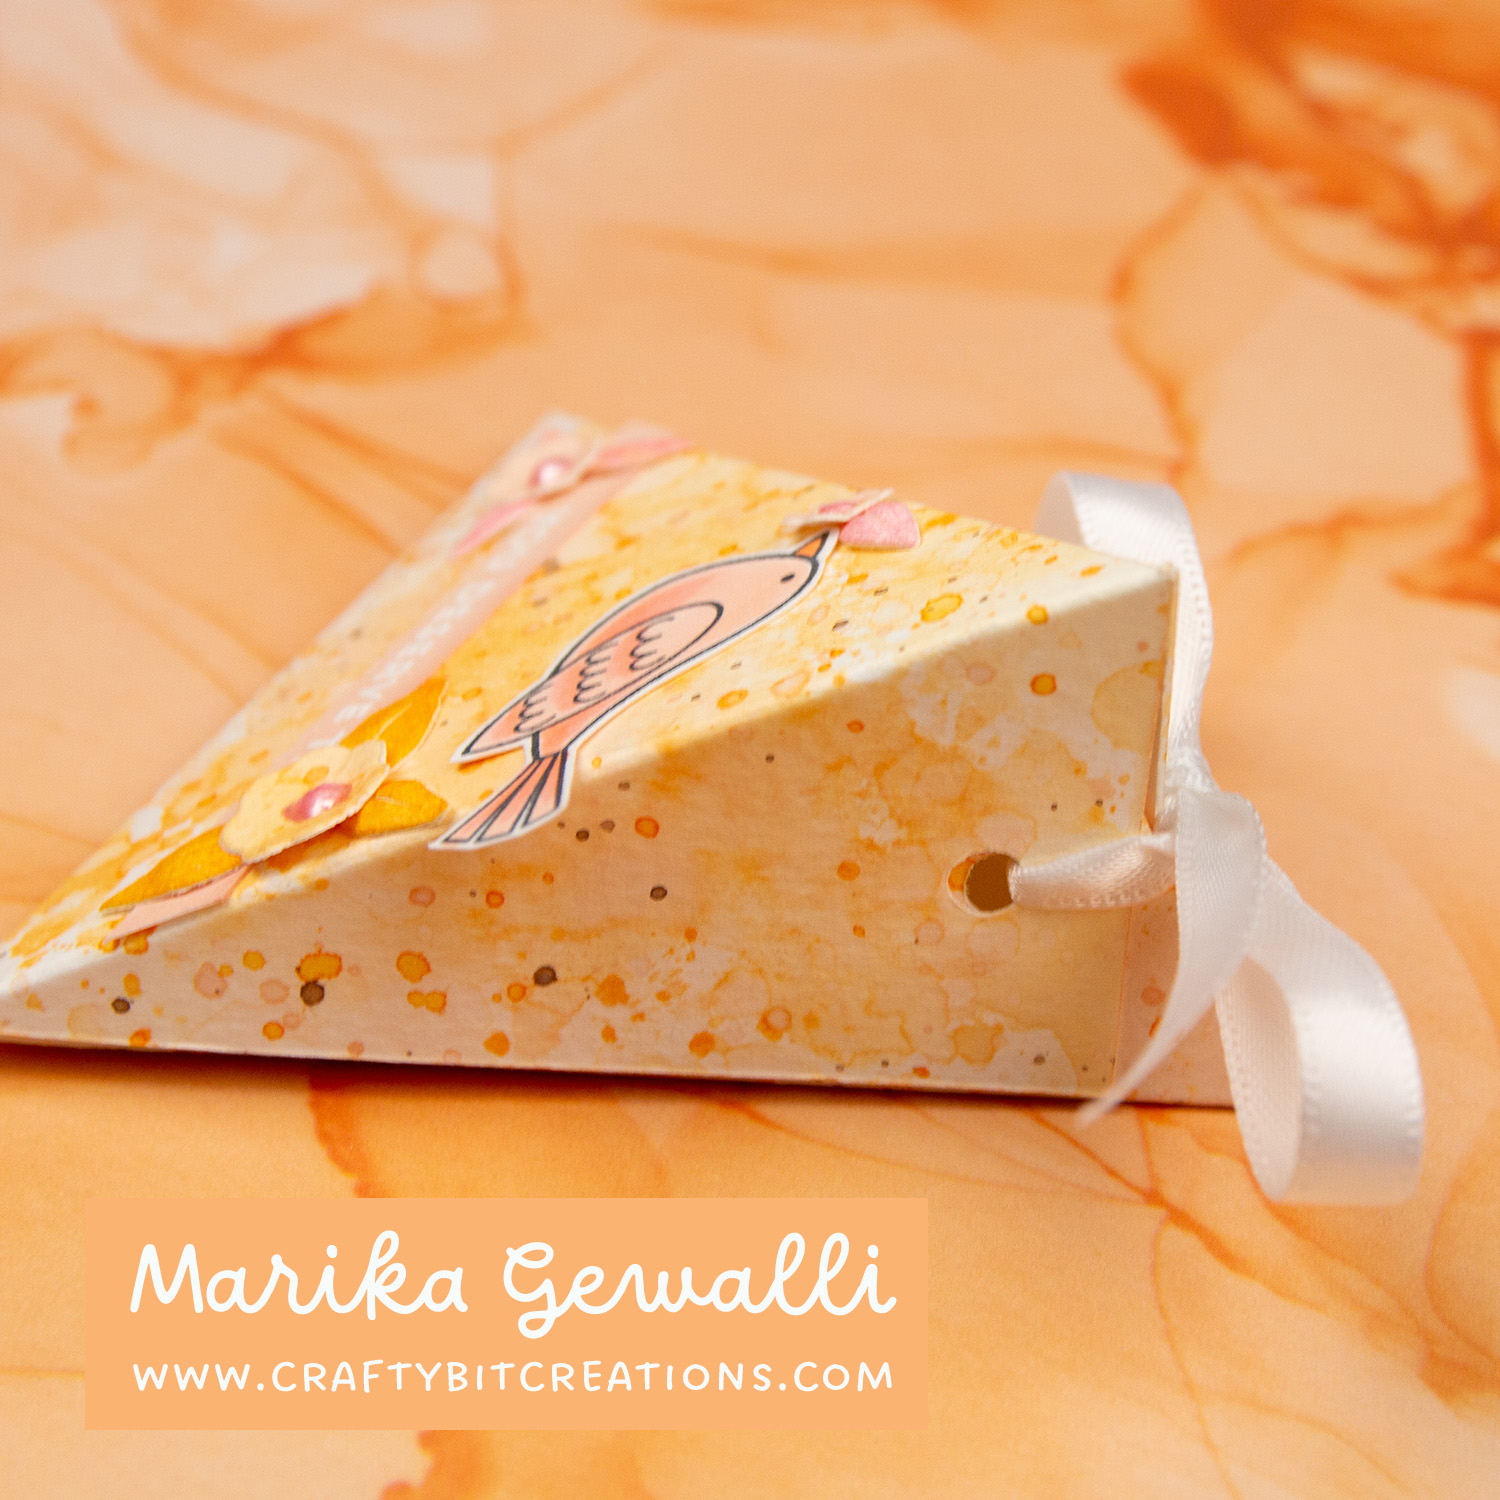
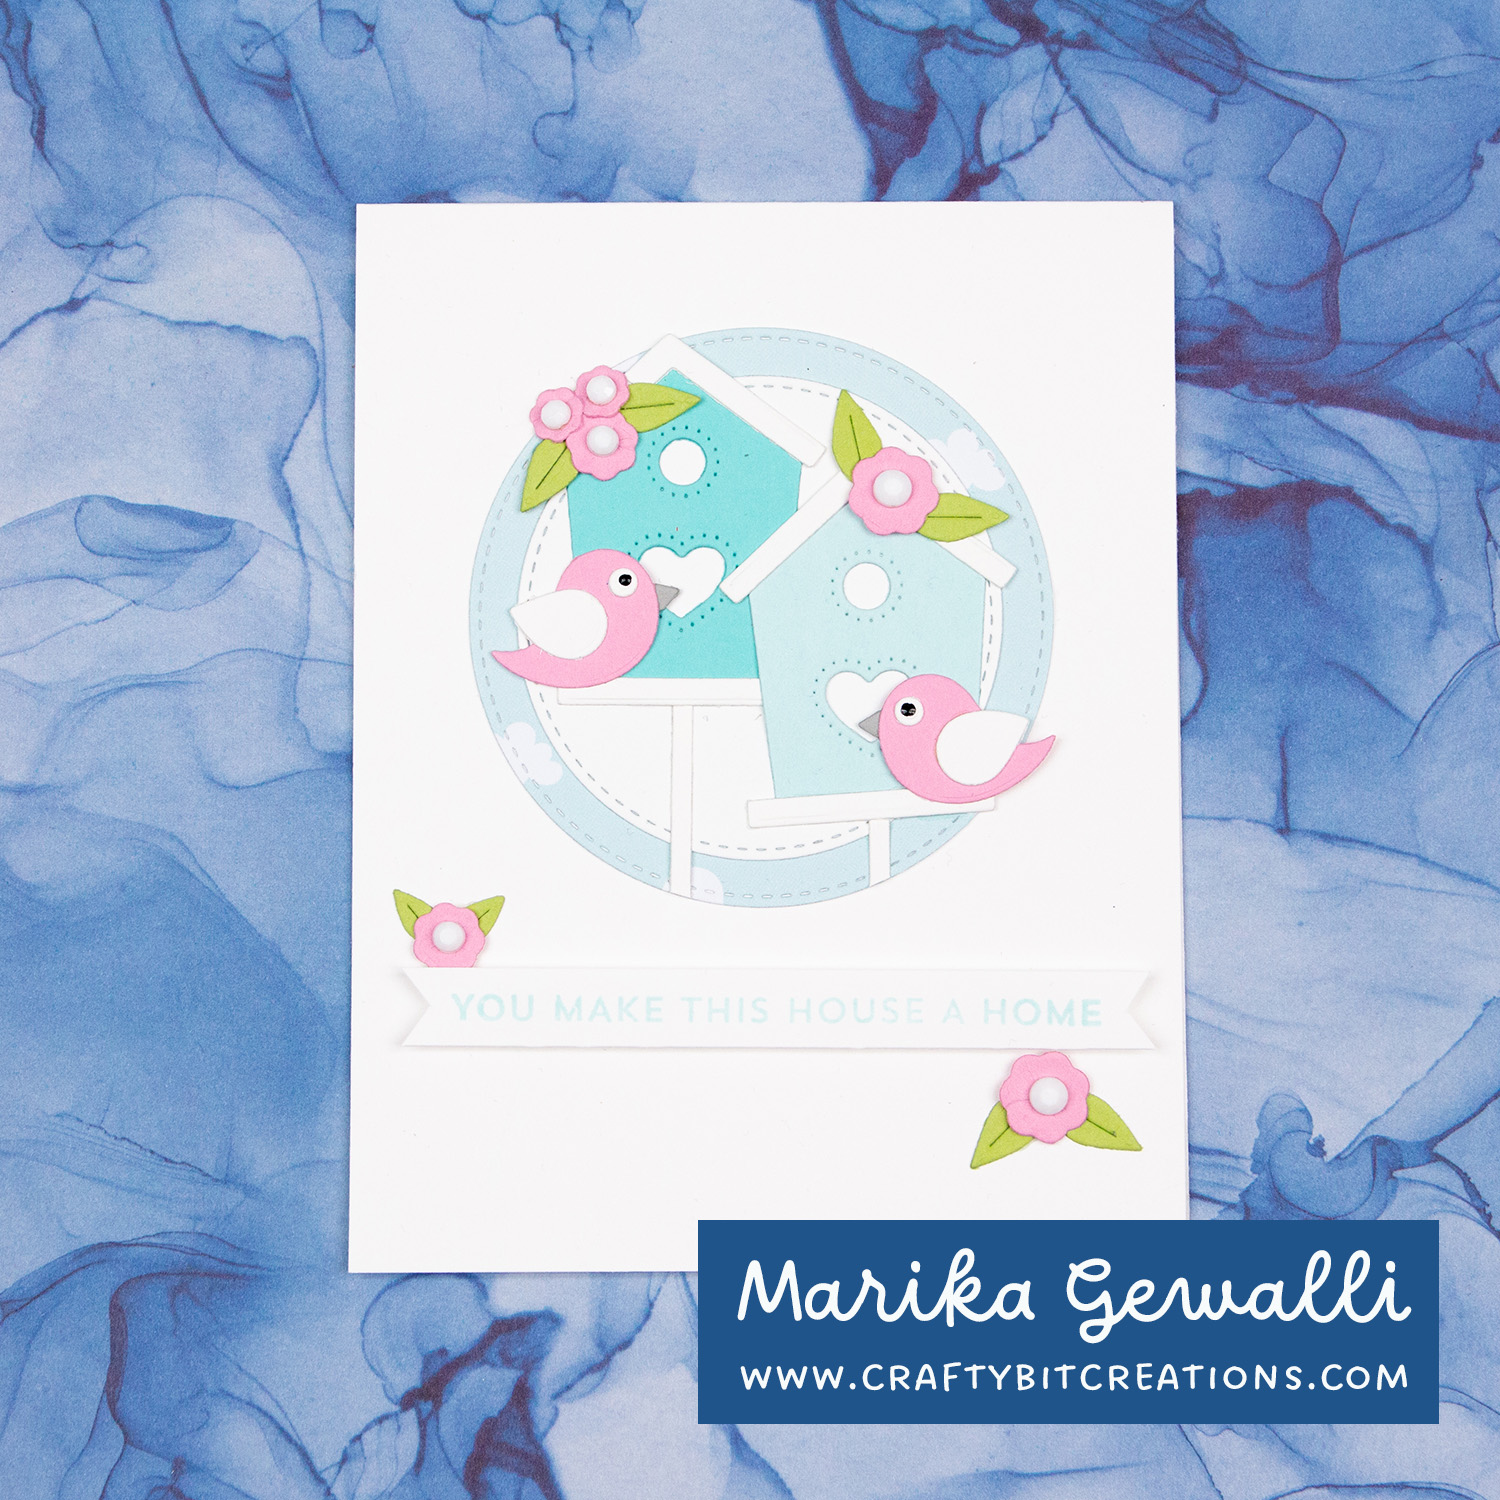
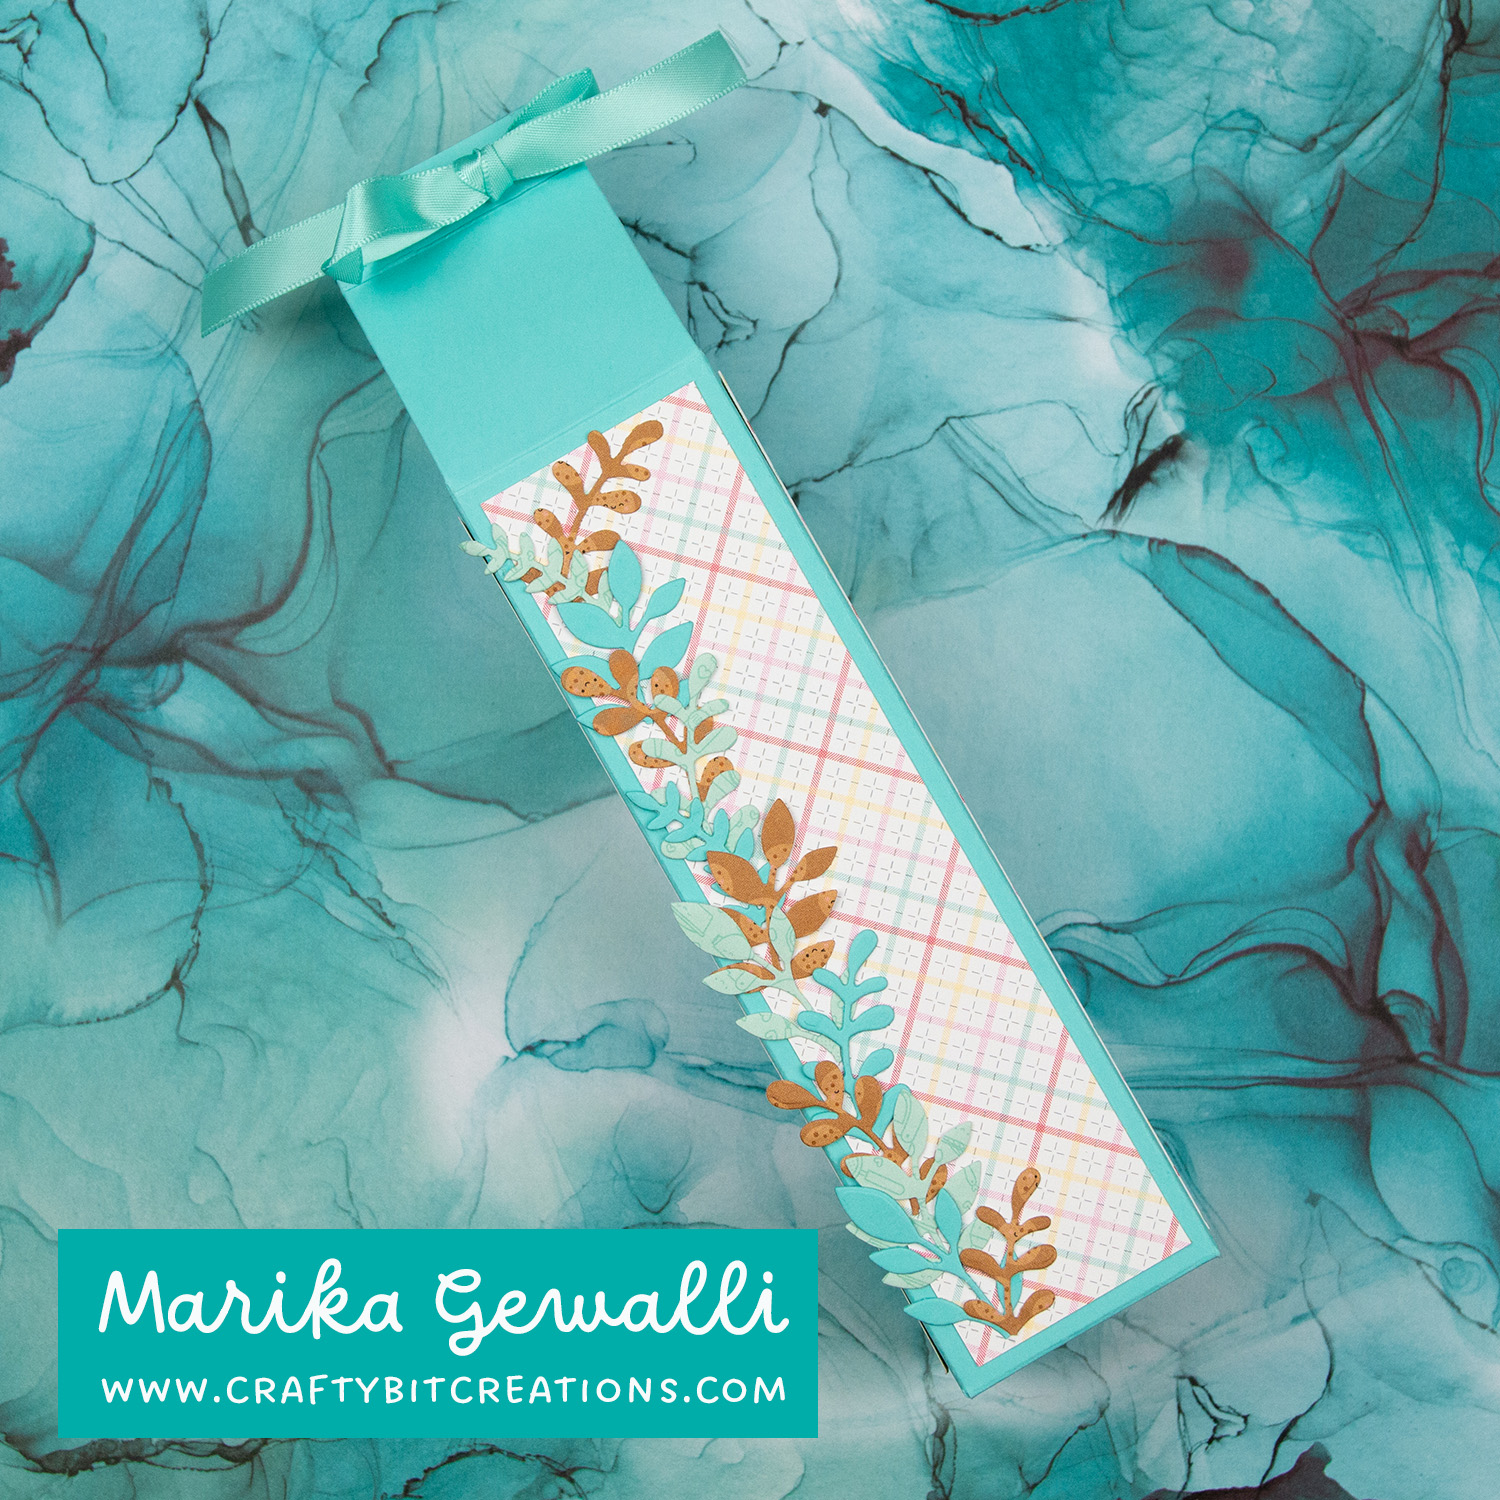
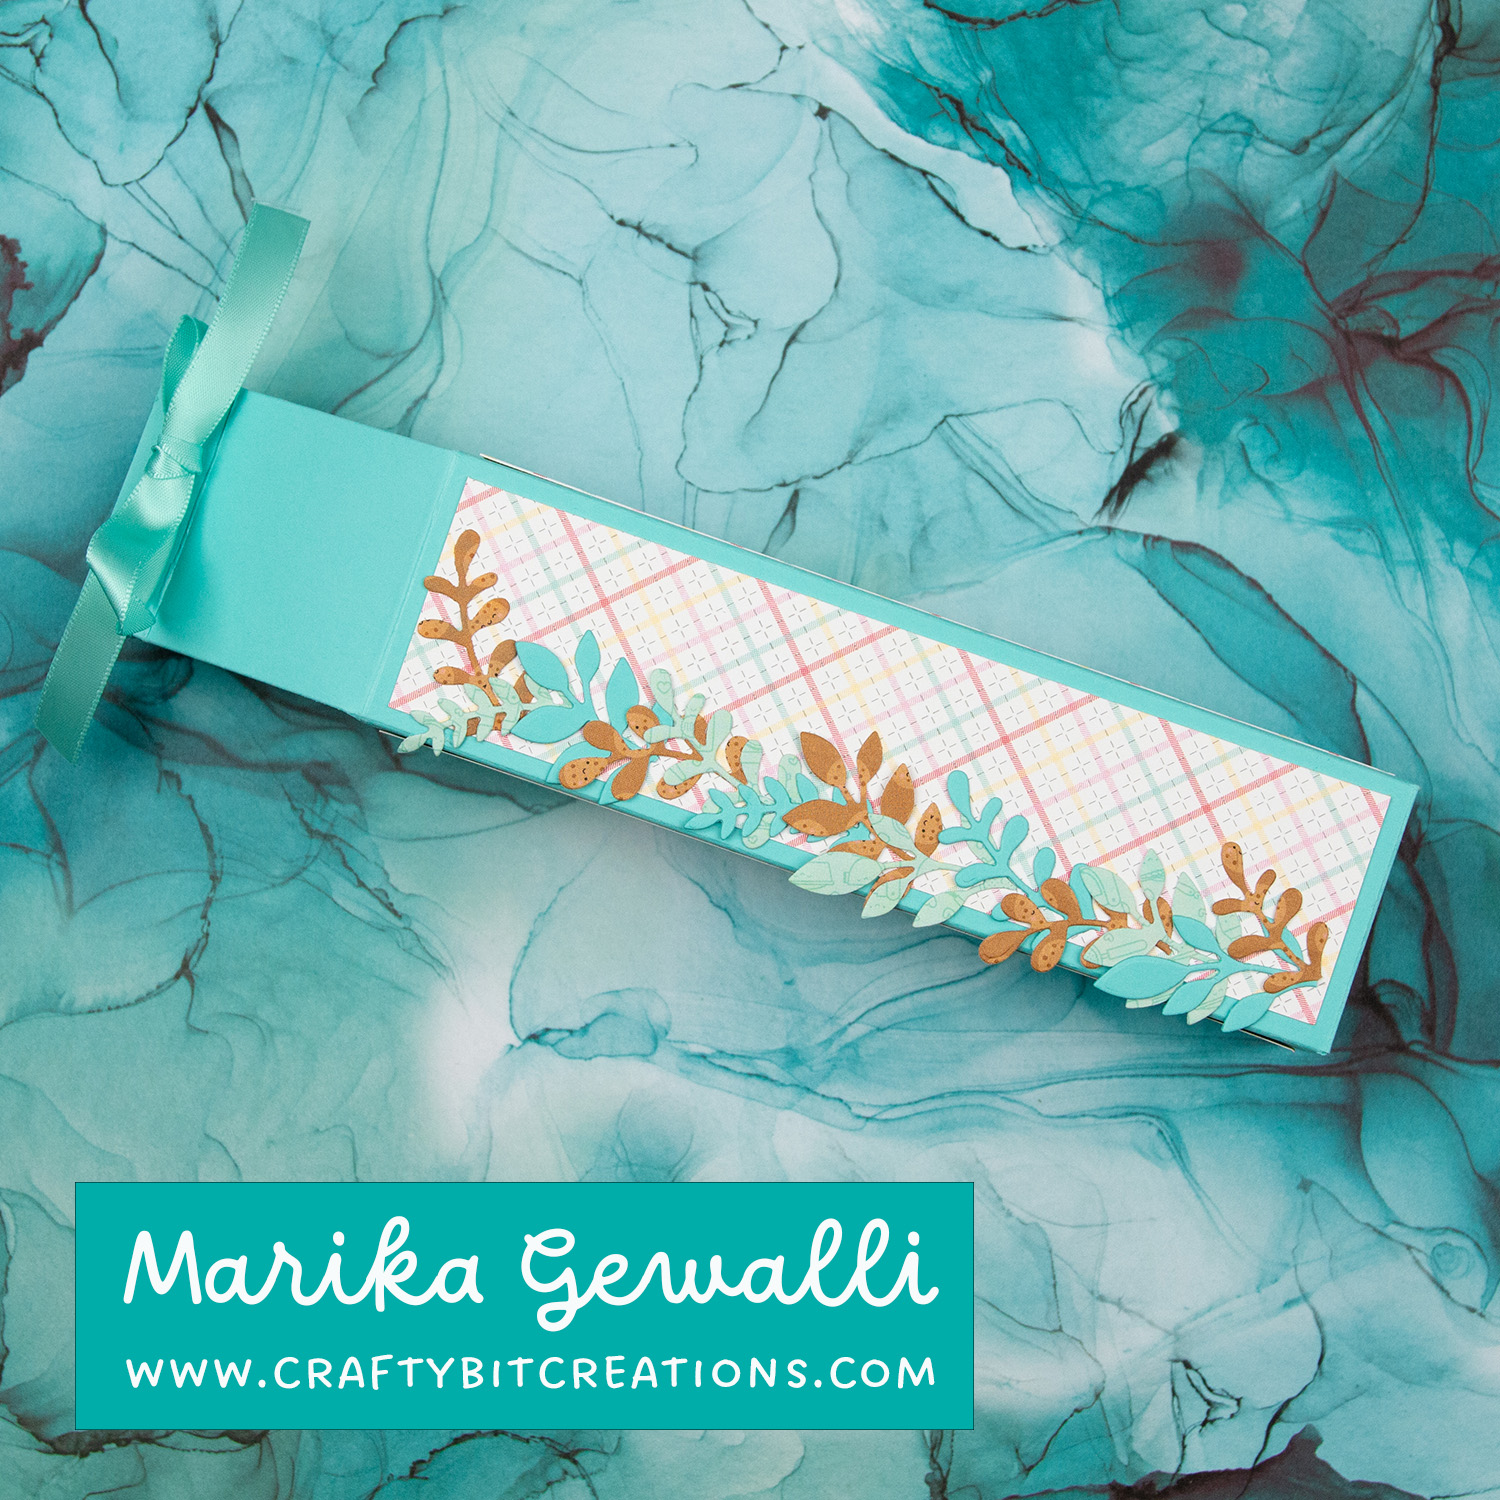
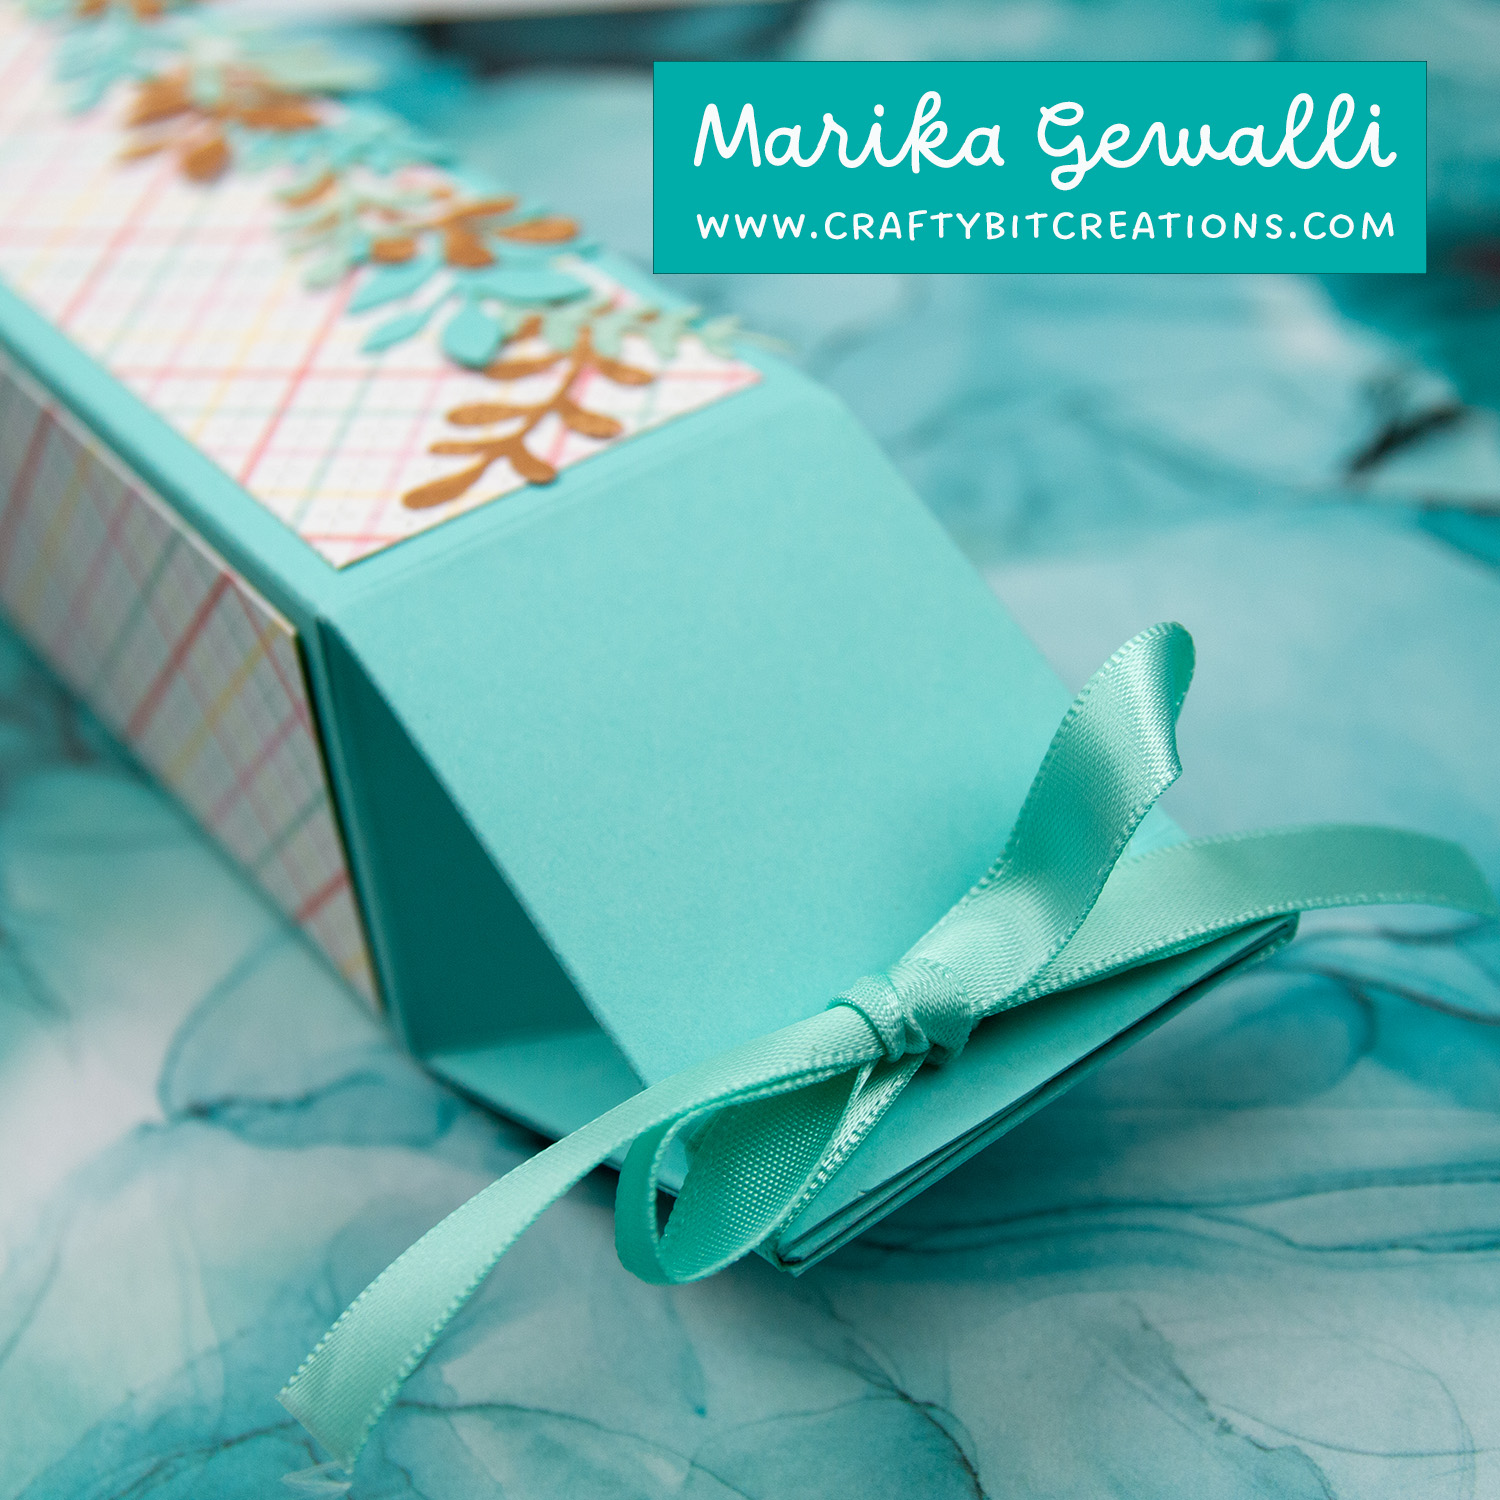
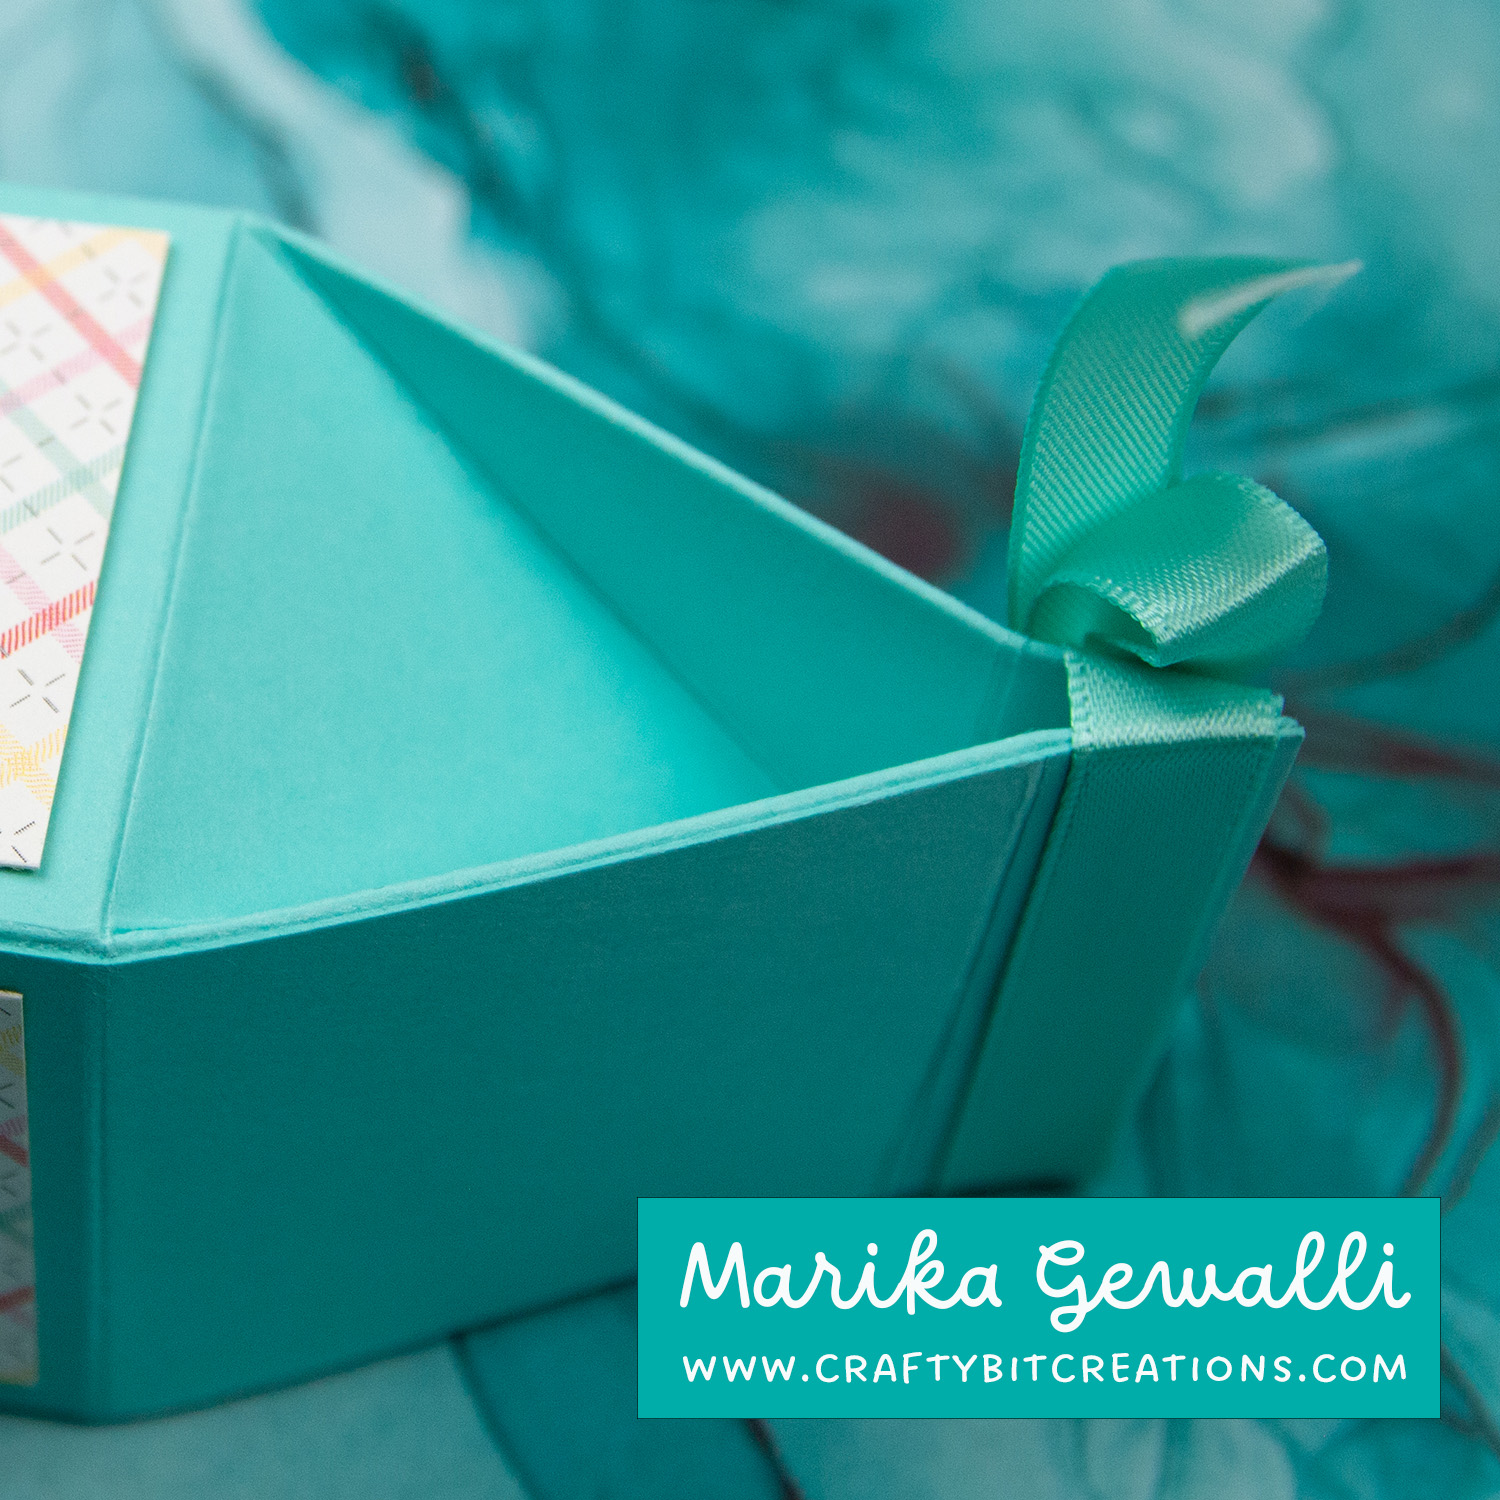
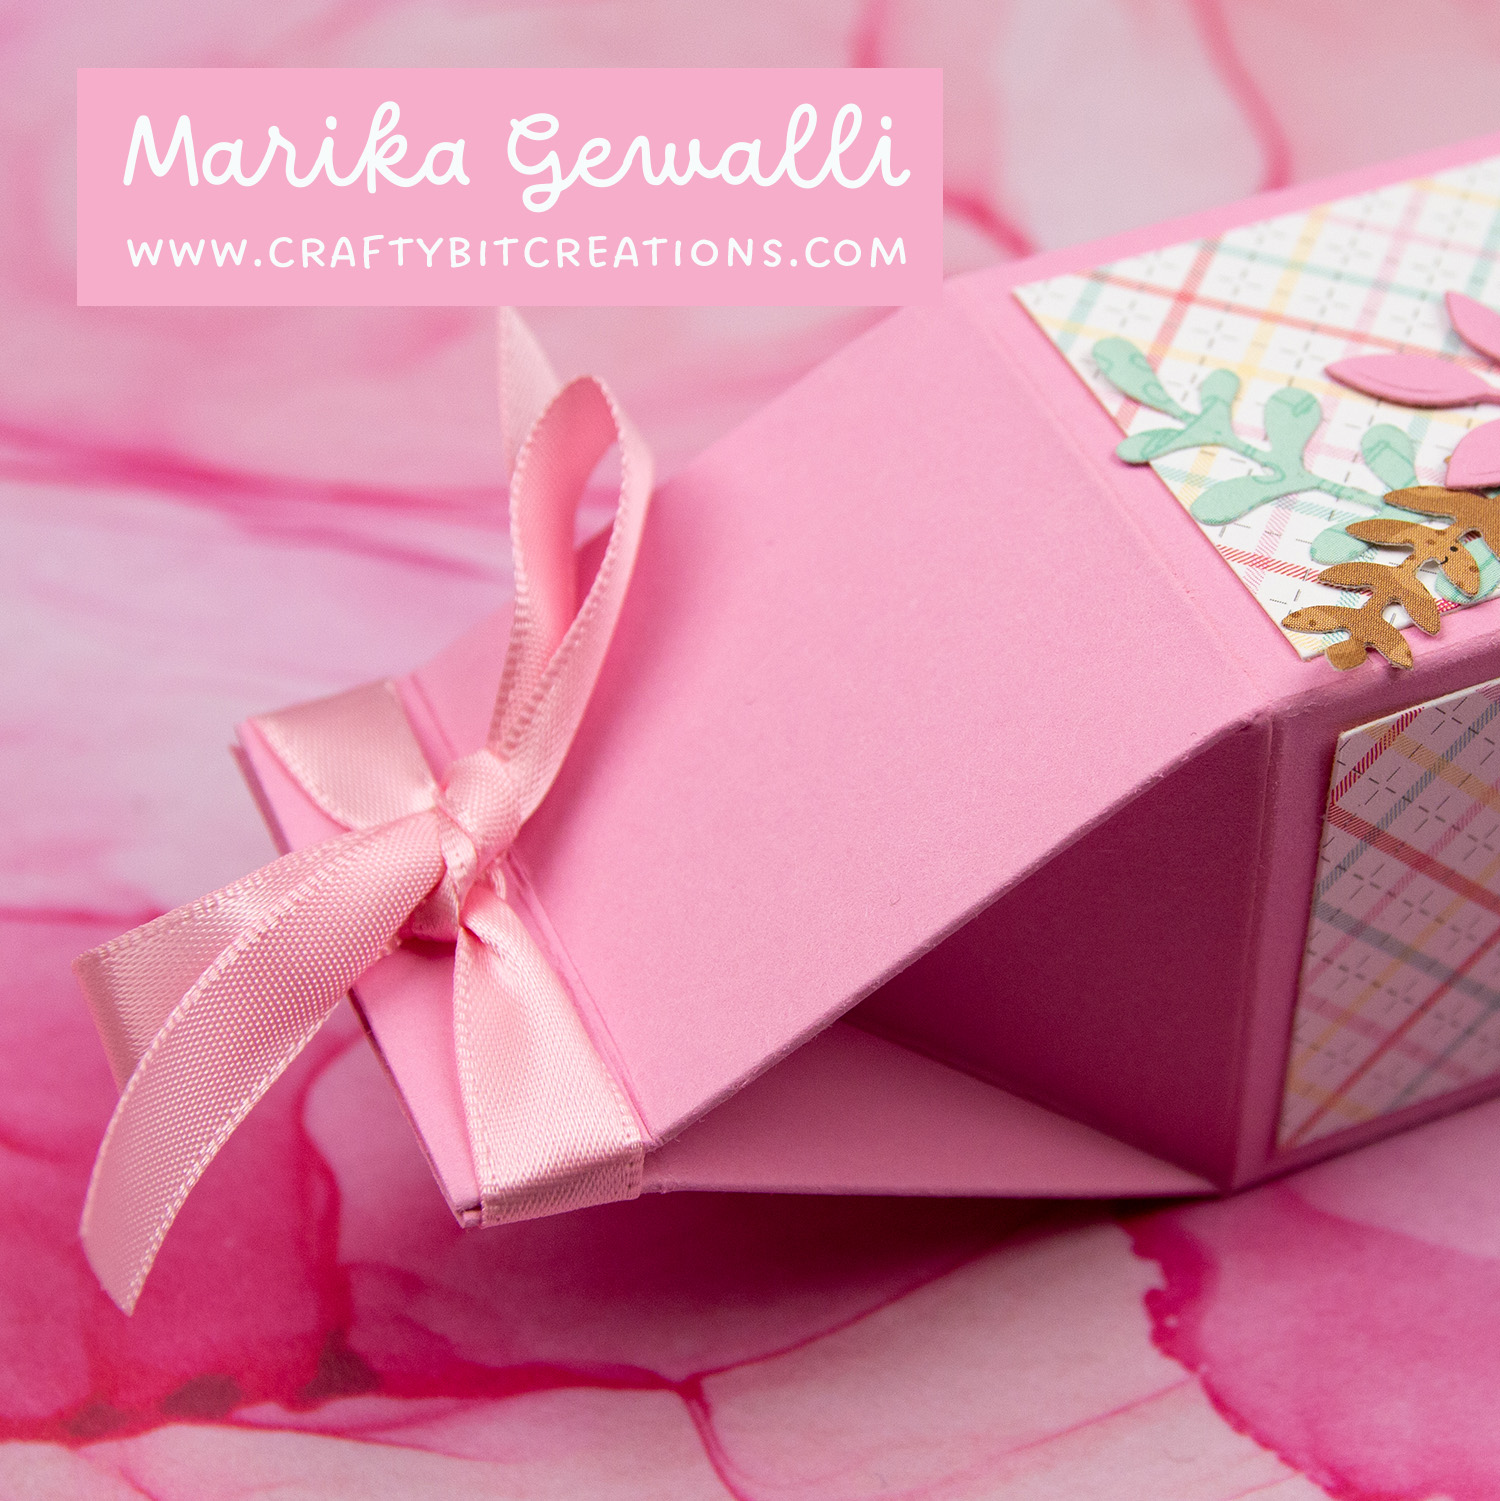
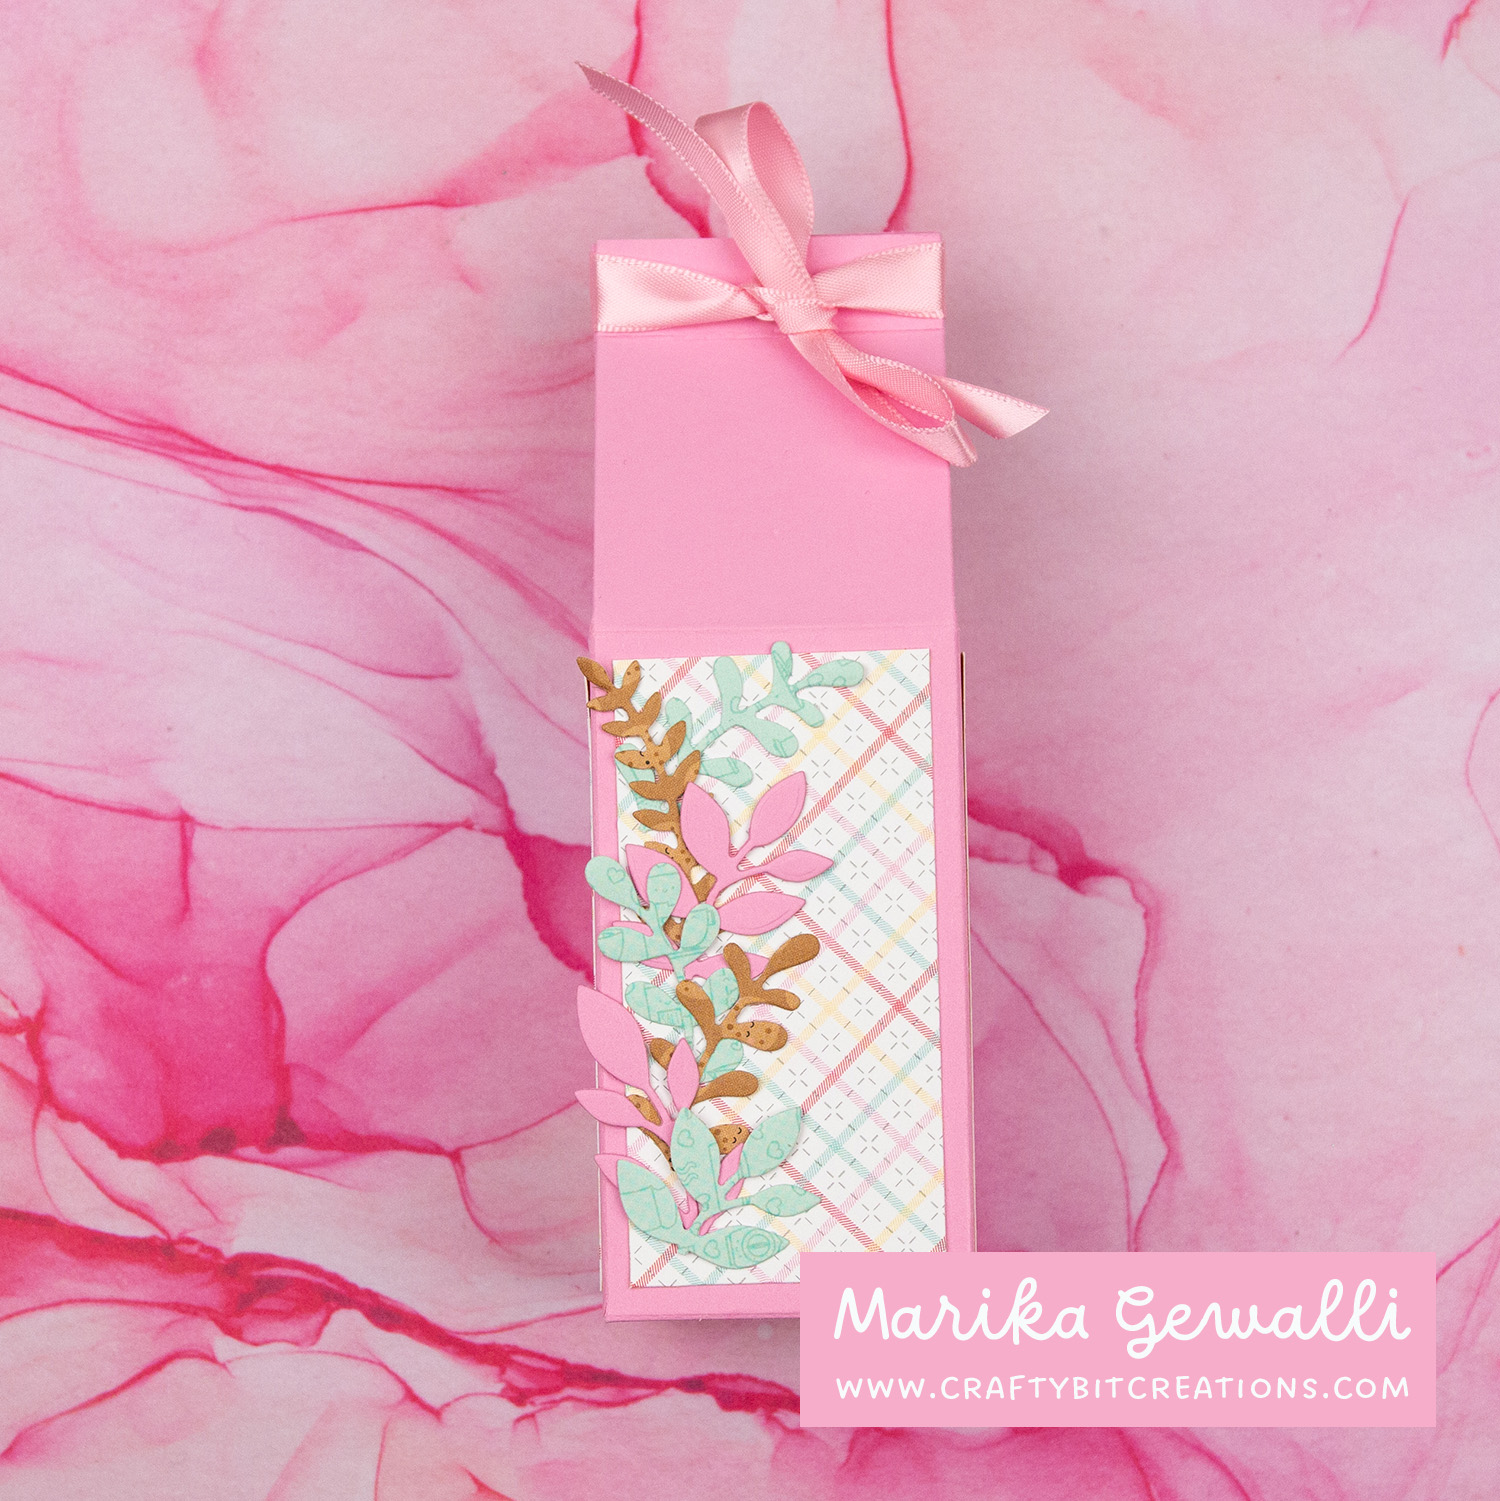
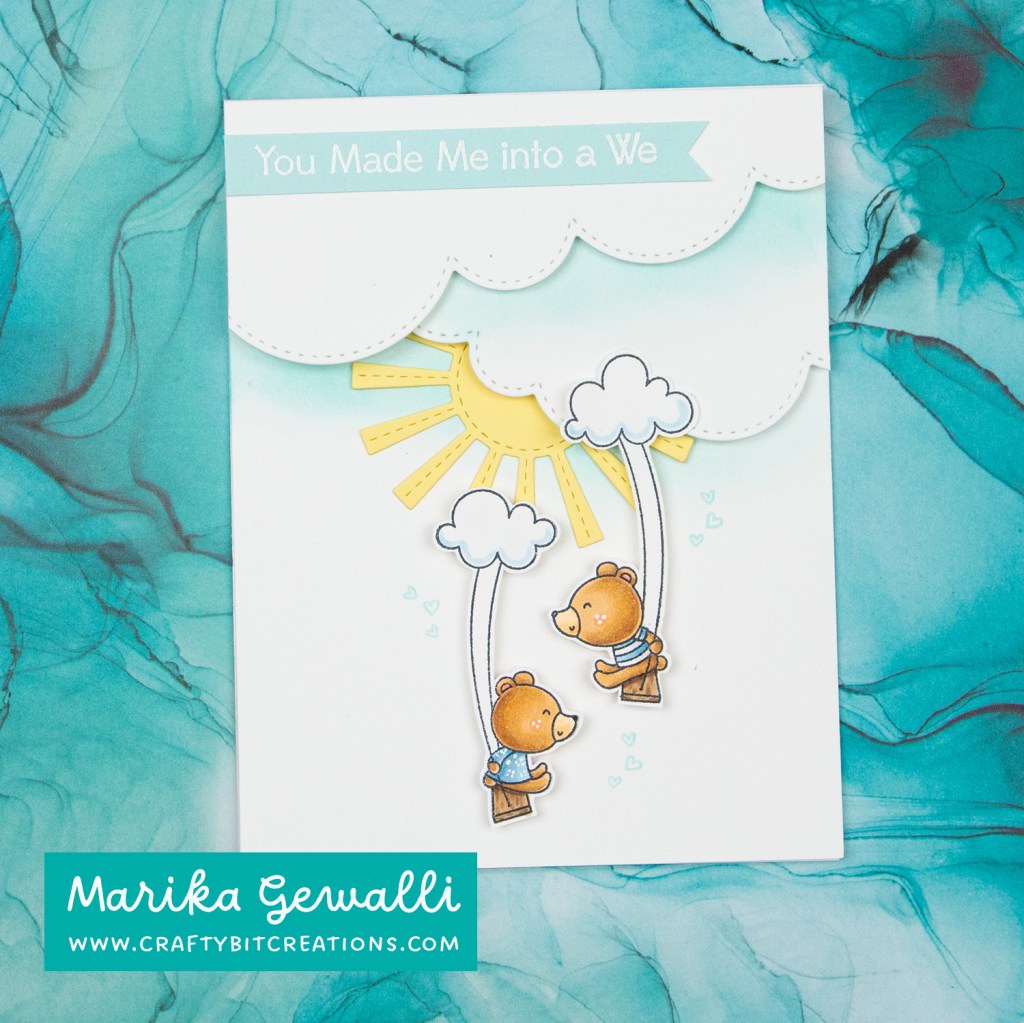
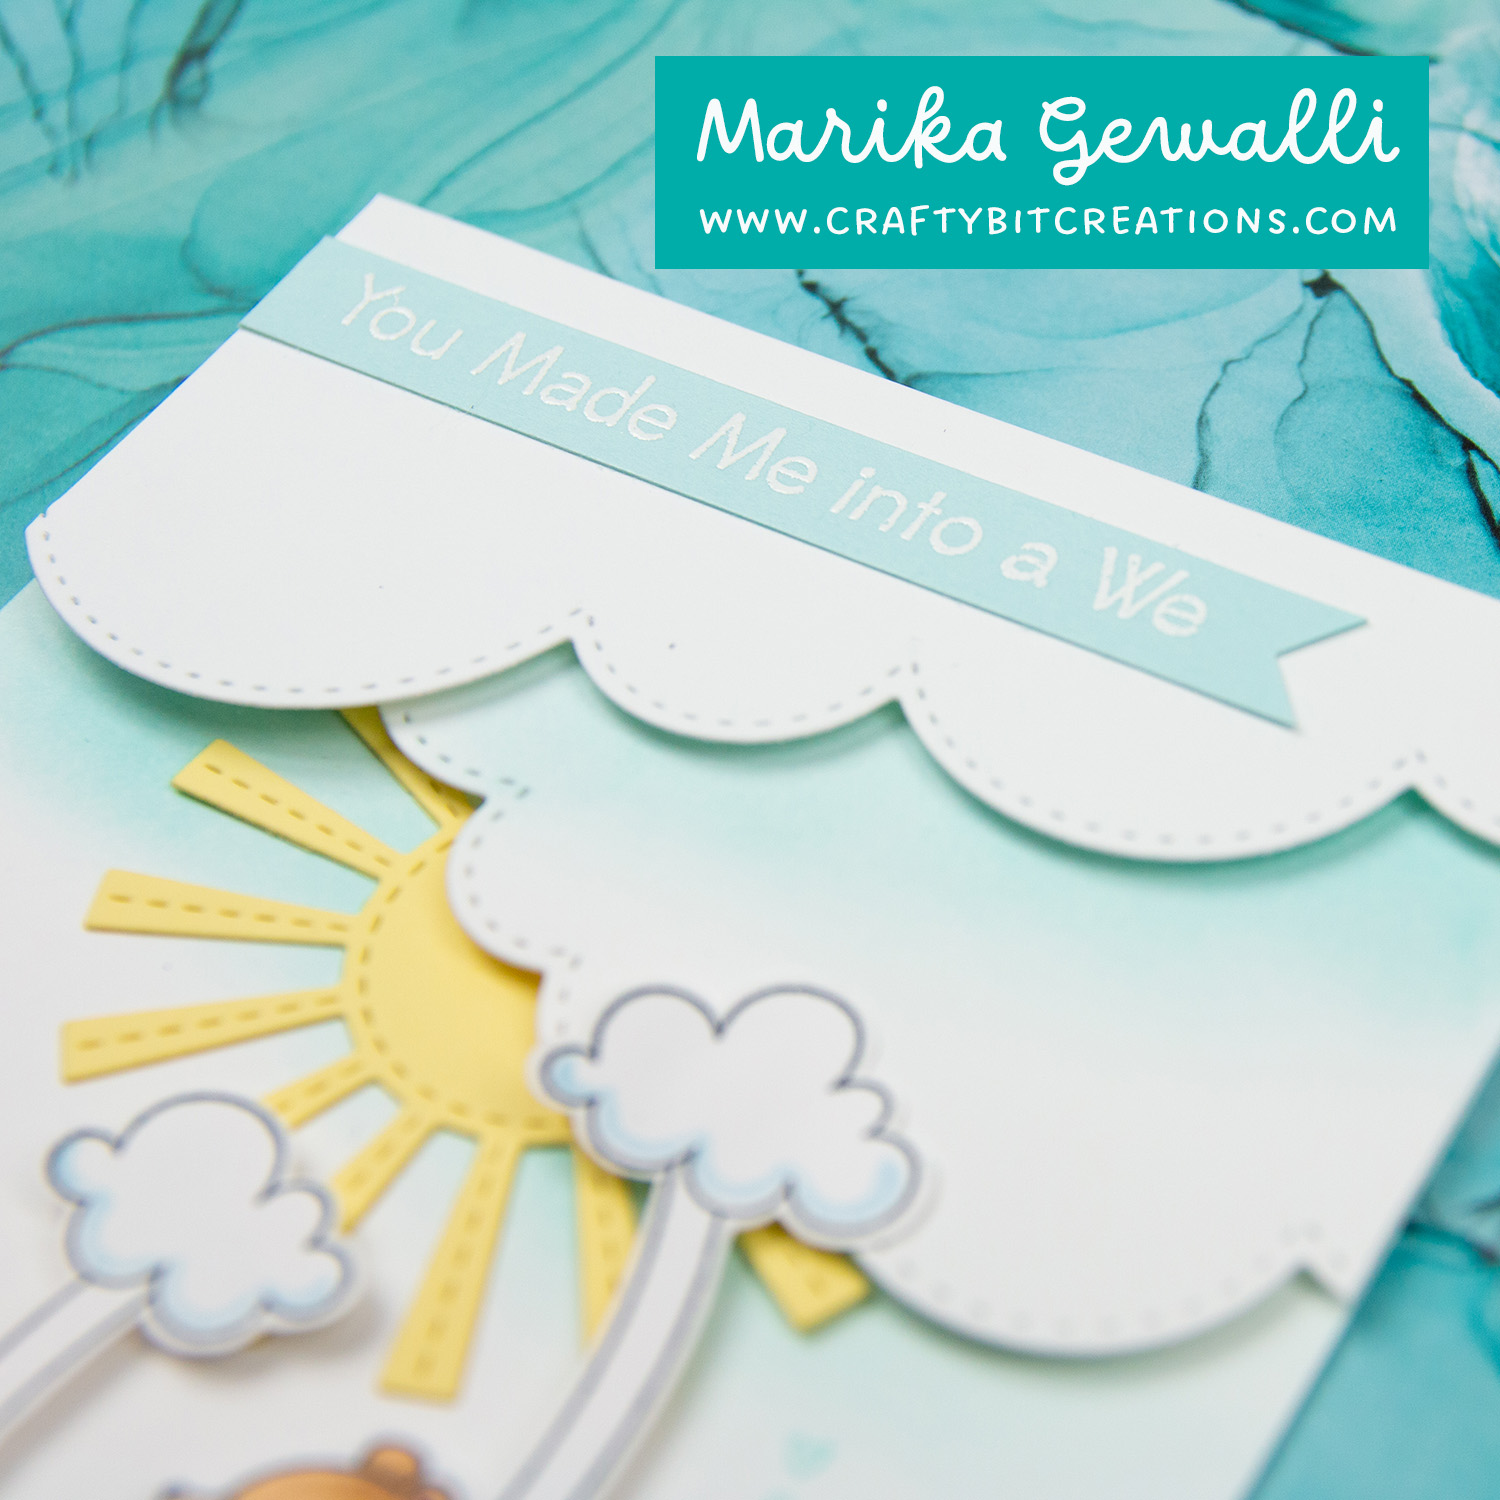
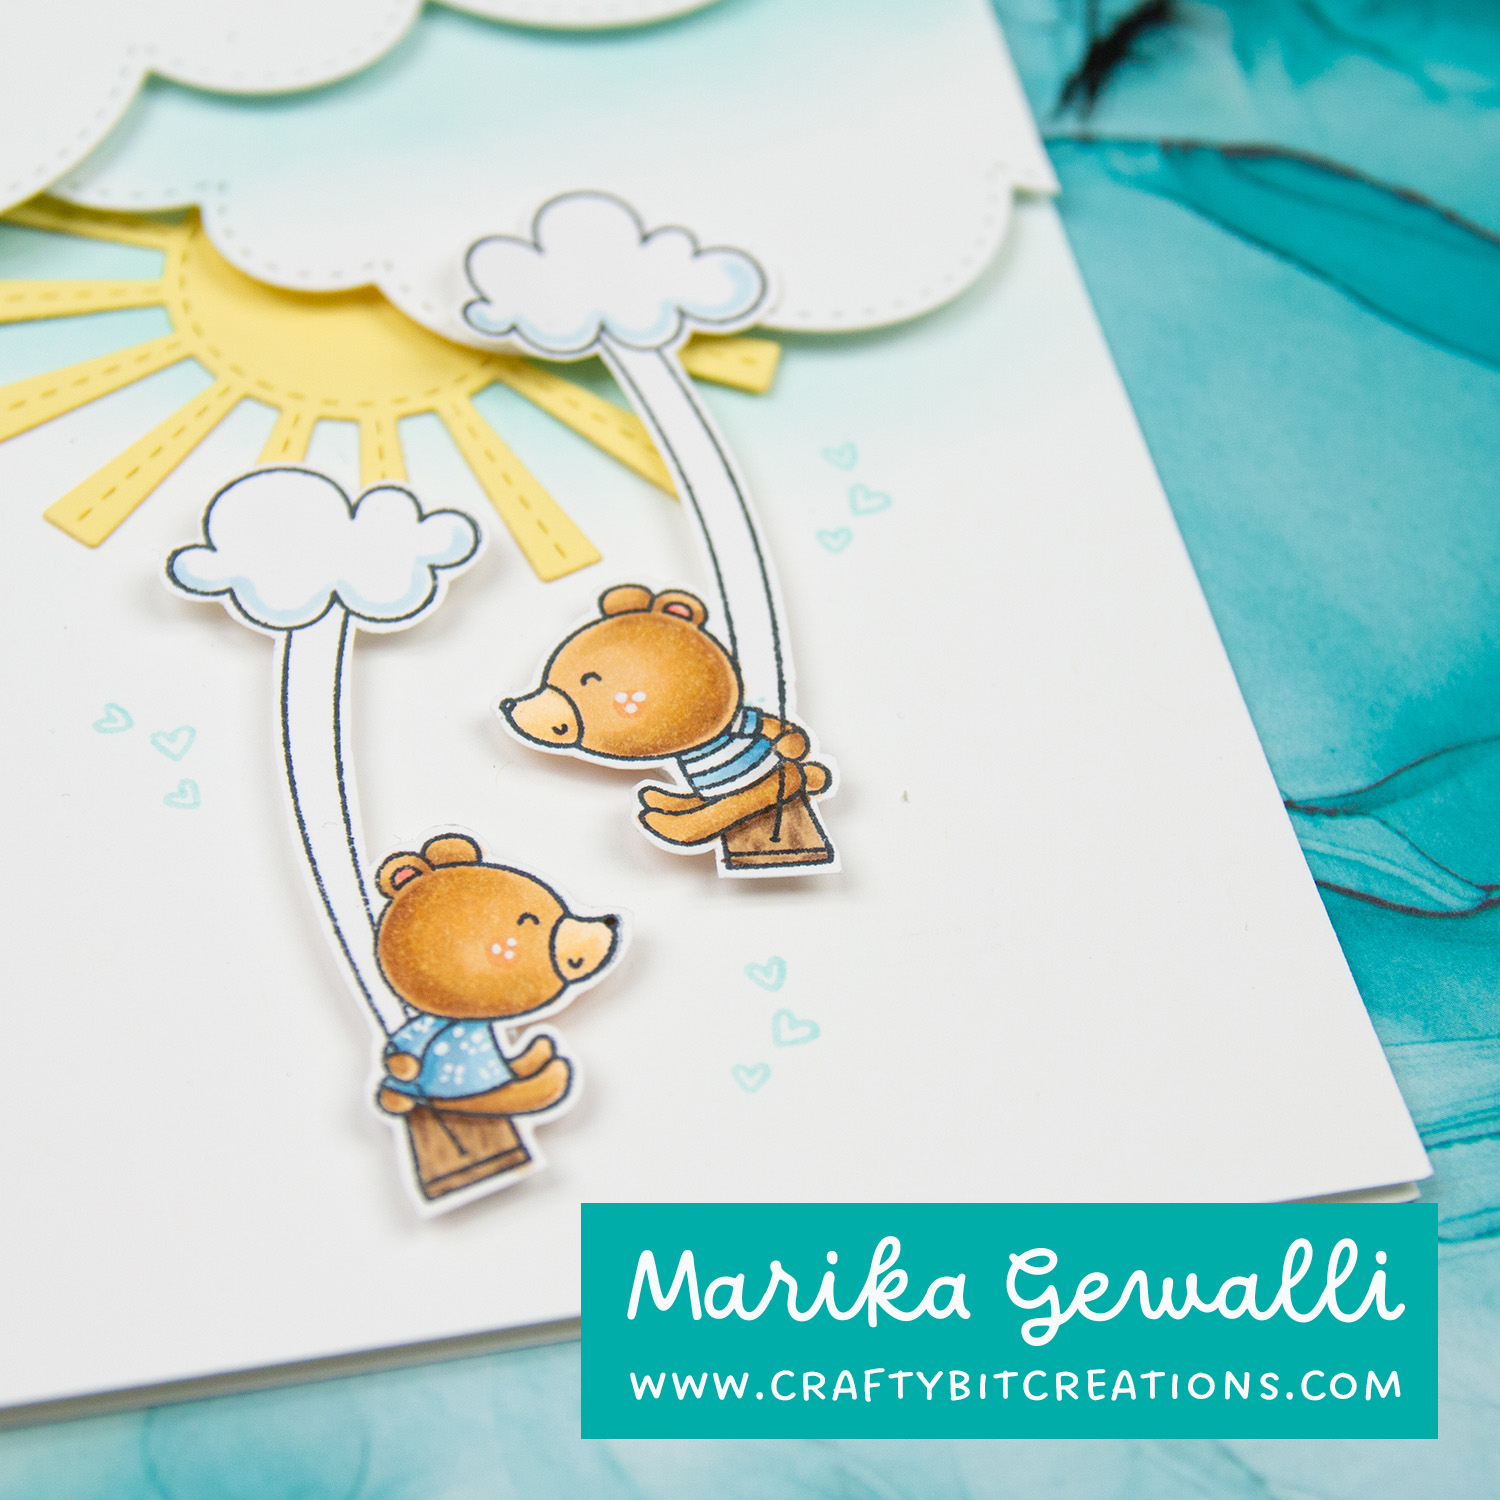
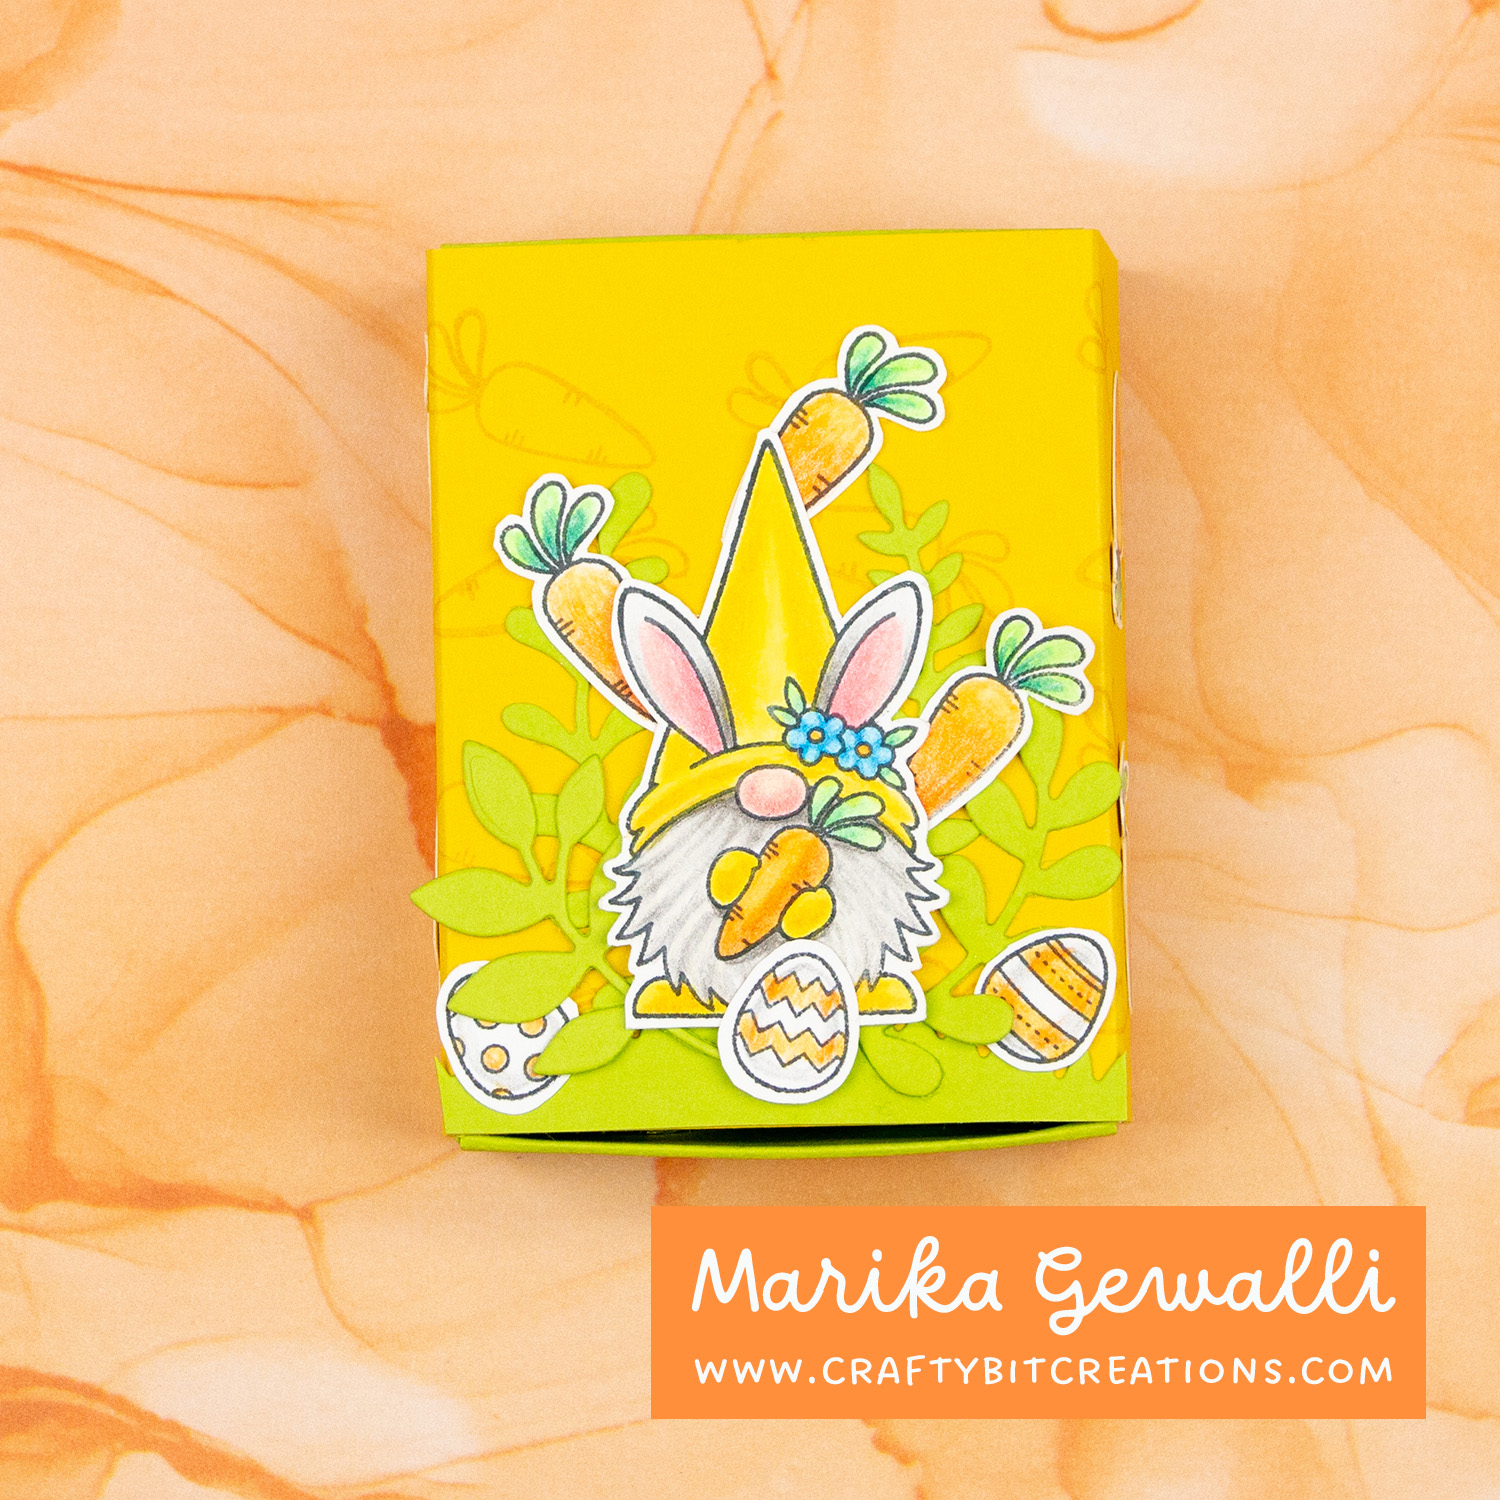
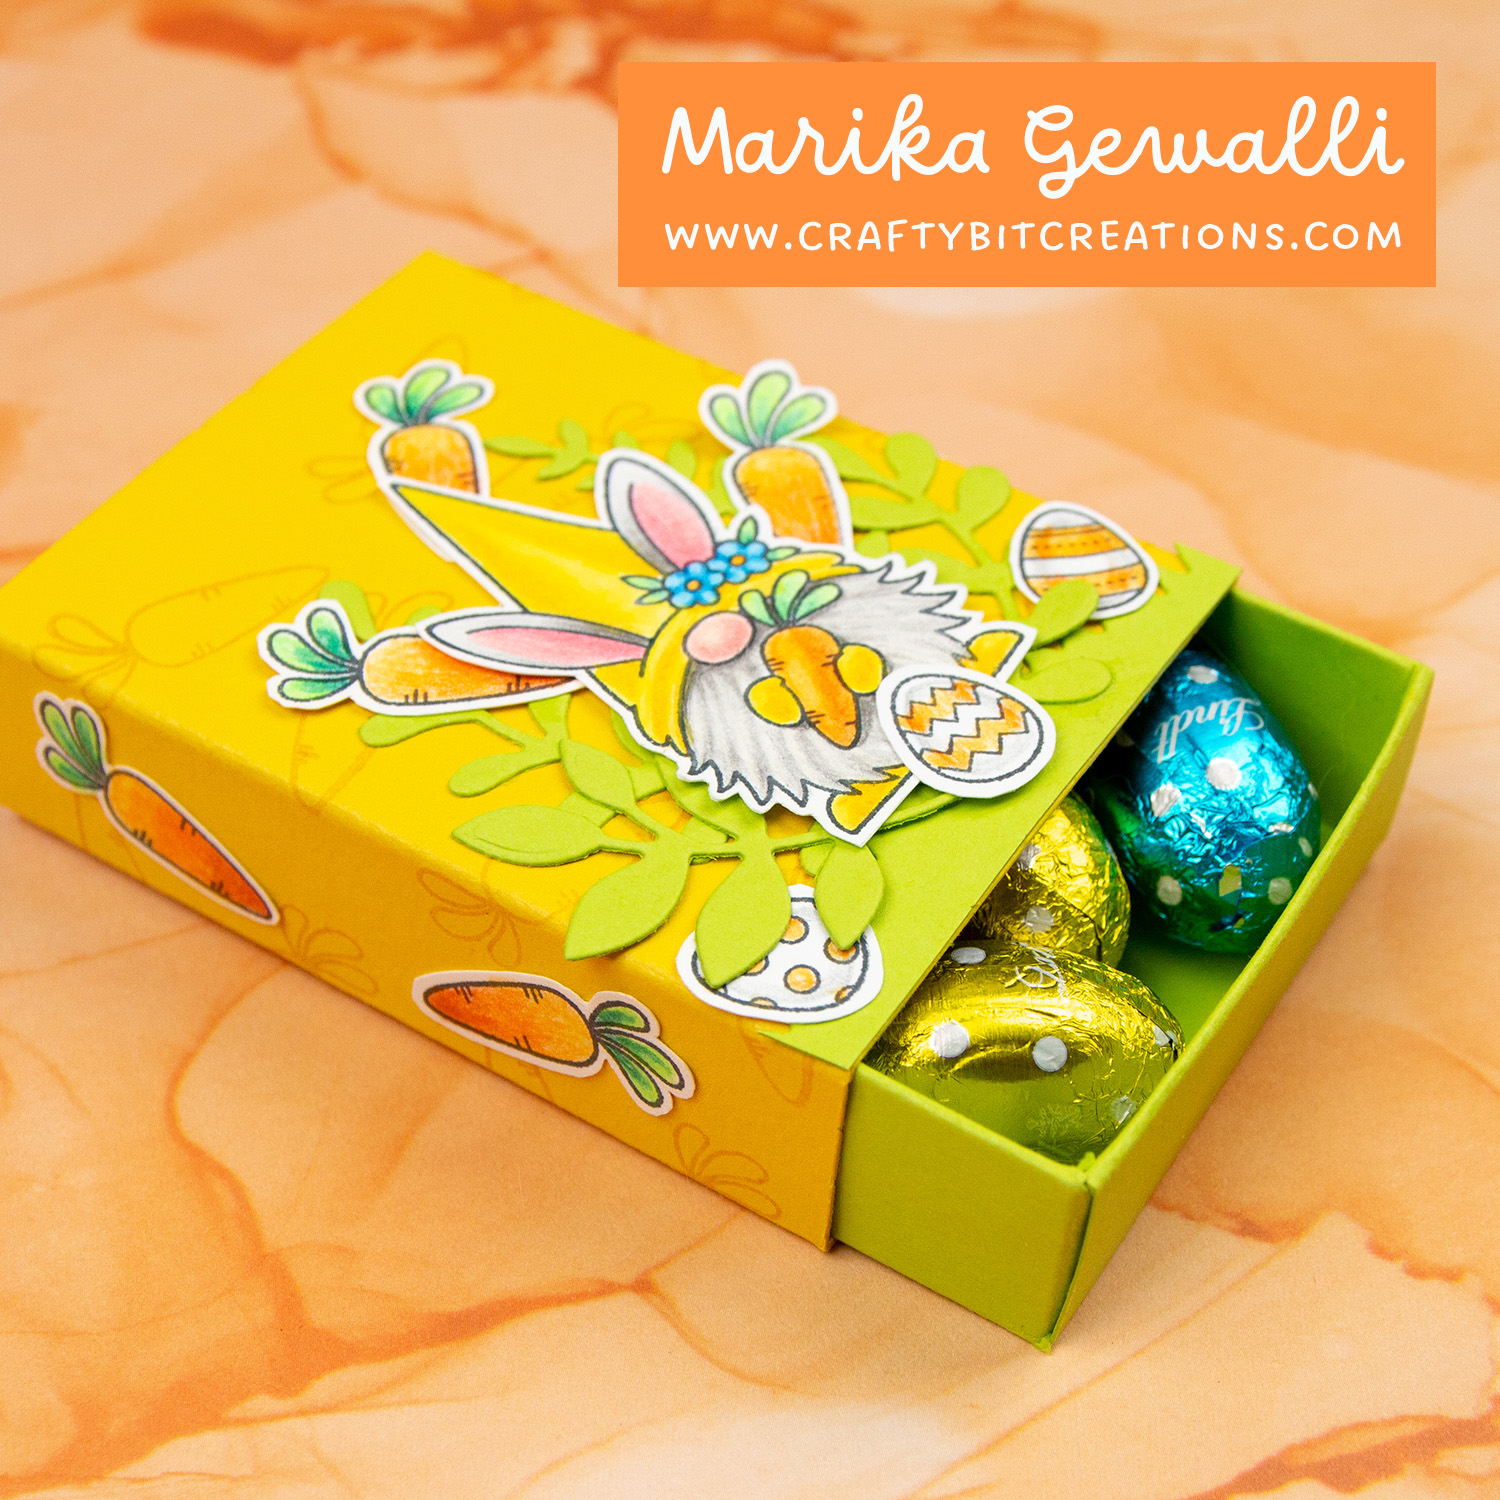
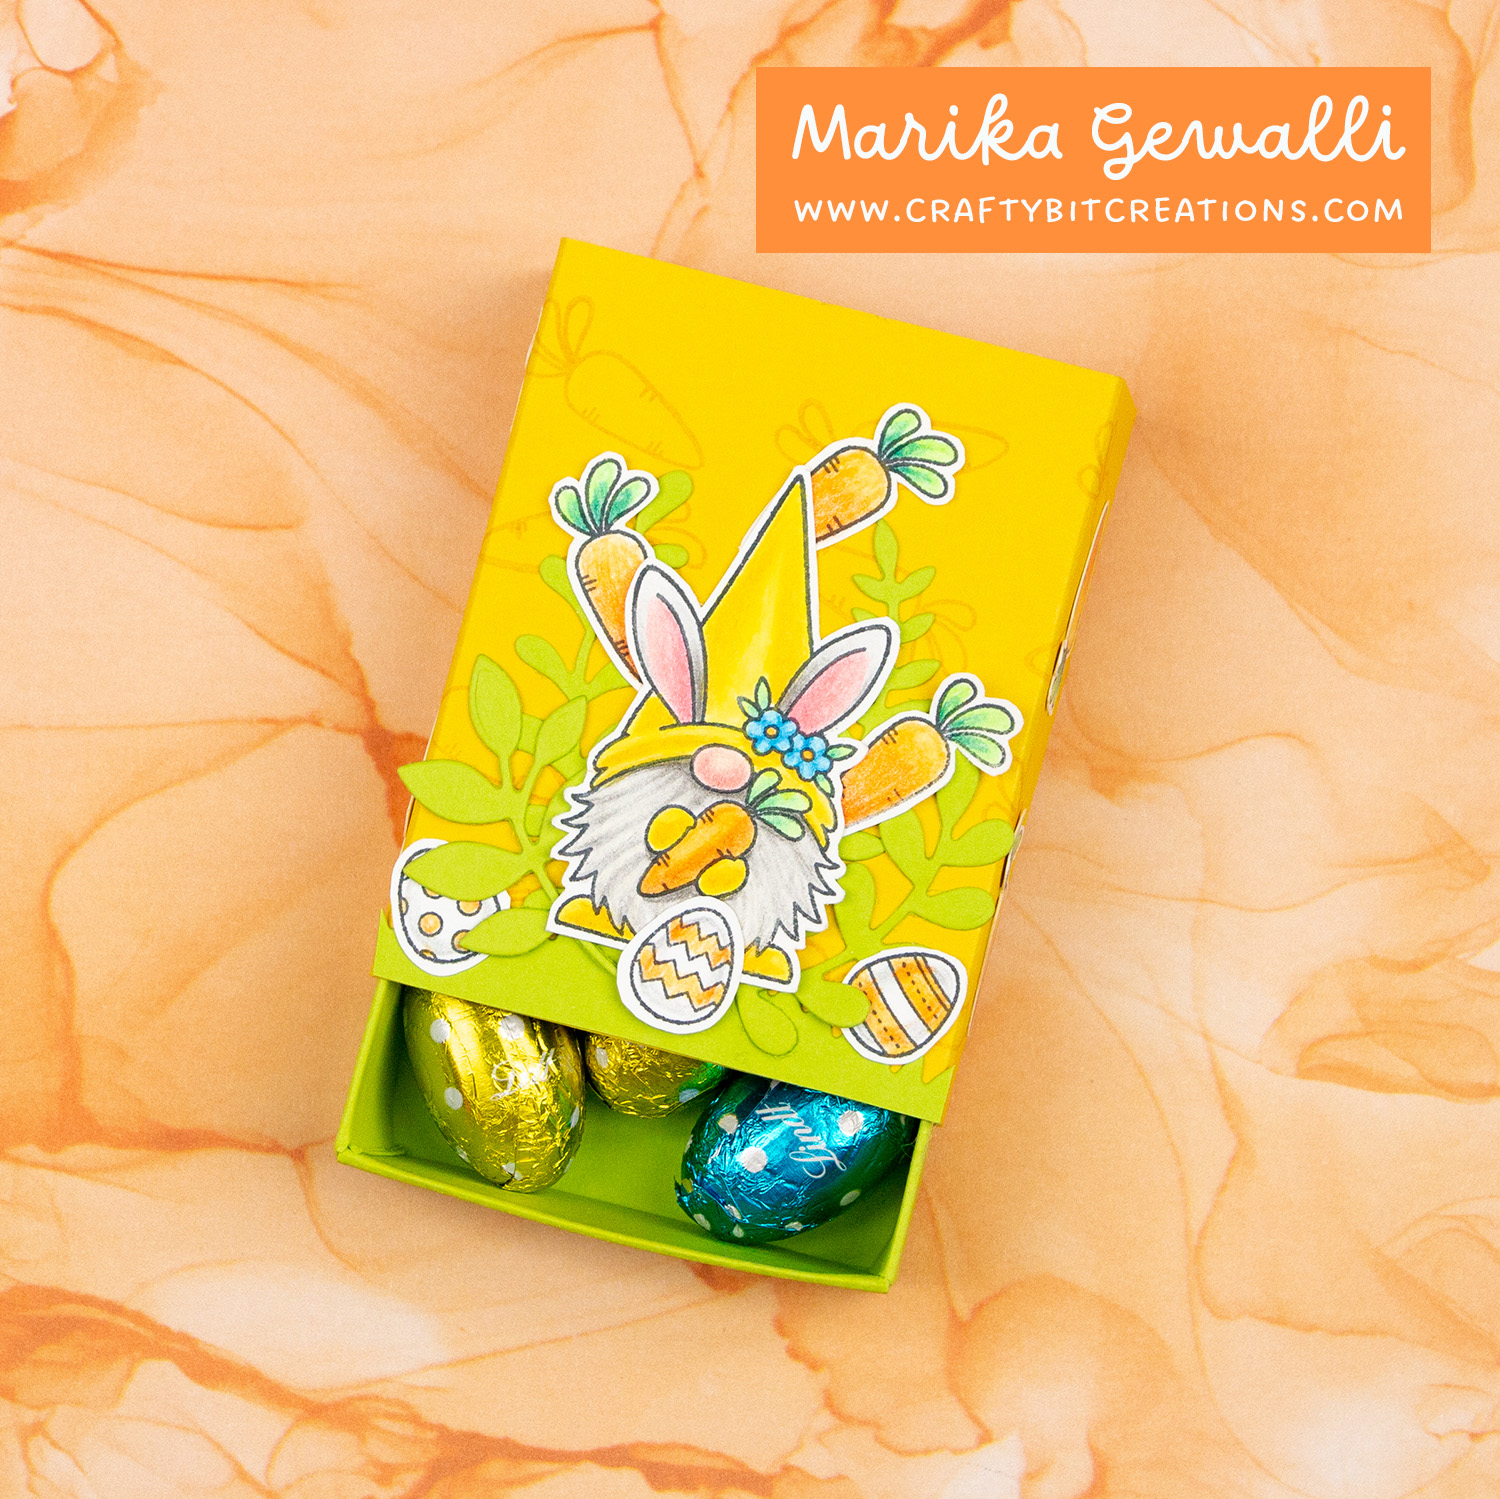
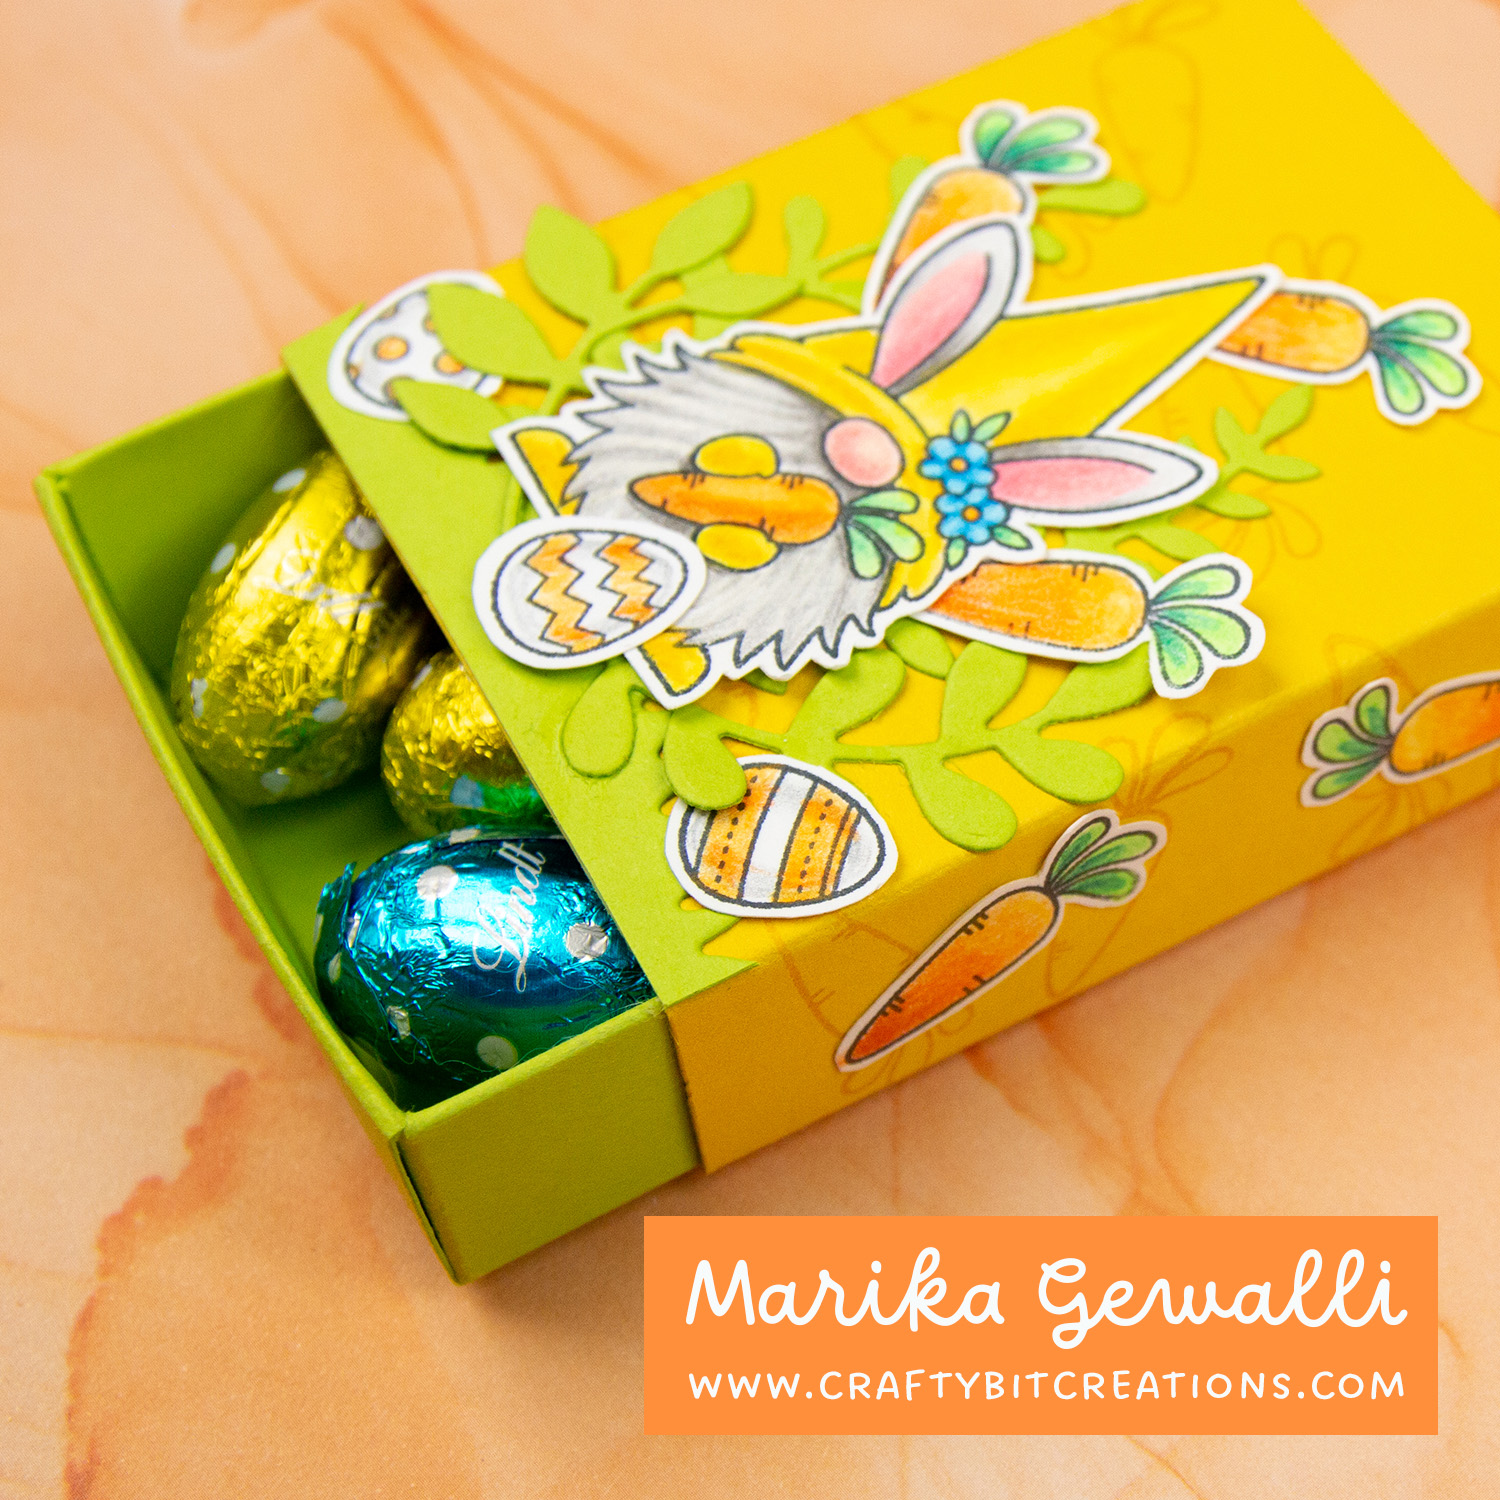
With easter coming closer and closer I thought I would show you how to make a mini easter matchbox. This matchbox is sized to fit 8 Lindth Chocolate Mini Eggs, and could be perfect for small table gifts on your easter lunch, or just to give as a little easter gift.

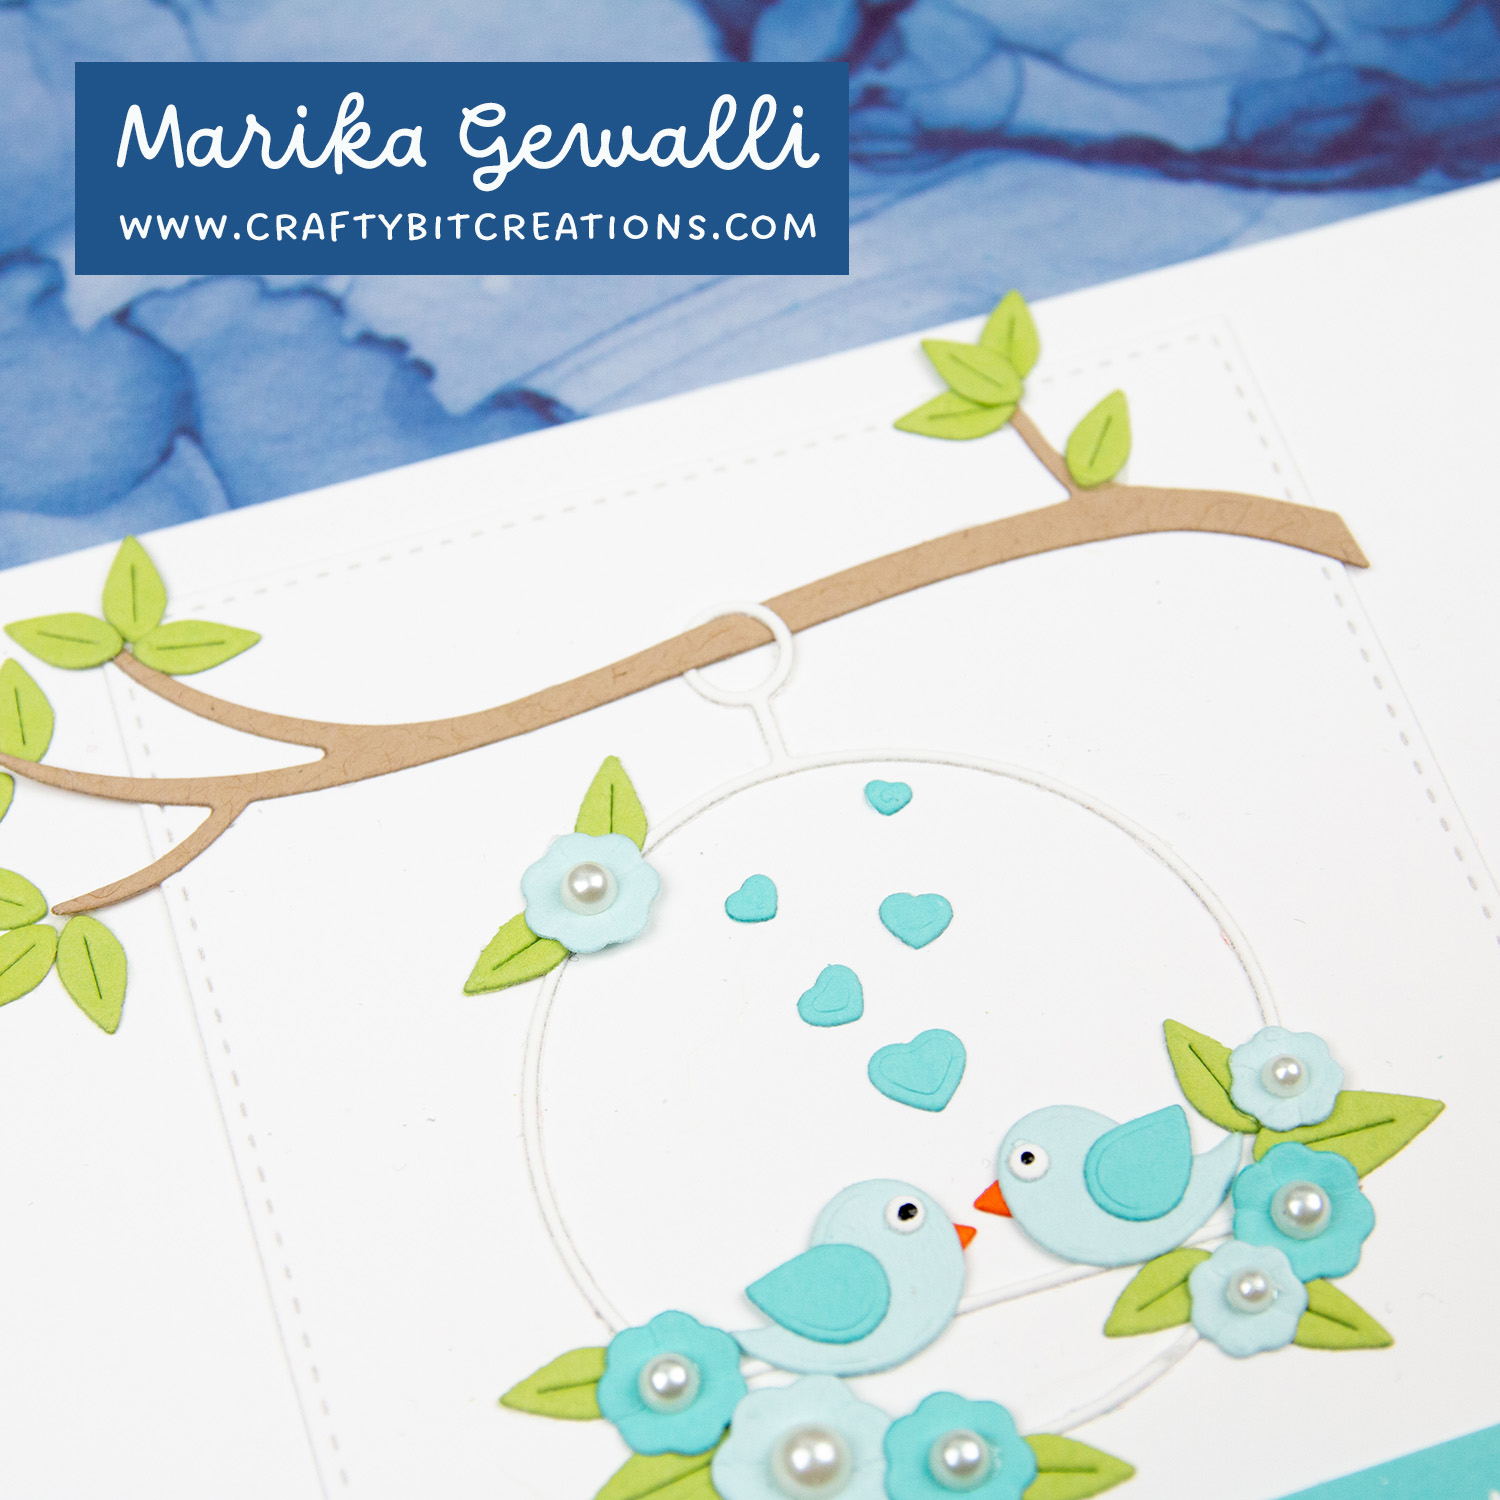
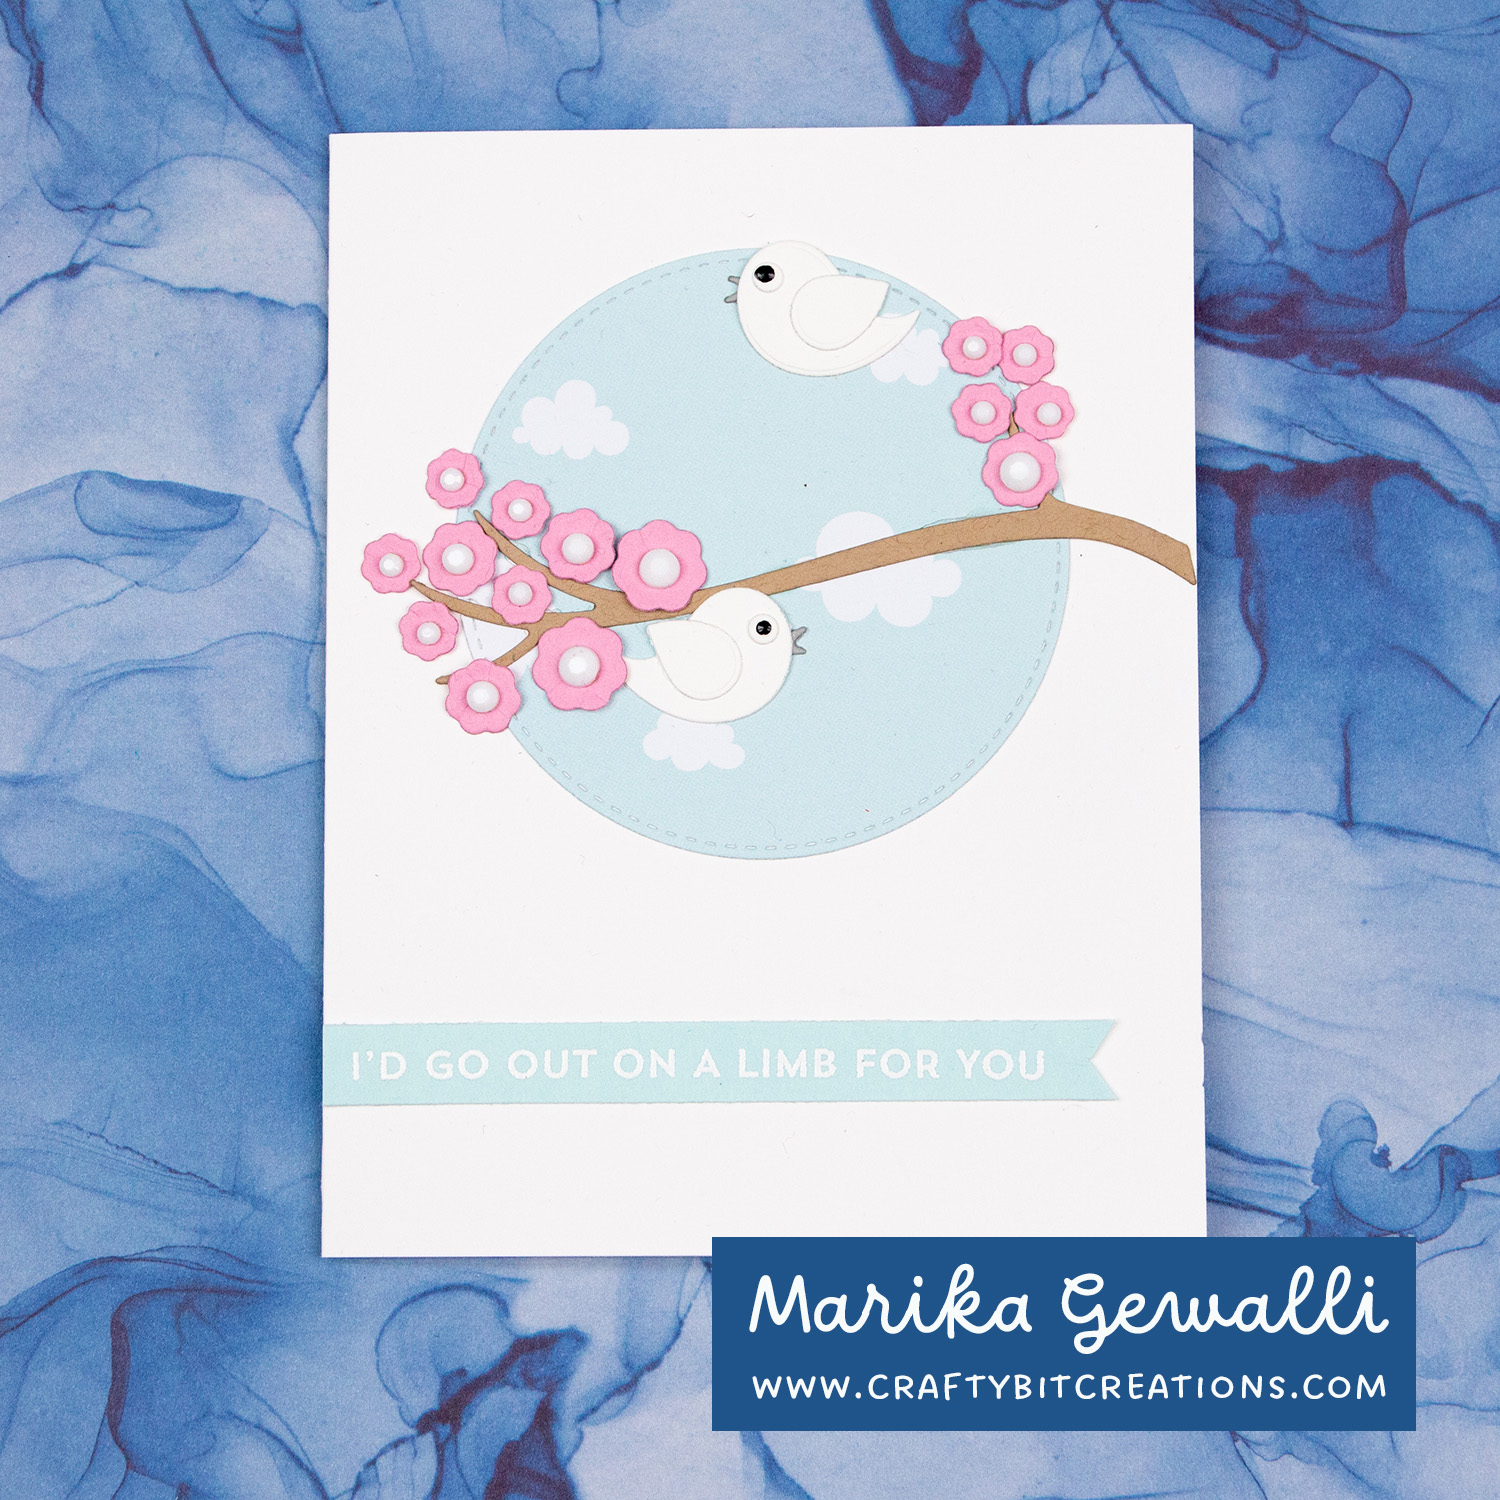
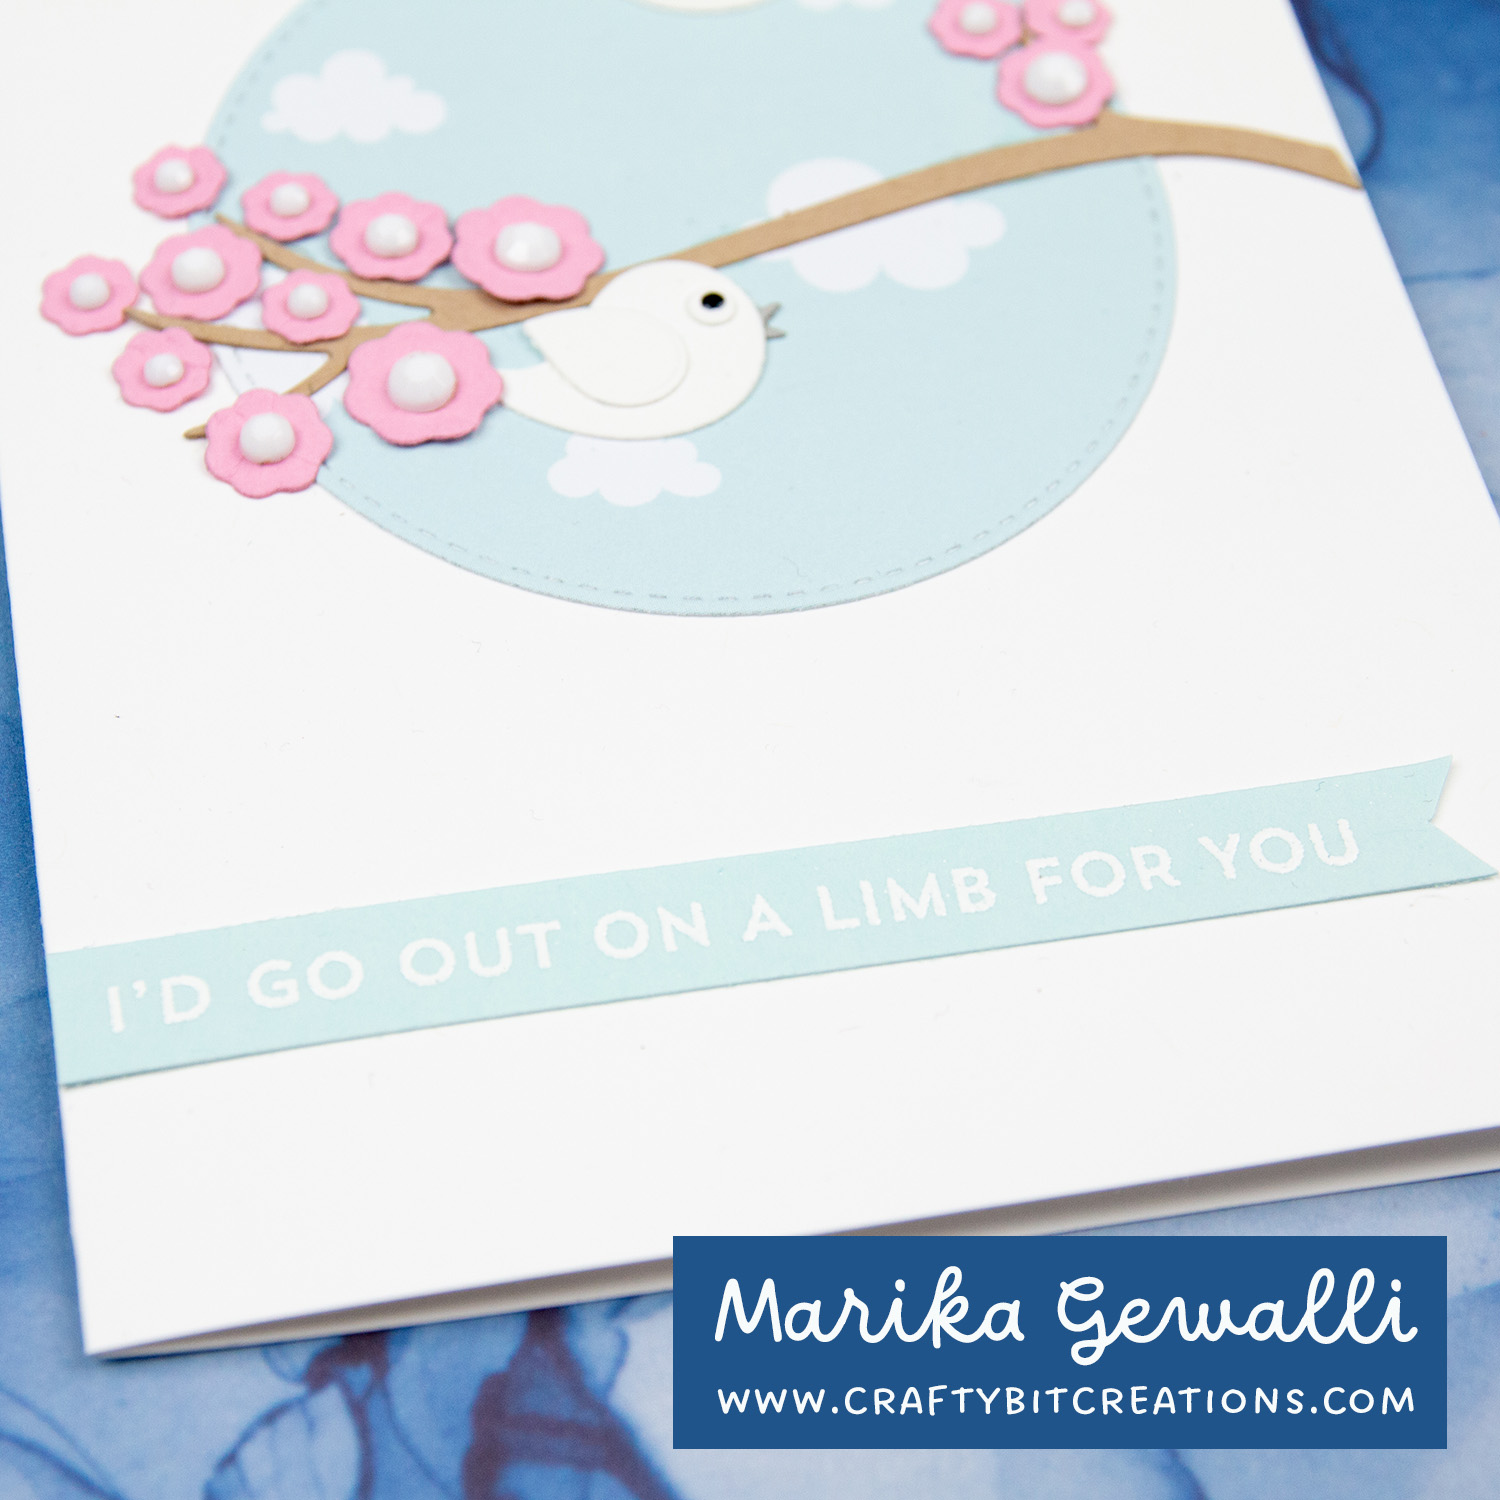
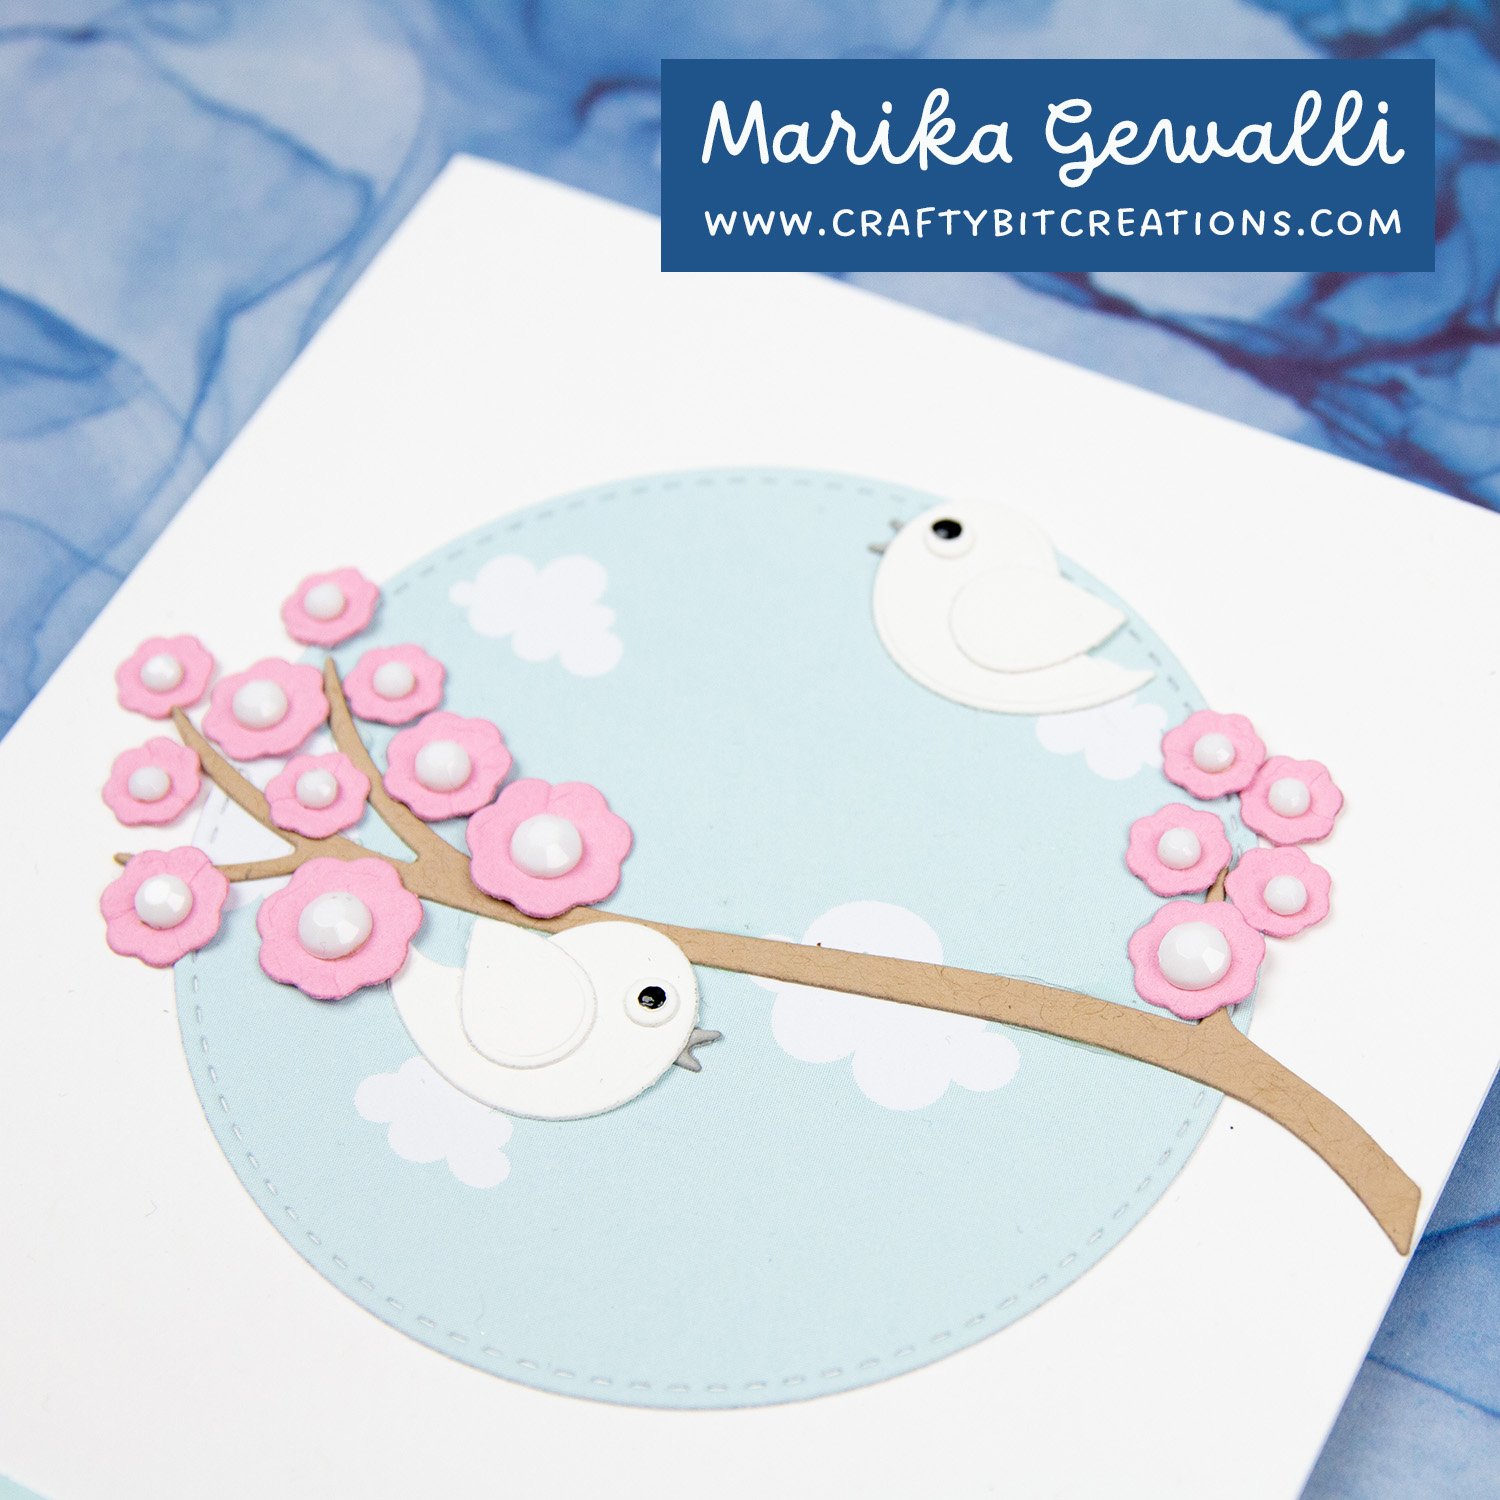
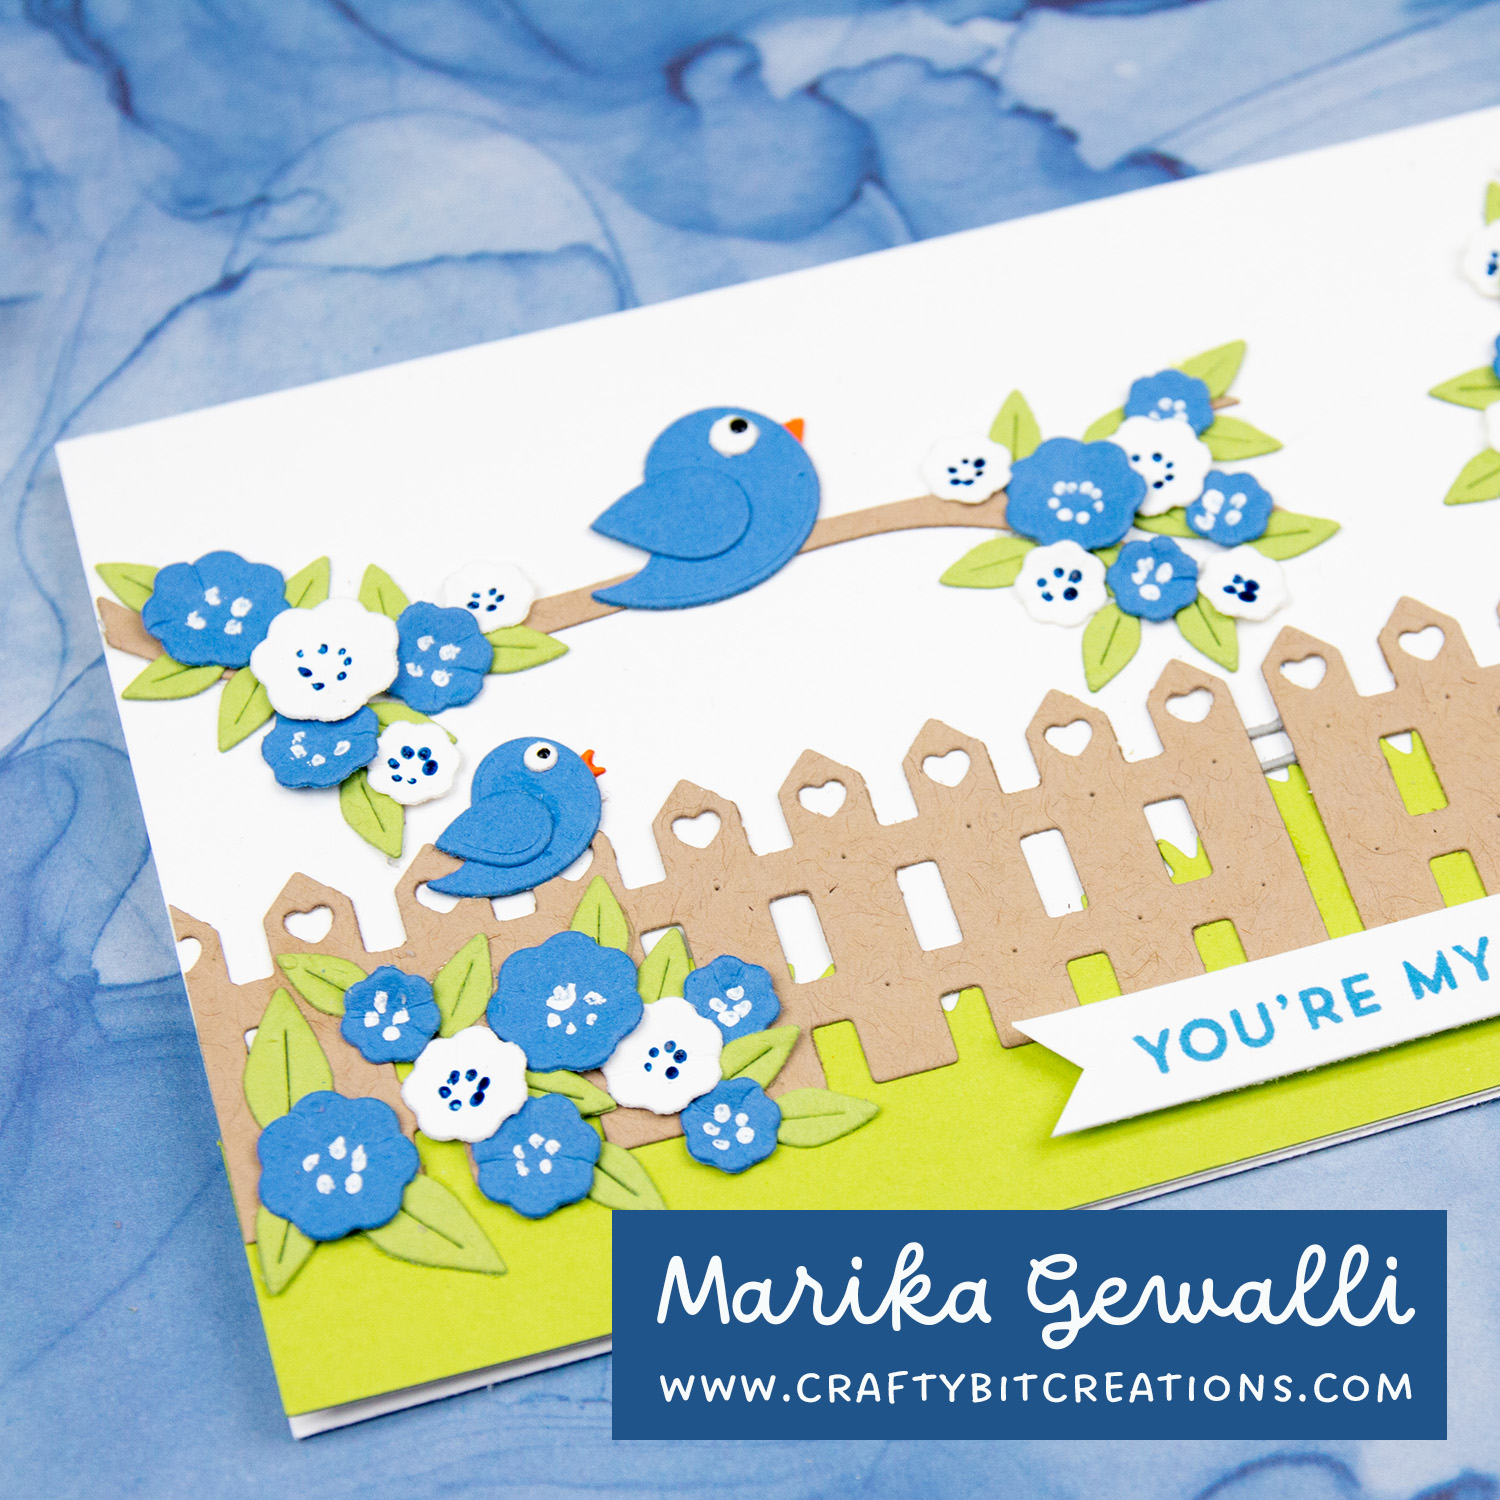
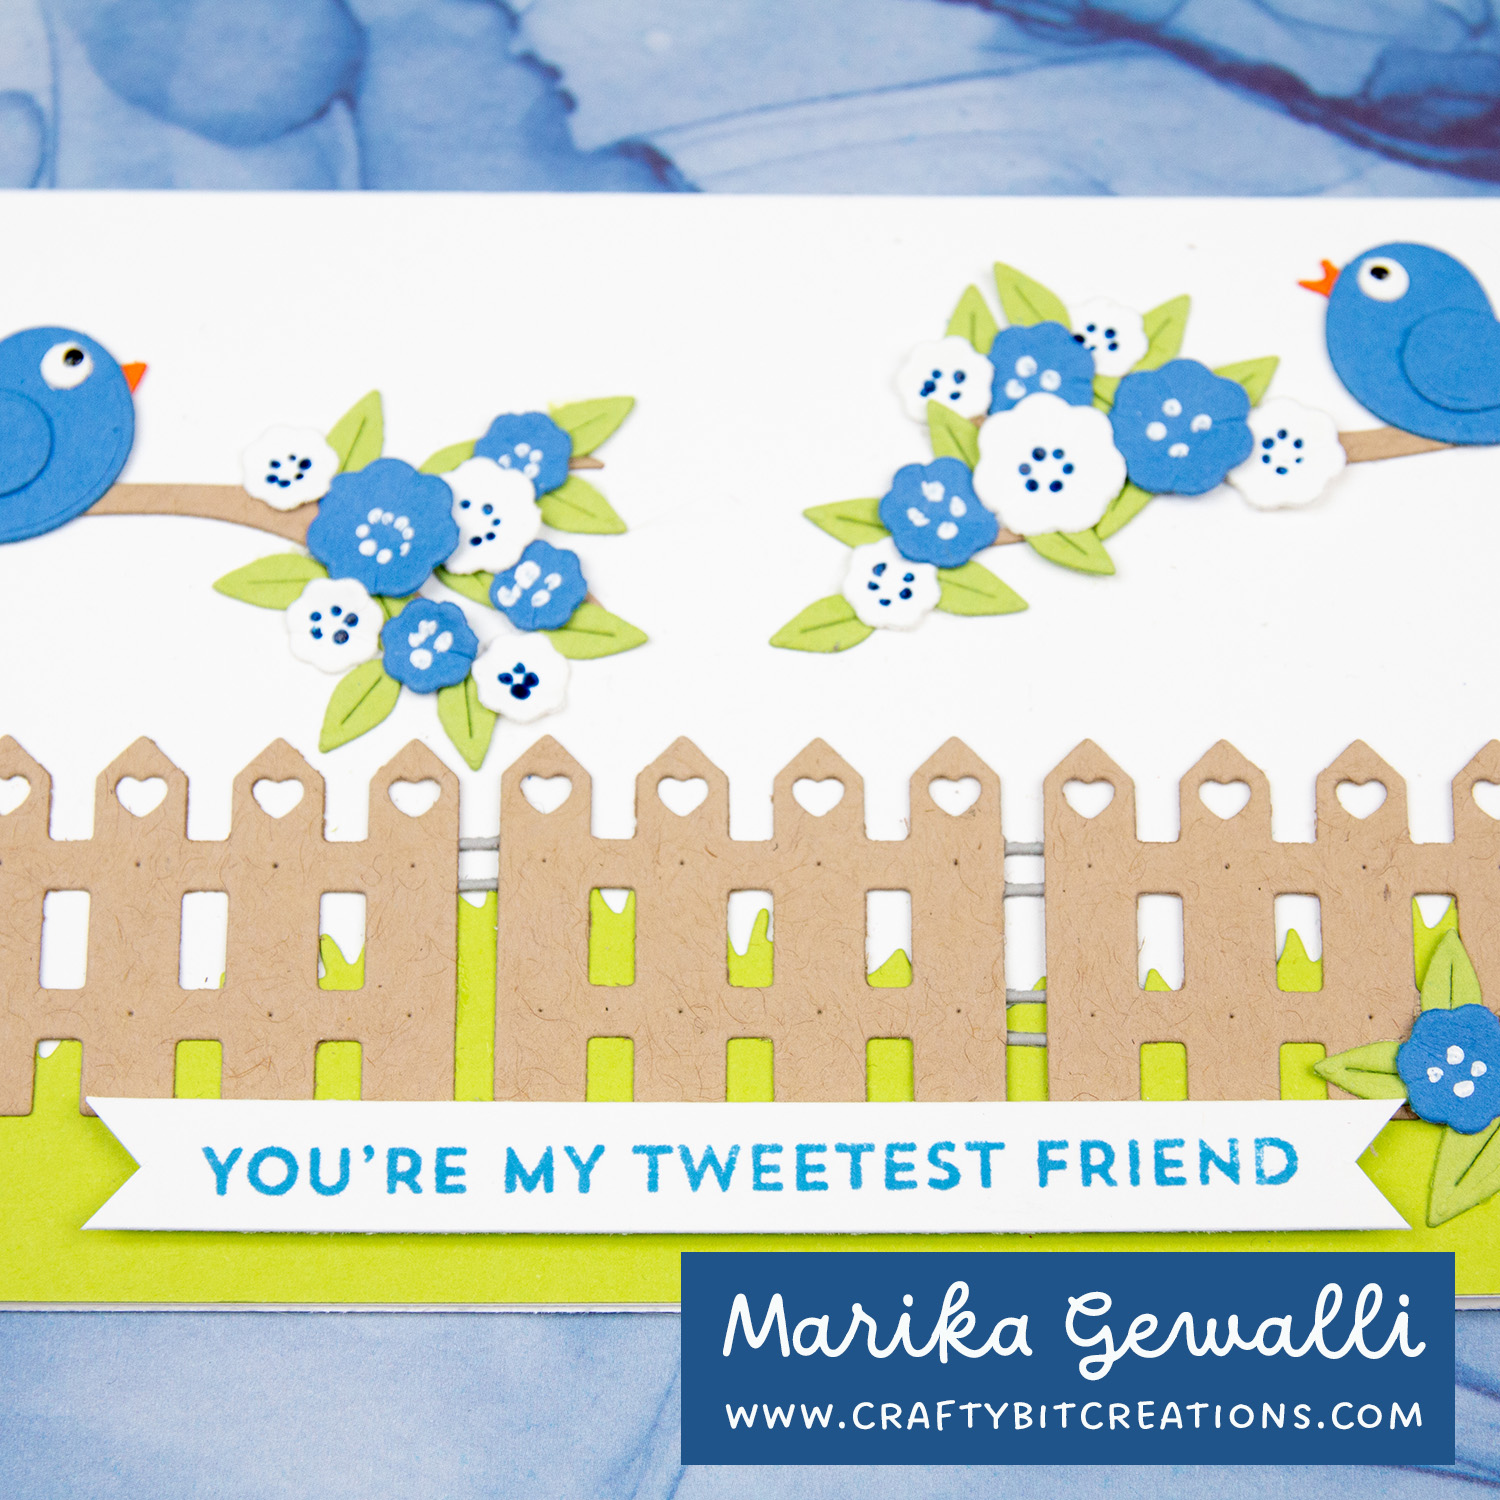
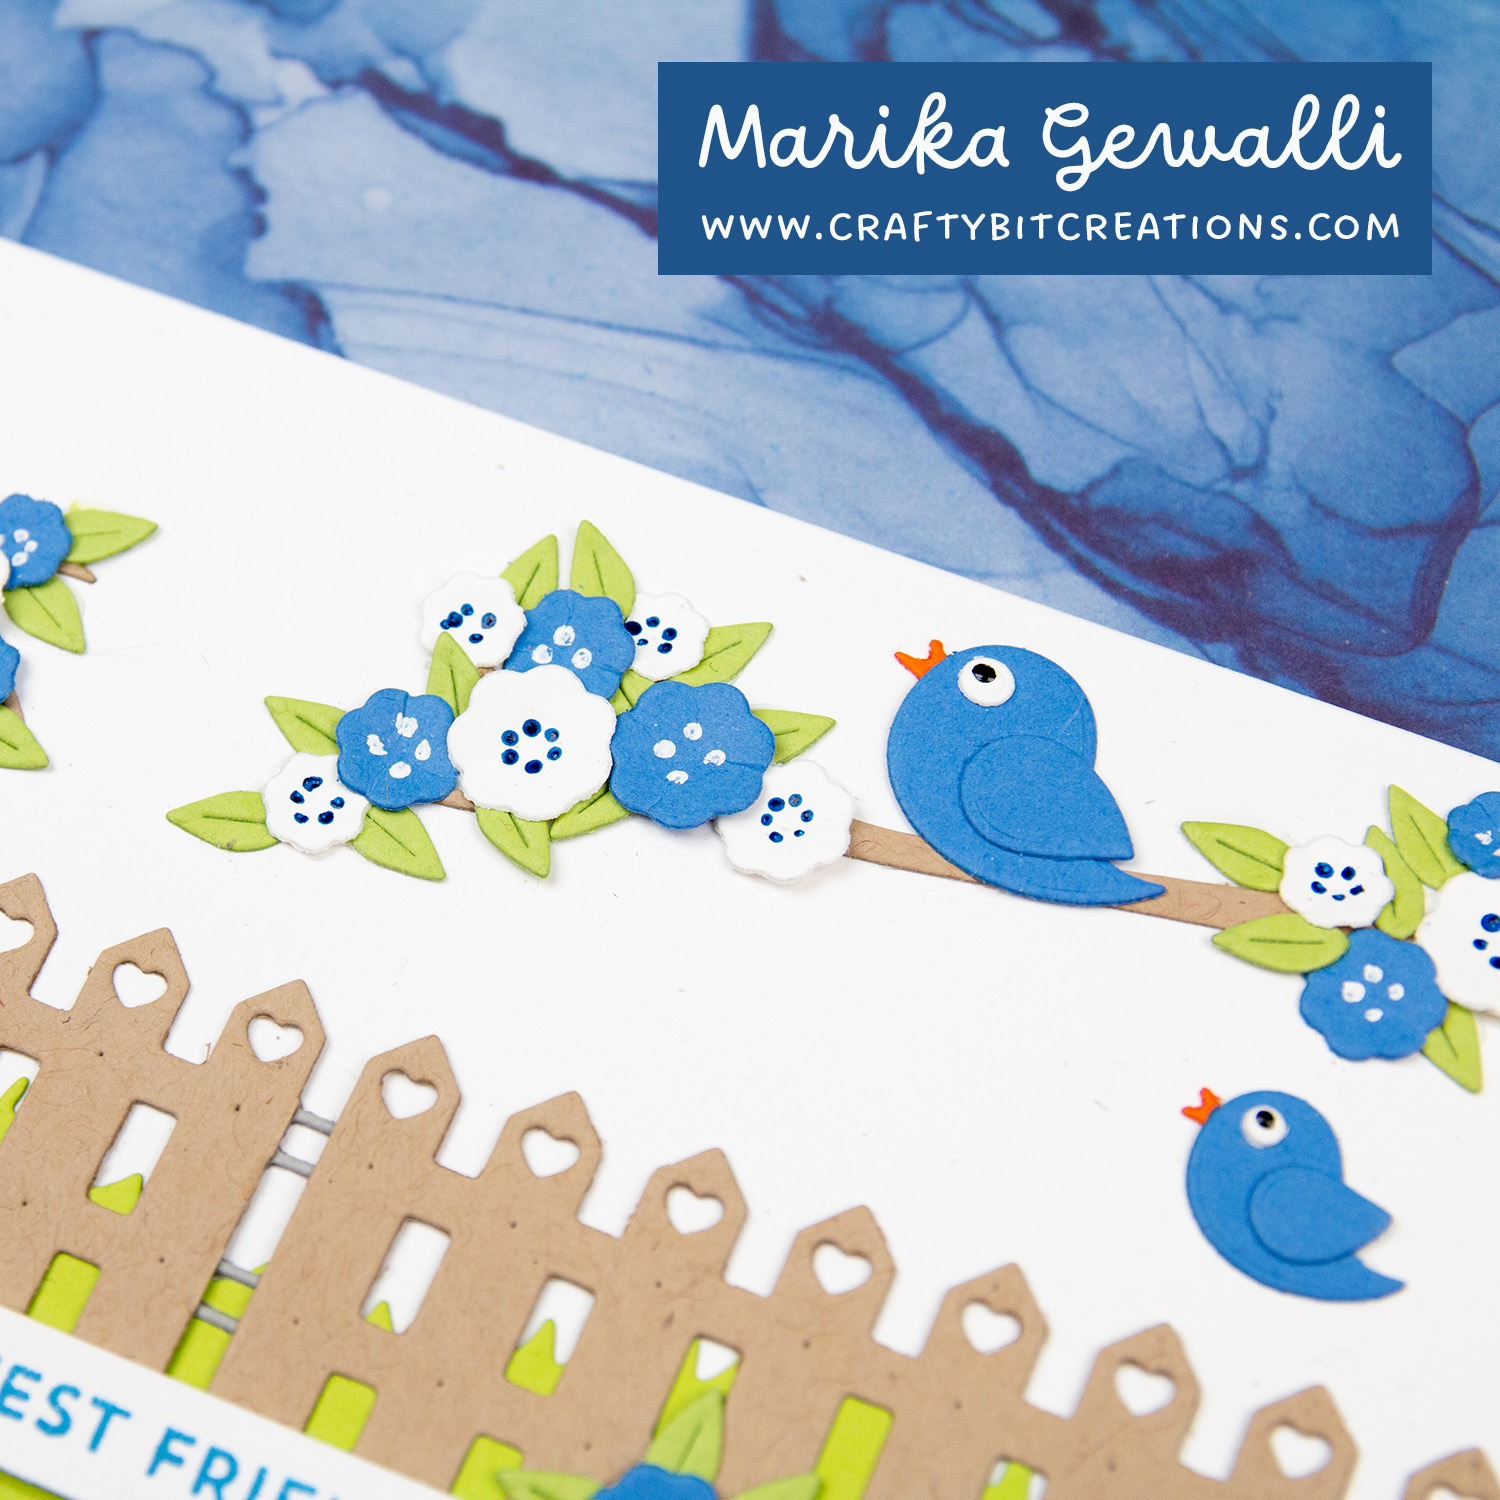
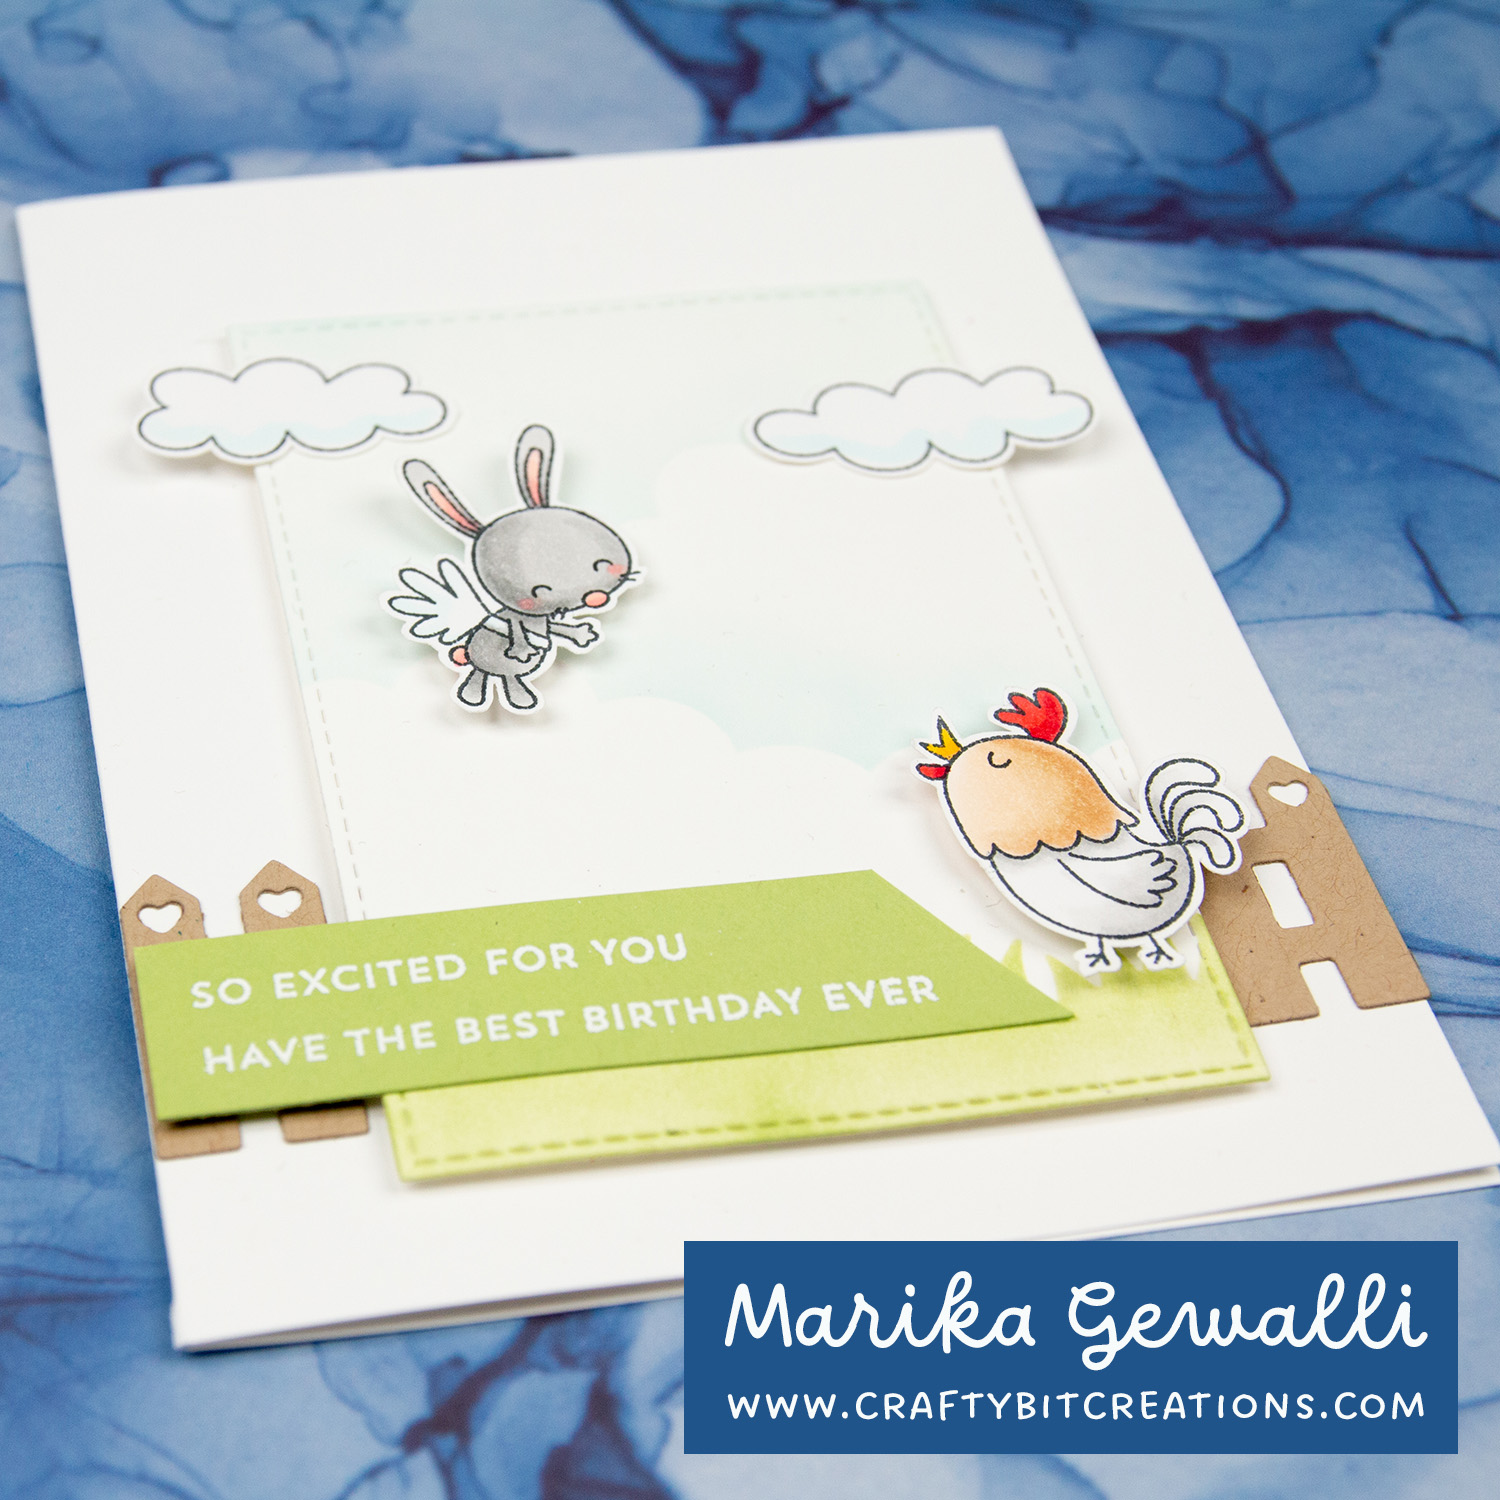
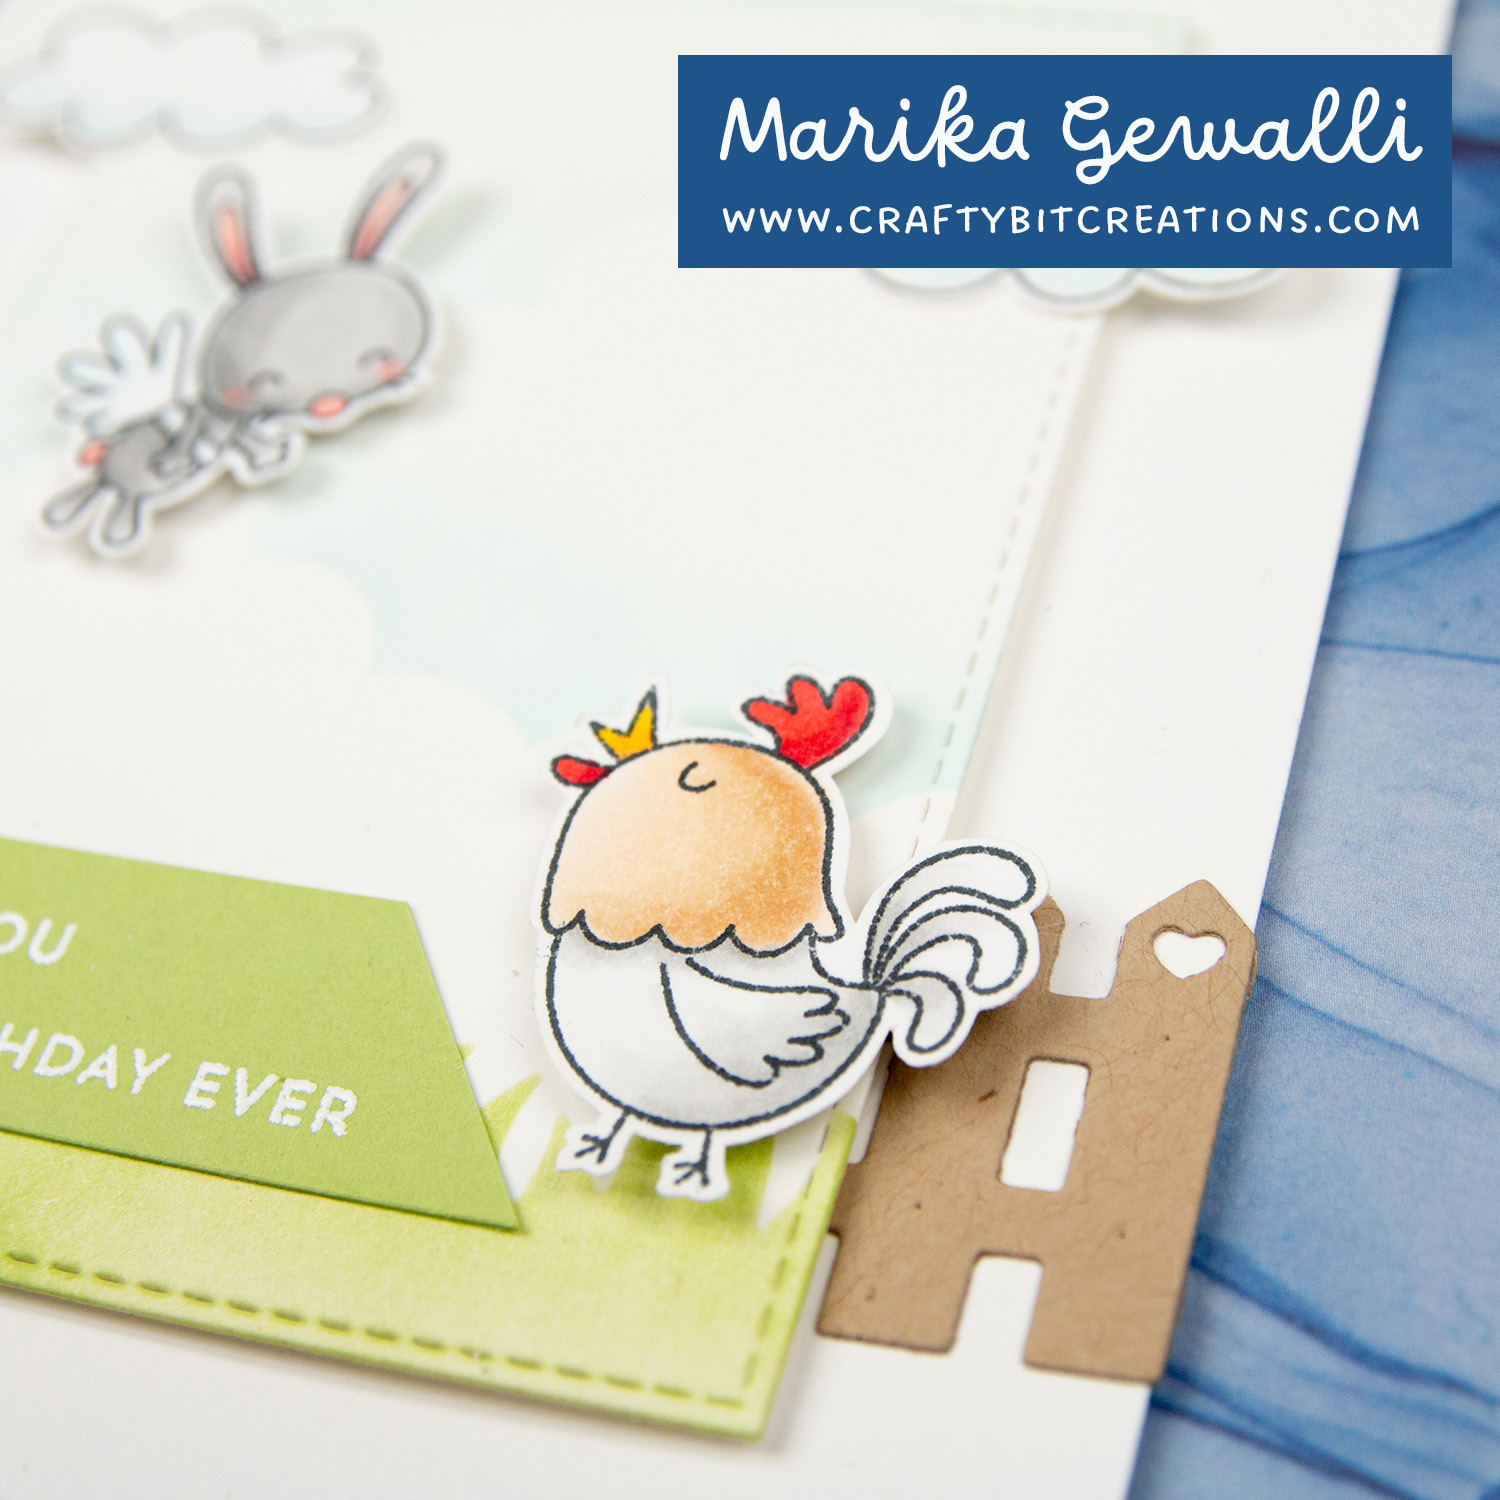
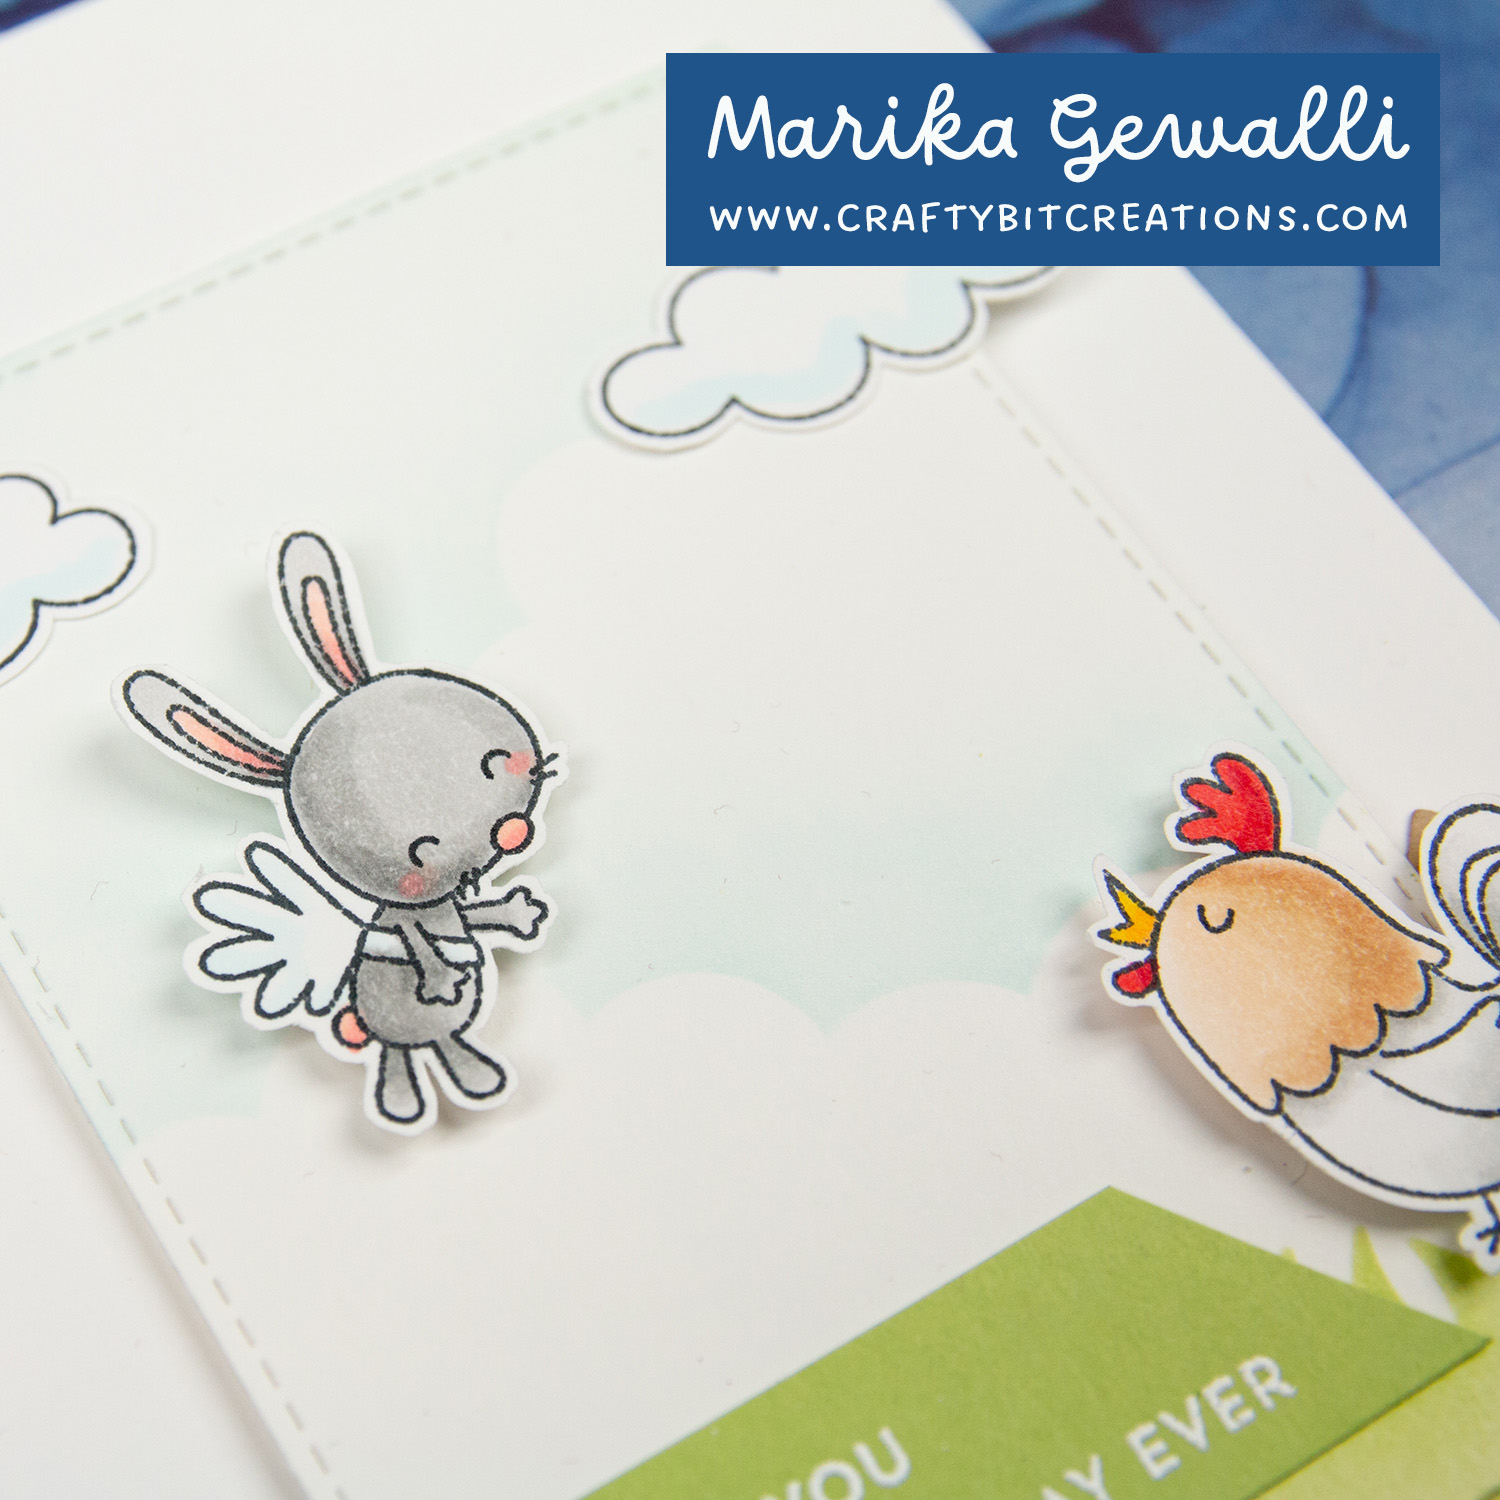
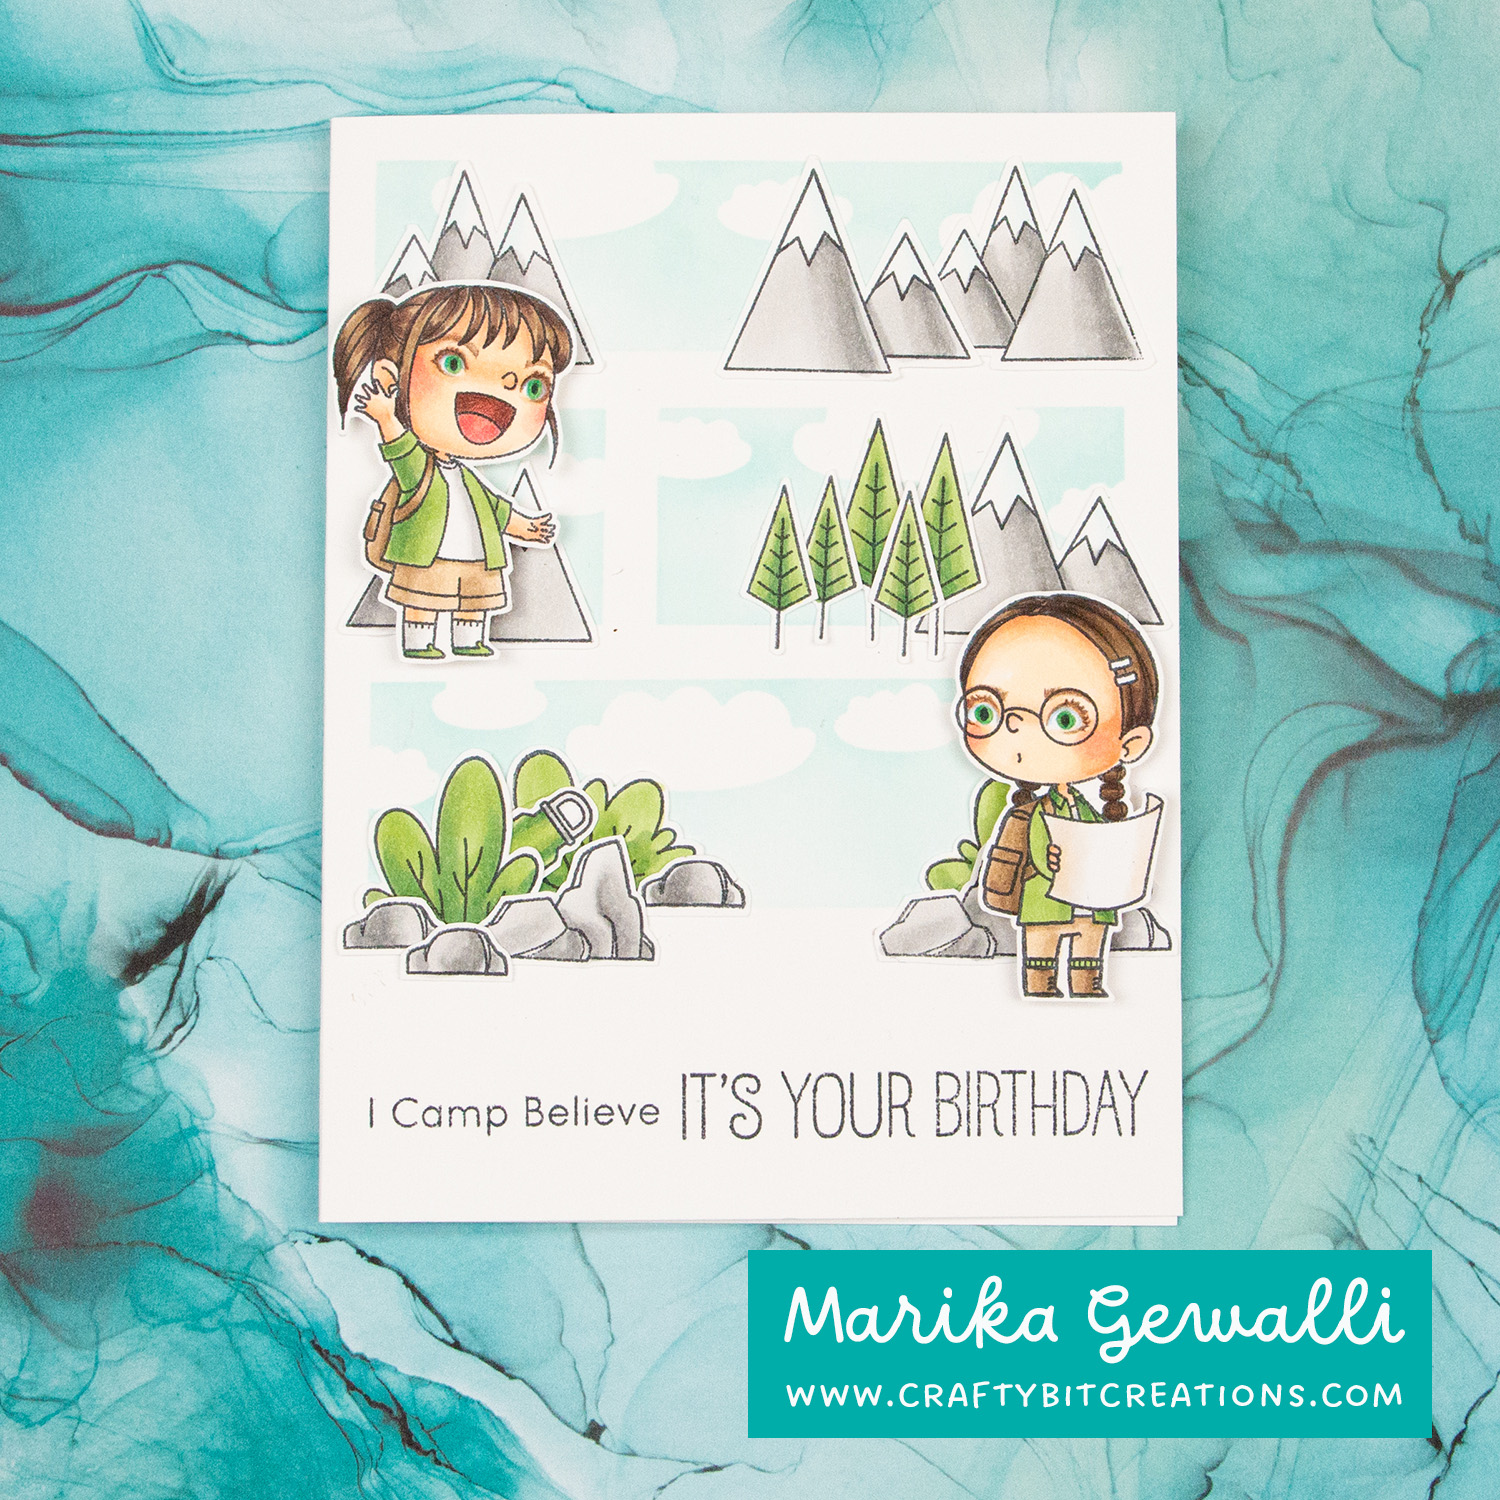
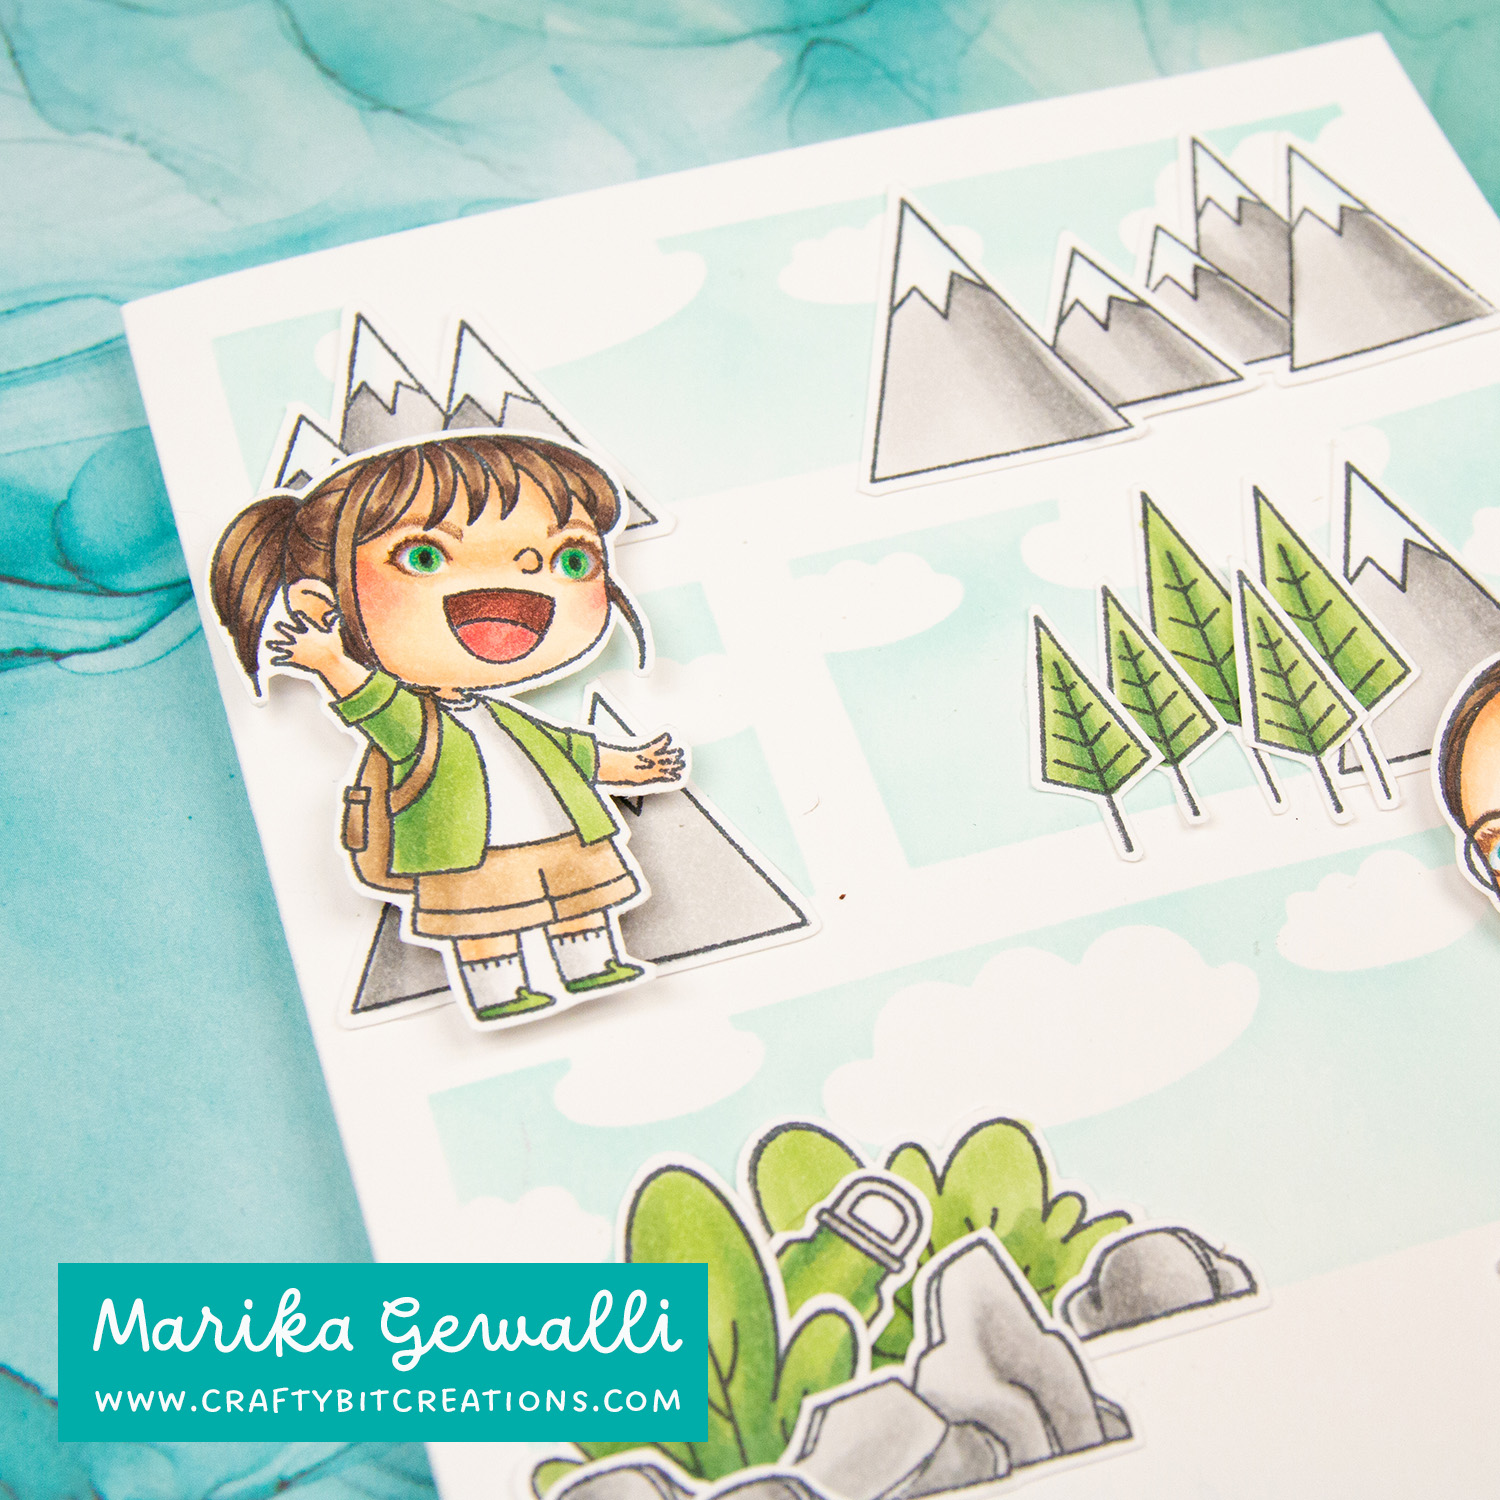
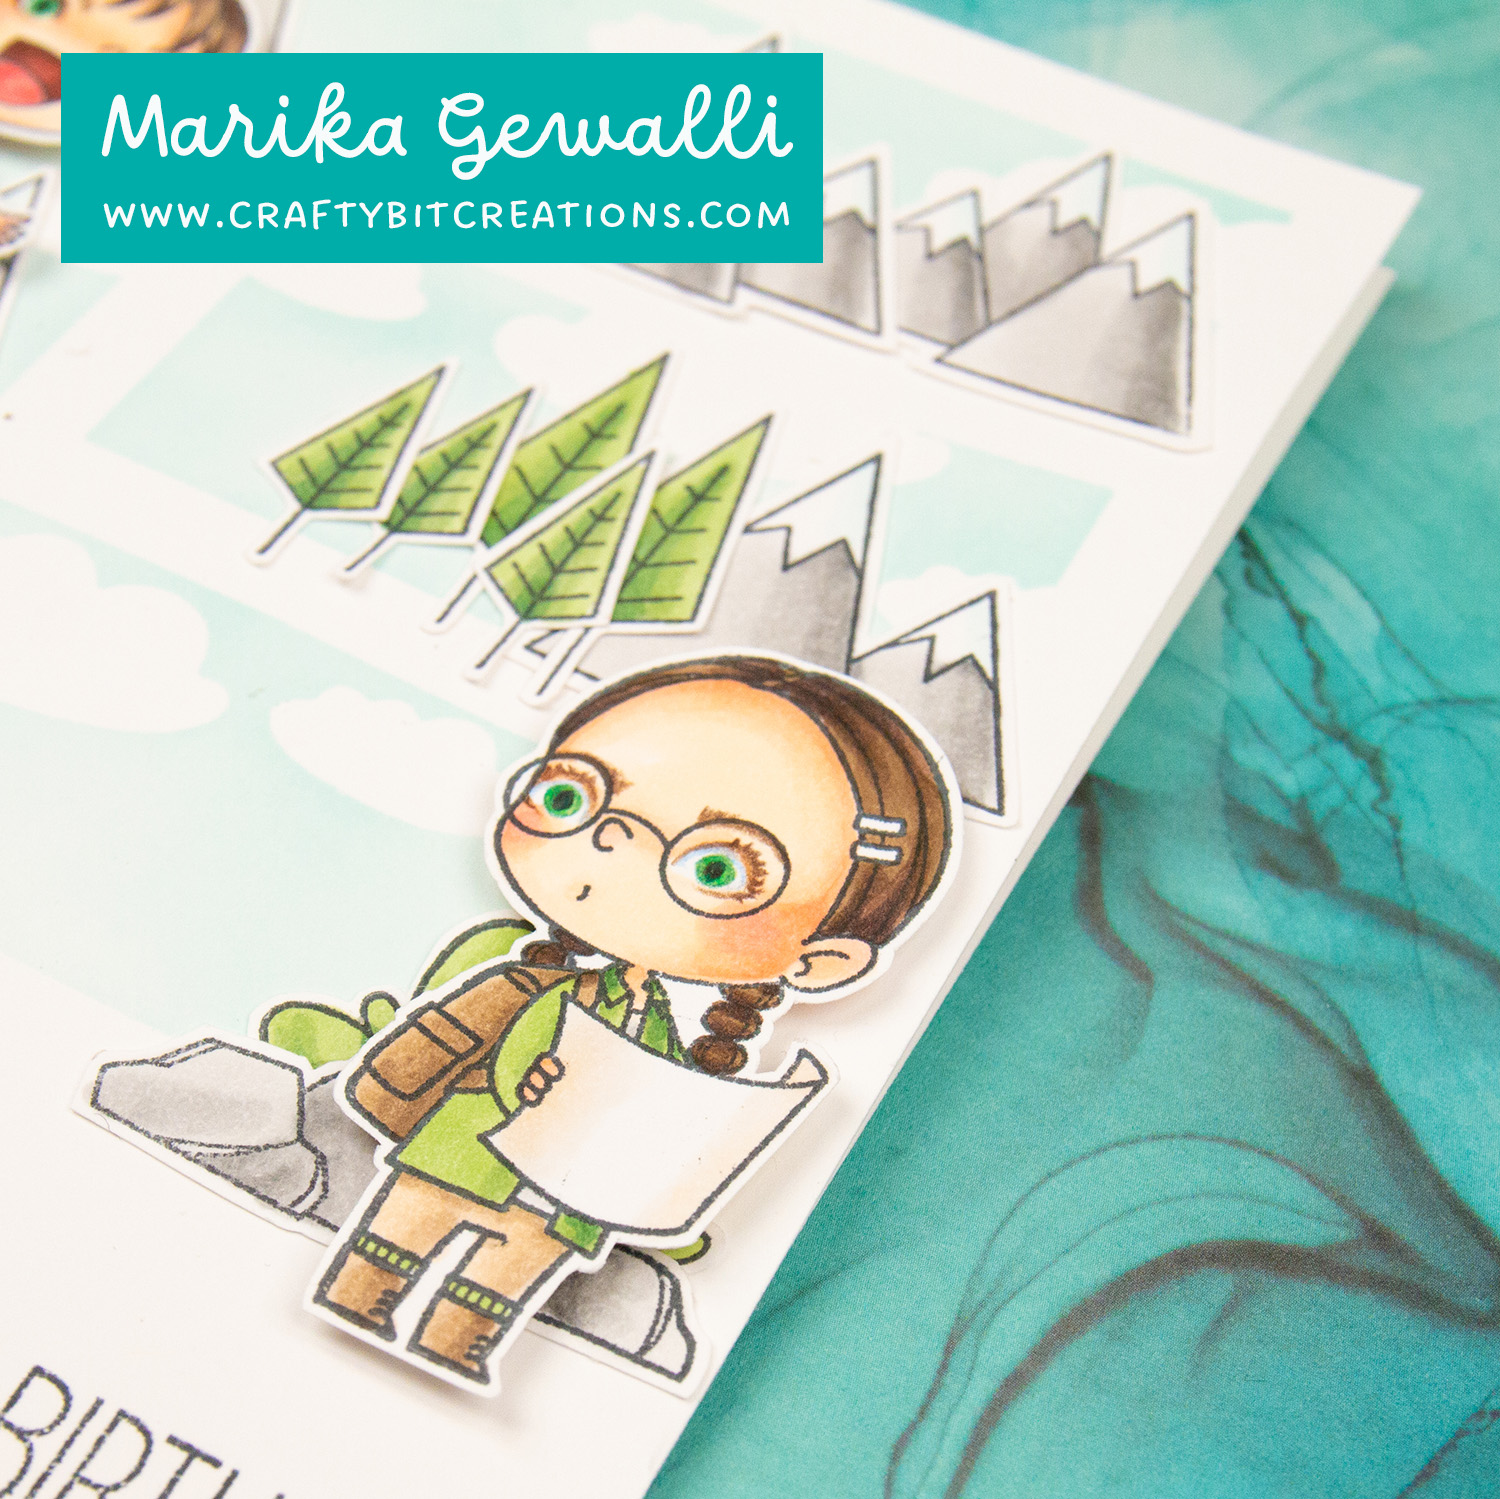
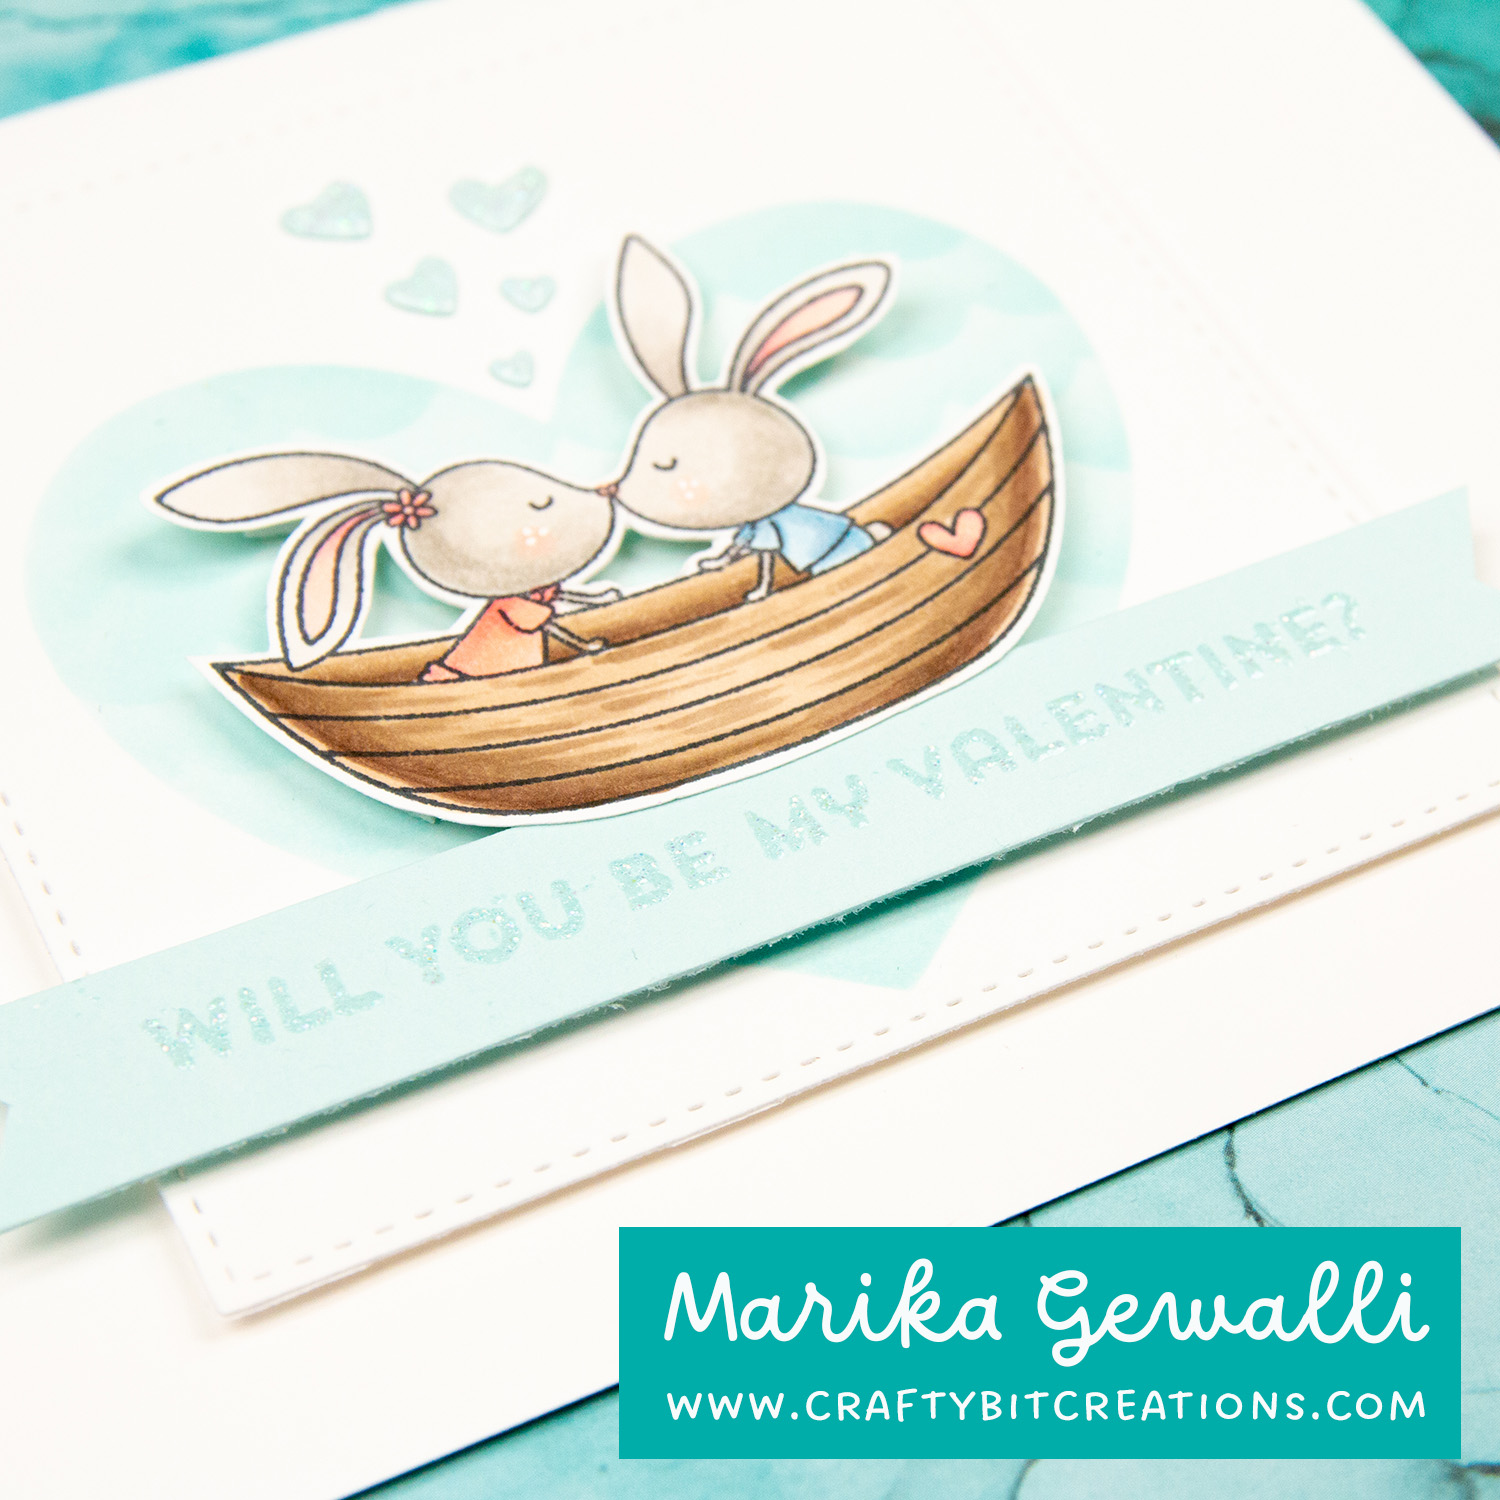
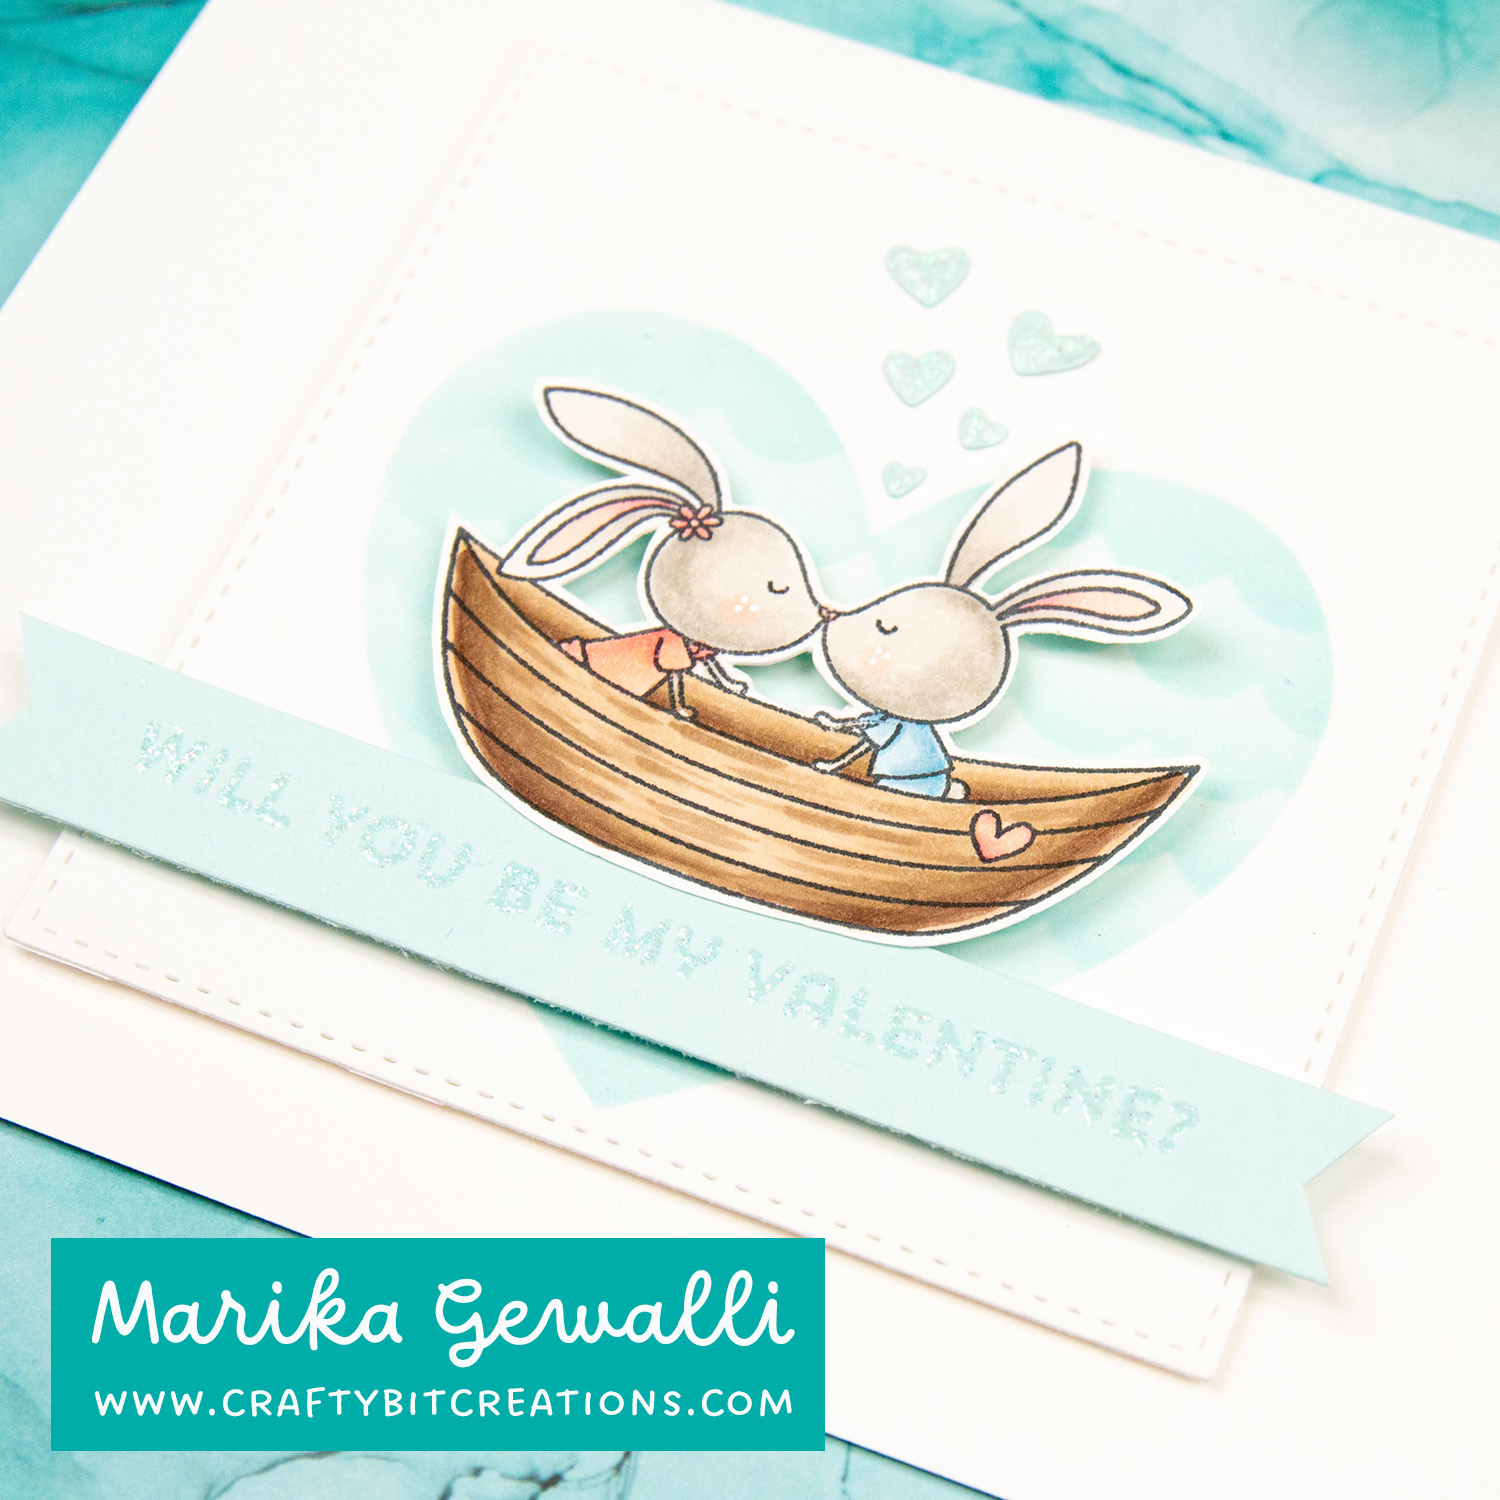
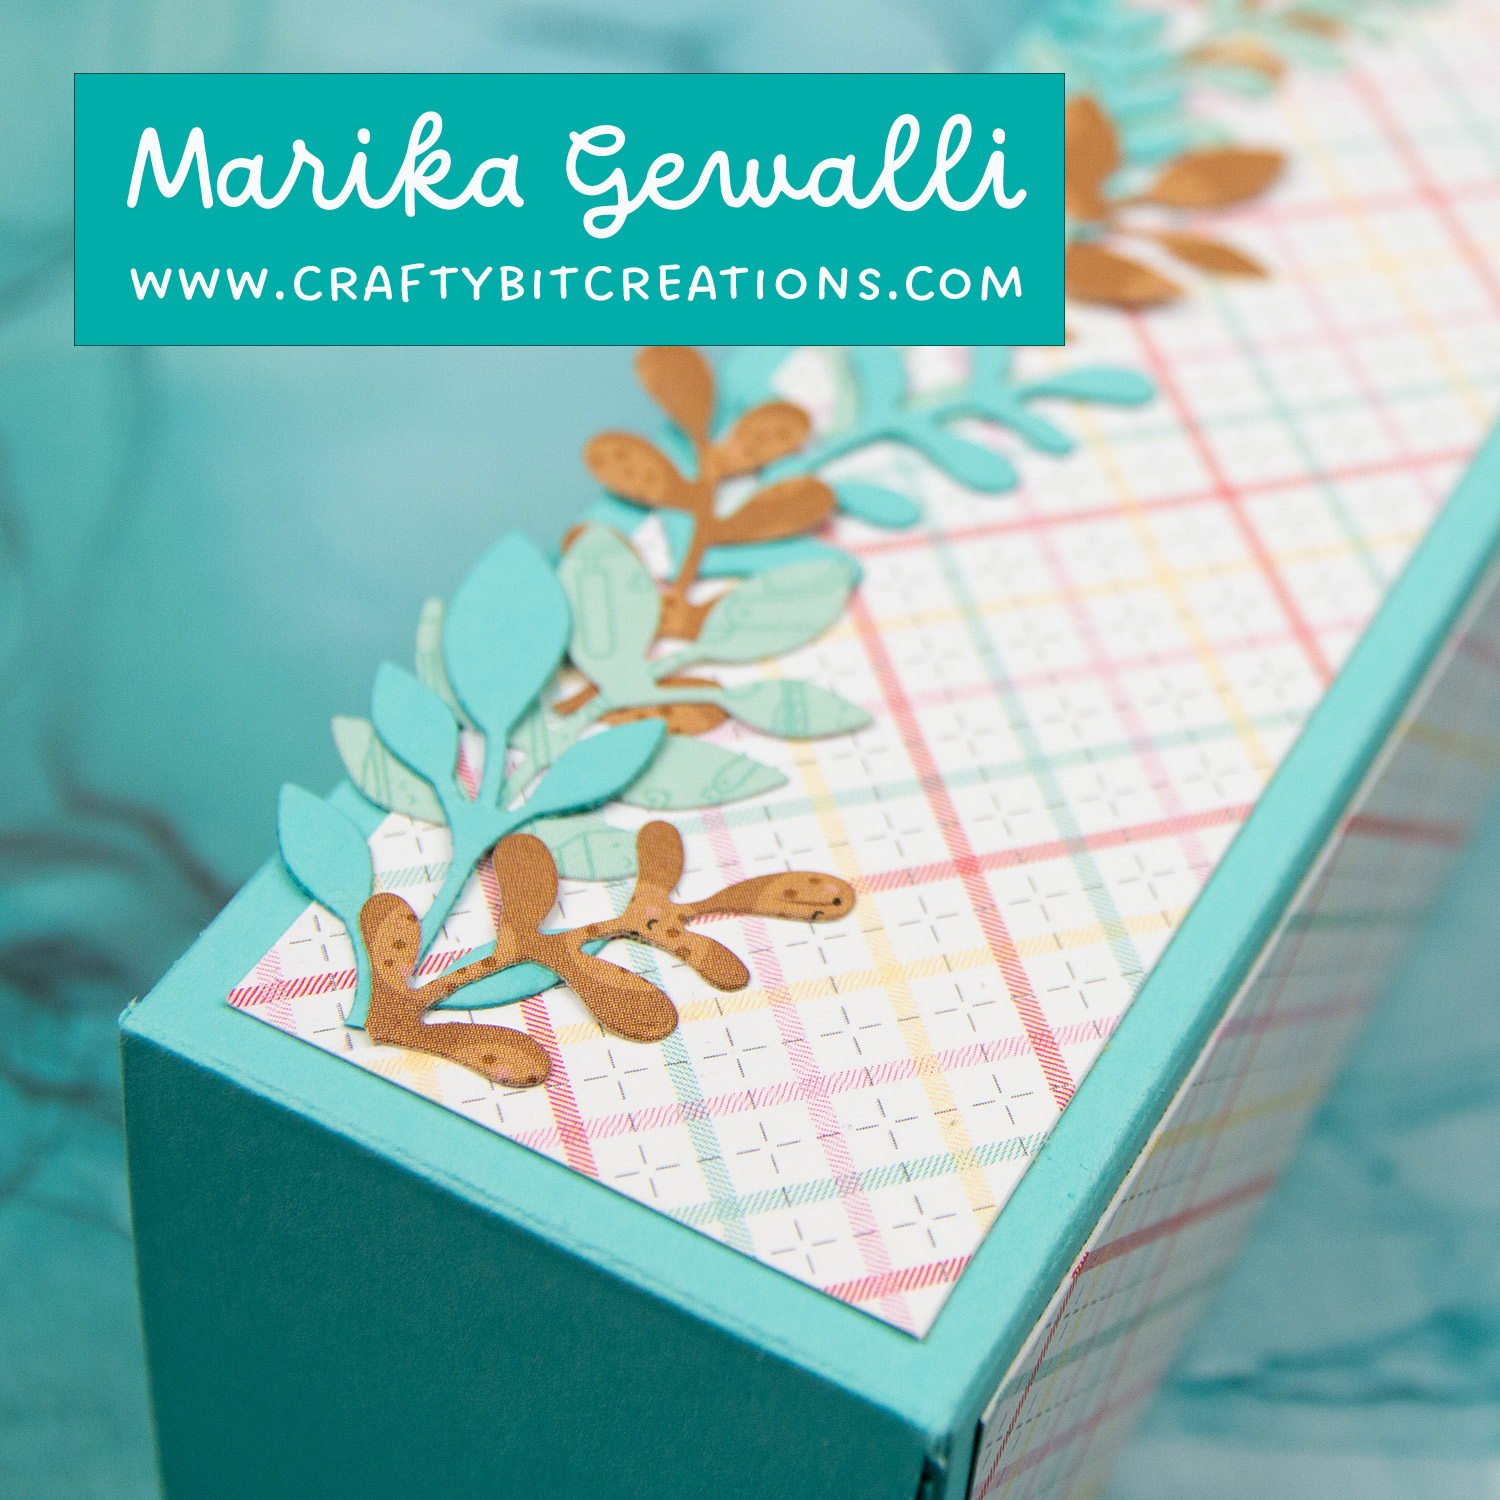
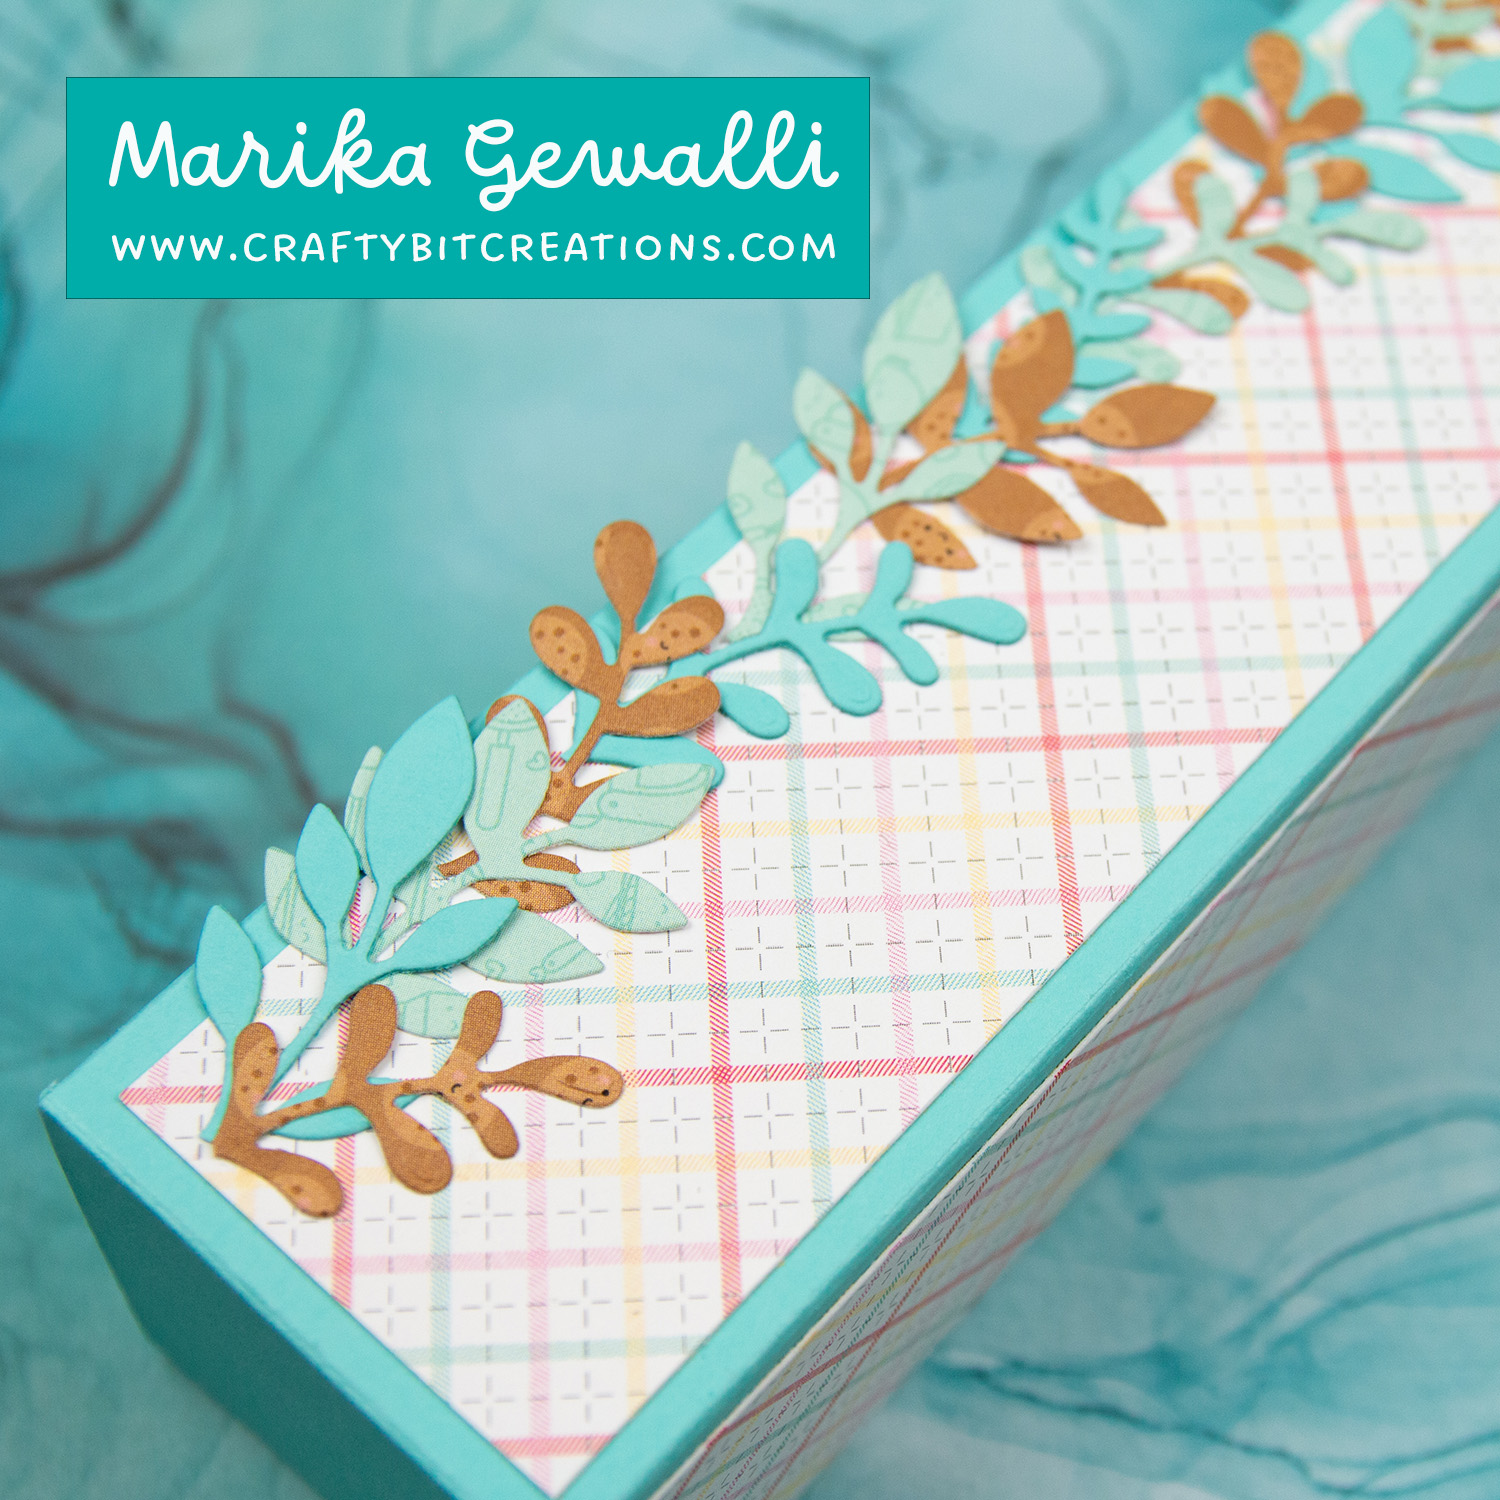
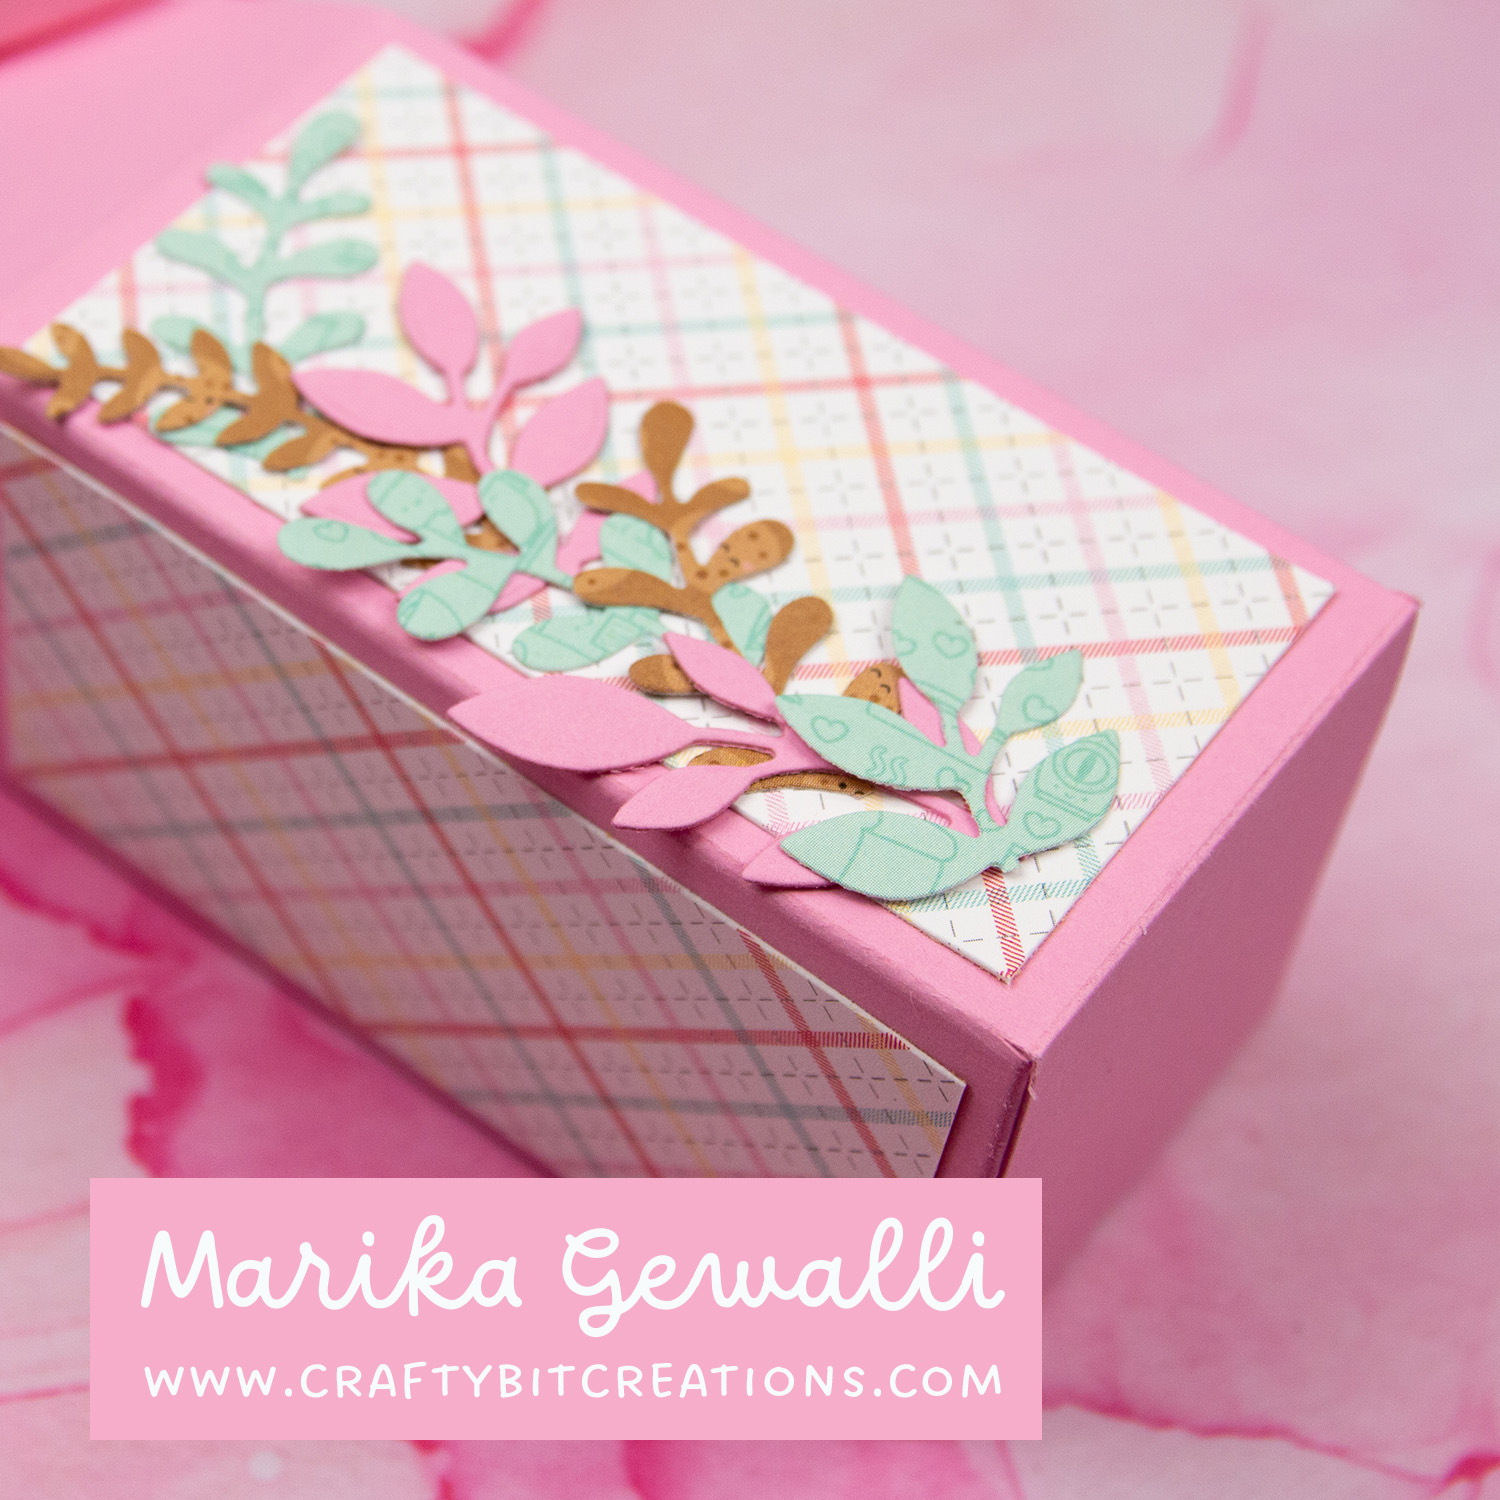
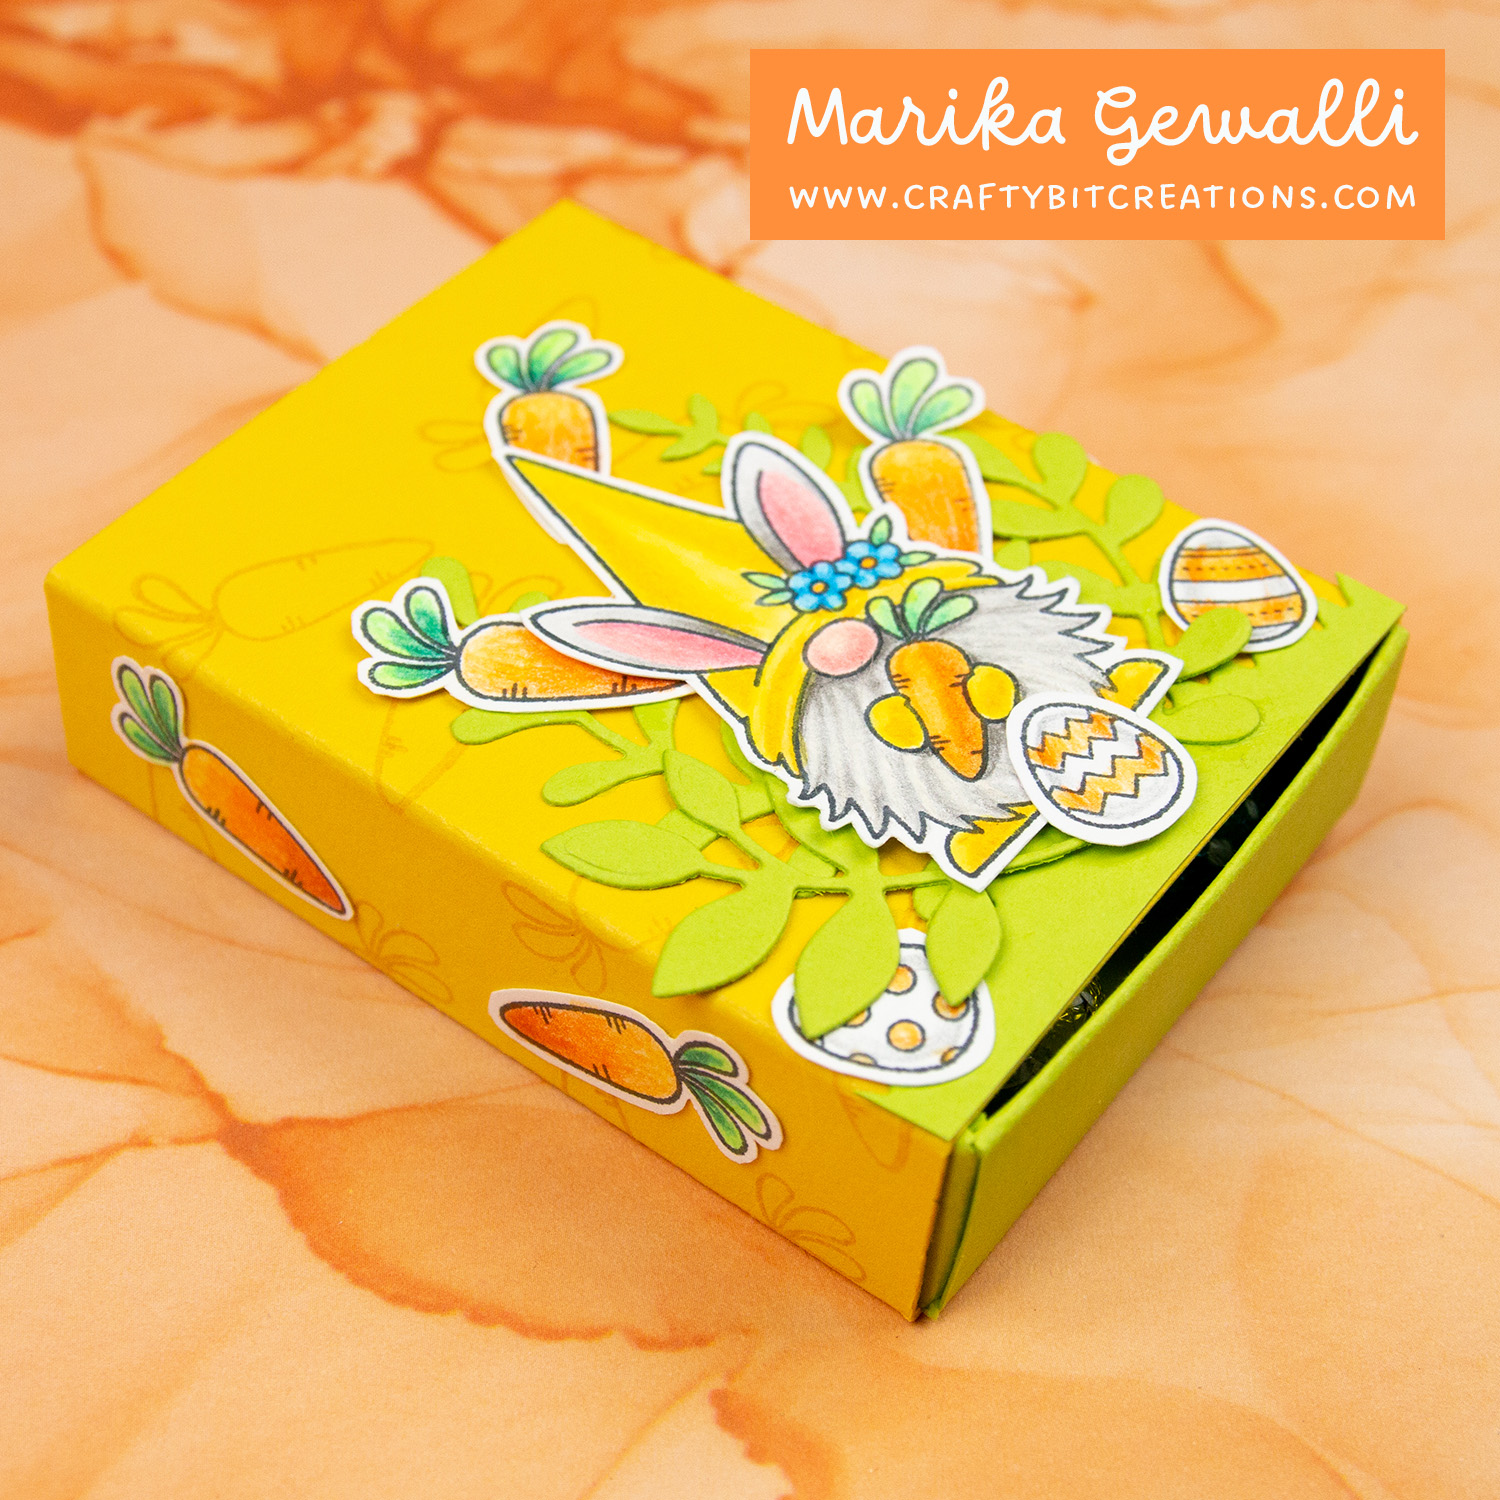
I started by coloring up a bunch of images from the Spring Gnome stamp set with my polychromos colored pencils. I think coloring is very soothing so I sat in front of the tv coloring away. I then cut the images out. For the box I use Lemon Drop Cardstock for the outer part and Limelight Cardstock for the drawer. To give the outside a little more interest I used the matching Lemon Drop Ink and stamped the cute little carrot all over it. After putting the box together I decorated it with my colored images and some diecuts from the Fab Foliage Die-namics.

You can find the templates, cutfiles and pdf for this box HERE.

Polychromos Colored Pencils

Cold Grey I, II, III, IV, VI, Light Flesh, Dark Flesh, Sanguine, Light Phtalo Blue, Light Green, Cobalt Blue-Greenish, Cinnamon, Light Chrome Yellow, Black, Terracotta, Light Yellow Ochre, Rose Carmine, Dark Chrome Yellow, Hookers Green, Ivory, Orange Glaze

When possible affiliate links are used, this means that I receive a small commission when products are purchased through the links (at no extra cost to you) I use the money to support my blog and youtube channel. If you like my projects and tutorial please consider supporting me by clicking through these links when you shop. Thanks!

Supplies

MFT Spring Gnomes: MFT SSS
Polychromos Colored Pencils: SSS AMZ
MFT Lemon Drop Card Stock: MFT
MFT Lemon Drop Premium Dye Ink Pad: MFT SSS
MFT Limelight Card Stock: MFT
MFT Fab Foliage Die-namics: MFT SSS
Mini Score Board: SSS AMZ SBC
Fiskars Trimmer : SSS AMZ
Cutter Bee Scissors: SSS AMZ SBC
MFT On-Point Precision Glue Pen: MFT
Sookwang Tape 1/4”: SSS AMZ
Hammermill 80lbs: SSS AMZ
feature image
Uncategorized

Mini Triangle Box Tutorial | You Deserve This

I love cute little boxes, and this Mini Triangle Box is just up my alley! I wanted to make a box that would use my 6″x6″ paper, however I also wanted to use the fun color scheme that I’ve been using all trough this week. And after deep diving into my pile of pattern papers I just couldn’t find one that was perfect for this project.

Instead of using something that wasn’t perfect, I made my own. I used Montval 100% Cotton watercolor cardstock, 200gsm. And created the background with a real fun smooching technique, which you can see in the video below. And below you can also find a schema and you can find it as a PDF HERE, and if you want cutting files you can find them HERE. If you want to know what papers and products to use for smooching you can find a video HERE that explains it.

Mini triangle made from watercolor cardstock with an ink smootch technique

When possible affiliate links are used, this means that I receive a small commission when products are purchased through the links (at no extra cost to you) I use the money to support my blog and youtube channel. If you like my projects and tutorial please consider supporting me by clicking through these links when you shop. Thanks!

Supplies

Birds of a Feather Die-namics: MFT SSS
Beautiful Branch Die-namics: MFT SSS
Neenah 110 LB SMOOTH SOLAR WHITE s: SSS
Distress Ink Tattered Rose: SSS
Distress Ink Dried Marigold: SSS SBC
Distress Ink Worn Lipstick: SSS SBC
Distress Ink Spiced Marmalade: SSS SBC
Dinstress Ink Ground Espresso: SSS
Distress Oxide Ink Tattered Rose: SSS SBC
Distress Oxide Dried Marigold: SSS SBC
Brushes: SSS AMZ SBC
Mini Blending: SSS AMZ SBC
Gina K Designs Sheer Satin Fancy Ribbon White and Silver: SBC
Tonic SHIMMERING ROSE Nuvo Crystal Drops: SSS AMZ
Tim Holtz Heat It Craft Tool US: SSS AMZ SBC
Tim Holtz Heat It Craft Tool EU: SSS AMZ
Tim Holtz Heat It Craft Tool UK: SSS AMZ
feature image
Uncategorized

Build a Scene Card | Fairy-tale Friendship

I love doing build a scene cards, and this one was no exception. And when I saw the Fairy-tale Friendship Stamp Set, I just know I needed to have it. There is nothing so cute as dragons and princesses. With the added castle this stamp set is perfect for build a scene cards.

I couldn’t find a pattern paper that matched the copic color scheme and that was subtle enough in the pattern. So instead I made my own. I just blended some Tattered Rose Distress Ink all over a stitched rectangle in the same size as the panel I was building my scene on. I then spattered some water, some Tattered Rose Distress Ink, Worn Lipstick Distress Ink, Walnut Stain Distress Ink and finally some gold Gansai Tambi water color. I then cut the piece horizontally with the Slimline Grassy Hills Die-namics dies to make two grass hills in different heights that I then layered on the panel.

I finally made a sentiment by stamping a sentiment from the You’re Super Stamp Set in Tattered Rose Distress Ink three times. Then I used Versamark Ink to stamp it a fourth time and heat embossed it in clear embossing powder. And then I put the scene together and the card was done!

Top view of card in the style of build a scene with stamps from stampset fairy-tale friendship

Copic

R01, RV42, R01, T0, T2, T4, E11, E21, E00, E50, R30, R32, E40, E41, E42, E43

When possible affiliate links are used, this means that I receive a small commission when products are purchased through the links (at no extra cost to you) I use the money to support my blog and youtube channel. If you like my projects and tutorial please consider supporting me by clicking through these links when you shop. Thanks!

Supplies

MFT Fairy-Tale Friendship: MFT SSS
MFT You’re Super: MFT
DI Tattered Rose: SSS
DI Worn Lipstick: SSS SBC
DI Walnut Stain: SSS SBC
Zig Kuretake Gansai Tambi 48 COLOR: SSS AMZ SBC
MFT Slimline Grassy Hills Die-namics: MFT SSS
Neenah Solar White 80lb: SSS AMZ SBC
Mini Blending: SSS AMZ SBC
Brushes: SSS AMZ SBC
MFT Stitched Rectangle A2 STAX Die-namics 1: MFT SSS
MFT Stitched Rectangle A2 STAX Die-namics 2: MFT SSS
Foam Squares: SSS AMZ SBC
Nuvo – Adhesive Tape Runner – Maxi: SSS AMZ SBC
Uncategorized

TWEET GREETINGS Card Kit | 1 Kit, 4 Cards

I love birds, I think I got it from my father. So when the Tweet Greetings Card Kit was announced I just knew I needed to pick it up. And I also felt that the add-ons fitted perfectly with the kit so just had to pick it up.

I could have made loads and loads of cards with the kit, I had so many ideas. But I stopped at four so that I would have time to edit the video. Also the video would be hours long if I didn’t stop there. But hope you enjoy the versions I made. My favorite is definitely the slimline card. Which one is our favorite?

When possible affiliate links are used, this means that I receive a small commission when products are purchased through the links (at no extra cost to you) I use the money to support my blog and youtube channel. If you like my projects and tutorial please consider supporting me by clicking through these links when you shop. Thanks!

Supplies

Tweet Greetings Card Kit: MFT
Tweet Greetings stamp set: MFT SSS
Birds of a Feather Die-namics: MFT SSS
Home Tweet Home Die-namics: MFT SSS
Happy Patterns Paper Pad: MFT SSS
MFT Smooth White Card Stock: MFT
MFT Cotton Candy Card Stock: MFT
MFT Moroccan Spice Card Stock: MFT
MFT Orange Zest Card Stock: MFT
MFT Lemon Drop Card Stock: MFT
MFT Limelight Card Stock: MFT
MFT Sour Apple Card Stock: MFT
MFT Sno Cone Card Stock: MFT
MFT Card Stock Summer Splash: MFT
MFT Something Blue Card Stock: MFT
MFT Kraft Cardstock: MFT
MFT Black Licorice Cardstock: MFT
MFT A2 Stitched Circle STAX Die-namics: MFT SSS
MFT Stitched Square STAX Die-namics: MFT SSS
MFT Sno Cone Premium Dye Ink Pad: MFT SSS
MFT Something Blue Premium Dye Ink Pad: MFT SSS
Self-Adhesive Pearls: SSS SBC
Neenah Solar White 80lb: SSS AMZ SBC
Wendy Vecchi PERFECT STYLUS: SSS AMZ SBC
feature image
Uncategorized

Sketch Challenge 582 | The Best Birthday Ever

With everything going on in the world this card was hard to create, I even considered just not to do it. But at the same time being creative can help mentally. It’s not my best card, but I do like it. I followed the sketch challenge 582 over at My Favorite Things.

I want to finish this by saying. I know that I sit safety here in Sweden, but I’m so scared over what is going on in Ukraine. Ukraine is a free democratic country and I hope that it will stay that way.

When possible affiliate links are used, this means that I receive a small commission when products are purchased through the links (at no extra cost to you) I use the money to support my blog and youtube channel. If you like my projects and tutorial please consider supporting me by clicking through these links when you shop. Thanks!

Supplies:

MFT Barnyard Birthday: MFT SSS
MFT Itty Bitty Celebrations: MFT SSS
MFT Stitched Rectangle A2 STAX Die-namics 1: MFT SSS
MFT Stitched Rectangle A2 STAX Die-namics 2: MFT SSS
MFT Heartfelt Fence: MFT
MFT Sno Cone Premium Dye Ink Pad: MFT SSS
MFT Sour Apple Ink: MFT SSS
MFT Kraft Cardstock: MFT
MFT Sour Apple Card Stock: MFT
Neenah 110 LB SMOOTH SOLAR WHITE s: SSS
Hero Arts White Embossing Powder: SSS AMZ SBC
MFT Mini Cloud Edges Stencil: MFT SSS
MFT Grassy Edges Stencil: MFT SSS
Feature image top of post
Uncategorized

Sketch Challenge 581 | I Camp Believe

Going into every sketch challenge I have a little list of supplies to pick from to have a head start before I see how the sketch look. With this weeks sketch challenge 581, that all flu out of the door. When I saw the challenge I saw the way I wanted to make the card in my head immediately. I just needed to use the Adorable Adventure stamp set. Happily enough the stamps fitted perfectly with the different levels of the sketch. Then we had the color scheme, which was the easiets. Have been using the G40s and E40s a lot lately and they fitted the images perfectly, I added the Ts for the grey and whites and finally B0000 for the snow on the mountains.

For the base of the levels I used my new favorite ink color, Sno Cone to blend over some cloud masks I made with the Cloud Trio Die-namics. Before blending I also masked off the card base so I only had the three different stripes. I then colored up a whole bunch of stamped images from the Adorable Adventure and fussy cut them out. I placed them on the different levels and then I stamped a sentiment on the bottom.

If you wan’t to see my entries to previous sketch challenges you can find them HERE.

When possible affiliate links are used, this means that I receive a small commission when products are purchased through the links (at no extra cost to you) I use the money to support my blog and youtube channel. If you like my projects and tutorial please consider supporting me by clicking through these links when you shop. Thanks!

Supplies:

MFT Adorable Adventures: MFT SSS
MFT Cloud Trio Die-namics: MFT SSS
MFT Sno Cone Premium Dye Ink Pad: MFT SSS
Blending Brushes: MFT SSS AMZ SBC
Gina K Masking Magic: SSS AMZ SBC
Memento Tuxedo Black: SSS AMZ SBC
Cutter Bee Scissors: SSS AMZ SBC
feature image
Uncategorized

Sketch Challenge 580 – Will You Be My Valentine?

Sometimes a card takes minutes, sometimes days and sometimes even weeks. I have had the basic idea of what I wanted for awhile. It wasn’t until I saw this weeks sketch challenge 580 over at My Favorite Things that the last piece come together.

I picked up some new stamps in January, and I stamped them and colored them in front of the tv. I have already used the bears from the same stamp set, but I really liked how I colored up the bunnies in the boat. So I have been waiting to use that image. I did try last week to make something with them, but the card wasn’t balanced and I decided to use another image.

closeup blue valentines card, two bunnies in a boat with a heart as backdrop

But this time it all came together. I also got to use two new stencils I hadn’t used yet. If you don’t recognise the little waves in the heart, that is because that haul is coming up on Wednesday. Hope you enjoy the card and if you wanna see how I interpreted previous challenges you will find them HERE.

Supplies:

When possible affiliate links are used, this means that I receive a small commission when products are purchased through the links (at no extra cost to you) I use the money to support my blog and youtube channel. If you like my projects and tutorial please consider supporting me by clicking through these links when you shop. Thanks!

MFT Im So in Love with You, Still: MFT SSS
MFT Stitched Square STAX Die-namics: MFT SSS
MFT Heart Extraordinaire Stencil: MFT SSS
MFT Classic Edges Stencil: MFT SSS
MFT Sno Cone Card Stock: MFT
MFT Sno Cone Premium Dye Ink Pad: MFT SSS
Nuvo White Blizzard: SSS
MFT Tag Builder Blueprints 5 Dies: MFT SSS
Neenah Solar White 80lb: SSS AMZ SBC
Blending Brushes: MFT SSS AMZ SBC
Fiskars Trimmer : SSS AMZ
Foam Squares: SSS AMZ SBC
MFT On-Point Precision Glue Pen: MFT
Milk carton box closeup for feature reason
Uncategorized

Milk Carton Box Tutorial | Clean & Simple

When making my accordion album last week I got loads of little pieces of pattern paper. In todays tutorial the box is sized so the main layers of pattern paper uses up a full sheet of pattern paper. The small one uses up half a sheet. The little leaf decorations uses another two sheets. However out of those sheets you can get decorations for two big boxes or four small ones. The card stock decorations was made of some offcuts I had laying around from previous projects. The box also is perfectly sized for tea lights!

For the tutorial today I’m going back to old school, just using a trimmer, a score board and scissors. But I do have cut-files and templates for you if you want to go that route. The cut-files and template, both PNG and SVG can be found –HERE–. You can also find the schema as a PDF HERE.

Milk Carton Box, big size shown how to make in this post.
  • Milk Carton Box, big size shown how to make in this post.
  • Milk Carton Box, big size shown how to make in this post.
  • Milk Carton Box, big size shown how to make in this post.
  • Milk Carton Box, big size shown how to make in this post.
  • Milk Carton Box, big size shown how to make in this post.
  • Milk Carton Box, big size shown how to make in this post.
  • Milk Carton Box, small size shown how to make in this post.
  • Milk Carton Box, small size shown how to make in this post.
  • Milk Carton Box, small size shown how to make in this post.
  • Milk Carton Box, small size shown how to make in this post.
Milk Carton Box Schema for how to measure, cut and score the box

Cut and score instructions:

Big box: Cut card stock to 10 1/4″ x 7 3/8″. Score on short side at, 1 3/4″, 8″, 9 3/4″. Score on long side at 1 3/4″ all the way down, 2 5/8″ only on the 1/2″ part, 3 1/2″ all the way down, 5 1/4″ all the way down, 6 1/8″ only on the 1/2″ part and 7″ all the way down. Line up the short score lines with the corner in the box below and make two diagonal score lines creating a triangle, this is the milk box corners. Cut out the bottom tabs, miter all except the middle one that doesn’t have a triangle above, this will be your front tab should just be cut straight, that should also be folded in last. Cut away the side tab from the bottom tabs and miter the corners.

Short box: Cut card stock to 7 1/4″ x 7 3/8″. Score on 7 1/4″ side at, 1 3/4″, 5, 6 3/4″. Then follow the instructions for the big box.

When possible affiliate links are used, this means that I receive a small commission when products are purchased through the links (at no extra cost to you) I use the money to support my blog and youtube channel. If you like my projects and tutorial please consider supporting me by clicking through these links when you shop. Thanks!

Supplies:

MFT Card Stock Summer Splash: MFT
MFT Cotton Candy Card Stock: MFT
DDD Made with Love: SSS SBC
MFT Fab Foliage Die-namics: MFT SSS
Large Score Board: SSS AMZ SBC
Fiskars Trimmer : SSS AMZ
Sookwang Tape 1/4”: SSS AMZ
Tape Runner: SSS AMZ SBC
MFT On-Point Precision Glue Pen: MFT
Uncategorized

My Favorite Things Haul | January 2022

About 2 weeks ago My Favorite Things had a 30% off sale on everything! (except new release) So of course I seized the moment and picked up somethings I have had an eye for for awhile, and some new stuff.

If you wanna see some projects I made with these products, you can find them HERE.

When possible affiliate links are used, this means that I receive a small commission when products are purchased through the links (at no extra cost to you) I use the money to support my blog and youtube channel. If you like my projects and tutorial please consider supporting me by clicking through these links when you shop. Thanks!

Supplies:

MFT Im So in Love with You, Still: MFT SSS
MFT Straight from the Heart: MFT SSS
MFT Itty Bitty Love: MFT SSS
MFT Say Anything Stencil: MFT SSS
MFT Heart Extraordinaire Stencil: MFT SSS
MFT A2 Stitched Circle STAX Die-namics: MFT SSS
MFT Fab Foliage Die-namics: MFT SSS
MFT Jalapeño Popper Premium Dye Ink Pad: MFT SSS
MFT Something Blue Premium Dye Ink Pad: MFT SSS
MFT Blue Yonder Premium Dye Ink Pad: MFT SSS
MFT Sno Cone Premium Dye Ink Pad: MFT SSS
MFT Lemon Drop Premium Dye Ink Pad: MFT SSS
MFT Wild Cherry Premium Dye Ink Pad: MFT SSS
MFT Blue Yonder Card Stock: MFT
MFT Something Blue Card Stock: MFT
MFT Lazy Day Card Stock: MFT
MFT Sno Cone Card Stock: MFT
MFT Lemon Drop Card Stock: MFT
MFT Wild Cherry Card Stock: MFT
MFT On-Point Precision Glue Pen: MFT

Feature image, teaser of the blog post
Uncategorized

Sketch Challenge 578 | You Made Me in to a We

Seeing the new sketch challenge over at My Favorite Things I directly got an idea in my head. I wanted to turn it upside down and use the Stitched Clouds Edges Die-namics on the top. That die is since retired but the Stitched Rolling Clouds Edges Die-namics is a perfect dupe. For the half circle I use one of my sun dies, sadly they no longer have any sun dies. But it fitted so perfectly!

The last thing was the little circles on the bottom. For those I used the swinging bears from the stamp-set “I’m So in Love with You, Still“. I also used the sentiment from the same stamp-set, “You Made Me in to a We” and white embossed it on some sno cone card stock. As a final touch i blended some sno cone ink underneath the clouds to give it some dimension. And with that same ink I stamped the teeny tiny hearts around the bears.

Are you joining the sketch challenge? Would love to see your take on the challenges. Want to see other sketch challenges I have participated in? You can find them HERE.

Picture of card with clouds on top with a sentiment strip in sno cone cardstock with white embossed sentiment "you made me into a we". under the clouds is a sun and two bears swinging from clouds. Around them are mini hearts stamped in sno cone ink

Copic:

E53, E55, E57, E42, E43, E44, N0, B91, B93, B95

When possible affiliate links are used, this means that I receive a small commission when products are purchased through the links (at no extra cost to you) I use the money to support my blog and youtube channel. If you like my projects and tutorial please consider supporting me by clicking through these links when you shop. Thanks!

Supplies

MFT I’m So in Love with You, Still: MFT SSS
MFT Sno Cone Premium Dye Ink Pad: MFT SSS
MFT Sno Cone Card Stock: MFT
Neenah Solar White 80lb: SSS AMZ SBC
Stitched Rolling Clouds Edges Die-namics: MFT SSS
Hero Arts White Embossing Powder: SSS AMZ SBC
Versamark: SSS AMZ SBC
Foam Squares: SSS AMZ SBC
MFT On-Point Precision Glue Pen: MFT