Coloring, My Favorite Things Stamps

Masked Blended Background – Halloween Edition

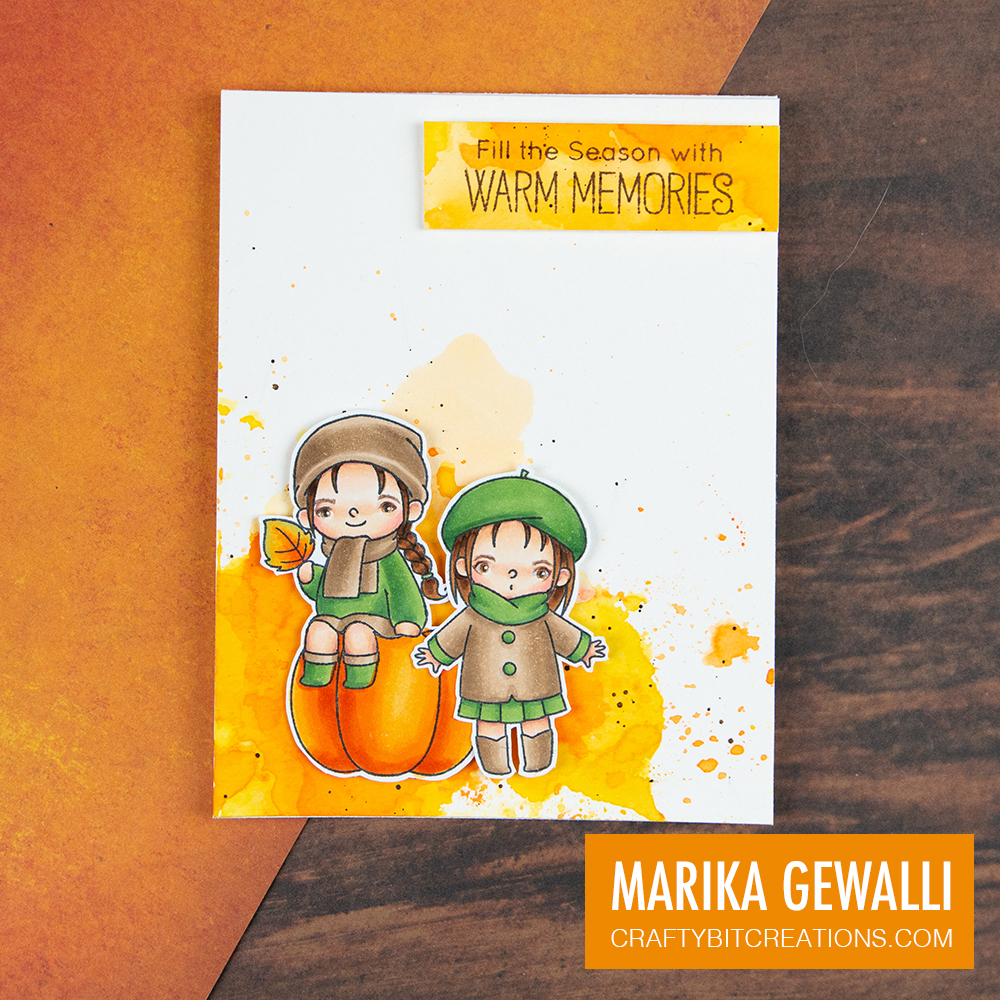
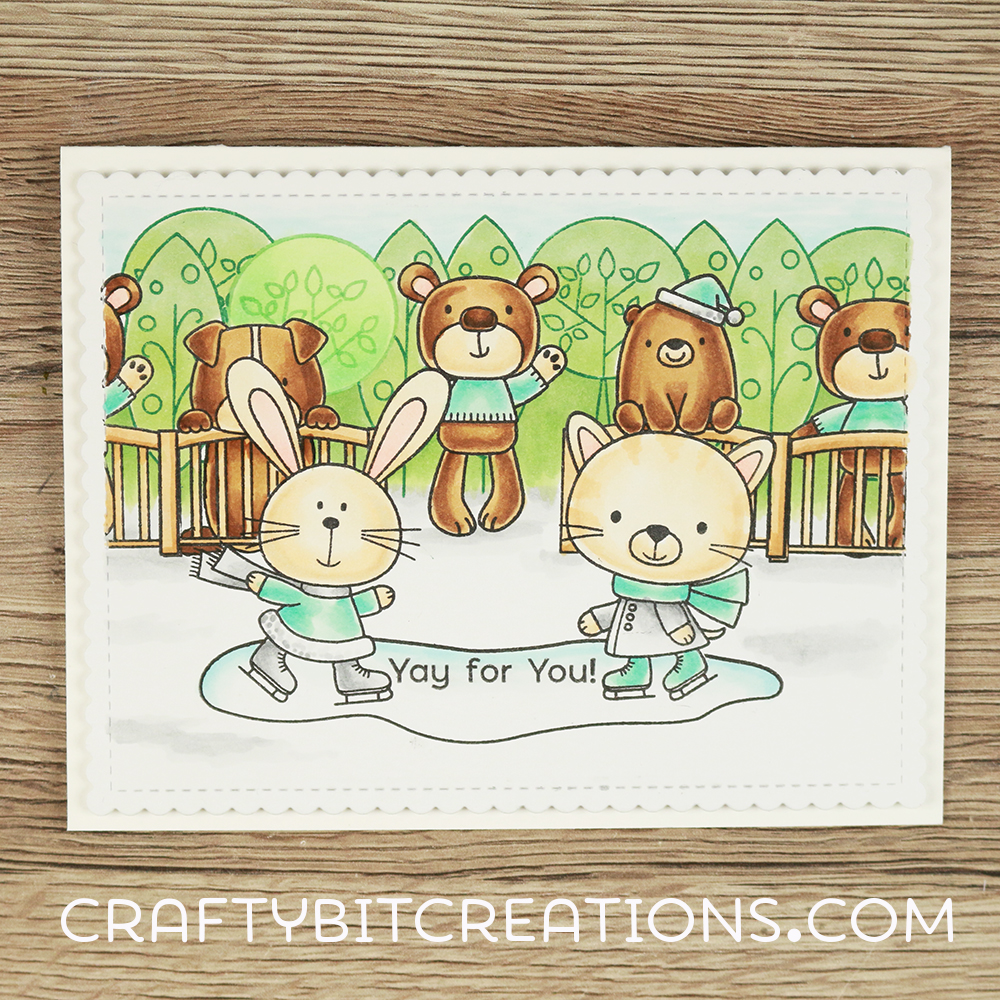
Today it is all about creating a masked blended background with distress inks and oxide inks, using dies and stamps with masking paper to mask out the area. The card is finished off with stamps by My Favorite Things colored in the no-line coloring technique with copic markers.

For the card base I went with a square base measuring 4 1/4″ by 4 1/4″. The first part of the mask was cut with a stitched mod square die out of a 4 1/4 strip of masking paper, so that the mask can cover the card base and a little over to the backside as it will not be folded when I blend.

I also stamped a couple of the clouds and a moon from the Witch Way Is The Candy stamp set onto another piece of masking paper and then cut them out with my scissors. These I placed towards the upper left corner in a little arrangement of three.

Photo showing Halloween Card with a masked blended background, halloween images and halloween sentiment.

I did the blending first with the distress inks in the colors Festive Berries and Wilted Violet, but as I was working on Neenah card stock and I went in with a little to heavy hand I just couldn’t get a good blend, so I finally decided to just take out my oxide inks in the same colors and then just blend on top. The oxide inks are a little bit easier to blend and they are also more opaque so it hid a little bit of the original blending. I finished it off with some water droplets flicked with my fingers and then padded off with a paper towel, to add a little bit of texture.

I then finished off the outside with some fussy cutted images, that I had colored in the no-line coloring technique, fastened with some foam tape. And a stamped sentiment. For the inside I stamped a sentiment, used my left over images and then I added splatters as I accidentally gotten some ink on the inside while blending and though it would hide it a bit.

The Inside of the Halloween Card with Masked Blended Background is finished off with two left over colored pumpkins and a sentiment and then added some splattered inks.

You can follow a long with both the coloring and the card progress in the videos below. And under that you find links to all the products I used and a list of the copics I used to color the images. Hope you have a great day!

Copic:

YG01, YG05, YG09, G07
E42, E43, E44, E49
B60, B63
E04, E11, E21, E00, E50
R30, R32
E51, E55, E57
W0, W2, W4, W6, W8, W10, 100
YR16, YR18, E09, E08, E18

When possible affiliate links are used, this means that I receive a small commission when products are purchased through the links (at no extra cost to you) I use the money to support my blog and youtube channel. If you like my projects and tutorial please consider supporting me by clicking through these links when you shop. Thanks!

Supplies:

https://linkdeli.com/widget.js?1559654439292
My Favorite Things Stamps

2019 Card Design Superstar – Entry for Coloring Virtuoso

I’m very passionated about coloring, coloring was what made me really enjoy cardmaking. I do feel a bit rusty, going from doing it on almost a daily basis to not picking up a marker for months. But I still wanted to join in with the challenge.

The Coloring Virtuoso category is described as:

Whether your preferred medium is paint, marker, or pencil, coloring is a skill you’ve honed since those early years spent with Crayolas and a favorite coloring book. The MFT collection of images is vast, so now is your opportunity to show off your exceptional coloring skills!

My preferred medium is definitely markers, I picked up my first markers 7 years ago and I now have the whole Copic set and I love them. I usually color the characters separately and then make a clean and simple cards. But this time around I wanted to do something that I really wanna learn more about, that is making a one layer scene.

The stampset I used is Friends at first Sip, and I wanted to continue with the autumn theme. As the coffee wagon was smaller than the characters I decided to give it a little bit of debt. The idea went through a bunch of different iterations. It started out being based on the topiaries that exists in the stampset, but I quickly realised that they wouldn’t fit the way I wanted on a A2 card and I wanted to stay in that size. But the idea of drinking coffee in the park stayed.

I hope you enjoy this, and did you get inspired to try you too? Leave a comment down below with your answer.

When possible affiliate links are used, this means that I receive a small commission when products are purchased through the links (at no extra cost to you) I use the money to support my blog and youtube channel. If you like my projects and tutorial please consider supporting me by clicking through these links when you shop. Thanks!

Supplies:

https://linkdeli.com/widget.js?1559654439292
My Favorite Things Stamps

2019 Card Design Superstar – Entry for Clean & Simple Genius

My Favorite Things have kicked off their yearly Card Design Superstar competition. I wanted of course to enter this year too!

First out is the Clean & Simple Genius category, and I would say that most of my cards fall into that category, less is more have always been my motto. The promt for the challenge says:

Here is your chance to showcase your innate understanding of design. White space, color theory, and design rules are critical components of pulling off a beautifully clean & simple look. You understand that sometimes, less is more, and you aren’t afraid to show it!

The challenge rules are to use exclusively MFT products when it comes to stamps, dies stencils and pattern papers, but you can use cardstocks and inks from other manufacturers if you don’t have the MFT ones. (there are more rules and you can find them on their website)

I knew I wanted to do an autumn card, the temperatures here have been falling and the leaves are turning orange. So for my first card I use the Fall Friends stampset.

For the background I have used a smootching technique, where I press a inkpad on to my Tim Holtz glass mat, spray a little bit of water to make the ink move, and then smootch the paper into the ink puddle. I repeated that a couple of times, drying the card with a heat gun in between. I both used different amounts of water in the ink and also different ink colors. As a last couple of layers I also added some oxide ink, they give a lovely almost chalk like finish. And then I took some dark brown ink and splattered with a number 4 brush for small pricks of brown to break up my little sea of orange.

I’ve chosen to add my blob of color (and my little focal images) in the bottom left corner, using the rule of thirds technique placing them on the lower left intersection, as it will give good balance and a little bit of air around the characters. I also used the color and small splatters to pull the eye towards the end of the card.

My last addition to the card was the sentiment, I was contemplating to leave it out but after stepping away for awhile decided that the top was to white and needed that little extra detail. The sentiment was stamped on a the first background panel I made, that didn’t came out as I wanted. But it worked perfectly for the sentiment.

Hope you like the card and you enjoyed my little thought process on how I made the card.

When possible affiliate links are used, this means that I receive a small commission when products are purchased through the links (at no extra cost to you) I use the money to support my blog and youtube channel. If you like my projects and tutorial please consider supporting me by clicking through these links when you shop. Thanks!

Supplies:

https://linkdeli.com/widget.js?1559654439292
My Favorite Things Stamps

MFT Creative Olympics 2018 – Speed Cardmaking

Hi Everyone!

My third and last card for today is a quick and simple one, with the challenge being Speed Cardmaking, make a card in 20 min or less. I came in just shy of 20 min and think I could have gotten it quicker if I hadn’t needed to look for my Neenah in my piles of stuff (after doing the other 3 cards I have piles with everything I used). My card is a watercolored background, colored with a combination of distress inks and oxide inks, which I then die cut with a rectangular die and a love die, the love die I also cut three times out of neenah and then I layered just the letters with those neenah letters making them stand out just a little. A quick and simple card but I do love it!

Supplies:

When possible affiliate links are used, this means that I receive a small commission when products are purchased through the links (at no extra cost to you) I use the money to support my blog and youtube channel. If you like my projects and tutorial please consider supporting me by clicking through these links when you shop. Thanks!

Supplies:

https://linkdeli.com/widget.js?1518439322996

My Favorite Things Stamps

MFT Creative Olympics 2018 – Crafty Biathlon

Hi Everyone!

Today’s second card is for the Crafty Biathlon over at My Favorite Things, they give you a list of techniques and a list of card types and you need to choose one from each. I’ve chosen Inlaid Die Cutting and Shaker. I did two frames from my stitched hexagon dies that I then inlaid in a mod rectangular piece, to keep the inlaid pieces I used some acetate on the bckside of the mod rectangle, making the frames the shakers. I also inlaid a hi in the same rectangular. I used some gorgeous mft cardstock for the inlaid pieces in the colors Tropical Teal, Cornflower Blue and Boysenberry, and then covered them with a spectrum noir sparkle pen. I used double layered of foam for the shaker and for a finishing touch I added two unicorns that I coloured during the 30 day coloring challenge. I filled the shakers with sequins from Pretty Pink Posh.

Supplies:

When possible affiliate links are used, this means that I receive a small commission when products are purchased through the links (at no extra cost to you) I use the money to support my blog and youtube channel. If you like my projects and tutorial please consider supporting me by clicking through these links when you shop. Thanks!

Supplies:

https://linkdeli.com/widget.js?1518439322996

My Favorite Things Stamps

MFT Creative Olympics 2018 – Freestyle Card

Hi Everyone!

Card one for today is a Freestyle Card with a winter theme, so I picked out a couple of more of the 30 day coloring challenge images. As I don’t have a slopes die I chose to go with the cloud dies and make my snowy slopes with that, this time I “shaded” them with a combination of Cracked Pistachio and Peacock Feathers. For the sky I also added Salty Ocean, Vilted Violet and a touch of Black Soot, which I also added to the friends die. For a finishing touch I did some water splashes on all pieces for some added texture and for the sky I added some Liquitex White Acrylic Ink splatters for falling snow. I used the stitched rectangular mod STAX as the outer border for some extra detail.

Supplies:

When possible affiliate links are used, this means that I receive a small commission when products are purchased through the links (at no extra cost to you) I use the money to support my blog and youtube channel. If you like my projects and tutorial please consider supporting me by clicking through these links when you shop. Thanks!

My Favorite Things Stamps, Uncategorized

Stamping Slalom

Hi Everyone!

MFT is having a Craft OS Week and I decided to join in, sadly it is ending soon and I don’t know if I will have time to join in with every challenge, but I thought I would try a couple. To start out I’m joining in with the Stamping Slalom.

Here we are supposed to create a card that uses at least 3 MFT stampsets. I ended up using 5 but that was just because I got an idea and just had to try it. The stamps and products are listed under supplies.

Supplies:

When possible affiliate links are used, this means that I receive a small commission when products are purchased through the links (at no extra cost to you) I use the money to support my blog and youtube channel. If you like my projects and tutorial please consider supporting me by clicking through these links when you shop. Thanks!