Coloring, Create A Smile Stamps, Design Teams, Real Time Coloring, Videos

You Got Superpowers | Interactive Slider Card

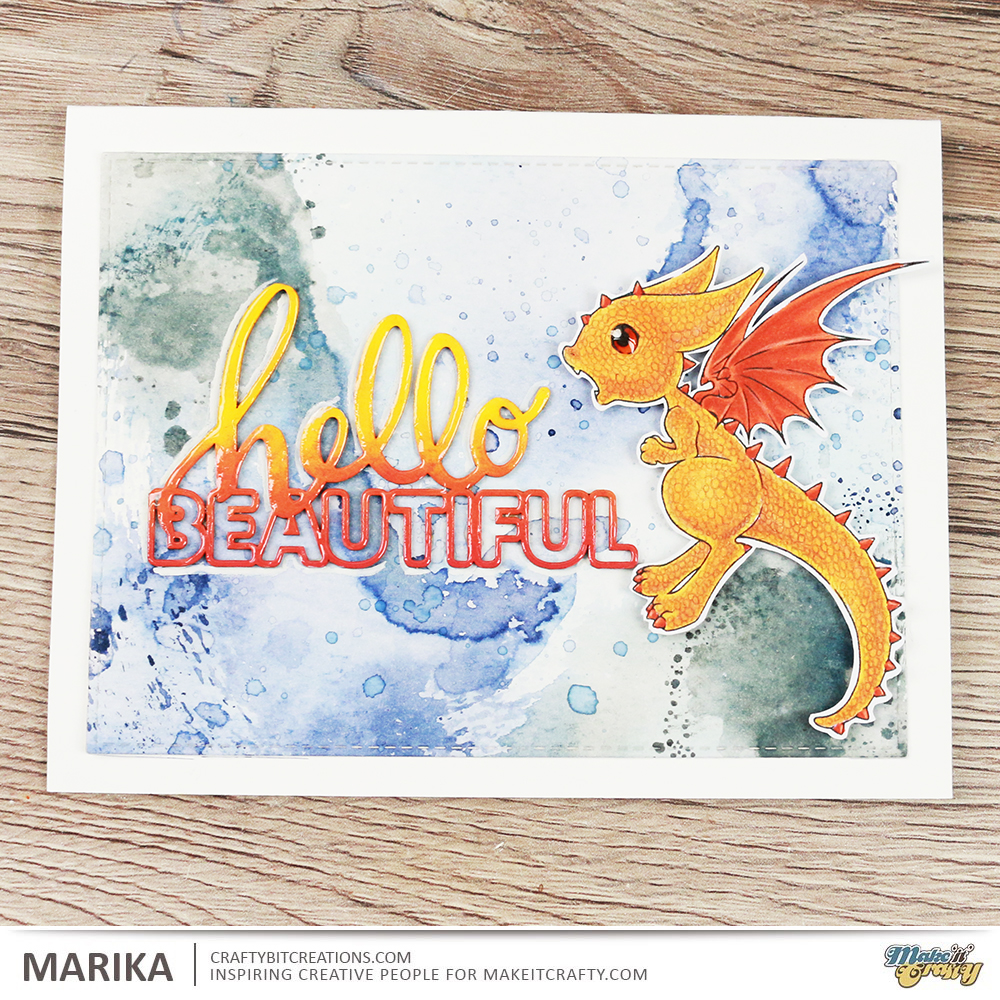
Hi Everyone! Got a new interactive slider card for you today. I love making interactive cards, some more fiddly than others but this one is very simple and very quick to make.

There are so many tools out there today that you can use to make your interactive card, but today I’m just using a craft knife and a pencil, making a very simple track but which fit perfectly for the card I’m making. I’ve made a video below to show you every step to make the card, and I’ll give you a couple of tips along the way.

Sometimes you get an idea to a card the first time you see the stamp set, and I knew that I just needed to make a slider card together with the super mouse from the Superpowers stamp set by Create A Smile Stamps. I wanted to make him fly over something so I dug through the other stamps I had by Create A Smile and I found the Glowing Seaside stamp set with the awesome lighthouse. That coupled with me being on vacation to the west coast of Sweden, which have loads of lighthouses really set the mood to the card and it all came together.

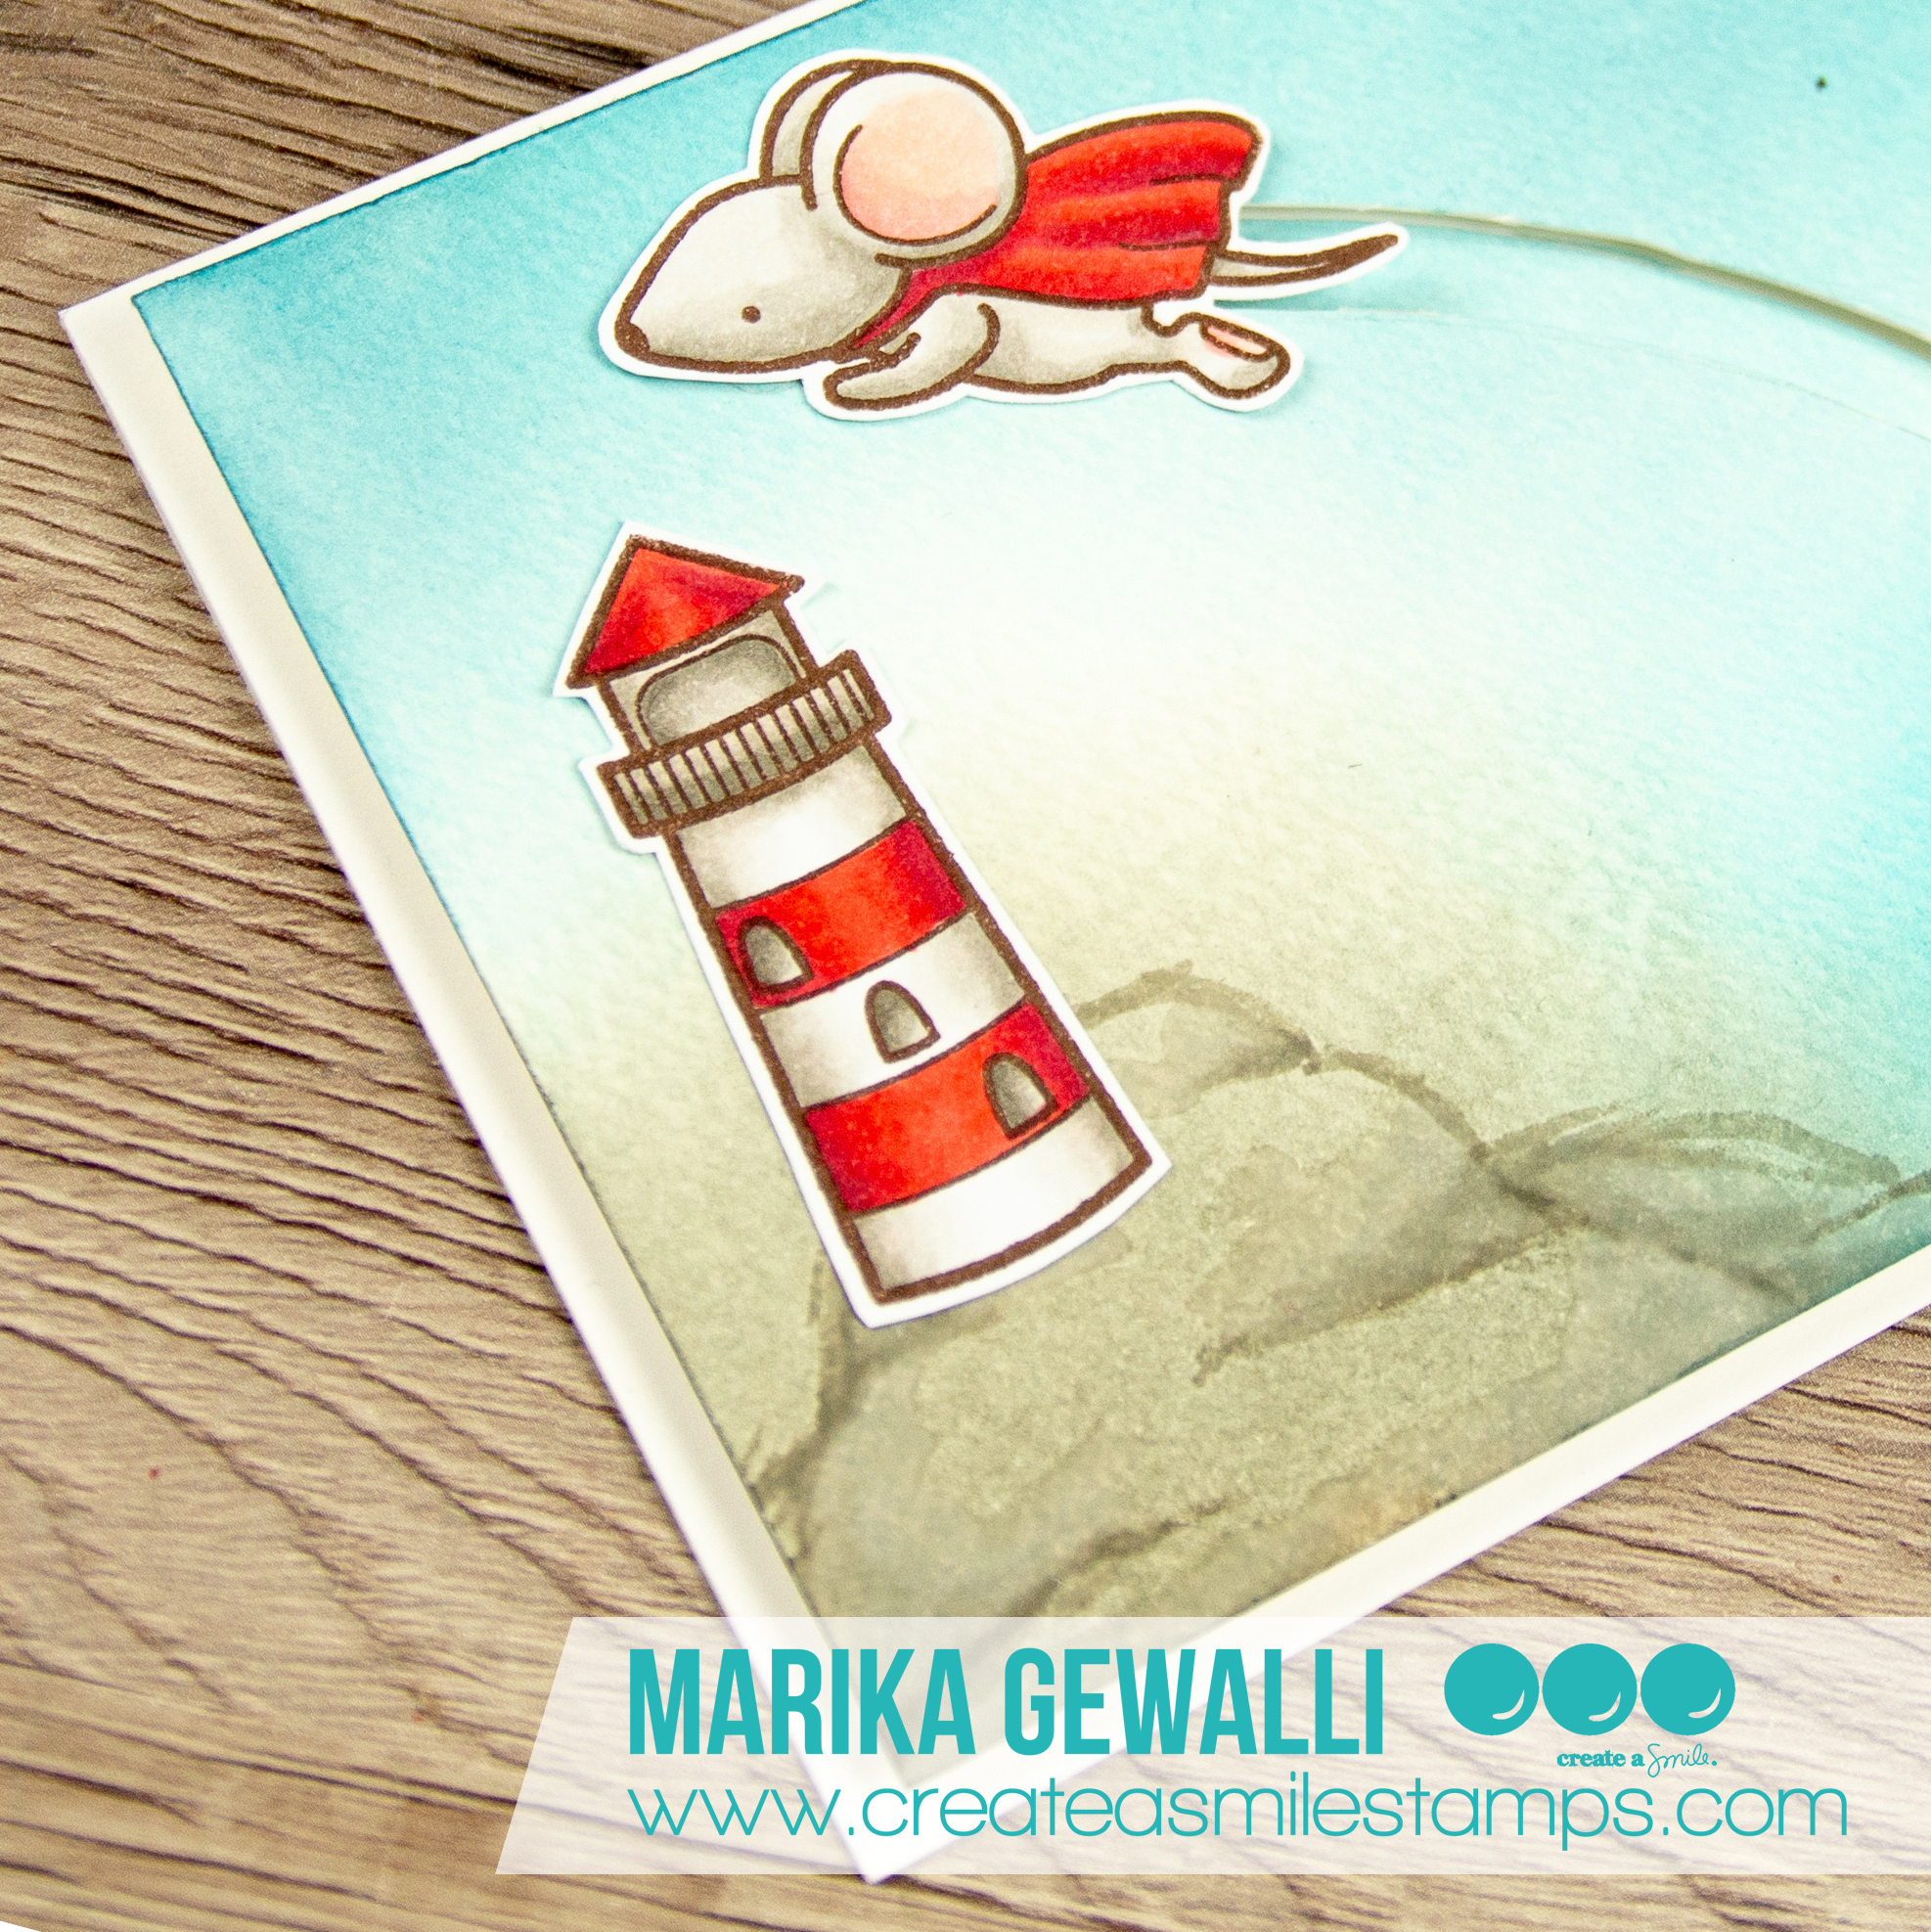
I decided to make a very soft background, just blending on a couple of colors of distress inks, I decided to use Mermaid Lagoon, Pumice Stone, Stormy Skies and Hickory Smoke, but after doing the blending I felt that the hill that I wanted to set the lighthouse on needed a little bit more definition. So I grabbed my trusty Copic Markers and loosely sketched it out, with just a tiny tiny blending. If you choose to do that to, remember that Copic don’t recommend you using the markers over any medias, and that drawing on top of other pigments can ruin your nibs, so it’s on your own risk you do this. Also watercolor cardstock is very porous and will use loads of your ink from your pens, but I felt safe as I used it so little.

Hope you enjoy the card and I see you next week.

Copic:

Mouse: W0, W2, W4, R30, R32, R24, R27, R46, R39
Lighthouse: W0, W2, W4, W6, R24, R27, R46, R39

Supplies:

When possible affiliate links are used, this means that I receive a small commission when products are purchased through the links (at no extra cost to you) I use the money to support my blog and youtube channel. If you like my projects and tutorial please consider supporting me by clicking through these links when you shop. Thanks!


https://linkdeli.com/widget.js?1529497022105

Coloring, Design Teams, Make It Crafty, Real Time Coloring, Videos

You’re My Bestie | Watercolor Background

Hi Everyone, did you like my dragon last week? I had so much fun creating it, and while looking for a image to use for that card I came across the image I’m using in todays card.

The stamp I’m using is called Sam’s Lizard and is by Make It Crafty, I used the same technique for the scales on the lizard as for the the dragon on last weeks card. I fell in love with the adorable face of Sam and I do not color enough guys or make enough guy cards.

The whole card is in neutral tones, which both works great for male cards but also lends it self for more storybookesk cards. I colored Sam and his Lizard with Copic Markers and added details with a couple of pencils. You really don’t need a full set of pencils, you can come very far with just 12 pen set if you are just using it for details like these, but if you are like me you might want them all.

I knew I wanted to have a very soft background, I was thinking sitting on a wooden dock by the water, but couldn’t find a good digi for it, and then I dawned on me that I wanted the stone wall. So I googled stonewalls to find different sorts, decided on what kind I wanted and sketched one up on my watercolor cardstock. Using watercolors for soft backgrounds are great, they give those soft and watery colors. I have a small 12 pan Winsor & Newton Cotman set, you really don’t need more and it’s a great way to get into watercolors as they are the “student” set and are actually quite affordable.

To get a cohesive look I started off by mixing a grey tone, this set doesn’t have a black, but it’s quite easy to blend together a greyish tone, I used a cold blue and a orangey red to get a purply grey. Then for every color I then add a little of that color and it ended up being really cohesive. I even colored the chipboard sentiment with the same colors to make it tie in.

And you really don’t need any fancy things either to watercolor, the smaller brush I’m using is a Cotman brush and really affordable and then I’m using a IKEA 365+ plate to mix on, have found that I really enjoy mixing on porcelain as the colors have a tendency to bead on plastic but they flow on porcelain.

If you want to see how I created the whole card I have both the card video and the real-time coloring video, you can choose which ever you like the best, or watch both if you want.

Copics:
Skin: E50, E00, E21, E11, E04, R30, R32
Hair: E41, E42, E43, E44
Clothes; E42, E43, E44, E47, T0, T2, T4, 0
Lizard YG01, YG03, YG25, Y17, Y35

Supplies:

https://linkdeli.com/widget.js?1529497022105

When possible affiliate links are used, this means that I receive a small commission when products are purchased through the links (at no extra cost to you) I use the money to support my blog and youtube channel. If you like my projects and tutorial please consider supporting me by clicking through these links when you shop. Thanks!

Coloring, Design Teams, Make It Crafty, Real Time Coloring, Videos

Fiery Dragon – Coloring Scales

Hi Everyone! I’m here with another card and another tutorial. Today I’m following this months coloring challenge from Make It Crafty, color ANIMALS, with an emphasis on animal textures, feather, fur and scales. Zoe likes to challenge us DT girls a little extra, and this time around she gave us the specific texture to work with. I got scales, and actually did a bunch until I settled on the one I made for this post, You’ll find them at the end of the post.

But first to today card and videos. I ended up choosing the Fiery Dragon, I colored him up before, I even have the honor to have my coloring being on the front of the package for the dragon! Btw I’ve used the digital stamp but you can also get him as a rubber stamp, and right now there is a great sale on rubber stamps!

I have colored Fiery in some gorgeous yellows and oranges with my copic markers and then added the scales with some colored pencils. I then made a smootching background in some blue and greys, I choose blue as it is the complimentary color to orange. I also used Hello Beautiful Chipboard Word and colored it with ditress paints in the same color scheme as the dragon.

Copic:
Y17, Y38, YR15, V12
YR07, YR18, V15

Polychromos:
Ivory, Burnt Ochre, Walnut Brown, DarkChrome Yellow

As I said I did a couple of test, playing with scales, I do really love them but they are very time consuming so decided not to reproduce them for video and go for the dragon instead. But I thought I share them here too to give you some more examples to what you can do for the challenge.

Supplies:

When possible affiliate links are used, this means that I receive a small commission when products are purchased through the links (at no extra cost to you) I use the money to support my blog and youtube channel. If you like my projects and tutorial please consider supporting me by clicking through these links when you shop. Thanks!


https://linkdeli.com/widget.js?1528278883368

Create A Smile Stamps, Design Teams, Videos

Slider Card | We are moving!

Hi everyone!

Don’t worry we are not going anywhere, but today I have a moving card for you! This card is a slider card and I had so much fun creating this card!

Sometimes card ideas come from the smallest thing, and today this whole card started with a party hat! I was going through my stamps trying to decide what to do for this month feature for the Create A Smile Stamps Video Design Team. And my eyes caught this little party hat, and I really thought it looked like a cheese, so with it being on the Cart Full Of Treasures stamp set I just had to fill up that cart with cheese wedges. For the cherry on top, or more the mouse, I knew there where a mouse or two to be found among my other stamps, and I was correct, on the Where Your Heart Is stamp set I found a cute little mouse that fit perfectly on top of my mountain of cheese!

And with a cart being pulled I knew I needed to make a slider card. The slider mechanism is super simple, I just made a slit in the paper, trying to match up the cuts with the floor boards in the paper to make it as invisible as possible. I made the pull mechanism in the same paper to get it to match. For more details on how I created the slider mechanism see the video below.

Copic:
Mouse & Koala: C0, C2, C4, C6, C8, C9, E57, E59, E49, B91, B93, B95, R30, R32
Cart & Cheese: B91, B93, B95, Y13, Y15, Y17, C0, C2, C4, C6, C8, C10

Polychromos:
White, Payne’s Grey, Cold Grey IV, Cold Grey II, Black, Ivory, Sky Blue, Light Ultramarine, Ultramarine, Dark Cadmium Yellow, Dark Chrome Yellow, Burnt Siena, Walnut Brown, Dark Flesh, Light Flesh

Supplies:

When possible affiliate links are used, this means that I receive a small commission when products are purchased through the links (at no extra cost to you) I use the money to support my blog and youtube channel. If you like my projects and tutorial please consider supporting me by clicking through these links when you shop. Thanks!

Coloring, Design Teams, Make It Crafty, Real Time Coloring, Videos

Spring Skies

Hi Everyone!

Gosh it’s been a month! My new job is keeping me busy and I have a few more things that is keeping me occupied, more of that another time. I finally got a couple of videos edited so today you get my Spring Skies duo. If you haven’t joined in with the spring skies coloring challenge over at Make It Crafty I really recommend you do! It’s loads of fun!

If you are unsure what to do you will find all the details over at the challenge page and there you also find a real awesome discount offer on the Coloring Skies E-book which was a steal even before the discount. So come and join us!

For some more inspiration and a tutorial you can see the videos below of how I made the Incredible Friend card, loads of great tips and tricks on how to color a sky.

Copic:
Skin: E00, E00, E21, E11, E04, R30, R32
Sky: B000, B00, BG01
Wheel barrow and bucket: E41, E42, E43, W0, W2, W4, W6, W8, W10
Grass, boots, overalls: G21, G24, G46
Shirt: W0, W2, W4
Hair: YR16, YR18, E08, E18
Flower: Y08, Y26, Y38
Eyes: E57, E59, E49

Supplies:

When possible affiliate links are used, this means that I receive a small commission when products are purchased through the links (at no extra cost to you) I use the money to support my blog and youtube channel. If you like my projects and tutorial please consider supporting me by clicking through these links when you shop. Thanks!

Create A Smile Stamps, Videos

Pirate – Box Pop-Up Card

Hi Everyone!

Been wanting to do a interactive card for so long, and I’ve been seeing these kind of cards everywhere lately, so I thought I would create one me too!

For the outside I did some simple blending and added a couple of images from the All Hands On Deck stamp set, stamped in Kraft Hybrid ink for a softer look. This card is all about the inside!

As this is a box pop-up card it has a box on the inside that pop-ups when you open it! I dressed the box in some Doodlebug Pattern Paper that looks like wood to make it look like a chest or a pirate ship. I have created a video for you so you can follow along.

Measurements:
Box: 8 1/2″ x 1 1/4 strip Latte Cardstock Score every 2″
Layering Panels: 1 1/8 x 1 7/8″ (4 of them)
Box inner pieces 1/4 x 2 1/2″ Score at 1/4″ on both sides (3 of them)
Fastening tabs: 2×1″ Score at 1/2″ (2 of them)
The cardbase is a standard A2 one, 8 1/2 x 5 1/2″ scored at 4 1/4″

Supplies:

When possible affiliate links are used, this means that I receive a small commission when products are purchased through the links (at no extra cost to you) I use the money to support my blog and youtube channel. If you like my projects and tutorial please consider supporting me by clicking through these links when you shop. Thanks!


https://linkdeli.com/widget.js?1518439322996

Make It Crafty

Celebrating Friendships with a hot cuppa!

Hi Everyone!
 
One of my favourite past times with friends is sitting around having a cuppa and chatting. It’s hard to beat face to face interaction with a friend. You can read each other’s body language, laugh out loud and easily get stuck for hours drinking way too much coffee.
 
Sadly, many of my bestest friends live so far away from me that I don’t get the opportunity to sit across the table and laugh over a cuppa so instead I do what I do best and make them cards that will brighten their day.
 
So with that in mind, this month we are inspiring you with some gorgeous images illustrated by Krista Smith and a whole range of new chipboard designs relating to Friends, Coffee & Tea!
Please join us on the hop and be inspired for a chance to win one of two Chipboard sets featuring the new friendship cursive sentiment designs. Simply leave a comment on each blog along the way as I will be picking a winner from two random posts. Winners will be announced and contacted Sunday 25th so get your hopping boots on!


My card today is as clean and simple as they go, I wanted the message to come through as good as possible. This card is supposed to be like a soft hug, like a cup of coffee. I knew I wanted to use the new Coffee Hug Sentiment, so I measured the size and then tried out some arrangements in photoshop (creating a rectangle with that size as a temp to see sizes). I finally decided on using a cropped version of the Coffee & Yarn Digi Stamp.
 
While coloring her skin I realized that I wanted to use her lip color as the color of her shirt and that I loved the softness of it and wanted it to continue through out the card. So I picked out my Distress Paints and colored up the sentiment. To finish the card off I found this cute paper in an old Doodlebug Designs pattern paper stack and then I used a die to cut it to give it a little more interest. Then I put it all on a white cardbase and the card was finished.
 
Here is a list of the blog hop in case you get lost along the way. Don’t forget to leave a comment on each blog for 10 chances to win!
 
Marika – YOU ARE HERE!
 
Copic:
Skin: E50, E00, E21, E11, E04, R30, R32
Hair & Eyes: E55, E57, E59, E49
Shirt: R30, R32, E04
Supplies:

When possible affiliate links are used, this means that I receive a small commission when products are purchased through the links (at no extra cost to you) I use the money to support my blog and youtube channel. If you like my projects and tutorial please consider supporting me by clicking through these links when you shop. Thanks!


https://linkdeli.com/widget.js?1518439322996

My Favorite Things Stamps

MFT Creative Olympics 2018 – Speed Cardmaking

Hi Everyone!

My third and last card for today is a quick and simple one, with the challenge being Speed Cardmaking, make a card in 20 min or less. I came in just shy of 20 min and think I could have gotten it quicker if I hadn’t needed to look for my Neenah in my piles of stuff (after doing the other 3 cards I have piles with everything I used). My card is a watercolored background, colored with a combination of distress inks and oxide inks, which I then die cut with a rectangular die and a love die, the love die I also cut three times out of neenah and then I layered just the letters with those neenah letters making them stand out just a little. A quick and simple card but I do love it!

Supplies:

When possible affiliate links are used, this means that I receive a small commission when products are purchased through the links (at no extra cost to you) I use the money to support my blog and youtube channel. If you like my projects and tutorial please consider supporting me by clicking through these links when you shop. Thanks!

Supplies:

https://linkdeli.com/widget.js?1518439322996

My Favorite Things Stamps

MFT Creative Olympics 2018 – Crafty Biathlon

Hi Everyone!

Today’s second card is for the Crafty Biathlon over at My Favorite Things, they give you a list of techniques and a list of card types and you need to choose one from each. I’ve chosen Inlaid Die Cutting and Shaker. I did two frames from my stitched hexagon dies that I then inlaid in a mod rectangular piece, to keep the inlaid pieces I used some acetate on the bckside of the mod rectangle, making the frames the shakers. I also inlaid a hi in the same rectangular. I used some gorgeous mft cardstock for the inlaid pieces in the colors Tropical Teal, Cornflower Blue and Boysenberry, and then covered them with a spectrum noir sparkle pen. I used double layered of foam for the shaker and for a finishing touch I added two unicorns that I coloured during the 30 day coloring challenge. I filled the shakers with sequins from Pretty Pink Posh.

Supplies:

When possible affiliate links are used, this means that I receive a small commission when products are purchased through the links (at no extra cost to you) I use the money to support my blog and youtube channel. If you like my projects and tutorial please consider supporting me by clicking through these links when you shop. Thanks!

Supplies:

https://linkdeli.com/widget.js?1518439322996

My Favorite Things Stamps

MFT Creative Olympics 2018 – Freestyle Card

Hi Everyone!

Card one for today is a Freestyle Card with a winter theme, so I picked out a couple of more of the 30 day coloring challenge images. As I don’t have a slopes die I chose to go with the cloud dies and make my snowy slopes with that, this time I “shaded” them with a combination of Cracked Pistachio and Peacock Feathers. For the sky I also added Salty Ocean, Vilted Violet and a touch of Black Soot, which I also added to the friends die. For a finishing touch I did some water splashes on all pieces for some added texture and for the sky I added some Liquitex White Acrylic Ink splatters for falling snow. I used the stitched rectangular mod STAX as the outer border for some extra detail.

Supplies:

When possible affiliate links are used, this means that I receive a small commission when products are purchased through the links (at no extra cost to you) I use the money to support my blog and youtube channel. If you like my projects and tutorial please consider supporting me by clicking through these links when you shop. Thanks!